Articles

Welcome to our annual guessing game of what the next twelve months will bring.

As ever, the design world isn’t isolated from the world in which it exists, so when events shape our lives, they impact our work, the work clients ask for, and the work that inspires us. According to Collins Dictionary, the word of the year for 2022 was permacrisis. And frankly, 2023 doesn’t look any less turbulent, with some good and some bad things already on the horizon.

Russia seems all but certain to retreat to Crimea and claim its objectives in Ukraine have been achieved; Ukraine may not accept that end, but it will probably be enough to end sanctions against Russia, which will significantly impact the economy worldwide. Brazil may have been forced to watch Argentina lift the FIFA World Cup, but it has a new (old) president and fresh hope for the survival of the Amazon rainforest. Crypto has weathered a series of storms (although there may be more to come), and historical precedence suggests the bear market has run its course; 2023 will see stagnation, with an upward trend taking hold toward the end of the year. The former Pope has died, potentially paving the way for the retirement of the current Pope and the election of a new Pope, bringing with it either renewed liberalism or renewed conservatism to the world’s largest religion. Oh, and the IMF thinks a third of the world will be in recession at some point in 2023; the UK and Russia already are, and policymakers in the US are looking nervous.

And that’s just the obvious. Of course, there will be surprises, too, because there always are.

Against this backdrop, designers must not only navigate a problematic jobs market but produce designs that respond to the needs and desires of their clients’ users.

How Did I Do in 2022?

Before diving into this year’s predictions, let’s take a look at how I thought 2022 would play out.

I predicted that 2022 would be the year of blockchain, with decentralized data storage taking over. Well, I got the decentralized part right, but not so much the blockchain aspect (feel free to tell me I’m wrong on Mastodon because I’m not checking Twitter anymore). I’ll call that half a point.

I said design would be positive, playful, and accessible. I think design did emerge from its obsession with corporate minimalism, but positive and playful? Unfortunately, I’m calling that a miss.

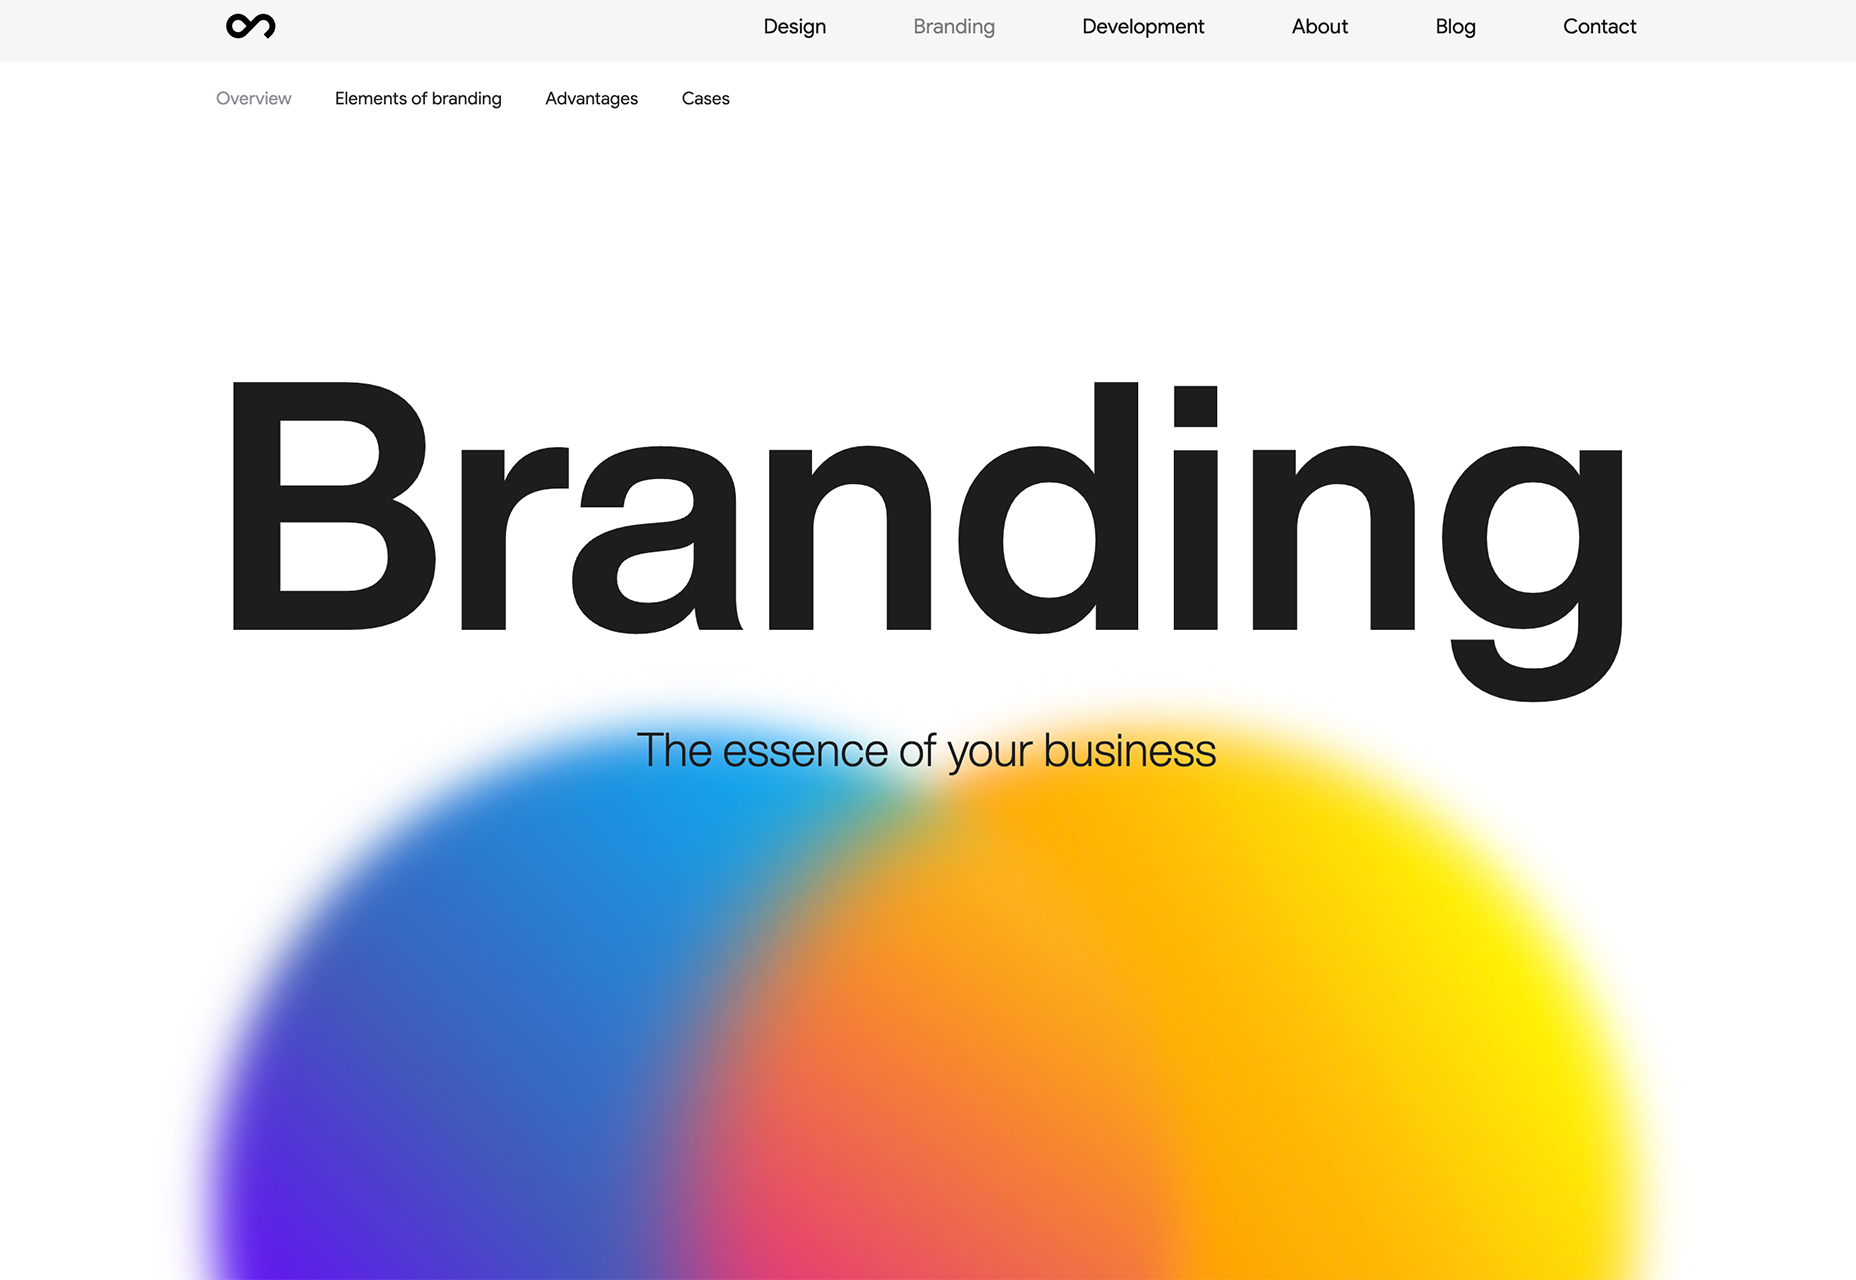
I said everything would be green. Again, that’s a miss. If there was a color for 2022, it was a pink-purple gradient.

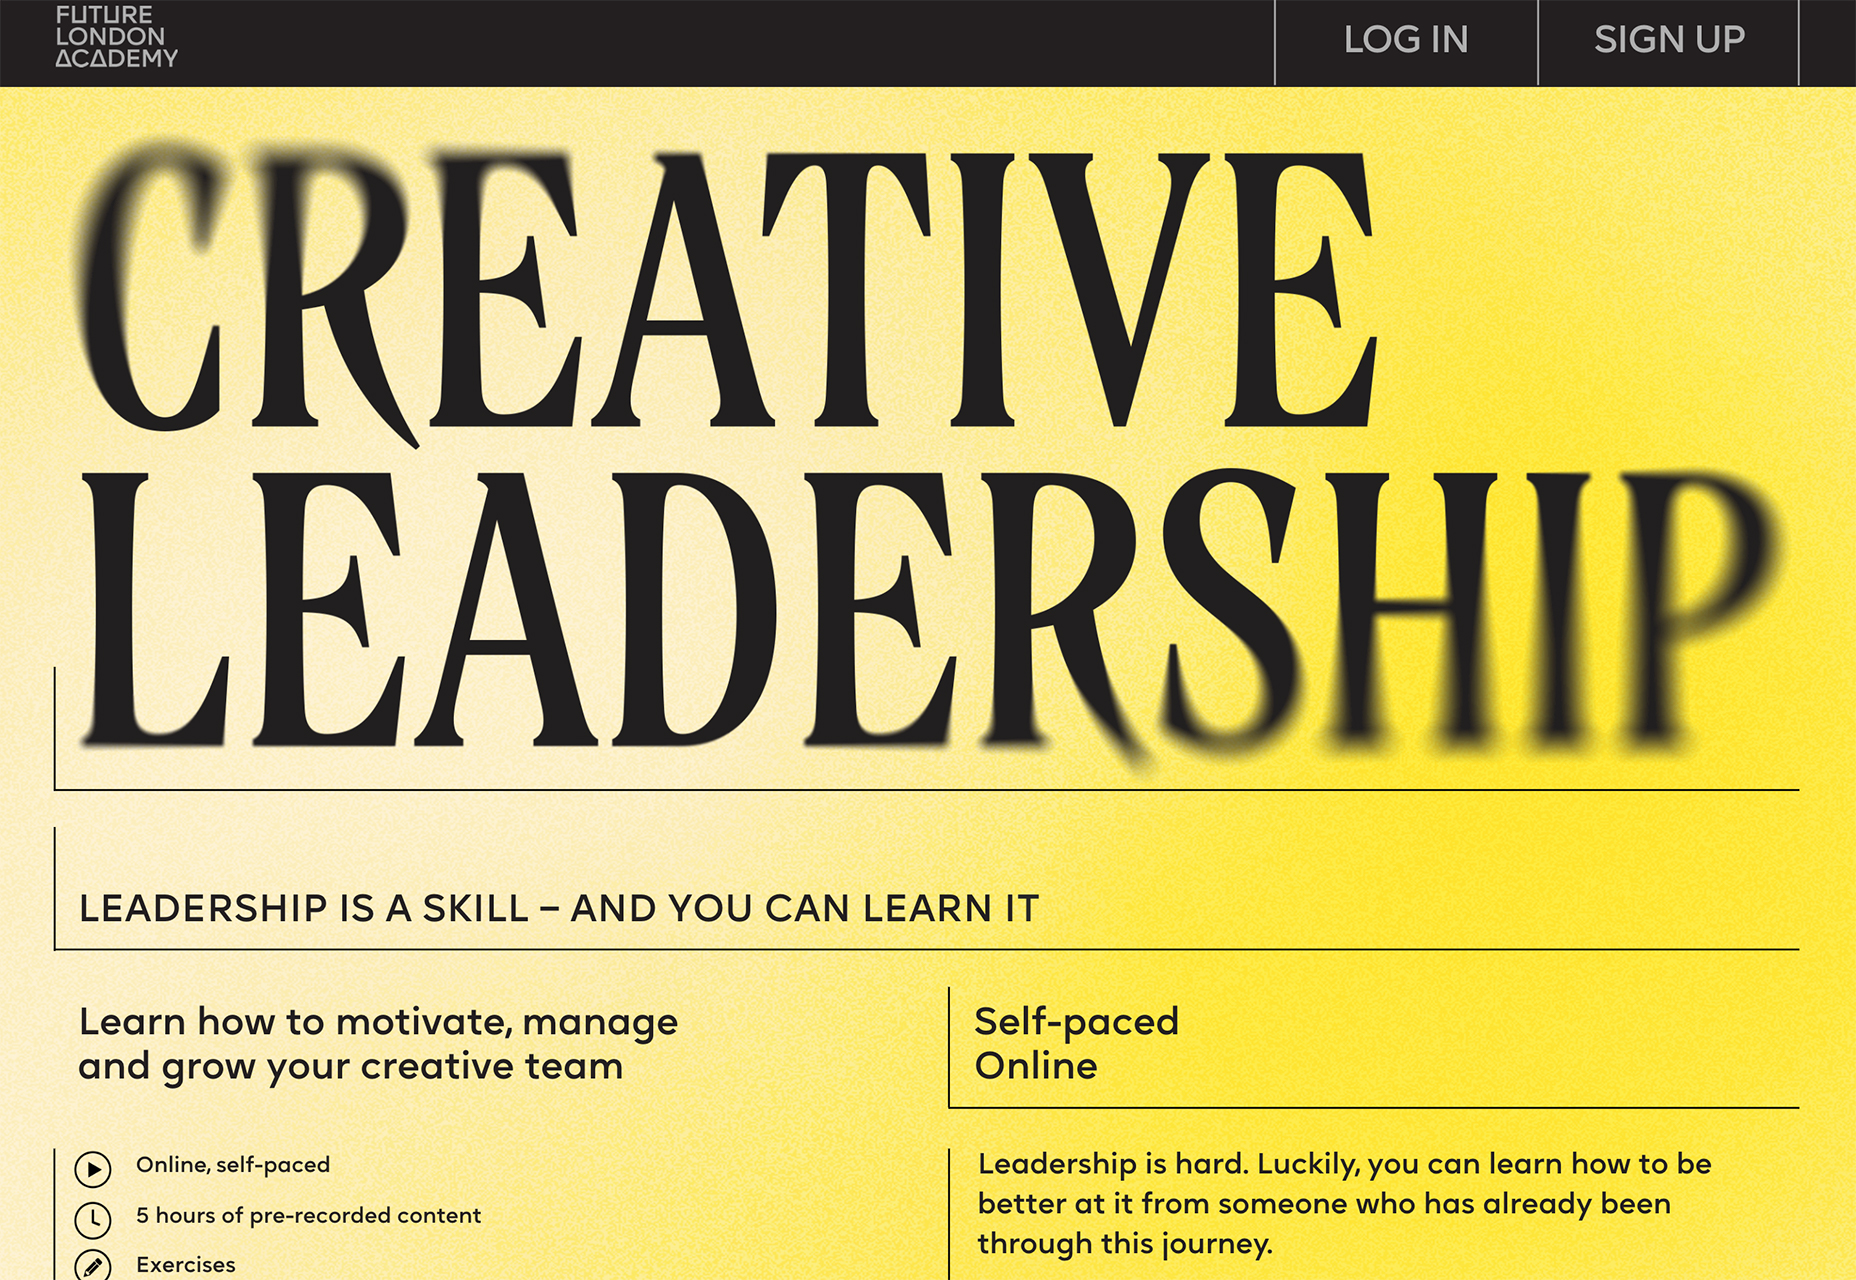
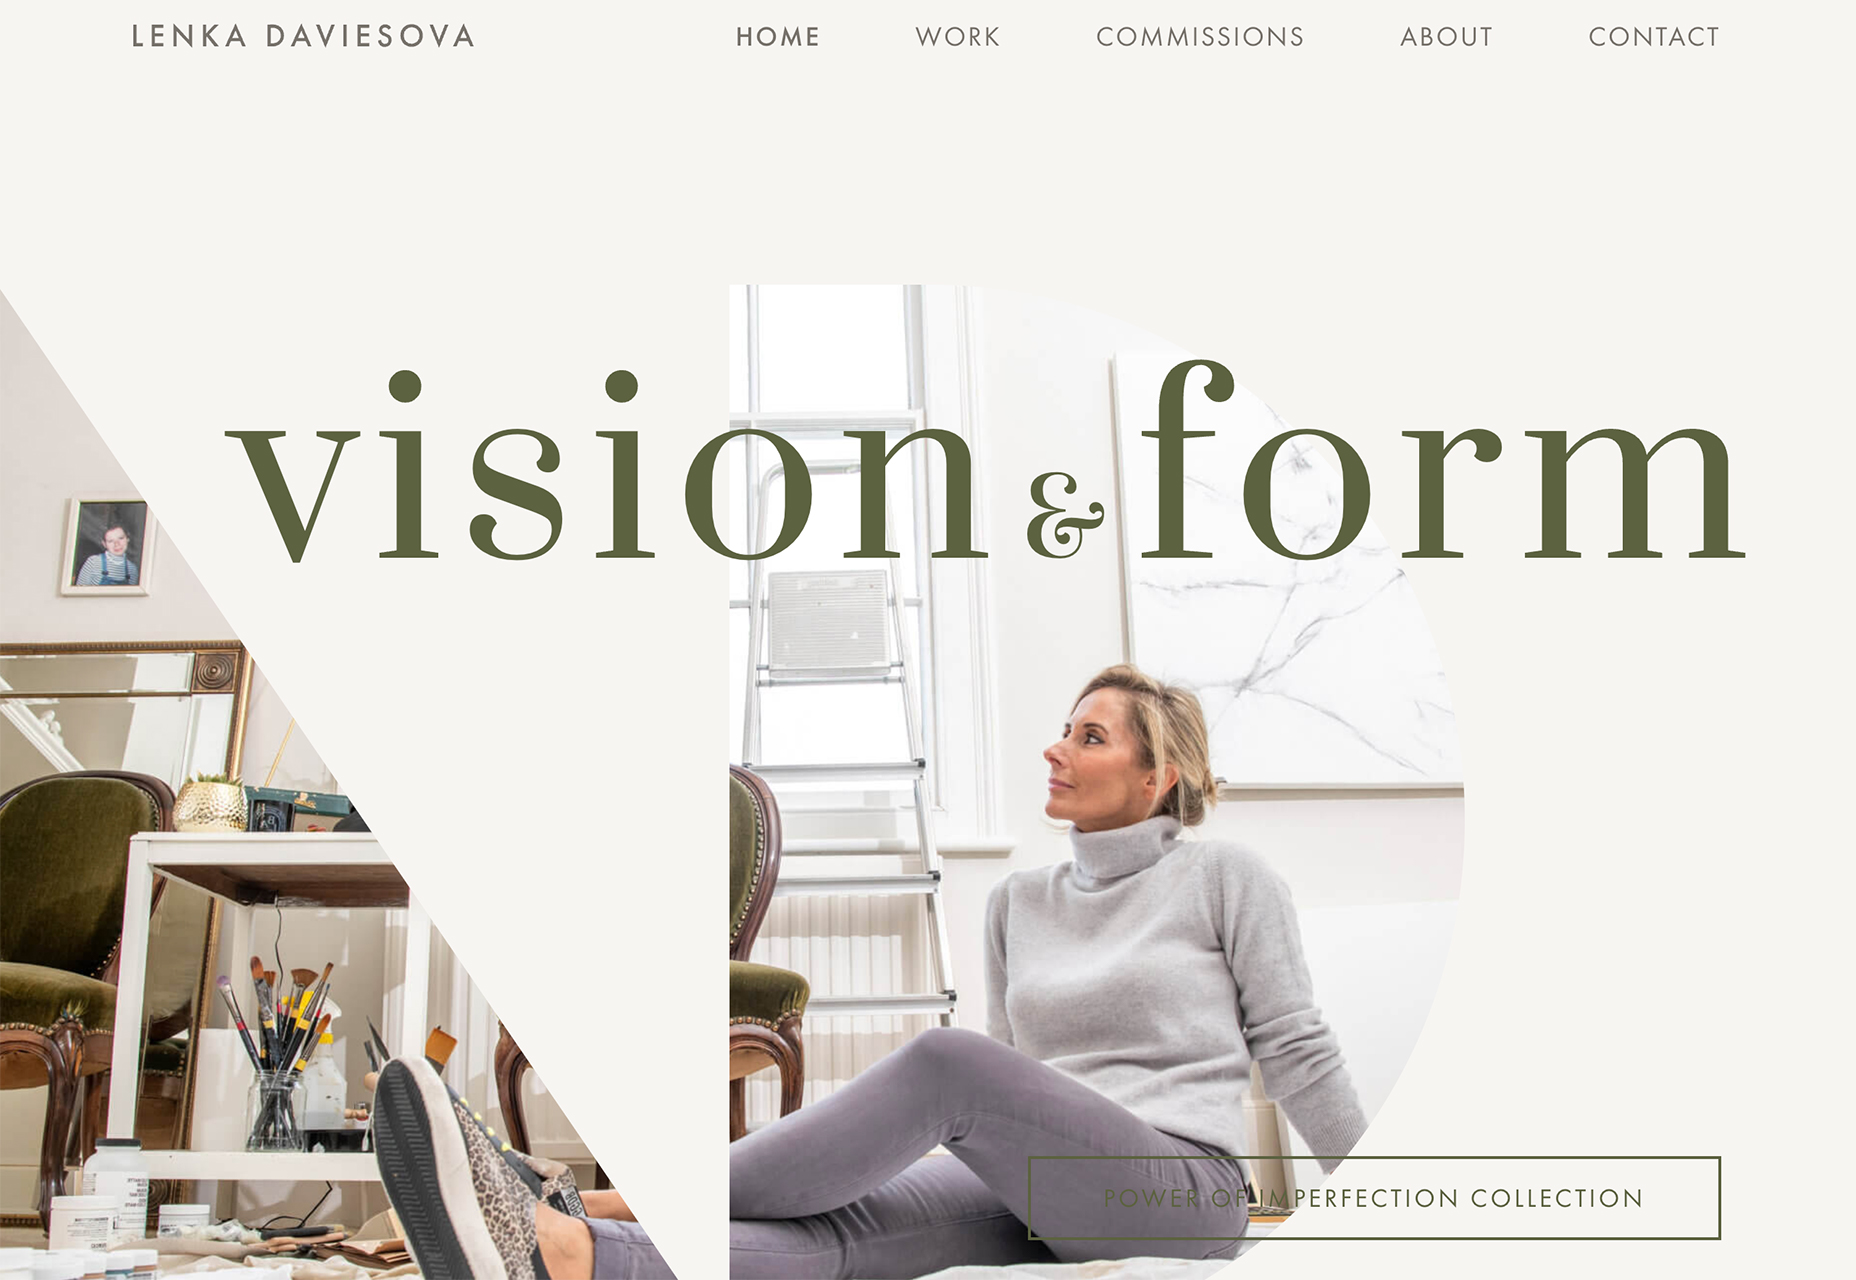
I predicted hero text would replace hero images, and in the third quarter of 2022, that’s exactly the trend we saw; tick.

Finally, I suggested that illustration would adopt a grainy texture. Well, some designers did, but it was hardly a dominant trend, so I’m going to have to call that a miss.

So for my 2022 predictions, I scored 30%. Way worse than last year’s clean sweep. Let’s see if we can’t beat that in 2023…

1. We’ll Stop Freaking Out Over AI

By now, you’ve probably tried AI, freaked out, and Googled how to start a small holding in the mountains.

The truth is that AI is just a tool. And a good one at that. AI is really good at derivative work. But it’s entirely incapable of improvising, holding opinions, having an agenda, or thinking outside the box.

AI will not replace your job — unless your job is deleting the background from photos, in which case it already has. Since when did Stephen King get replaced by a spellchecker?

If you haven’t tried an AI tool yet, I’d encourage you to try it. It does the small repetitive tasks well.

2. We’ll Embrace the Real World

One of the reasons AI can’t be creative is that it doesn’t have the same number of input sensors we have. We can smell, hear, feel, and experience the world in a multitude of different ways.

Most of us spent a year in lockdown working remotely. Then rushed back to the office, only to discover that our teamwork didn’t actually improve. With the worsening economic outlook, big companies are looking to budget, and the simplest way to cut costs is to ask staff to work remotely.

When your commute is a five-second walk to the spare bedroom, you find yourself with more free time. Sure, you could probably learn Python, but wouldn’t you be happier learning to paddleboard?

As we open ourselves to new experiences, our design work will inevitably become more diverse and natural.

3. We’ll Reject Brutalism

It had a good run, but Brutalism isn’t a good fit for most UI projects. The trend of 2021–22 will vanish as quickly and as unexpectedly as it arrived.

4. We’ll Reject Darkmode

It has had a good run, and dark mode is a perfect fit for most UI projects. But we’re all kinda sick of it.

I hope I’m wrong about this one; not only is dark mode genuinely better for both your eyes and the environment, but the rich, warm blackness is the perfect antidote to sterile white corpo-minimalism.

Dark mode options are built into our OS, so it’s doubtful that it’s going to vanish anytime soon. However, dark mode as a design trend for its own sake is probably on the wane.

Typically trends come and go in symmetrical waves. Dark mode has been a dominant trend for years, so it should take as long to vanish completely.

5. We’ll Embrace Personal Retro

Every year we get the exciting job of guessing which decade the zeitgeist will rip off next. Will 2023 be the year of ’80s retro, ’90s retro, ’00s retro, or maybe (somebody shoot me) ’10s retro?

The retro trends we’ve seen over the last few years have been poor pastiches of their associated decades. If last year’s ’90s retro was inspired by the ’90s, it was a ’90s someone else was living.

In 2023 we’ll move beyond someone else’s ideas of what the past was like, to a personal vision of what came before. One in which the sunbleached colors of eternal Summers in the suburbs dominate.

6. We’ll Fall For Borecore

We’re all guilty of designing with our egos from time to time, and there is a tendency to hit users between the eyes with the biggest type, the loudest gradient, and the flashiest animation.

If you truly want to impress users in 2023, stop inserting pop-ups, adverts, cookie notices, and the other extraneous detritus that stops them from doing whatever it is they arrived on your site for. Impressing users in 2023 means clean typography, low-distraction art direction, and helpful content. Boring design just isn’t as boring as it used to be.

In 2023, the best thing designers can do for their users is get out of the way.

Happy New year! We hope it’s a good one.


Featured image by myriammira on Freepik

Source

The post 6 Predictions for Web Design in 2023 first appeared on Webdesigner Depot.

Source de l’article sur Webdesignerdepot

Whether you’ve worked with a few WordPress themes to design websites or worked with many of them, you’ll no doubt agree that plenty of WordPress themes that are visually gorgeous on the front end can be terribly unattractive and extremely awkward to use on the backend. 

Working with a WordPress theme can sometimes be difficult, but it can be different.

Want proof? Look no further than with BeTheme. 

BeTheme, with 260,000+ sales and counting and a 4.83-star user rating, is one of the top 5 best-selling WordPress themes of all time.

In this article, we’ll show you one of the many reasons why this is the case by focusing on how BeTheme’s backend is designed to make web design tasks more manageable.

Enhance your workflow experience with a WordPress theme backend that won’t stress you out 

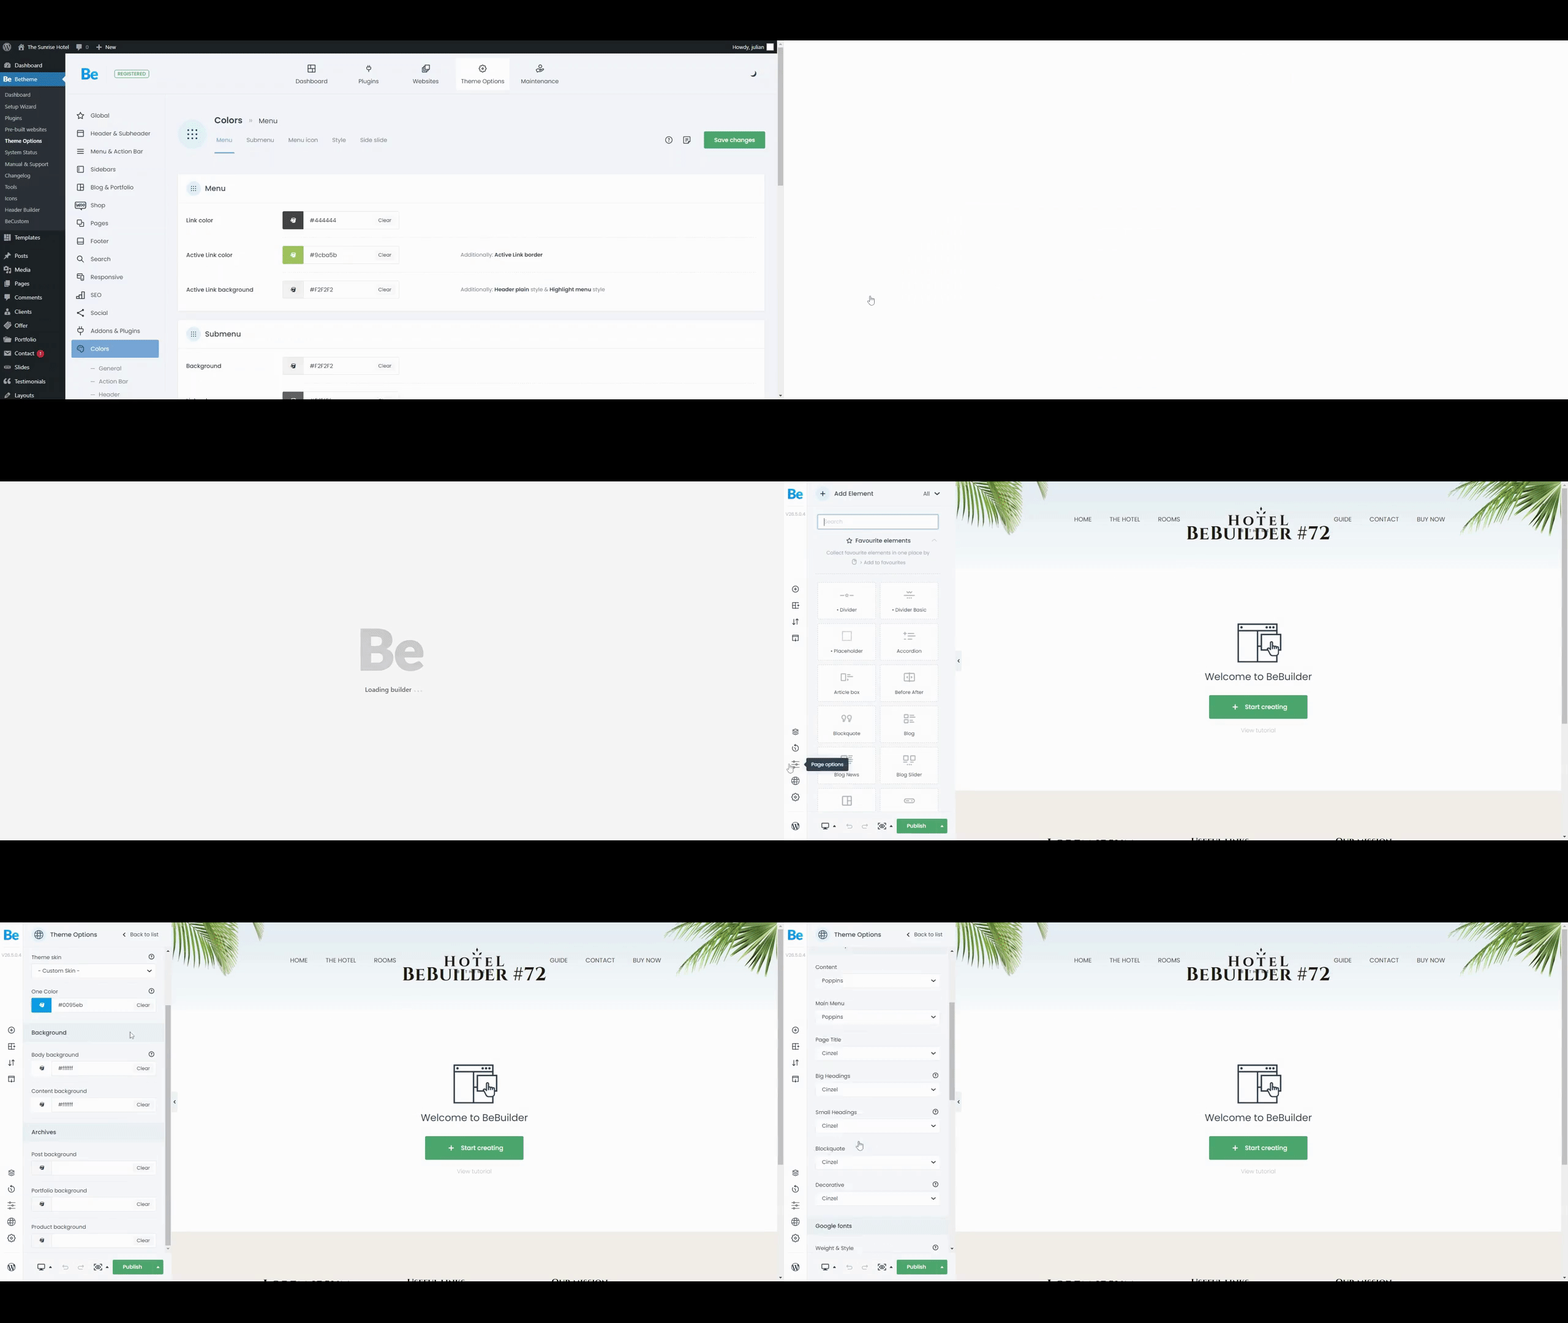
Once you install BeTheme, you’ll almost immediately notice it’s different. Instead of a drab and often unintuitive WordPress backend, you’ll suddenly be confronted with a clean, well-organized dashboard and toolset.

You haven’t actually lost anything. WordPress, with its impressive assortment of content management tools, is still there. Be’s backend is a visually appealing space in which you will take pleasure to work.

If only the rest of WordPress could follow suit.

If you haven’t worked with BeTheme recently (or at all), why not let us walk you through several of its most helpful backend features.

Starting with:

1. Dashboard Design

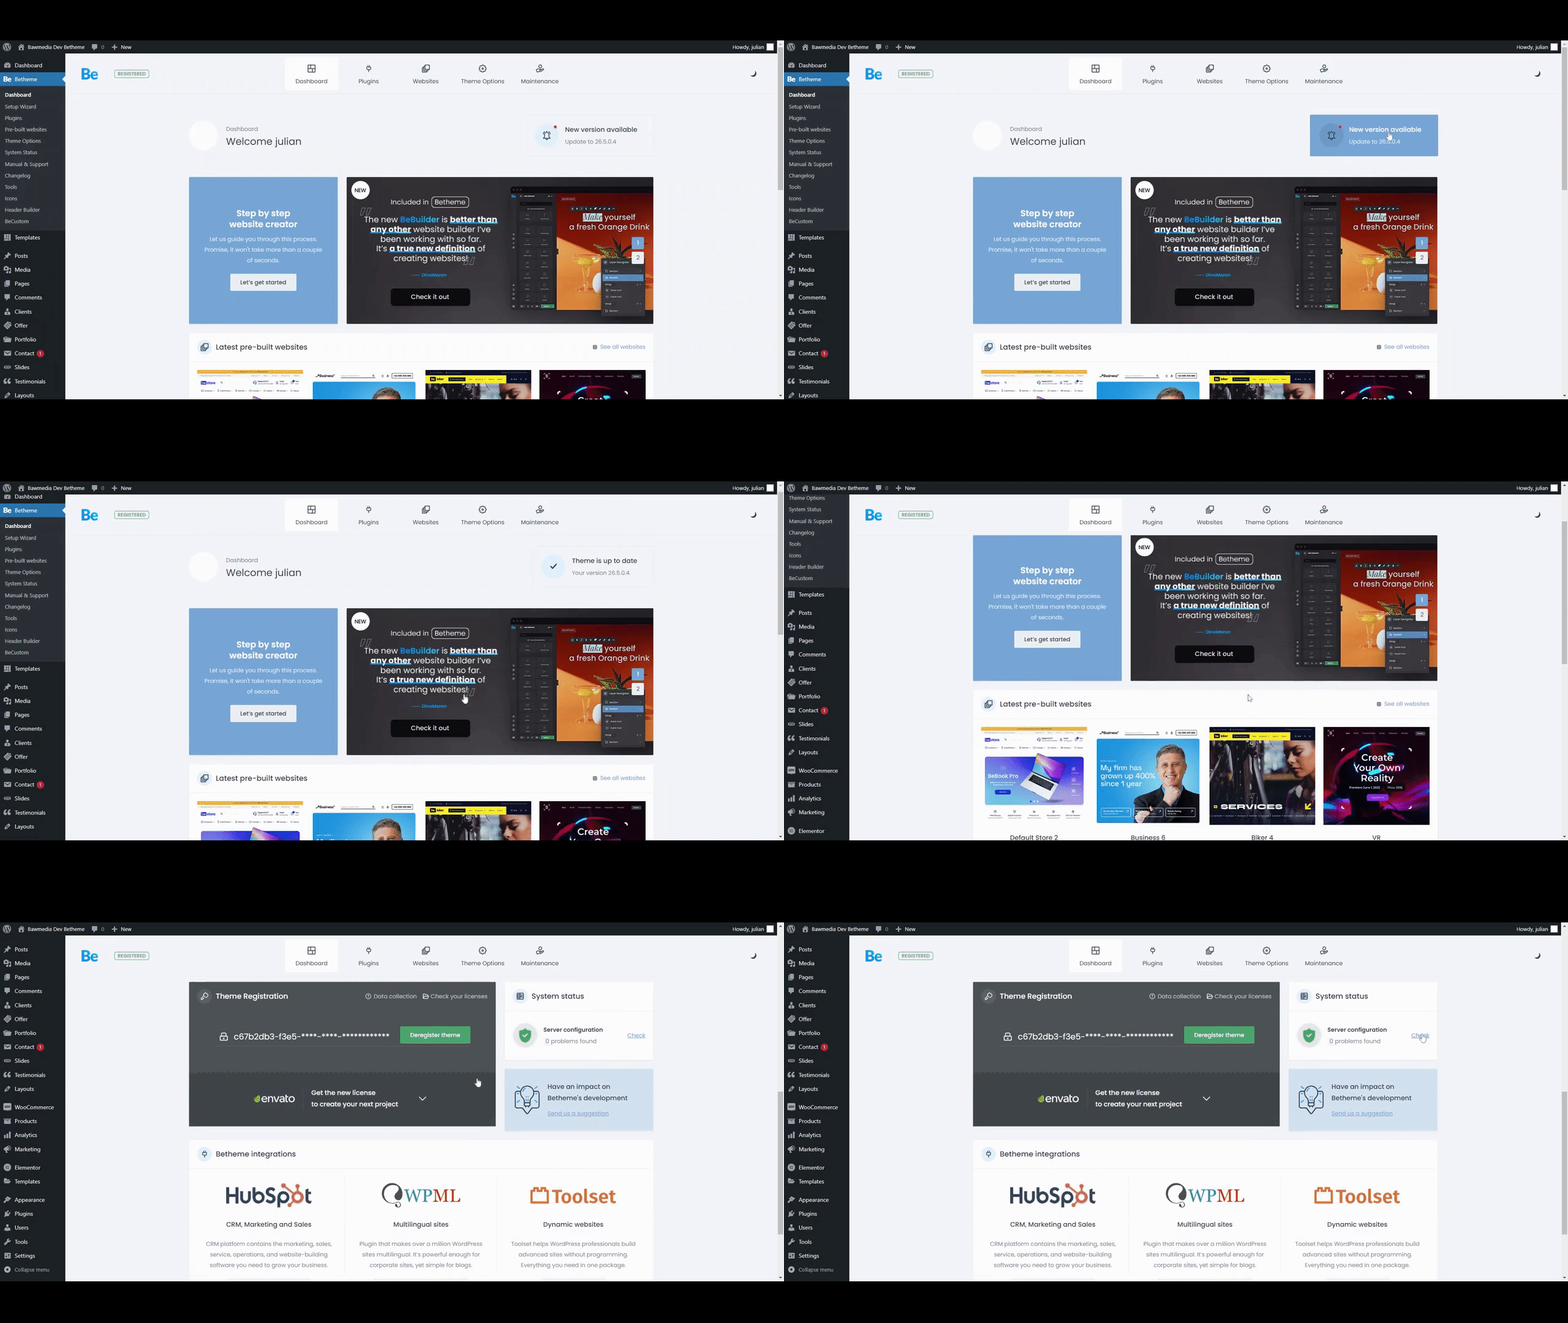
BeTheme’s dashboard is conveniently located directly beneath the main WordPress Dashboard link. So you won’t waste time sifting through the sidebar trying to find your theme’s settings, and everything displayed in the dashboard is designed to help you get the most out of your WordPress theme. 

Clicking on the BeTheme or the Dashboard link gives you immediate access to the following: 

  • Theme registration information
  • BeTheme’s step-by-step website creator
  • A Navigation bar that directs you to BeTheme’s frequently used tools
  • Plugin status and updates and new features announcements
  • The latest additions to BeTheme’s ever-growing library of pre-built websites
  • Beloved BeTheme integrations

It takes a minute to fully appreciate how helpful this dashboard will be. 

BeTheme

2. Dark/Light Mode

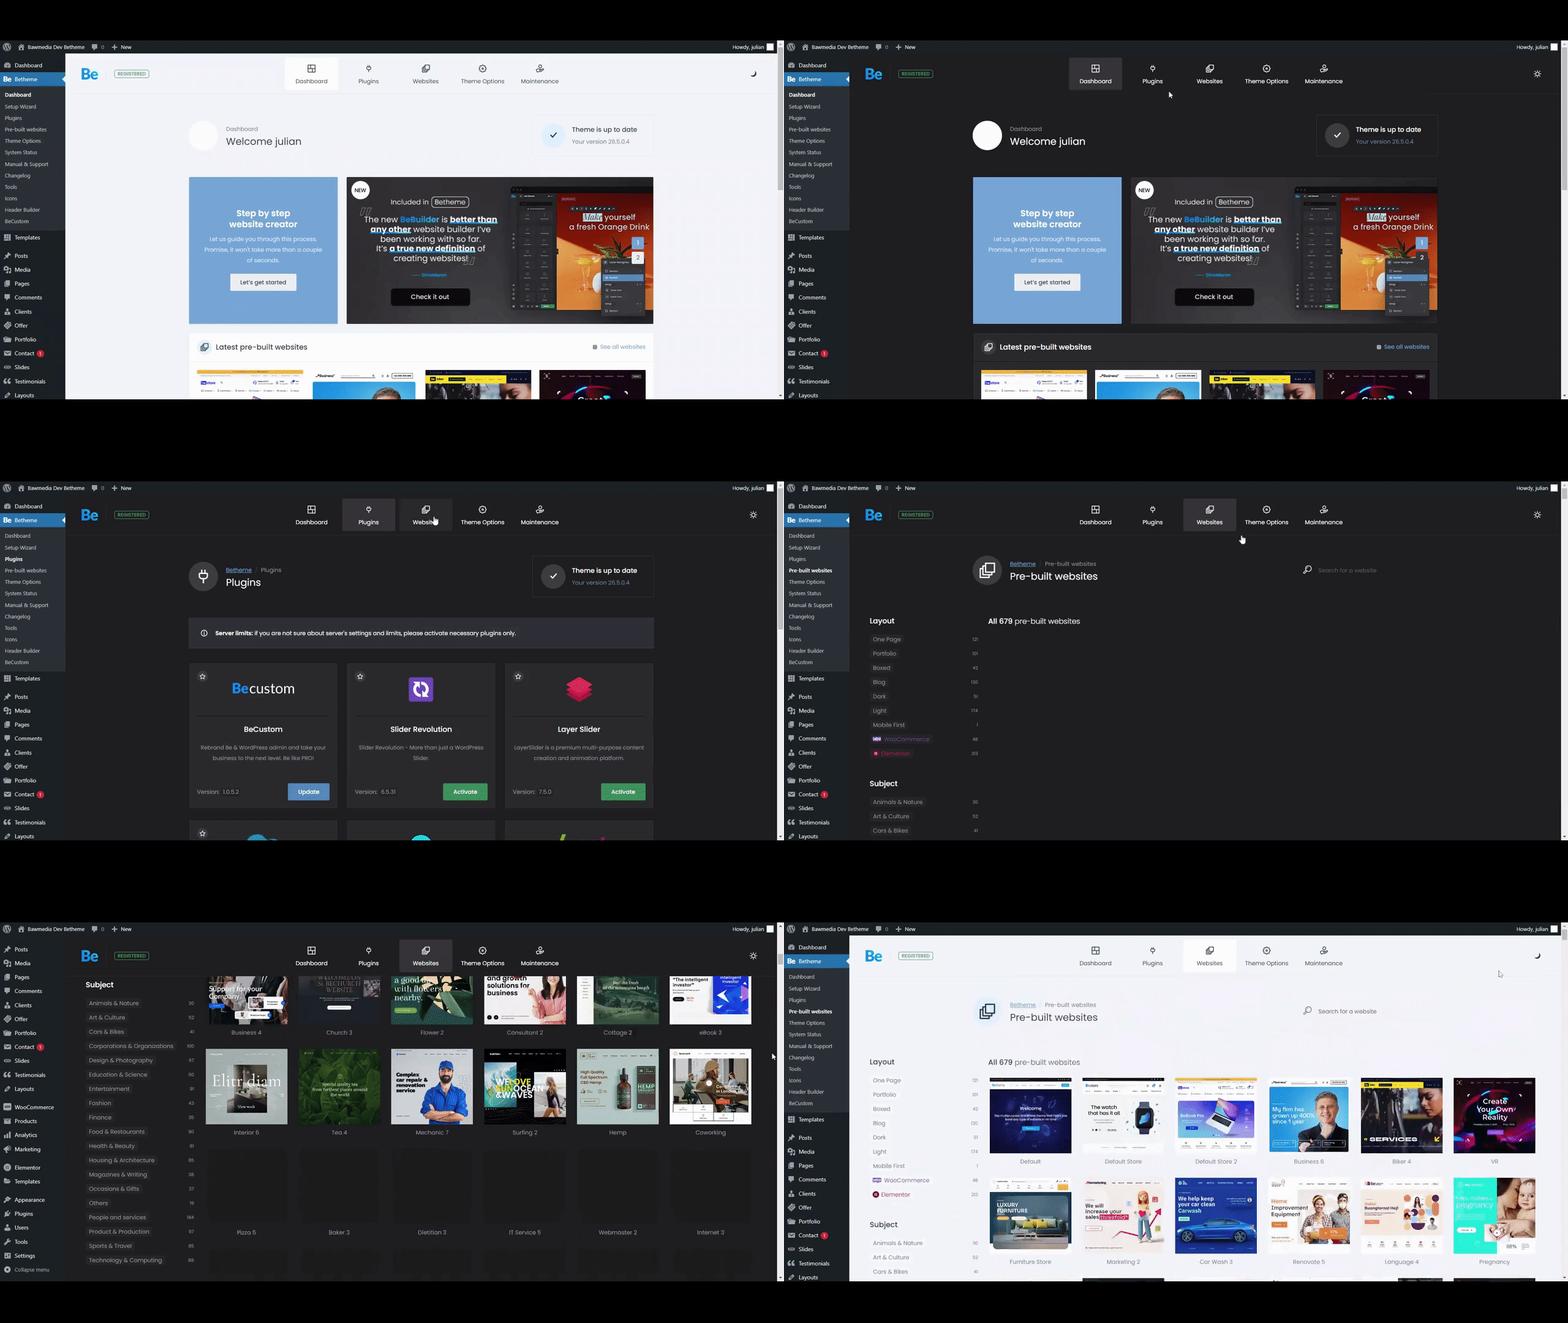
Research on dark mode benefits is inconclusive. But since so many people seem to like it, it is offered as an option in many popular apps and devices.

Dark mode users will tell you that they experience less eye strain, they sleep better, and their device’s batteries last longer than is the case with light mode.

BeTheme’s backend offers a dark mode option, and you are encouraged to try it.

If you feel it beneficial, so much the better, and you needn’t concern yourself with what the research indicated, or didn’t indicate.

BeTheme

3. Step-by-Step Website Creator

When you first install a WordPress theme, it’s not uncommon to spend some time trying to figure out what to do next. The theme’s advertisements may highlight a selection of impressive demos, but where are they more exactly?

Of course, you’ll eventually find them, but is whatever difficulty you may have encountered necessary?

BeTheme removes that impediment. 

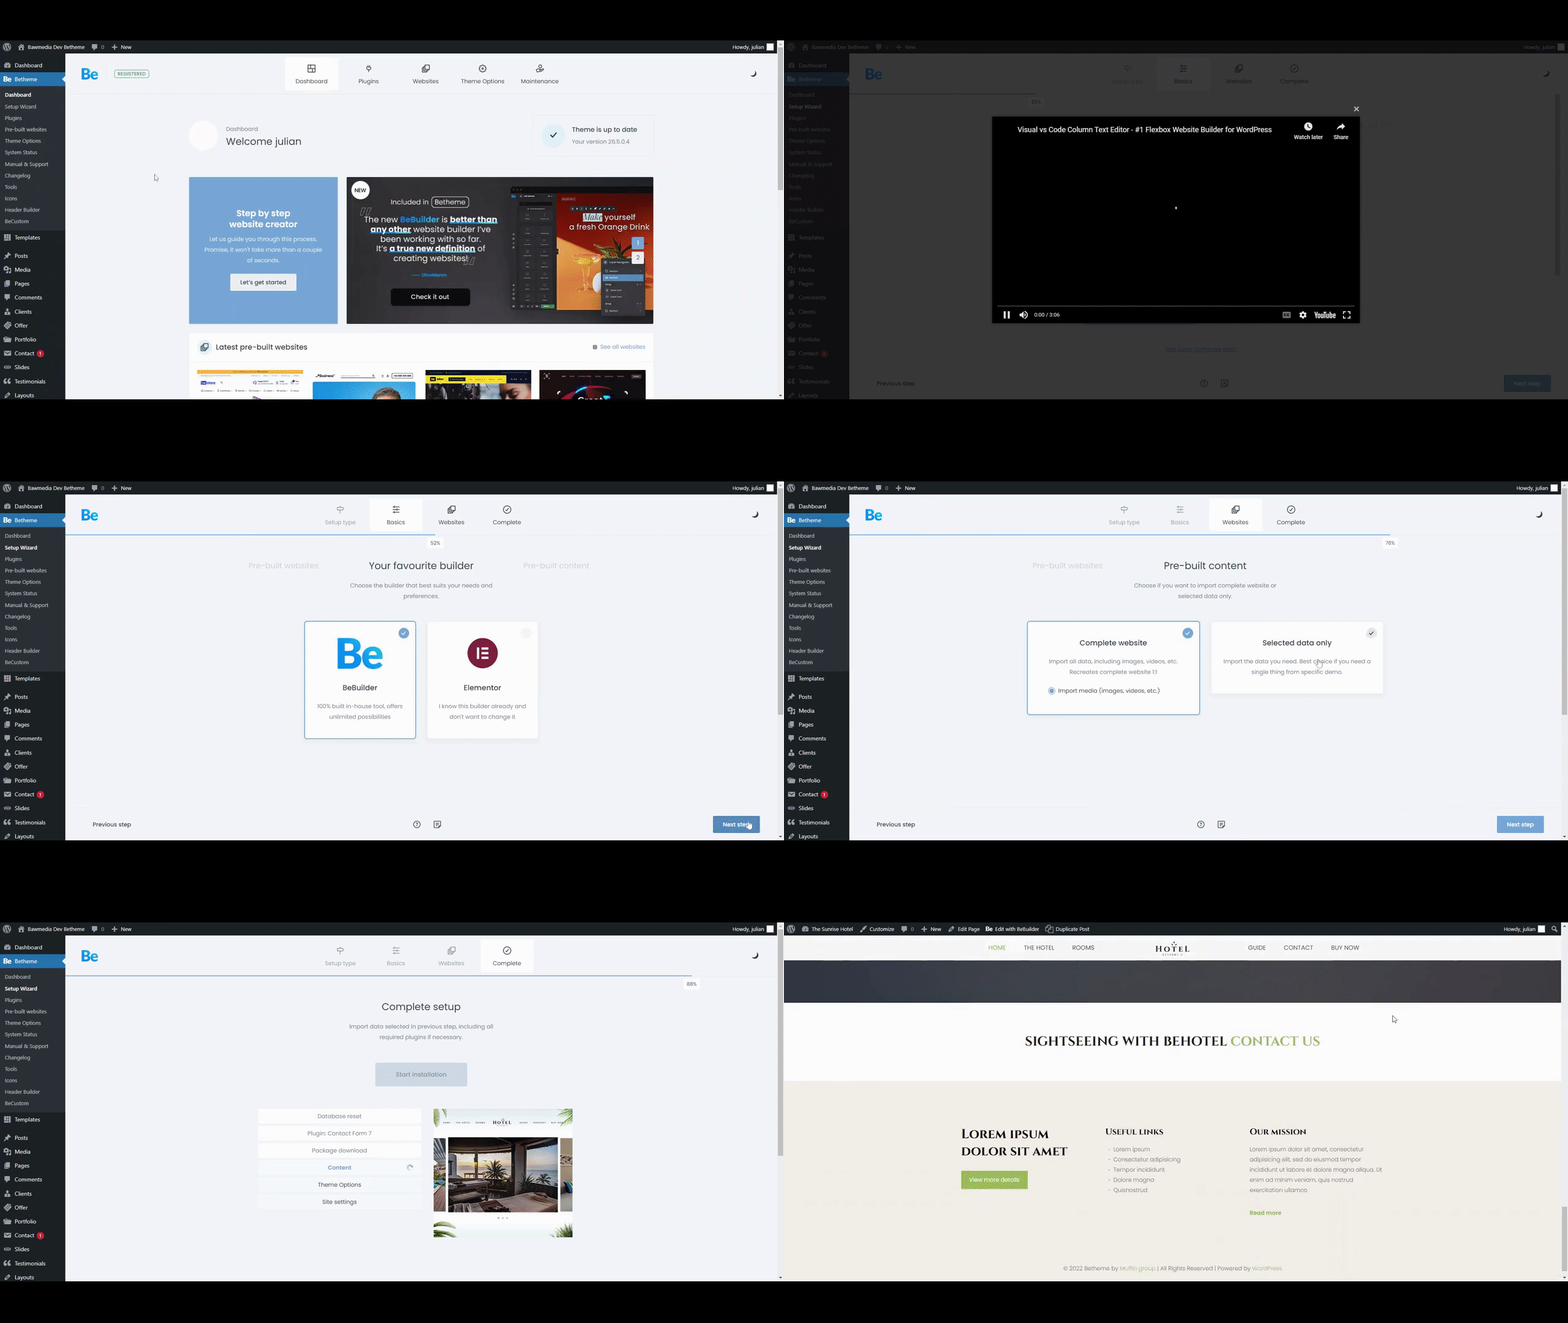
You will notice the Setup Wizard under BeTheme (and in the dashboard as well.) Click on the wizard, and with its step-by-step website, you can: 

  • Give your website a name.
  • Select the page builder you want to work with and choose your preferred editing mode.
  • Pick an ideal pre-built website based on your new website’s industry or niche.
  • Easily replace existing content with your own.

The entire process of loading your brand-new site and page builder into WordPress takes a minute (or more like 30 seconds once you are used to it).

BeTheme

4. Pre-Built Site Previews

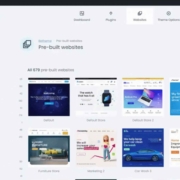
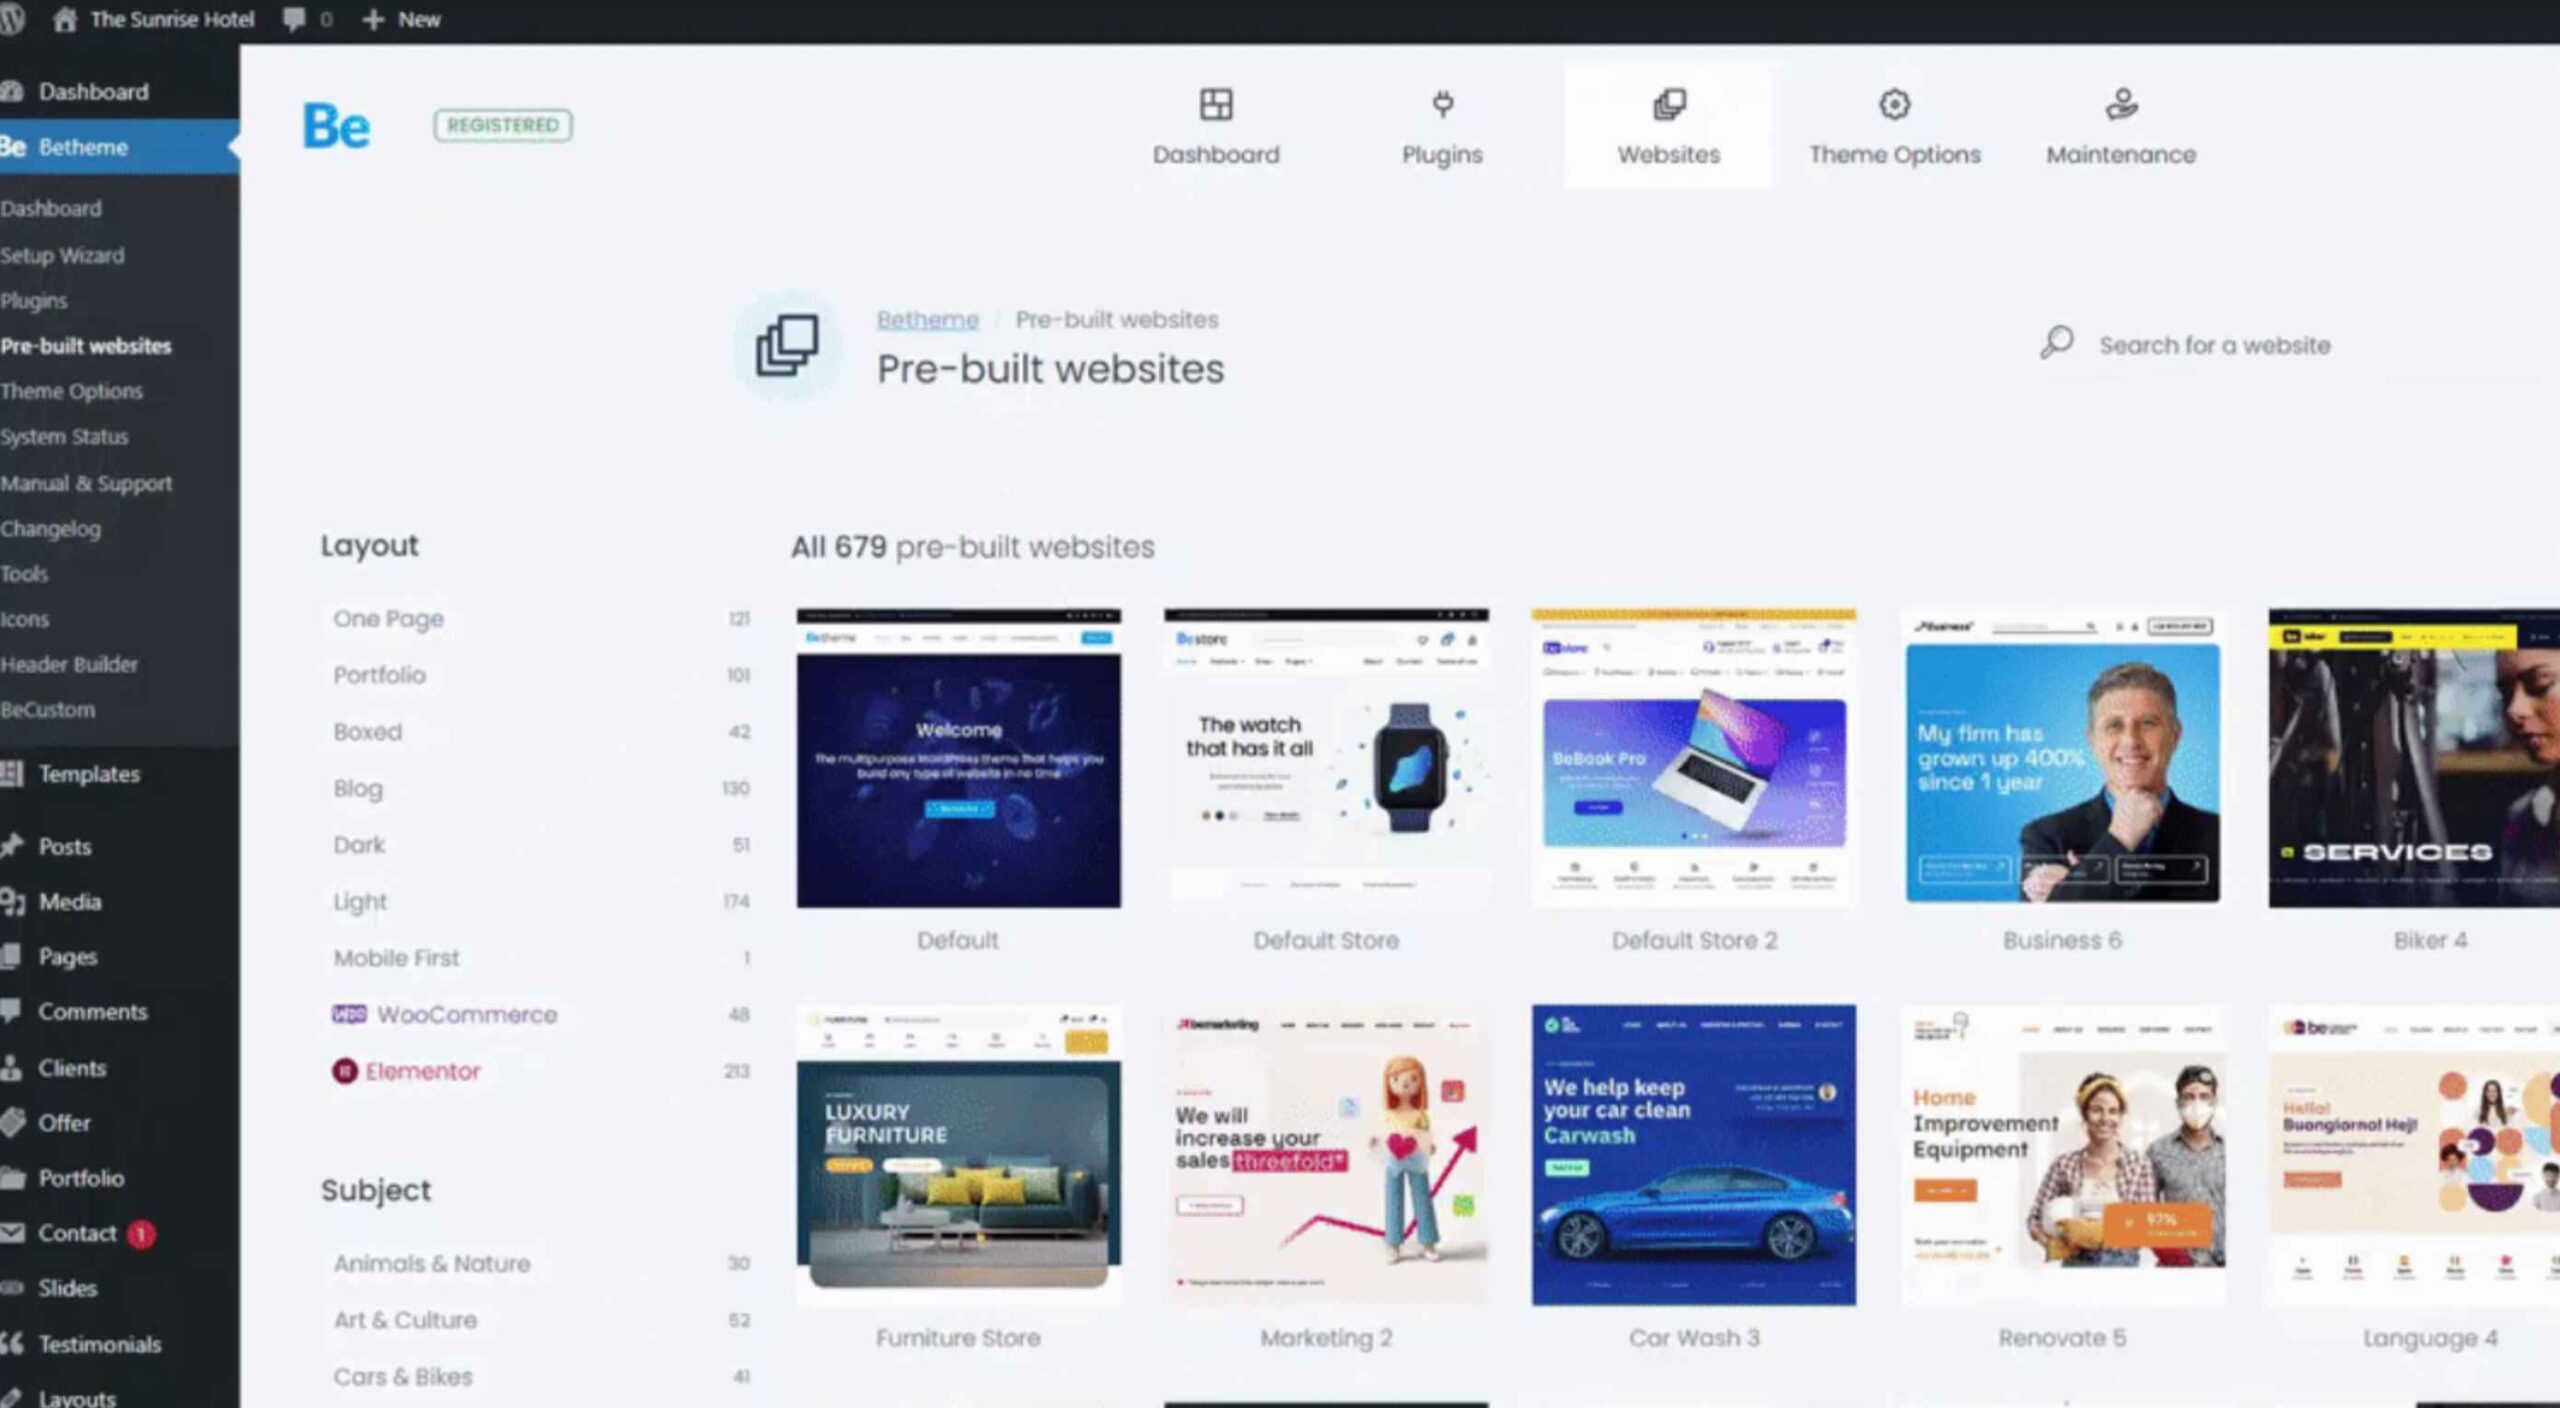
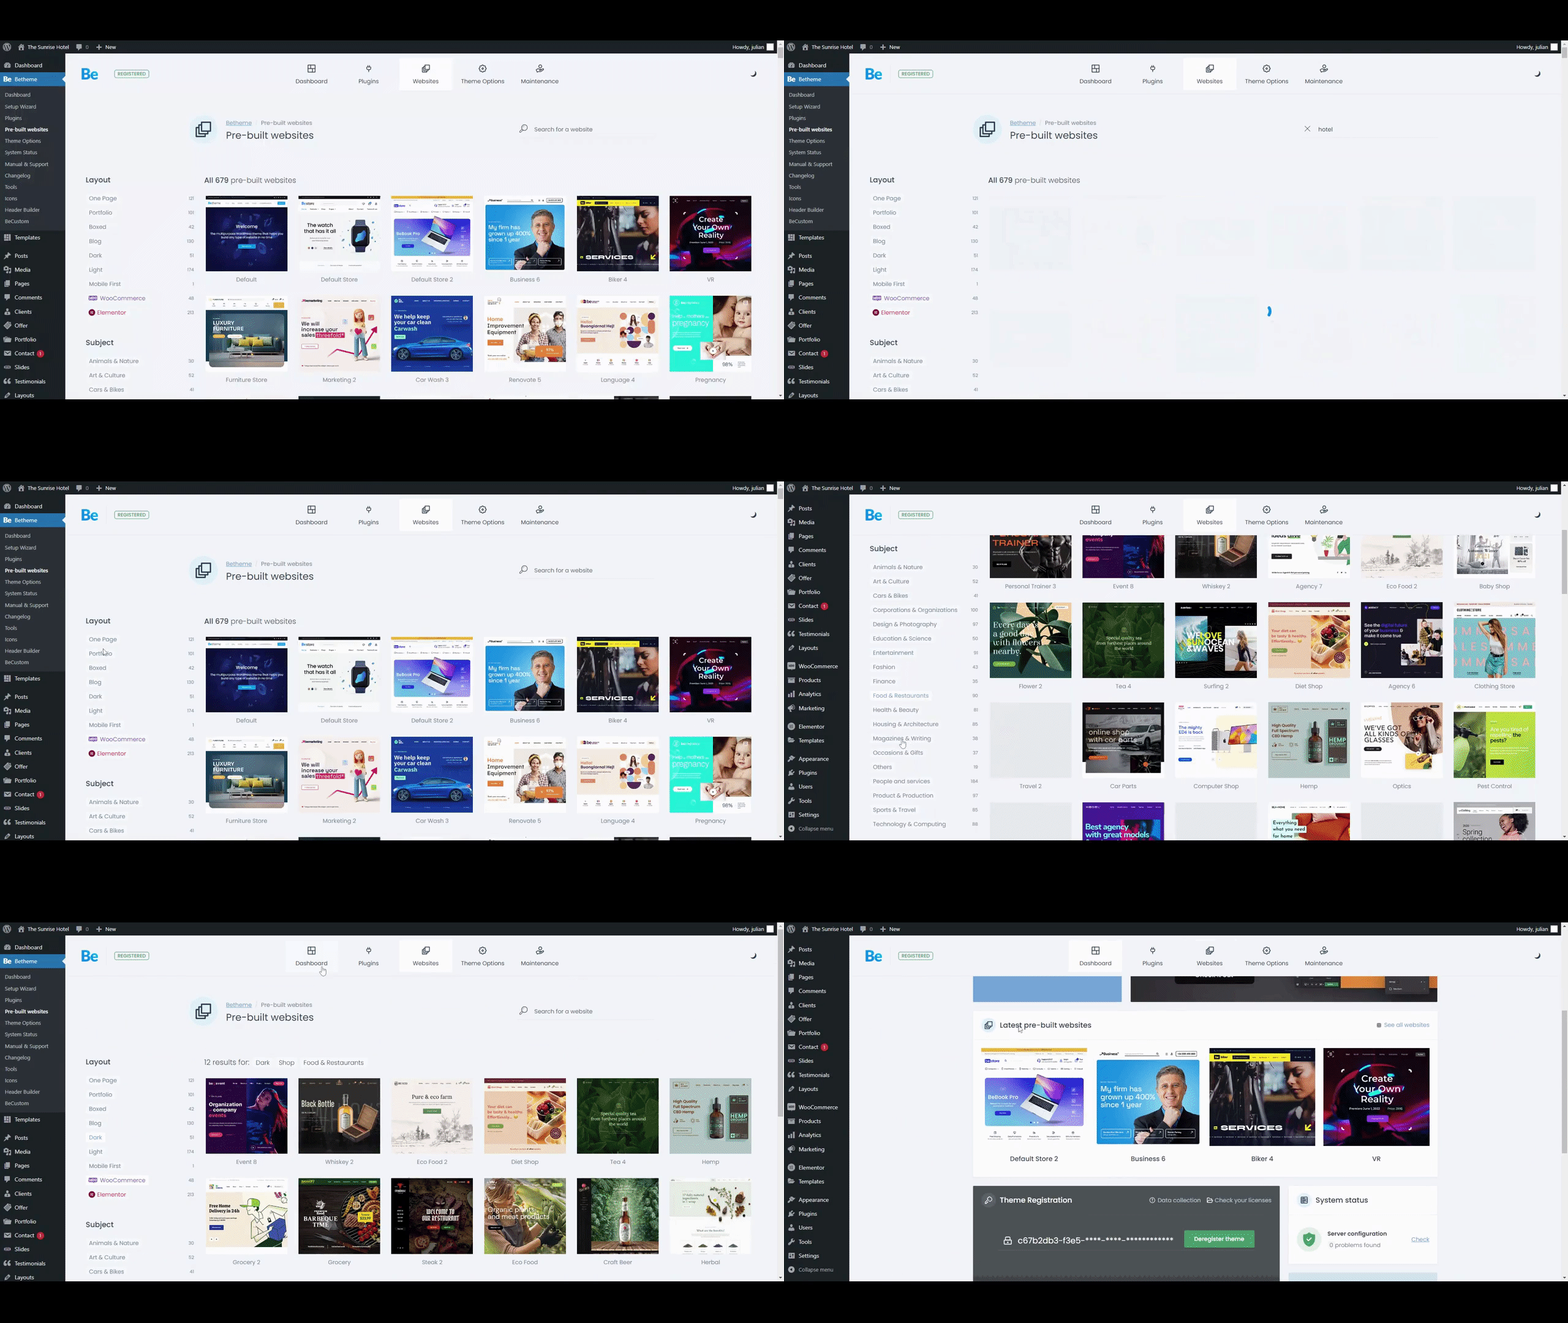
With BeTheme, you can choose from more than 650 pre-built websites. New ones are being added as we speak, and they’re delightfully easy to find. Just look under the dashboard’s Websites link or Pre-built Websites in BeTheme’s sidebar menu, and there they are!

You’ll be familiarized with the available design aids and options in no time, and you’ll find it easy to incorporate the latest design trends into your websites. BeTheme has even placed previews of its newest pre-built websites in your dashboard to help you along.

You may choose one of the latest pre-built websites to work with, or you might find one or more others you particularly like. Pre-built sites you do not plan to work with can still be sources of inspiration.

Whatever your choices, you’ll find it easy to incorporate the latest trends into website designs.

BeTheme

5. Plugin Manager

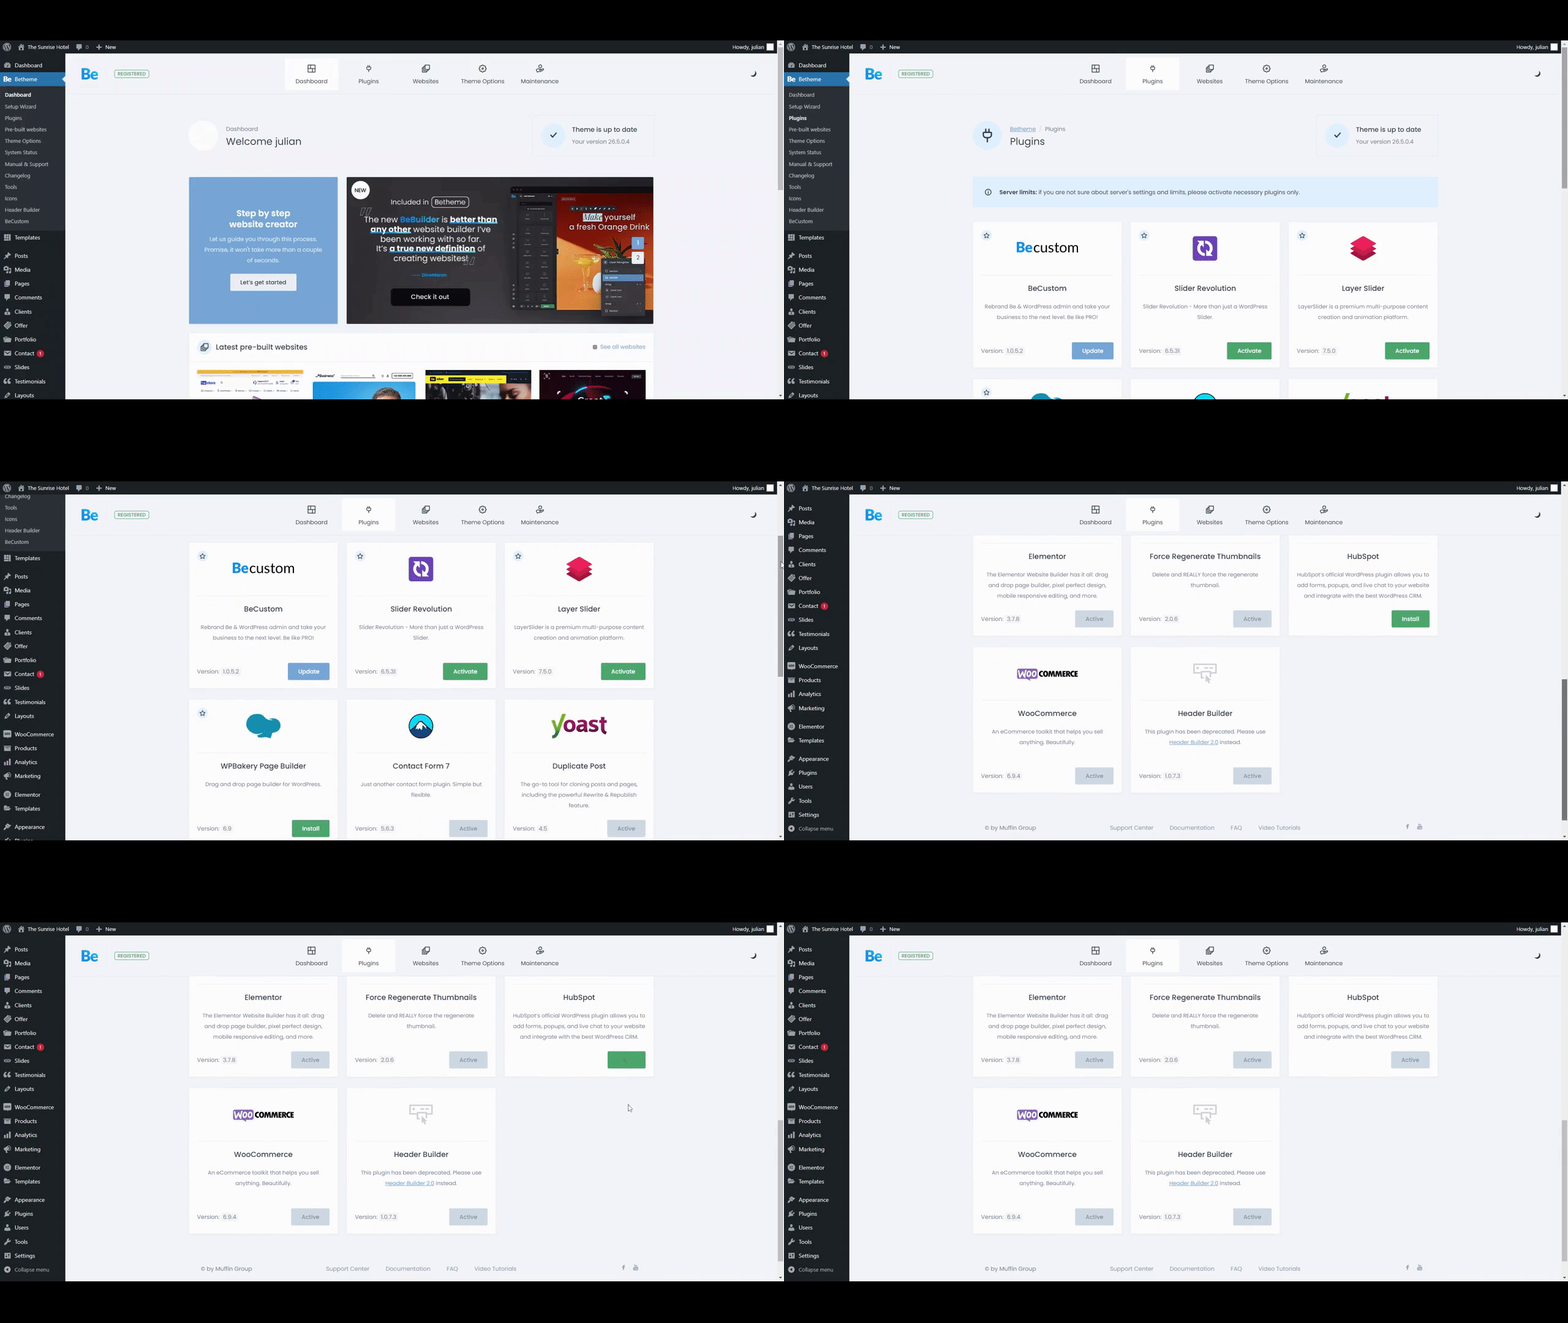
BeTheme’s Plugins area differs from what you see in the WordPress plugins area. You’ll find several of these differences to be particularly helpful in that BeTheme’s plugins manager enables you to: 

  • View the active plugins you’ve installed.
  • Update plugins when necessary.
  • Install and activate plugins only when it’s required.

The last item is essential in that plugins do not appear in the WordPress plugin manager until you have installed them. Not having to install plugins you will not need will help keep your website operating at a high level of performance.

BeTheme

6. BeTheme Support

WordPress is a powerful content management system and an extremely popular one. It may, in fact, be the most powerful and popular system of its type.

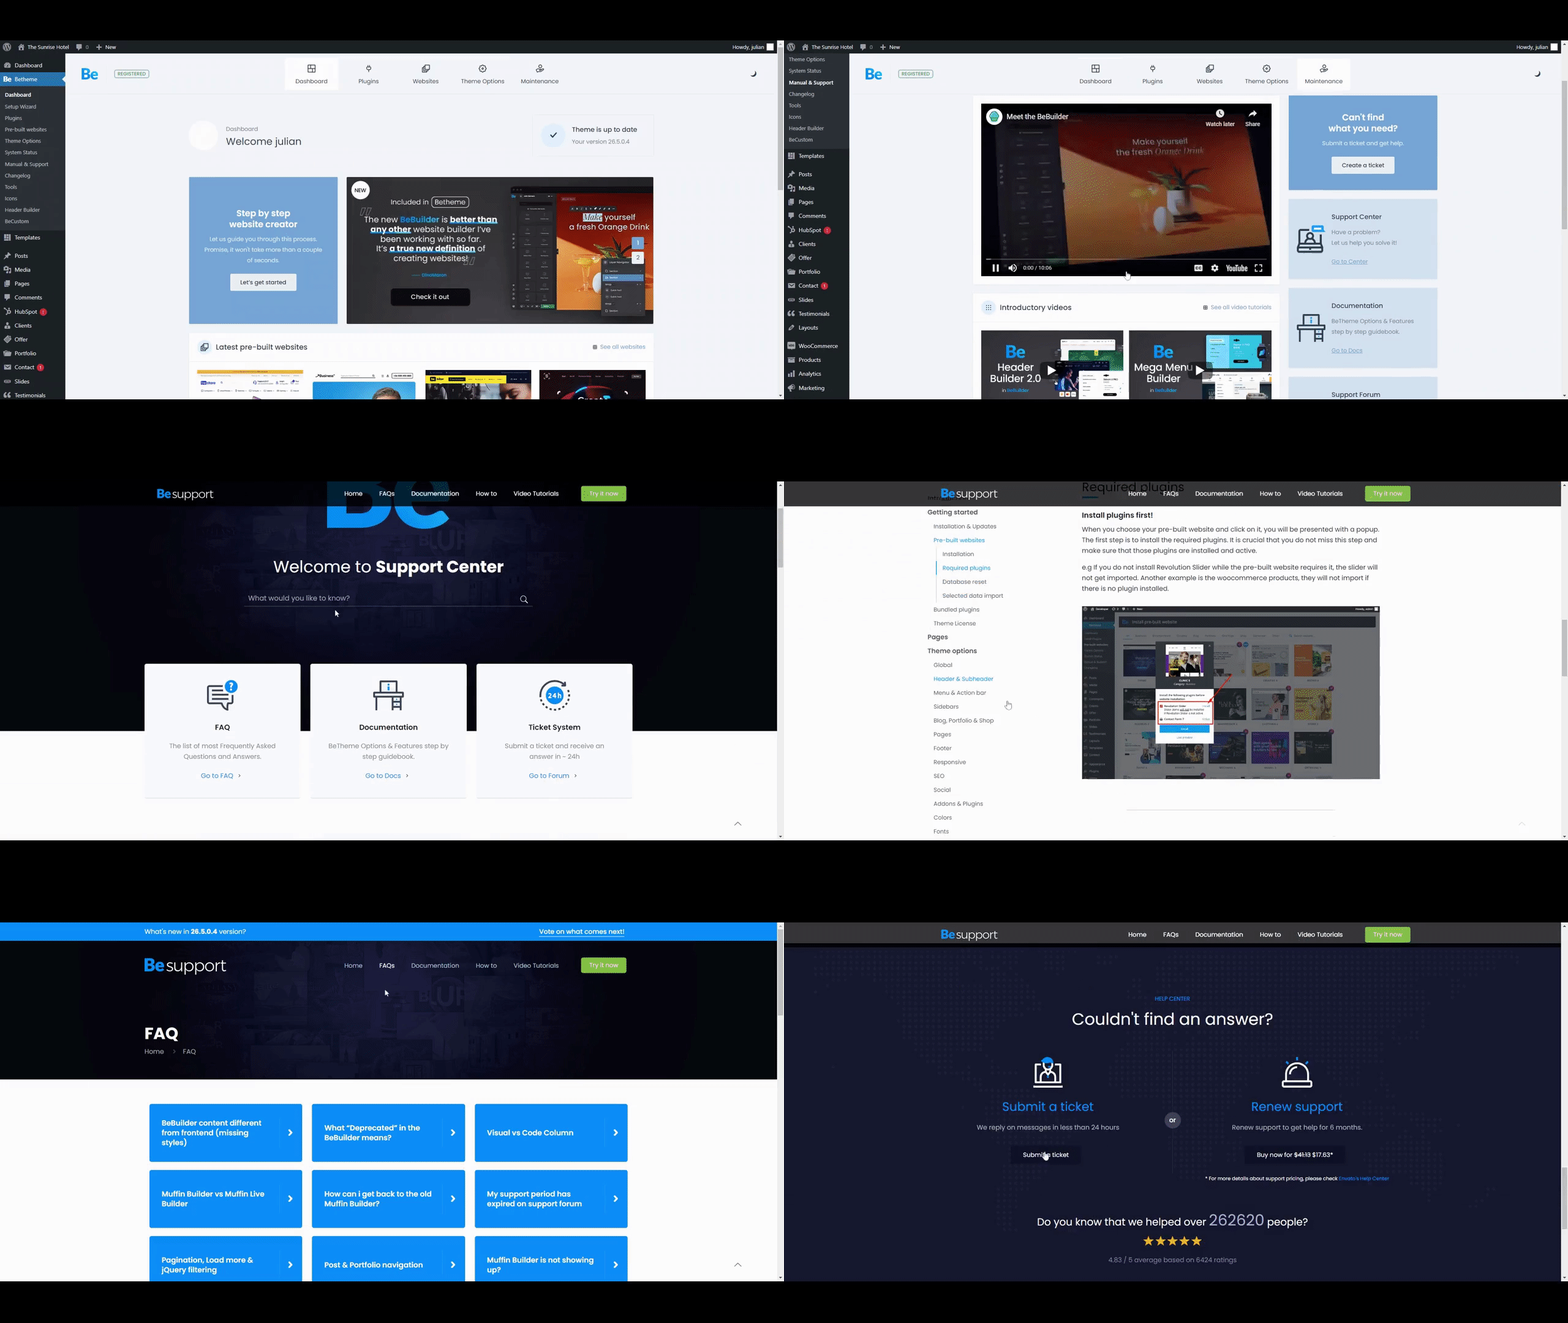
WordPress is also community-driven to a considerable extent, which can sometimes create user inconvenience. As a user, you might sometimes have to dig to find answers to your questions or get help when needed.

You don’t have to experience that inconvenience to get support from BeTheme.

To gain access to BeTheme’s support center, you need go no further than BeTheme’s sidebar or dashboard to access self-support options or open a ticket for direct assistance.

BeTheme

7. Theme Options

Plenty of well-known WordPress themes have theme settings customization capabilities. With BeTheme, it’s easy to set brand colors, choose custom fonts, and establish global layouts. The same holds for configuring responsiveness, performance, and accessibility, all of which are essential for optimizing UX and search engine functionalities.

The problem with most theme options is that they can only be modified from the main WordPress dashboard. So if, while designing on a page, you suddenly realize a portion of its design hasn’t been configured correctly, or you’re dissatisfied with any design segment, you’ll have to save your changes and go to your theme’s backend to make the necessary fixes.

From the BeTheme dashboard inside the BeBuilder BeTheme, you can modify your Theme Options without having to interrupt your workflow.

BeTheme

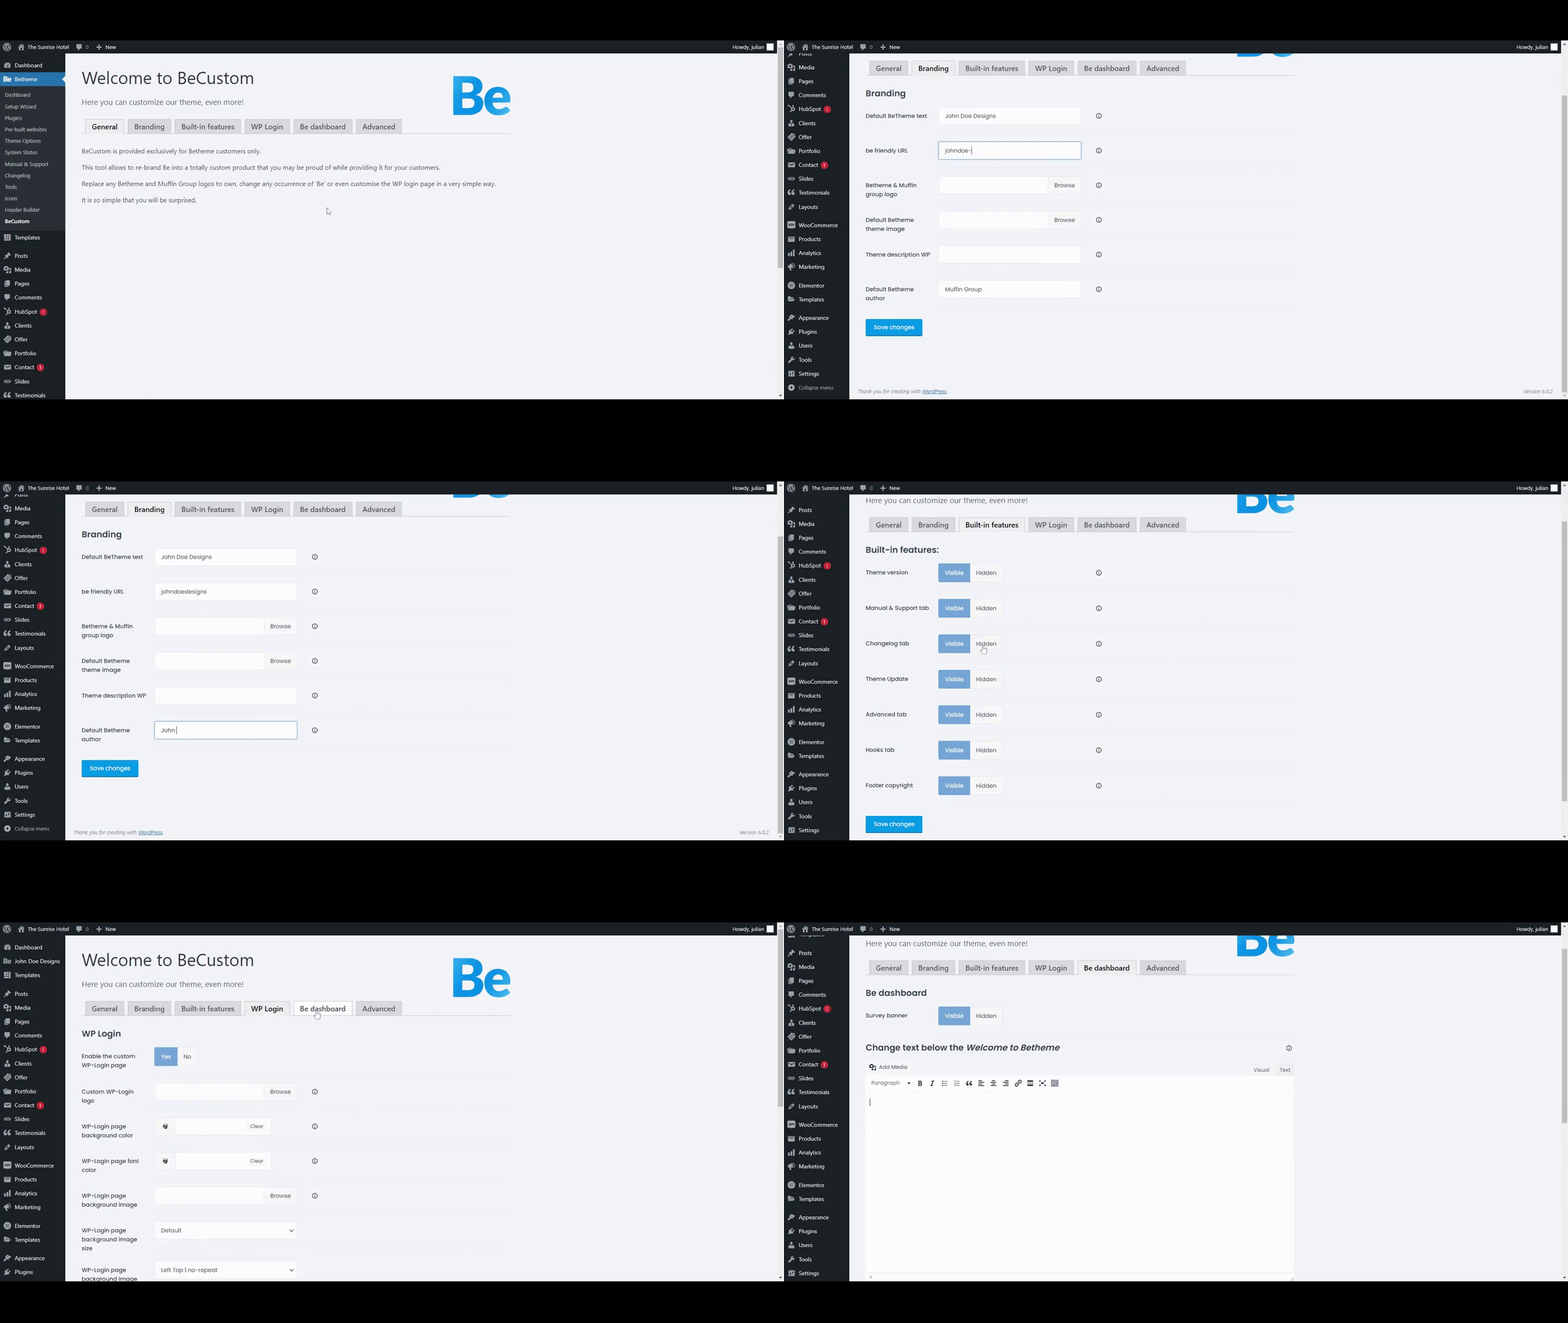
8. White-Label Mode

A final feature of the BeTheme WordPress theme’s backend you should become familiar with is BeCustom. This critical feature is located under BeTheme in the sidebar.

BeCustom enables you to access some white-label regions in BeTheme. 

  You can use BeCustom to:

  • Substitute Be’s branding with your business’s branding to reinforce your name with your clients.
  • Disable any features your clients have no use for and deny access to any features you do not want them to modify while at the same time making the WordPress theme’s backend easier to work with.
  • Create an extra user-friendly and secure WordPress login.
  • Customize the dashboard’s “Welcome” message.

BeTheme

Make Your WordPress Design Projects Simple to Handle With BeTheme

Is there anything BeTheme doesn’t do?

Most likely, but nothing that would adversely impact your design effort.

This multipurpose WordPress theme’s hundreds of pre-built websites will help you get virtually any website project off to a rapid start and headed in the right direction.

BeTheme features the fastest and most powerful page builder for WordPress.

You will have total control over every feature and facet of your website’s UI.

In short, BeTheme offers the finest way to manage any web design project within WordPress.


[- This is a sponsored post on behalf of BeTheme -]

Source

The post Why Do WordPress Theme Backends Have to Suck? (Hint: They Don’t!) first appeared on Webdesigner Depot.

Source de l’article sur Webdesignerdepot

There are a lot of dark, retro vibes trending in website design right now. Although there are still some light projects popping up – including a pastel trend below – a lot of what we are seeing has a quite moody feel.

Here’s what’s trending in design this month.

Pastel Color Palettes

Let’s start with the trend with a lighter feel – pastel color palettes. While much of the web is trending toward dark aesthetics, there’s a segment that’s going in the exact opposite direction. Those sites feature soft, pastel color palettes that serve as a balance to all the super dark websites out there.

One thing about this website design trend is that it jumps out because of the stark contrast with all of the dark color palettes out there.

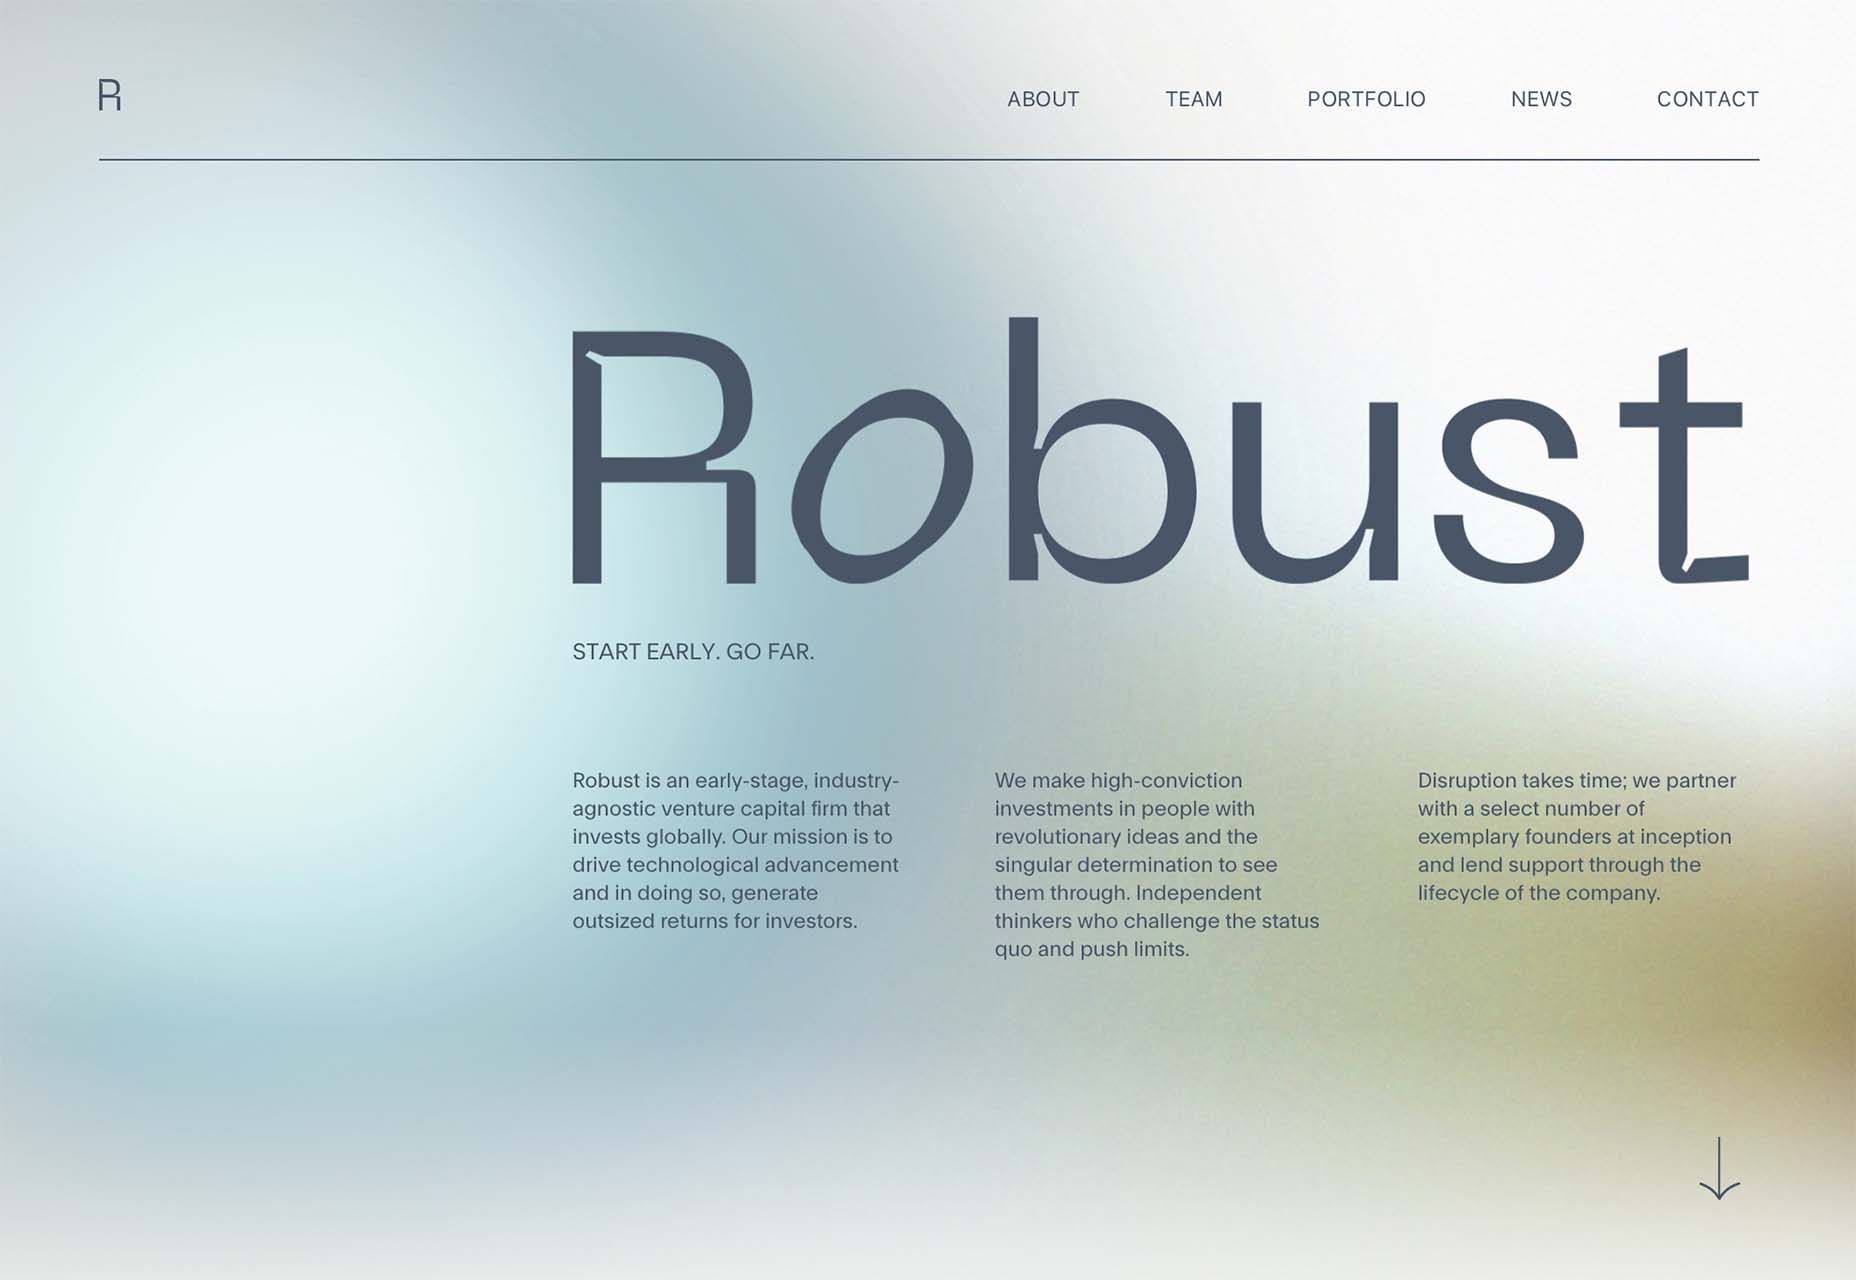
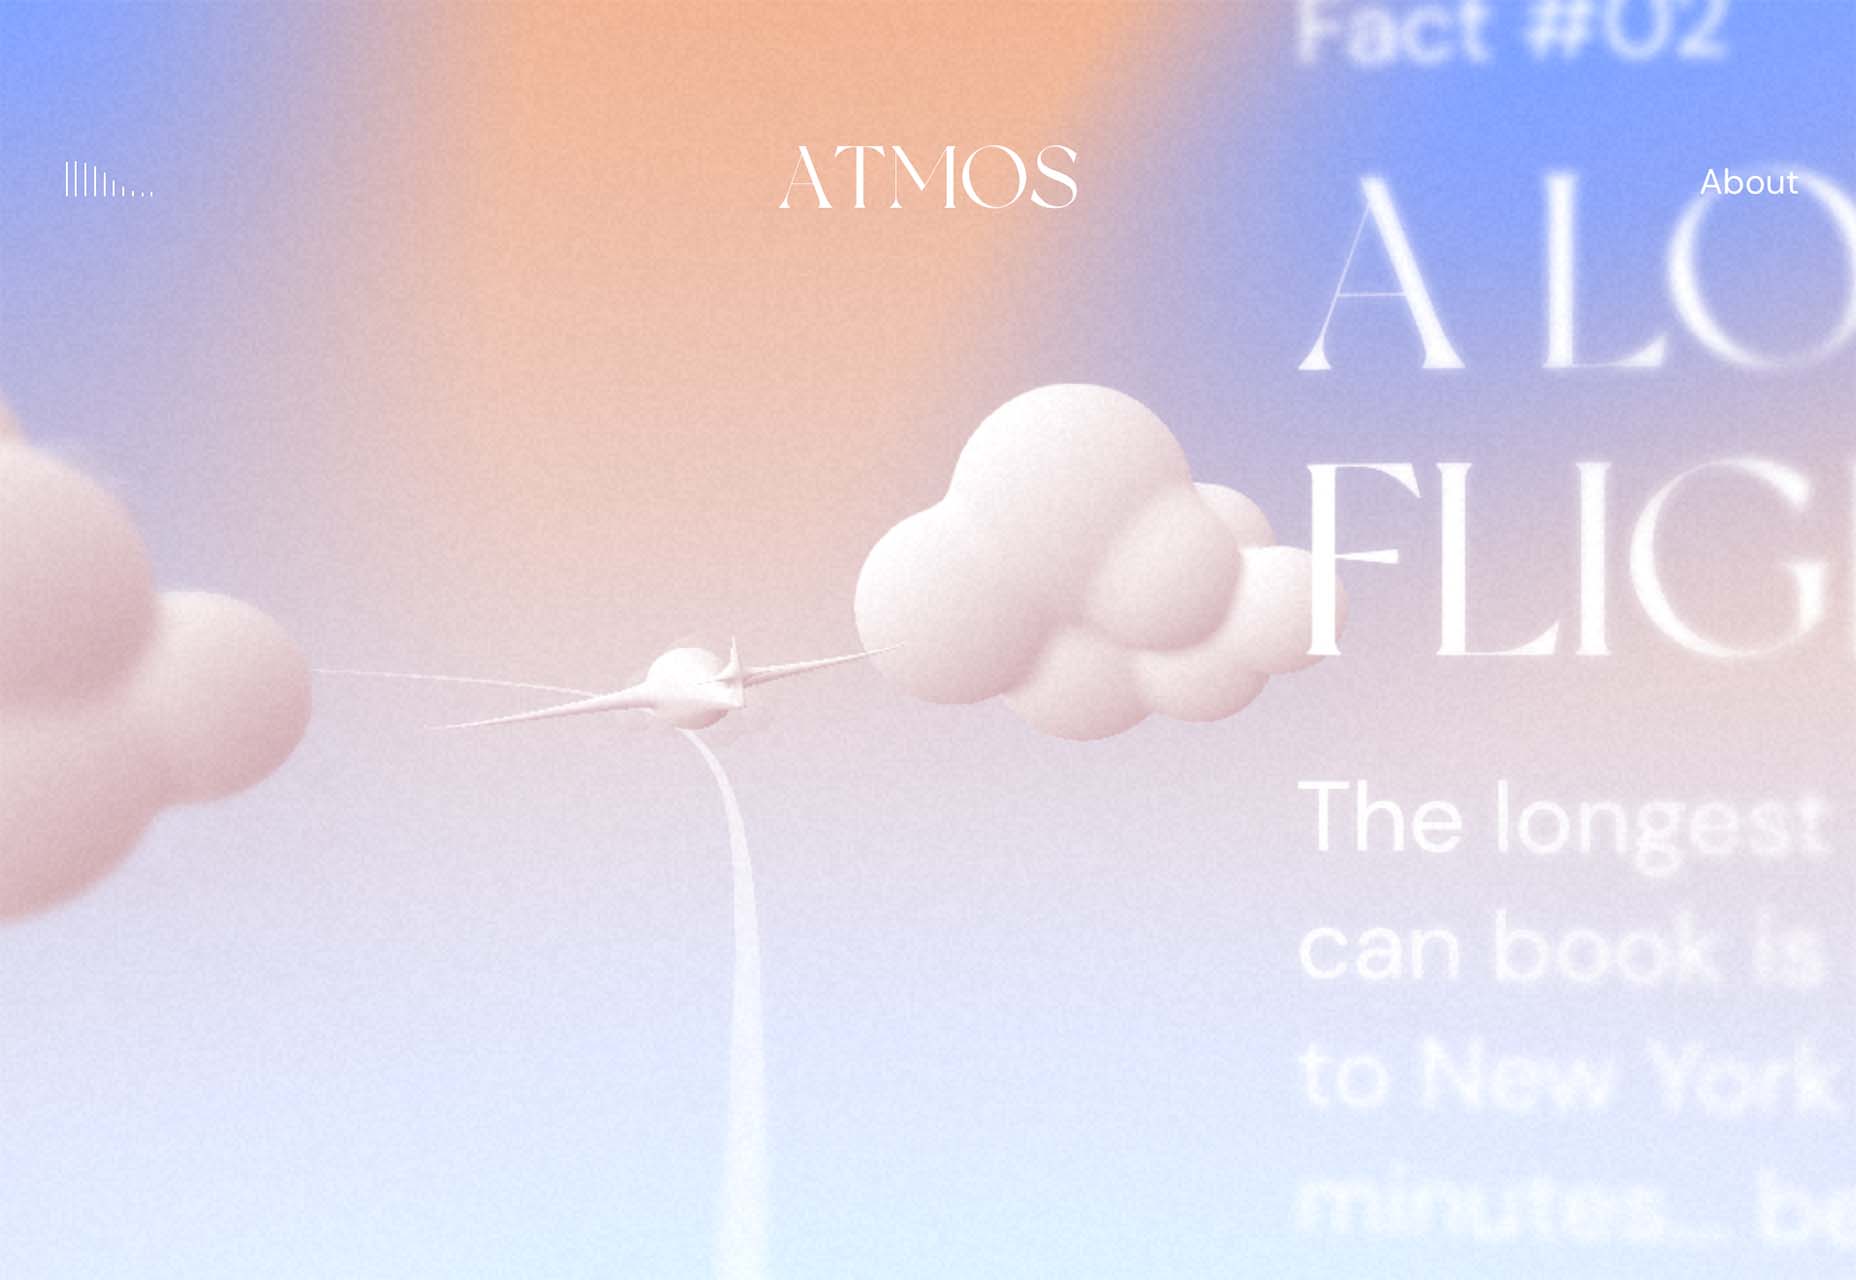
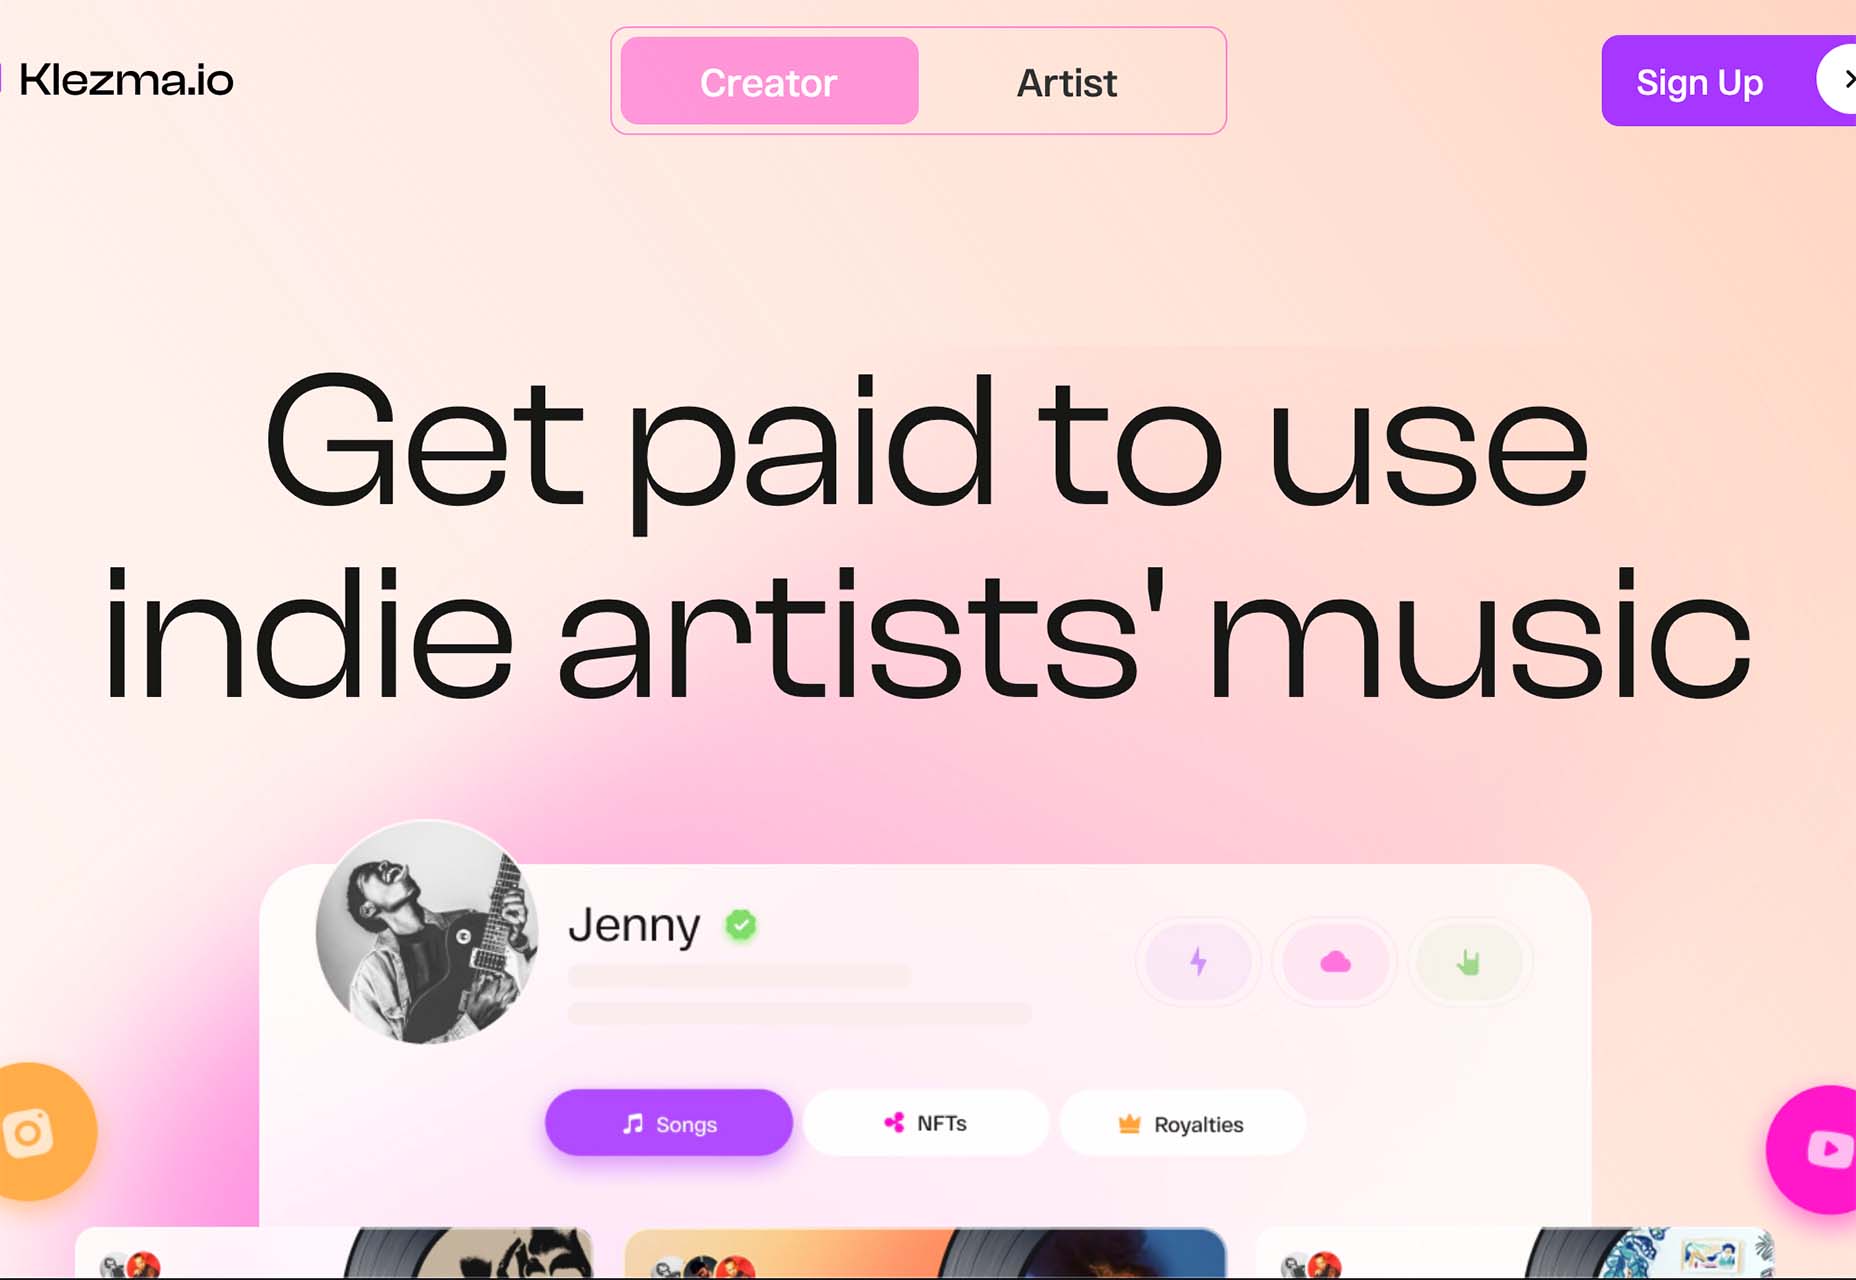
Each of these designs seems to use a pastel color palette as the basis for a background. A blur effect is paired with the colors to use pastels in a way that has a natural feel without appearing too feminine or light.

Robust uses blue and earth tones for a pastel background that feels modern and strong when paired with the hard-edged headline font.

Atmos uses a light pastel theme that takes you through the clouds with blues, and pinks, and purples. The pastel color scheme works well with the content which is airline-themed and makes you feel like you are flying through the sky. The colors are also soft enough to provide an easy reading experience.

Klezma is another design with the same pastel background with graduated color. The peach tones are fairly neutral and give plenty of room to the content.

Fonts with a Distinct Retro Look

Every one of these websites uses a typeface with a similar look and feel. This retro headline style is trending in a major way.

The best way to use this design element is for short words. This typeface design isn’t meant for a lot of words or when readability is a high priority.

This style is all about creating a specific kind of vibe for your website. The typefaces in this trend have a quite retro look and feel with an almost 1960s or ’70s feel to them. The rest of the design mimics this feel as well with colors and surrounding elements that contribute to the overall look.

A couple of common elements here include the use of all capitals font sets and letterforms that include odd shapes and lines.

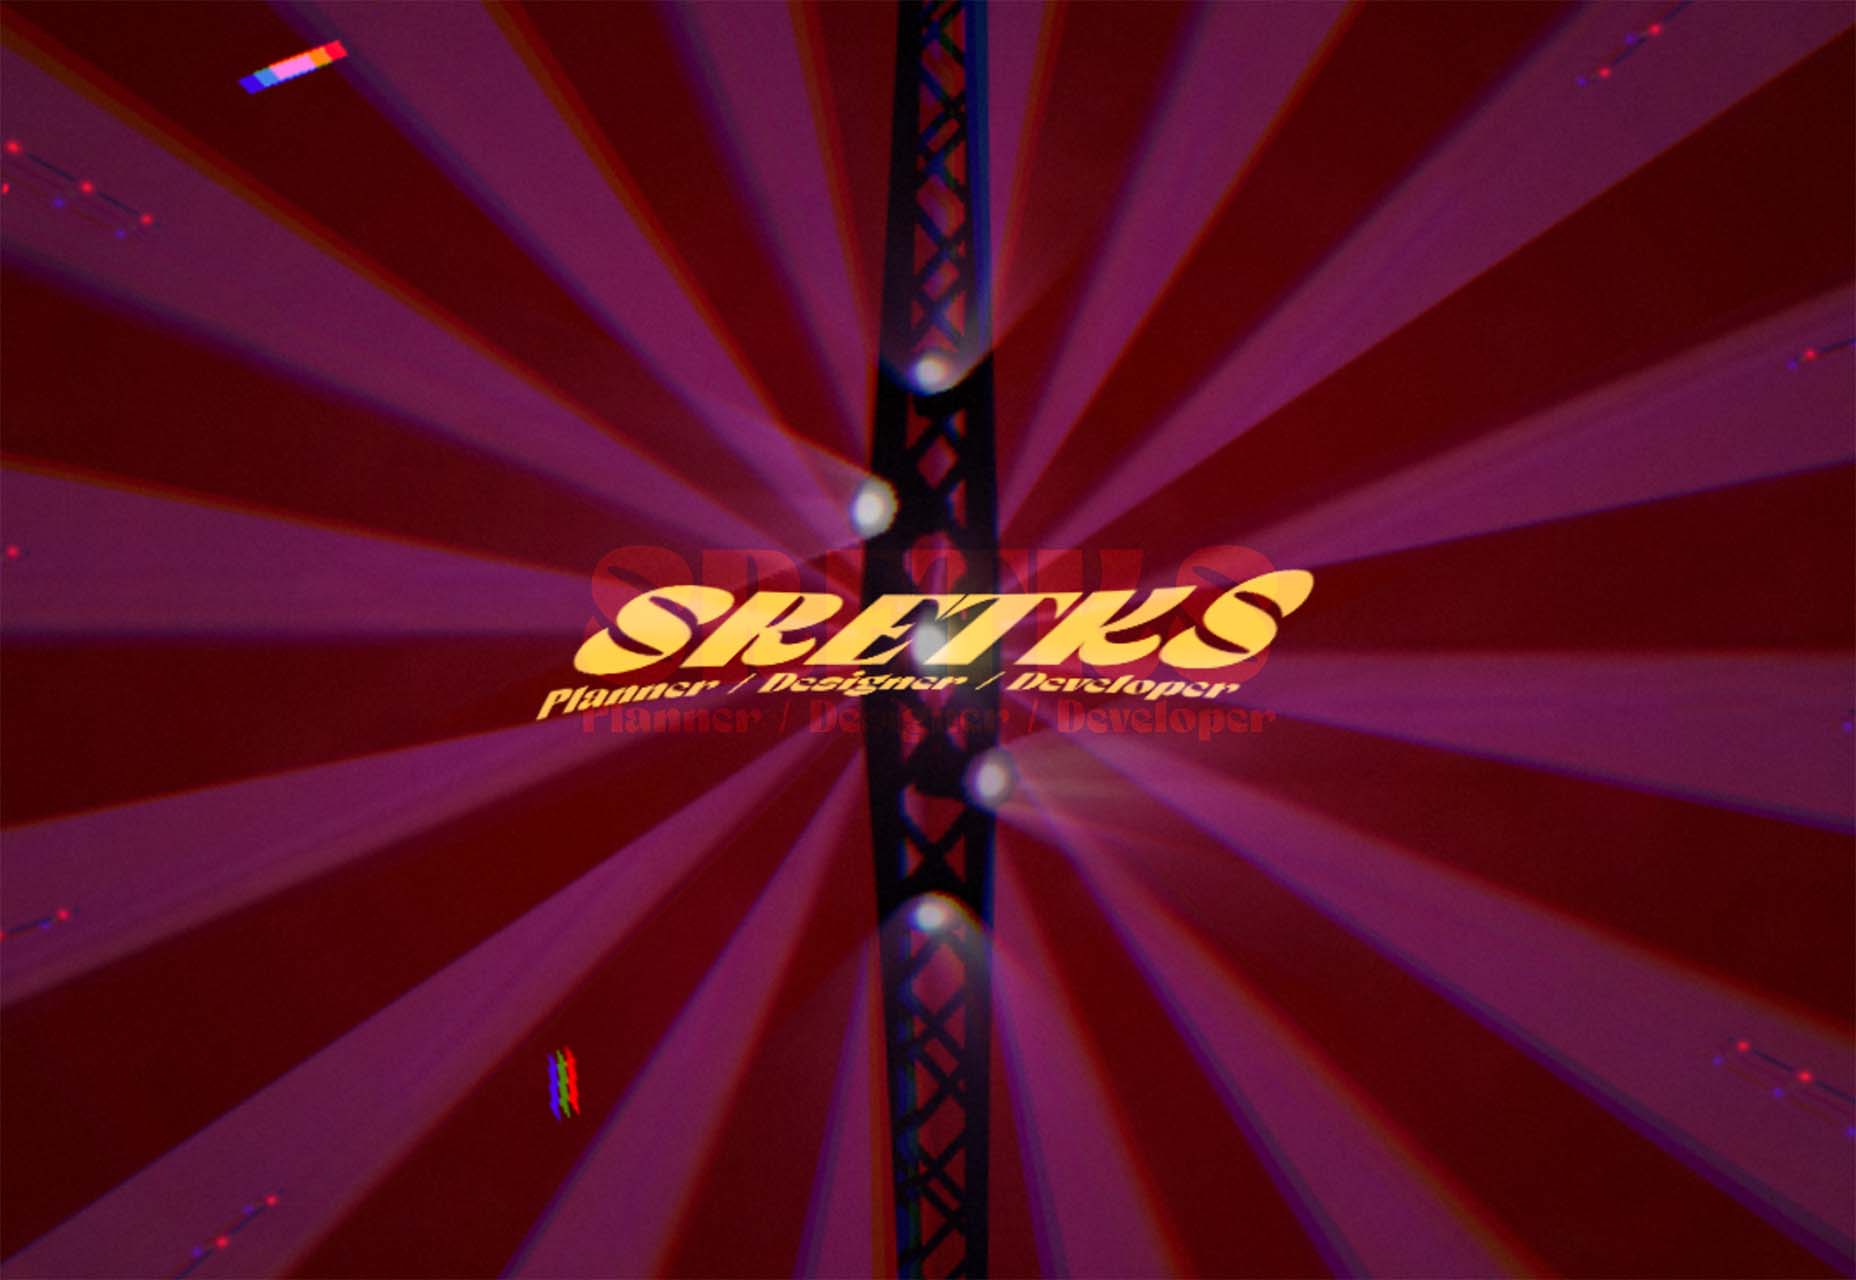
Sretks not only uses a retro typeface but bends and twists it a bit too to add to the old-school feel. The background color helps add to the groovy vibe.

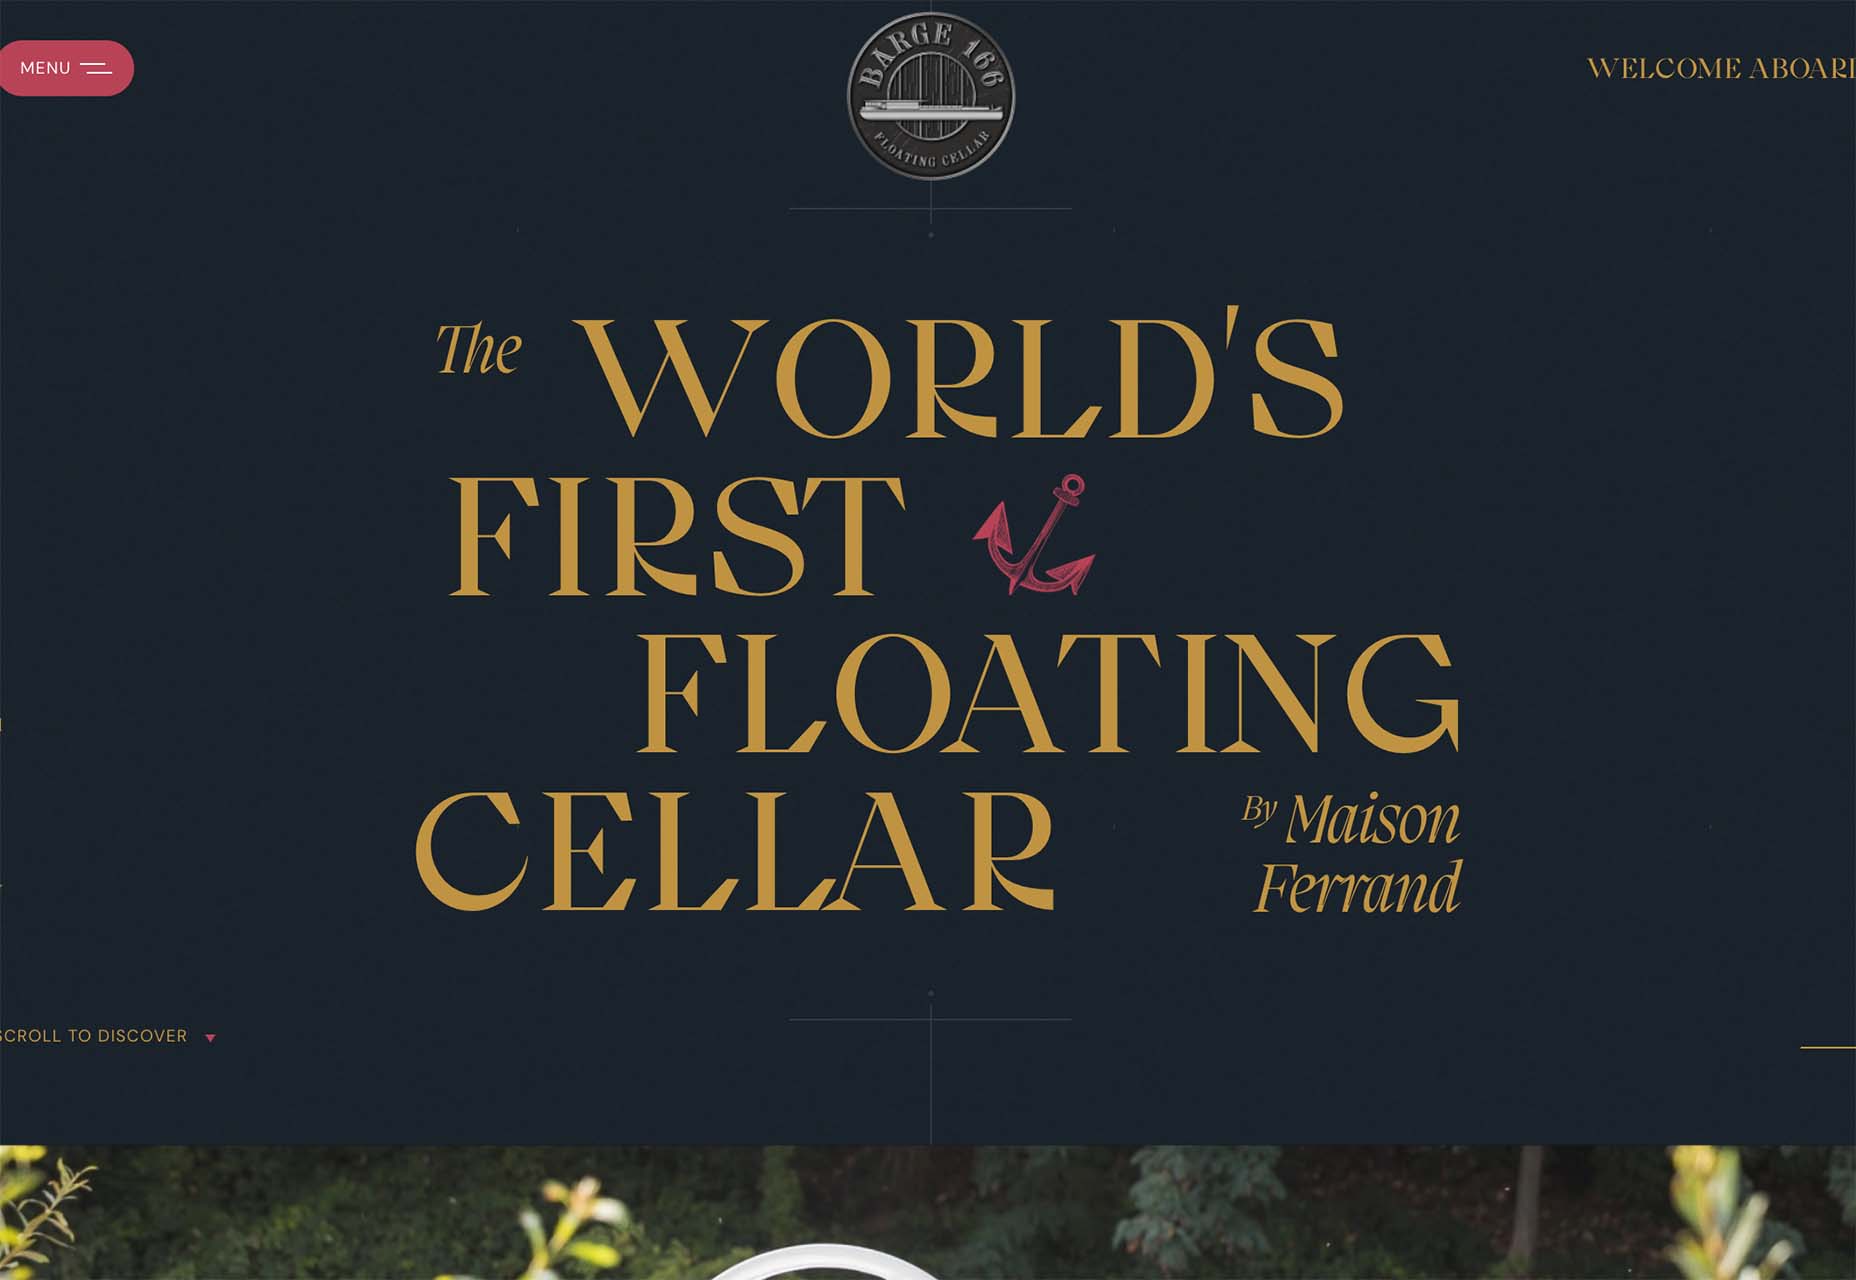
Barge 166 uses a retro typeface with the same design feel as the other examples but with a sharper, more serif-style edge. It’s easier to read but still carries a retro look and feel. Use a typeface similar to this if you want to capture that retro font style for a trending look while maintaining as much readability as possible. This option works best for multiple lines of words in a large size.

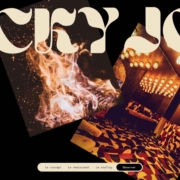
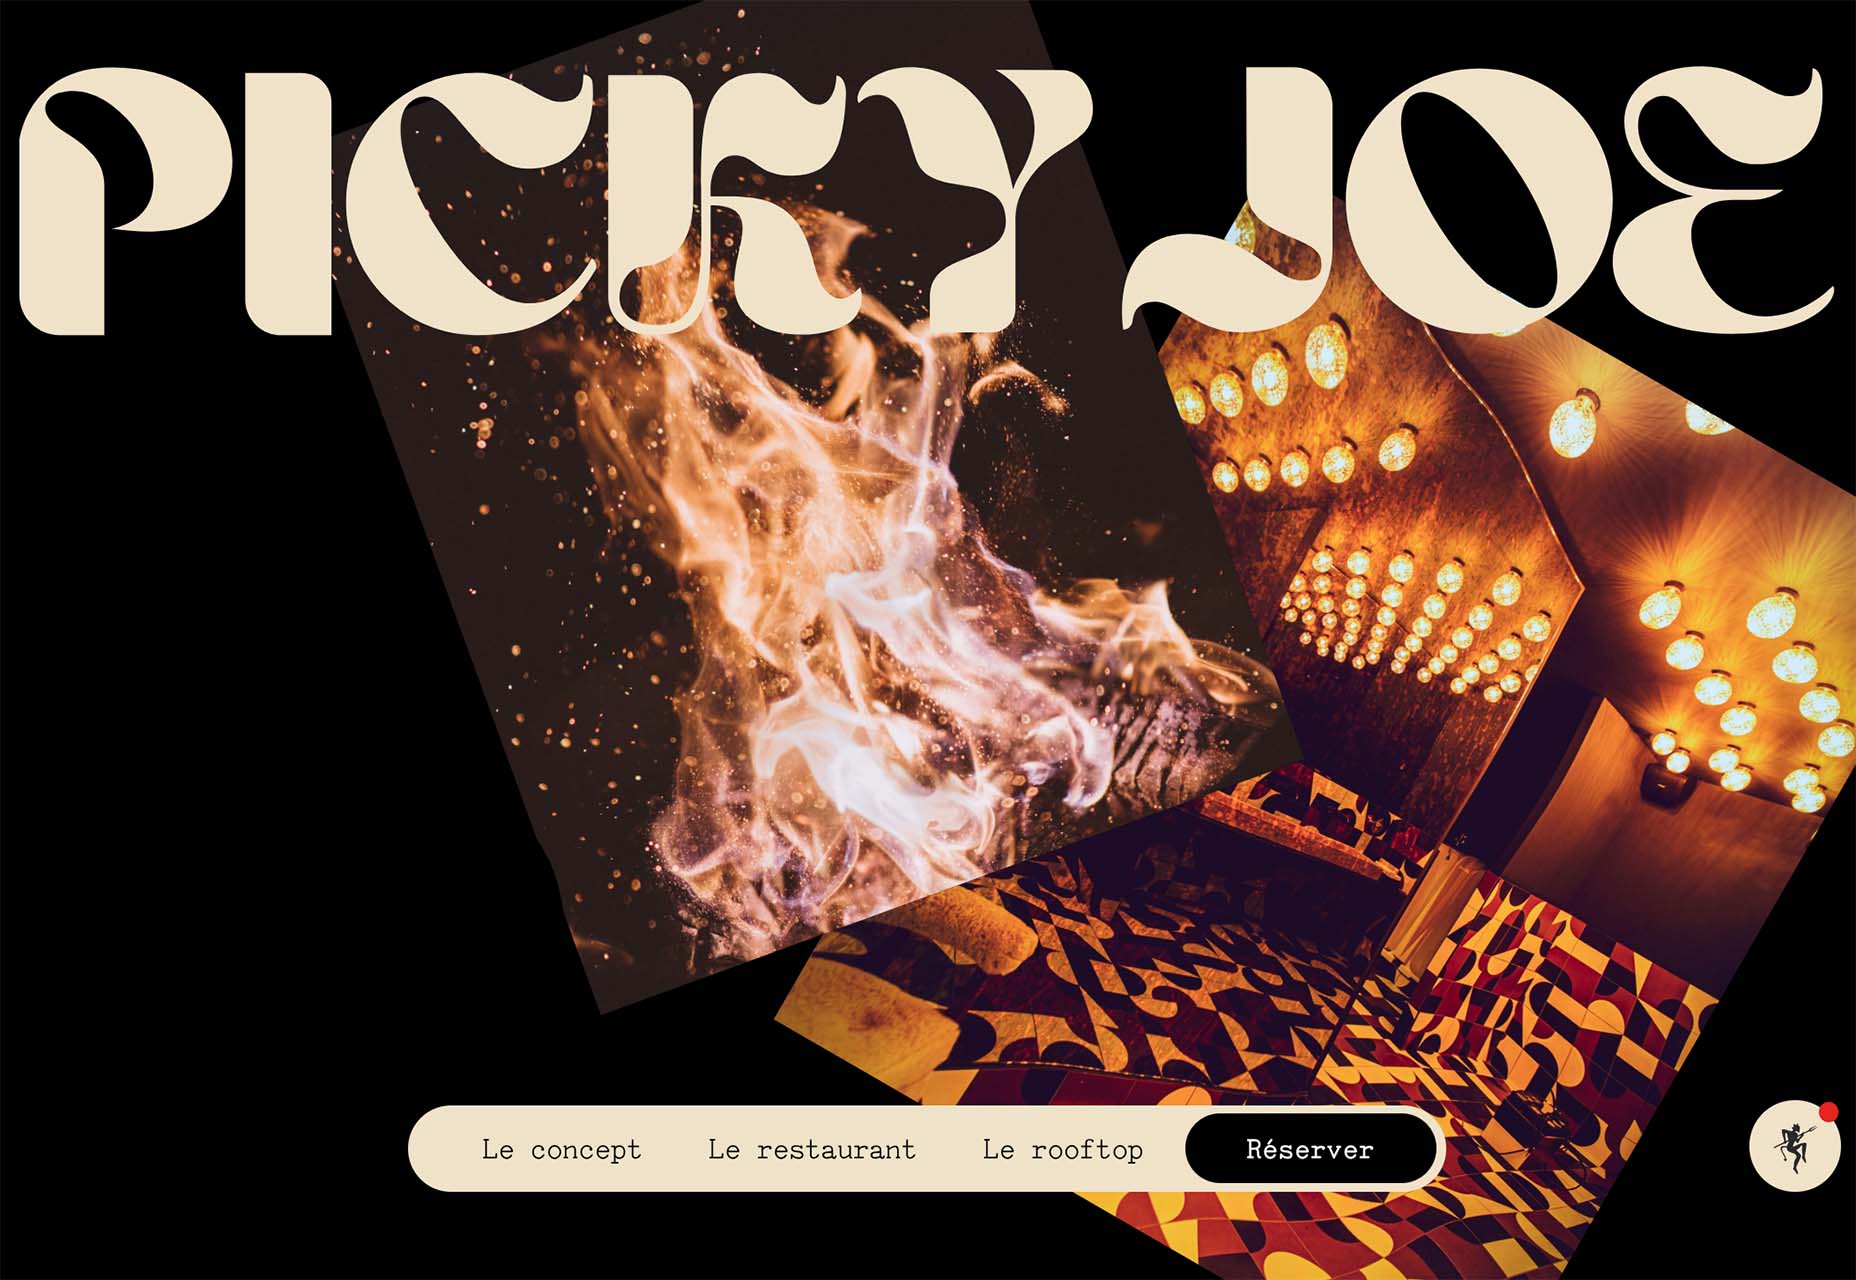
Picky Joe uses a retro typeface with rounded letters and a bit of a tilt to the characters to create a distinct feel. This is definitely a style that has to be used sparingly but can be a fun option, depending on the content of your website design.

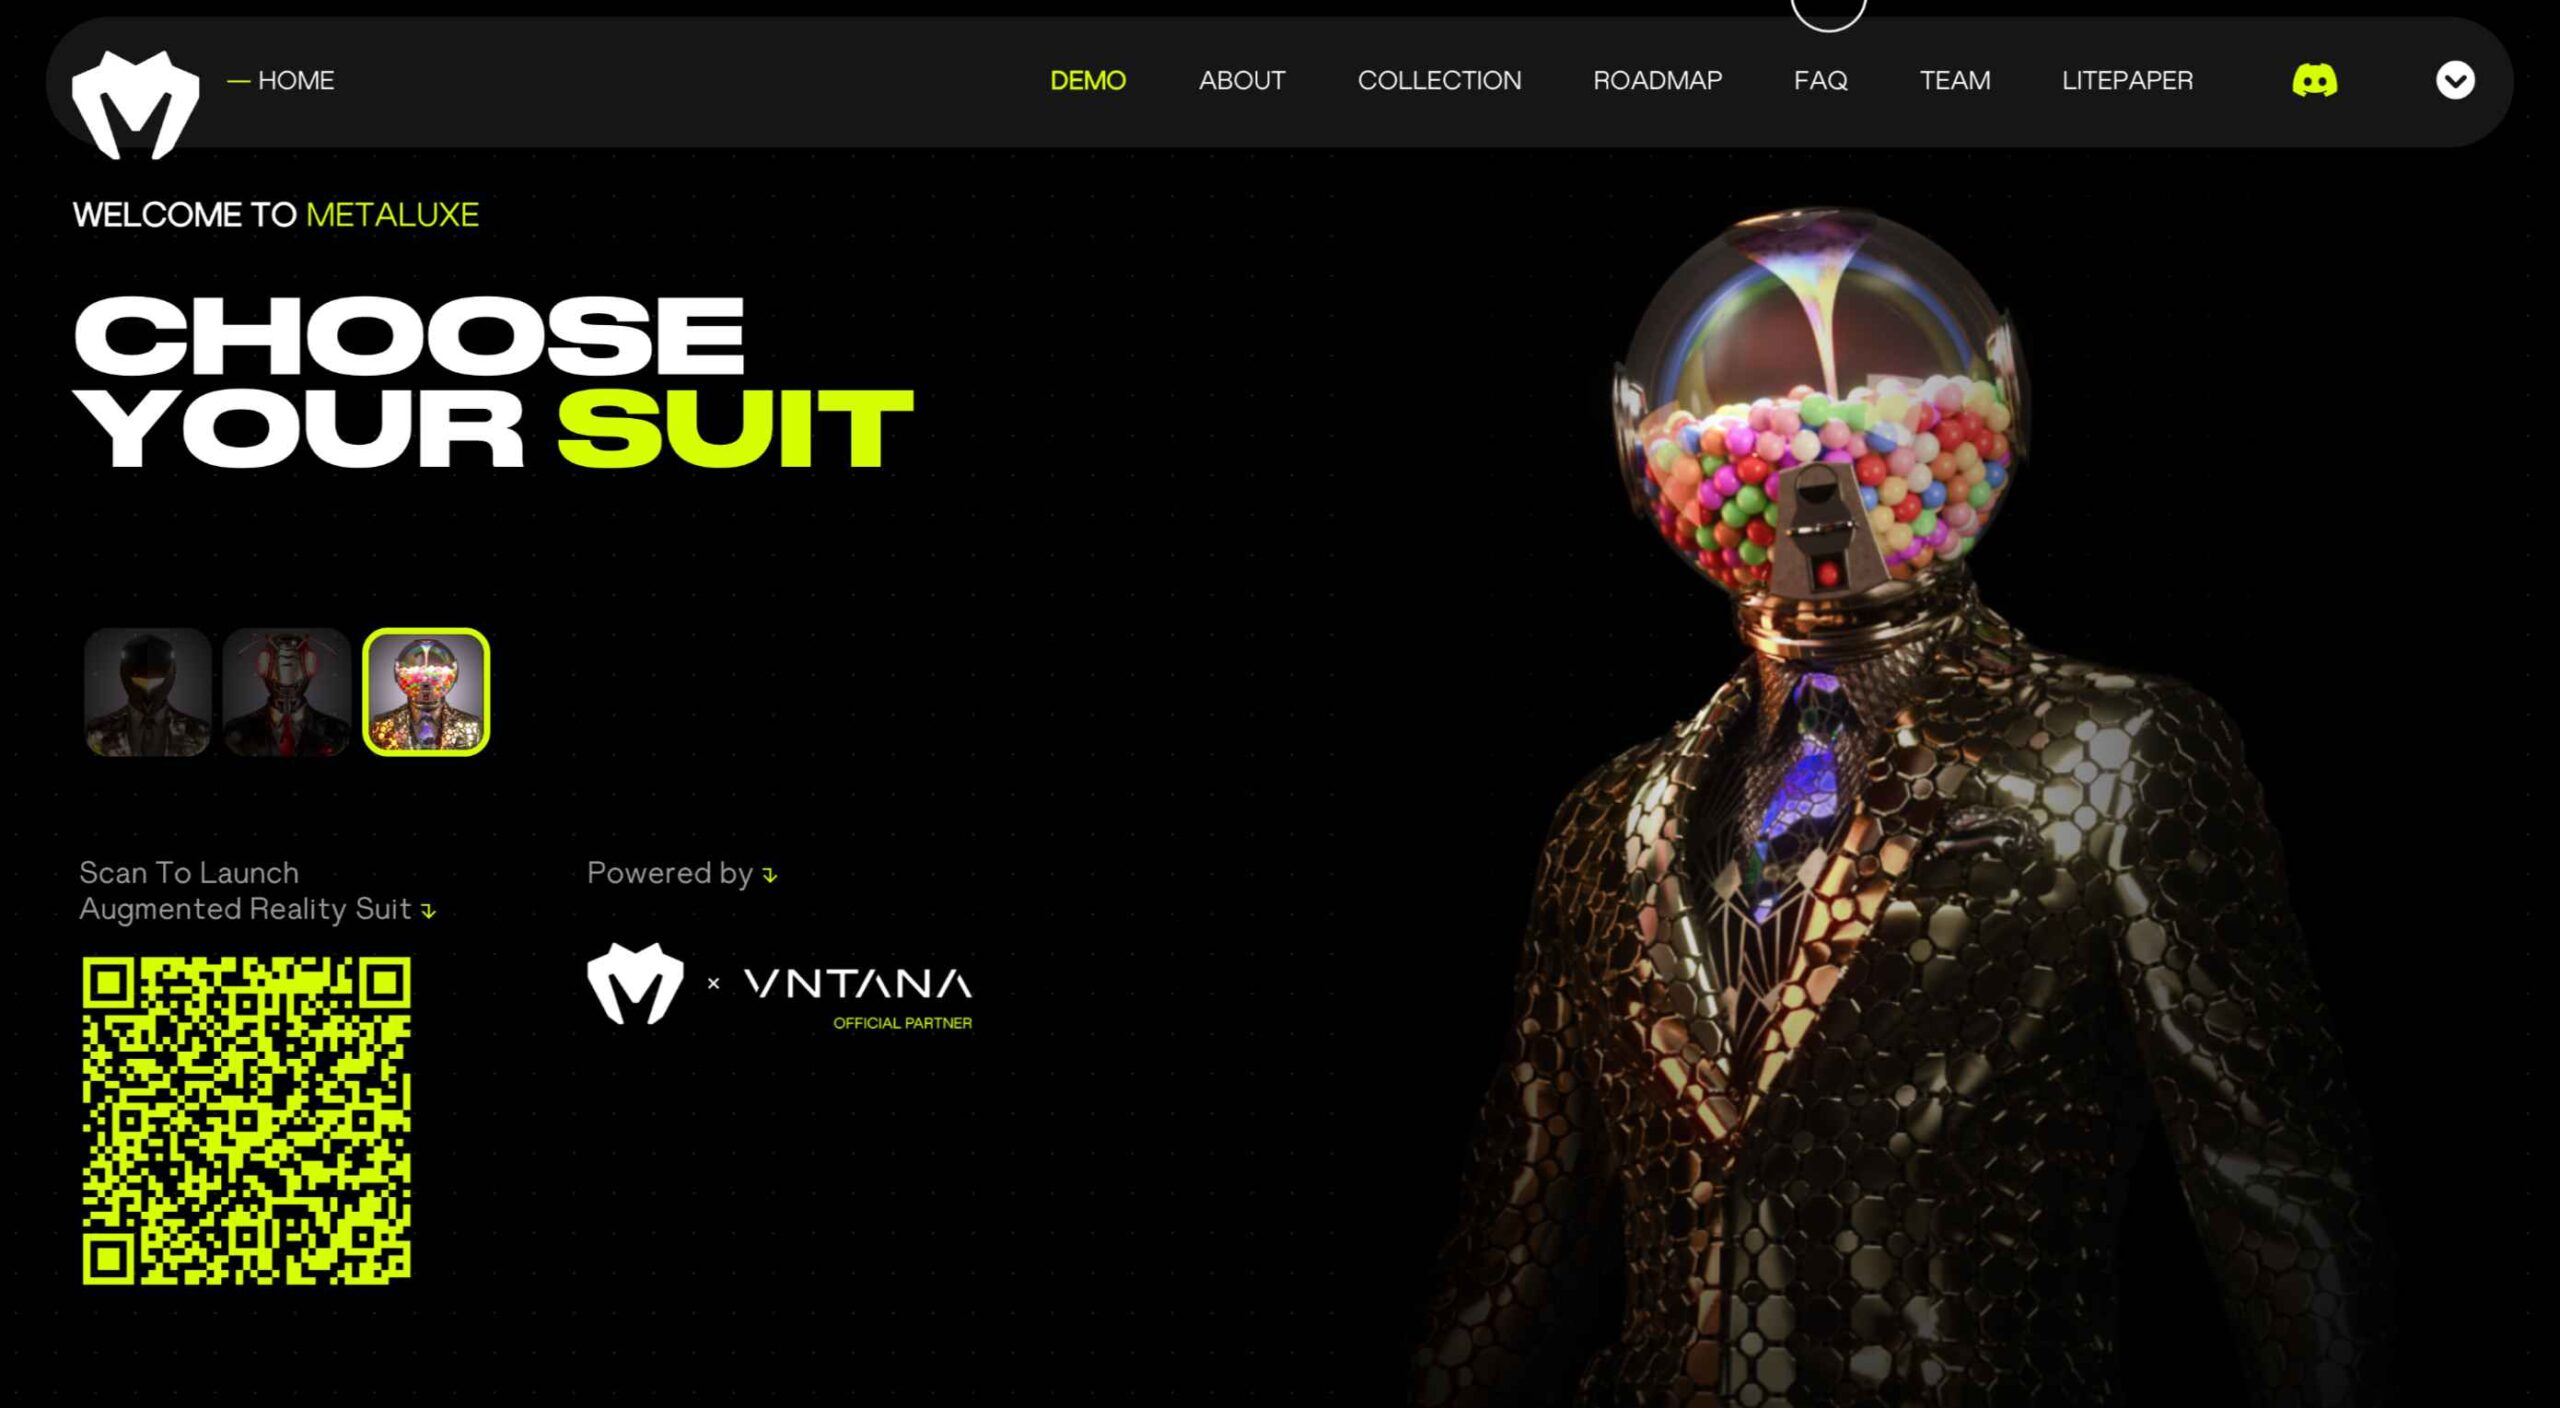
Dark “Product” Sites

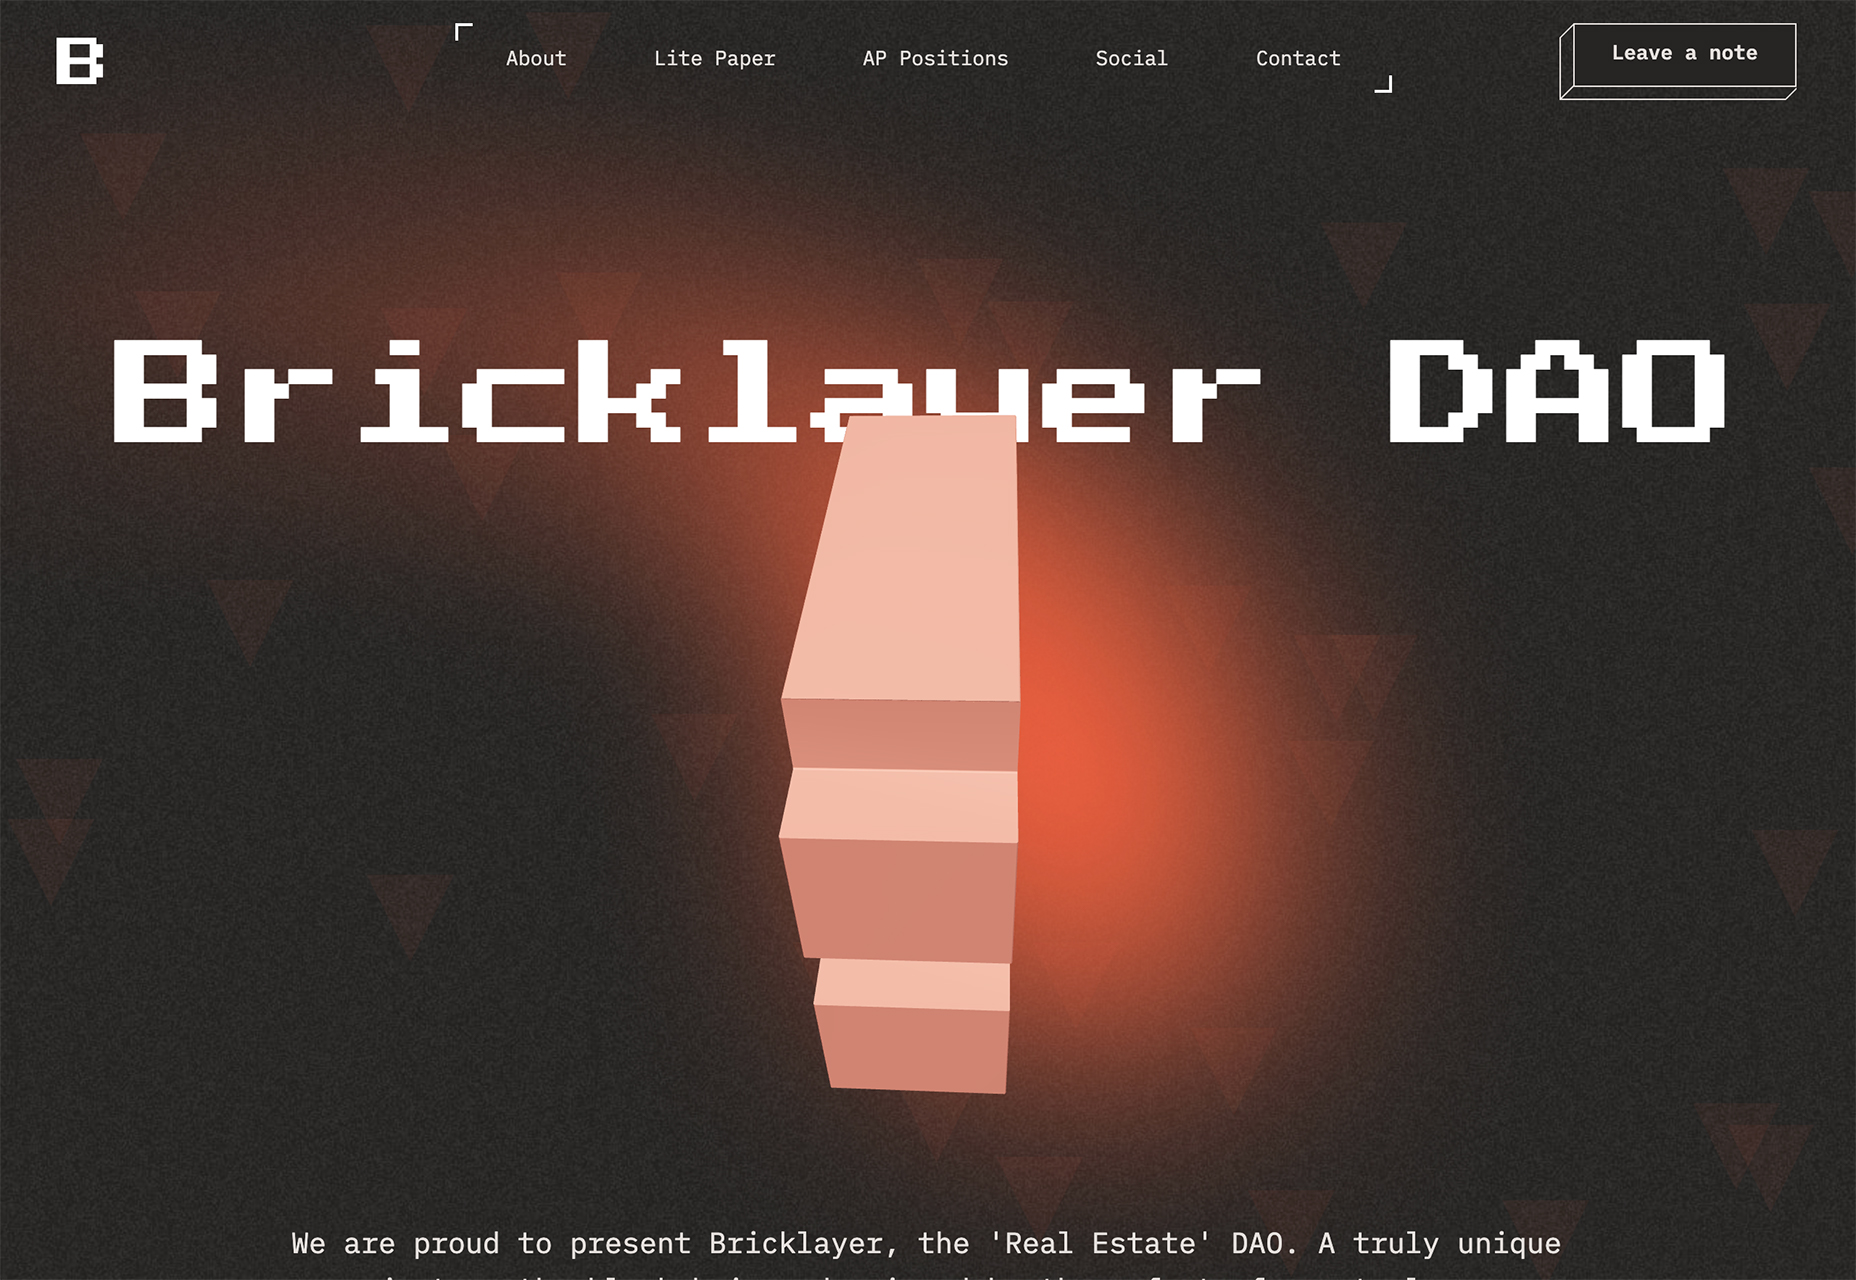
Dark mode design is probably the biggest design trend of 2022. Everywhere you look, websites are using dark color palettes and styles. Designers are creating more projects with a dark/light toggle so users can control their experience.

This visual concept is carried over to website designs that feature products as well. This is one of the last places the dark aesthetic had not touched. It’s been a bit of an unwritten rule that product images should be on white or light backgrounds to help make them easy to see and inspect digitally.

This design trend bucks that idea and features products on dark backgrounds – some with so little contrast that you almost have a hard time seeing the products. (Maybe these brands are banking on the idea that you already know them or are selling a lifestyle product.)

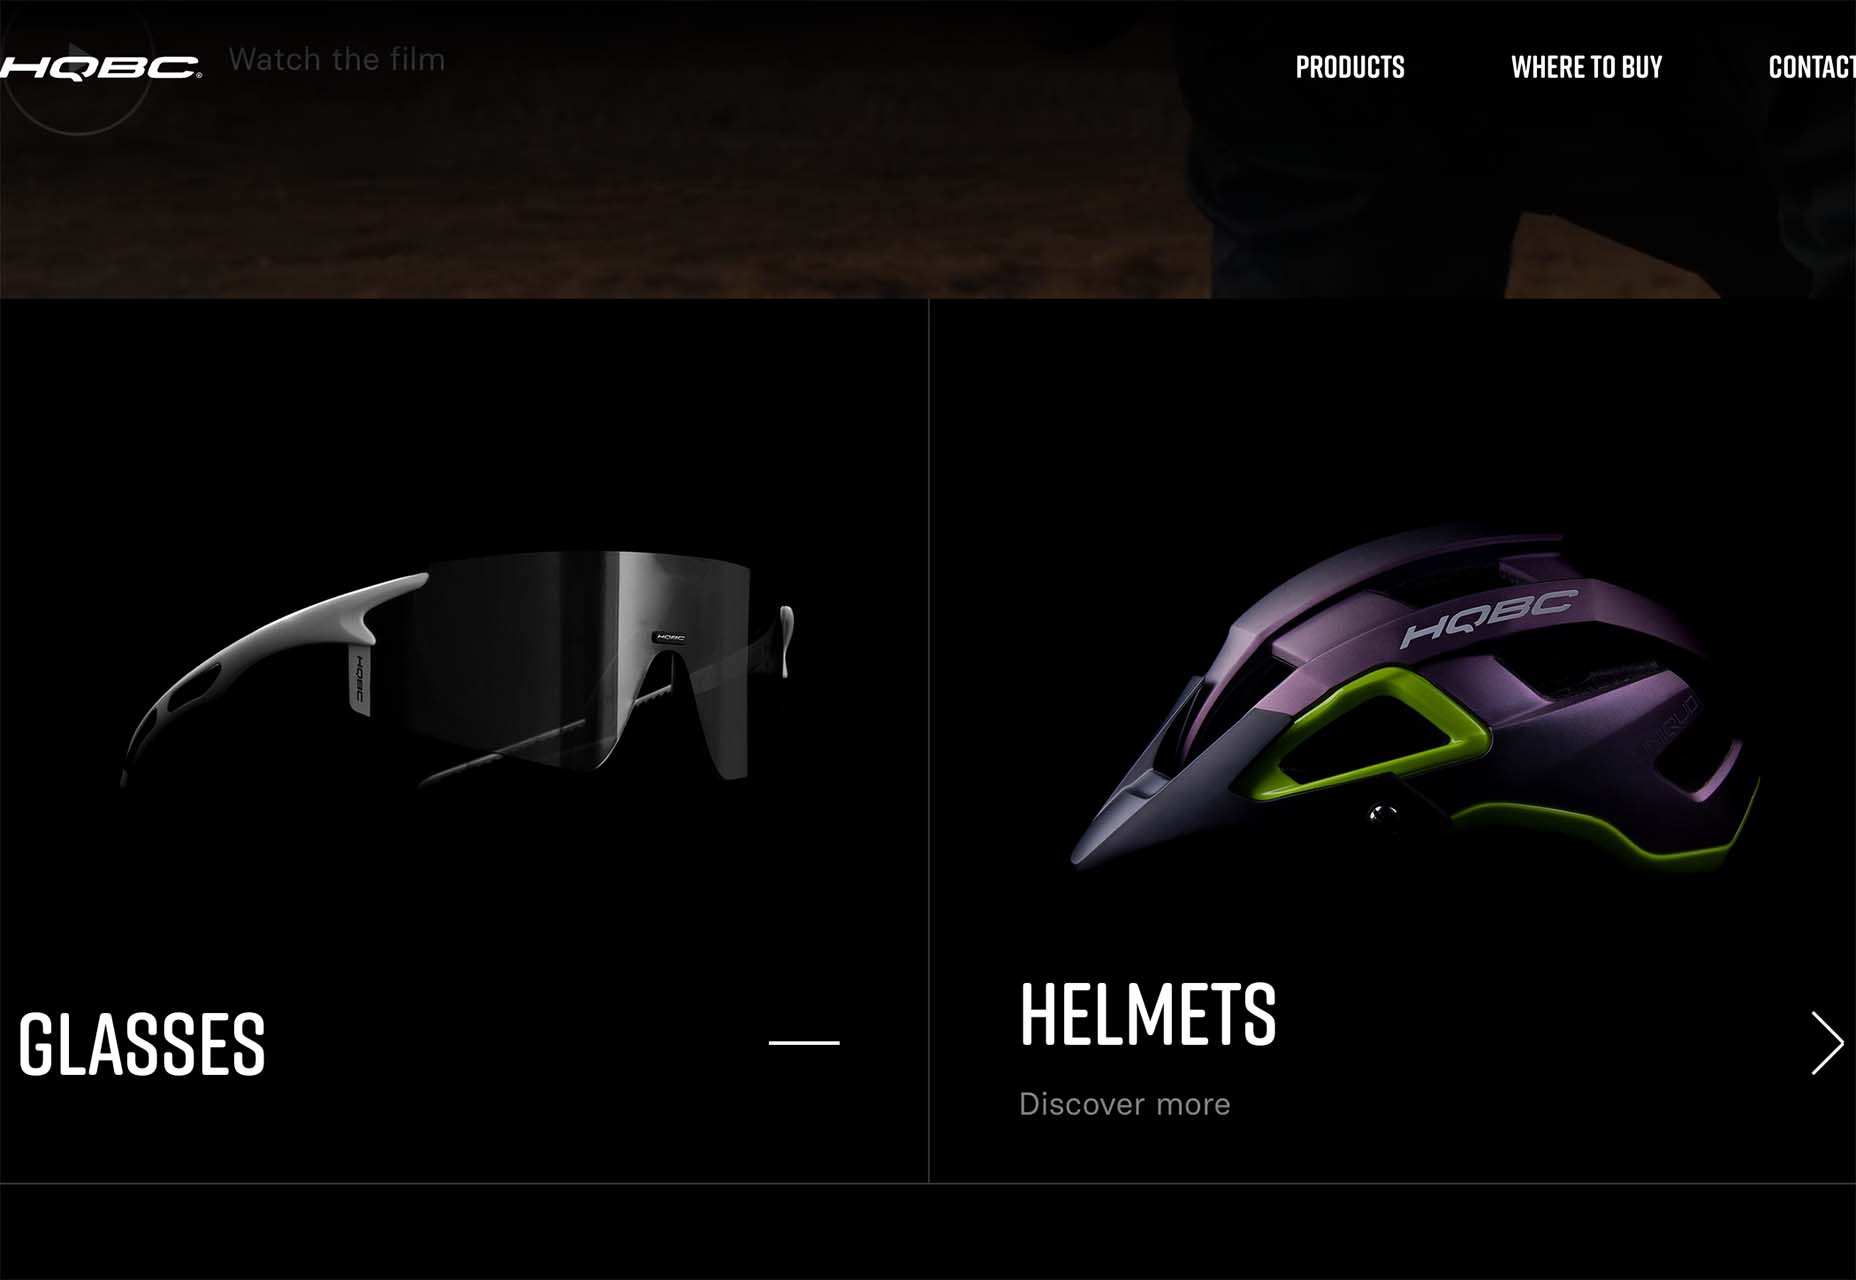
HQBC sells bike accessories such as glasses and helmets and the site has a sleek look and feel. You know it is cool from the second you land on it. The question though – is there enough visual information with the dark background to help you make a purchase? This design probably works because it only encourages you to find a physical location to make a purchase rather than buy online.

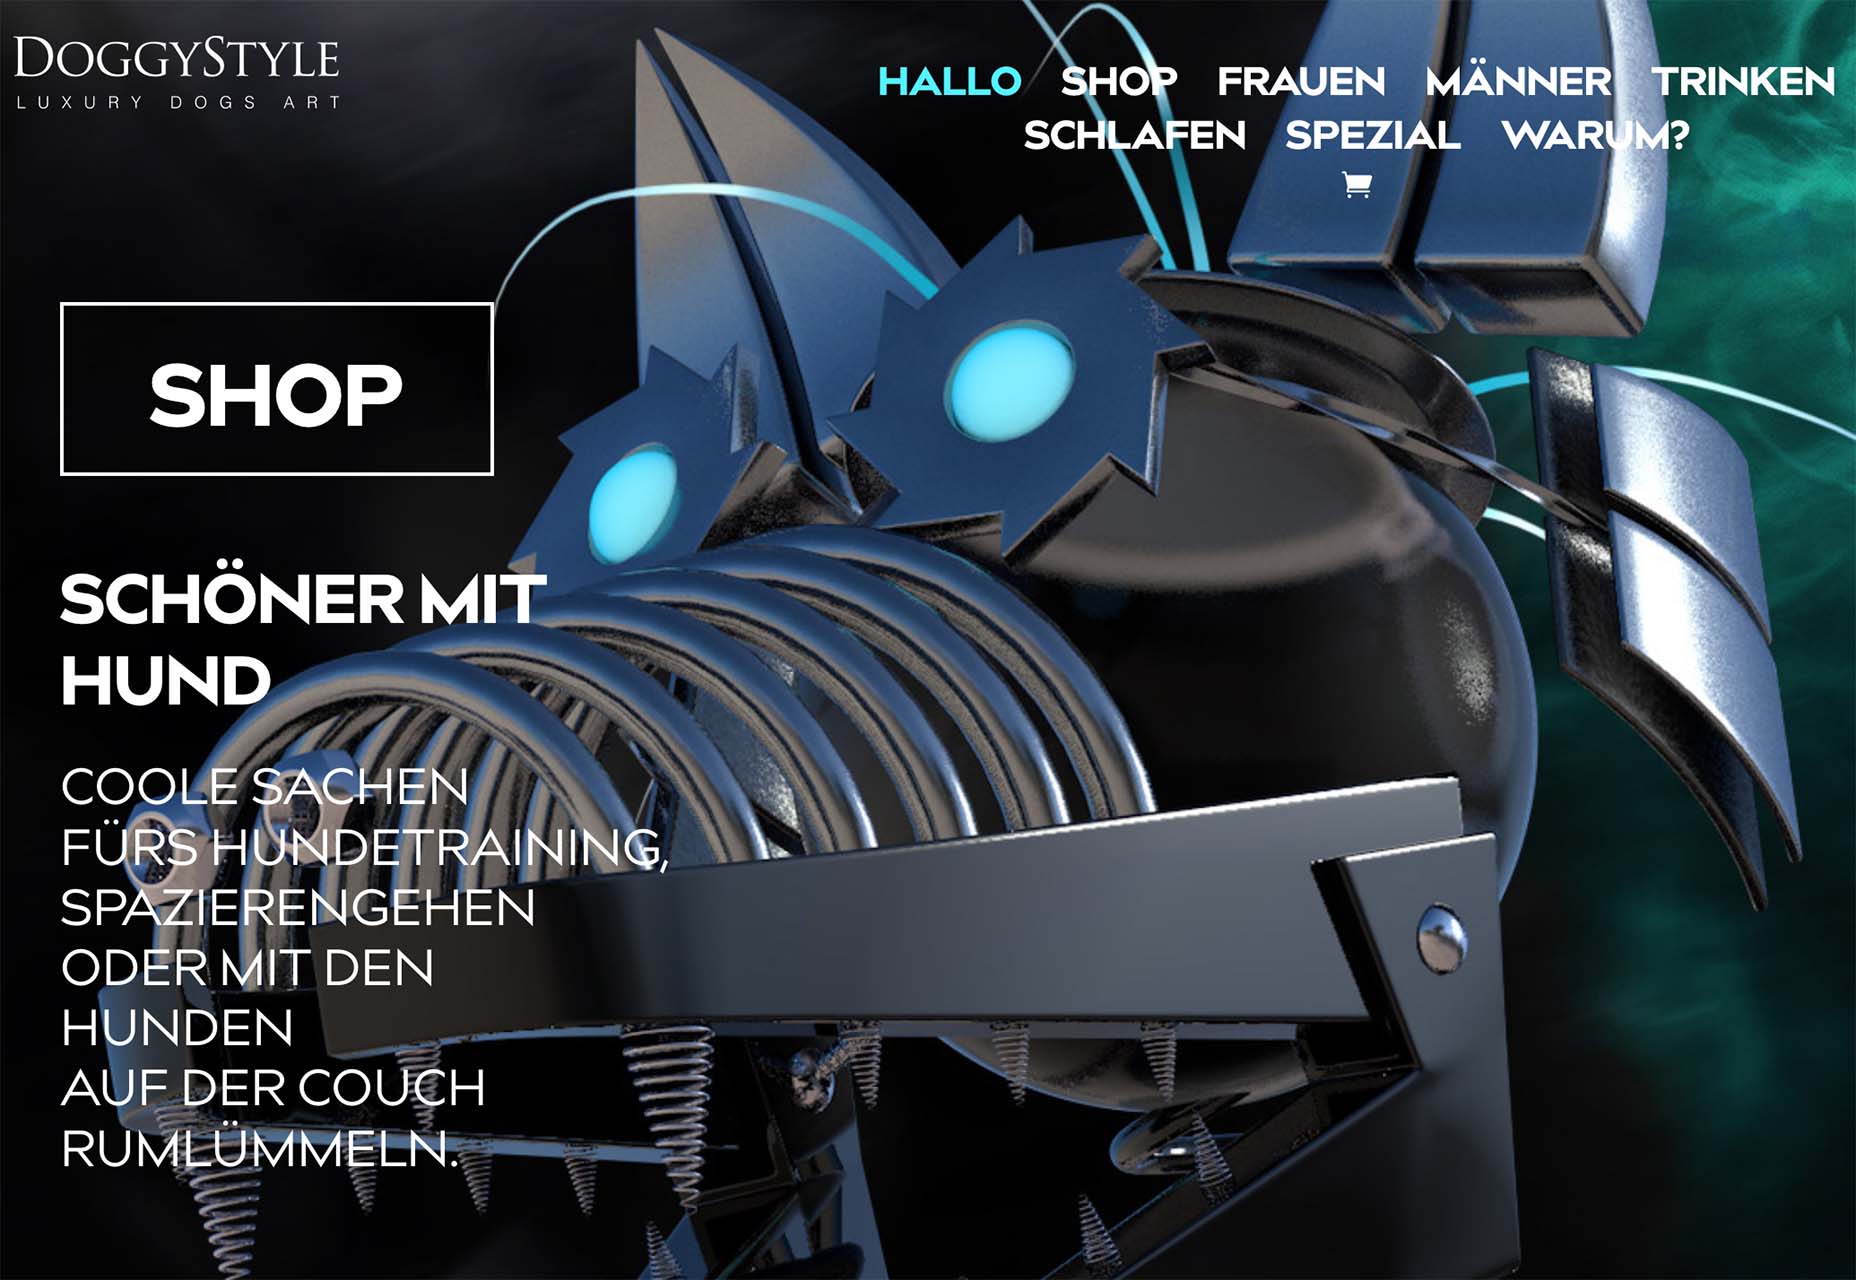
Doggystyle Shop also banks on the idea of you knowing the shopping experience or brand when you arrive. What the design does do though is put products on white backgrounds after you have clicked through far enough to make a commitment to buy. This helps you see the product well one final time before making a purchase. (The challenge is that it is three to four clicks in for the most part.)

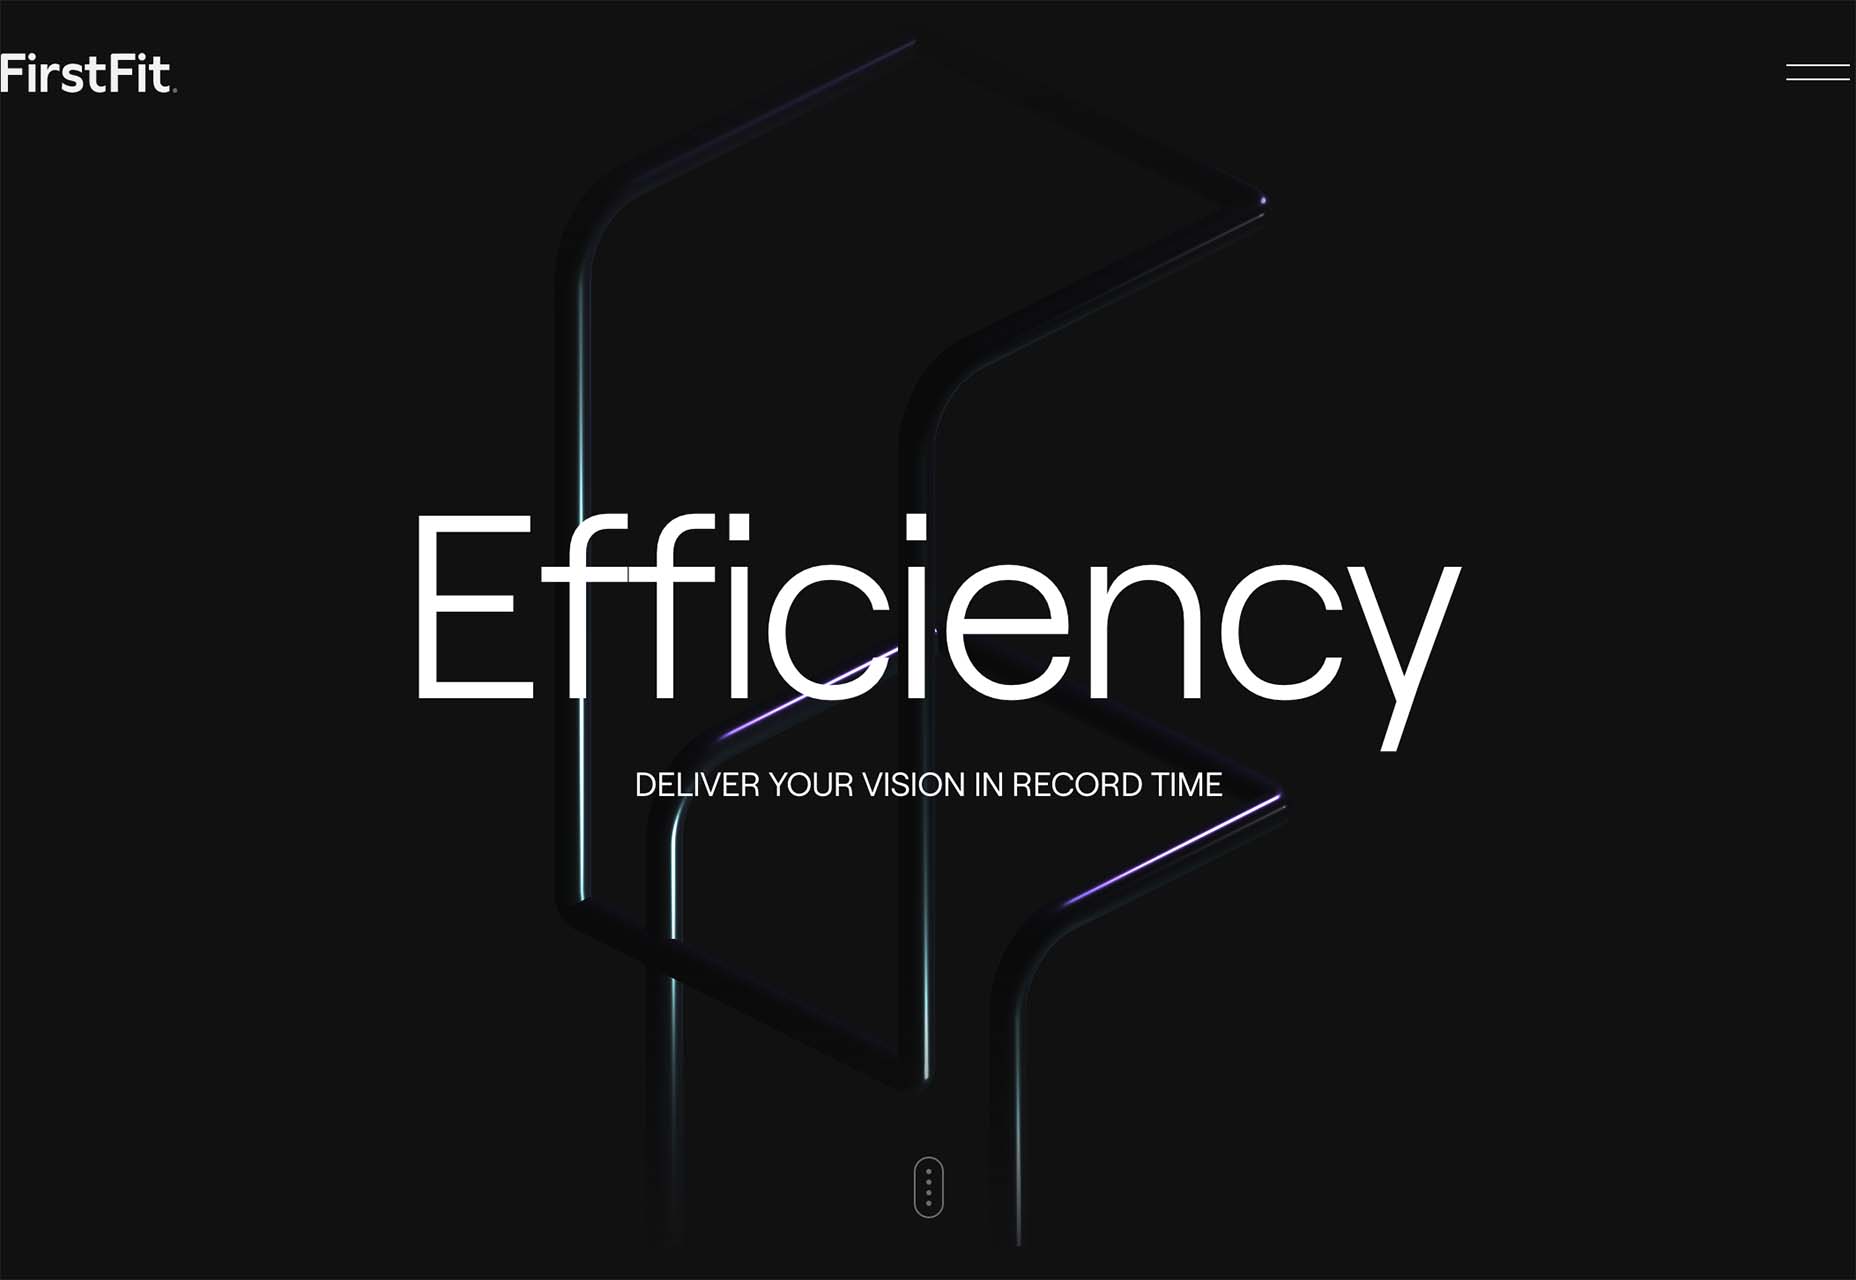
FirstFit uses the design trend in a way that’s similar to the first example. They are showing a product, but not actually trying to convert sales on the website. Other links take you to more product information and content – using a lighter background and color scheme – and the dark background with the product serves mostly as a highly visual landing page that will help entice users to learn more. When it comes to dark mode and products, this seems to be the best option for most website designs.

Conclusion

The state of the world around us and our emotions can play hard into websites and other design projects. Some of the darker elements that are popular now may be a reflection of that or it could be more of a lean into dark mode schemes.

Either way, the web has a pretty dark feel right now.

Source

The post 3 Essential Design Trends, July 2022 first appeared on Webdesigner Depot.

Source de l’article sur Webdesignerdepot

Todoist is a to-do list app that 25 million people rely on every day to keep their lives organized. As part of the Doist design team’s goals for 2021, we aimed to redesign the Todoist Android app to take advantage of the latest Google Material Design guidelines.

In this post, we cover the design decisions and processes behind redesigning the Todoist Android app for Material Design. We explore the Design and Android team’s collaboration practices that brought the app update to life, which resulted in winning the Material Design Award 2021 in the large screen category. Let’s get started!

Opportunity

When we started the project, our design implementation on Android was ready for a major overhaul. The last milestone redesign on Android was initiated after the release of the first Material Design guidelines in 2016. Since then the team successfully worked on continuous improvements to the Android app, but we saw the opportunity to improve Todoist on Android on a more holistic level.

We set out to clean up instances of older UI components, colors, and text styles and update them with the latest Material Design components. We observed that some interactions and navigational patterns had become inconsistent with what users were expecting on newer Android devices and were eager to modernize this experience. With new hardware and software changes in mind, we set out to make the experience on larger phones and tablets even better, so Todoist could take full advantage of the latest generation of devices. Material 2 and 3 provided an incredible new framework to rethink the current app experience. With this in mind, we set out to challenge what a modern Android app should look like and innovate on top of the default user experience.

Solution

The team set itself the goal of redesigning our Todoist Android app and aspiring to make it the best-designed productivity app on Android. The project was ambitious and scheduled to take several months to complete. We set ourselves the following targets while working on the project:

  • Review the current implementation and older design specs.
  • Study the latest Material Design Guidelines and assess what is relevant for our project.
  • Research great Material Design apps and case studies and learn from their execution.
  • Define the new Todoist Android app design language and document the changes.
  • Design and development work together to assess the proposed solution and implementation.
  • Test an early version of the new app internally to gather feedback and make adjustments.
  • Invite beta testers to the new app to gather feedback and make adjustments.
  • Refine the app and address core issues before launching to the public.

Review

The project was kicked off by reviewing the current Todoist Android app implementation, noting down what areas needed to be fixed and what was up to date. While reviewing, we took screenshots of the app implementation for reference. This way we could easily see the current state of the app and compare it to the new design proposals that would be created. Once the review process was finalized, we had a comprehensive overview of the current state of the app and the layout, component, and styling changes we wanted to make.

Study

We continued the project by studying the latest Material Design Guidelines, assessing the components and practices that were most relevant to Todoist.

When the project kicked off in February 2021, Material 2 was the most recent version of their design system. Since Material 2 had already been released for quite some time, we anticipated that design changes to Material would be announced soon at the Google I/O event in May 2021. Rather than wait, because we expected the changes to be iterative, we pushed ahead with our work.

We identified 25 components and UI patterns that we wanted to change across the app. The changes included buttons, forms, menus, sheets, navigation drawer, app bar, system bars, text and color styles, and more. We started by creating a table view in a Dropbox Paper document with the component changes and references links to Google’s Material Design Guidelines.

This components list was a starting point for discussion to plan the scope and complexity of the changes. Close async discussions between the design and development team in Twist and Dropbox Paper comments helped us make decisions about scope and complexity early on and set a solid foundation for the project.

Research

In the initial Material Design study, we also researched inspiring Material Design apps, Material studies, Play Store apps, and Google Workspace apps to learn from their execution.

We started out by studying the Material Design Award Winners 2020 and tested out the products that were showcased. The showcased winners struck a good balance between implementing the Material Design Guidelines while maintaining their own product’s brand within the system. This balance between Google’s guidelines and the Todoist brand was also key for us to get right and so we strived to find this mix across the work we created and implemented in the project.

Along with the MDA winners, we researched the Material Studies that Google produced to showcase what apps could look like with branding and Material Design guidelines applied. It was a great reference to see how far components could be customized while maintaining the core platform principles. The Reply case study in particular offered valuable insight to us as its content type and layout came closest to Todoist. It showcased how components like the app bar, navigation drawer, and large screen layouts worked while being customized.

We continued our research by searching the Google Play store for inspiring app examples. Google Tasks, Press, Periodic Table, and Kayak stood out to us as the level of polish and quality of the apps were on par with the experience we were aspiring to create.

Sometime later in the project when Material You was released (more on that later), we stumbled upon the Google Workspace apps blog post which previewed Material 3 changes that Google was introducing to their own products. It offered a great glimpse at what was to come before the Material 3 Design Guidelines were officially released. This post sparked new internal discussions and further design explorations that we considered for future Todoist Android updates.

Design Spec

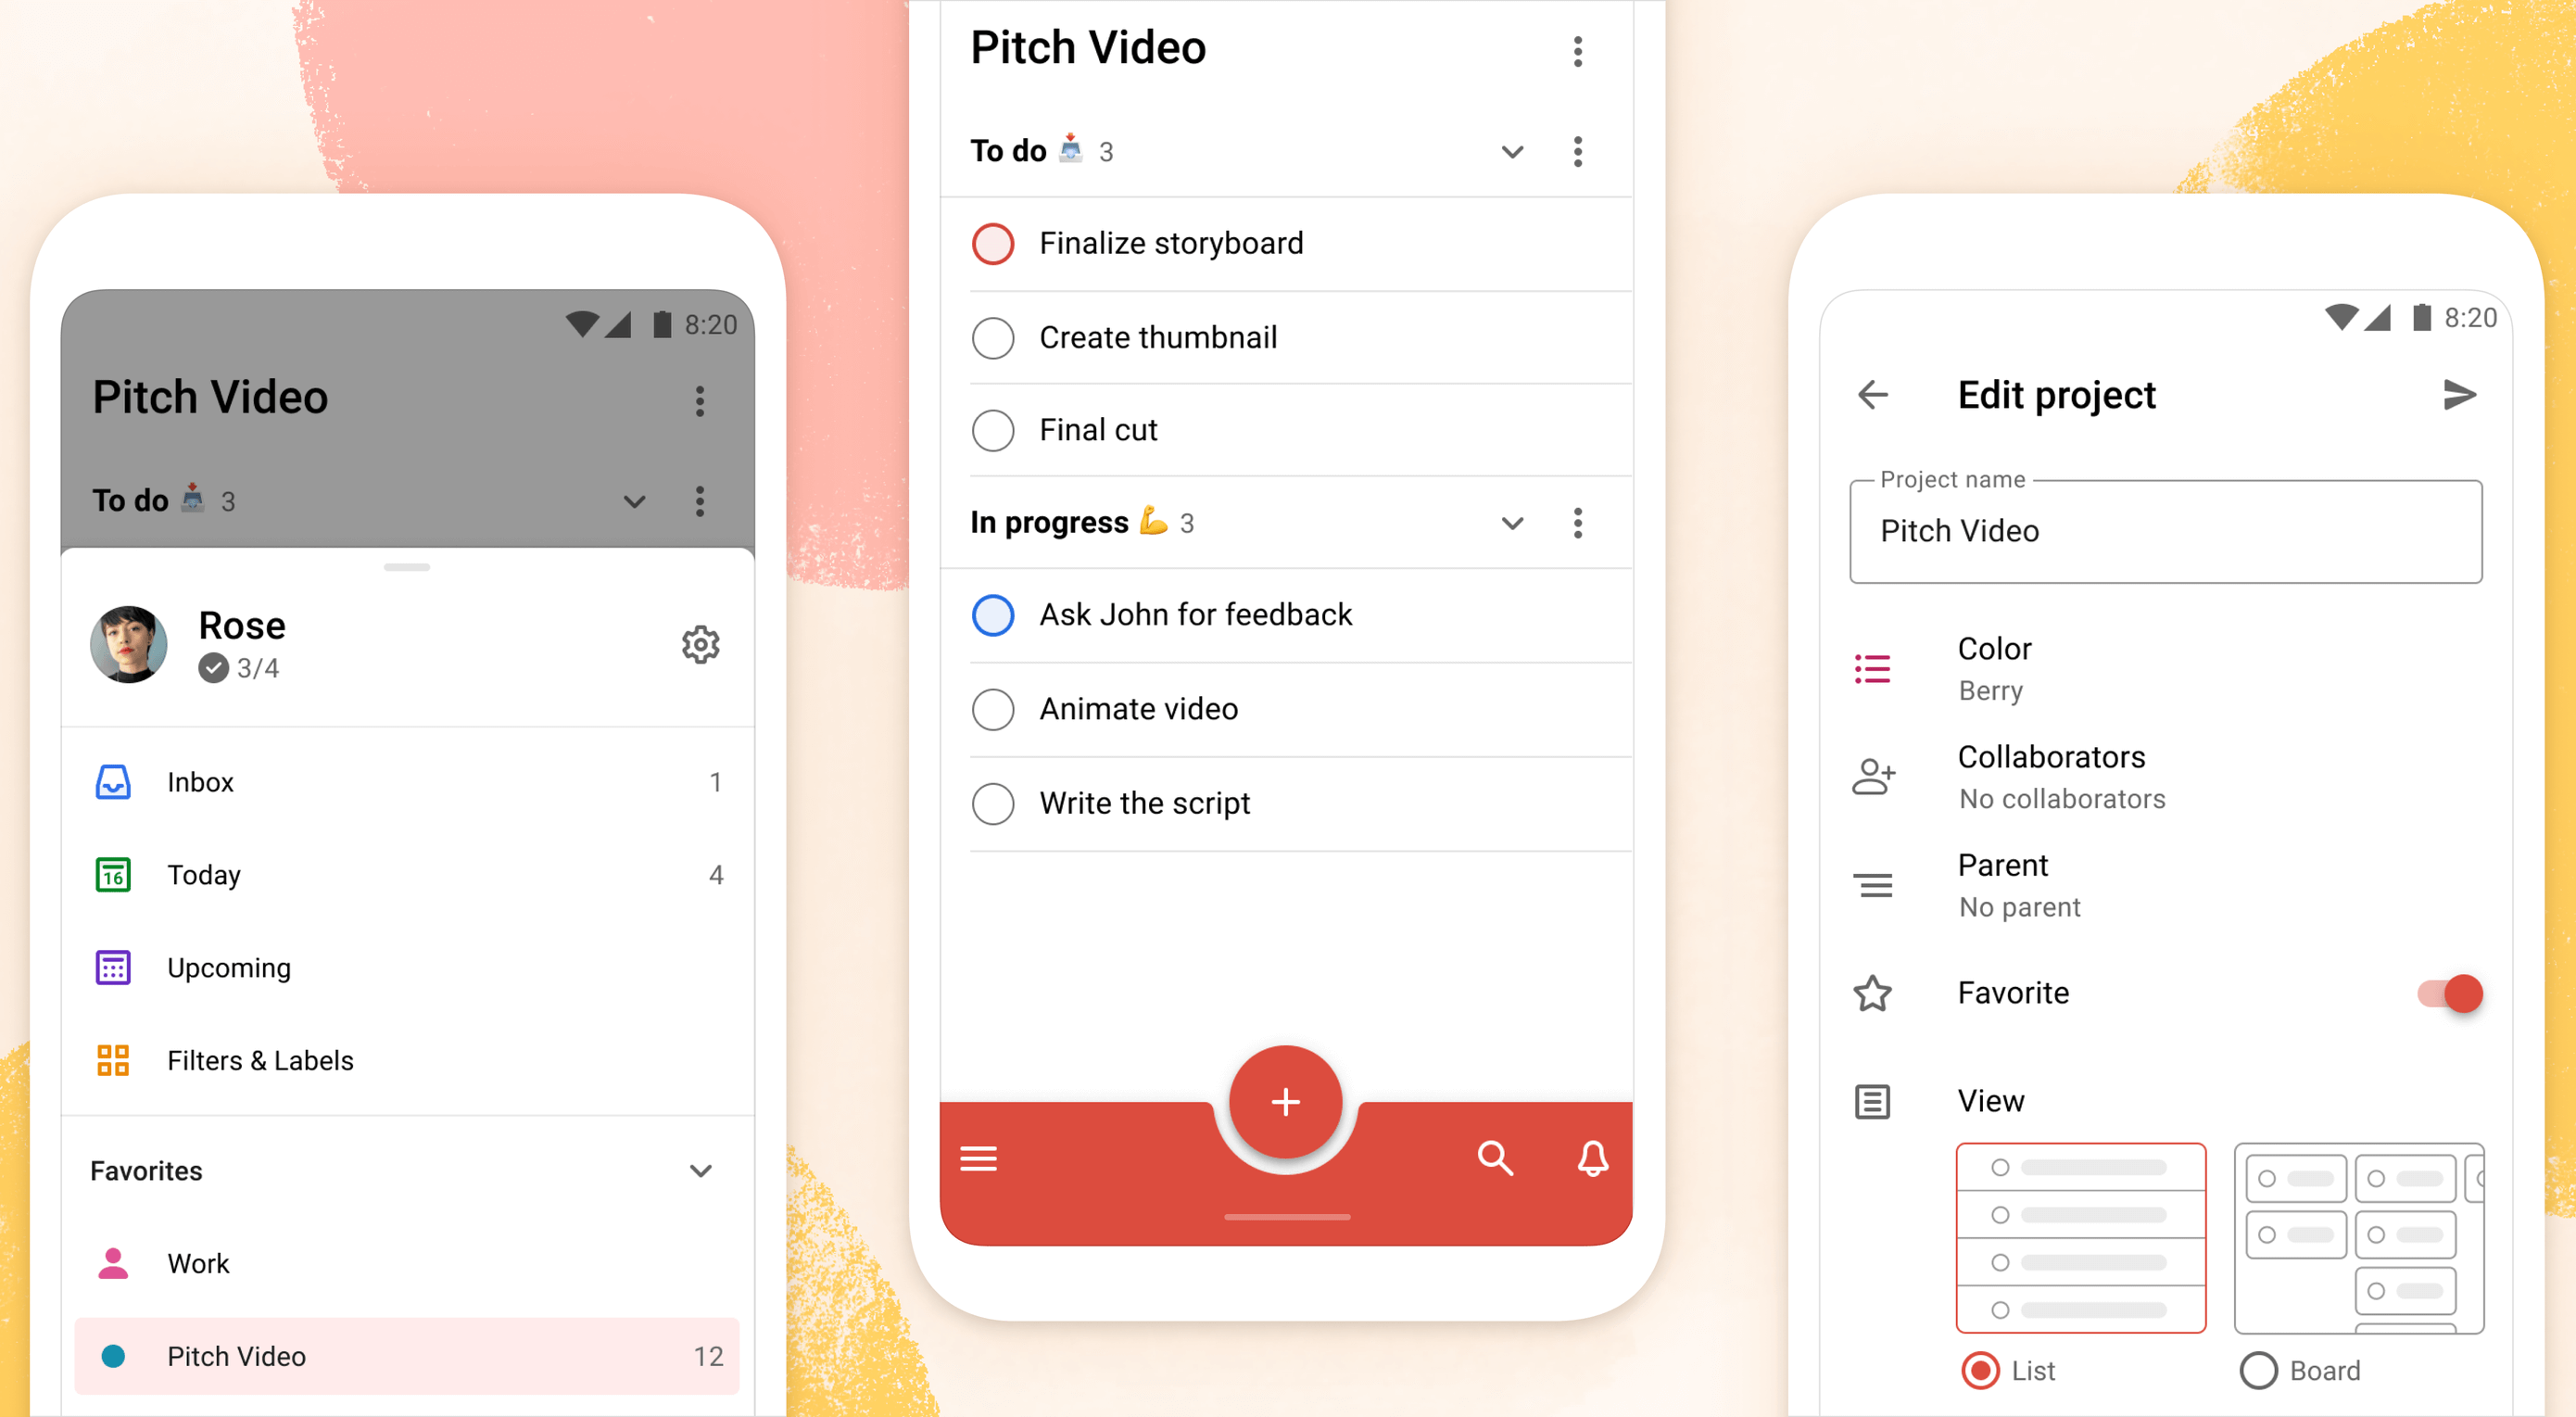
As we started to define the new Todoist Android app design language and document the changes, we opted to create a design framework, focusing on creating components rather than designing every screen in the app. This allowed us to consistently apply the design system in the app. We did so by using the previously defined component list that we created during the review and study process.

Core screens from different areas of the app were chosen to demonstrate how the components could be applied. We chose to mock up the Todoist project view, navigation drawer menu, project view edit screen, settings, and project detail view, among others. These screens gave us a good overview of how buttons, forms, drawers, lists, and other components would work together and in different states; selected, pressed, disabled, etc.

During the project, we were transitioning our Doist design system to Figma and started creating our first components in the new Doist Product Android Library. We started by using some components from the Material Design UI kit – Components library from the official Google Figma resource file and added them to our Doist design system. We then continued to build up the Product Android Library file with our Todoist-specific components such as task list & board views, detail views, sheets, colors, typography, etc.

We continued by documenting color and typography changes that were based on the Material Design guidelines. The design team opted to implement a new Design Token framework that would share the same values between our design system and the development implementation. The development team would output the values they had in the current implementation and the design team would analyze which values were needed and which could be merged, changed, or deleted. This informed the new Design Token color and typography system which we then documented and discussed with the team to implement. Later in the project, we were happy to see a similar token system introduced by Material 3 in the latest guidelines which validated our thinking and principles behind the new design system.

The design documentation expanded to hold other edge-case mockups that could sit alongside the design system. We documented different responsive screen experiences between phones and tablets against the previous implementation. Additional sections were created to document the motion that should be used for certain components and screens by referencing existing Material Design guidelines examples or prototyping custom motion in Principle and After Effects. The design spec also touched on haptic feedback that should appear on touch targets, how dark mode should work across the new components, documenting Todoist themes within the new design language, and more.

Design Implementation

At Doist, the benefit of the squad is that cross-team collaboration is built into the make-up of the team. Designers, developers, support, and product managers work together in a squad to deliver the project. This close collaboration from the start is key to bridging the gap between scope, estimations, design, development, and delivery. The squad discussed their findings on a daily basis and came up with the best plan of action together.

Designers started by creating components in Figma and shared them with developers in Dropbox Paper. We used screenshots to document the current implementation next to the new designs and linked to the default Google Material Design components. This allowed the team to compare all references in one place. Developers shared their feedback, adjustments would be brainstormed together as the designs were iterated.

Designers on the project would share their work in progress on a weekly basis with the rest of the design team in a design review Twist thread. Here details about the designs were discussed, alternatives mocked up and bigger picture plans made. Design reviews brought up topics like FAB (Floating Action Button) placement, theme options, accent color usage on components, consistency with other platforms, navigation options, and shadow elevation. After thorough discussions and alternative mockups were presented, the design team aimed to find the right balance between Material Design and Todoist brand guidelines. The development team, also part of the design reviews, gave their feedback on the solution and raised technical complexities early on.

Eventually, the design was stabilized and consistencies updated across components and mockups. The design spec was kept up to date so the development team could always review the latest designs in Figma.

Testing

As soon as the development process started, the Android team provided early screenshots and videos in Twist threads while they were implementing the design spec. This practice allowed us to review the app implementation early and often. Designers could review the development work and share feedback in Twist, which resulted in getting the implementation to a high quality. Alongside Twist discussions, the team set up a Todoist project to track ongoing issues and fix bugs. Designers logged new issues, developers would solve them and share the new implementation for designers to review.

When the team had the first stable version of the Android app, we shared it internally at Doist to get more insight and feedback. Other Doisters could access the redesign via a feature flag that could be turned on in the app settings and test the new version for however long they wanted. The feature flag system allowed people to give us early feedback on the design decisions we made and report bugs. Feedback was submitted by the wider team through a dedicated Twist thread and designers and developers could discuss how best to address the feedback during the active project implementation.

After we refined the app implementation further and addressed early feedback we opened up the app update to our beta users. Here users had access to the new Android redesign and were able to give us feedback. Our support team gathered feedback and shared it with us in a dedicated Twist thread. The squad aimed to analyze every comment and looked for patterns where we could make tweaks and improvements to the user experience.

As part of these tweaks, we made changes to how the bottom bar and navigation drawer worked. Some users reported frustrations with the way the new bottom navigation and menu drawer worked. In its first implementation, the drawer was half raised when opened and had to be swiped up to be raised again to see the full content list. This was an issue for some users as it was slower to get to the content below the list. So we decided to fully raise the drawer by default when opening. We also made it easier to open the navigation drawer by sliding up from the bottom app bar. This was a small shortcut but it enabled users to get to their content faster.

Material You

While we were in the testing phase and about to wrap up the project, Google unveiled Material You, and sometime later the Material 3 Guidelines were published. With the newly announced resources, we went back to study the latest guidelines and references we could find to see where the Todoist Android app redesign fits in and which adjustments we might need to make now or in the future.

Dynamic Color was a big new feature that was announced as part of the Material You update. As Todoist supports many different themes the Material You Dynamic Color feature seemed like a good fit for our product. We decided to prioritize this feature and implement Dynamic Color light and dark themes as part of our Todoist theme settings options.

To implement Dynamic Color, the development team started off by creating a demo prototype that utilized the Dynamic Color system and showcased how we could select from a range of color choices that the system defined based on the wallpaper choice. From there, we tried to incorporate system behavior in our design mockups. We designed a range of different color mockups and components to see which ones could fit with which components. We then came up with a color system that worked for the Todoist app and the new themes. These new Dynamic Color themes would sit alongside our current theme options in the Todoist app settings. From here users could choose between Dynamic Color Light and Dark themes.

Along with Dynamic Color, the team also created a customizable bottom app bar, allowing users to set up the app in a way that’s most convenient to their workflow. The location of the Dynamic Add Button can be changed to the center, left, or right corner of the screen. The order of the Menu, Search, and Notification buttons can be rearranged to best fit the ergonomics of the user’s dominant (left or right) hand and optimize their navigation patterns.

Launch

As critical beta feedback was addressed and stability tweaks were made, the squad felt ready to release the new Todoist Android app to the public. The team logged the issues that could not immediately be addressed for future reviews and updates.

The design and marketing team readied the launch by creating What’s New banner artwork and copy that are displayed within the app when launching the update. The Doist marketing team also created release notes and shared the app update announcements on our social channels. The brand and product design team worked together to create custom image assets and copy that summarised the project work in a simple and beautiful way.

What’s Next: Material 3

After a successful launch of the redesigned Todoist for Android app, Google contacted Doist to announce that Todoist was selected as the Material Design Award 2021 winner in the Large Screen category. The team was excited to be recognized for their hard work and it felt like we achieved the goal we had set out to accomplish.

Internally, designers and developers continued to study and discuss the Material 3 updates. The design team started exploring mockups and design changes inspired by Material 3 and Google’s Workspace app updates. Some of our current Todoist explorations include changing the FAB styling, updating the app bar, further removing elevation shadows, and more. Here is a preview of what a future Todoist update could look like.

We hope these insights into Doist’s design process and collaboration practices have sparked your interest. Thank you for reading and stay tuned for future design updates!

Takeaways

  • Study the Material guidelines, Material Design winners, Material studies, and Google Workspace apps to make informed design decisions when designing your next product or app update.
  • Evaluate which Material Design components and practices are right for you and implement them into your product.
  • Carefully balance the Material Design guidelines with your brand guidelines to create a unique and consistent experience between your product and the platform it lives on.
  • Collaborate with your Android developers early and often to ship app updates efficiently and increase the design implementation quality.
  • Use design components and build a design system along with practical mockups to create an efficient design spec.
  • Consider how the latest Android features fit into your product and which have the most impact on your users before deciding to implement them.
  • Test and review builds with your internal team and external beta users to get valuable feedback and make adjustments before releasing them to the public.
  • Create announcement artwork to showcase your latest app or feature update along with a clear description to share in-app and on social media.

Source

The post Case Study: Redesigning Todoist for Android first appeared on Webdesigner Depot.

Source de l’article sur Webdesignerdepot

The year’s winding down as everyone segues into a much-needed holiday R&R. But that doesn’t mean there aren’t some awesome new tools and resources for website design projects.
Check them out, and hit the ground running in January. Here’s what’s new for designers this holiday period. Enjoy!

Fancy Border Radius Generator

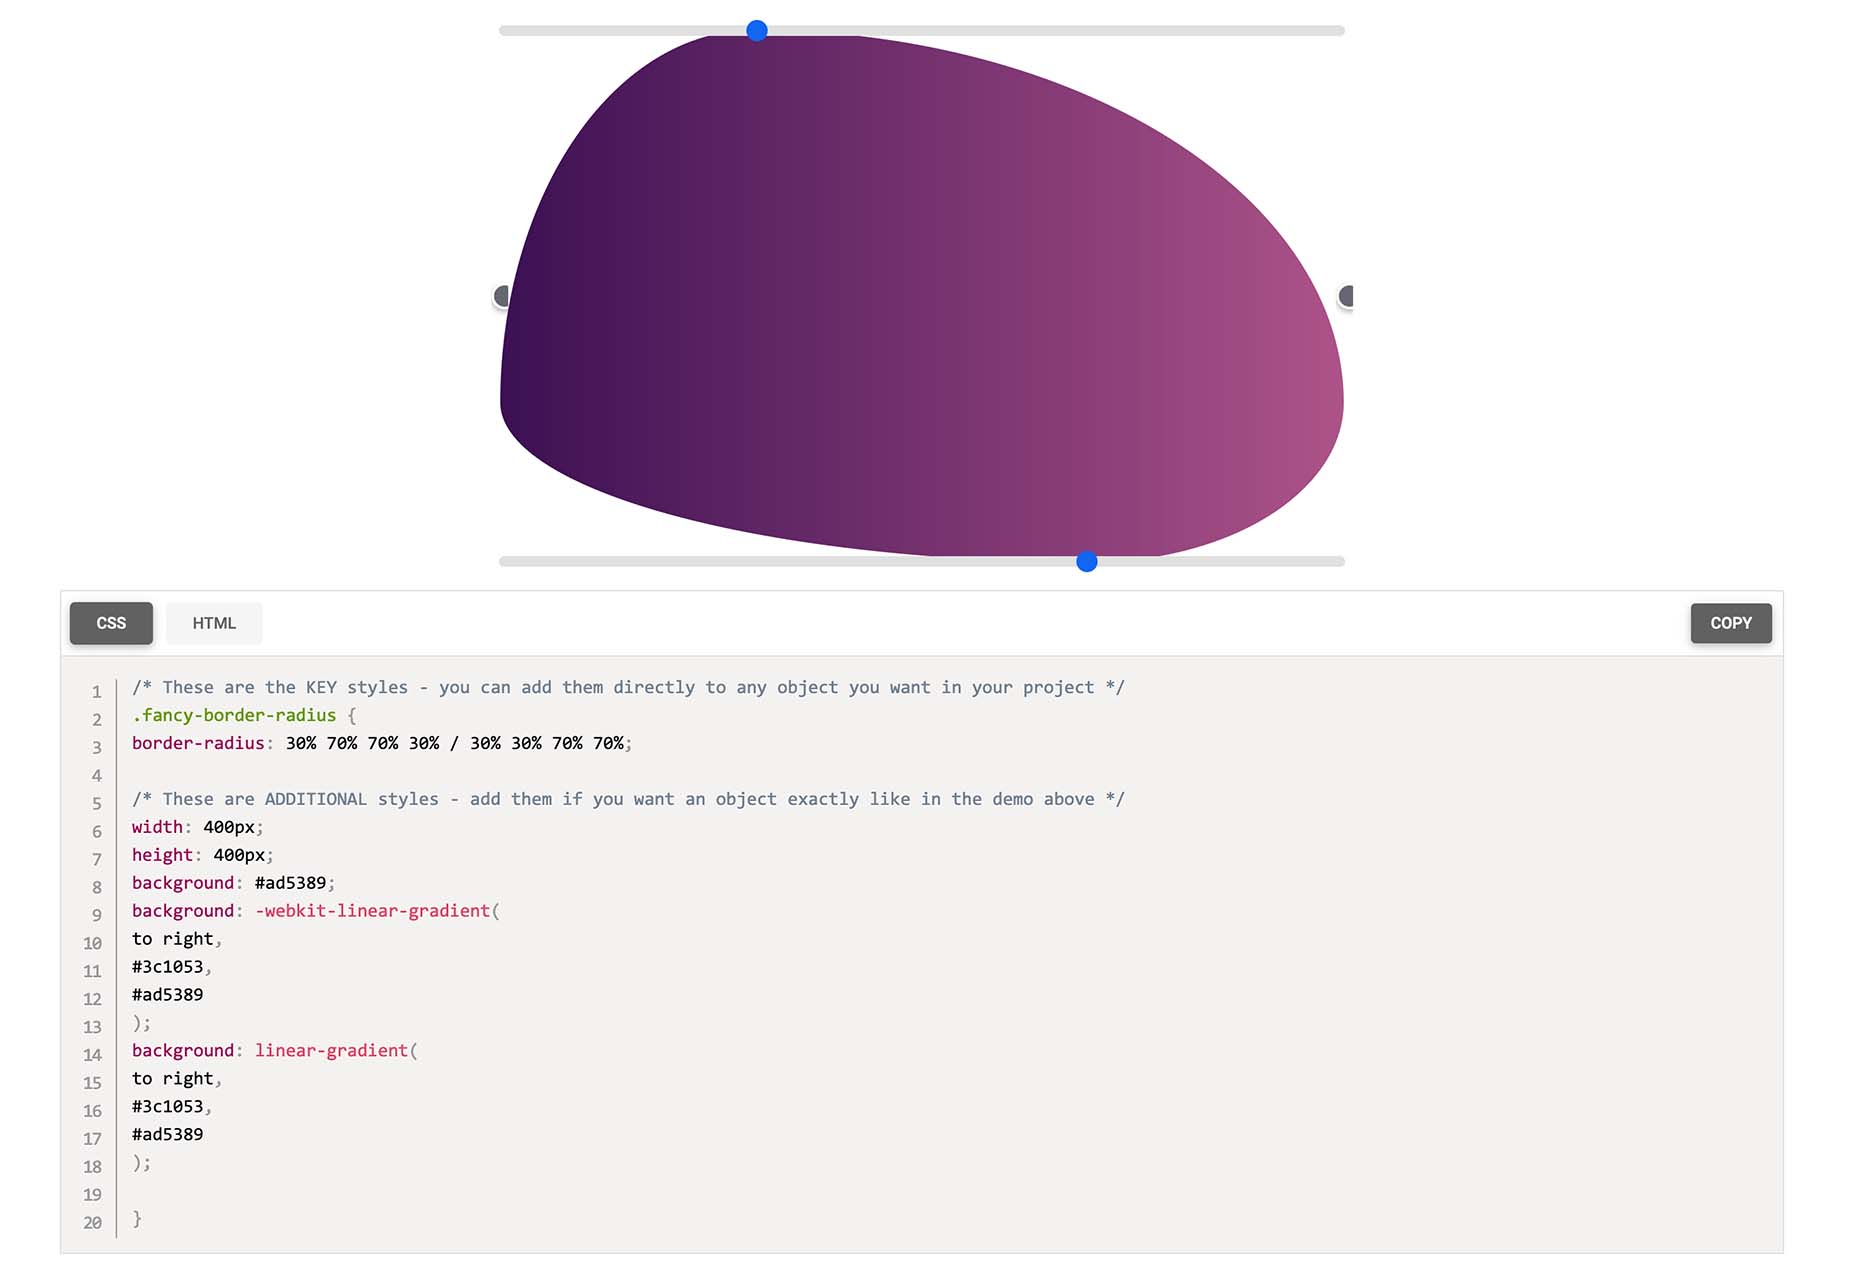
Fancy Border Radius Generator is a fun tool that allows you to create exciting shapes for elements. Use the included templates or create your own border shapes and then export the CSS/HTML for a variety of uses.

Pulsetic

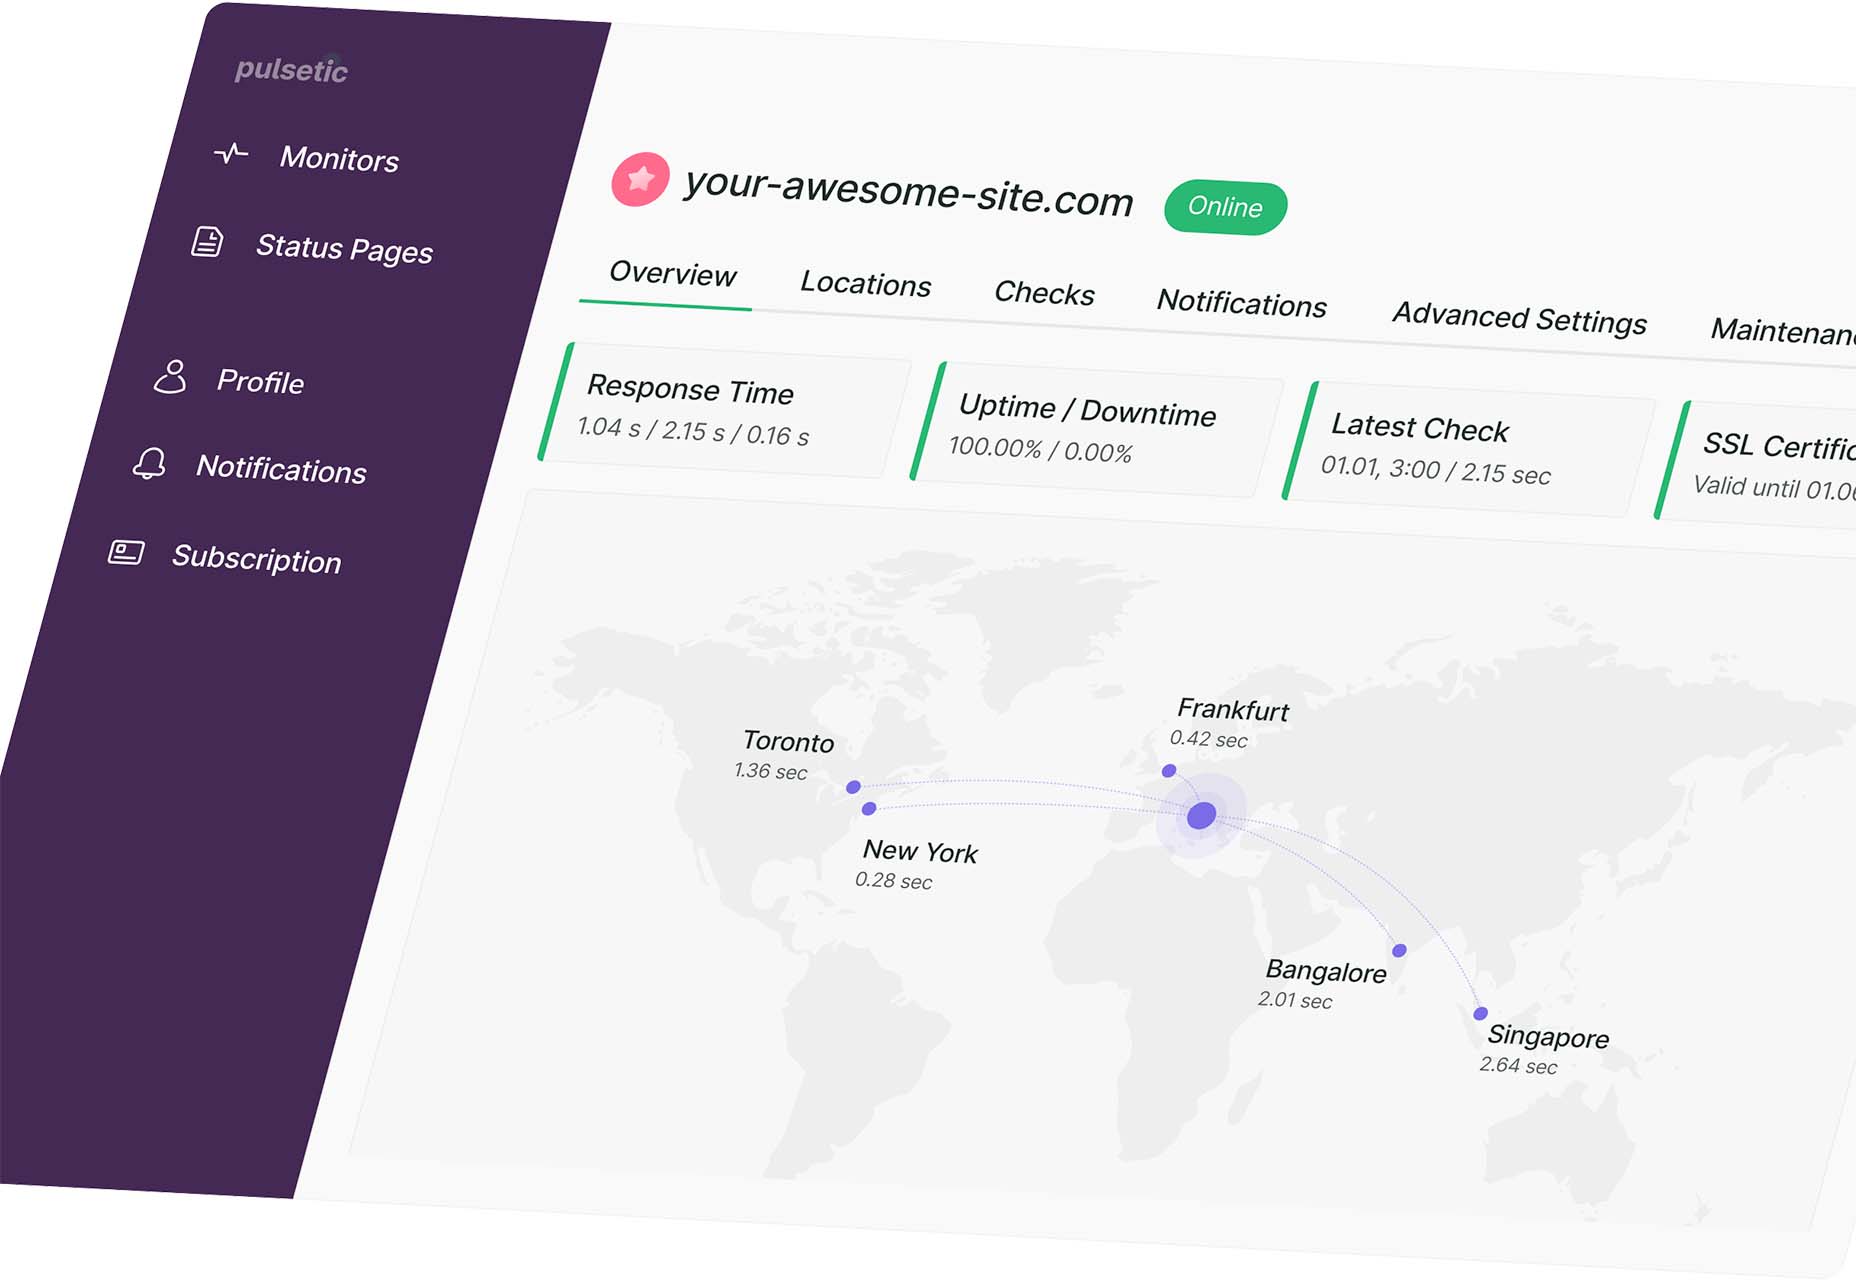
Pulsetic answers the question: “Is your website down?” Get website downtime alerts by phone call, SMS, email, or Slack. Create beautiful status pages and incident management reports and keep visitors (and your team) updated.

Ffflux SVG Generator

Ffflux SVG Generator makes it easy to generate fluid and organic-feeling gradients. You can use the resulting graphics as backgrounds to elements on a page to give a colorful fluid look to page elements. Choose colors and styles, then save or copy your SVG for use.

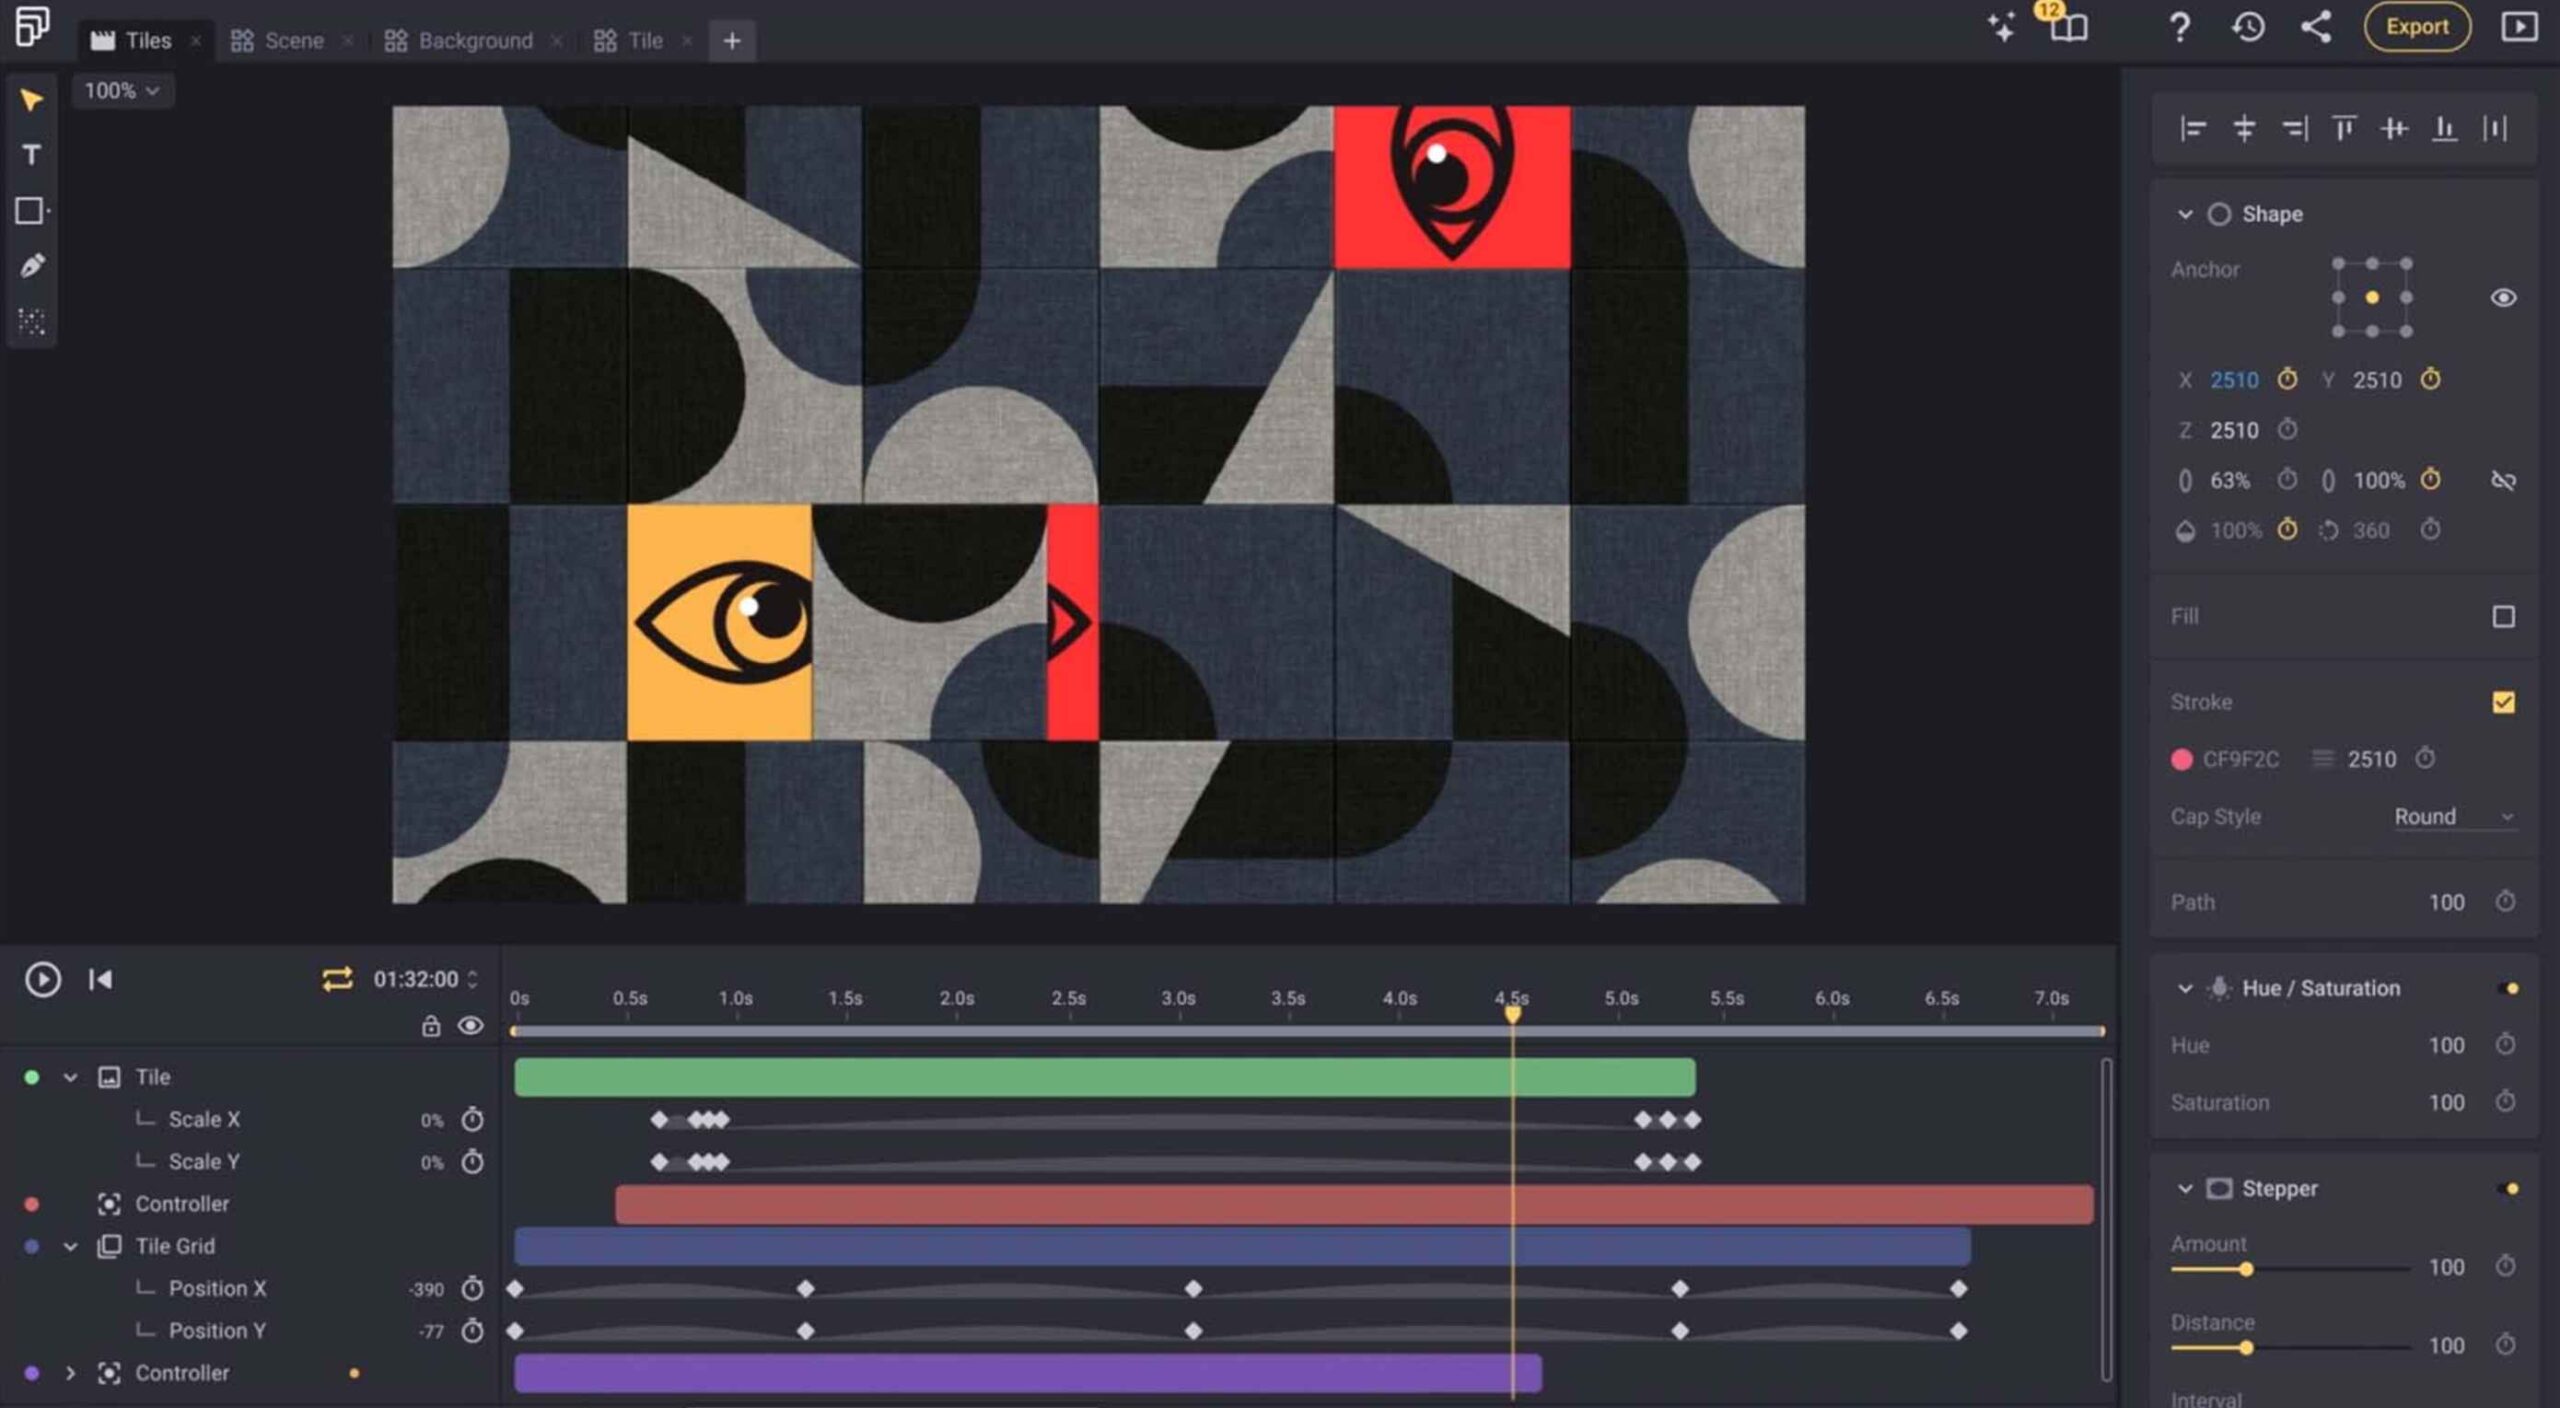
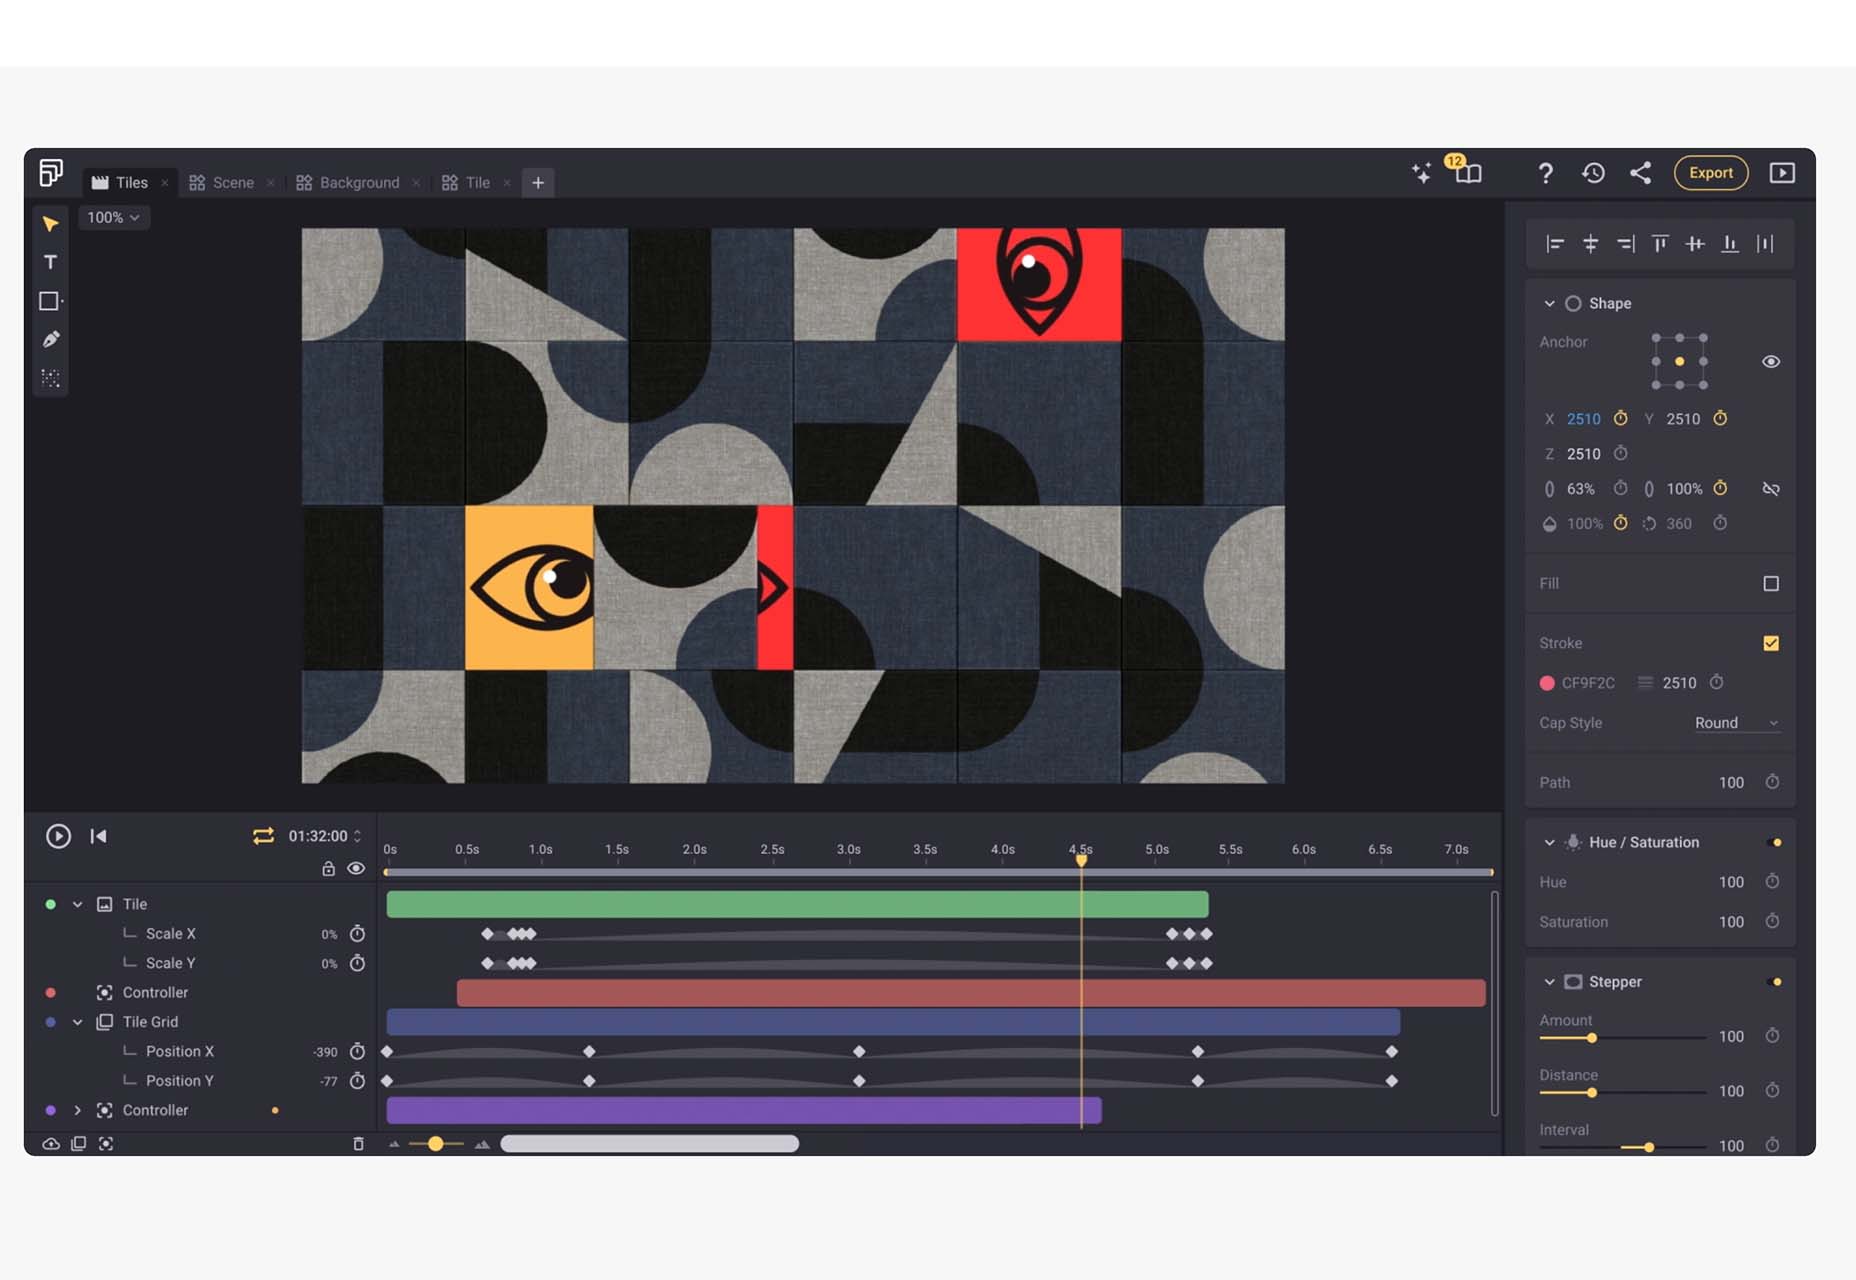
Fable

Fable is a web-based motion design platform to help you tell moving stories. It’s designed to be easy enough for beginners to use but has tools that even the most experienced motion designers can appreciate. This is a premium tool, but you can try it free.

Modern Fluid Typography Editor

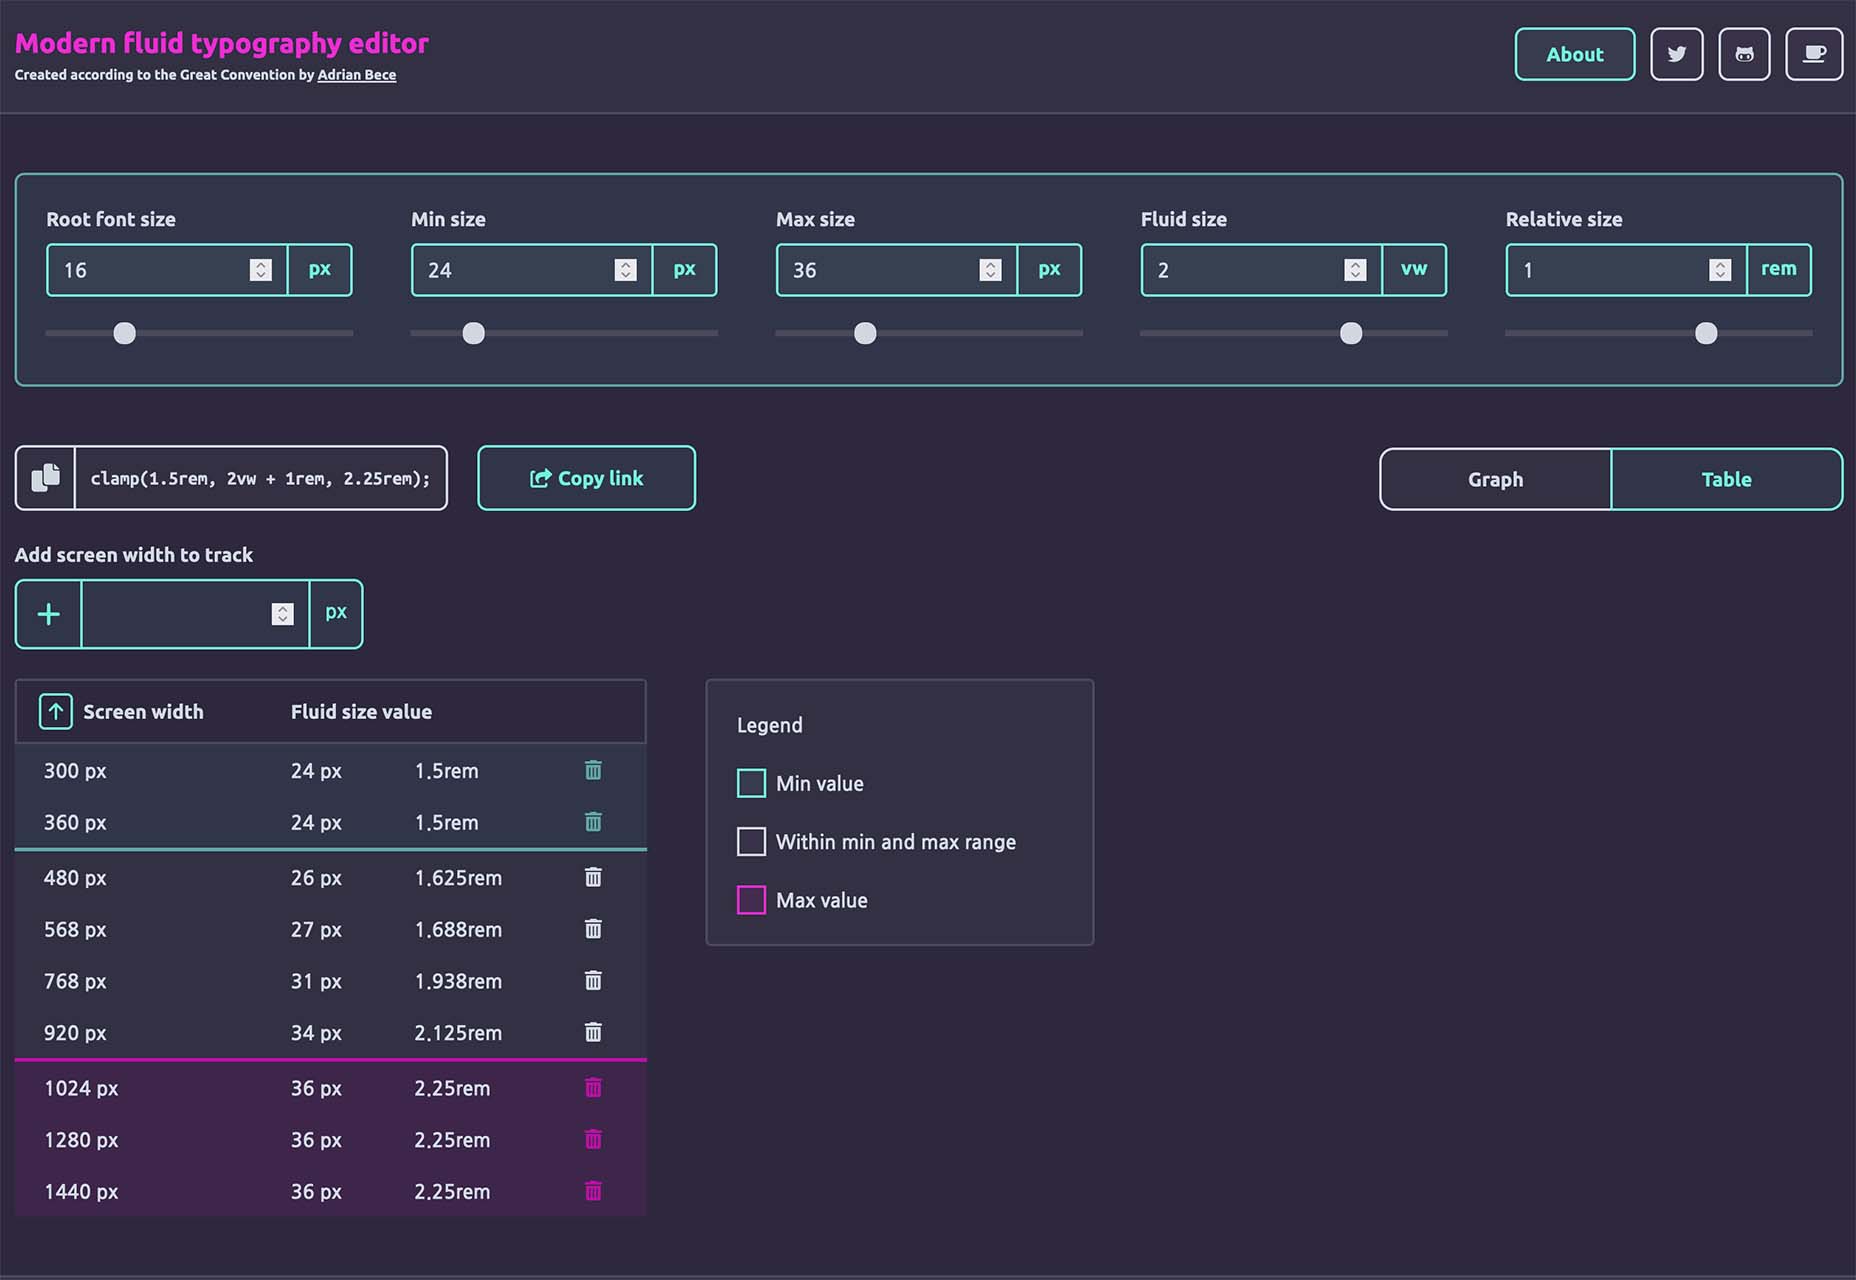
Modern Fluid Typography Editor takes the guesswork out of sizing and scale for type sizes on different screens. Set a few preferences and see ranges your type styles should fall in. This typography calculator is visual and easy to use.

Emoji to Scale

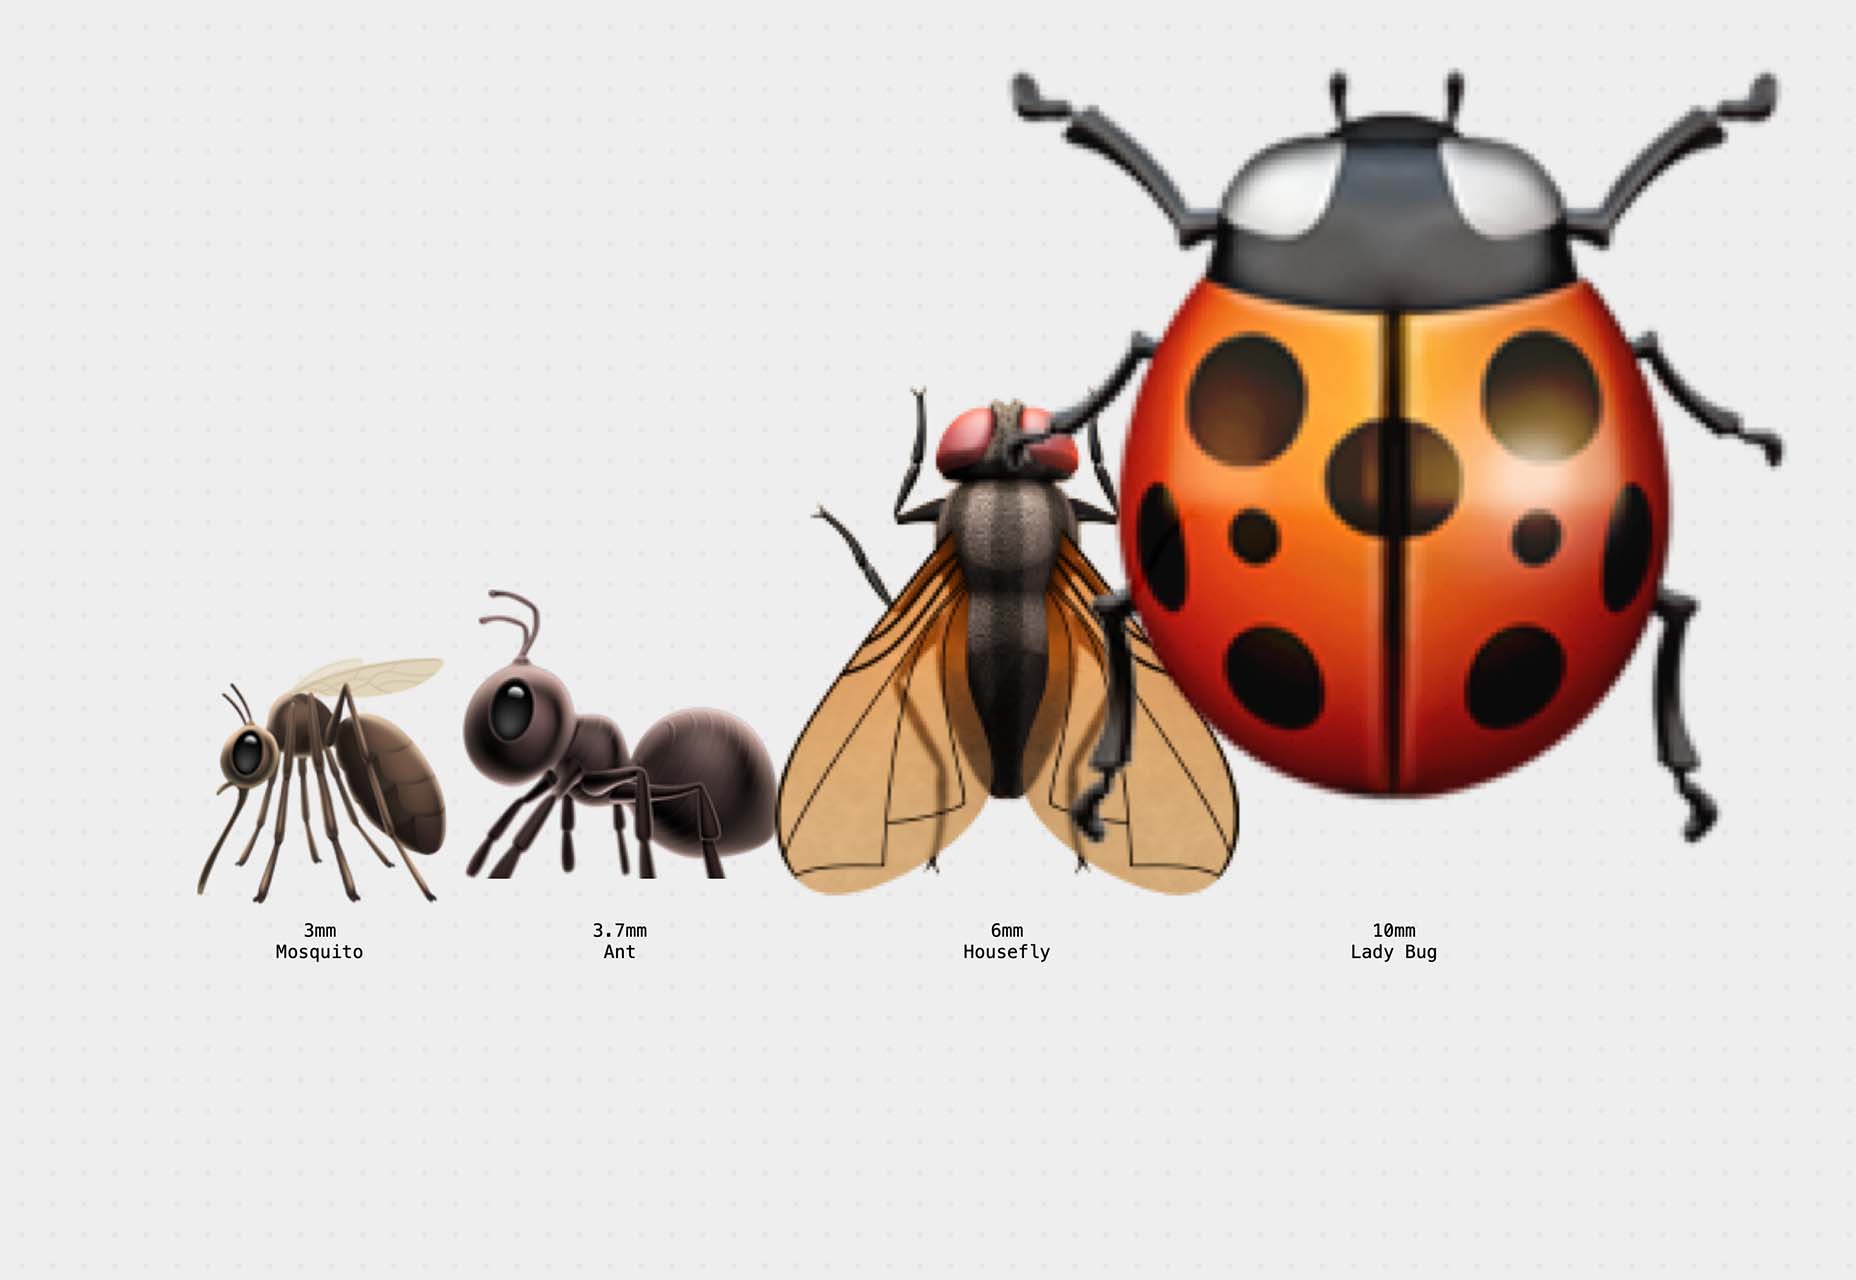
Emoji to Scale is a fun look at emojis in a real-world relationship to each other. Make sure to also note the Pokemon to Scale project, which is just as much fun.

Page Flip Text Effect

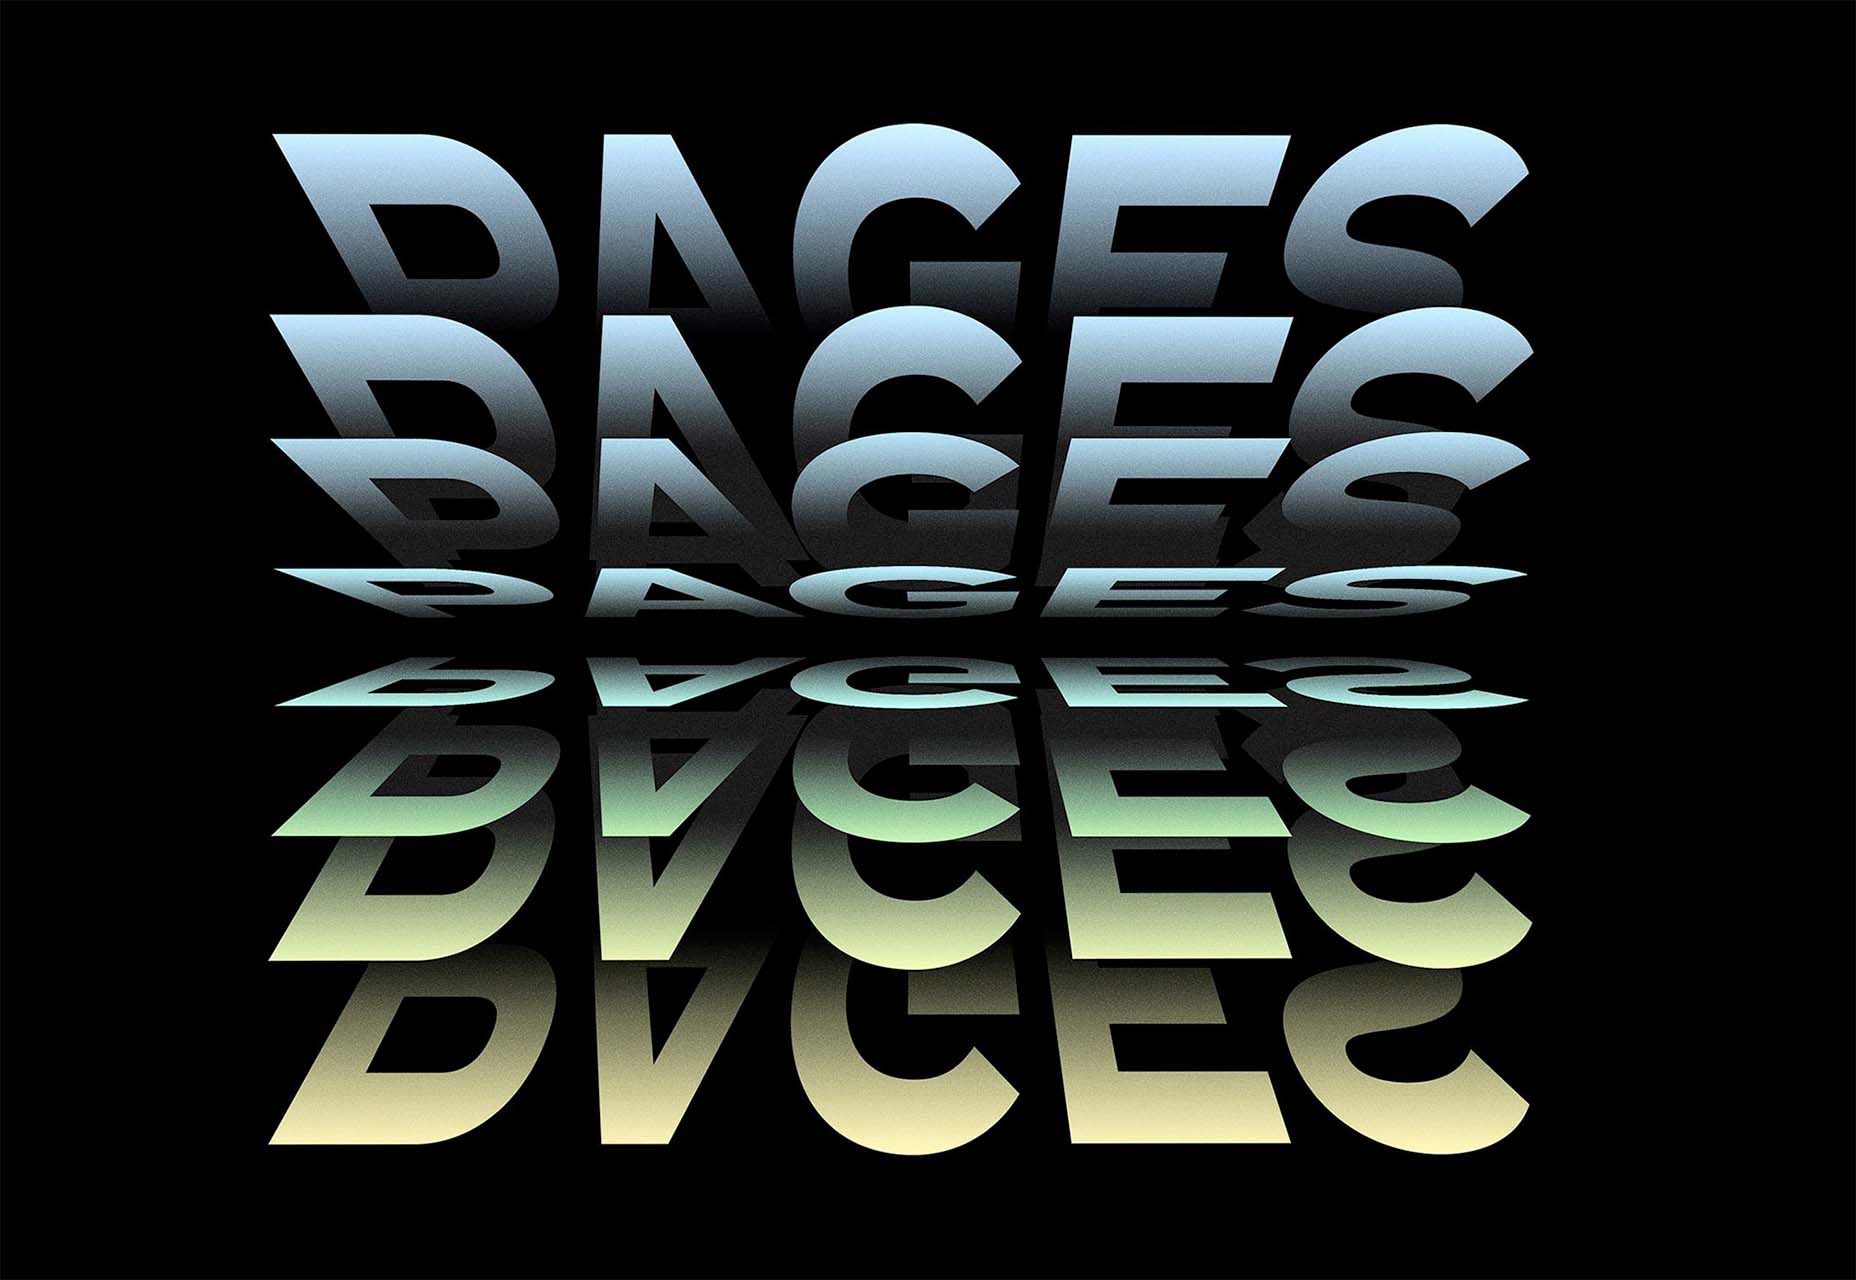
Page Flip Text Effect is a fun and straightforward PSD asset that adds a nice element to design projects. Everyone can use some fun, colorful animation, right?

Nanonets

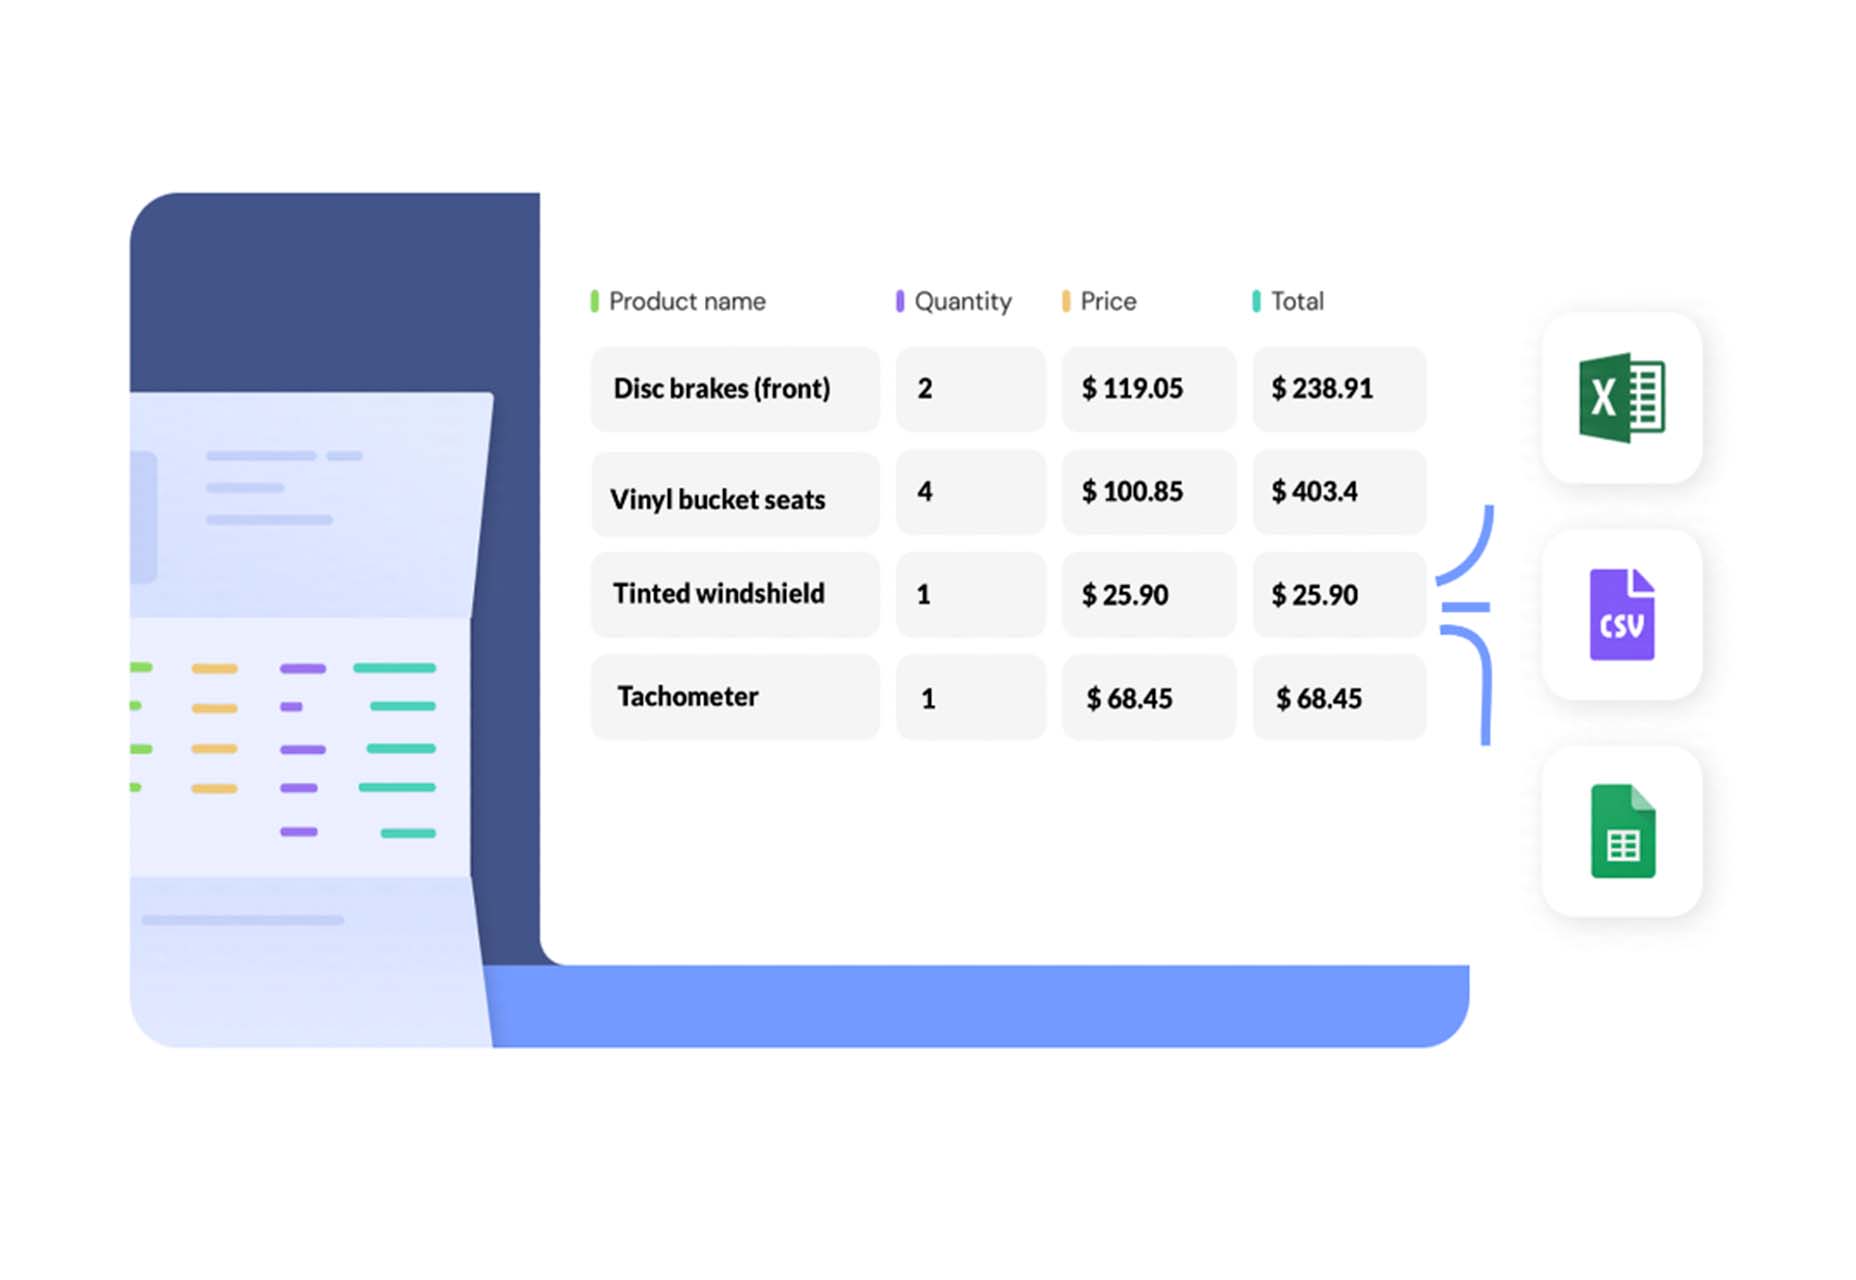
Nanonets is a practical tool for automated table extraction. You can snag tables from PDFs, scanned files, and images. Then capture relevant data stored in tabular structures on any document and convert to JSON Excel, or CSV and download.

Browsers.page

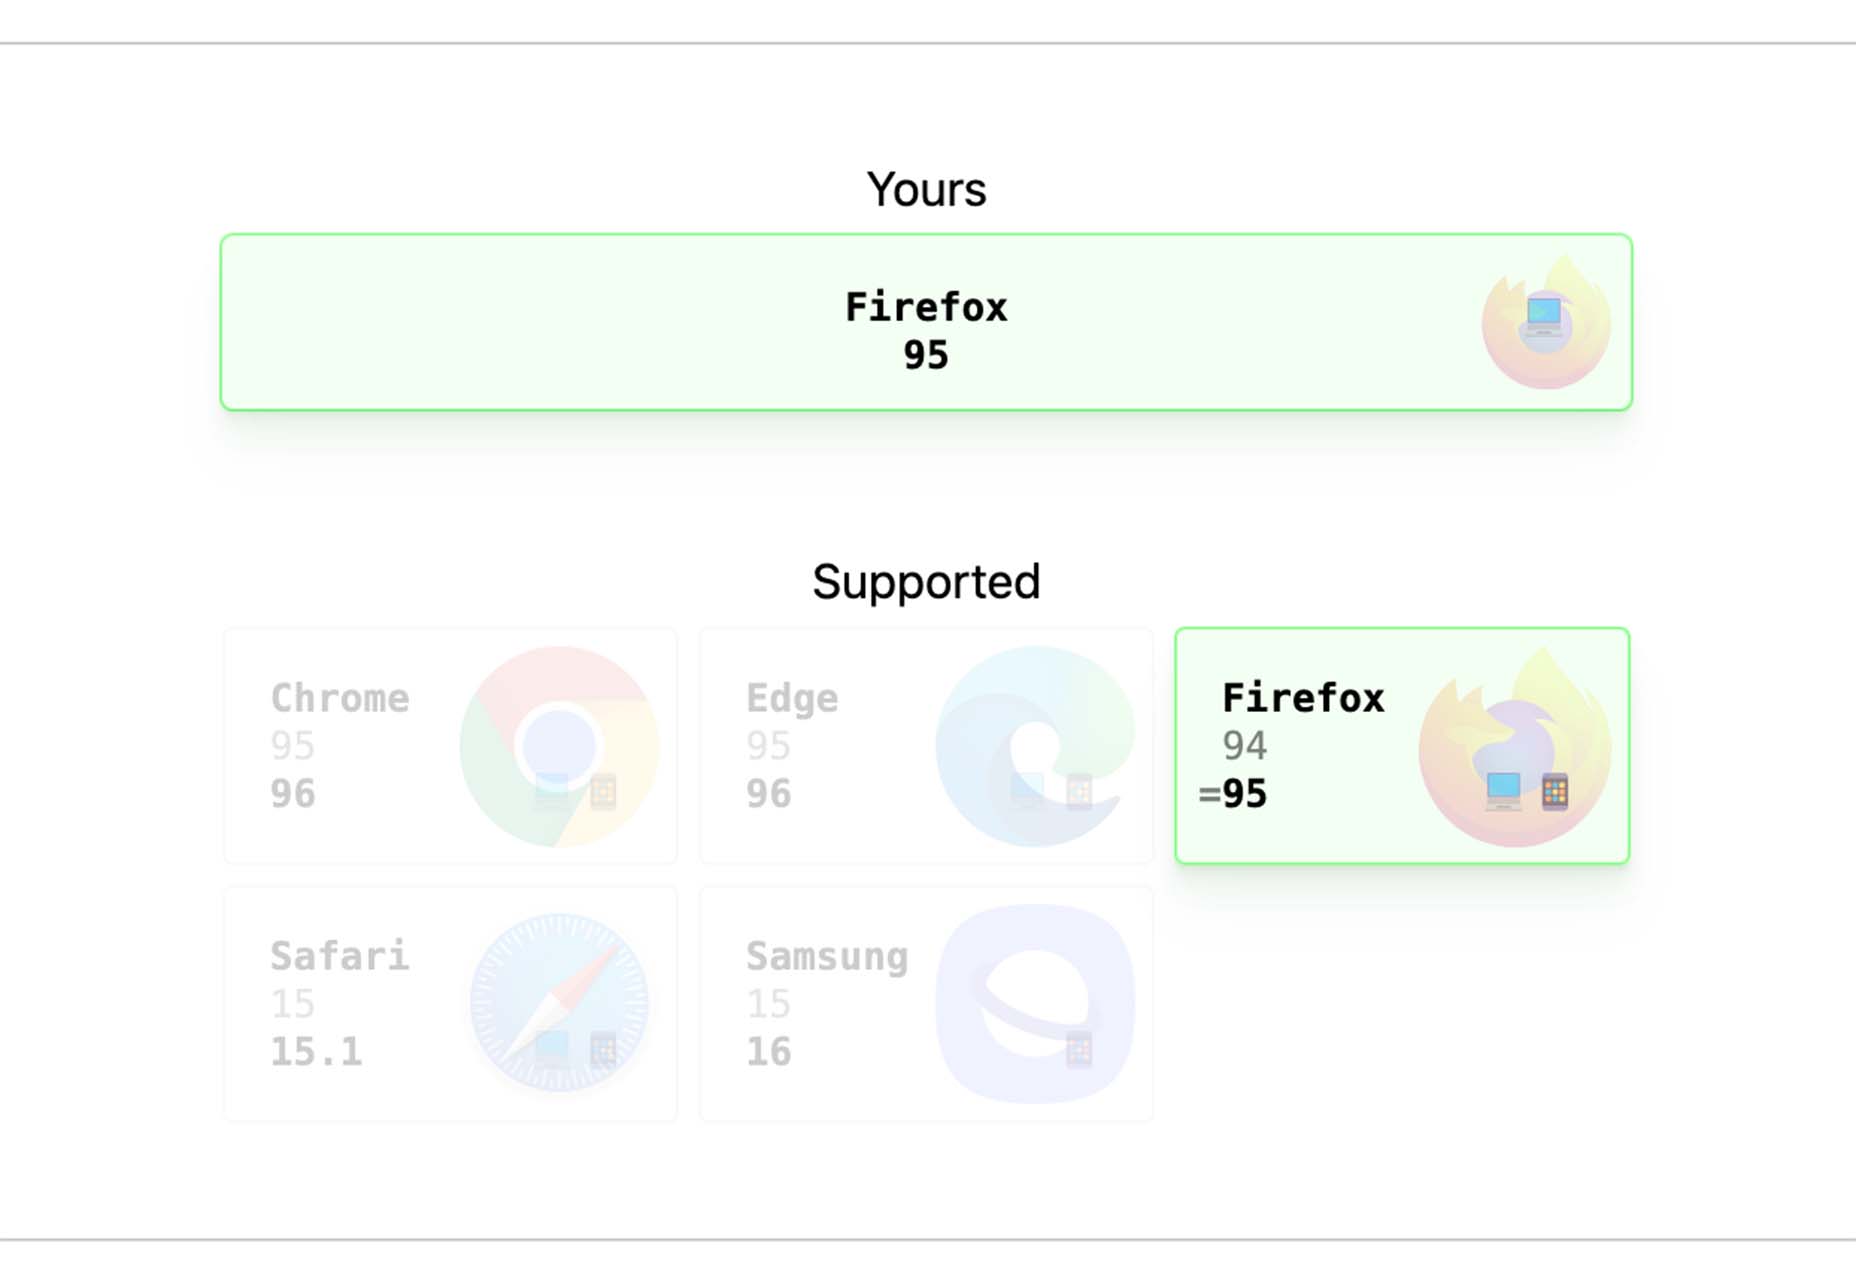
Browsers.page shows browser name and version, matched with a list of the browsers you support as a company or project. It’s a visual reminder to update if you are working with some browser lag. It’s a free tool and includes a frontend API.

UKO UI

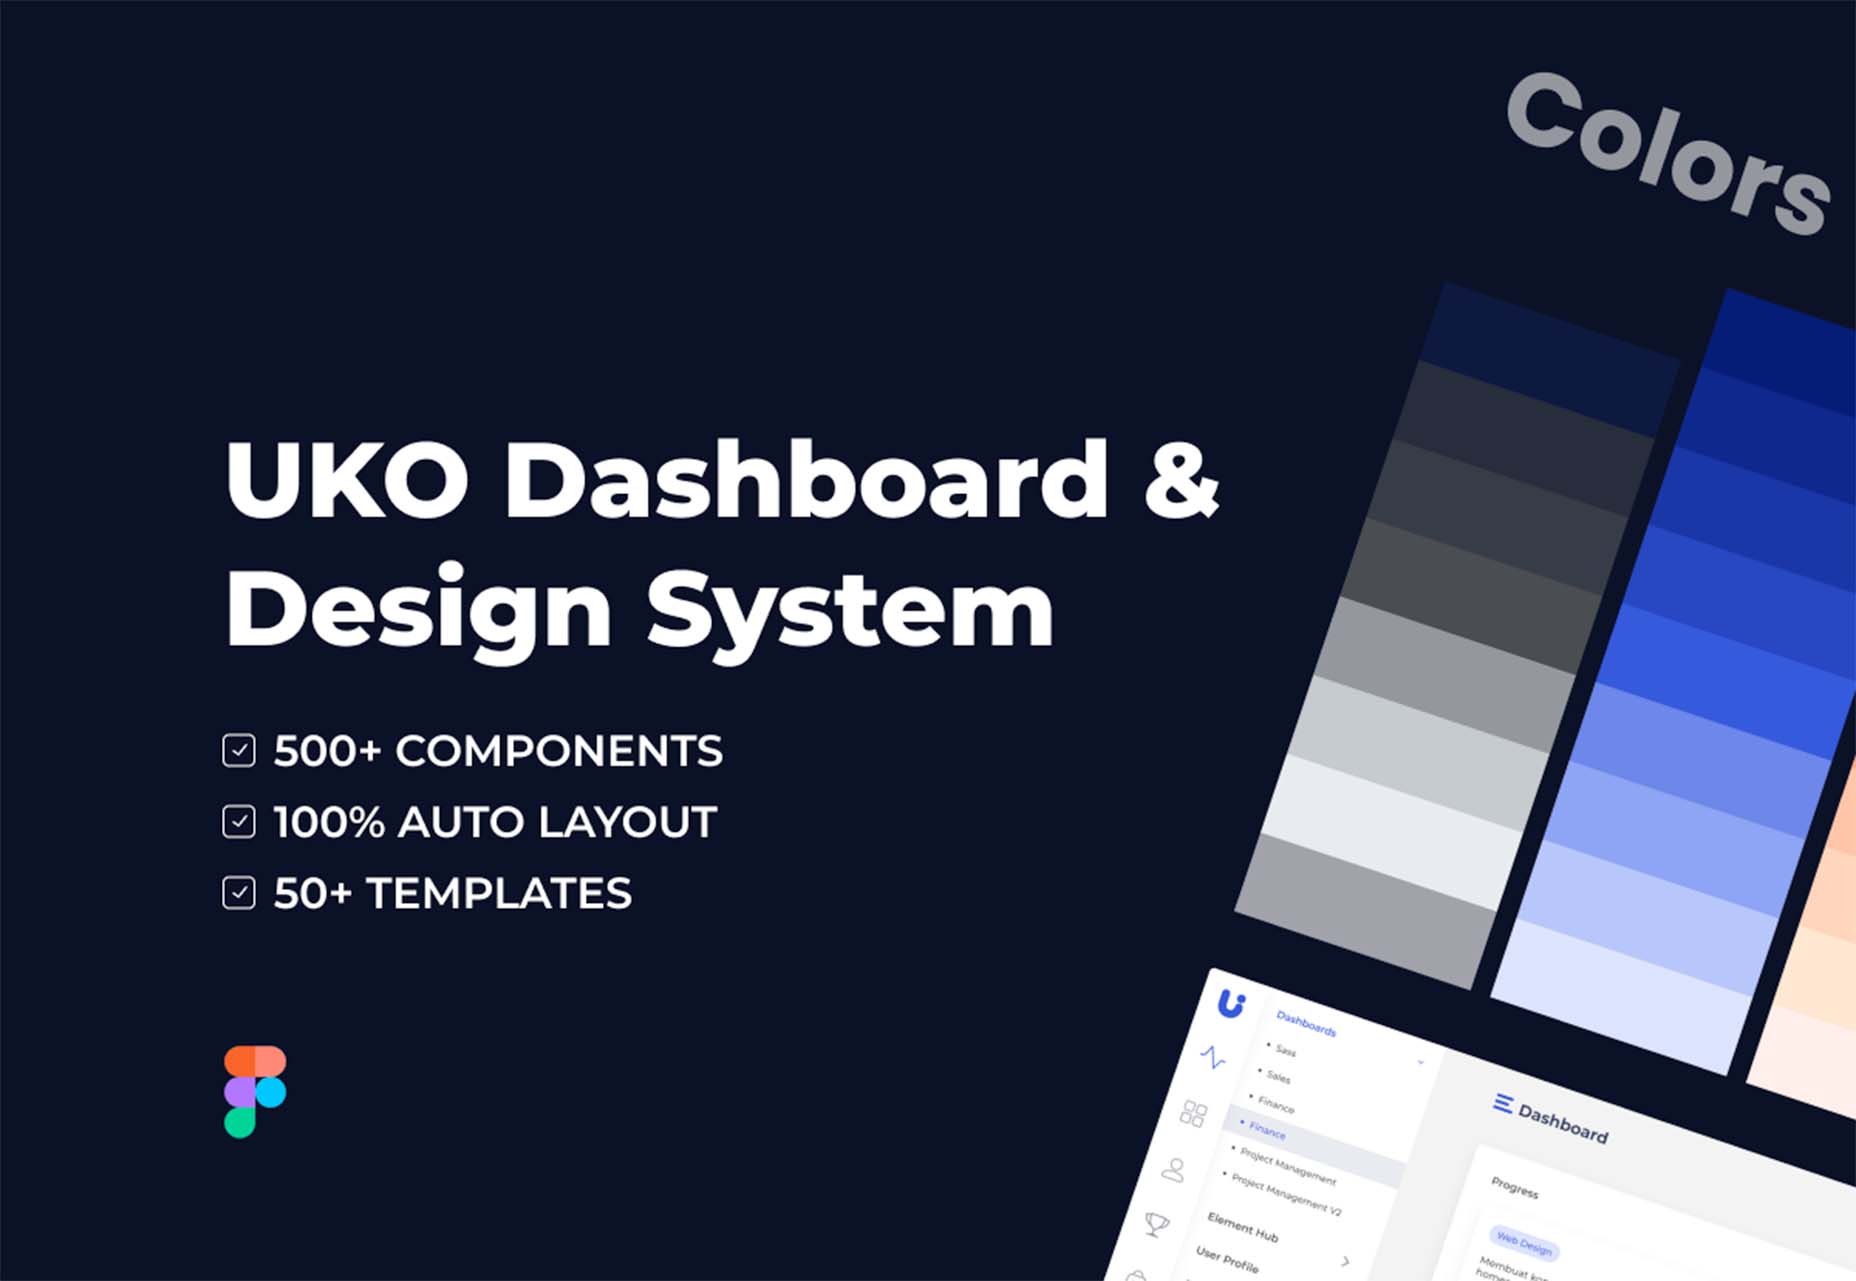
UKO UI is a Figma dashboard and design system bundle packed with components and pages to build from. It’s free for personal use.

Floating UI

Floating UI is a low-level library for positioning “floating” elements like tooltips, popovers, dropdowns, menus, and more. Since these types of elements float on top of the UI without disrupting the flow of content, challenges arise when positioning them. It exposes primitives, which enable a floating element to be positioned next to a given reference element while appearing in view for the user.

Style-Dictionary-Play

Style-Dictionary-Play lets you experiment with a style dictionary in your browser with a live preview and mobile and desktop views. It’s an open-source tool and allows for URL project sharing, and you can use it without logging in or signing up.

Airplane Runbooks

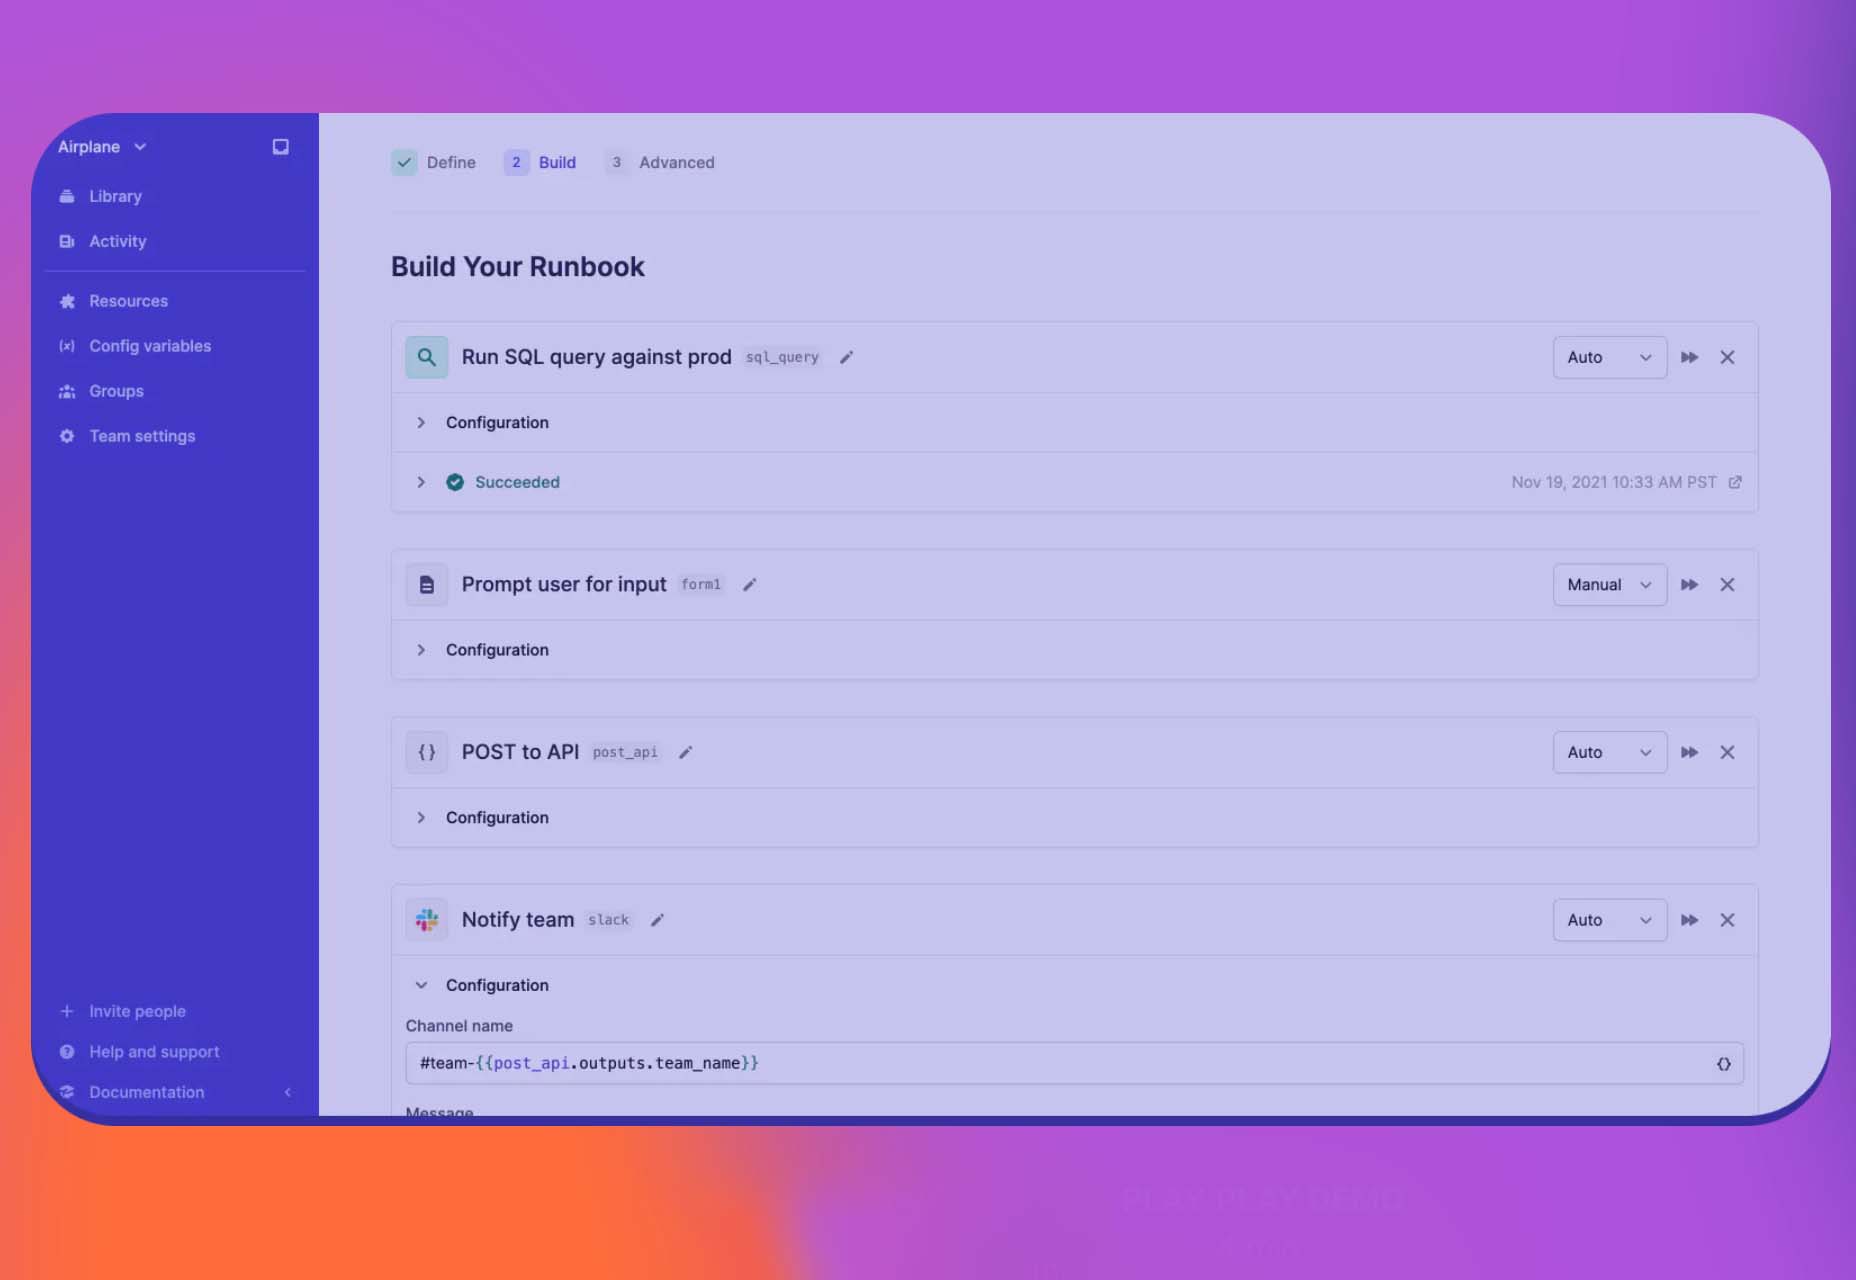
Airplane Runbooks makes it easy to turn small amounts of code into complex internal workflows. Model onboarding flows, admin operations, cron-like schedules, and more and share with your team. It’s like Zapier but for first-party operations that touch prod data.

Shoelace

Shoelace is a forward-thinking library of web components that works with any framework. It’s fully customizable – and has a dark mode. It’s built with accessibility in mind, and the open-source tool is packed with components.

Tutorial: Coloring with Code

Coloring with Code is an excellent tutorial by the team at Codrops that will help you create beautiful, inspiring, and unique color palettes/combinations, all from the comfort of your favorite text editor. It’s practical and easy to follow along as you work through the steps on your own.

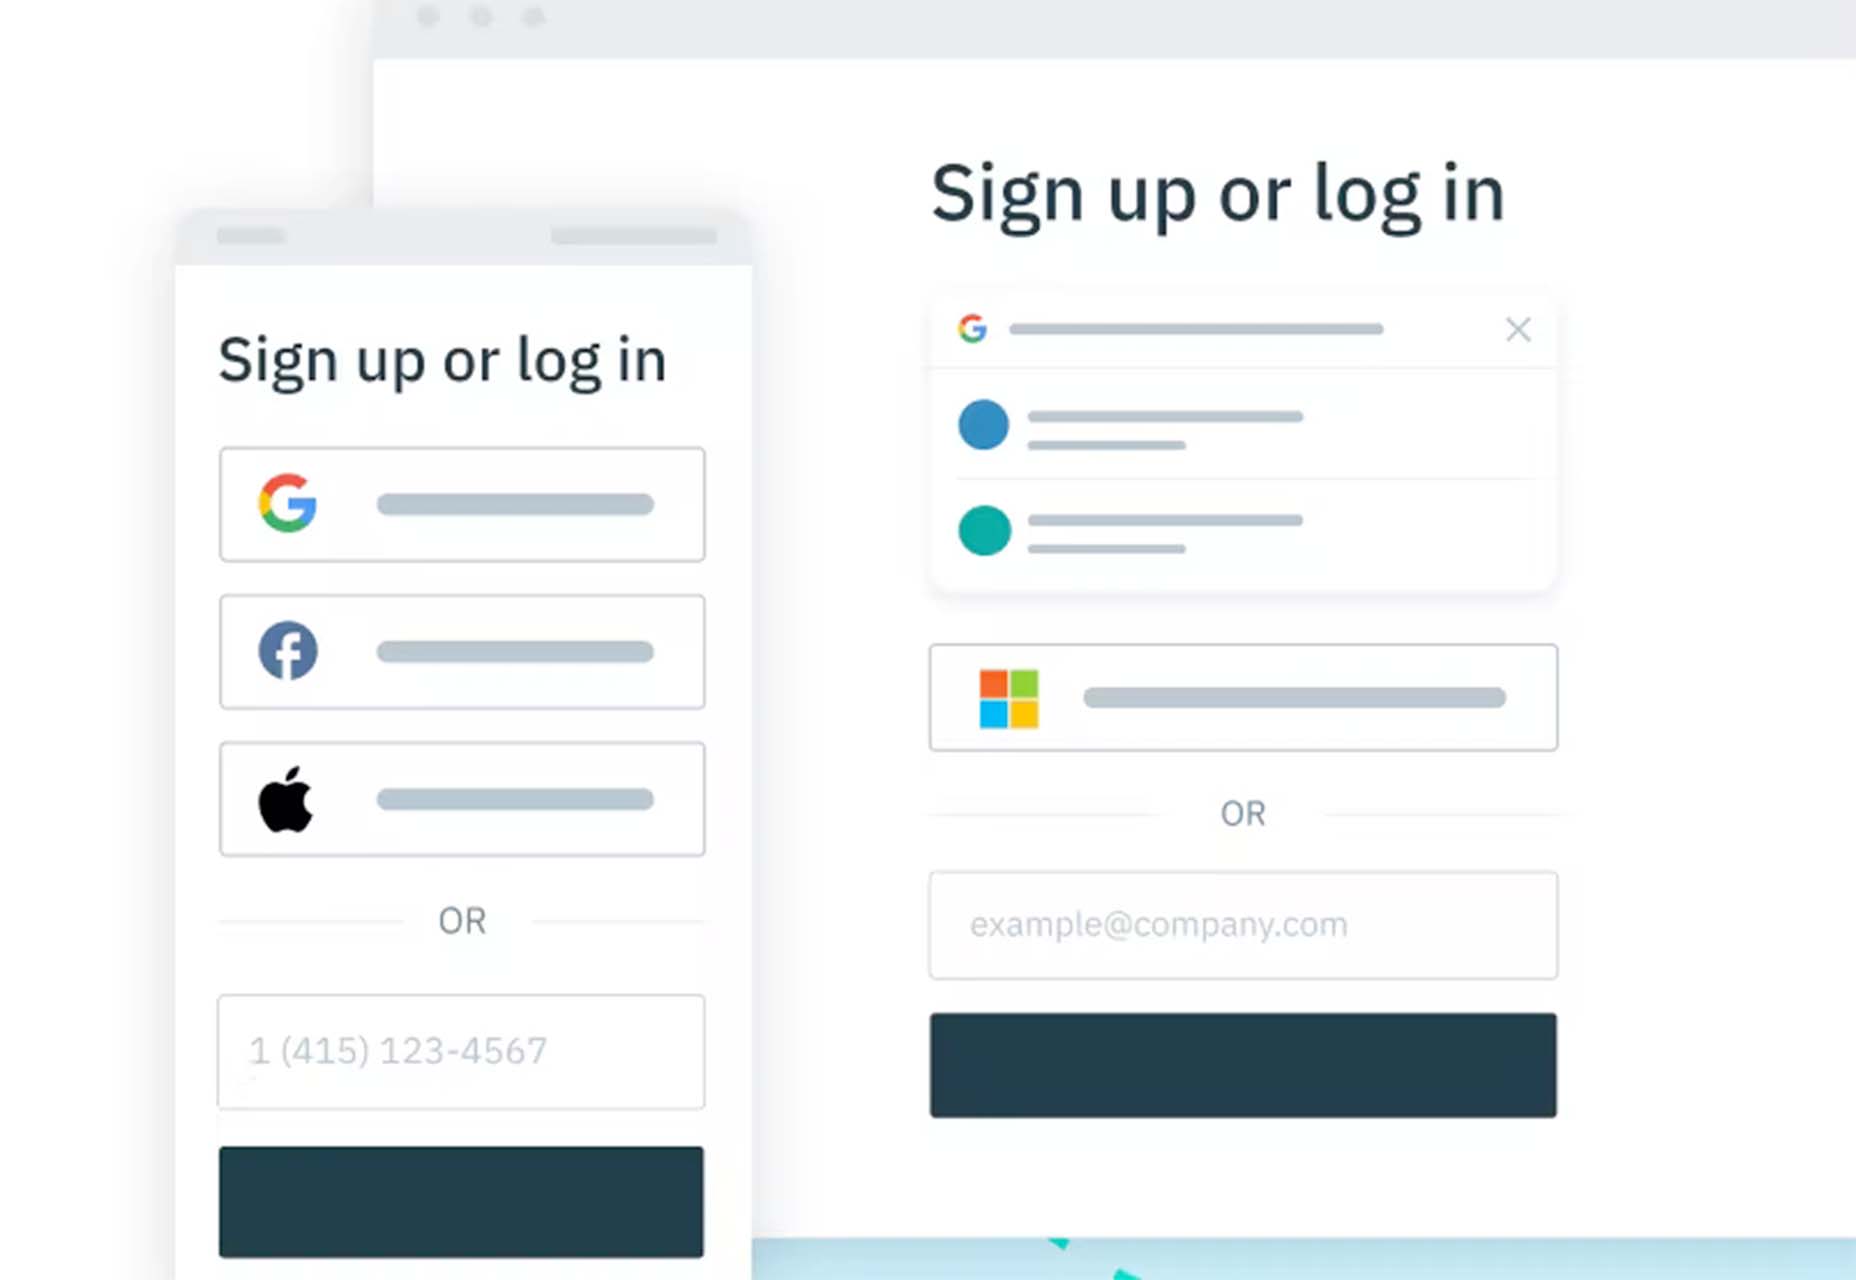
Stytch

Stytch is a full-stack authentication and authorization platform whose APIs make it simple to seamlessly onboard, authenticate and engage users. Improve security and user experience by going passwordless with this premium tool.

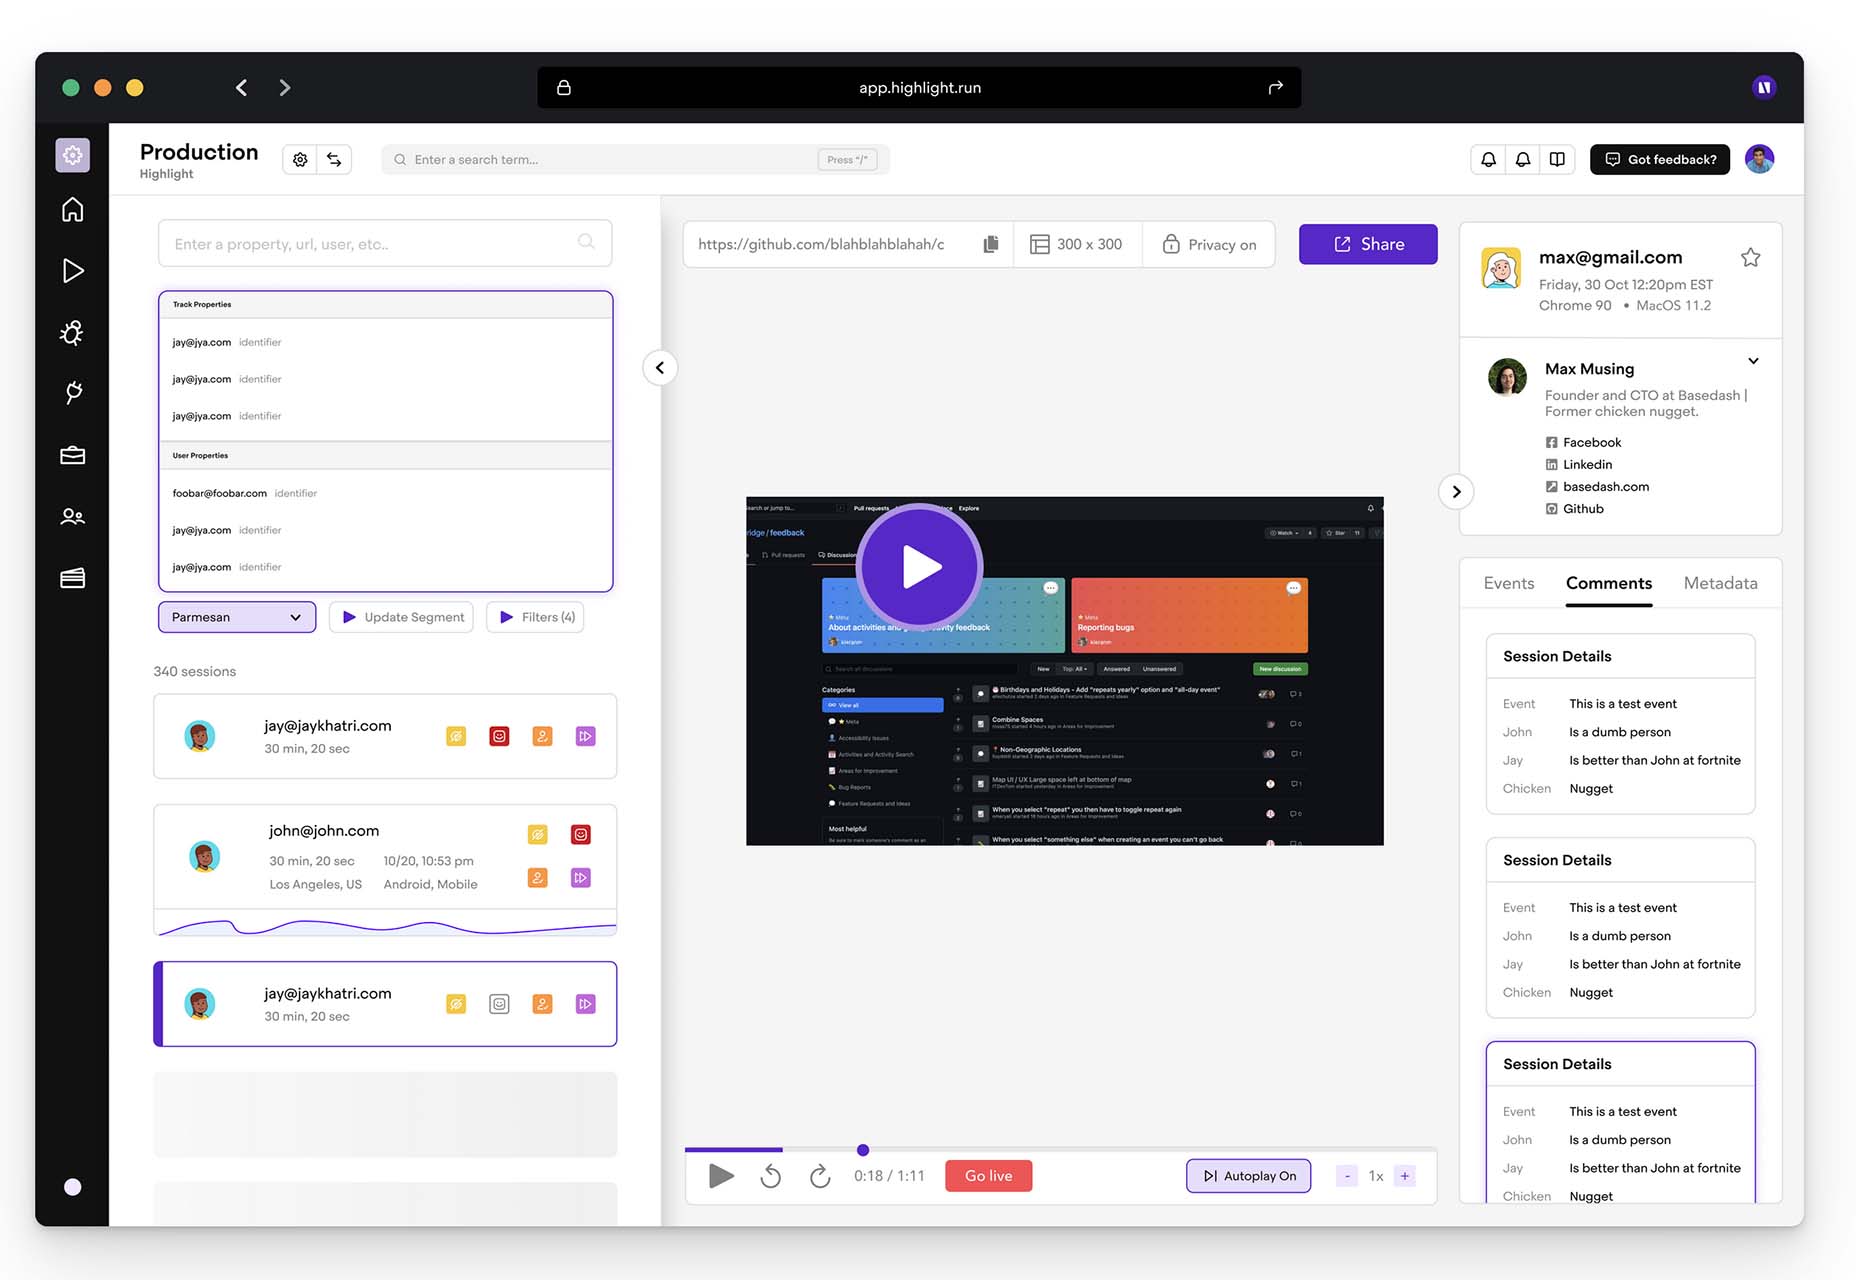
Highlight

Highlight keeps web apps stable. With pixel-perfect session replay, you’ll get complete visibility into issues and interactions that are slowing down users. You can start using this premium tool in minutes, and it works on every framework.

Source

The post Exciting New Tools For Designers, Holidays 2021 first appeared on Webdesigner Depot.

Source de l’article sur Webdesignerdepot

As a web designer, you’re responsible for a lot of things. Your client is relying on you to ensure that their website is user-friendly, accessible, eye-catching, and even good enough on the back-end to capture the attention of the search engines. 

However, what many business leaders and clients don’t realize is that they also have a part to play in ensuring that they get the right results from their site; there’s more to the client and contractor relationship than an exchange of funds. 

Today, we’re going to examine some of the most common mistakes that clients make when they begin working with a website designer for the first time. After all, when a client makes a mistake, it’s up to you to show them how to get back on track. 

Client Mistake 1: Providing Minimal Insight

Creativity, for the most part, is the responsibility of the designer in any web-building project. You know best what you can do for a client. 

When you’re discussing an upcoming project with a business owner, you can walk them through concepts like dark mode design or strategies for digital accessibility. However, you’re still reliant on your client to let you know if there’s anything specific they need. 

An insufficient brief in a web design project usually means that you waste time on a project because you have to go back and forth multiple times, making updates and edits. Getting a brief ironed out properly from day one can reduce misunderstandings and mistakes. 

To get your client started, ask them to share some details like:

  • Who’s the target audience? Do they have a user persona they can share?
  • What specific features does the site need? Landing pages, forms, widgets, etc.?
  • Competitor sites they like: What do they appreciate about those designs?
  • Brand colors and assets: What kind of hues and shades should you use?
  • Technical feature requirements: Does the site need to have its own app, integrate with APIs, or have a checkout solution, for instance?

Client Mistake 2: Underestimating The Workload

Perhaps one of the most common mistakes that clients make when seeking help from a designer is that they have no idea how much work it will take to create the kind of site they want. If they haven’t provided a great brief in the first place, they might not have had a chance to see all the work they’re asking for written down. Walking your client through the brief process can help here. 

On the other hand, if your client has already provided a brief, along with an unrealistic deadline for completion, you might need to have a discussion with them about what you need to do. Walking your client through some of the processes involved in creating their website could give them an insight into how long it will realistically take to bring their ideas to life. 

Additionally, ensuring that your customers fully understand the amount of work you’re taking on could also mean that they can better grasp why you’re charging a certain price for your services. That brings us neatly to the next mistake…

Client Mistake 3: Not Having The Right Budget

Pricing your design services can be a complicated process for web designers. You need to make sure that you’re charging enough to cover the cost of things like essential software and hardware for your company. At the same time, with so many other designers out there, you also need to ensure that your costs are competitive. 

After you’ve gone through the hard work of figuring out what your pricing structure should be, you also need to be capable of justifying that expense to your client. It’s common for many customers to go into their work with a web designer expecting that they’ll be able to get an entire website, blog, and app for less than a couple of hundred dollars. 

Make sure that your client is aware of your pricing immediately to avoid any confusion. If possible, have a pricing page on your website or portfolio which highlights the cost of different packages and precisely what your clients are going to get. 

If your customers can see the value in your services and even equate to an hourly workload or skillset, they might be better equipped to set the proper budget. 

Client Mistake 4: Making Too Many Technology Decisions

You’ll find that you work with many different types of client during your time as a web designer. Sometimes, you’ll have people who come to you not really knowing what they want or need. This means that you may need to spend some time speaking to them about their expectations and discussing what’s possible. 

On the other hand, there’s always a chance that you could work with a client who thinks that they should be making all of the decisions themselves. While it’s true that your client should have some control over things like the style of their website and what features it has, it’s up to you to make technical decisions like what kind of tools you’re going to use. 

If your client tries to dictate everything you do and how you’re going to do it, this could make it difficult for you to deliver your best work. Explain your processes to your customer in advance and find out why they want you to use specific technology. 

For instance, if your client wants to use a specific kind of website builder because they’ve heard it’s “the best,” you can explain what you like most about the product you’re already using. 

Client Mistake 5: Being Too Attached To An Idea

This is a problem that happens in a lot of creative industries. A client goes out and finds something that they like on another website. It might be an attractive landing page or a specific checkout process. They’re so excited by what they see there that they refuse to compromise on that idea when working with their designer – even if the concept isn’t suitable. 

For instance, your client might come to you wanting a website that’s full of dynamic animations and videos. However, if they only have a limited amount of bandwidth from their hosting provider, this could mean that they end up with a slow site that aggravates their customers. 

The best thing you can do when this happens is to present the issue to your client in a way that they can understand. For instance, if you’re worried something will slow down their website, talk to them about how speed is essential to good customer experience. You could even share some page speed stats like: if a page takes more than 3 seconds to load, over half of all visitors will abandon it. 

Seeing the stats for themselves could mean that your clients are more likely to change their minds. 

Client Mistake 6: Working With The Wrong Designer

Finally, one of the biggest mistakes any client can make is working with the wrong website designer. There are a lot of professionals out there, each with their unique skills to offer in things like UX design, ecommerce page creation, and so much more. However, it’s not always easy to know what you need as a business owner getting online for the first time. 

The good news for web design clients is that there’s a lot of information out there that you can use to get informed fast. The bad news for designers is that this means you’re going to need to work at keeping your skills on the cutting edge if you want to attract the widest selection of customers. 

To ensure that you’re more likely to be the right designer for your customers, stay up to date with the latest web design standards, and check out what’s trending in your industry. Webinars, articles, and even TED talks can be an excellent way to brush up your knowledge and make your portfolio much more appealing. 

Strengthen Your Client/Designer Relationships 

Succeeding as a web designer isn’t just about building a robust portfolio full of excellent websites where you can showcase your skills. While it’s true that you need to stay on the cutting edge with your design talents, you also need to make sure that you can create positive relationships with every client that comes to you. 

Like designers, clients can make mistakes too, but not knowing what they want, trying to take too much control, or simply failing to understand the scope of a product. Rather than letting those mistakes hold you back, prove your mettle as a designer by helping your clients navigate these issues. The result will be more streamlined project experiences, happier customers, and better reviews for your company. 


Featured image via Unsplash.

Source

The post Protect Your Design Clients From These 6 Easy Mistakes first appeared on Webdesigner Depot.


Source de l’article sur Webdesignerdepot