Articles

Artificial intelligence is the latest buzzword in the tech world. It’s everywhere and has been for a while, but AI-powered writing software is a relatively new concept.

AI Writing Software uses artificial intelligence to write articles, blog posts, and other content in your voice. The goal is to provide a tool that will save you time and energy so you can focus on different aspects of your business or life.

To help you get started, we’ve compiled a list of 20 AI writing software you can use to create content for your website, blog, or social media accounts.

1. Copy.ai 

Copy.ai uses Natural Language Processing (NLP) to produce high-quality content for your business, ebooks, blog posts, articles, product descriptions, social media content, and more. It can also be used to rewrite existing content so that you can use it on your website, blog, or social media pages.

Since it uses artificial intelligence to mimic human writing patterns and styles, the copy will be more natural and easier to read than the typical machine-generated text we’re used to seeing.

Copy.ai differs from traditional content creation tools because it doesn’t just offer suggestions on improving your current content; it generates new text based on what it thinks would be most relevant for the topic or audience.

Key Features: 

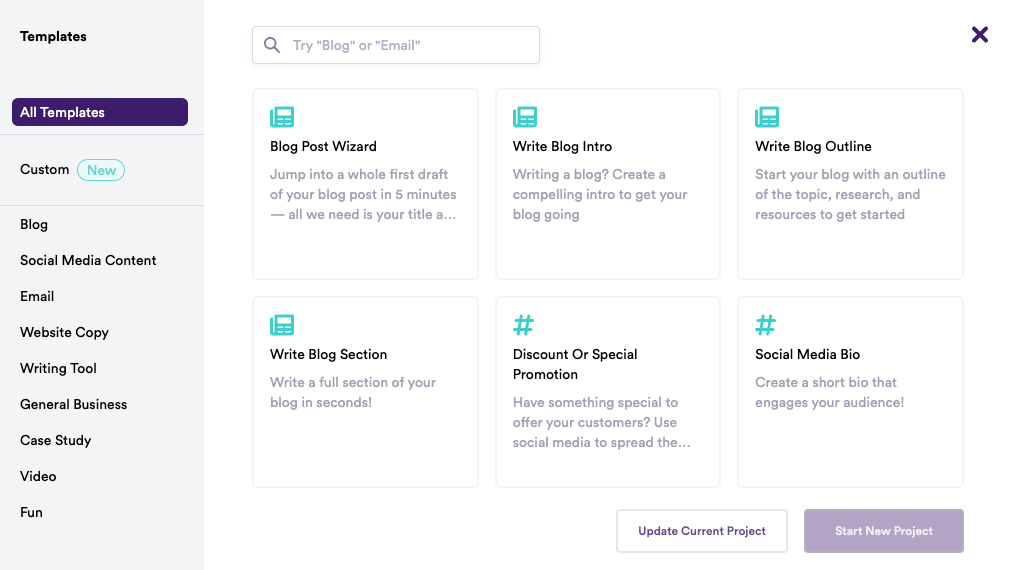
  • Pre-built Templates – Copy.ai has a ton of pre-built templates for different kinds of content. For example, you can see below that it has options for blogs, social media content, video, case studies, and more:

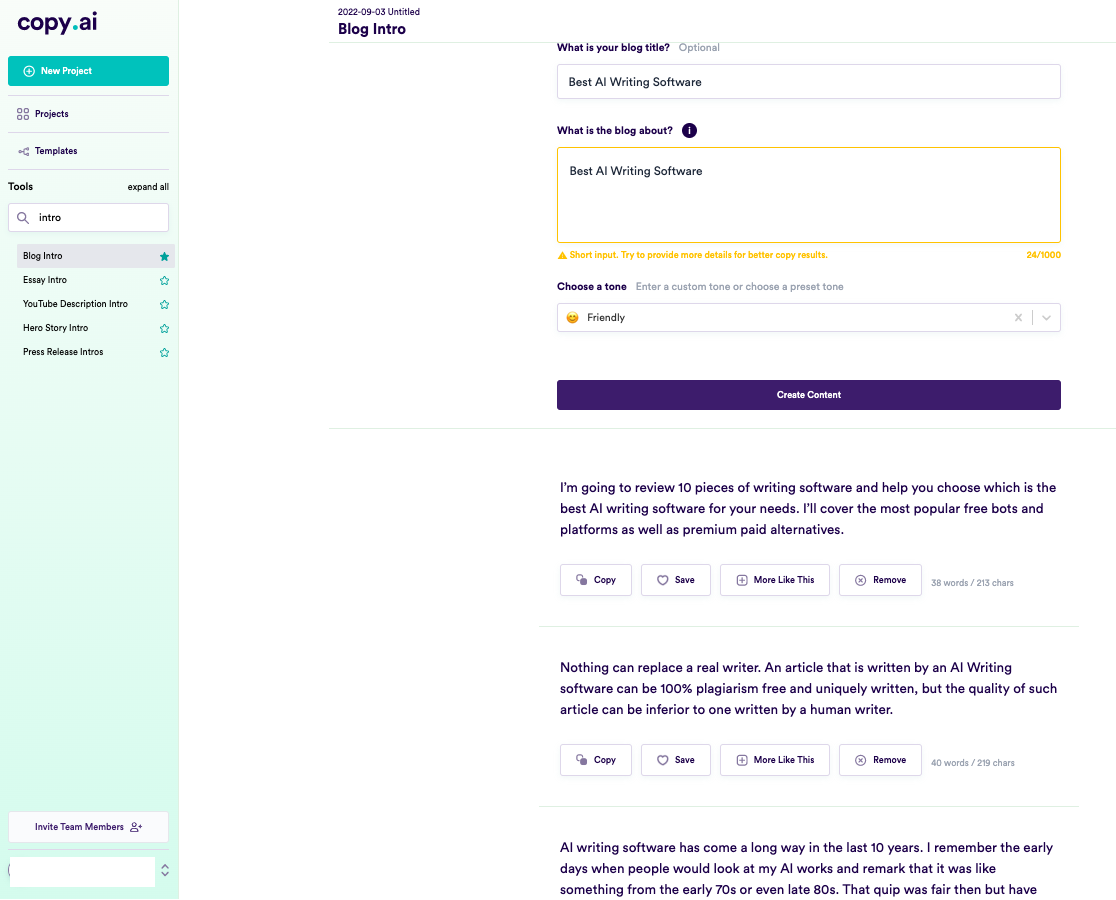
  • Different tones and variations – Get access to tones like friendly, persuasive, professional, luxury, witty, bold, and more to align the content with your writing style. It also creates multiple variations based on your input – you can pick the one you like or make more.

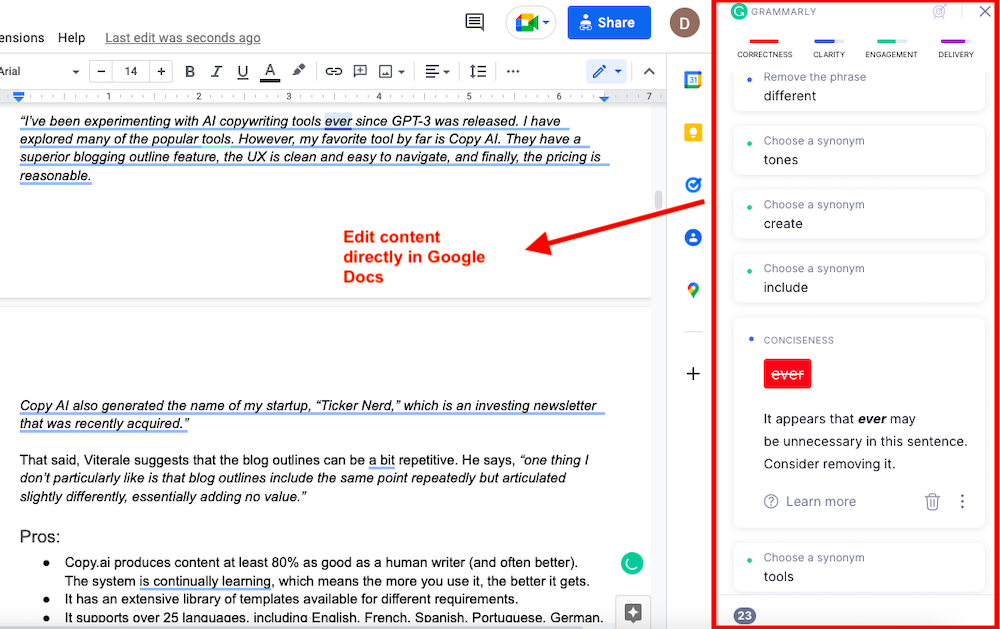
    To illustrate this, here’s a screenshot of the results we got while trying to write the introduction for this article using Copy AI. 

  • Writing and Brainstorming tools – You also get tons of writing tools, brainstorming tools, and personal tools. Writing tools include essay intro, cliffhanger generator, adjective accelerator, passive to active voice, verb booster, and the like. Brainstorming tools have a name generator, startup ideas, viral ideas, and more – while Personal tools include birthday cards, clubhouse bios, cover letters, love letters, and shower thoughts.

    You can save your content and then return to it later if you wish. Plus, the software’s user interface is easy to navigate, and the program is simple. 

Luciano Viterale, Co-founder of Ticker Nerd, also shares his experience with Copy.ai

“I’ve been experimenting with AI copywriting tools since GPT-3 was released. I have explored many of the popular tools. However, my favorite tool by far is Copy AI. They have an outstanding blogging outline feature; the UX is clean and easy to navigate, and the pricing is reasonable.

Copy AI also generated the name of my startup, “Ticker Nerd,” which is an investing newsletter that was recently acquired.”

That said, Viterale suggests that the blog outlines can be repetitive. He says, “one thing I don’t particularly like is that blog outlines include the same point repeatedly but articulated slightly differently, essentially adding no value.” 

Pros: 

  • Copy.ai produces content at least 80% as good as a human writer (and often better). The system continually learns, which means the more you use it, the better it gets. 
  • It has an extensive library of templates available for different requirements. 
  • It supports over 25 languages, including English, French, Spanish, Portuguese, German, Italian, Dutch, Russian, and more. 

Cons: 

  • Not suitable for long-form content. 
  • The content can get a bit repetitive after a while.  
  • The free plan lets you create only 2000 words per month. 

Pricing: 

It starts from $39 per month (if you pay yearly) for up to 40k words per month, unlimited copywriting tools, priority email support, Blog Wizard tool, support for 25+ languages, and five user seats. 

2. Jasper 

Jasper.ai is an AI copywriting tool that uses a combination of artificial intelligence (AI) and natural language processing (NLP) to create content based on user input. 

It helps you generate original content for your blogs, social media, websites, and more. Jasper also knows 10% of what’s on the internet and continues to learn more daily.

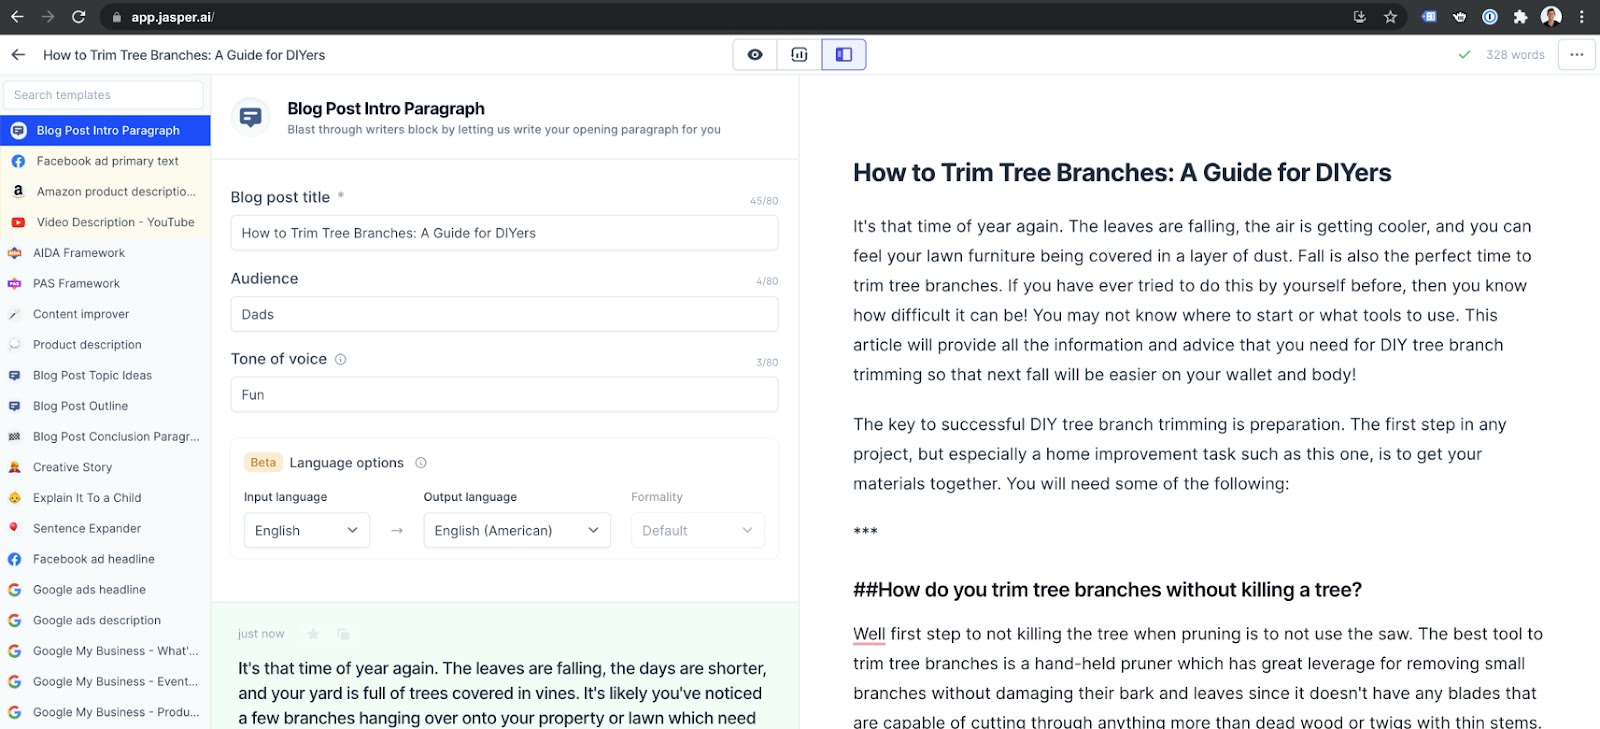
Just like Copy.ai, Jasper’s user interface is easy to use and navigate around. With its specific template for blog posts, articles, ebooks, and more, it’s also one of the few AI writing software suitable for long-form content. 

All you have to do is enter the title, your intended audience, tone of voice, and language options, along with the main point of your copy, and voila – Jasper can churn out a high-quality piece of content for you within seconds.

(Jasper Interface

Key Features: 

  • 50+ AI templates – Jasper.ai offers a variety of AI templates, including Blog Posts, Summary, Conclusion, Q&A, Ads, Videos, Social Media, Rewriter, Marketing Frameworks, Articles, and more. Each template has several use cases – for example, a blog has Blog Titles, Content Briefs, and Outlines.

Headline Generator

  • Boss Mode lets you write long-form content such as blog posts, stories, and books. It also allows you to organize your content into projects and find help with priority chat support, Grammarly integration, and plagiarism checks. You can also choose from 25 languages, including English, French, German, Italian, Spanish, Polish, and more.
  • SurferSEO Integration – If you have a Boss Mode plan, you can add SurferSEO to your Jasper account. This integration will enable you to find the best keywords, build a content strategy, create blog outlines, and more.

Content production using Surfer SEO Integration

Pros: 

  • No technical assistance is required.
  • Simple, easy-to-use interface.
  • Provides plagiarism-free content every time.
  • It helps you build a content strategy based on high-ranking topics and keywords.
  • Ready-to-use templates cover most of the use cases that a writer or marketer will need.
  • Excellent customer support is provided through live training sessions, live Q&A sessions, blogs, Facebook community, help docs, and emails.

Cons: 

  • Plagiarism-free content doesn’t always mean unique content.
  • Customer support options via chat or email are limited.

Pricing: 

It starts with $40/mo for 35K words, 50+ AI templates, 20+ languages, up to 5 seats, and chat support.

3. Rytr 

Rytr is a content generation tool that uses AI to generate high-quality, human-sounding content for emails, blogs, YouTube videos, and landing pages. 

It also supports multiple languages and tones and uses copywriting frameworks, including AIDA & PAS. And to ensure that your content is free of plagiarism, it comes with a built-in plagiarism checker.

Like Copy.ai. Rytr is also more suitable for short-form content and copywriting than long-form content. 

Key Features: 

  • 30+ languages – Rytr supports many languages, including English, Finnish, French, German, Greek, Italian, Japanese, Korean and Polish. It also uses a proprietary approach to support languages that are not supported by the limitations of GPT3.

Language Support

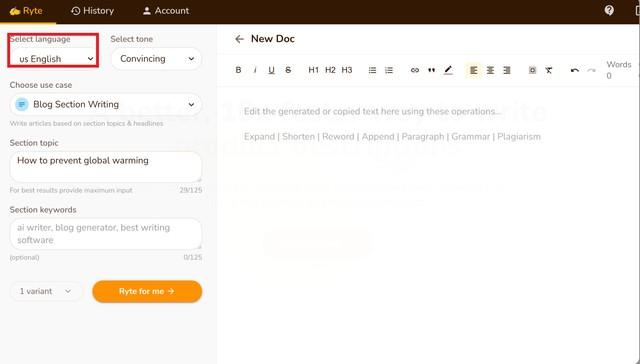
  • Use Cases: Rytr offers 40+ use cases, including Blog Section Writing, Blog Ideas & Outline, Brand Name, Business Idea Pitches, Call-to-action, Cover letters, Emails, and more.

    Each use case has a short description of what it’s about below it. Select the use case to write about, give a little context about what you want to write, and then select how many variants you want the AI to write for you (max is 3). 

You can also choose a creativity level by selecting one of 6 options, including Default, Non, Low, Medium, High, or Max.

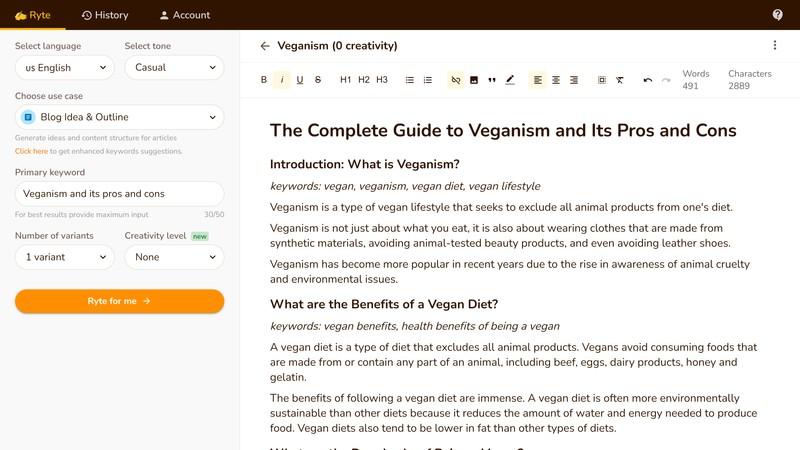
Generating Blog Ideas & Outlines

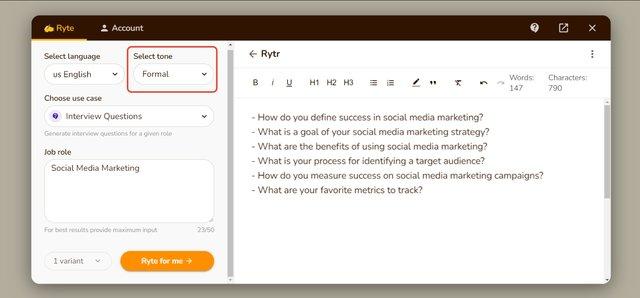
  • Tone – You can add a personal touch to your content by choosing from over 18 tones, including Formal, Convincing, Inspirational, and more.

Writing in a formal tone.

Pros: 

  • Simple user interface.
  • Fast live chat support.
  • Using the magic command, you can produce content for poems, letters, and more.
  • Comes with an in-built tool for plagiarism checks.
  • Provides multiple resources for guidance.

Cons: 

  • Tone options are limited.
  • You will receive a small number of credits per month.

Pricing: 

It starts at $9/month for 100K characters per month. There is also a free plan with a 10K characters limit.

4. Writesonic 

Writesonic is a content-creation platform that uses generative artificial intelligence models to write SEO-optimized long-form blogs and articles. 

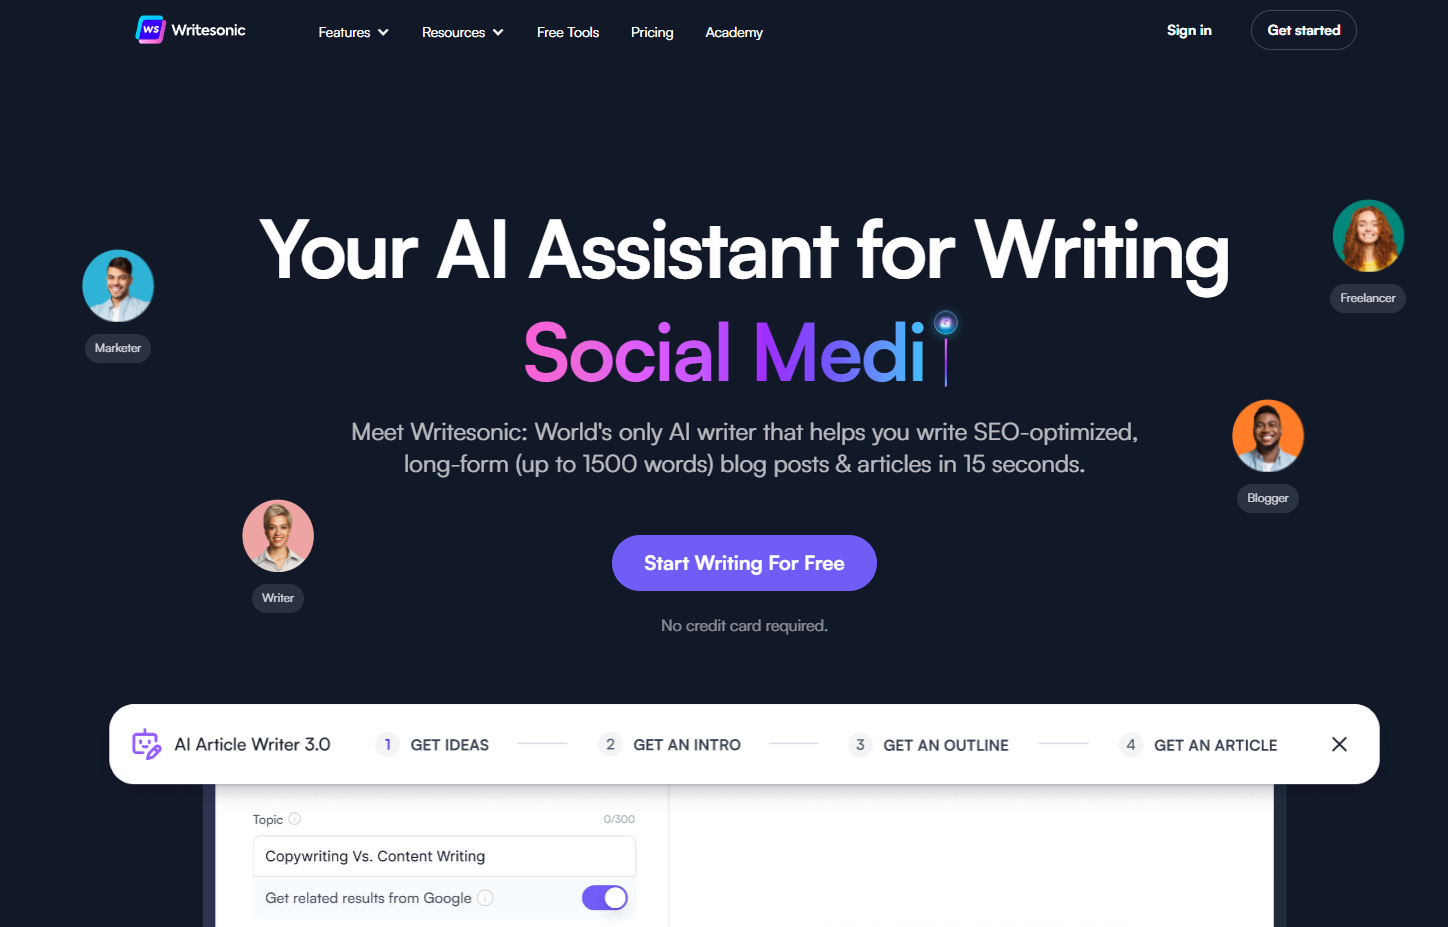
It has 65+ use cases or templates, including Article Writer 3.0, Landing Pages, Tweets, Quora Answers, Facebook Ads, and more.

You can easily create desired content by picking a suitable use case, typing a topic, and adding a paragraph of your own words. You can also set the language and quality level before generating it.

Generating Pros and Cons

Key Features: 

  • 24 Languages: You can produce content in 24 languages, including English, Dutch, French, German, Italian, Russian, Czech, Danish, Greek, Hungarian, and more. They’re also continually adding more language options.

Languages

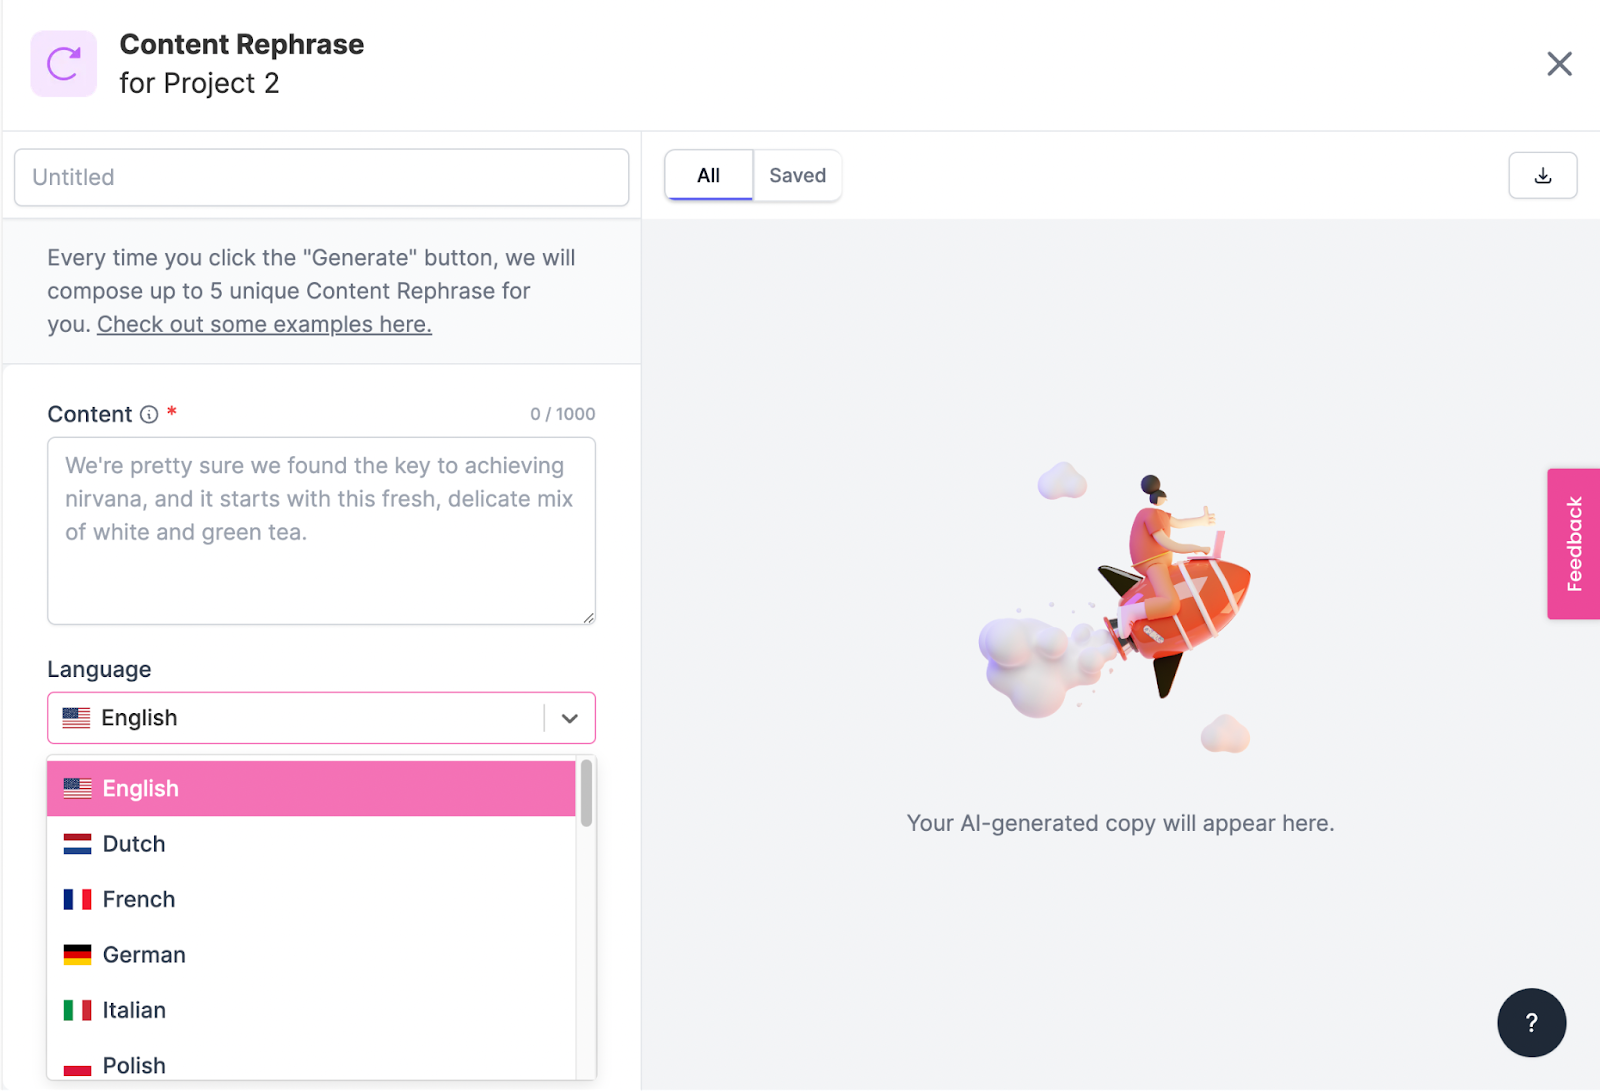
  • Unconventional Use Cases: It’s got a more comprehensive range of templates, including Sentence Expander, Text Summary, Conclusion Writer, YouTube Outlines, LinkedIn Ad Descriptions, Analogy Maker, Question Generator, Song Lyrics, Definition, and more.
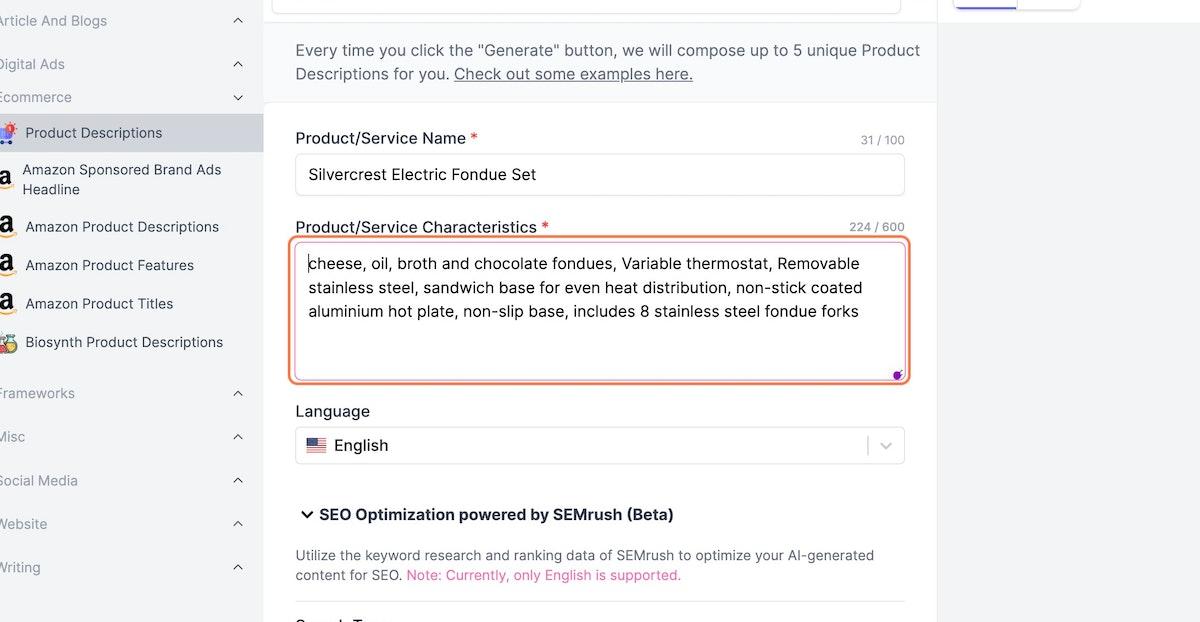
  • SEMrush and WordPress Integrations: Writesonic integrates with SEMrush, Zapier, and WordPress.org. SEMrush helps you optimize your content for search engines, and WordPress.org lets you publish your blog directly from Writesonic. Zapier integration enables you to automate your content from Writesonic.

SEMrush Integration

Pros: 

  • Easy to use.
  • The User Interface gives you step-by-step instructions and tips for how to use the tool more efficiently.
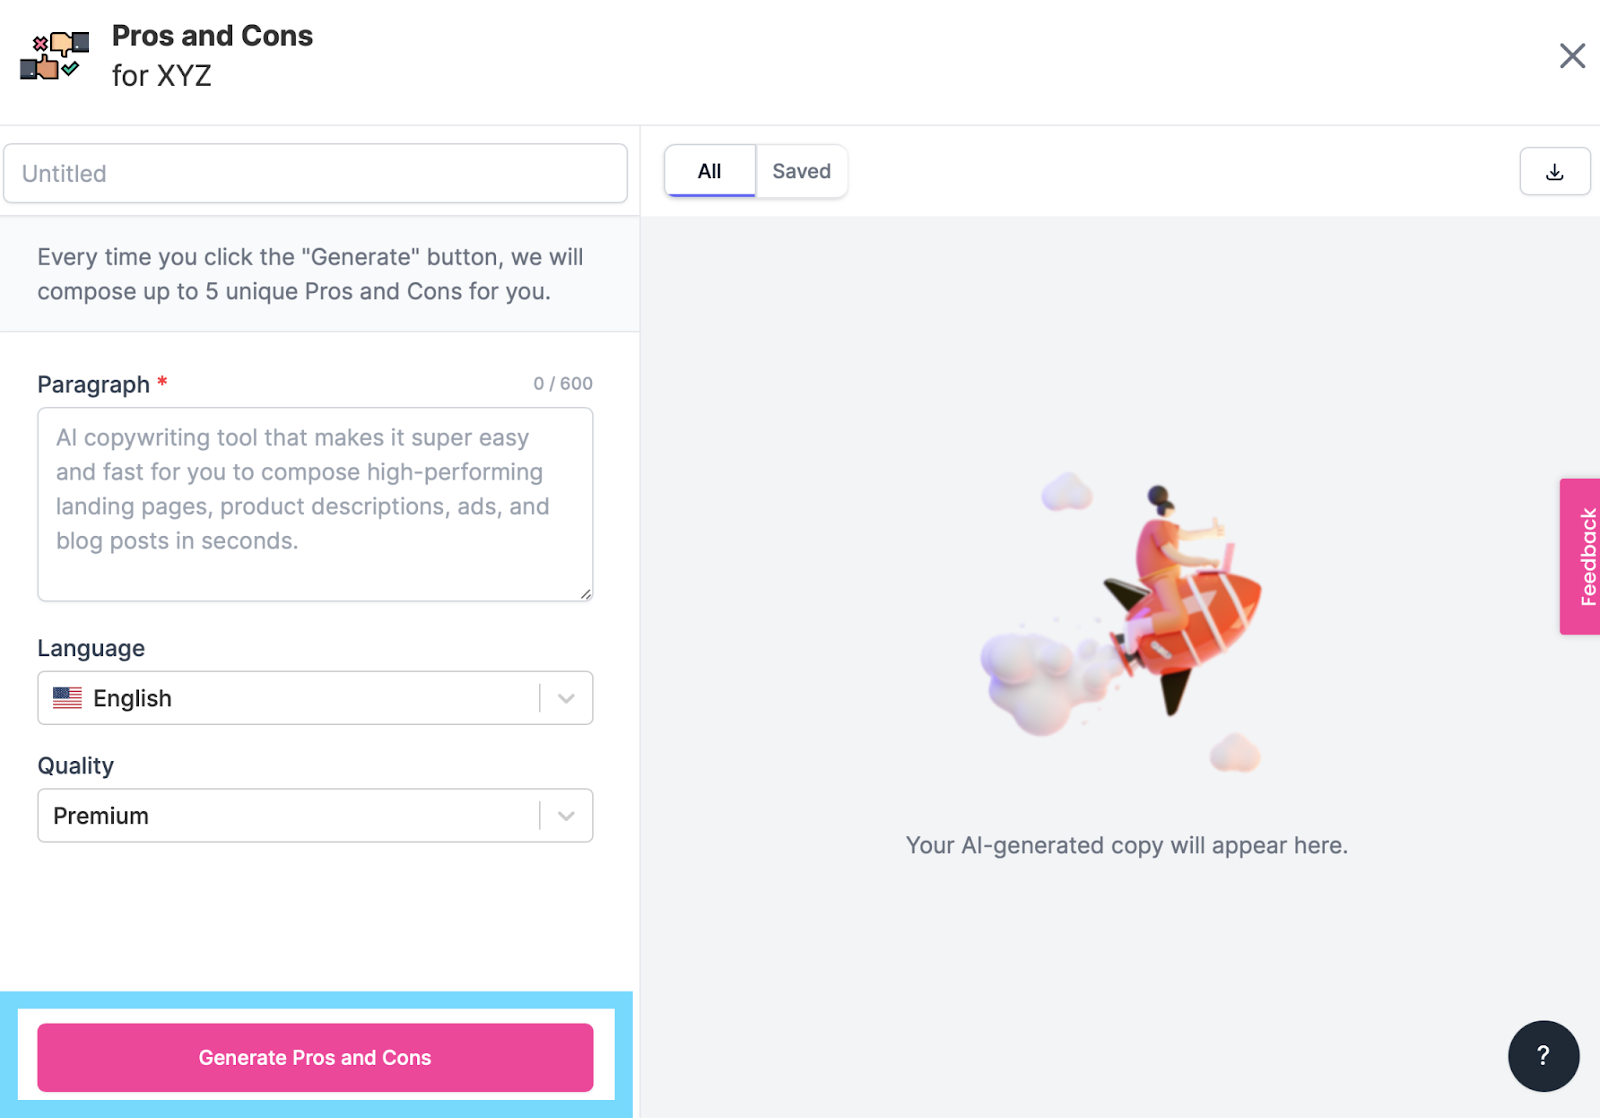
  • There are many unique use cases, including a hook generator, pros and cons generator, and landing page creator.
  • Free trial available.

Cons: 

  • Like other tools on this list, the copy may not always be accurate. 

Pricing: 

It starts at $10/month for 12K words, 70+ AI templates, a Landing page generator, a browser extension, Zapier integration, and more.

5. Grammarly Business 

Like most other tools on this list, Grammarly Business isn’t an AI-based content writer per se—it’s more like an AI-based writing assistant. Specifically, it checks your documents for grammar, spelling, plagiarism, and style mistakes.

Grammarly Business also provides feedback on your writing style so that you can improve as a writer over time. 

You can use Grammarly Business to:

  • Get suggestions to improve your writing style, including word choice and sentence structure.
  • Identify common grammatical mistakes and fix them in one click.
  • Improve your email response time by checking emails before they’re sent out.

It’s also ideal for larger teams of writers who need to access the same Grammarly accounts, enabling multiple users to edit documents simultaneously.

One of the best parts about this tool is that it integrates with every online writing space, including Google Docs. This allows you to write and edit simultaneously without waiting for one draft to be finished before making changes to the next.

Key Features: 

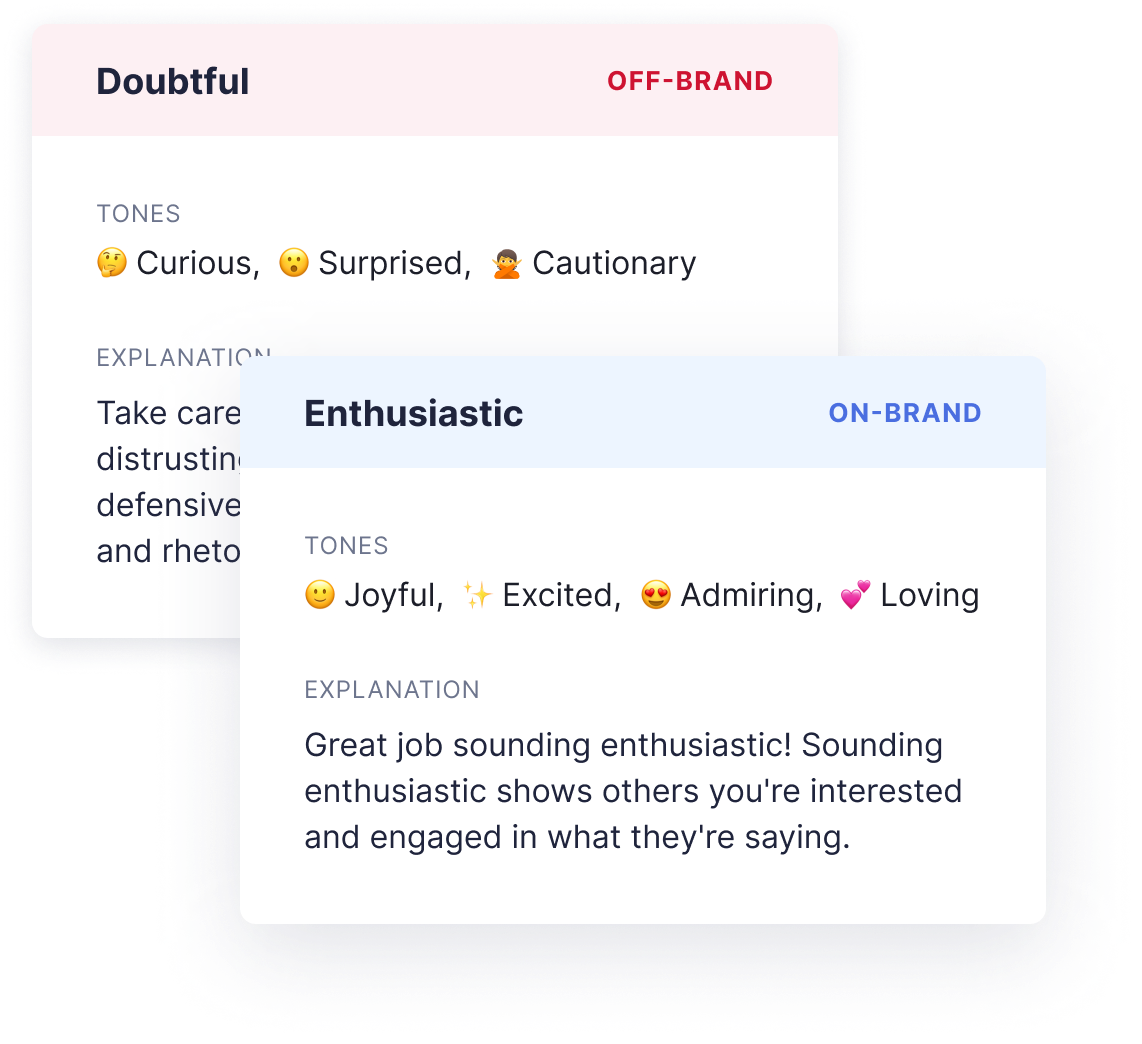
  • Custom Brand Tone: You can create multiple tone profiles to suit your needs and assign them to different Teams. You’ll also get real-time feedback on your tone and can adjust it while writing. Your tone can be anything from Joyful, Excited, Loving, and Surprised to Curious, Formal, and Cautionary.

Brand Tone Feedback

  • Grammar Checker: Grammarly gives you feedback on everything that can be improved in your writing – from typos to sentence structure. It also checks for grammar mistakes, spelling errors, and incorrect punctuation.
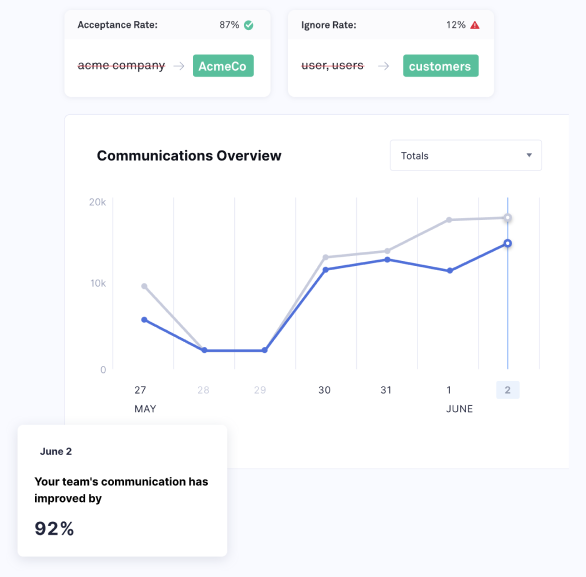
  • Style Guide: Grammarly Style Guide enables you to establish a uniform tone and style across all your teams. You can set a library of words, terms, and phrases that your teams should adhere to.

    You can also prevent them from using complex acronyms or jargon. Lastly, you can get feedback on how the performance has increased with the Style Guide.

Style Guide Analytics

Pros: 

  • Real-time feedback on errors and tone usage.
  • Grammarly gives instant, easy-to-understand feedback and lets you fix mistakes with just one click.
  • You can always add new words to the dictionary.

Cons: 

  • It flags passive voice as an error.
  • Grammarly is good at catching mistakes, but sometimes it corrects things unnecessarily.

Pricing: 

It starts at $15/month for one member, real-time feedback, style guide, snippets, brand tones, admin controls, and more.
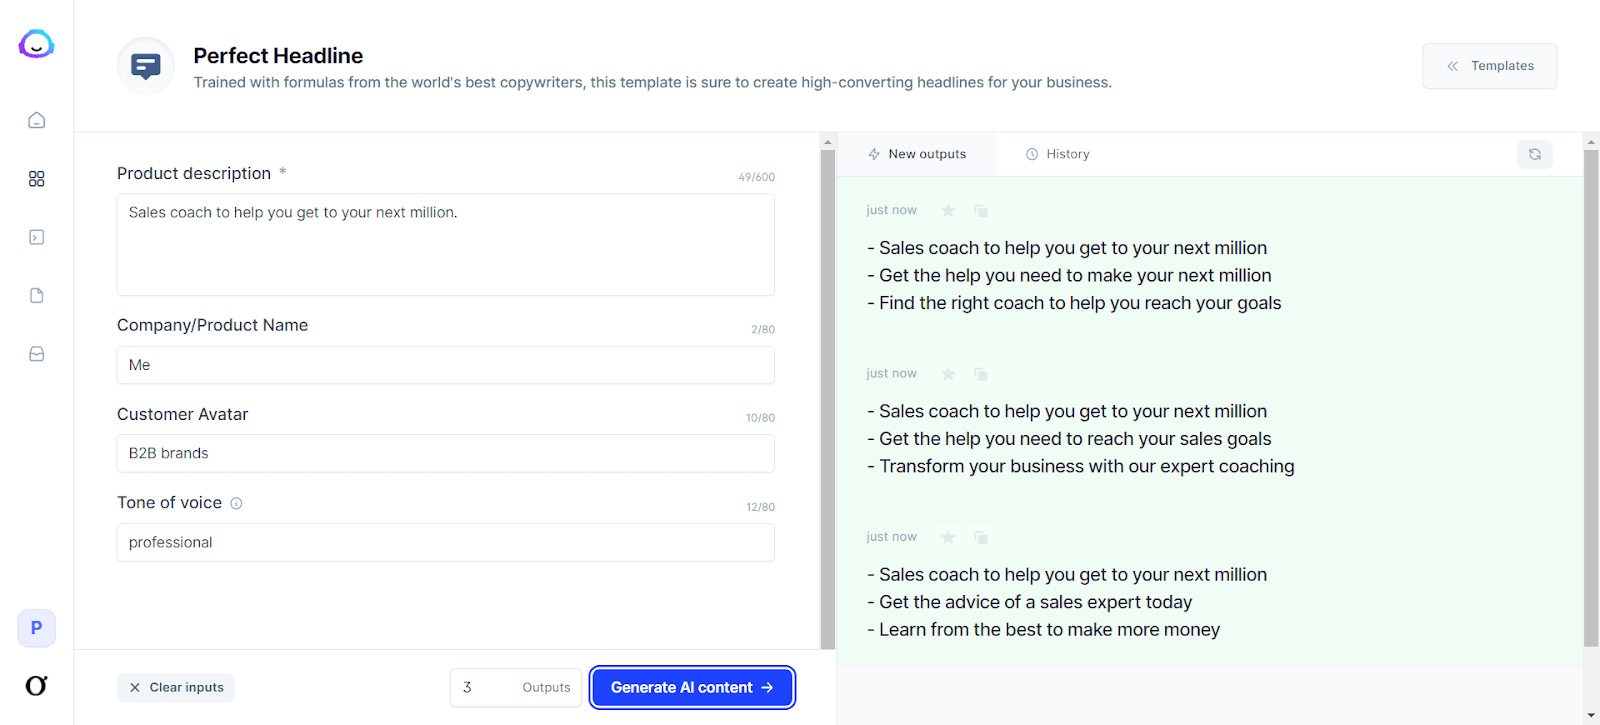
6. Peppertype.ai 

Peppertype.ai is another AI-based content generation tool that claims to create content ten times faster, boost Google ranking, and optimize conversions.

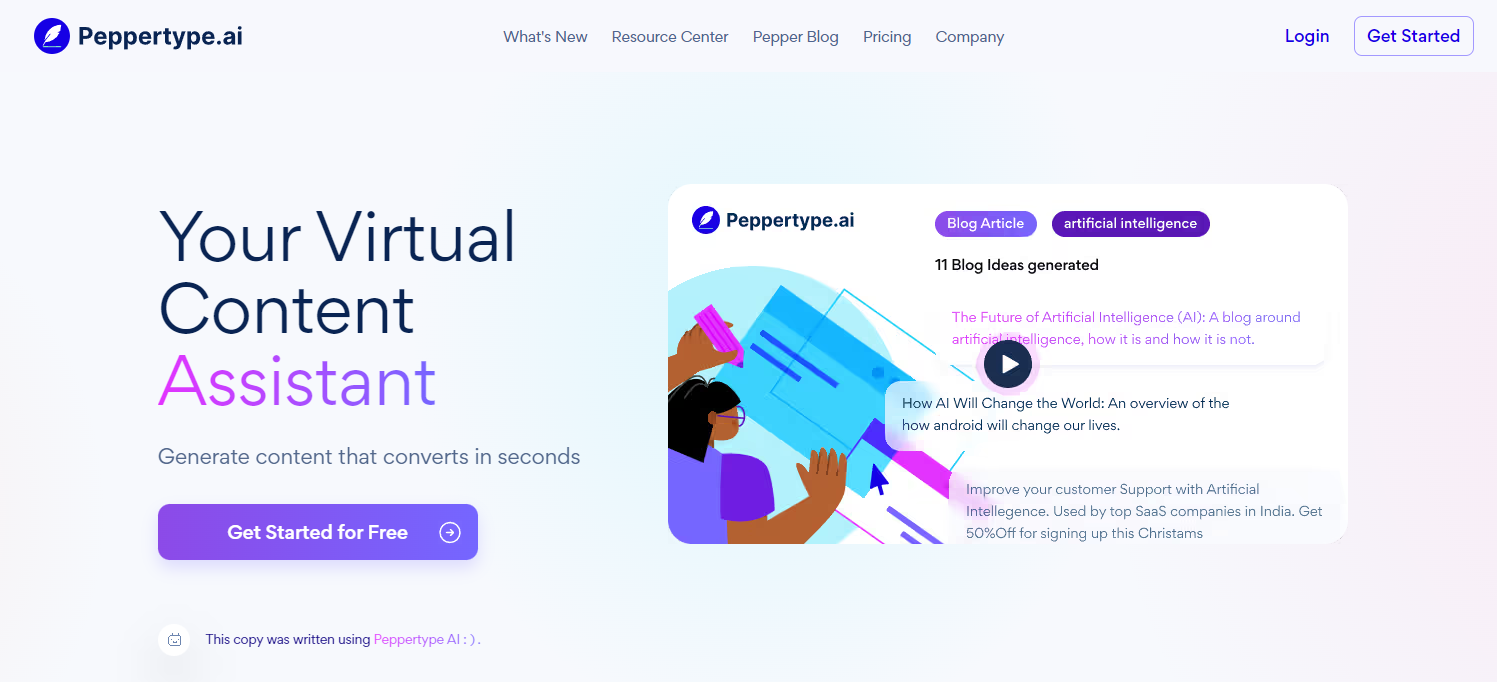
It’s a simple but valuable tool for writers who need help getting started on their next article, email, or blog post.

Some of its use cases include a product review generator, Amazon product descriptions, personal bio, email subject lines, cold emails, paragraph writing, Google Ad copy, Meta descriptions, blog outlines, blog conclusion, and more.

Key Features: 

  • Projects: You can organize your content under Projects, which will group similar types of content so that you have an easier time finding and repurposing the content.

Projects

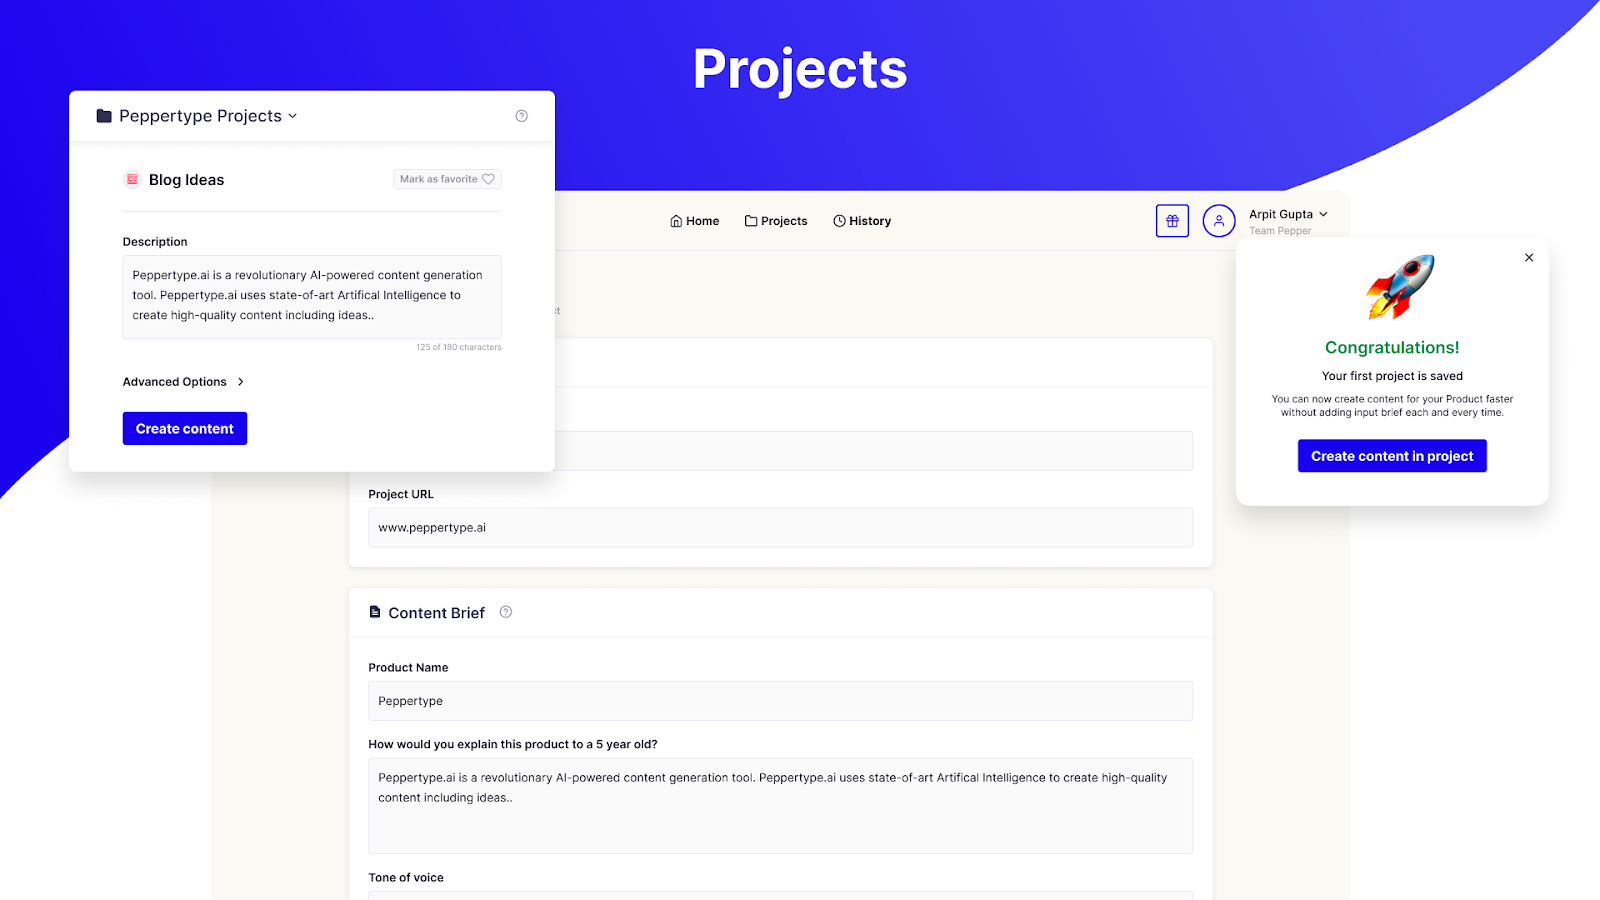
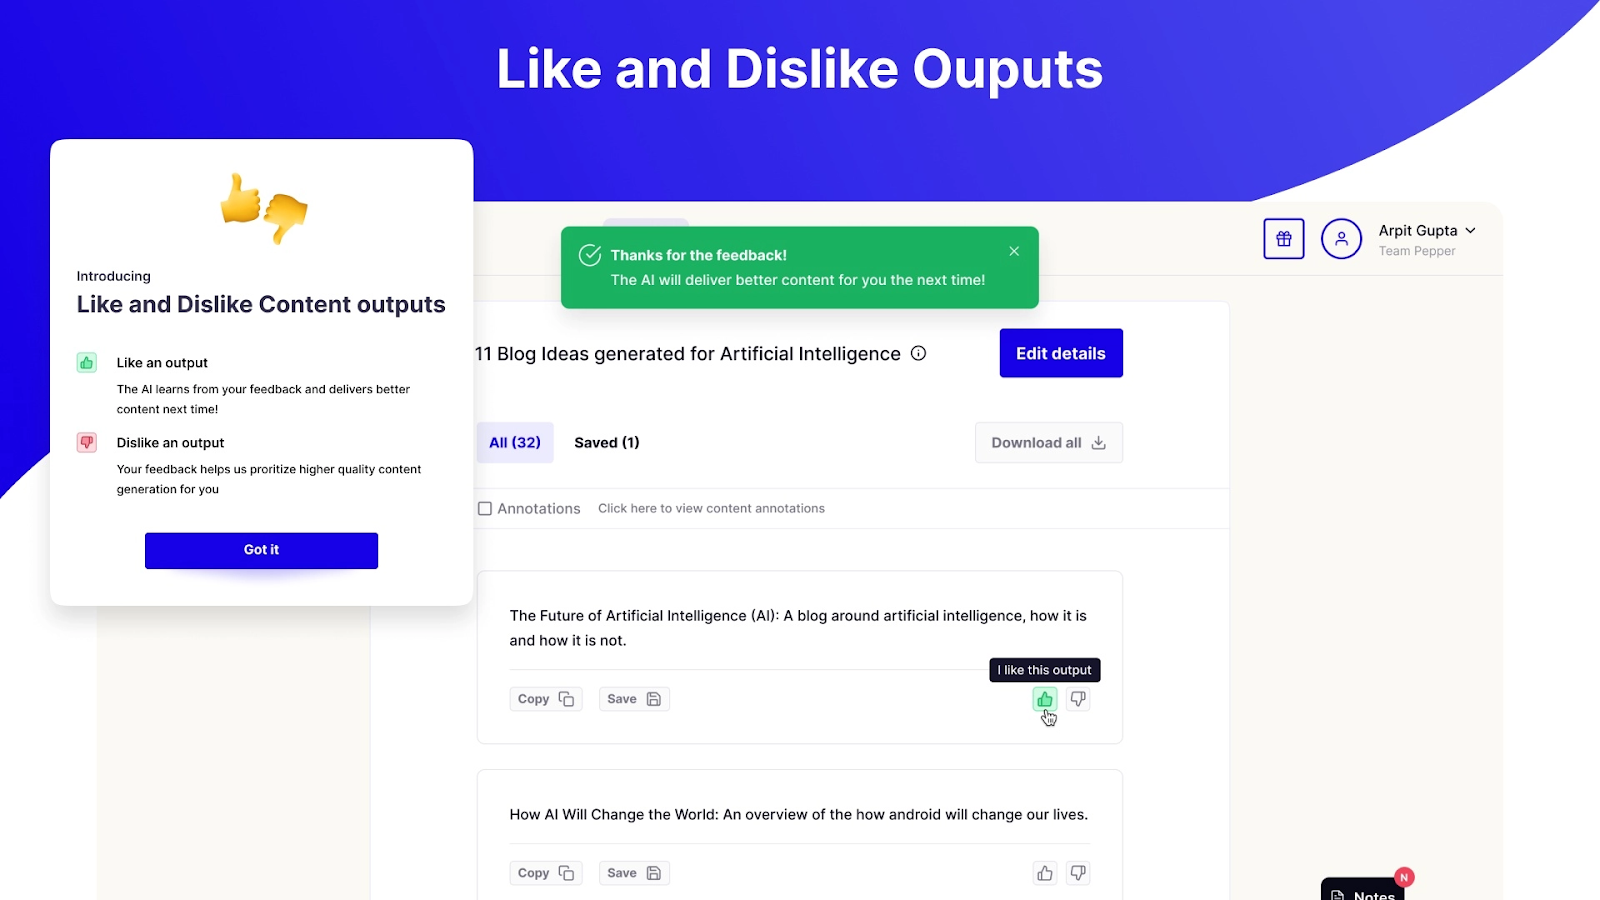
  • Output personalization: You can like or dislike the output so that the AI behind it can learn your preferences and improve its performance.

Personalizing output

Pros: 

  • If you invite your friends to use Peppertype.ai, join our community, write them a review, and schedule a training call, they’ll reward you with more word credits.
  • You can create teams, projects, and workspaces.
  • You can filter out unwanted results with annotations.

Cons: 

  • One seat is expensive, and the price increases with each added seat.

Pricing: 

It starts at $35/month for one user, 50K words, 40+ use cases, unlimited projects, customer support, and more.

7. Anyword 

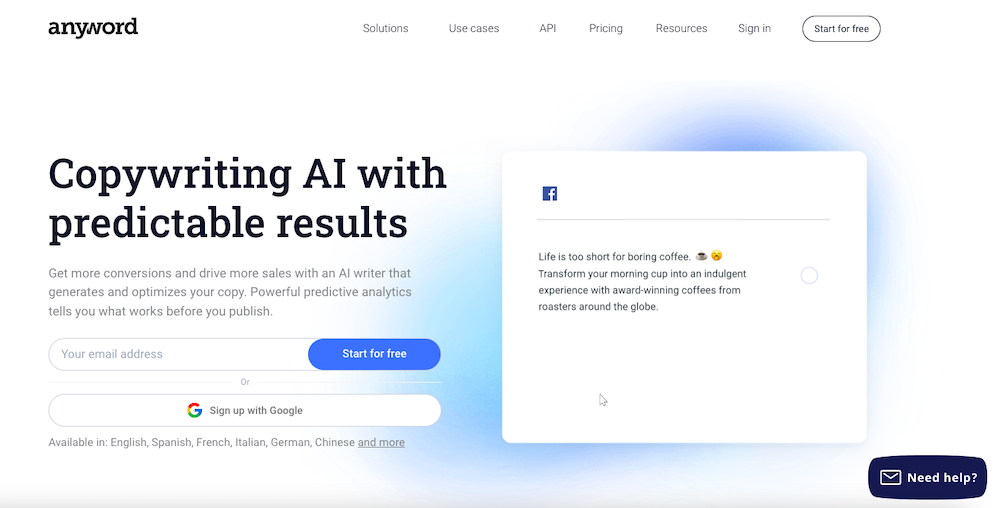
Anyword is a copywriting AI that creates content tailored for your customers and target audiences. 

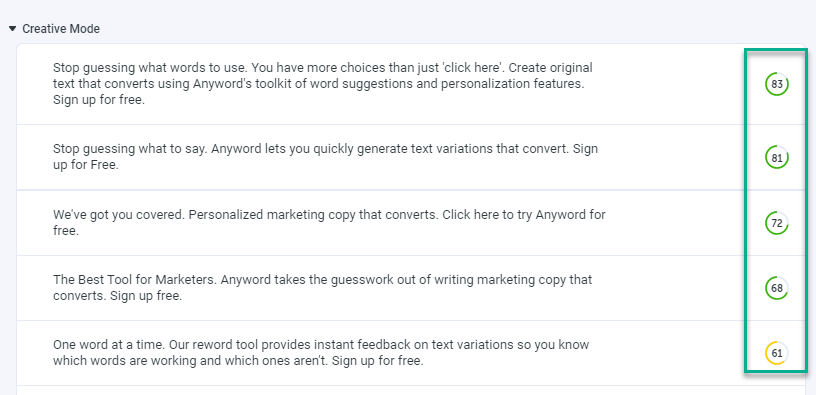
It has a unique feature – the predictive performance score to predict how well your copy will perform and engage with your audience. This helps you write optimized texts that boost your conversions.

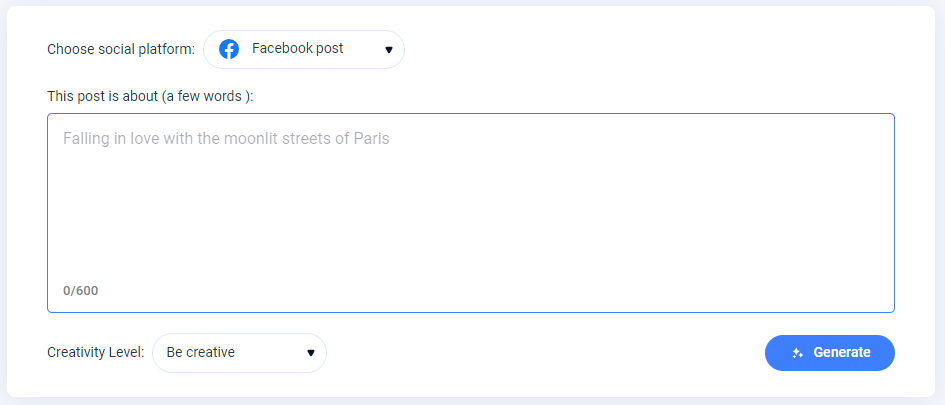
It has 11 major use cases, including a social post generator, Instagram caption generator, sentence rewriter, AI writer tool, meta description generator, Ad copy, landing page, blog, and more. 

Generating Facebook Post

Although it can create blog post titles and outlines, it’s better suited for writing short-form content like ad copy, product descriptions, and headlines. When writing a blog post, it can generate the title, outline, and introduction before creating body paragraphs.

Key Features: 

  • Predictive Performance Score: This score is given to your copy based on its potential to perform well with your target audience. This can help you immediately improve your copy.

Predictive Performance Score

  • Website Triggered Messages: This feature helps you create and deploy multiple copy variations on your website and apply the best one automatically.

Pros: 

  • It offers a predictive performance score to optimize your copy beforehand.
  • It also offers a free social post generator. No sign-up is required.
  • It automatically creates and runs multiple copy variations to determine the best one.
  • A Freemium plan is available.

Cons: 

  • Limited use cases.
  • A bit expensive for the credits and the number of use cases it offers.

Pricing: 

It costs $24/month for 20K words and one seat.

8. Scalenut 

Scalenut uses Natural Language Processing (NLP) to produce content that ranks higher on search results. It also gives insights into statistics such as word count, grade level, H tags, readability, and the number of images you should use in your content piece. 

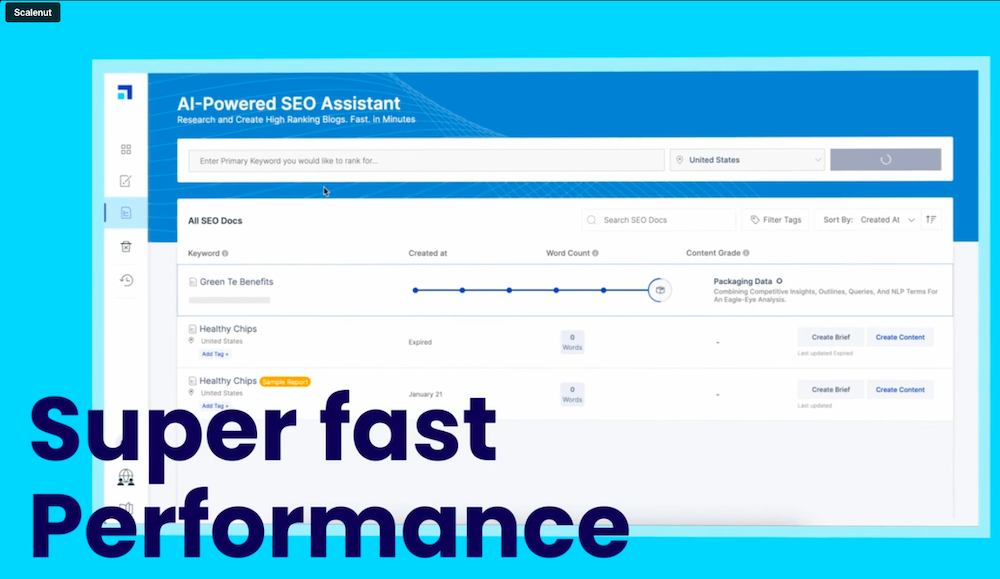
Aside from that, it offers a variety of use cases, including SEO Hub, AI Copywriter, Talent Network, Chrome Extension, Cruise Mode, and more. With these features, you can create content for blog ideas, product descriptions, website copies, blog intros, and more.

Key Features: 

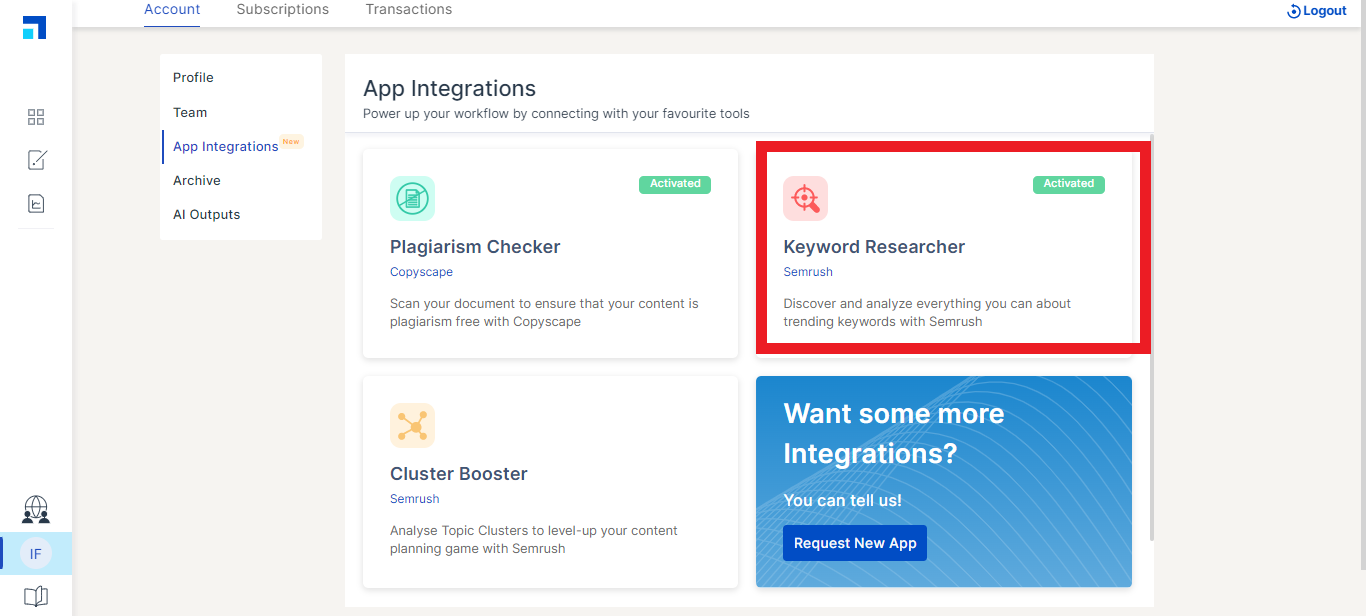
  • Integrations: You can integrate Scalenut with SEMrush for keyword research, cluster boost, and Copyscape to check plagiarism.

App integrations

  • Cruise Mode: Cruise Mode helps you create blog content in 5 minutes. You just need to provide your blog post’s title, outline, and main points to get your intended content. You’ll also get a real-time quality score that helps you improve your search ranking.

Pros: 

  • It offers a quality score.
  • Affordable plans with a 7-day free trial.
  • 24*7 chat & email support.

Cons: 

  • Limited use cases and features.
  • Content quality is not consistent for all businesses.

Pricing: 

It starts at $12/month for 100K AI words, 5 SEO reports, 24*7 chat and email support, and more.

9. Frase.io 

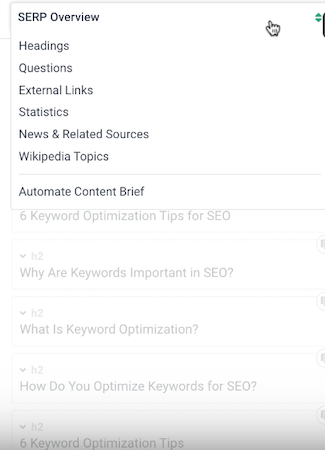
Frase.io is an all-in-one AI writing tool that helps you, research competitors, develop content briefs, and produce and optimize content.

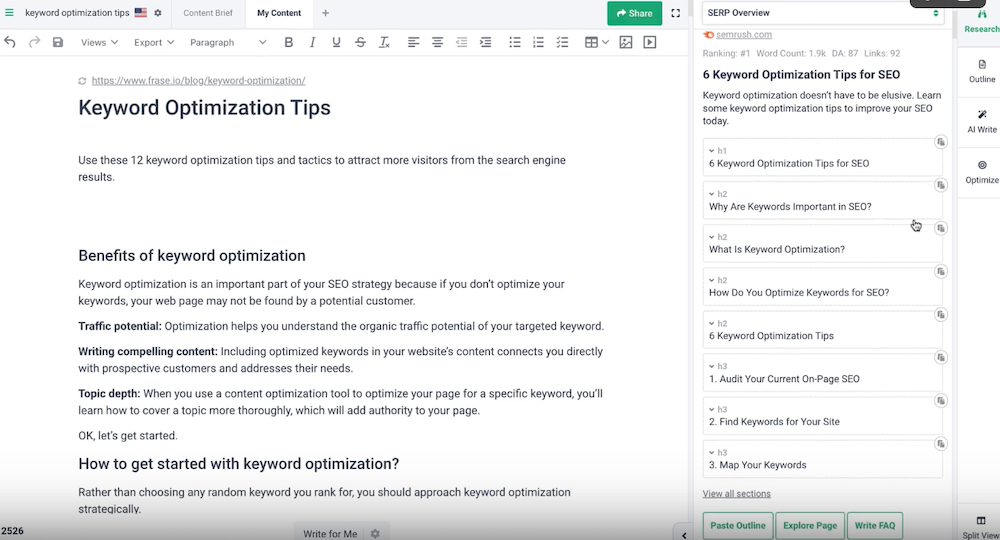
First, you’ll analyze your search competitors using Frase so you can see what your competition is writing about. Next, you can focus on Then, your overall outline or dig deeper by focusing on individual headlines, external links, statistics, etc. 

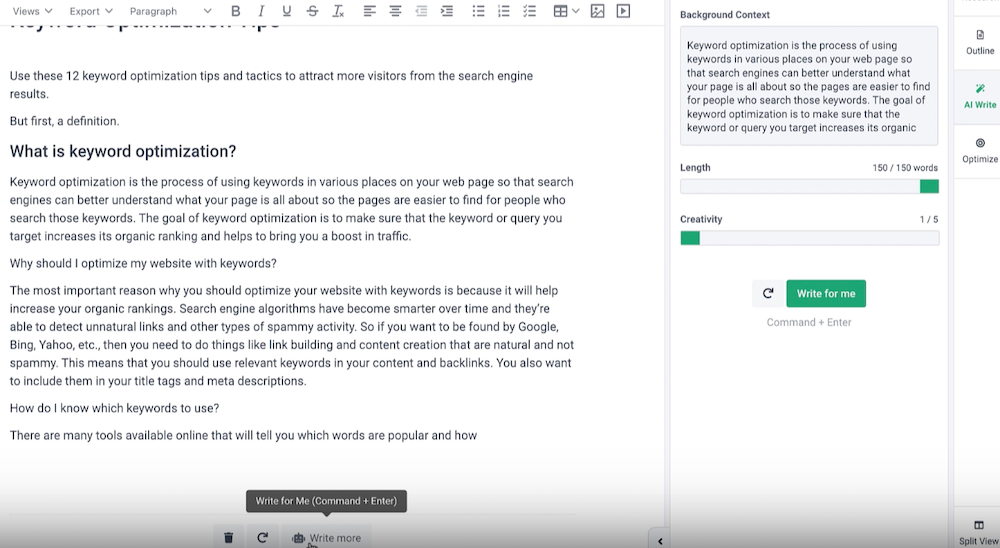
Next, use Frase’s AI writer to finish your draft. You can choose from dozens of use cases to generate content, including product descriptions, blog introductions, and more. You can even automatically expand on what you’re currently writing or rewrite what you’ve already written. 

Finally, you can optimize your draft using recommended keywords and readability scores. Again, Frase provides real-time feedback as you fill in the gaps. 

Key Features: 

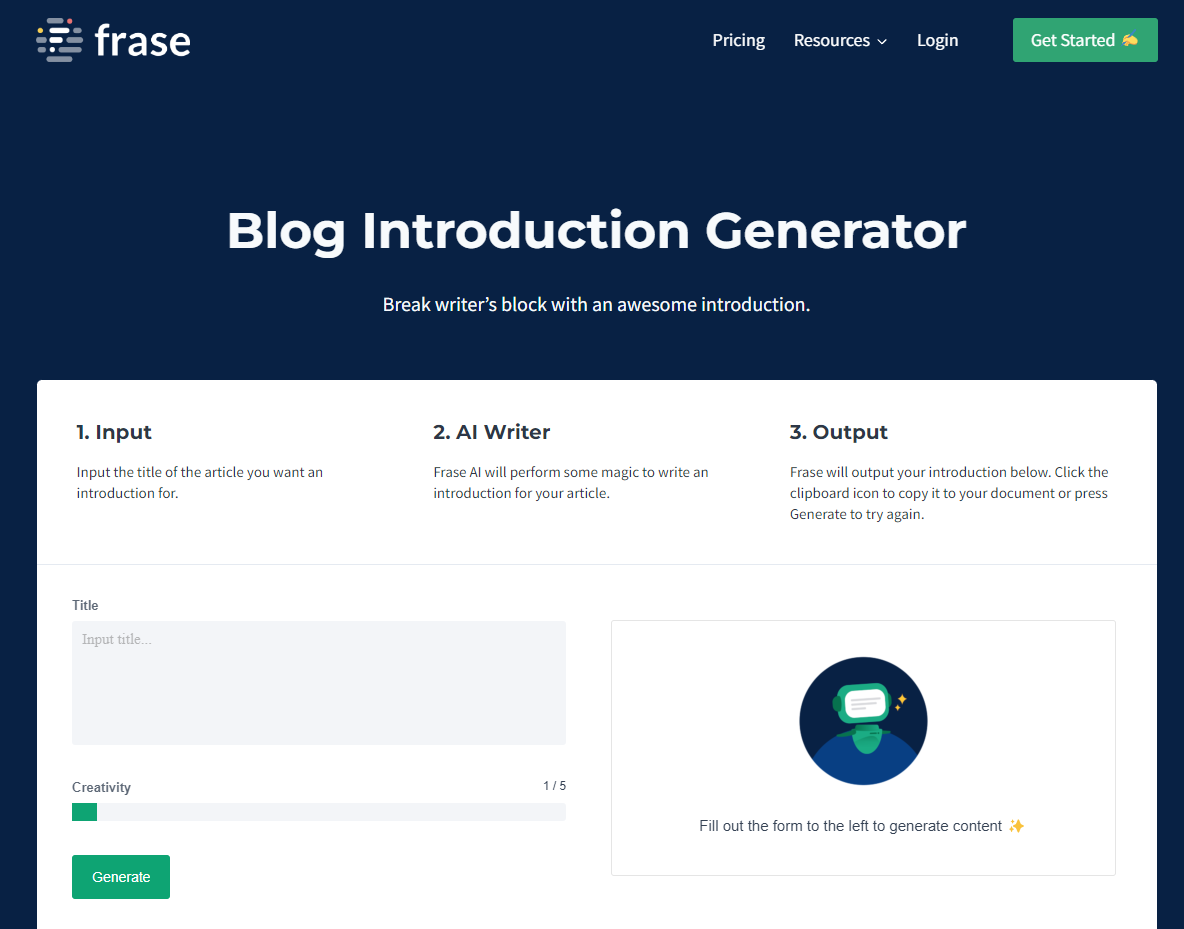
  • AI Writing Tools: They include an AI content generator, introduction generator, outline generator, paraphrasing tool, paragraph rewriter, blog title generator, meta description generator, product description generator, slogan generator, summary generator, sentence rewriter, and more. 

Blog introduction generator

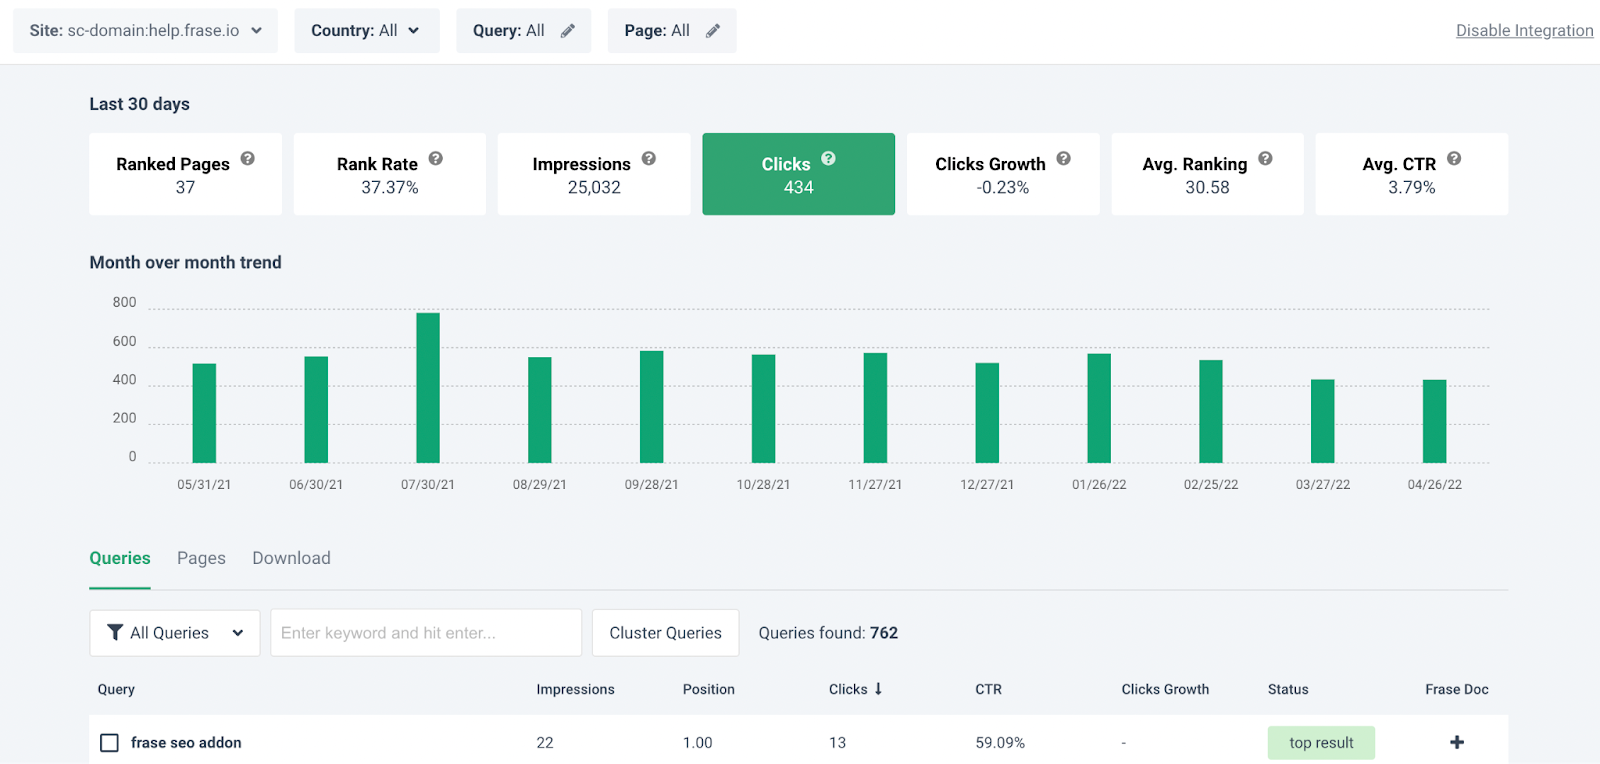
  • Content Analytics: It fetches data from Google Search Console to provide insights into organic growth, content decay, and keyword opportunities.

Frase Content Analytics

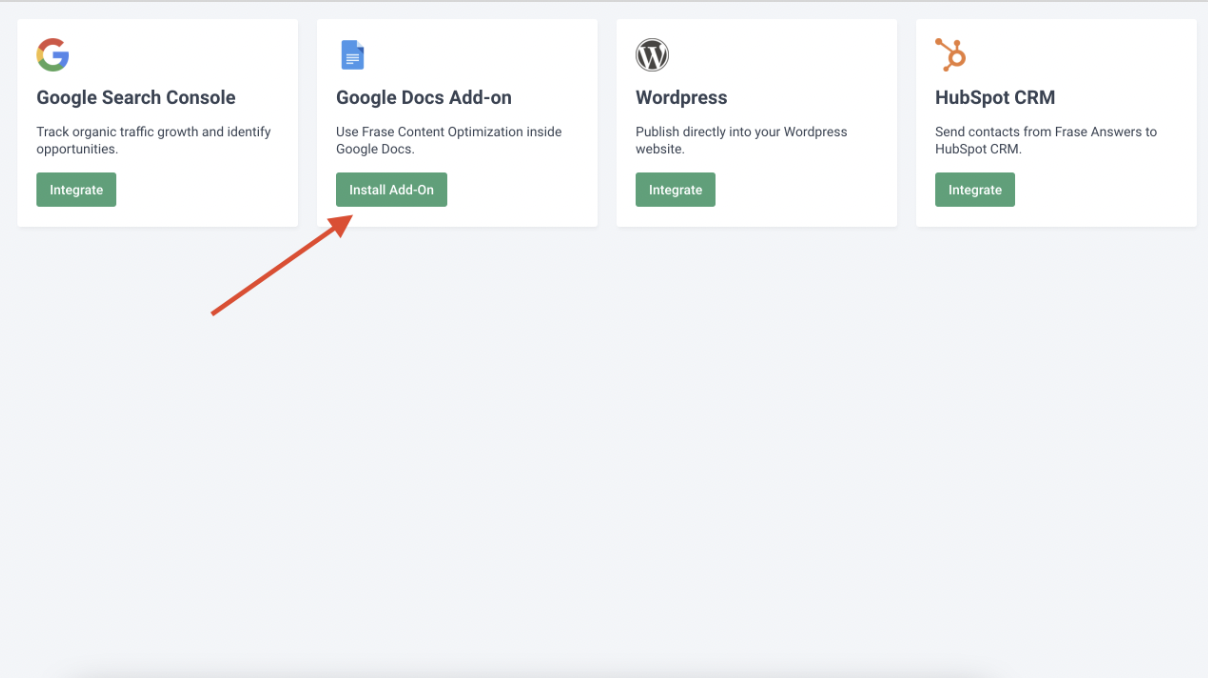
  • Integrations: It integrates with Google Docs, Google Search Console, and WordPress. It also offers a Chrome extension.

Frase Integrations

Pros: 

  • You can add multiple pages in a single doc.
  • It offers content analytics, allowing you to see which articles are getting the most traction and which ones are not.
  • It enables you to do competitors’ research.

Cons: 

  • Limited word credits in each plan.
  • Max 3 seats available.

Pricing: 

It starts at $14.99/month for one user, 20K AI characters, and four articles (write/optimize) per month. There’s also a 5-day free trial for $1. 

10. Surfer SEO 

Surfer SEO is an SEO tool and AI writing assistance that uses Natural Language Processing (NLP) and machine learning (ML) to help you manage and improve your content strategy.

Rather than creating the body of your copy, it helps you create outlines and optimize the content you write based on that outline. 

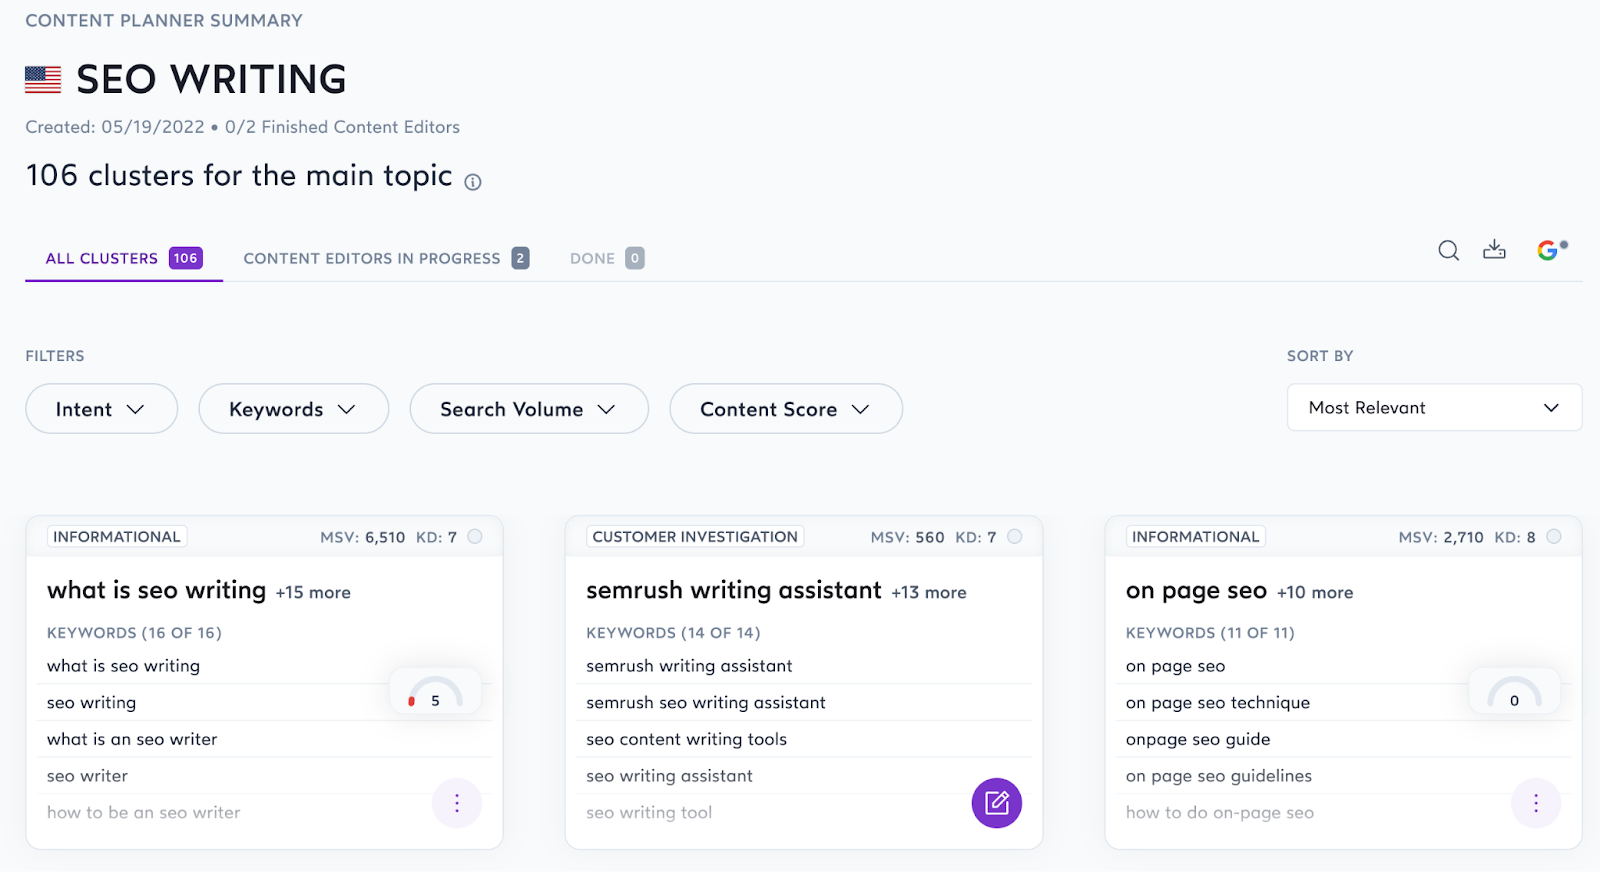
It helps you to evaluate your content and find places to improve it using its content score metric, competitor research, SERP analyzer, and keyword recommendations. It also offers a content planner that you can share with your team. 

Key Features: 

  • Outline Builder for Content Editor: The tool generates headlines and paragraphs based on your competitors’ postings. You can use that content as is or edit it by copy-pasting it into the editor. Content paragraphs are available in English, German, French, Polish, Swedish, and Dutch.

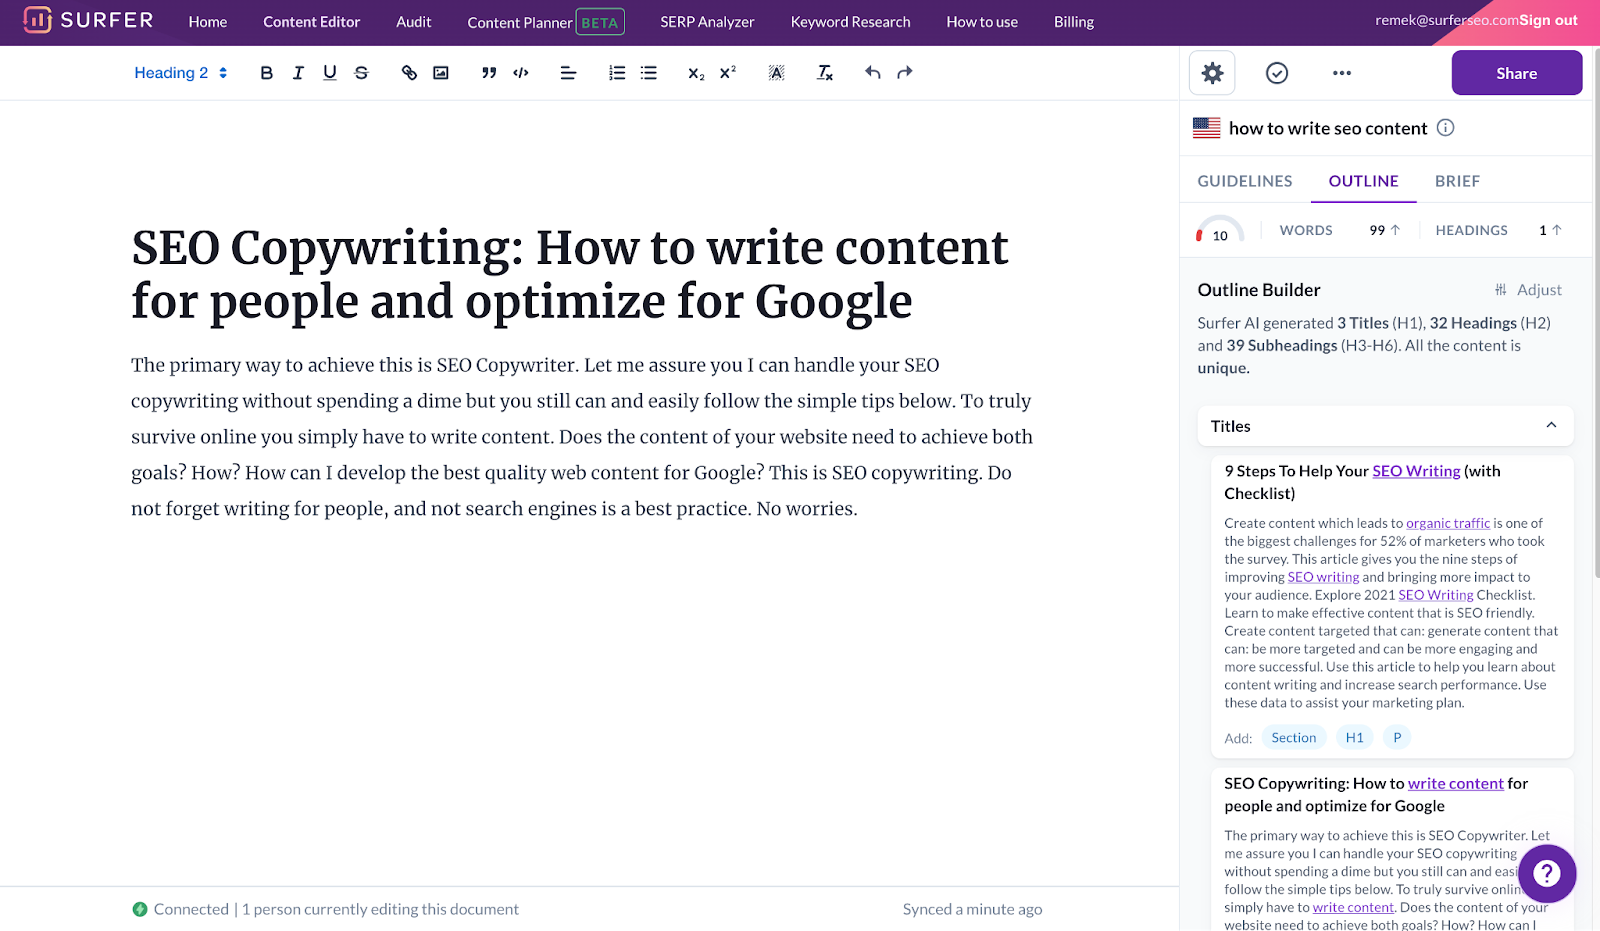
Outline Builder Content Builder

  • SEO Audit Tool: This tool performs step-by-step optimization on your website to improve your Google search results. When you pick an URL to audit, it provides suggestions such as missing backlinks, internal links, word count, and important keywords to use.

Terms to use

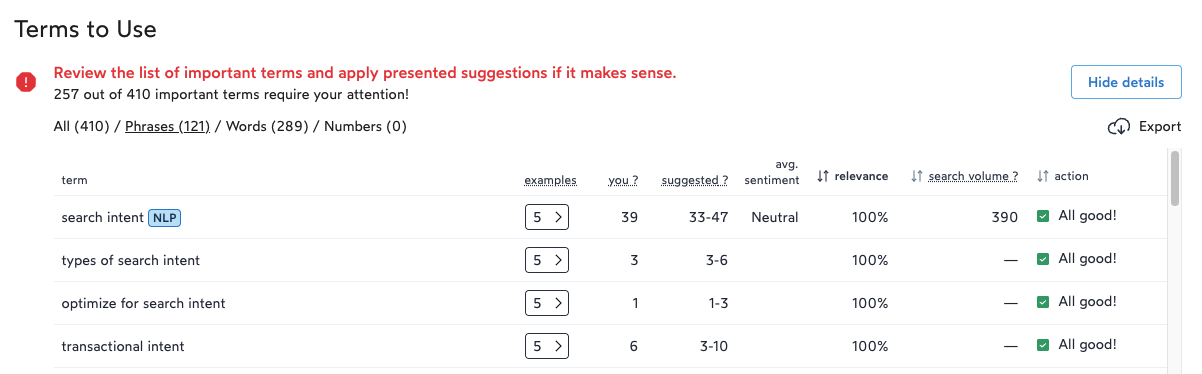
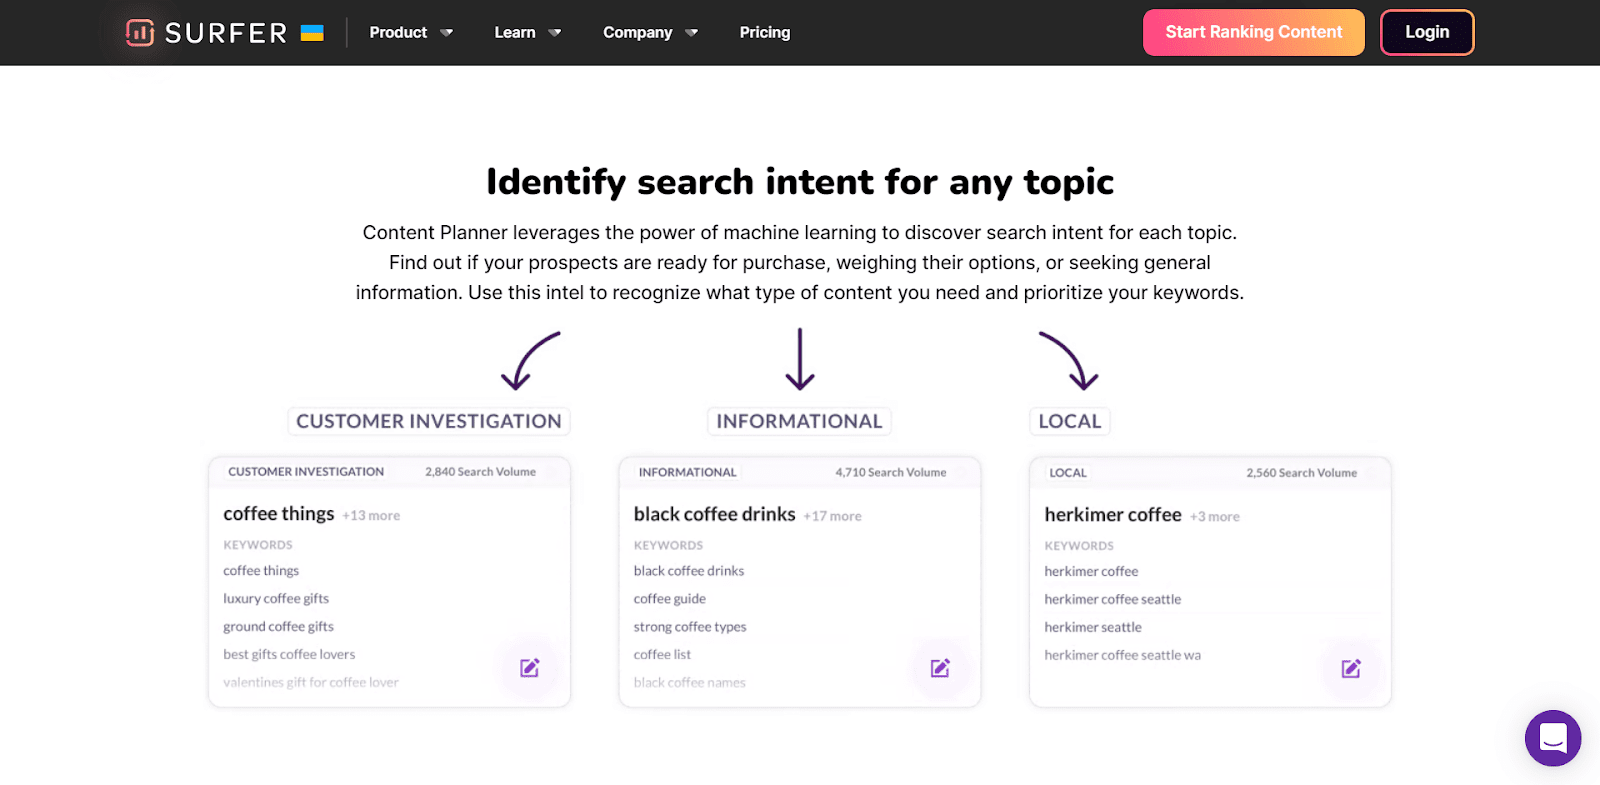
  • Content Planner: You can start with your content planner by keyword or domain. Based on your keywords, it comes up with clusters that you can use to create your content topics.

    However, there is a learning curve involved. You will need to understand topic clusters, search intent, and keyword difficulty, among other metrics.

Content Planner

Pros: 

  • Easy to use interface.
  • They offer a 7-day money-back guarantee – if you don’t find it helpful, you get your money back.
  • It identifies keyword stuffing and prevents you from doing so.

Cons: 

  • Each plan offers a limited number of pages that you can audit.

Pricing:

It starts at $49/month for one website tracking and ten articles/month.

11. Copysmith 

Copysmith markets itself as an AI content creation solution for teams. 

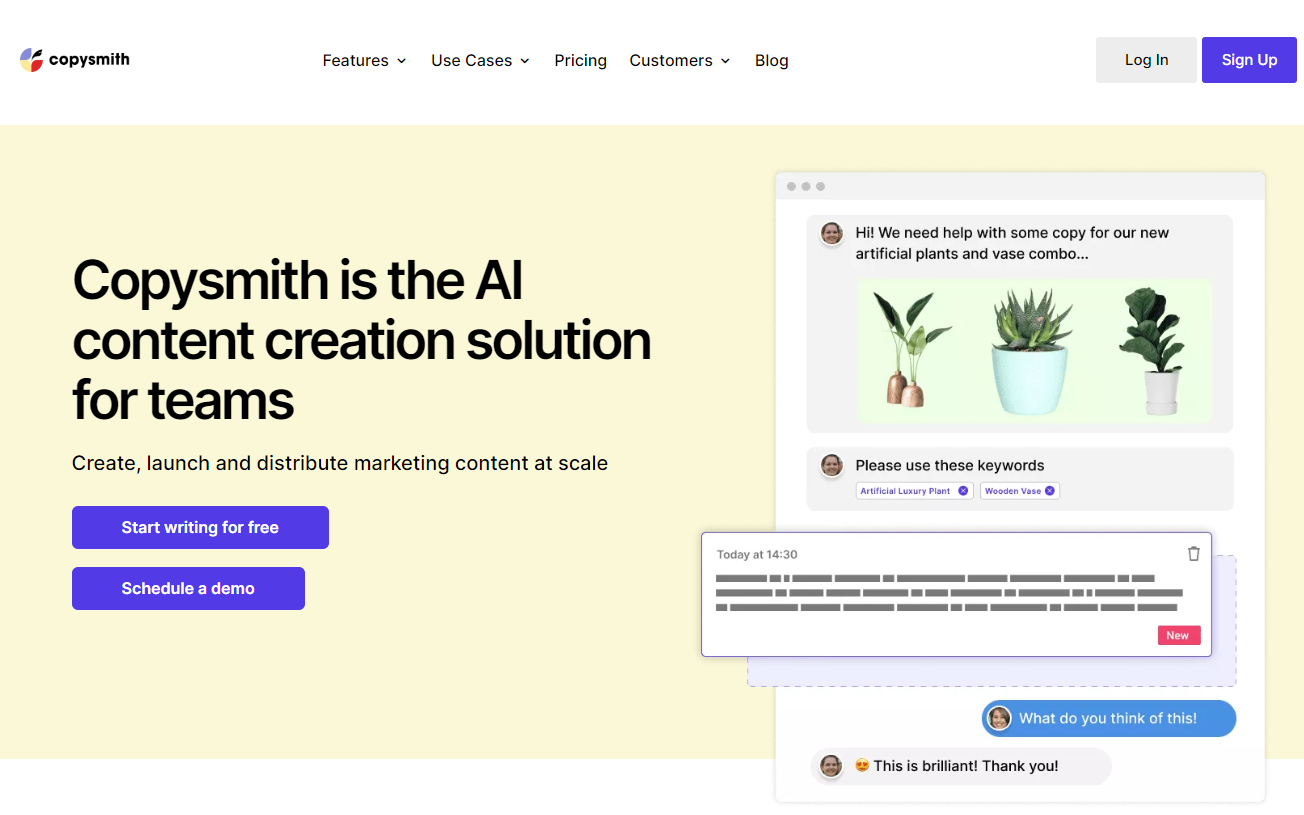
This AI writer is best suited for bulk and short-form content copy like product descriptions, blog templates, social media content, advertising content, and more.

Key Features: 

  • Use cases: It includes product descriptions, content enhancement, ads & social media, blog templates, and brainstorming. With Product descriptions, you can generate descriptions for eCommerce Products, Instagram, Amazon, eBay, Etsy, and Flipkart. Blog templates include blog titles, blog ideas, outlines, intro, Kickstarter, and more.

Product Description

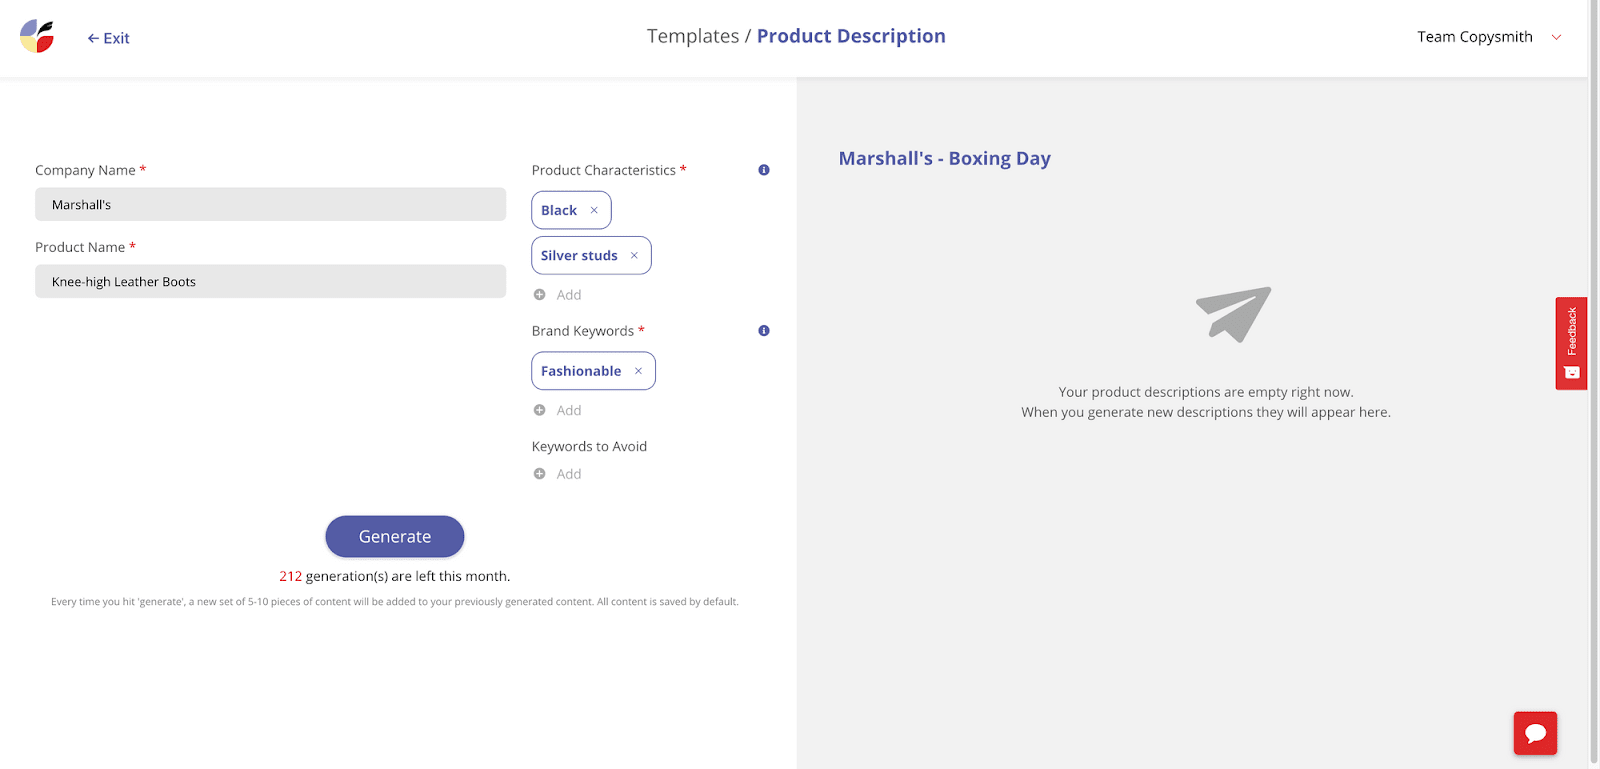
  • Campaign Builder: It includes several AI templates to help you generate SEO-optimized product descriptions, Facebook posts, and Google ads in just a few seconds. 
  • Integrations: Copysmith integrates with Frase to use SEO data, Google Ads to publish campaigns, Microsoft Word to produce content, and WooCommerce for products.

Pros: 

  • It’s easy to use and generates SEO-optimized content.
  • It comes with an in-built plagiarism checker.
  • Provides good training material for new users.

Cons: 

  • Not suitable for long-form content. 

Pricing:  

It starts at $19/month for 75 credits, up to 40K words, and up to 20 plagiarism checks.
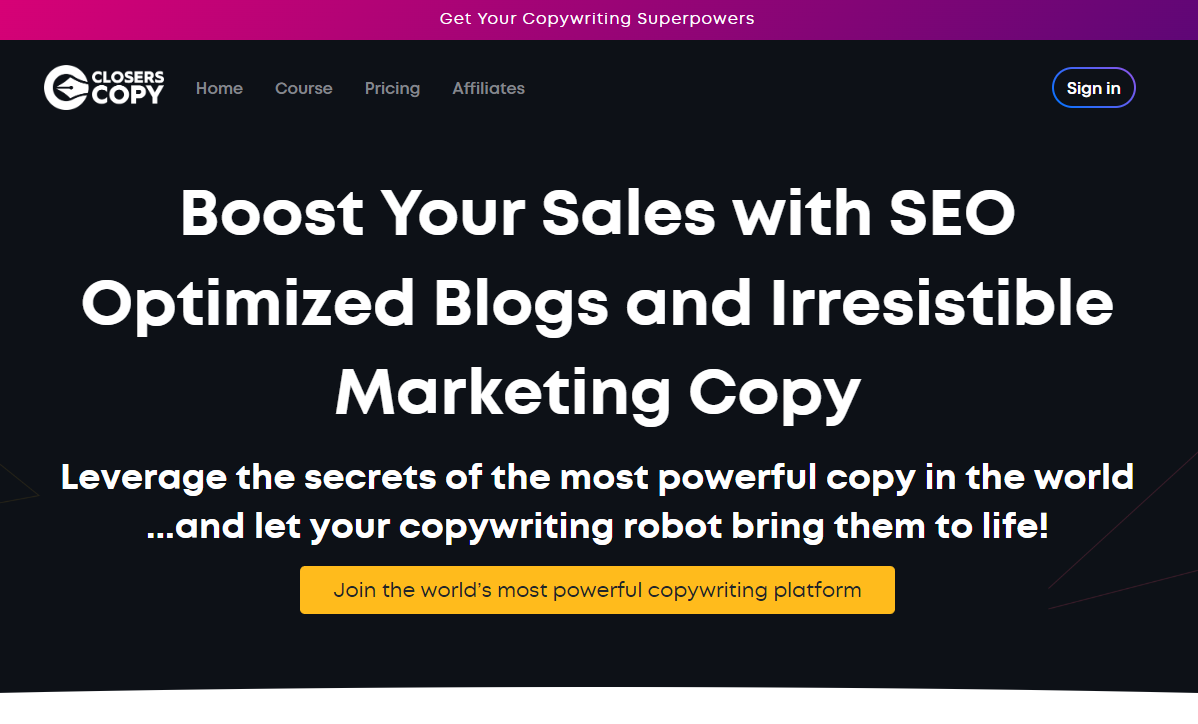
12. ClosersCopy  

ClosersCopy is an AI writing robot that provides various templates for producing marketing materials, including website content, sales copy, email marketing campaigns, and social media posts. This tool doesn’t require any special skills or training to create engaging text.

Key Features: 

  • Use cases: It includes Facebook & Google Ads, email subject lines, landing pages, sales copies, social media content, and more.
  • LongForm editor: You can create blog posts, articles, sales copies, and email marketing copies.
  • Drag-and-drop builders: The drag-and-drop content builder makes your tasks more manageable by allowing you to drag and drop elements on your copy. The only thing you need to do is provide some context at the time of configuring this builder.

Pros: 

  • Its user interface is easy to use and navigate.
  • You can easily create content with their drag-and-drop builder.
  • The video tutorials provide in-depth, step-by-step instructions for each process.
  • Tone analysis helps you understand the emotions in your writing.

Cons: 

  • No free plan or trial period is available.
  • More expensive than most other AI tools.

Pricing:  

It starts at $49.99/month for two seats, 300 AI runs, 50 SEO Audits, an SEO planner, Email support, and more.

13. LongShot AI

LongShot AI is another writing tool that can help you write SEO-friendly content. It comes with over 30 use cases and a plagiarism checker to ensure your content is original. 

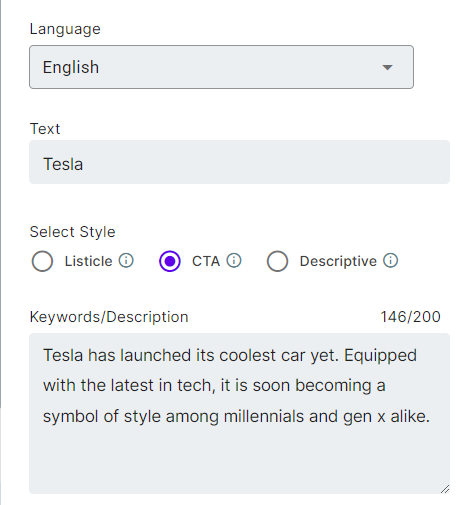
While most of its use cases are for short-form content, you can use templates like the content expander, write more, or bullets to text generator to assist you with your long-form piece. 

Key Features: 

  • Use Cases: It includes content rephrasing, FAQ generator, headline generator, blog ideas generator, meta description generator, text extender, blog insights creator, headline intro generator, product description generator, FAB copywriting framework generator, content readability improver, sales email generator, video description generator, and more.

Headline Generator

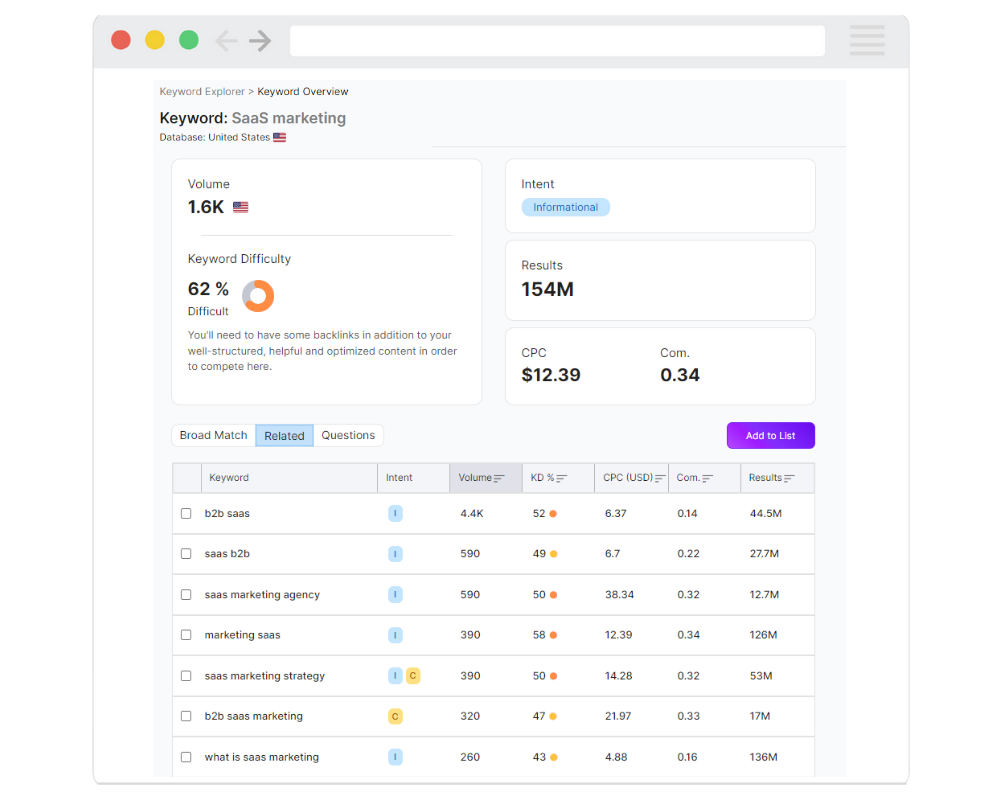
  • Integrations: It integrates with WordPress to enable you to export AI-generated copies directly to WordPress. Its integration with SEMrush will help you write SEO-friendly content. Apart from these, LongShot AI will also provide integration with Hubspot and Grammarly soon.

LongShot X SEMrush

  • LongShot AI Community: The LongShot AI Community is a group of researchers and developers working on open artificial intelligence problems. Anyone can join and contribute to the research.

Pros: 

  • The free forever plan offers ten credits daily.
  • Community is a big help for new users.
  • It gives you multiple ways to know more about the product, including blog posts, help videos, customer support, and announcements.

Cons: 

  • Aside from the free plan, it’s costly, especially considering the limited number of use cases and credits.
  • Doesn’t have use cases for social media content.
  • Supports only eight languages.

Pricing: 

It starts at $49/month for 1000 monthly credits, one user, basic integrations, and more.
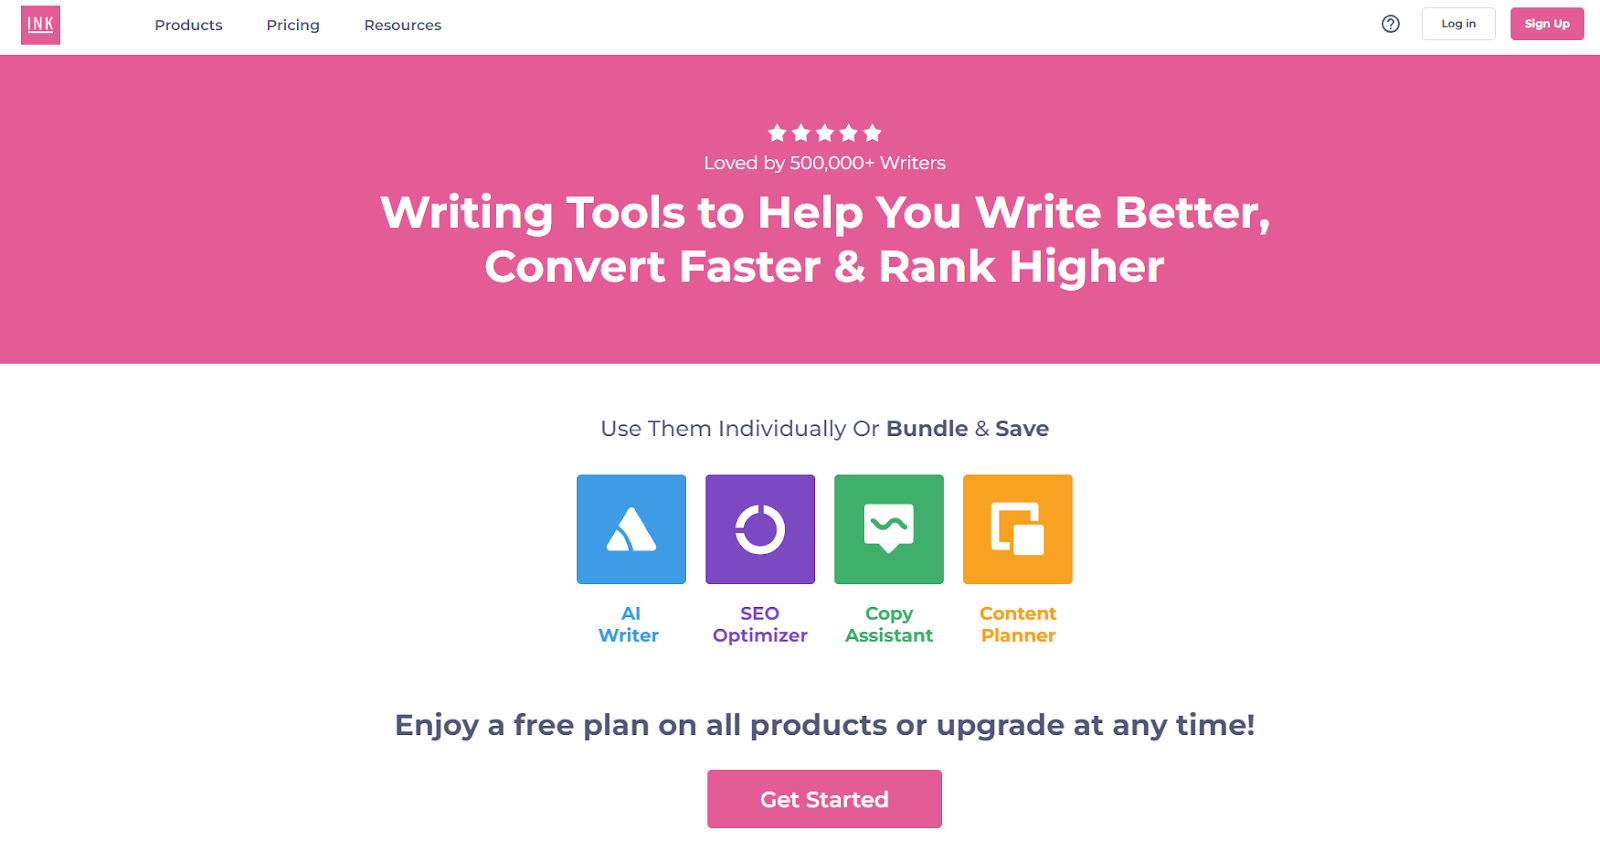
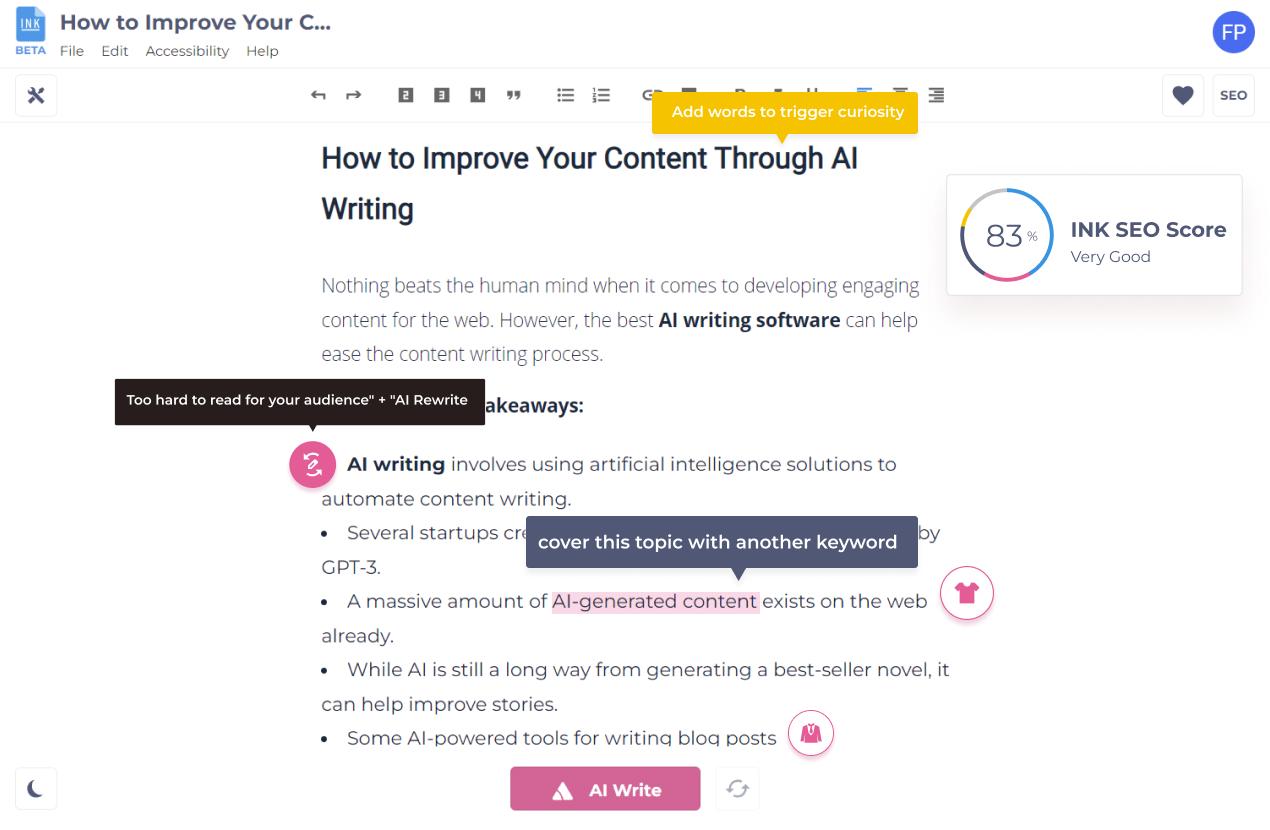
14. INK Editor

Inky is a suite of content marketing tools that include AI-powered tools: AI Writer, SEO Optimizer, Copy Assistant, and Content Planner. These features can be used individually or collectively, and the price will be adjusted accordingly.

The AI Writer offers unlimited credits and helps you write long-form and short-form content. In addition, you can re-edit the generated copy with a single click as often as you want. The tool also offers WordPress plugin integration and open-source export API.

In addition, you get access to use cases like product descriptions, social media copies, sales copies, blogs, essays, emails, microcopies, product ideas, and more.

AI Writing Tools

Key Features: 

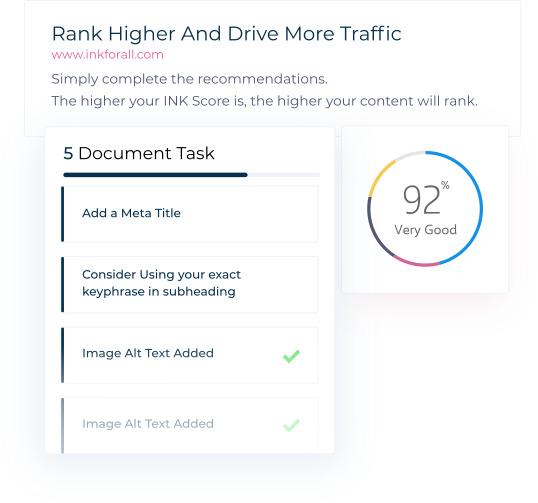
  • SEO Optimizer: INK’s SEO Optimizer is a natural language optimization tool that can improve your SEO score and increase engagement by providing recommendations on keywords, titles, alt text, and the like. Enter a keyword or phrase, and the INK SEO Optimizer will do the rest.

SEO Optimization Score

  • Content Planner: The INK Content Planner helps you group keywords and analyze search intent. You can also import your keywords and download your clusters for further analysis.
  • Copy Assistant: A built-in grammar checker automatically checks your grammar and spelling. It also checks words, tone, and sentence fragments.

Pros: 

  • Easy to use.
  • You can use it as an all-in-one content marketing tool. 
  • Offers unlimited AI text writing even on a free plan.
  • Offers keyword clusters to optimize your SEO strategy.

Cons: 

  • The paid plan is relatively costly for one seat.

Pricing: 

It starts at $50/month for one seat, INK Copy Assistant PRO, INK AI Writer PRO, INK SEO Optimizer PRO, and INK Content Planner PRO with 1,000 Keywords.

15. Articoolo

Articoolo is an AI content generator developed by a group of mathematicians, computer scientists, content writers, and marketing specialists. Thanks to NLP and AI technology, the tool drafts articles in a way that mimics the human brain.

Key Features: 

  • Use Cases: It includes Text Writer, Article Rewriter, Article Summarizer, and Image Scraper. Based on your keyword, Articoolo will also fetch images from royalty-free websites.
  • WordPress Plugin: This will help you export your copies directly to WordPress so you can post faster.
  • Plagiarism Checker: All you have to do is enter your text into the program, and it will scan for instances of plagiarism.

Pros: 

  • It has pay-per-use plans.

Cons: 

  • There’s no official website.
  • Customer support is missing the mark.
  • Not much information about the tool online.

Pricing: 

It starts at $19/month for a ten-article fixed package.

16. NeuralText

NeuralText is a writing tool that offers users keyword reports and cluster credits. It also has an API for developers looking to integrate its services into other programs.

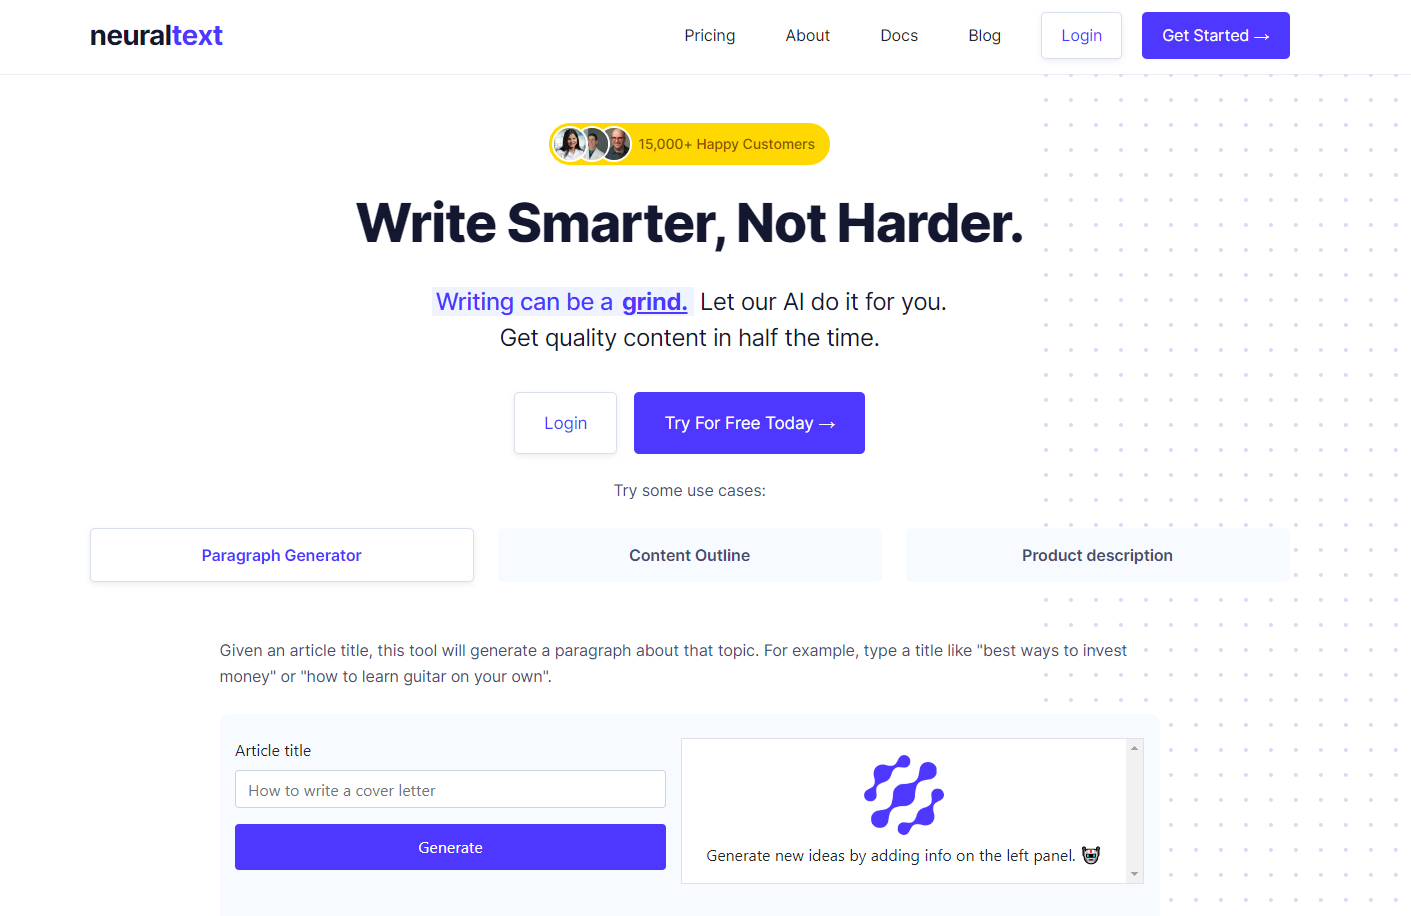
Some of its most prominent use cases include a paragraph generator, content outline, and product description – making it a short-form content-centric tool. 

The best part is that it not only creates content but also creates content briefs and optimizes the content based on keywords and SERP analysis.

Key Features: 

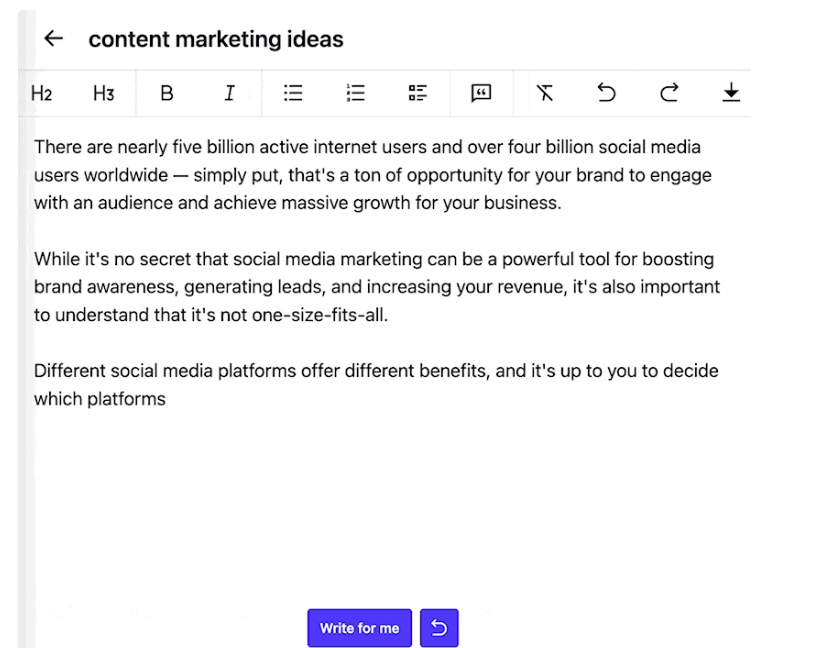
  • AI Writing Assistant: This tool will help you produce text in any format. It also provides text recommendations while you write.

AI Writing Assistant

  • Content Optimization: NeuralText can help make your content more search engine-friendly and improve its score in Google’s search results. It analyzes your word choice and sentence structure to ensure your content is easy to scan and relevant to your topic.

Content Score

  • Content research analysis: It makes content research and studies more accessible, allowing you to see real-time data across SERPs. It also has a Google Docs-style editor, making managing your data points and keeping track of your research effortless.

Content research analysis

Pros: 

  • Free plan available.
  • Offers keyword clusters.
  • You can group content into different projects.

Cons: 

  • The community is not active.
  • A bit on the expensive side. 

Pricing: 

It starts at $49/month for one user, unlimited AI text generation, 50 content analyses, and 50 keyword reports.
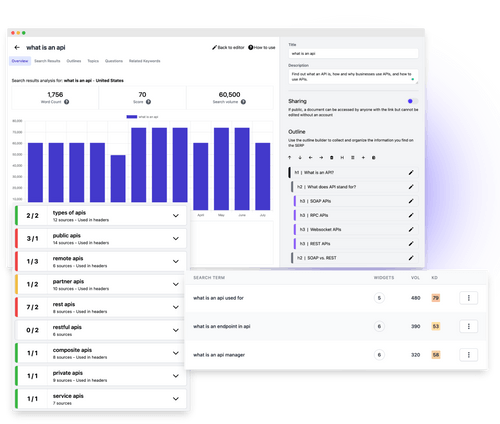
17. AI Writer

AI Writer helps you create unique, SEO-friendly content that you can publish directly to WordPress. In addition, it offers features like research & write, text rewording, verifiable citations, and source summarizer.

Key Features: 

  • AI-Writer Content Kit: AI Writer uses artificial intelligence to analyze keyword difficulty and ranking opportunities based on the field you enter. It chooses up to 250 keywords and generates one article per keyword, which can be directly published to WordPress.
  • (Sub)Topic Discoverer: It checks to see what other writers have written about and then uses that information to create new topics for you.
  • Verifiable Citations: When it produces content for you, it also provides a list of citations so that you can check the accuracy of the information.

Pros: 

  • It offers a free trial for seven days.
  • One of the few AI writing tools to offer verifiable citations so you can confirm the accuracy of the content.

Cons: 

  • Not enough resources in the knowledge base for new users.
  • Fewer use cases.
  • Does not offer a free version.

Pricing: 

It starts at $29/month for one user and up to 40 articles.
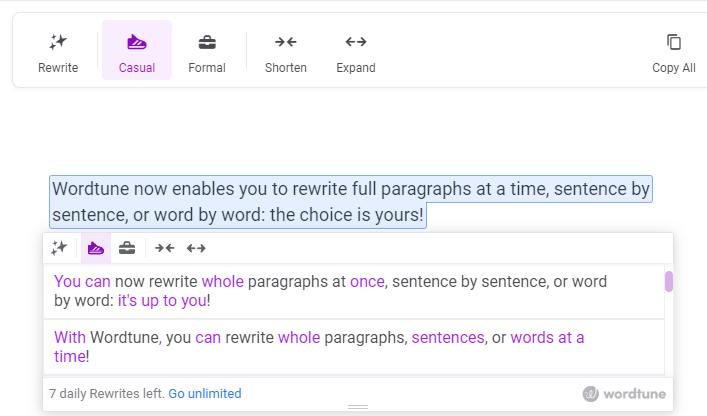
18. Wordtune

Wordtune makes your previously written content clearer, more compelling, and more authentic by bringing out the best.

Although this tool doesn’t write content from scratch, it makes your content look more professional. It also integrates with Microsoft Word, so you can edit your work while you write your content.

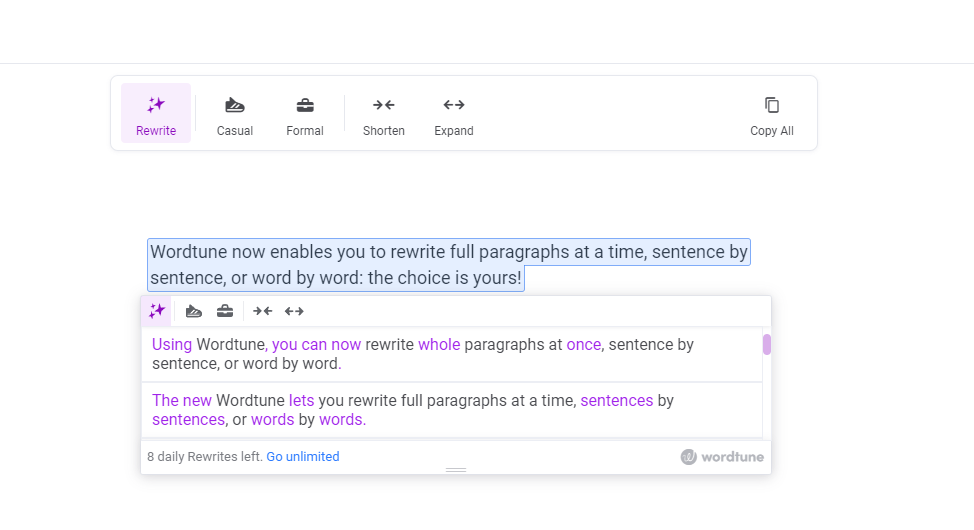
It provides tools to: 

  • Rewrite your content 
  • Make your content casual 
  • Make your content formal 
  • Shorten your sentences to make them crisp 
  • Expand your sentences to give more detail 

Key Features: 

  • Paragraph Rewriter: Wordtune can rewrite your paragraphs entirely at once, one sentence at a time, and one word at a time. See below for an example.

Paragraph Rewriter

  • Tone: You can alter how your content appears by making it more informal or formal. Here’s an example: 

Casual Tone

Pros: 

  • You can make the text longer or shorter.
  • It offers a casual and formal tone.
  • Simple and easy-to-use interface. 

Cons: 

  • It doesn’t offer any other benefits besides rewriting.

Pricing: 

It starts at $9.99/month for unlimited rewrites. 
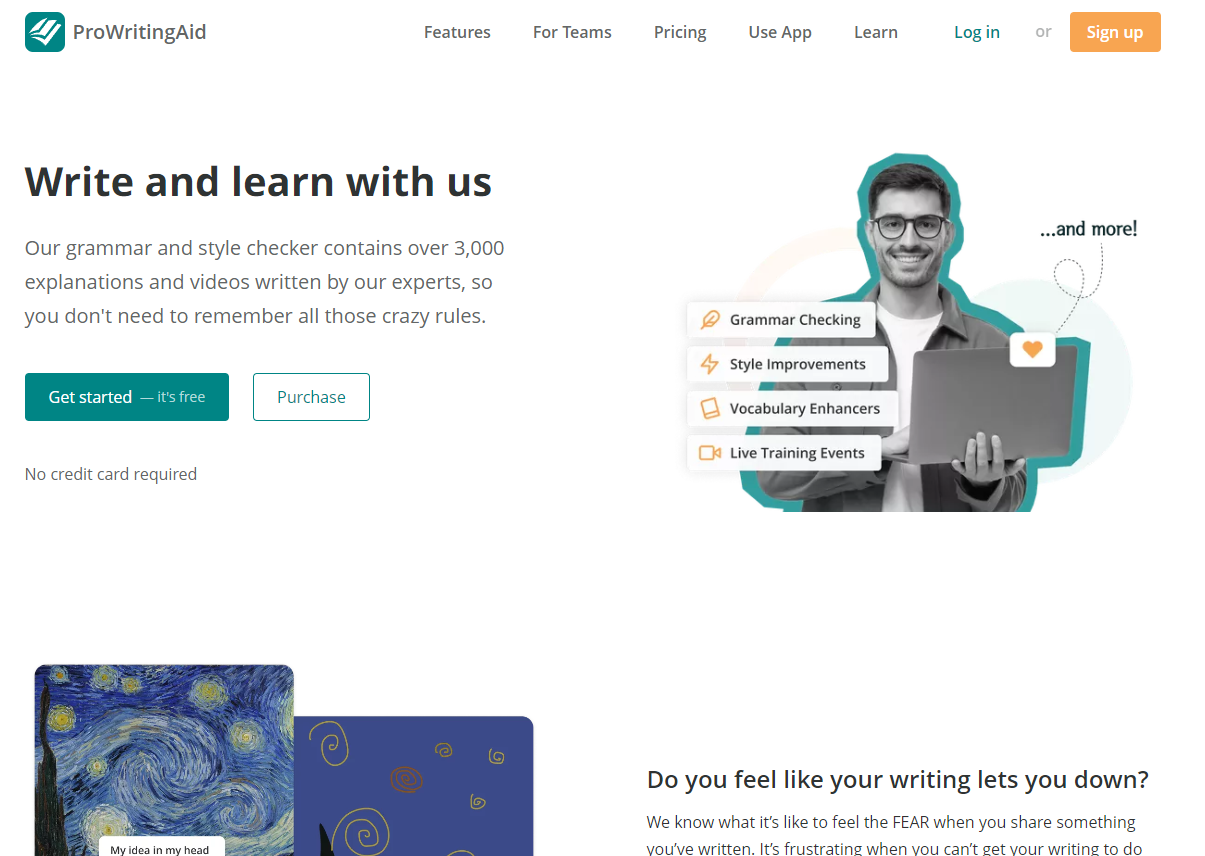
19. ProWritingAid

Rather than a full-fledged artificial intelligence writer, ProWritingAid is a grammar checker and style editor that’s available online. It helps prevent spelling errors, suggests impactful words, and corrects grammar and punctuation.

It supports general English, British English, US English, Australian English, and Canadian English.

Key Features: 

  • Document type: You can choose from 35+ document types for your content. They include general academic abstract, academic essays, admission letters, book reviews, business books, and more.
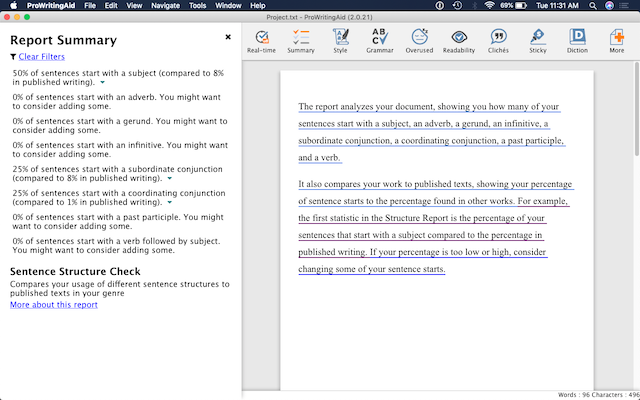
  • Reports: ProWritingAid provides three types of reports: real-time reports, summary reports, and style reports.

    Real-time reports show errors and corrections as you write. Summary reports provide an overview of all reports. It contains a spelling score, grammar score, and style score. On the other hand, Style reports identify problems in writing style and readability.

Summary report

Pros: 

  • It offers 20+ reports to track your progress as you improve your writing.
  • There are no limits on the number of words you can use with premium plans.
  • Notifies of style changes and suggests corrections if needed.

Cons: 

  • Only available through the web browser. 

Pricing: 

It starts at $20 per month or $120 per year (if you pay yearly). 

20. Article Forge

Once you provide ArticleForge.com with a keyword, article length, and other custom information, the program creates a 1500+ word article in seconds.

Your content will be checked for plagiarism and uniqueness before being delivered.

Key Features: 

  • Media-rich content: It can automatically find and insert relevant images, videos, titles, and links in your articles. To make it more relevant, ArticleForge also uses LSI keywords.

Creating an article

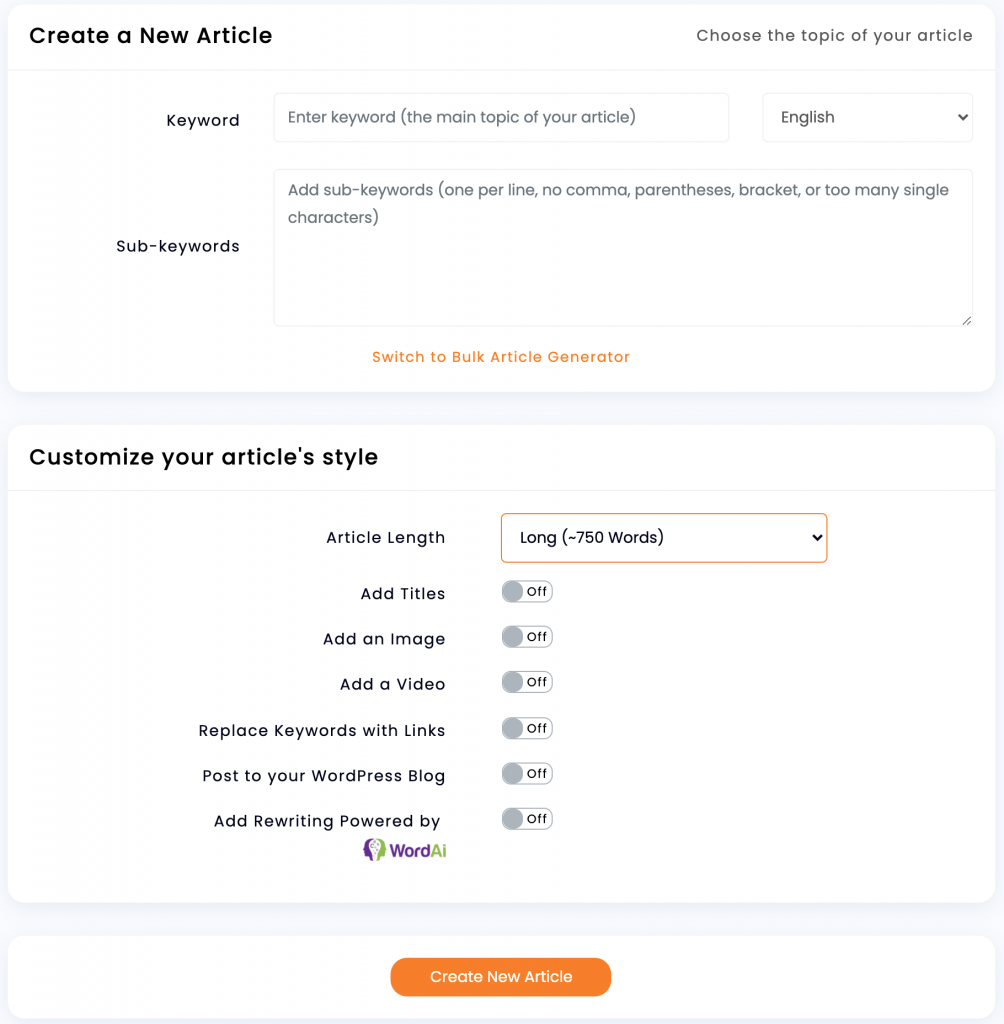
  • SEO Automation: It integrates with WordPress to automate your scheduling and posting of articles.

WordPress Integration

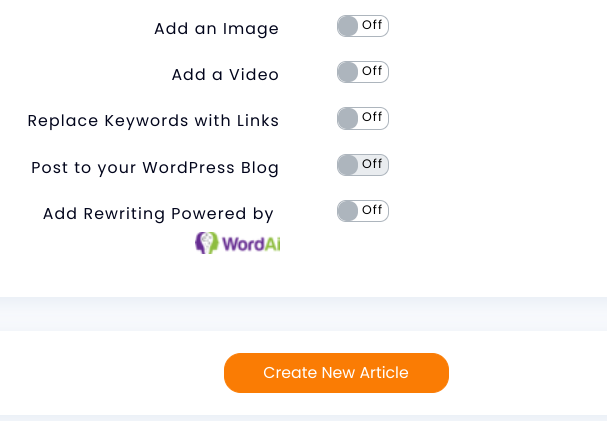
  • Interlinking: It can automatically turn URLs into links within your article. You can choose how often to do this for every keyword or just the first occurrence.
  • Languages: It can generate content in English, French, German, Dutch, Portuguese, Spanish, and Italian.

Pros: 

  • Produces SEO-optimized content.
  • Can schedule posts on WordPress automatically.
  • Plagiarism-free content.
  • Automatic keyword linking.

Cons: 

  • The content can be repetitive.
  • You need to check the accuracy of the content before publishing.

Pricing: 

It starts at $13/month for 25K words and the rest of the features.

Frequently asked questions about AI writing software.

1. What is AI Writing Software?

AI writing software is an artificial intelligence program used to write text. It can generate content for websites, blogs, and other fields. The content created by AI writers is often indistinguishable from human-created content. Still, sometimes it has a slightly robotic feel or may include words or phrases that seem out of place in the context of the writing.

2. How does AI Writing Software work?

The software uses an algorithm to mimic the creative process of human writers. It first creates a base text that modifies by adding words and phrases specific to your content. This ensures that you get high-quality original content every time you use it.

3. Who can use AI Writing Software?

Anyone who needs to create texts for their business or website can benefit from using this software. It’s also an excellent option for freelance writers and content marketers facing writer’s block. As it’s easy and fast, even beginners can start using it immediately and see great results within minutes!

4. Can I use AI writers for everything I write?

No — AI writers are best suited for shorter pieces like headlines or product descriptions because they don’t have much time to learn about your company’s brand voice or personality. 

While there are tools to churn out long-form content, you still need the human touch for longer and more research-intensive pieces like blog posts or sales copy. AI algorithms still can’t pick up on nuances like a human can.

5. What are some of the benefits of using AI Writing Software?

There are many benefits to using AI writing software. The most obvious benefit is that you no longer need to spend time creating content yourself. The software will do it for you! 

Another benefit is that AI writing software allows you to create content in any niche or topic you desire. You can even target multiple niches at once! This makes it possible to scale your business quickly and easily by leveraging the power of automation while still keeping your hands on the work itself.

6. How much does it cost?

The pricing depends on the type of service you want to use. Some companies offer free trials or even freemium versions with limited credits so that you can test their services before making a purchase decision. Some companies offer lifetime discounts for repeat customers, so keep an eye out for those offers when making your choice!

7. What’s the difference between AI-powered and human-written content?

While humans are still required for high-quality content creation, AI makes scaling up your content marketing efforts easier. By automating much of the writing process – from keyword research to formatting – AI can help you create more content at a lower cost per article. In addition, this frees your team members to focus on other tasks that require their expertise (like outreach) or simply spend more time enjoying their lives!

8. What is the best AI Writer?

The best AI writer depends on what you want it to do and how much you want to spend. If you’re going to write books or articles, many different programs can help you with this task. Our top pick for long-form would be Jasper

On the other hand, if you only need help with short-form content such as blog posts or press releases, there may not be any need for an AI writer because these documents don’t require as much work or effort from the user. In that case, you might want to use tools like Copy.ai, Rytr, and more. 

9. Can I use AI Writing Software to replace my human writers?

No, AI writing software isn’t meant to replace human writers. It’s designed to work alongside them, helping them create more engaging and relevant content for their audiences. You’ll still need human writers who can add style and personality to your content.

Over to You! 

Do you find writing to be an exhausting activity? If yes, you would want to try one of the AI Writing Software tools we suggested above. These are some of the best AI writing tools specially developed to boost creativity, motivation, and productivity.

There’s room for experimentation with AI-generated content as long as you can recognize where specific tools are lacking and how to incorporate that into your work. Ultimately, the future of AI writing assistant software will mean ever-more versatile tools for writers, so don’t be shy about testing the waters.


Featured image by pch.vector on Freepik.

Source

The post 20 Best AI Writing Apps first appeared on Webdesigner Depot.

Source de l’article sur Webdesignerdepot

Learning how to design an MVP webpage or website could be one of the best things you can do as a site creator in today’s digital world.

In a fast-paced landscape, where customer preferences and technology are constantly changing, most companies don’t have time to dedicate months or years to each web project. The longer you take to complete your website, the more likely your creation will be outdated by the time you hit “publish.” That’s why countless creators are beginning to take a different approach.

To avoid wasting time, money, and effort on something that doesn’t deliver a significant return on investment, designers are now building “Minimum Viable Products,” or “MVPs.”

Here’s what you need to know about creating your MVP webpage.

What is MVP Web Design?

Typically, the “MVP” development process is most common in the app or software creation world. It refers to when a developer builds the simplest version of a technology capable of achieving specific goals. For instance, if a company wanted to create an ecommerce app, they would design a simple tool capable of listing products, enabling payments, and tracking orders.

After launching the MVP product, the company or developer would check to ensure it had the right impact on the target market and generated positive results. Using feedback and analytics, the developer would then begin to add new features one at a time.

MVP design aims to ensure you’re developing the best, most valuable product for your audience while getting your solution to market as quickly as possible.

The same strategy in MVP app and software design can also apply to website creation. Rather than building a highly complicated website with multiple features straightaway, the designer would focus on creating a single page equipped with the essential elements.

For instance, instead of building an entire site for your online course, you may develop a single-page website where customers can learn about the system, sign up, and pay for their membership. The great thing about an MVP web page is it allows companies to start advertising their solution, product, or service quickly, with the minimum initial investment.

How to Create an MVP Web Page

Creating an MVP web page is similar to designing any Minimum Viable Product. Throughout the project, the focus will be on keeping the development process simple while collecting as much feedback as possible.

Here’s how you’d get started with an MVP web page.

Step 1: Planning

Planning is an important stage in any web design project. It’s particularly crucial in the MVP landscape, where you need to define the most critical features of your webpage or website to ensure it’s “viable” for your needs. The initial planning stage can sometimes be the lengthiest part of the process, depending on the amount of research you need to do.

For the most part, web designers and companies will begin by conducting market research. This means examining crucial concepts intended to drive your strategy, such as:

  • Your target audience: Who are you trying to target with this web page, and what will they need from your site? A user persona can be helpful if you don’t already have one.
  • Competitors: Who are your main competitors in this space, and what do their web pages offer? Which features do you need to replicate or avoid?
  • Goal setting: What is the main objective of this web page? What do you need it to do, and what might it need to accomplish in the future?

The key to MVP web page planning is ensuring you look holistically at your project without thinking too far ahead. The site you create should be capable of scaling and expanding in the future, but it shouldn’t have too many features from day one.

Step 2: Creating Your Feature List

Once you’ve done your research and formed the foundations of your plan, it’s time to list all the features your MVP web page needs to have. Unfortunately, this is where the process can get a little complicated. It’s easy to start adding capabilities and components that aren’t necessary to make your site more exciting or competitive.

As worrying as it can feel to release a very basic web page, remember your focus is on rapid growth and development. With this in mind, concentrate on narrowing your feature lists down into:

  • Initial must-have capabilities: First, decide what your web page can’t thrive without. If the primary goal of your page is to sell software subscriptions, then you’ll need to implement tools for collecting member information and payments.
  • Next stage functionality: Consider the features you might add once you’ve confirmed your webpage is effective. This will allow you to ensure you’re creating a platform that can expand to suit future needs.
  • Possible future requirements: You can also list features that might be helpful in the future but don’t necessarily need to be implemented immediately. For instance, if you’re selling an online course, you might create a separate page where people can sign up to learn about future lessons.

Step 3: Finding the Right Software

Next, you’ll need to decide how to build your web page. There are several options available to today’s designers. An open-source solution is usually the best route for designers who need to create something specific from scratch. However, if the factor that makes your solution “viable” is unique, you may need access to code to bring your idea to life.

Alternatively, if you’re building a basic webpage capable of something like collecting customer email addresses or facilitating transactions, you might be able to use an off-the-shelf tool. CMS services for web designers can reduce the work and expense involved in creating a minimum viable product.

For instance, you might use a tool like Wix or Squarespace to edit a pre-existing template and simply drag-and-drop the features you need into the right places. On the other hand, if you’re planning on adding more functionality to your site down the line, it’s worth checking if any builder you will use has the right level of flexibility. Many tools will allow you access to code, advanced features, and essential module-based building functions.

Step 4: Implement Your Analytics

One of the essential parts of an MVP workflow is feedback. When you roll out your MVP, you’ll be looking for insights, guidance, and analytics to help you decide what your next steps are going to be. As a result, MVP workflows are based heavily on experimentation.

This means you’re going to need the right analytical tools in place to track crucial information. You can implement tools for collecting customer feedback directly. It’s also worth having a system in place for tracking metrics like:

  • Conversion rate;
  • Traffic numbers;
  • User behavior;
  • Most used/least used features;
  • Technical site performance;
  • Bounce rate;
  • Average time spent on the page.

While Google Analytics is one of the most popular tools for collecting insights in the MVP website design world, various other options are available. You can even find tools with in-built heatmaps to see how people navigate your site more effectively.

It’s also worth having A/B testing components in place. This will allow you to test the different “new” features you add to your web pages over time and examine how they influence your conversions and support your goals. For example, you can use A/B testing to explore the impact of everything from CTA button colors to webpage copy and offers.

Creating Your MVP Web Page

In the fast-paced web development and design world, the old-fashioned and slow approach to designing web pages is growing increasingly less common. Instead, an MVP strategy may be the best bet for companies looking to go to market faster, collect insights from their target audience, and accelerate growth.

Though getting used to this design strategy initially can be challenging, it can save you significant time, resources, and money in the long term.


HTML vector created by vectorjuice – www.freepik.com

Source

The post How to Design an MVP Web Page first appeared on Webdesigner Depot.

Source de l’article sur Webdesignerdepot

E-commerce storefronts have been slow to offer crypto payment methods to their customers. Crypto payment plug-ins or payment gateway integrations aren’t generally available, or they rely on third-party custodians to collect, exchange, and distribute money. Considering the growing ownership rate and experimentation ratio of cryptocurrencies, a « pay with crypto » button could greatly drive sales.

This article demonstrates how you can integrate a custom, secure crypto payment method into any online store without relying on a third-party service. Coding and maintaining smart contracts needs quite some heavy lifting under the hood, a job that we’re handing over to Truffle suite, a commonly used toolchain for blockchain builders. To provide access to blockchain nodes during development and for the application backend, we rely on Infura nodes that offer access to the Ethereum network at a generous free tier. Using these tools together will make the development process much easier.

Source de l’article sur DZONE

UX laws are an invaluable tool, providing guidelines for designers that ensure we don’t have to continually reinvent the wheel when crafting experiences for the web.

However, UX laws tend to be devised by scientists and psychologists — people who are more than comfortable with the exceptions and allowances of academic language. By the time they filter down to us in the trenches, the language has invariably been over-simplified, and the wisdom behind the idea diluted.

Today we’re going to look at seven well-known and commonly cited rules of UX design that too many designers get wrong.

1. Jakob’s Law

Jakob’s Law, named for the UX researcher Jakob Nielsen, states that users spend most of their time on other sites and as a result prefer sites that work the same way as the sites they already know.

Jakob’s Law has often been used to limit experimentation and encourage the adoption of common design patterns in the name of usability.

However, the word ‘prefer’ is hugely loaded. While it’s true that a user will more easily understand a familiar design pattern, they do not necessarily prefer familiar experiences.

It has been widely proved that new experiences boost our mood and that new experiences improve our memory. If your goal is a memorable site that leaves users with a positive impression, introducing novelty is a sound decision.

2. Goal Gradient Hypothesis

The Goal Gradient Hypothesis assumes that the closer users are to their goal, the more likely they are to complete it.

It’s an attractive theory, especially in e-commerce, where it is often used to justify simplifying the initial purchase process and postponing complexity to move users along the funnel — a typical example is leaving shipping charges until the final step.

However, anyone who has studied e-commerce analytics will know that cart abandonment is a huge issue. In North America, shopping cart abandonment is as high as 74%.

We don’t always know what the user’s goals are, and they may not match ours. It may be that users are treating your shopping cart as a bookmark feature, it may be that they have a last-minute change of heart, or they may be horrified by the shipping charges.

While providing a user with an indication of their progress is demonstrably helpful, artificially inflating their proximity to your preferred goal may actually hinder conversions.

3. Miller’s Law

Never in the whole of human history has any scientific statement been as misunderstood as Miller’s Law.

Miller’s Law states that an average person can only hold seven, plus or minus two (i.e., 5–9) items in their working memory. This has frequently been used to restrict UI navigation to no more than five items.

However, Miller’s Law does not apply to items being displayed. While it’s true that too many options can lead to choice paralysis, a human being is capable of considering more than nine different items.

Miller’s Law only applies to UI elements like carousels, which have been widely discredited for other reasons.

4. Aesthetic-Usability Effect

Edmund Burke once said, “Beauty is the promise of happiness.” That belief is central to the Aesthetic-Usability Effect, which posits that users expect aesthetically pleasing designs to be more usable.

Designers often use this as a justification for grey-on-grey text, slick animations, and minimal navigation.

Critical to understanding this is that just because users expect a design to be usable does not mean that it is or that they will find it so. Expectations can quickly be dashed, and disappointment often compounds negative experiences.

5. Peak-End Rule

The Peak-End Rule states that users judge an experience based on how they felt at the peak and the end, rather than an average of the experience.

Designers commonly use the Peak-End Rule to focus design resources on the primary goal of each experience (e.g. adding an item to a cart) and the closing experience (e.g. paying for the item).

However, while the Peak-End Law is perfectly valid, it cannot apply to open experiences like websites when it is impossible to identify a user’s starting or ending point.

Additionally, it is easy to see every interaction on a website as a peak and even easier to make assumptions as to which peak is most important. As such, while designing for peaks is attractive, it’s more important to design for exceptions.

6. Fitts’ Law

In the 1950s, Paul Fitts demonstrated that the distance to, and size of a target, affect the error rate of selecting that target. In other words, it’s harder to tap a small button and exponentially harder to tap a small button that is further away.

UX designers commonly apply this law when considering mobile breakpoints due to the relatively small viewport. However, mobile viewports tend not to be large enough for any distance to affect tap accuracy.

Fitts’ Law can be applied to desktop breakpoints, as the distances on a large monitor can be enough to have an impact. However, the majority of large viewports use a mouse, which allows for positional corrections before tapping.

Tappable targets should be large enough to be easily selected, spaced sufficiently, and tab-selection should be enabled. But distance has minimal impact on web design.

7. Occam’s Razor

No collection of UX laws would be complete without Occam’s Razor; unfortunately, this is another law that is commonly misapplied.

Occam’s Razor states that given any choice, the option with the least assumptions (note: not necessarily the simplest, as it is often misquoted) is the correct choice.

In an industry in which we have numerous options to test, measure, and analyze our user interfaces, you shouldn’t need to make assumptions. Even when we don’t need extensive UX testing, we can make decisions based on other designers’ findings.

Occam’s Razor is a classic design trap: the key to avoiding it is to recognize that it’s not your assumptions that matter, it’s the users’. As such, Occam’s Razor applies to a user’s experience, not a design process.

Source

The post 7 UX Laws You’Re Probably Getting Wrong first appeared on Webdesigner Depot.

Source de l’article sur Webdesignerdepot

This month, you will either love or hate the featured design trends.

The common theme among them is a strong design element that can create distinct emotional connections. They range from interesting monotone color choices to brutalist examples to AI-inspired faces and design elements.

Here’s what’s trending in design this month.

1. Interesting Monotone Color Palettes

Monotone color palettes aren’t something that we usually call a trending design theme because mono patterns are almost always in style. What makes these monotone website designs interesting is color choice.

The trend is to use a pretty unconventional color choice for monotone color palettes. For example, would you start the design process thinking of an all-mauve, canary yellow, or purple aesthetic?

For most designers, those probably aren’t the first choices. But, conversely, the outcome of those decisions is rather stunning in each of the examples below, whether you love the color choices or not.

What works (and what might fall short) with each of these trending examples:

Wookmama: This mauve color scheme might be the first one you’ve encountered? It uses varying hues that are pretty in-your-face. It works because the concept behind the website is to create custom color schemes. The challenge lies in contrast and that there’s not a lot of distinction between hues in the mono scheme.

BBC Storyworks: The deep purple color palette with pinkish highlights is bright and readable, despite the dark background. White text and elements with smooth animation bring out the regality of the color choice. The challenge with this color is that purple often has strong emotional associations for individuals (good and bad), and you don’t know what “baggage” users might bring to the design.

Yellow Pony: This design is incredibly bright and has some brutalist undertones. What makes this color choice work is that it stops you in your tracks. You can’t help but look at the bright yellow and oddly-colored pony. The challenge, like with Wookmama, is contrast. There’s also a lot going on here with the bright color.


2. Fairly Brutal Black and White

Brutalism and brutalist design themes seem to keep ebbing and flowing. Understandably, it seems like, as a whole, designers can’t quite decide how they feel about this overall visual theme.

This trio of fairly brutal designs shares more than starkness in technique. They also feature distinct black and white color schemes and animation.

Put it all together, and the overall theme is maybe more “fairly brutal” than straight brutalist, re-emphasizing the hesitancy with the trend.

What’s nice about each of these designs is that they feel special and content-focused. This is a little in contrast with some other brutalist designs that are so stark and harsh that it can be hard to figure out what you are supposed to do with the website or what information is most important.

The other interesting thing here is that while all three websites have a similar design theme, they are nothing alike. (Personally, I find this type of brutalism and the included animation a lot easier to understand and digest. It uses the harsh feeling that you want to associate with the style but adds an element of comprehension that’s incredibly valuable.)

Callshop Radio uses an almost magazine theme style, block design with big buttons, a simple animation, and flash of color.

BCKDRP features a more subtle richer, almost black background with blocky type and accented color without the harshness often associated with brutal styles.

Vision Get Wild may be the closest to true brutalism, but the animated element in the center of the screen has a simple softness that lightens the entire feel.


3. Futuristic Faces

The final trending design element this month is a fun take on faces. There’s a movement happening with a futuristic or artificial intelligence/cyborg-inspired look to the people featured in the designs.

It’s hard to say where this design inspiration is coming from, but it is fun to look at with so many ways to play the style. The other commonality seems to be the dominant use of female faces.

These computer-generated images start with photos that are brightened and smoothed so that all imperfections are lost. The faces have no lines, color that might not look 100% natural, and enhanced features that may or may not be realistic.

You aren’t quite sure if you are looking at a face from a video game or image in many instances.

The types of websites that are using this design trend are similar in content and fashion, art, gaming, portfolios, and AI themes, among the most popular.

The true common thread is imagination. This type of design element can’t come to fruition without a strong vision and the ability to see the vision through creation.

These examples use progressively more futuristic variations of the trend:

HueLe Museum: The least AI-looking of the examples, has imagery with super bright light on faces to remove lines and imperfections so that the models almost the look of mannequins.

Jenny Lin: The portfolio design shows the designer in a style representing her work with a headshot that features an augmented reality, or digital design feel with an almost plastic-looking, on-the-verge of cartoon style.

Ruby9100m: The imagery here is full-on futuristic. From coloring to facial features to an almost Frankenstein-pieced-together look, nothing about this image insists on reality. (Did you notice the blue hand?)


Conclusion

This month’s design trends are a lesson in experimentation and evolution of other visual concepts. They also create an immediate impact on you in terms of emotion because of strong design choices.

Trends like these tend to come and go quickly; nevertheless, it will be interesting to see how they evolve.

Source

The post 3 Essential Design Trends, July 2021 first appeared on Webdesigner Depot.


Source de l’article sur Webdesignerdepot

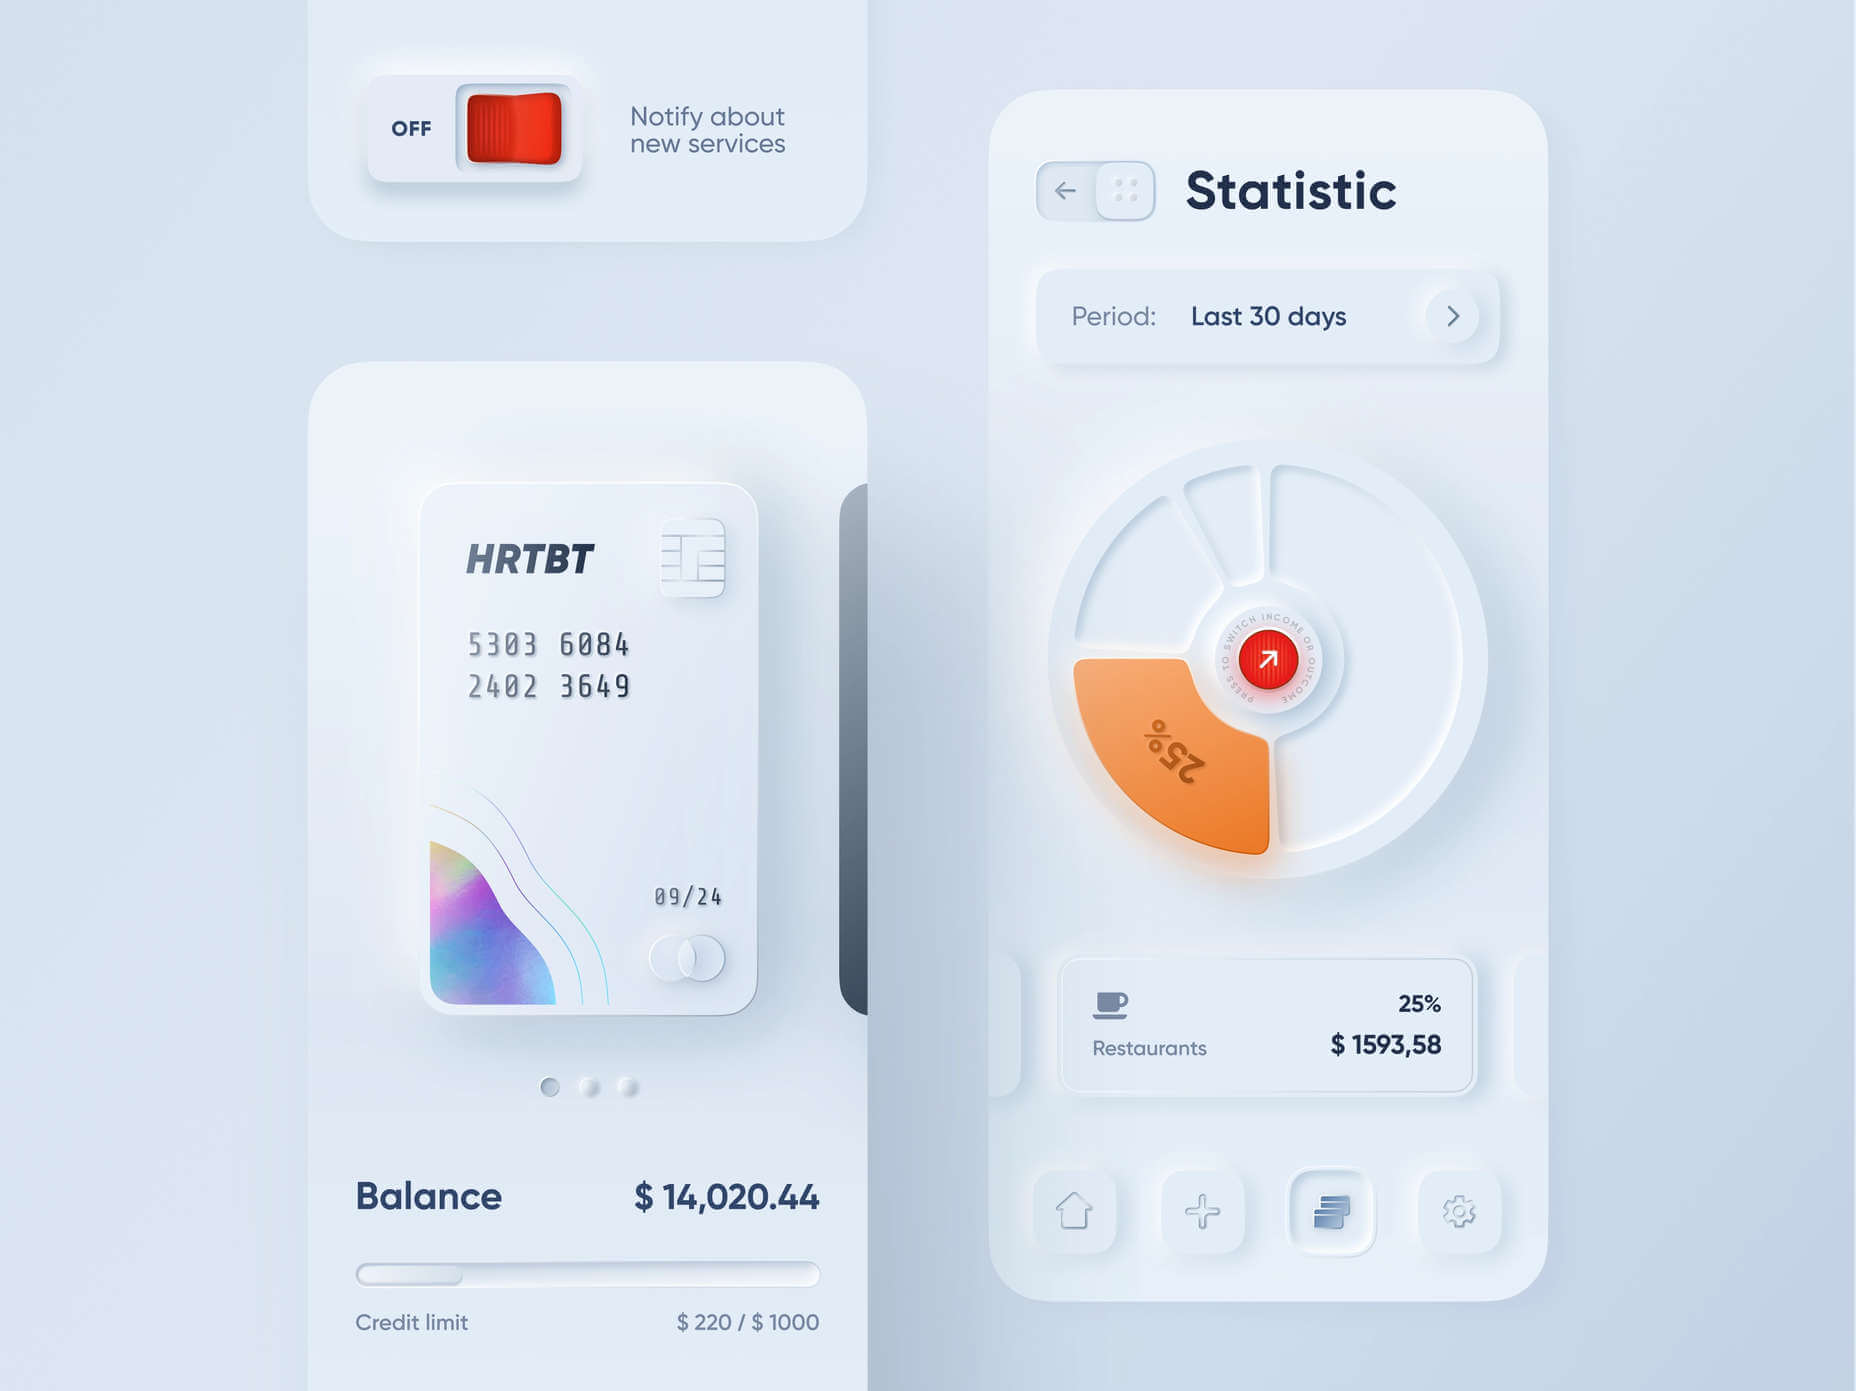
A new design trend has emerged in the last year: Soft UI or Neumorphism is everywhere. 

Even Apple is in on the trend; the company introduced a host of changes in both its mobile and desktop operating systems that use the style. The elements of Soft UI introduced by Apple reflect various aspects of the Microsoft Fluent UI design too. 

So, if soft UI is such a huge concept, what do we need to know about it? How does soft UI work, and what are the pros and cons of using it?

What is Soft UI (Neumorphism)?

Soft UI involves using highlights and shadows in design elements to make them look as though they’re layered on the page. 

The term neumorphism is derived from a previous design style — skeuomorphism, where designers create something as close to its real-life counterpart as possible. If you remember the shift between iOS 6 and 7, you’ll remember the switch between skeuomorphic and flat designs. However, neumorphic design isn’t quite as dramatic. 

Neumorphism doesn’t focus excessively on things like contrast or similarities between real and digital elements. Instead, this “soft UI” practice creates a smoother experience for users. 

With neumorphism, you get the sense that buttons and cards are actually part of the background they’re on. This trend removes the flashier aspects of a typical interface and focuses on a softer style that stays consistent throughout the design. 

The Common Features of Soft UI

Soft UI is all about smoothing out the experience by making everything feel more connected. There’s nothing overly harsh in the aesthetic, hence the term “soft.”

So, what kind of features can you expect?

Rounded Corners: Soft UI removes some of the sharper parts of the interface, like the corners on modules and segments. This allows for a more gentle appearance overall. In this experimentation from Iqonic Design, we can see how the round corners tie everything together.

Transparency and Background Blur: Background blur and transparency are more popular today since the infamous iOS 7 solution emerged. Most people hated the appearance of ultra-minimalism, combined with thin fonts. However, the background blur effect was more popular. The blur in soft UI shows that part of the window is connected to the rest of the OS. It seems like parts of the background in the app are pushing through to the surface. 

Unified Symbols: Everything needs to fit perfectly in a soft UI design. Anything that doesn’t look like it’s part of the same entity throws off the experience. In this design experiment by Surja Sen Das Raj, you can see how all the colors, shadows, and gradients tie together consistently. Because everything is more uniform, the experience flows perfectly for the end-user. 

Implementing Soft UI Elements in Your Design

So, what does neumorphism look like in your UI design process?

Ultimately, it’s all about subtle contrast and aligned colors. Every part of your interface needs to look like it’s part of the same form. Your element and background need to be the same color so that you can create a feeling of objects protruding from the background. 

With Soft UI, the keys to success are shadows and highlights. 

Let’s take a look at some key steps. 

Achieving the Soft Look

When you’re designing your interface, remember that sharp edges make the interface more serious and formal. Rounded corners are more playful and friendly. 

What also makes the design look lightweight and delicate is plenty of deep shadows and highlights. When you add shadows to elements, you create a visual hierarchy. The items that cast a larger, deeper shadow are the ones closest to you. That’s why only a few elements need to cast an intense shadow. Everything else should work in the background. 

Take a look at this design by Alexander Plyuto, for instance.

Creating Smooth and Delicate Gradients

Gradients are part of the shadow and highlighting process in Soft UI design. Ideally, you’ll need to choose colors from the same palette, just toned down or brightened, depending on your needs. The gradient needs to be barely visible, but just enough to make the elements stand out. 

For white gradients, like highlights, use a very delicate color somewhere between white and your background shade. For instance, consider this design from Marina Tericheva.

Consider the Little Details

Finally, remember that the neumorphism design principle is all about little details. 

Choosing a font that visually matches the background is an excellent choice. However, you can also choose something more contrasting, as this will help information stand out

Adding a little bit of the background into your fonts might be suitable too. For instance, if you have a green font and a grey background, add a little grey into the mix. 

Extra elements in your design, like allowing a button to shift into a more recessed state after being clicked, are a great way to make the soft UI more engaging. Everything your end-user interacts with needs to feel smooth and perfectly unified. 

The Problems with Soft UI Design

Just because a design process is trending – doesn’t mean it won’t have its issues. 

Neumorphism is a fun way to make apps, operating systems, and websites feel more friendly and informal. However, this softer approach has a weak spot too. 

When you’re dealing with a small margin of contrast and color where neumorphism works well, it’s hard to get the effect right every time. For instance, this all-yellow design for Dtail Studio may be overwhelming for some.

A slight deviation in saturation or a problem with your shadowing could render the entire effect of Neumorphism completely pointless. 

Another major issue is accessibility. The soft UI design looks great for people who have a full visual range. However, visually impaired users might not see the same benefits. Anyone without perfect vision may see crucial objects disappearing into the background.

Your users don’t necessarily need significant vision problems to struggle with neumorphism, either. The design is all about softness that causes elements to almost blend together. People with low-quality screens that don’t have as many pixels to work with won’t see these elements. 

Issues With Buttons and CTAs

Another major issue of neumorphism is that its subtlety can lead to problems with attracting clicks and conversions. Usability is the most important consideration of any UI design. 

Unfortunately, when you focus on subtle elements throughout your entire interface, usability sometimes takes a hit. 

Let’s consider buttons, for instance – they’re essential to any interface. To simplify the customer journey, these buttons need to be noticeable, and they need to shift into different states when your customers interact with them. 

For the button experience to be excellent, users need to notice the design instantly. However, the heart of neumorphism revolves around the idea that nothing stands out too much. 

This isn’t just an accessibility issue; it’s a problem for conversions too. 

Neumorphism is soft on the eyes, with minimal color contrast and few color pops. This means that CTA buttons don’t stand out as much as they should. Buttons almost blend into the background, and the website struggles to pull attention to the areas that demand it most. 

How to Experiment With Soft UI (Free Kits)

The key to unlocking the benefits of soft UI interfaces without getting lost in the negative points – is proper experimentation. Like any new design trends, professionals and artists will need to learn how to merge the elements of soft UI together in a way that doesn’t compromise usability. 

Trends in UI design can’t focus exclusively on aesthetics, as a customer’s comfort will always be an essential part of the process. 

If you want to start exploring, here are some of the best kits and freebies to get you started:

Closing Thoughts on Soft UI

The world of design and the trends that we use are constantly changing. Companies are always searching for the best ways to connect with their users. Often, this means focusing on an interface that really connects with your target audience and delivers the best possible results. 

The soft UI design trend has its benefits and its downsides. On the one hand, the smooth appearance of every element on a combined screen can deliver a delightful aesthetic. Buttons feel less imposing, and elements are friendlier and easier to interact with. 

On the other hand, neumorphism also makes it difficult to truly capture your audience’s attention in the places where it matters most. It suffers from accessibility issues and requires plenty of care and practice.

Source

The post Soft UI: Making Sense of the Latest Design Trend first appeared on Webdesigner Depot.


Source de l’article sur Webdesignerdepot

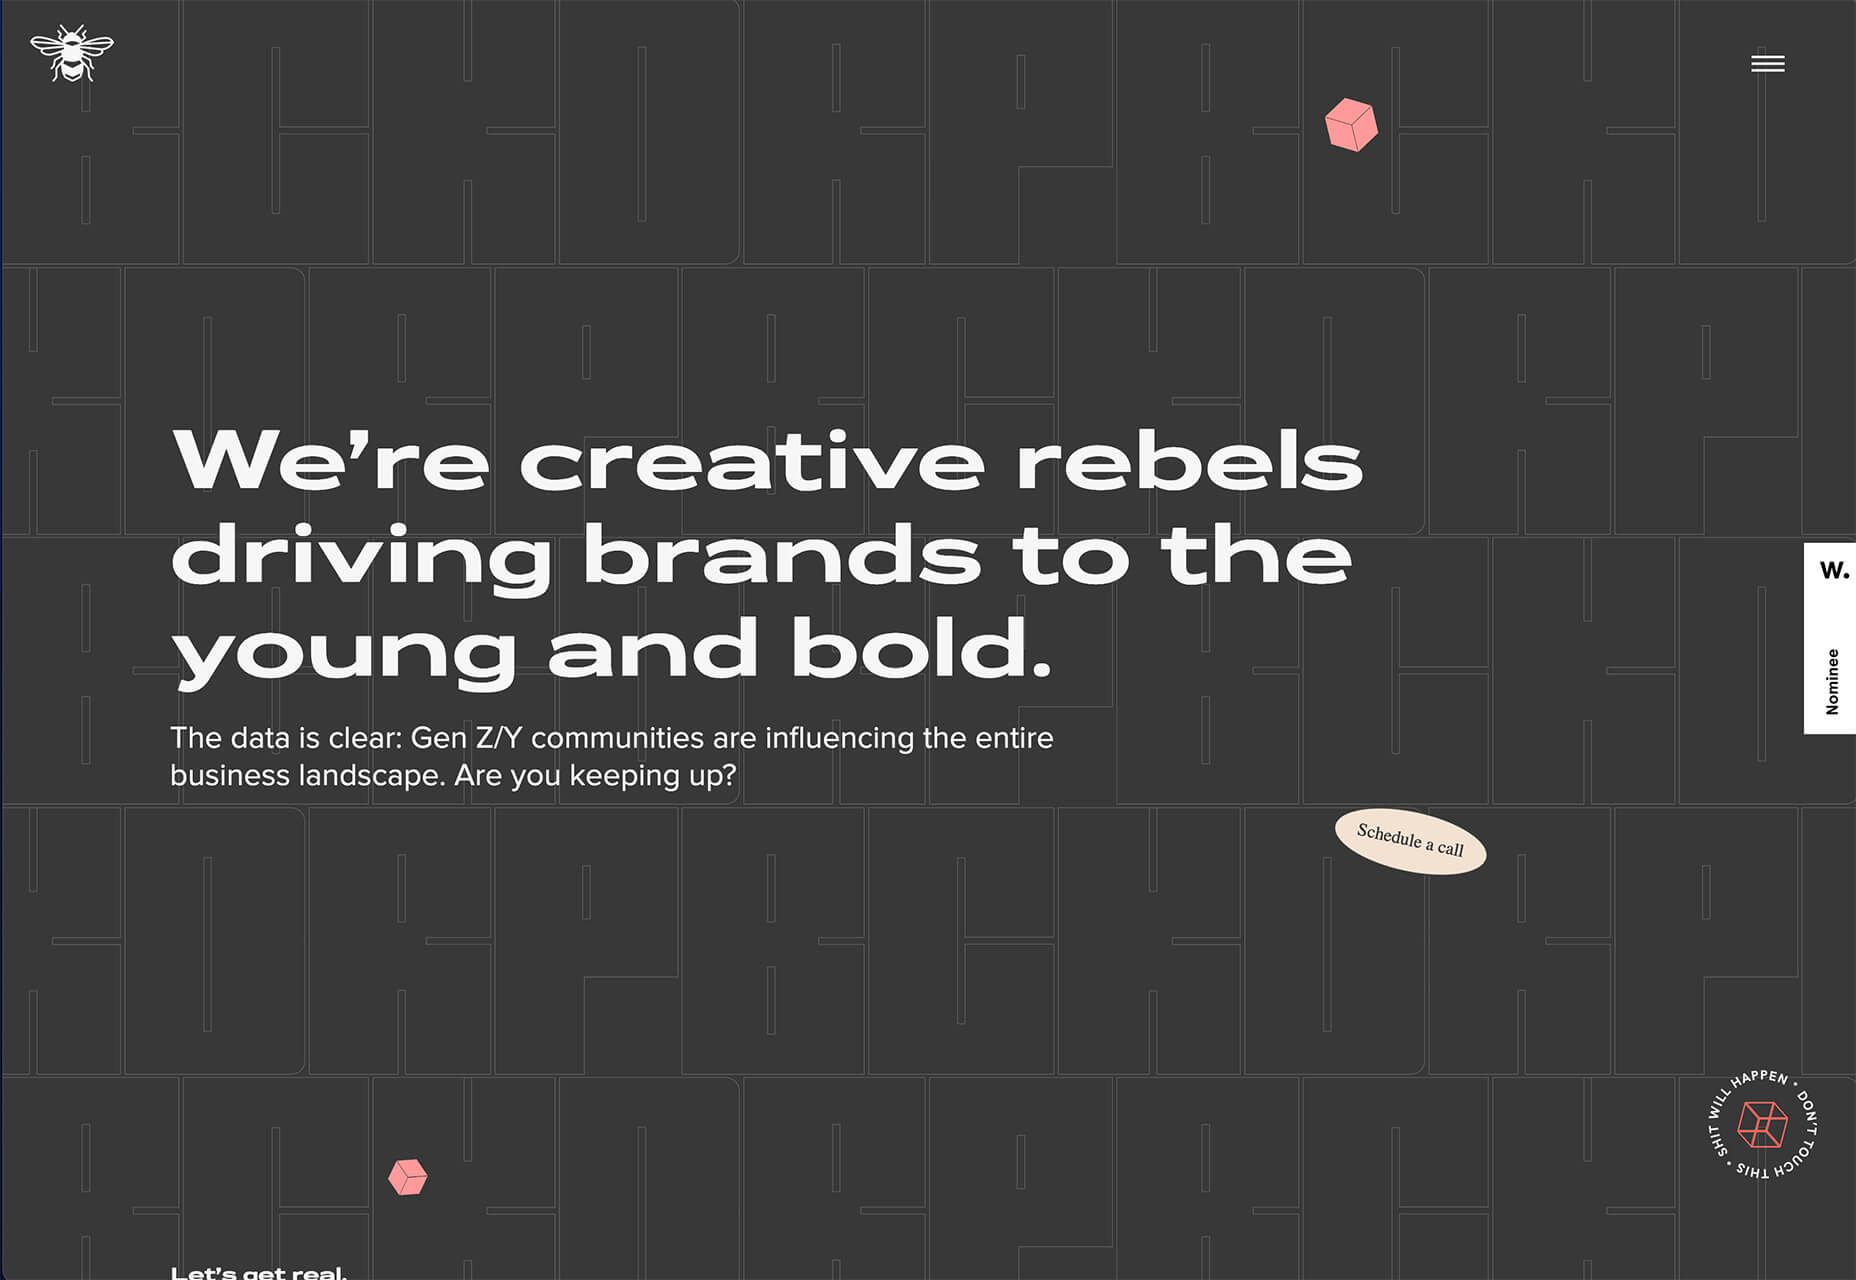
Spring and fresh designs are in the air. This month, it’s obvious that designers are feeling creative with new and interesting concepts that range from a new style for cards, homepage experimentation with multiple entry points or calls to action, and risky typography options.

Here’s what’s trending in design this month.

1. “Flat” Cards

Card-style design elements that allow users to click through to other content aren’t new, but the design of these cards is fresh and interesting.

Rather than more heavily designed cards with shadows and layers of content, flat styles are trending. Expect this trend to explode thanks to usage by Google for a shopping experience page.

The Google example below is interesting because Google’s Material Design guidelines are what helped card-style elements grow in popularity previously. However, those cards did include more layers, color options, buttons inside the cards, and shadows.

Today’s trending cards are completely flat. And beautiful.

Each of these websites does it in a slightly different way.

Heartcore, a consumer technology VC company, uses a series of flat cards as a navigation element to help users find their way through the website. Each features a bright color background with an illustration and a simple text block.

Each card has a nice hover state where only the illustration zooms inside the card frame. This is an interesting effect because it is exactly the opposite of the previous iteration of cards, which zoomed the entire card as a hover state.

Google Shopping uses that whole card bounce hover state (plus a not-so-flat shadow) for each card. The initial design is sleek with the pairing of white and image cards with simple text in each. You are enticed to click around to see what happens.

Click on Greece is a travel website design that uses simple cards with a minimal color and text overlay. The consistency of these cards makes the design pop and the beauty of the images draw you in. Each card also has a hover state with a darker color mask to guide navigation and make text elements easier to read.

2. Multiple Homepage Entry Points

For a long time, designers have been working off the philosophy that the homepage should have one direct entry point, creating a direct funnel for the user experience.

These designs throw that idea out the window, with multiple entry points and click elements.

You can think of it as the “create your own adventure” option for these designs.

It can be a risky concept if you are diving into analytics to pay attention to user paths. You want to make sure you know what choices users are making so that you can help them on the journey to the content and information that you want them to get from the visit.

But this type of design scheme does feel somewhat personalized, putting the user in more control.

Parcouse Epicuriens uses three flat card-style elements to help users pick what they want to see from the home page. There’s no other button or direct call to action, which is somewhat uncommon in today’s website design landscape. Users have to pick from one of the cards, scroll, or enter using the hamburger menu icon.

Tasty Find uses search options to help users start their journey. What’s interesting here are the choices – search for the food you want, pick something random, or (in the small print) find even more options. Users get three choices to begin their journey with the website.

What’s interesting is how simple this complex user journey looks. The design is easy to digest, but so many options could overwhelm users. This is one of those situations where you have to watch return search data and information and weigh the risk versus the reward of so much choice. It’ll be interesting to watch this design over time and see if the options decrease in number.

Accord also has several levels of user engagement opportunity. Option 1: Every block contains a click element. Option 2: Use the search at the top to narrow choices. This is an interesting configuration as the homepage for an e-commerce website because they get right to product selection and shopping without a softer sell or introduction.

3. Risky Typography

Typographic risk has been an ongoing theme for a little while. Designers are embracing experimental and novelty typefaces to stand out in the cluttered website space. Sometimes it works beautifully, and other times, it can fall short.

Here, each of these trending website designs uses a risky typography treatment. The risks are a little different for each design, from readability to comprehension to font delivery.

How Many Plants has duel typography risks: A funky typeface paired with odd word breaks. Interestingly enough, readability isn’t as big of a concern as you might think. This is likely because there aren’t many words, and they are short. Plus, the imagery ties in nicely.

Do you notice a similarity between How Many Plants and The Great Lake? The typography has the same style with a blocky, slab, sans serif with alternating thick and thin strokes. (It’s the same font.)

The risk in the typography design for The Great Lake isn’t in the homepage display, although you might wonder what the design is about. It is carrying this font throughout the design. While it looks great large and with only a few words, it gets a little more difficult the more you see it. This type of mental reading weight can be difficult for visitors over time, creating an element of risk.

Zmaslo uses an interesting typeface with a liquid effect on top of an unusual word. That combination of text elements makes you think hard to read the homepage, despite its neat looks. The risk here is weighing visual interest against comprehension. Depending on the audience, this risk can be worth the chance.

Conclusion

Spring always seems to be that time of year where designers start thinking about new, fresh design elements. That might explain some of the “riskier” design choices and experimentation here.

Regardless of the motivation, it is always fun to see the creative stretch happen. It can be even more interesting to see what elements from these trends continue to grow in the coming months.

Source

The post 3 Essential Design Trends, May 2021 first appeared on Webdesigner Depot.


Source de l’article sur Webdesignerdepot

If we don’t question this kind of design homogenization, do we put ourselves at risk of perpetuating the same mistakes in the years to come? Or is it even a mistake to begin with?

Today, I’m going to look at four things that are likely causing this, and what you can do to break the mold.

1. Education

We used to have a design school in every city in the world, each with its own design style or, at the very least, the encouragement of its designers to be creative and come up with something new.

These days, though, traditional design education isn’t as popular as it once was. According to Design Census 2019, only about a third of working designers have a formal education and degree:

The rest have been trained through a variety of means:

  • Online learning (17%)
  • Self taught (12%)
  • Workshops (10%)
  • Mentorship (6%)
  • Certificate programs (4%)

Cost and convenience are definitely two factors influencing this shift towards online learning methods. And with a wealth of resources online to teach them how to design and code, why not go that route? Plus, designers have to keep learning new things in order to remain competitive, so it’s not as though a degree is the be-all and end-all of their design training.

Plus, there isn’t as much demand for it from employers. Unless you plan on working for one of the top global marketing agencies, many hiring companies just want to see proof in the form of a portfolio and maybe have you do a test job.

Now, I’m not saying that online courses and other informal design education don’t foster creativity. However, in order to make them cost-efficient and quick to get through, they have to focus on teaching essential best practices, which means less room for experimentation. Perhaps more importantly, their curriculums are guided by fewer voices. So, this could likely be one of the culprits.

2. Design Blogs and Vlogs

You have to wonder if all the design blogs out there (yes, like Webdesigner Depot) impair designers’ ability to break free from the homogeneity of websites.

I think the answer to that is both “yes,” and “no”.

Why, Yes?

What is the purpose of a web design blog? Mainly it’s to educate new and existing designers on best practices, new trends, and web standards.

By their very nature, they really should be teaching web designers the same kinds of things. Let me show you an example.

This is a Google search for “web design trends 2020”:

Most design blogs will publish trends predictions around January 1. And herein lies the problem. The writers/designers can only deviate so far from what we know to be true when writing on the same topic… so these sites end up with similar recommendations.

For instance, the top search results recommended similar things for 2020:

  • Dark mode
  • Hand-drawn illustrations
  • Immersive 3D
  • Glowing colors
  • Minimalist navigation
  • Geometric shapes
  • Inclusivity
  • Accessibility

When web designers receive the same guidance no matter where they turn, it’s only logical that they’d end up creating websites that adhere to those same practices.

Why, No?

Because I write for web design publications, I can tell you that there’s a big difference in the kinds of content some of them publish.

For instance, I find that WebDesigner Depot isn’t interested in rehashing what everyone else is writing about this month. We’re given topics that challenge us to think outside the box and present readers with meaningful insights and recommendations.

So, I think that finding design blogs that push the boundaries and don’t just want to recap what everyone else is saying is really important. That’s how web designers are going to master the basic skills they need to succeed while getting inspired to try new things.

3. Designs Tools and Frameworks

This is another one that’s not as cut and dried. I think it depends on the tools used and the intent to use them.

Where Issues Start to Arise

There are certain site builder solutions that you’re going to be hard-pressed to create something innovative with. The same goes with using templates from sources like Dribbble. It’s just the nature of the beast.

If your goal is to create a cheap website very quickly for a client, then you’re probably going to use a cheap builder to do so. With ready-made templates and a lot of the work already done for you, you can create something that looks good with little effort.

When you’re limited by time and cost, of course you’re going to rely on shortcuts like cheap site builders or boring (but professional) design templates.

How to be More Careful

You can run into these kinds of issues with more flexible content management systems like WordPress or frameworks like Bootstrap, too.

Whenever you rely heavily on ready-made templates, pre-defined styles, or pre-built components, you run the risk of someone else’s work informing your own.

The solution is simple: Use demos, templates, UI kits, and so on as a base. Let them lay down the foundation that you work from.

But if you want your website to look different from the sea of lookalikes, you’re going to have to spend much more time developing a unique visual style that’s equally as effective in its mission. Which also means moving beyond clients that have small budgets or low expectations.

4. User Data

Data gathering is an important part of the job you do as a web designer.

You research the target user (or the existing user, when applicable). You look at industry trends as well as the competition to formulate an idea of what you need to build and how you’re going to do it. And you also use resources like Nielsen Norman Group and Think with Google that put out definitive research on what users want.

Even with the most niche of audiences, consumers’ wants and needs are all basically the same. So, obviously, you have to design experiences that align with them. If you deviate too much from what they expect from your site or brand, you run the risk of creating too much friction.

Is This a Bad Thing?

It’s not in terms of usability. If we build simple, predictable and user-friendly interfaces based on data that successfully drive visitors to convert, that’s great. So long as the content remains strong and the UI attractive, there’s nothing wrong with that approach.

But…

This is the same issue presented by templates and site builders. If you do exactly what’s needed and not much more, your site is going to look and act just like everyone else’s. Which comes at the cost of your brand reputation.

Just look at Google’s Material Design. This design system may have made it easier for web and app designers to create new solutions that were user-friendly and responsive, but there was just too much spelled out. And this led to a slew of Material Design lookalikes everywhere you turned.

This is the whole reason why companies take the time to craft a unique selling proposition. Without a USP, brands become interchangeable in the eyes of consumers.

So, again, my suggestion here is to use data to formulate a strategy for building your website. But don’t forget to spend time adding a unique style, and voice of the brand to the site.

Wrap-Up

It seems like, despite all that we’ve learned to do, websites are becoming less and less diverse in terms of design. And I think a lot of that is due to the fact that it’s much easier to design websites today than it was ten, or even five years ago.

Modern-day education, resources, tools, and consumer data take a lot of the questions and the work out of building websites. Which is good… but only to a point.

Unless you’re building websites for clients who have absolutely no budget, you can’t afford to skimp on the creativity and personalization that will set their website apart. Yes, you need to adhere to tried-and-true practices and standards, but beyond that, you should be experimenting.


Featured image uses photo by Kari Shea.

Source

p img {display:inline-block; margin-right:10px;}
.alignleft {float:left;}
p.showcase {clear:both;}
body#browserfriendly p, body#podcast p, div#emailbody p{margin:0;}

Source de l’article sur