Articles

User experience design is something that most of us associate with websites. But why isn’t it something we extend beyond the website?

Here’s why I ask this:

As a consumer, it’s so rare that your only interaction with a brand is through its website. Take an ecommerce site, for example. You buy a product from it, and then what happens?

  • You get a confirmation email;
  • You get another email when the package ships;
  • You might get another email or SMS notification when the package is delivered;
  • You retrieve the package and open it;
  • You open up your purchase and use it.

These are all an extension of that initial user experience on the site. If there’s just one hiccup along the way, it could easily erode the trust and happiness you felt after quickly finding and buying what you needed on the site.

So, what I’d like to do today is look at 10 areas where UX design should extend beyond the website to ensure that the frictionless experience started there remains untarnished.

Extending UX Design Beyond the Website

As a web designer, you might be thinking that this part of the user experience doesn’t fall under the umbrella of your responsibilities. And you may be right about that.

For brands to truly be successful and profitable, someone needs to carefully examine the bigger picture and ensure that the user experience is flawless no matter how far away from the site it is. At the very least, you should share the UX research and strategy you do for a client’s site so their team can ensure it carries over to other areas of the business.

Here are some things to think about:

1. Mobile App

It’s not uncommon for websites to have mobile app counterparts these days. The layout doesn’t need to be identical since mobile users tend to behave differently than those on desktop.

That said, an app shouldn’t force users accustomed to the desktop experience to re-learn how to navigate or engage with the brand. So, the branding, UI design, speed, security, and navigation all need to be on par with what’s already been established in terms of usability.
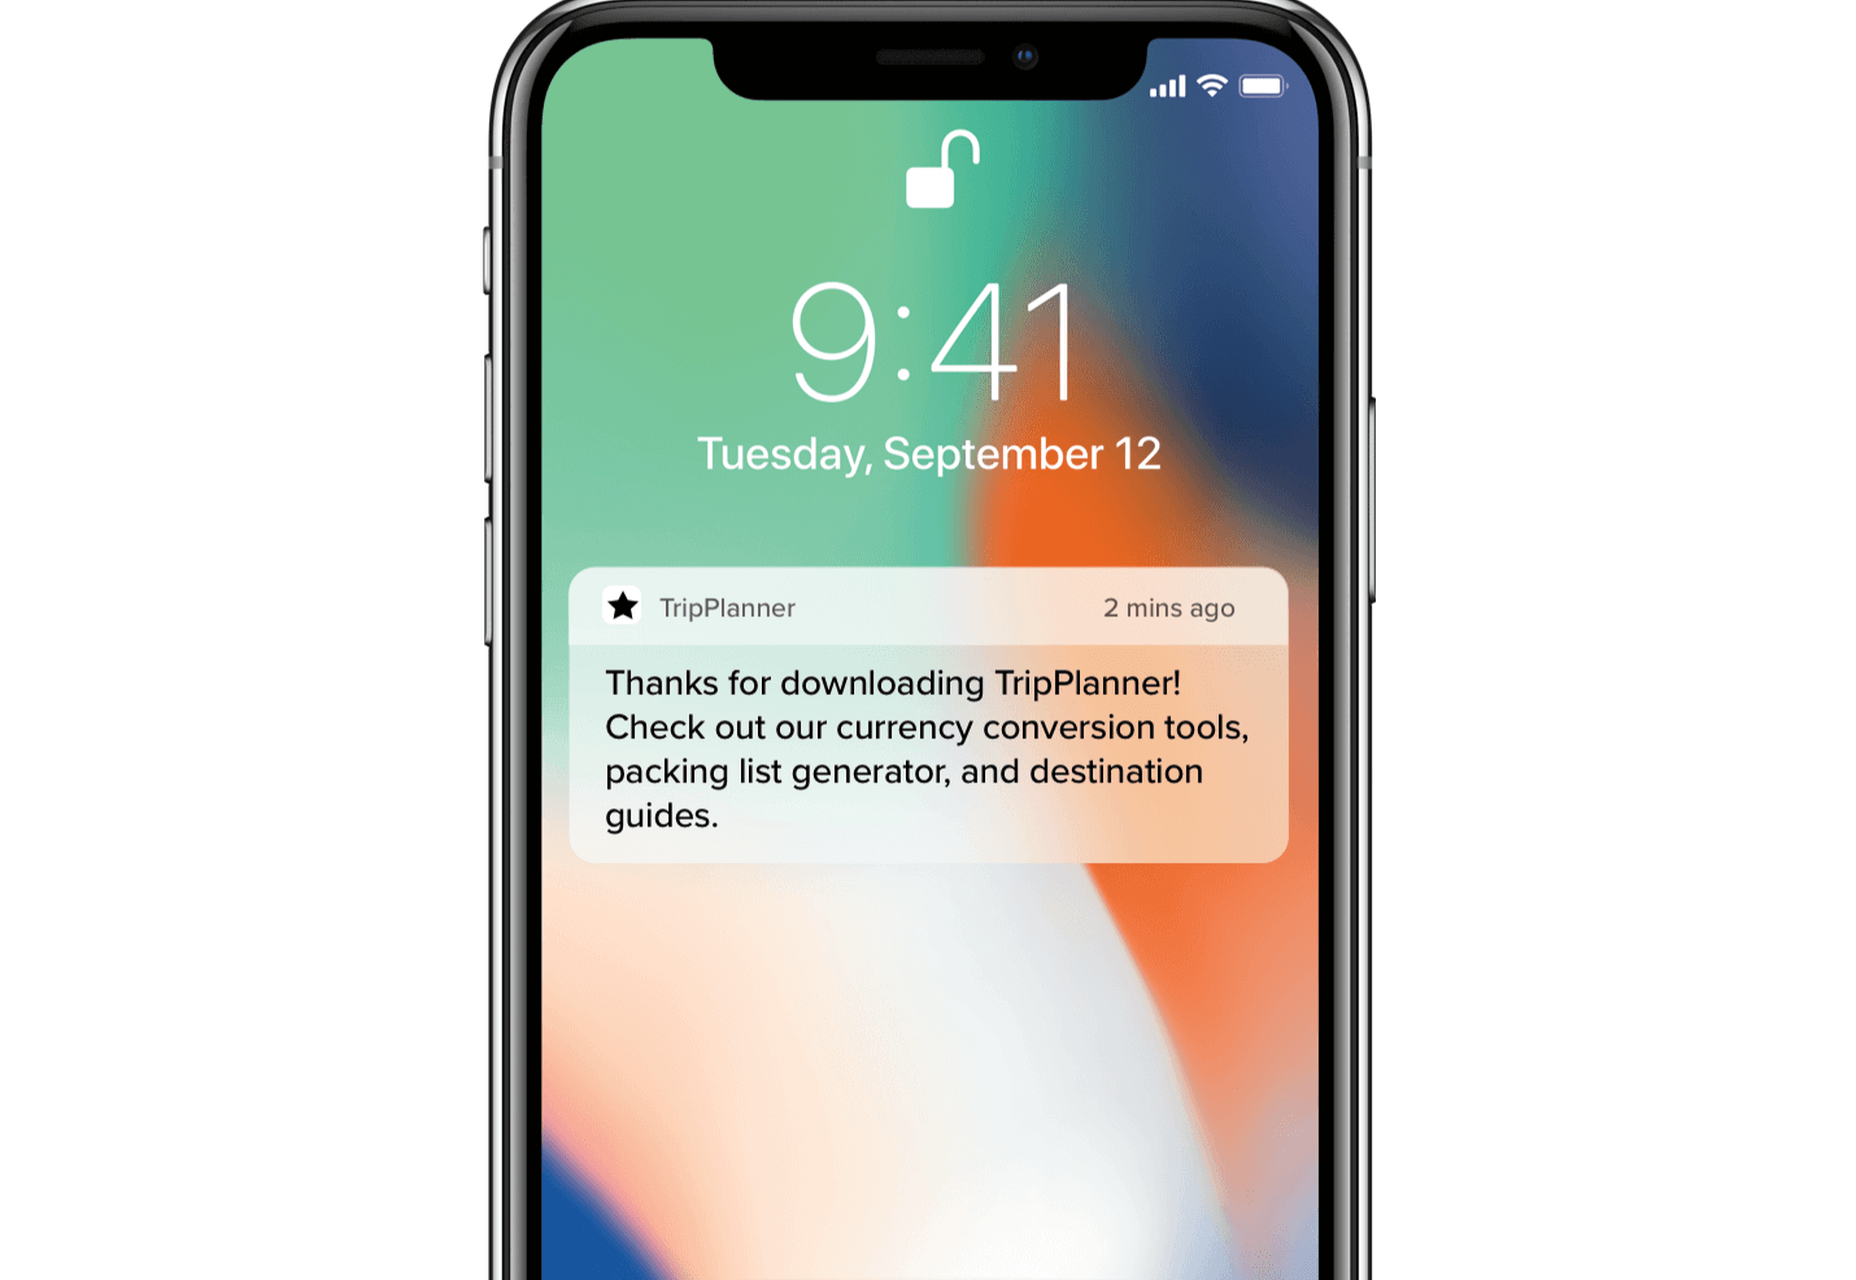
2. Email

Most websites have a direct connection to email. For example, blog newsletters, purchase confirmation emails, and lead generation follow-ups all start on the website.

Consumers are well aware that when they hand over their email address, they will receive an email in return. In many cases, those emails are welcomed when they’re done right. But if something feels off, that bridge could easily burn between brand and consumer.

To preserve the UX, emails should come with the following:

  • The same branding and visual style as the website;
  • A personalized subject line, greeting, or offer;
  • Consistent messaging as the site, especially when it comes to the CTA.

Another thing to remember is that email isn’t the time to inject dark patterns into the experience. So, the “Unsubscribe” option should be in an easy-to-spot area and a sharply contrasting font color.

3. Social Media

Social media is another channel that’s commonly connected to a website. While you can’t control the aesthetics of social media websites themselves, the visuals and messaging in posts need to be on-brand.

That means that things like memes and emojis — which are popular means of communication on social — should only be used if they’re normally part of the brand identity. If not, you’ll need to find other ways to communicate engagingly.

Another part of the user experience to think about is customer support. Social media is a lot like going into a store. If someone has an issue with what they bought or the service they received, there will be many people around to witness the complaint. Social media only amplifies that — so the quality of customer care needs to be consistent with how the brand handles it everywhere else.

4. SMS

Not every brand will need to be connected to customers via text messaging. eCommerce companies, news sites, and personal services providers likely will, though.

However a brand uses SMS, the same UX guidelines apply here as they do across all other channels:

  • Keep messages concise;
  • Make sure they’re relevant and valuable;
  • Use branded messaging and design;
  • Don’t abuse the privilege and send too many;
  • Make it easy to opt out.

Basically, if you can’t make it a valuable extension of the brand’s offering, don’t use it.

5. Phone

Any website that publishes its phone number should expect to receive calls from prospects and customers. While there’s nothing to design here visually, the experience of getting on the phone with a company should be consistent with what they experience elsewhere.

One way to do this is to design an easy-to-follow routing system. It should be simple for callers to figure out which number to choose. What’s more, there should be no endless loops. If a caller has exhausted the options, they should be immediately directed to a representative.

Another way to ensure consistency is to adhere to a script — that goes for call centers for enterprises as well as the local lawyer’s office. Every caller should be greeted with the same tone and handled in the same manner (depending on the situation, of course).

6. Ads

There are a lot of places where brands can advertise these days:

  • Google search;
  • Social media;
  • Ad networks;
  • TV;
  • Radio;
  • Podcasts;
  • Blogs;
  • Billboards;
  • Direct mail.

When designing an ad campaign, there should be consistent messaging, aesthetics (when relevant), and CTAs presented. If branding isn’t consistent from ad to ad, there may be a delay in consumers recognizing the brand or its offer. Or, worse, not recognizing it at all.

7. Packaging

For brands that sell products, you have to think about how the packaging will impact the user experience. There are two types of packages to consider, too.

The first is the product’s own packaging. Branding should be clear as day and consistent with the site they bought it from.

It should also be easy to open. There’s nothing more frustrating than finally getting your purchase, only to realize you need tools to get it out of the packaging.

You also have to think about packaging for products that get shipped.

The product should fit well within the packaging. A too-roomy package will feel downright wasteful. So will excessive bubble wrap and paper filler.

Having a shipping label present in the package is also important. If the website makes it easy to make a purchase, the package should offer a convenient way to return the product if they’re not happy.

8. Product

The product itself has to align with the expectations set by the website.

Take the example of a SaaS. You’ve built an awesome landing page and mobile app store page to promote it. It looks great, it loads fast, and it’s easy to get around. But if the SaaS itself is ugly, disorganized, slow, or otherwise just clunky, all of the work you did to market it will end up being just false advertising.

So, make sure the expectations set before and during purchase naturally carry over to the experience with the product.

9. Business Exterior

For brick-and-mortar companies, the business’s exterior matters just as much as what happens inside it.

The most obvious thing to focus on is the aesthetics of the building. Does it look attractive? Is it in a safe area? Is there clear signage around it? Is it easy to find?

But you also have to think about user experiences that take place outside of the building. For example, there’s now a rise in curbside pickup. There are tons of things that can affect how happy the customer is with the experience — like if the pickup area is hard to find, there are never enough spots or the associates who deliver the orders always seem to be in a foul mood.

The business’s exterior should always set a good impression for what takes place inside.

10. Business Interior

Here are some things to think about when it comes to “designing” business interiors for a good UX:

  • Decor;
  • Layout;
  • Signage;
  • Furnishings;
  • Product discoverability;
  • Availability (of products or people);
  • Quality of customer service;
  • Checkout process.

It doesn’t matter what the company does — whether it’s a large retailer like Walmart or your own freelance design business. If a business’s establishment doesn’t look good, operate flawlessly, or provide a good person-to-person experience, it’s going to be very hard to get people to return.

So, all those things you do to design a streamlined website journey should be applied to a bricks-and-mortar business’s interior.

Wrapping Up

Depending on the types of companies you build sites for, some of the channels and suggestions above might not be relevant. Hopefully, this has got you thinking about other ways you (and your clients) can extend the UX design and strategy from the website.

If you can maintain the high-quality user experience from channel to channel, your clients’ brands will get more business, grow their profitability, and see a rise in loyalty, too.


Featured image via Pexels.

Source

The post UX Design Doesn’t End With Your Website first appeared on Webdesigner Depot.


Source de l’article sur Webdesignerdepot

L’équipementier japonais JTEKT cherchait un outil de planification flexible et rapide pour améliorer son processus S&OP. La solution SAP IBP et l’intégrateur TeamWork ont été choisis pour ce projet d’envergure.

JTEKT est un équipementier proposant des systèmes de direction automobile, mais aussi des roulements et des machines-outils. L’industriel japonais regroupe 137 filiales de par le monde. La branche Europe division automobile compte plus de 4600 collaborateurs, ainsi que 7 usines réparties dans 6 pays, pour un chiffre d’affaires annuel de 1,7 milliard d’euros.

L’Europe est stratégique, car c’est elle qui concentre le plus de constructeurs automobiles premium. Notez d’ailleurs que PSA et Renault font partie des clients de l’équipementier. Le siège européen de JTEKT est situé en France, à Irigny, près de Lyon.

La volonté de gagner en flexibilité et réactivité

Les équipementiers automobiles travaillent dans un secteur procurant une grande visibilité, la mise au point de nouveaux véhicules se faisant très en amont et les projections sur le volume d’activité étant particulièrement précises. Fort de cette visibilité, JTEKT a pris l’habitude d’investir sur le moyen et long termes. « Nous avons vraiment une culture du business plan dans le groupe, confirme Blandine Simon, Purchasing Performance Project Leader chez JTEKT. À ce titre, nous avions déjà une vision S&OP, mais à visée plus stratégique qu’opérationnelle. »

Pour la planification, JTEKT s’appuie – comme de nombreuses entreprises – sur Microsoft Excel. Une solution perfectible : non intégration dans l’ERP ; planification longue et fastidieuse ; manque de flexibilité et de réactivité.

L’équipementier s’est tourné vers SAP IBP, car l’interaction qu’il propose avec Microsoft Excel en fait un outil familier pour les utilisateurs. « Excel n’est toutefois que la partie émergé de la solution, les données étant concentrées dans une base de données SAP HANA en mode cloud », précise Daniel Lellouche, Directeur et Consultant Architecte SAP SCM, Dowap by TeamWork. SAP IBP propose d’autres atouts, comme la capacité à intégrer des données venant de sources hétérogènes et le partage du processus S&OP avec l’ensemble de la supply chain.

Une phase de POC essentielle

Partenaire de longue date de JTEKT, TeamWork a été tout naturellement choisi pour ce projet, avec des objectifs répartis selon quatre thématiques : Demand Plan (business plan S&OP, projections de chiffre d’affaires et estimations du gap par rapport au budget) ; Supply Plan (plans d’achats, plans de production des usines et inter-usines) ; Scenario (impacts des fluctuations de marché, capacité à répondre rapidement à des demandes client) ; Capacity (suivi des taux de charge des usines et machines, prise en compte des alertes fournisseurs).

Le projet a débuté par la mise au point d’un démonstrateur, sur une durée d’environ deux mois. Un POC s’appuyant sur les données de l’entreprise et proposant des scénarios réalistes. Par exemple la simulation d’un problème capacitaire chez un client.

« Le POC est très important, explique Blandine Simon. Il faut prendre le temps de le construire avec le prestataire, afin de comprendre l’outil, sa philosophie et les enjeux par rapport à votre business. Le passage à SAP IBP représente un changement notable dans la façon d’aborder la supply chain, poursuit Daniel Lellouche. Le POC permet d’illustrer ces changements et de visualiser les processus. C’est clairement un bon exercice. » Le POC est également décisif pour engager les métiers dans le projet… et convaincre la direction de la justesse de l’investissement.

Plusieurs vagues de déploiement programmées

Huit mois se sont écoulés entre le démarrage effectif du projet et la finalisation de la première étape, la planification budgétaire sur cinq ans. Les gains en réactivité sont impressionnants : « ce processus demande aujourd’hui quelques minutes de calcul, alors qu’il fallait compter en heures auparavant, témoigne Blandine Simon. Et nous ne nous arrachons plus les cheveux lorsqu’un client arrive avec une notification de dernière minute, car nous pouvons la prendre en compte rapidement. »

La seconde vague du projet, toujours en cours, consiste à intégrer le processus S&OP dans SAP IBP. « L’objectif est de prendre en compte les fluctuations de volume mensuellement et de les cascader dans la supply chain plus régulièrement qu’auparavant ». Il sera ainsi possible de déterminer chaque mois les écarts entre l’activité réelle et le budget.

D’autres étapes sont programmées : le suivi des projets potentiels ou en cours de réalisation, pour repousser encore la vision à long terme ; la gestion de la problématique capacitaire ; l’adoption de SAP IBP par d’autres divisions du groupe.

Aller plus vite et mieux anticiper

L’adoption de SAP IBP permet de gagner en temps sur la planification et en réactivité, pour la planification budgétaire annuelle, le suivi mensuel des activités, mais aussi lors de demandes ponctuelles. Par exemple lorsqu’un client sollicite les équipes pour des enquêtes capacitaires.

Ceci permet en bout de chaîne d’améliorer la satisfaction client. « La performance de SAP IBP est mise à la disposition des métiers, mais le premier acteur qui en profite c’est le client, qui obtient plus rapidement des réponses à ses questions », confirme Daniel Lellouche.

Le second bénéfice est l’anticipation, qui permet d’éviter certaines pertes financières. Que ce soit lors des hausses d’activité (difficultés d’approvisionnement) ou des baisses d’activité (augmentation des stocks morts).

Blandine Simon conclut sur le déroulé du projet : « nous avons particulièrement apprécié l’expérience de TeamWork dans la supply chain, le bon relationnel avec leurs consultants, toujours à l’écoute et en recherche de solutions. » Et concernant SAP IPB ? « Nous le trouvons rapide, flexible et intuitif. »


Pictogramme d'une chaîne, qui représente la supply chain

En savoir plus sur la planification de la Supply Chain


The post JTEKT accélère sa planification avec SAP IBP et TeamWork appeared first on SAP France News.

Source de l’article sur sap.com

You’ve named your business. You’ve sorted out the visual branding piece. Now, it’s time to get your business online so you can start making money.

In this post, we’re going to look at where your web design business needs to set up shop online and how to get it up and running quickly.

Step 1: Set Up Your Website

As a web designer or developer, having a website is non-negotiable.

Not only does a website provide prospective clients with all the information they need about you, it can help you automate many of those annoying tasks that get in the way of your actual paid work.

So, let’s start here:

Buy Your Domain Name

If you haven’t done so already, use the business name generator exercise to come up with a domain name. You then have a couple of options for buying it.

To Do:

  • Buy it from a domain name provider like GoDaddy or Domain.com;
  • Or buy it from your web hosting company;
  • Check the next step to see which option makes the most sense for you.

Choose a CMS

Use the same CMS as the one you’ll use to build your clients’ sites. That way, clients don’t wonder why you’d use something like Squarespace for your site, but then recommend WordPress for theirs, for example.

To Do:

  • If you use a self-hosted CMS (like WordPress, Drupal, or Joomla), hold on this until you purchase your web hosting;
  • If you use a hosted CMS (like Wix, Squarespace, or Shopify), you won’t need to do the next step. Instead, just sign up for your website builder and buy your domain name now.

Buy Your Web Hosting

If you’re wondering what the difference is between the various types of web hosting, read this post.

Basically, this is what you’re looking for:

  • A hosting company with a good reputation that provides expert and timely support;
  • An affordable starter plan — either shared or cloud hosting;
  • Server locations near you (at the very least, in the same country as you);
  • Top-notch security features at the server level as well as the physical hosting facility;
  • Caching and other speed optimizations built into the server and on-site equipment;
  • Compatibility with your CMS (look for one-click install, too).

Also, look for add-ons like SSL certificates, CDNs, and, of course, a free domain name.

To Do:

  • Sign up for the hosting plan you want along with your domain name and SSL certificate (this is a must for SEO);
  • Install your CMS from the control panel once you’re ready to go.

Build Your Website

Ultimately, you have two goals here:

  1. To build a website that convinces prospective clients that you’re the real deal;
  2. To build a website that prospects would want for themselves.

So, there’s no need to go crazy with outlandish features or futuristic animations and design. Keep it simple. Keep it neat. And give prospects an honest portrayal of who you are, and what you can do for them.

Design It

The first thing to do is take all that work you did to create your visual branding and use it to design your website.

If you’re building a WordPress website, consider starting with one of these multipurpose themes.

Build Out the Pages You Need

A theme will automatically create the pages you need (most of them, anyway). If you’re not sure which ones to start with, these are the ones your prospects are going to be looking for:

You may also want to add separate pages for Testimonials and Case Studies once you’ve accumulated enough of them to show off. For now, you can include samples of your work in the Portfolio page and testimonials on the Home page.

Fill in the Content

Even if writing isn’t your strong suit, that’s okay. So long as the content you write for your site is free of spelling and grammar errors, your prospective clients are going to focus on what you’re telling them, not on how proficient a writer you are.

That said, if you’re nervous about this piece of your website, here are some tips to help you out:

1. Be concise, it’s not just minimal design that goes over well with modern audiences. Minimal copy does, too.

2. Be transparent. Tell prospects what exactly they can expect when they work with you and why your web design services are going to be different from the competition.

3. Consumers don’t trust companies that use meaningless buzzwords and make empty claims. Instead, focus on writing about the real and very competitive skills you have. According to research from NIDO Student, these are the skills employers look for when hiring a designer:

4. Let your images tell some of the story for you. Just make sure you use (or create) images that will impress your audience.

5. After you’ve written your content, take a step back and tackle the structure and formatting from a designer’s POV.

6. Before you hit the “Publish” button, run your copy through Hemingway Editor to ensure your content is error-free.

Add the Right Features

When I talk about features, I’m referring to anything outside the main design and content on your website. These are usually sales and marketing tools like:

  • Chatbot/live chat
  • Contact forms
  • Pop-ups or notification banners
  • Discovery call scheduler
  • Cookies consent notice

Only add the features you absolutely need. In other words, the features that will automate the marketing and sales tasks you’d otherwise have to manage on your own.

Step 2: Optimize Your Website for Search Engines

Search engine optimization (SEO) is a very important part of the work you do to get your business online. Here’s why:

After you launch your business and website, the next thing you’re going to focus on is getting clients. This can take a lot of work as you pore over the following resources for referrals and leads:

  • Your existing contact list (i.e. family, friends, old employers, colleagues, etc.);
  • Freelance job boards;
  • Industry-specific job boards;
  • Social media posts, pages, and groups;
  • Google search results for “we’re hiring”;
  • And so on…

And when you’re not busy cold-emailing prospective clients or talking to them on the phone, you’re probably going to be working on your business’ processes. Running a business is very time-consuming.

So, what happens when you finally start working on website projects? It’s not like the client search ends there. It’s an ongoing thing. Which is why your website needs to be optimized for search.

Once your site gets indexed by Google and starts to generate authority, your pages will rank better and the increased visibility will start generating leads without you having to actively make the first move.

SEO is a huge topic, so I’m not going to cover it here. However, the links below will do a good job of guiding you towards your next steps.

To Do:

Step 3: Get Active on Social Media

Your website is going to play a lot of roles:

  • Digital business card;
  • Authority builder;
  • Marketing vehicle;
  • Sales platform;
  • Content marketer.

But there’s one very critical thing it can’t do and that’s directly converse with your audience and grow your network. This is why you need to spend time building out your social media once your website is good to go.

As for which social media platforms to use (as there are way too many), here are my thoughts:

Become an authority on Twitter.

Twitter is a good place to share daily thoughts and interesting content you’ve found on the web.

Get discovered on LinkedIn.

LinkedIn is useful because it’s another place to get noticed by potential employers, so make sure your relevant work experience and portfolio are up-to-date.

Connect with other creatives on Facebook.

It’s really hard to get noticed on Facebook unless you pay to play. Instead, use it to find groups that you can turn to for support, referrals, and brainstorming.

Share your work on Dribbble.

While you could use Instagram or Pinterest to show off your work, you might get more traction on a design-specific platform like Dribbble. Serve as inspiration for others and potentially get discovered by prospects looking for designers there.

Down the line you might decide to expand your business into recurring revenue opportunities like online courses. In that case, a platform like YouTube would be great. For now, focus your efforts on the main ones above.

To Do:

  • Create your social media accounts;
  • Brand them to match your website — both the visual component as well as the bio;
  • Start sharing content on a regular basis. You can automate sharing with a social media management tool, but remember to log in at least a couple times a week so you can engage with others, too;
  • Be careful not to commit these social media faux pas.

Wrap-Up

I realize this is a ton of information to throw at you. However, if you want to get your new business online and for it to succeed, you need to maximize the opportunities that are available to you.

I hope this three-part guide to starting a new business has been helpful. If you have any questions on the tips provided along the way, let me know in the comments.


Featured image via Pexels.

Source


Source de l’article sur Webdesignerdepot

A hacked WordPress site is as damaging as having your home burgled. It can completely shatter your peace of mind and adversely impact your online business. 

Why do hackers target WordPress sites? The answer is relatively simple: WordPress is the single biggest platform for website creation these days, so there’s a larger base to attack; this attracts the attention of online criminals. 

So, how can a hack impact your website? 

Depending on the type of attack, your website could suffer any of the following:

  • It could be defaced completely;
  • It could load or operate very slowly on any device;
  • It could completely crash and malfunction;
  • It could display the dreadful “White Screen of Death”;
  • Its incoming visitors could be redirected to other suspicious websites;
  • It could lose all your valuable customer data.

This list is not exhaustive but you get the idea.

Now that we know how a successful hack can impact your website and online business, let us look at the top 10 reasons behind WP hacks and prevent them.

1. An Insecure Web Host 

Like any website, WordPress is hosted on a web host or server. Unfortunately, most site owners do not pay much attention to the web host they select and choose the cheapest they can find. For example, it is more affordable to host a website on a shared hosting plan — one that shares its server resources with many other websites like yours.

This can make your site vulnerable to hackers as a successful hack into any website on the shared server. A single hacked site can consume the overall server bandwidth and impact all the other sites’ performance.

The only way to fix this problem is to opt for a reliable host and a virtual or dedicated server.

Pro tip: If you’re already using a shared hosting plan, check with your hosts if they offer VPS hosting and make the switch.

2. Use of Weak Passwords

Weak passwords are the main reason behind successful brute force attacks that target your account. Even to this day, users continue to use weak and common passwords like “password” or “123456”; if you’re one of them, your website could land in trouble!

Guessing weak passwords allows hackers to enter the admin accounts where they can inflict the maximum damage.

How do you fix this problem? Simple, ensure all your account users (including admin users) configure strong passwords for their login credentials. With at least 8 characters, passwords must be a mix of upper- and lower-case alphabets, numbers, and symbols. 

For added safety, install a password management tool that can automatically generate and store strong passwords.

Pro tip: You can use a plugin to reset passwords for all your users.

3. An Outdated WP Version

Outdated software is among the most common reasons why websites get hacked. Despite being free to download, most site users defer updating their site to the latest version, for fears of updates causing their site to crash.

Hackers take advantage of any vulnerability or bug in an older version and cause issues like SQL Injections, WP-VCD Malware, SEO Spam & other major issues like website redirecting to another site.

How do you solve this problem? When you see a notification about an update on your dashboard, update your site as soon as possible.

Pro tip: If you are worried about updates crashing your live website, you can first test the updates on a staging site.

4. Outdated WP Plugins and Themes

Similar to the previous point, hackers also take advantage of outdated, unused, or abandoned plugins and themes installed on websites. With over 55,000 plugins and themes that are available, it is easy to install a plugin or theme, even from unsafe or untrusted websites. 

Plus, many users do not update their installed plugins/themes to the latest version or do not find the updated version. This makes it easier for hackers to do their job & infect sites.

How do you avoid this problem? As with the core WP version, update each of your installed plugins/themes on your site regularly. Take stock of all the unused ones and remove them or replace them with better alternatives.

You can update your plugins/themes from your hosting account.

Pro tip: We suggest setting aside time every week to run updates. Test them on a staging site and then update your site.

5. Common Admin Usernames 

In addition to weak passwords, users also create common usernames that are easy to guess. 

This includes common usernames for admin users like – “admin”, “admin1”, or “admin123”. Common admin usernames make it easier for hackers to get into admin accounts and control backend files in your WP installation.

How do you avoid this problem? If you are using any such usernames that are easy to guess, change them immediately to a unique username. The easiest way of doing it is through your hosting account’s user management tool, by deleting the previous admin user and creating a new admin user with a unique username.

As the first step, change the default username of your admin user and limit users who have administrator privileges.

Pro tip: WordPress has 6 different user roles with limited permissions. Only grant admin access to users who really need it.

6. Use of Nulled Plugins/Themes 

Coming back to the importance of plugins/themes, users have access to many websites that sell nulled or pirated copies of popular and paid plugins and themes. While these are free to use, they are often riddled with malware. They can compromise your website’s overall security and make it easier for hackers to exploit. 

Being a pirated copy, nulled plugins/themes do not have any available updates from its development team, hence will not have any security fixes.

How do you fix this problem? Simple, for a start, only download original plugins and themes from trusted websites and marketplaces.

Pro tip: If you don’t wish to pay for paid or premium plugins and themes, opt for a free version of the same tools that will have limited features but are still safer to use than the nulled version. 

7. Unprotected Access to wp-admin Folder

To take control of your site, hackers often try to break into and control your wp-admin folder in your installation. As the website owner, you must take measures to protect your wp-admin directory.

How can you protect your wp-admin folder? First, restrict the number of users having access to this critical folder. Additionally, apply for password protection as an added layer of security for access to the wp-admin folder. You can do this using the “Password Protection Directories” feature of the cPanel in your web host account.

Pro tip: Besides these fixes, you can also implement Two Factor Authentication (or 2FA) protection for all your admin accounts.

8. Non-SSL Website

You can easily migrate your HTTP website to HTTPS by installing an SSL certificate on your site. SSL (or Secure Socket Layer) is a secure mode of encrypting any data transmission between your web server and the client browser.

Without this encryption, hackers can intercept the data and steal it. Plus, a non-secure website can have many negative implications for your business – lower SEO ranking, loss of customer trust, or a drop in incoming traffic.

How do you fix this problem? You can quickly obtain an SSL certificate from your hosting company or SSL providers. It encrypts all data that is sent from and received by your website. 

Pro tip: You can get a free SSL certificate from places like Let’s Encrypt, but these provide limit protection that will only be sufficient for a starter site or small site.

9. No Firewall Protection

Lack of firewall protection is another common reason why hackers can bypass website security measures and infiltrate the backend resources. Firewalls are the last line of defence against hackers and work like the security alarm installed on your house. Firewalls monitor web requests coming from various IP addresses, including the suspicious (or bad) ones. 

They can identify and block requests that are known to be malicious in the past, thus preventing easy access for hackers to your website domain. Web application firewalls can thwart various attacks, including brute force attacks, XSS, and SQL injections.

Pro tip: A firewall provides much-needed security and is  your first line of defence. But it’s important to also have a malware scanner installed.

10. Lack of WordPress Hardening Measures

Typically, hackers target the most vulnerable areas or weaknesses within a WP installation, to illegally access or damage the website. The WordPress team has identified these vulnerable areas and has devised a list of 12 hardening measures recommended for every website.

A few of these include:

  • Disabling the File Editor;
  • Preventing PHP execution in untrusted folders;
  • Changing the security keys;
  • Disallowing plugin installations;
  • Automatic logout of inactive users;

How do you implement these hardening measures? While some steps are easy to understand, others require the technical expertise of how WordPress works. 

Pro tip: You can implement hardening measures on your own. However, some measures require technical expertise so in these cases, it’s much easier and safer to use a plugin.


Featured image via Pexels.

Source


Source de l’article sur Webdesignerdepot

Plugins offer a ton of benefits to developers and website administrators; from flexibility, to saving time in development, the right plugin is priceless to a project.

In this article, we’ll cover a list of the best new plugins for October 2020. You’ll find useful plugins for WordPress, Craft, Shopify, and Joomla.

Let’s get started.

WordPress

Sticky Post Expire

Sticky Post Expire is a simple plugin for WordPress that allows you to add an expiration date to your sticky posts. When the expiration date you set on a post expires, the post will automatically no longer be sticky. All you need to do is install/enable the plugin and a meta checkbox will appear in your posts admin area. It’s in this checkbox you will set the post’s expiration date.

Product page shipping calculator for WooCommerce

The Product Page Shipping Calculator plugin allows your customers to calculate the cost of shipping before adding the product to their cart. The plugin also allows customers to see the available shipping methods for their area. If the product cannot be shipped to the customer’s location, the plugin will notify the customer. All calculations are done using Ajax, so you don’t have to worry about the plugin slowing down your site.

Payment Page

Payment Page makes it easy to collect payments on your WordPress website. The plugin allows you to connect to any payment gateway platform of choice. You can also receive one-time or recurring payments using Payment Page. The plugin comes with beautifully designed templates that you can customize to fit your brand and style. The form builder helps you increase your sales and conversions. You can collect payment in any currency. After payment, customers will also receive a confirmation message.

WP Roadmap

Wp Roadmap is a product feedback board for WordPress. The plugins allow you to display your company’s product roadmap on your WordPress website or blog. The plugin will display your new products, business developments, upcoming events, achievements, awards, and future projects on your site. WP Roadmap also gives you the option to collect and create feedback boards. The plugin comes with an intuitive interface and works with any WordPress theme.

LiveSession

LiveSession is a session replay plugin for WordPress. The plugin allows you to record everything happening on your site, including clicks, scrolls, and mouse movements. This plugin helps you understand how your visitors interact with your website. You can rewatch the videos as many times as you like. Instead of recording every single visitor on your site, LiveSession will record visitors with a high engagement score.

The plugin also comes with a feature called Rage Clicks. This feature helps you identify when visitors encounter Javascript errors. The plugin also has a beta feature called Clickmap. It helps you identify the specific elements on your site that visitors clicked and how many times. There is also a heatmap feature that identifies which pages on your site get the most interaction. The plugin is very useful in improving your user experience (UX) and conversion rates. It easily integrates with Google Analytics, Segment, Intercom, LiveChat, HelpScout, Olark, Wix, Shopify, and WooCommerce.

Auction Feed

Auction Feed makes it easy to display eBay items on your WordPress website. Visitors to your website will be able to search and buy products directly from your site. The plugin comes with a variety of styles to fit any WordPress theme. You can also add a product description above or below the product image. Customers won’t have to leave your website before making their purchases. The plugin is also free to use.

Floating Related Posts

Floating Related Posts is a WordPress plugin that allows you to display a banner with a list of related posts on your website. The banner can appear at the top or bottom of the web page. You can set the banner to pop up using a time filter or scroll trigger. The plugin is also compatible with Google Analytics. You can customize the banner background color, font size, button style, and text color. The plugin can be translated into any language.

Simple Restrict Content

The Simple Restrict Content plugin allows you to restrict the content that visitors can access on your WordPress site. You can choose who can access content on your website by setting up roles. The simple lightweight plugin restricts different content types, including, posts, web pages, and WooCommerce products. The plugin is available in Spanish and English.

Easy Video Publisher

Easy Video Publisher is a WordPress plugin that allows you to easily publish YouTube videos on your website. You can import YouTube videos from multiple channels. You can also schedule the YouTube videos to automatically upload to your website. Note that a YouTube API key is needed to import multiple videos at a time from a specific channel. The plugin allows you to use multiple API keys.

Preloader Awesome

Preloader Awesome is a preloader plugin for WordPress that allows you to create a page preloader interface while the rest of the webpage is still loading. Preloaders are interface elements that notify visitors that your website hasn’t crashed, just processing before serving content. Some of the features of the plugin include 14 page transition styles, progress bar, GIF support, 10+ default CSS loader, progress status counter, unlimited color, and counter font size options. The plugin is responsive and works on all modern browsers.

Menu Hover Effect

The Menu Hover Effect plugin allows you to add hover effects to the menu bar on your website. With this plugin, you don’t need to learn CSS. This plugin gives you 20 CSS menu hover options to choose from. It is a lightweight plugin and won’t affect your website speed.

Better Comments

The Better Comments plugin allows WordPress users to easily customize the comment section of their website. With the plugin, you can customize the look of your comment form fields, match the submit button with the colors of your site, and hide the comment’s date. The plugin also allows you to create a comment policy section. You can further customize the comment fields to highlight when they are selected and typed in. If you find rounded avatars common, the plugin also offers a hexagonal avatar option.

WP Pocket URLs

WP Pocket URLs is a handy WordPress Plugin that helps you manage your affiliate links. The plugin allows users to automatically shorten and track any affiliate link on their website. You can also manually shorten the links on your website. Each time a visitor clicks on a link you get access to information like click date/time, country, IP address, etc. You can also categorize your links and also create custom permalinks. There is also a dashboard widget that displays your top 10 links. On the “Reports” page, you can generate clicks reports. You can filter the reports by Month/Year, link category, country, and link title.

Craft CMS

Formie

Formie is a Craft CMS plugin that allows you to create user-friendly forms. The plugin comes with a drag and drop builder for creating forms. You can store user form submissions in your control panel in case you want to review them later. When a user submits a form, you will get an email notification. Formie also has an in-built keyword blocking feature to protect you from spam. The plugin has several integrationS: API for Elements, Address Providers, Captchas, CRM tools, Webhooks, and Email Marketing software. You can also create your custom integration. You can add over 25 fields to your forms using Formie.

Craftagram

Craftagram is a Craft CMS plugin for adding any Instagram feed to your website. Since the plugin uses the official Instagram API, you don’t have to worry about your website getting blacklisted. Craftagram also handles pagination for your Instagram feed. 

Shopify

We’re Open

We’re Open is a handy plugin for Shopify users. The plugin lets your customers know when you are open to receive new orders. Once your business hours are close, customers won’t be able to make new orders. A message will be displayed in your store that you are closed. The plugin ensures that you only receive orders when you are open. It works in any time zone and the API easily integrates with mobile apps.

Punch Metrics

Punch Metrics is a Shopify Plugin that helps you track your store’s visitors and also analyze their behavior. The plugin offers real-time data on your site’s visitors, the pages that see the most engagement, and which devices are the most popular. You can also record and replay visitors’ sessions so you can know exactly what they did on your site. Punch Metrics also has a heatmap tracking feature to understand which elements on your site get the most clicks.

Joomla

Simple Sliders

Simple Sliders is a content plugin for Joomla. The plugin allows users to easily create accordion sliders in their articles. You can add the sliders to your Joomla articles by adding this code:

{s​lider title="Slider 1 Title" class="blue"}
Slider 1 content.
{s​lider title="Slider 2 Title" class="red"}
Slider 2 content.
{/s​liders}

Jitsi Conferencing

Jitsi Conferencing is a video conferencing plugin for Joomla. The plugin will allow you to host meetings and easily connect with your clients. The module is simple and effective to use.


Featured image via Unsplash.

Source


Source de l’article sur Webdesignerdepot

Alors que les collaborateurs commencent à abandonner progressivement cette longue période de travail à distance et à retourner sur leur lieu de travail, les entreprises se demandent à quel moment et de quelle manière il convient de le faire en toute sécurité. Il s’agit d’une tâche essentielle et d’un nouveau défi pour tous, tant pour les employés que pour les responsables des ressources humaines (RH).

Tout d’abord, la santé ainsi que le bien-être des collaborateurs et de leurs familles sont en jeu. Deuxièmement, il existe des risques commerciaux que les employeurs peuvent ne pas prendre en compte, allant du respect de la vie privée au non-respect du règlement général sur la protection des données (RGPD).

Aux États-Unis, par exemple, les Centres pour le contrôle et la prévention des maladies (CDC) ont récemment formulé des recommandations détaillées pour améliorer la sécurité dans les immeubles de bureaux, notamment en contrôlant les températures et les symptômes. Par ailleurs, l’Equal Employment Opportunity Commission (EEOC) des États-Unis continue de réviser ses lignes directrices aux employeurs afin d’équilibrer le respect du Americans with Disabilities Act (ADA) et des CDC.

Cette situation peut être éprouvante pour n’importe quelle organisation. Nombreuses sont celles qui choisissent d’adopter une longue période de travail à distance avec des horaires flexibles. Les entreprises qui sont implantées dans plusieurs régions se trouvent dans des phases et des environnements très différents. De l’Asie à l’Europe, certaines régions se montrent plus agressives en matière de déconfinement.

La première recommandation que j’adresse aux clients qui envisagent de faire revenir leurs employés au travail en toute sécurité est de commencer par un plan qui intégrera les processus RH. Pour aider les clients de tous les secteurs et de tous les pays à gérer cette transition, SAP a publié les principales mises à jour de la solution SAP SuccessFactors Visa and Permits Management ainsi que l’application partenaire Guardian by AlertEnterprise.

Une technologie SAP tournée vers l’avenir pour un lieu de travail sûr et sain

Au lancement, la solution SAP SuccessFactors Visa and Permits avait un cas d’utilisation particulier, comme en témoigne son nom. Cependant, en travaillant avec ses clients pour étendre ses capacités, SAP a découvert de nombreux cas d’utilisation autour du suivi des certificats, des licences, des justificatifs et de bien d’autres choses encore qui sont particulièrement pertinentes aujourd’hui. Grâce à cette solution, les utilisateurs peuvent désormais contrôler le processus visant à faire revenir les employés au bureau tout en automatisant l’application de politiques complexes et évolutives en matière de santé et de sécurité liées au COVID-19 pour mieux protéger les personnes.

En quoi ces outils sont-ils utiles ?

Pour assurer un retour au travail sûr et sain, voici une approche en trois étapes qui vous permettra de démarrer.

Préparation

Grâce à la solution SAP SuccessFactors Visa and Permits, soutenez le déconfinement tout en minimisant les risques, et gérez les procédures de santé et de sécurité qui encadrent le retour au travail des collaborateurs.

  • Prévoyez pour vos collaborateurs un moyen sûr d’envoyer les documents, comme une preuve de certificat numérique de santé ou des justificatifs, avant leur retour au travail.
  • Suivez les coûts du dépistage. Les fonctionnalités de libre-service permettent aux utilisateurs de remplir et de soumettre des documents afin de réduire le travail manuel.
  • Gérez les renseignements médicaux sensibles des collaborateurs. Par exemple, les lignes directrices de l’EEOC précisent que l’ADA demande que les renseignements médicaux concernant un employé soient stockés séparément du dossier personnel de l’individu afin de limiter l’accès aux informations confidentielles. Autrement dit, au lieu de stocker les nouveaux renseignements médicaux dans SAP SuccessFactors Employee Central, ces informations peuvent être gérées dans SAP SuccessFactors Visa and Permits, ce qui contribue à la fois à sécuriser les données et à protéger les collaborateurs.
  • Réduisez le risque d’encourir de lourdes sanctions financières, comme le non-respect du RGPD en matière de « traitement de catégories particulières de données à caractère personnel ». Respectez les réglementations légales supplémentaires et les règles en matière de confidentialité des données, comme la Health Insurance Portability And Accountability Act ou HIPAA.
  • Configurez les processus de notification, d’approbation, de renouvellement et plus. Les tableaux de bord fournissent un aperçu de la conformité, et les actions en temps réel permettent aux entreprises de gérer en toute confiance leur personnel dans un environnement en constante évolution.
  • En ce qui concerne l’intégration, les entreprises ont la possibilité de simplifier le processus d’embauche afin de traiter les formalités administratives le plus tôt possible pour que les nouveaux collaborateurs puissent commencer à travailler.

Prévention

Faites revenir le personnel non essentiel au bureau en toute sécurité grâce à la solution AlertEnterprise Health & Safety Access Governance.

  • Contrôlez le nombre de personnes dans les locaux, gérez l’accès aux sites qui sont temporairement saturés et autorisez de nouveaux modes de travail par roulement
  • Prévoyez un système d’autodéclaration et d’autoattestation avec un rétablissement contrôlé de l’accès au lieu de travail déterminé par la politique. Par exemple, les employés et les visiteurs peuvent s’autoévaluer et vérifier s’ils ont de la fièvre, si quelqu’un dans leur foyer a été déclaré positif au COVID-19, etc.
  • Gérez les contrôles d’entrée au site grâce au libre-service pour les contrôles préalables, comme les contrôles de température, avec l’application de politiques et la gestion de l’accès.
  • Mettez en place des systèmes de badges et de sécurité pour gérer l’accès à l’espace de travail et contribuer à l’application des politiques de l’entreprise, comme avec le retrait automatique de l’accès.

Détection

Minimisez les risques permanents grâce à la solution AlertEnterprise Health & Safety Intelligence Tracker et protégez votre lieu de travail.

  • Utilisez les analyses pour suivre les personnes qui ont été exposées au COVID-19 ou qui pourraient l’être. Cette technologie permet de suivre une infection suspecte ou confirmée et de détecter les personnes ainsi que les zones susceptibles d’avoir été exposées au virus.
  • Déterminez les zones exposées pour les mettre en quarantaine ou les assainir. Les zones à haut risque peuvent alors être désinfectées, et les personnes à haut risque peuvent se voir retirer leur accès de sécurité.
  • Prenez des décisions à partir de données concrètes, comme les niveaux d’exposition, les cartes thermiques de localisation, et d’autres analyses de santé et de sécurité.

En ce qui concerne le déconfinement, les clients comprennent qu’il ne s’agit pas de revenir au travail comme si de rien n’était. Ils savent que le déconfinement ne se résume pas à choisir une date pour ouvrir les portes et à distribuer du gel hydroalcoolique. En cette période d’incertitude, ils veulent apprendre à préserver la santé, la sécurité et la sûreté de leurs collaborateurs et clientèle.

Si chacun doit jouer son rôle en assumant une responsabilité personnelle, les employeurs peuvent ouvrir la voie à un retour au travail sûr et sain.


Imran Sajid est le directeur international de la gestion du capital humain pour SAP SuccessFactors.

Publié pour la première fois en anglais sur news.sap.com

The post Préparer, prévenir, détecter : comment les employeurs peuvent assurer un retour au travail sûr et sain appeared first on SAP France News.

Source de l’article sur sap.com

To understand why user onboarding is such an indispensable tool, we need to empathize with the people using our products; we all come from different backgrounds and cultures, we make different assumptions, and we see the world differently.

User onboarding helps mitigate these differences by making your product’s learning curve less steep.

However, companies often make unfortunate mistakes that hinder user experience and cause frustration. In today’s article, we’ll take a look at eight ways companies ruin their products’ onboarding process.

Let’s dive right in, shall we?

1. No User Onboarding at all

As a part of the team that created a product, you’ve probably spent hundreds of hours going over its features and the most minute detail. Naturally, you know the product like the back of your hand. The user does not.

Naturally, you know the product like the back of your hand. The user does not

We may believe that the app we’ve worked on is straightforward and that user onboarding is probably overkill — but that’s almost never the case. Guiding our users through a product will help with retention, conversion, and their overall satisfaction.

However, there are very rare cases when you can do without user onboarding, here are a few:

  • Your product is too straightforward to cause any confusion;
  • Your product has a formulaic structure, similar to that of other products’ in your category, i.e., social media or e-commerce;
  • Your product relies heavily on Google or iOS design guidelines with common design patterns;
  • Your product is too complex (enterprise or business-oriented) — in such cases, users need special training, rather than just an onboarding;

2. Assuming That Users “Get It”

 One of the vital UX mottos we should always be mindful of is that “we are not our users.” When onboarding them, we always need to assume that they’re at square one. We should communicate with them as if they have no prior knowledge of our product, its terminology, and the way it works.

Providing freshly-registered users with highly contextual information will most likely confuse them. As a result, this will render your attempts to create a helpful onboarding process useless.  

3. Onboarding Users on a Single Touchpoint

it’s tempting to brainstorm which features should make it into the onboarding, then design and code them; that’s a very bad idea

The main problem with the previous point is that it’s too contextual for new users. However, providing no context altogether can be problematic as well. This is commonly found in onboarding processes that focus on a single touchpoint while leaving out the rest of the product.

By choosing to inform users of our product’s features, we force them to detour from their “normal” course of action. This comes at the cost of the user’s frustration.

Since we’re asking people to pay this price, it’s best to provide them with information that will also help them navigate the entire product. As a result, this will decrease the number of times we’ll have to distract them from their ordinary flow.

4. Forcing Users Through Onboarding

We’ve previously mentioned that we mustn’t assume that users have any background knowledge about our products.

The opposite argument can be made — experienced users don’t need a basic onboarding process. It will most likely frustrate them, and it won’t provide them with any real value. Also, forcing users through this process will most likely take the onboarding frustration to a whole other level.

This is why it’s essential that we allow them to skip the parts they don’t find useful. This way, we’ll address the knowledge gaps of the people who really want it and need it.

5. Onboarding Based Purely on Assumptions

This is yet another point that’s implicit in “we are not our users”. Oftentimes, it’s tempting to brainstorm which features should make it into the onboarding, then design and code them; that’s a very bad idea.

Here’s what every designer should do instead:

  • Do user interviews: You should conduct these before having anything designed; user interviews will help you shortlist and prioritize features in terms of their significance, so that the onboarding is focused around the features that matter most.
  • Do usability testing: Once you have a good idea of what features your users consider most important, design onboarding that reflects that; having completed your design, make sure to conduct at least 5 usability testing sessions with users, so that you can make sure that your design works.

6. Just Letting Users Quit

While we shouldn’t force people to go through onboarding, it doesn’t mean we shouldn’t nudge them in the right direction.

find that sweet spot between being front of mind and annoying

People choose not to onboard for many reasons, but showing them around will benefit both parties. Therefore, it’s never wrong to remind them that they can always resume onboarding via email or push notifications (unless you’re too pushy). Make sure to find that sweet spot between being front of mind and annoying. 

Similarly, these two mediums are a great way to deliver valuable information as well.

Here’s a great example of an onboarding email from InVision:

And here’s a clever notification from TripPlanner:

Source: clevertap.com

7. Asking For Too Much Information

We need to always be mindful of the fact that the product’s spokesperson should act as a guide during onboarding. Its goal at the very beginning is to build trust.

We can ask for small favors when we’ve built a solid and lasting relationship

Not only is asking for too much information from the get-go unproductive, but it will also undermine the trust that the user already gave us.

It’s best to abstain from asking freshly-registered users for their credit card information. Nearly 100% of businesses care about profits — and there’s no shame in it. However, today’s most successful companies make money by providing users with value. So it’s best to stimulate users to share their financial data in subtler ways while focusing on customer experience.

The same can be said about subjecting the people using your service to extensive questionnaires. At the first steps of our interaction, it’s all about giving and gaining trust. We can ask for small favors when we’ve built a solid and lasting relationship.

8. Onboarding for the Sake of Onboarding

While there are dozens of reasons why you should guide your users through your product, it needs to be done well. A pointless onboarding process that doesn’t provide users with value is more frustrating than the lack thereof.

Onboarding can be a bit frustrating at times. Pointless onboarding will just raise eyebrows. It will slow users down and disengage them, which is exactly the opposite of what we want.

Conclusion

The process of introducing your users to your product is one of the factors that will define its success.

A critical aspect of user onboarding that we need to always take into account is value. Is this detour from our user’s ordinary course of action valuable to them? Will this improve their experience with the product?

Onboarding demands careful and continuous tailoring. Once perfected, this process will help you win new users’ hearts and help you build brand loyalty.


Featured image via Unsplash.

Source


Source de l’article sur Webdesignerdepot

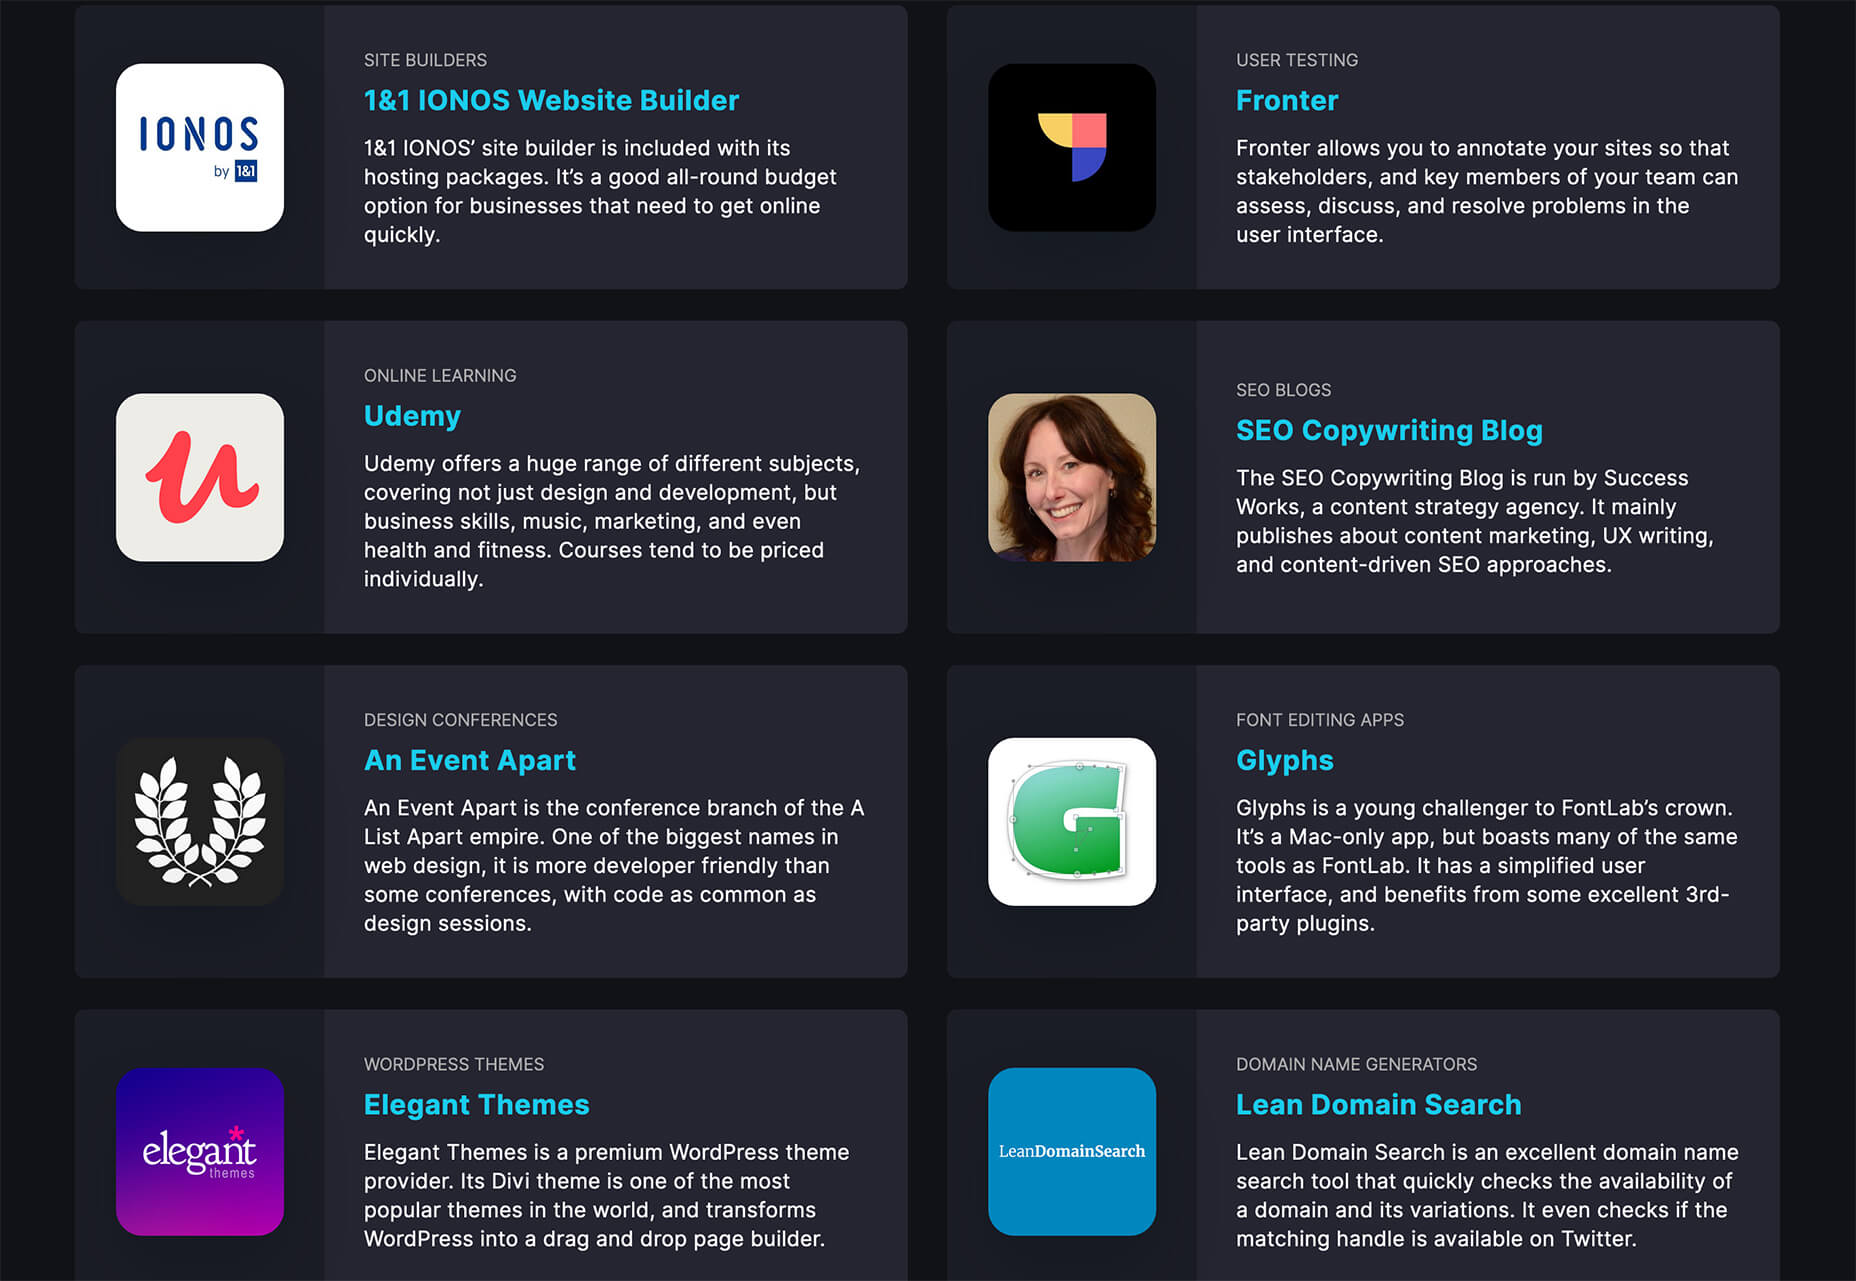
Some of the changes we are seeing with where we work are starting to pop up in the type of new tools made for designers and developers. More tools with remote collaboration as a key feature are increasing in popularity. (You’ll find a few of those here.)

Here’s what new for designers this month.

Webdesign Toolbox

Webdesign Toolbox is a collection of tools, apps, and resources all in one location for designers and developers. The best part of this resource is that it is human-curated, so every tool is quality checked and makes the list because it has been tested and researched. Search the collection by design, dev, stock, typography, UX, or workflow tools (and more) and use them to help create more efficiently. The collection is constantly growing, too.

CodeStream

CodeStream might be the new-world workflow tool for web designers and developers. It is made for remote teams to review code right inside your IDE without breaking from development flow. You can post and review changes and comments are all independent of the code itself, even though they link to it.

Litur

Litur is a color management app for iOS. Use it to find and collect color swatches, create custom palettes, and even check color combinations against accessibility standards. The app can even generate color codes for you from swatches you find from a photo or image upload or create. The app works on mobile and desktop Mac devices and is a paid app.

Editor X

Editor X, which is still in beta, is a website building tool that combines advanced design and prototyping capabilities with secure web hosting and integrated business solutions. Go from an idea straight to production in a highly intuitive design workspace. The best feature might be exact design precision tools.

Grid Cheatsheet

Grid Cheatsheet is a visual and code-based set of “cheats” based on the W3C CSS Grid Specifications. What’s nice is it makes these guidelines easier to understand and use if reading through them makes you a little uneasy.

Tutorialist

Tutorialist brings together some of the best development tutorials on the web. All of the tutorials are free videos available on YouTube, and this project collects them all in one place.

Pure CSS Halftone Portrait from JPG

Pure CSS Halftone Portrait from JPG is a beautiful pen from Ana Tudor that shows how to change the visual representation of an image. The examples are brilliant and in true halftone fashion. The code snippet works with color, or black and white images as well.

VoiceText for Slack

VoiceText for Slack is another work from home productivity tool. Integrate it with Slack and send messages with text that’s transcribed right in your channels. It’s a free integration and supports 18 languages.

Feature Peek

Feature Peek is a developer tool that helps you get frontend staging environments on demand and gather team feedback earlier in the development process. It’s made for use with GitHub and works with a variety of other tools as well.

Formbutton

Formbutton is a simple and customizable pop-up form. (And we all know websites have plenty of them right now.) It connects to other services you already use, such as Google Sheets and MailChimp, and is simple to set up.

Blocksy Theme

Blocksy is a WordPress theme that’s made for non-coders. It’s a zippy and highly visual theme made for Gutenberg. It works with other builders and allows the user to customize pretty much everything visually. (There’s even a dark mode.) The theme is packed with tools and options and is a free download.

Oh My Startup Illustrations

Oh My Startup Illustrations is a set of vector illustrations in several categories featuring a popular style on many projects. Use the characters and scenes to create a semi-custom story for your startup project.

1mb

1mb is a code editor and host where you can create a static website with a custom domain and SSL included. The editor works in-browser and everything is saved in the cloud.

Linear

Linear is an issue tracking Mac app for teams. It’s designed to help streamline software projects, sprints, and tasks, and can integrate with standard tools such as Github, Figma, and Slack.

Hosting Checker

Hosting Checker solves a common issue – a client wants you to work on their website, but has no idea who hosts it. Hosting Checker shows the user hosting provider and IP address the website uses, along with where its server computers are located and the host’s contact details. It also claims to be 82% faster than other similar tools.

Spike

Spike alerts you to website incidents before customers. Create alerts and get a phone call, text message, email, or Slack notification right away. The tool provides unlimited alerts and integrations to you can stay on top of issues before they become real problems.

Magnus UI

Magnus UI is a framework that helps you building consistent user interfaces in React. It comes with plenty of components ready to use and you can customize the theme.

SpreadSimple

SpreadSimple uses data in Google Sheets to create styled websites with features such as filtering, search, sorting, cart, order collection via forms, and much more. Update the sheet and instantly see changes on the website.

WebP vs. JPEG

Google is starting to suggest using it’s WebP image format to decrease load times, because of the lighter file size. But is WebP better than the traditional JPEG? Developer Johannes Siipola tested the file types at different sizes to answer the question. The answer is a bit complicated, but sometimes it might be better; read the full analysis for more.

Oh Dear

Oh Dear is a website monitoring tool that can help you keep a check on websites. Monitor uptime, SSL certificates, broken links, and more with notifications that come right to you if there’s an issue.

Airconnect

Airconnect is a Zoom video conferencing alternative that you can use for your brand with a custom header, colors, and portal for clients. The tool includes video calling as well as the ability for customers to access their data and automate your onboarding process.

Free Faces

Free Faces is a curated collection of free typefaces that you can browse and use in projects. Search by type style with visual results that include a download link.

All the Roll

All the Roll is a fun novelty font for just the right type of project. It includes 167 characters with swash characters that can be added before or after certain letters.

Backrush

Backrush is a handwriting-style typeface with easy strokes and a pen-like feel. It includes thicker letterforms with nice swashes and a full character set.

Thuner

Thuner is a slab display font with interesting quirks. It’s made for larger than life designs. It includes a full uppercase character set and numerals.

Source


Source de l’article sur Webdesignerdepot

In this article, I will explain how to execute a Java method once or on Mulesoft Application Startup. With this approach, we can add or execute some needed tasks before a Mule Application fully deployed such as User Notification or Data Clean-Up (Truncation of Database Tables or purging of files from the temporary storage within the server).

First, we need to create a Custom Java Class that implements the interface MuleContextNotificationListener<MuleContextNotification> and override the onNotification() method. We also need to make sure that our startup logic should run after the Mule Context started.

Source de l’article sur DZONE