Articles

There was a point at which I was very close to losing my business, and I didn’t realize how close.

I wasn’t always a good planner, and I didn’t plan to start an agency. One day I was a freelance graphic designer, my job list grew, I hired some help, and suddenly I was managing a team.

There isn’t a guidebook for new business owners, you have to learn on the job, and there’s no one-size-fits-all approach. We expanded rapidly from two to four people, then seven, and suddenly we hit 16 employees in just 18 months. It was pretty scary and felt like driving on the freeway without brakes. A client shared a story that they were turning over $20m, and the owner was only taking home $30k. It felt like where I was headed. At that point, I could easily have lost it all.

I took a hard look at the numbers and realized that we were barely breaking even, let alone profitable. That needed to change to stabilize the business and regain control of my operations. The change wasn’t easy, and there were some hard lessons, but 11 years later, with a strong local team and 40+ awards for our work, I’m thankful for that wake-up call.

There are other people in my position struggling with the same issues I faced, so I’d like to share the four key things I did that helped turn things around and move us from surviving to thriving.

1. Don’t Diversify Your Services

I wanted to do it all, and as the business owner, it was hard to turn down a new client. Our instincts are to help, and declining opportunities feels wrong. In our industry, digital agencies, especially web design agencies, try to cover all bases from marketing, SEO, adwords, design, photography, and coding. Everyone wants to be a one-stop shop for clients. I used to be that person: I would wash your car and shine your shoes if I could.

Do not give in to that fear.

When you’re a generalist, you spread yourself too thin. I know: a decade ago, we were offering dozens of services outside of the web design realm: packaging, branding, copywriting, sticker design, SEO, hosting, analytics, you name it, we provided it. We used over seven different CMS for our projects. If a client wanted it, we tried to offer it, no matter how unsuitable it was for us.

On the surface, we fulfilled our projects, and our clients were always thrilled with the results. But below the surface, our operations were dissolving into a mess. Our eyes weren’t on the prize; we were always chasing after each little job for cash. It took too much time to learn new skills. When I looked at our timesheets and deducted the unbillable hours, our projects would hardly break even.

What hurt us even further is that with diversifying, we had to manage multiple workflows, software, and systems: Sketch, Illustrator, Photoshop, WordPress, Joomla, Drupal, Google Analytics, Final Cut Pro, etc. It was expensive with minimal return. It was like an Olympic swimmer signing up for a swimming-diving-ice-skating club when their passion is swimming.

So I took a step back. I boiled it down to what we enjoyed and excelled at. Ask yourself: for what do you want to be known? For us, it was psychology-driven, conversion-focused web design. This was the service our team had the most skills in and collectively could give the best value to our clients. Once I’d figured that out, it was easy to eliminate those other services and specialize.

You can niche down by service or industry and be the specialist in what you offer.

2. Know Your Numbers

The first red flag that my business was in trouble was when I said to my accountant, “I feel like my business is doing great.” He replied, “I don’t care how you feel. The facts are in the numbers. Show me your accounts, and I’ll tell you if you’re actually doing well.” As an intuition-driven guy, it was a real eye-opener; I’d only ever relied on gut instinct.

At one point, we had a ton of work coming in, so I hired a few juniors to help the rest of the team. The team grew to 16, and the vibes in the studio were great, but the numbers weren’t. Instead of increasing efficiency, projects took 40 hours longer than they should have done. Why? The seniors and mid-level designers were taking time out to train the juniors! Reassessing the team showed me I needed to hire experienced staff, so projects ran on time and budget. It was a hard decision but a necessary one to keep us afloat.

The crucial numbers for any design agency are your timesheets, where bottlenecks lie, how much you’re spending, how long a project takes; these determine your actual margins. Setting up quantitative software like Toggl, Gantt, and Asana were a game-changer for us. They gave our project management real purpose and potential. Knowing the average hours our primary type of project took made it easy to give clients realistic deadlines, anticipate the need for fresh hiring, and know when our plates were full. You do not want to bite off more than you can chew.

3. Become The Best Fit For Your Target Market

You can’t please everyone, and frankly, you shouldn’t be trying to. One type of bait won’t attract every kind of fish. First, identify the type of fish you want to catch, the pond where this type of fish lives, and finally, bait your hook with something that type of fish can’t resist.

Your sales team should be able to identify them instantly, and all you then need to do is streamline your team, process, and systems towards being the best fit for them.

4. Double Down On Marketing That Works

There are many different marketing avenues you can go down, but go down too many, and it becomes a tangled web of confused messaging.

Remember, just because your competitors are doing it does not mean it’s the most effective approach for your target market.

There are really only inbound and outbound types of strategies, and it’s a great idea to list out the pros and cons (and the ROI of each) concerning your target market. Or, you can approach marketing based on your existing skillset — for example, if you detest being in front of a camera and don’t want to do video marketing, then just don’t do it.

Identify what works for you, and then be consistent. Consistency is the secret to a successful marketing strategy.

Source

The post How I Saved My Design Agency & Tripled My Profits first appeared on Webdesigner Depot.

Source de l’article sur Webdesignerdepot

If you are a designer and have never dealt with designer’s block, you are probably a superhero. For us mortals, designer’s block is a pretty common problem. There are occasions when we sit in front of our screen, and our creativity just evaporates.

I have spent many hours trying to get rid of this annoying wall. It took some time, but I have found some tactics that work best for me. So, do not panic! In this article, we will share five ways you can overcome designer’s block and get back on track.

From innovative sources of inspiration to the importance of collaboration and food, nothing will be left out. But first, let us analyze what designer’s block is and how common it is among creatives.

What is the Designer’s Block? Can You Force Creativity?

In a few words, designer’s block is nothing but a situation where you are stuck as a designer. In this unpleasant moment, you feel like you are losing your design skills and creativity.

Fortunately, this is not permanent. Of course, you are still a great designer. You should know and embrace that designer’s block happens to almost every creative out there. Even the most experienced of us. So the first thing you should do is to stay calm.

Remember that you can not force creativity. When designer’s block comes knocking on your door, you need some time to recover.

So instead of panicking, take to heart some practical tips that will help you regain your confidence and creativity.

How to Get Rid of Designer’s Block?

1. Take Care of Yourself

In some cases, designer’s block is your own body’s reaction. Think about it. How can you perform well when you are tense with pressure? There are many ways to take care of your mental and physical health. For example, you can take a break and have a snack.

Sleep is also critical when it comes to avoiding designer’s block. Recent research has shown that creative thinking is directly related to our periods of sleep. Lack of concentration, more mistakes, and erratic behavior are just some of the consequences of insufficient sleep.

For this reason, napping is a smart solution to designer’s block. So if you are feeling unproductive, first make sure you are not tired or hungry.

2. Change Your Location, Get Inspired

But what if you’re not hungry or tired? There are situations where we are stuck in front of a project. If that’s the case, you should decide to take an inspirational break.

The first thing you can do is to change your location. If you are working from home, you should get some fresh air. There are numerous sources of inspiration that can help you overcome designer’s block. Personally, I take a break and visit one of the following sources:

  • Parks: Nature will calm you and help you get inspired.  
  • Art Galleries: A designer’s best friend. Visiting an art gallery can help you find the missing elements for your upcoming project. 
  • Coffee shops: Quiet coffee shops are an intelligent way to get inspired. What’s better than a big mug of coffee and relaxing music?

Alternatively, watch a movie or a TV series. This may sound like an unorthodox way to get inspired, but it works perfectly when overcoming designer’s block.

3. Explore the Power of Collaboration

More than 90% of graphic designers in the world are freelancers. Although freelancing is an exciting job, it can be pretty lonely. The next time you are struggling with designer’s block, you might want to ask for some help.

Other UI or UX designers can help you see a project through different eyes and find the missing design elements. For this reason, collaborating with other designers is a great way to overcome designer’s block.

On the other hand, you can also ask your friends or family for ideas and feedback. Remember that inspiration can come from anyone.

4. Plan and Break the Project into Chunks

Most times, I get stuck as a designer, it is entirely my fault. To be precise, there are many cases when we do not plan the project efficiently. When the work is overwhelming, the lack of a well-organized plan can be why.

The best thing you can do is to take a step back. Take a look at the work that needs to be done. Then, you can start breaking your project down into small sections. If you reorganize everything, you can get rid of designer’s block in a matter of minutes.

Try not only to organize your tasks but also to manage the time you will spend on each chunk. This will probably help you understand that you have more time than you think.

5. Apply Some Pressure, Just Start

Unfortunately, few of us have infinite time to find inspiration. Most professional designers work with deadlines. That’s why putting pressure on yourself is not always a bad thing.

After following the above tips, all you have to do is start. Don’t forget that the designer’s block will remain until you start designing.

When I try to apply some pressure, my first drafts are usually bad. But after a while, everything comes back to normal.

Wrap Up

If none of the tactics analyzed above helped, you can always use one (or more) of the following quick tips:

  • Take a short break (5 minutes or so);
  • Start with the most challenging task;
  • Go for a walk or exercise;
  • Ask for more information about the project. Sometimes, the client can help you overcome designer’s block;
  • Think about what is distracting you and solve it.

Remember, every creative out there has faced designer’s block at least once. So there’s no need to panic at all. Of course, not all of us deal with it in the same way. That’s why you should first try out the tips above and find out what works best for you. This will help you overcome designer’s block and regain your skills as a designer.


Featured image via Pexels.

Source

The post 5 Brilliant Ways to Tackle Designer’s Block first appeared on Webdesigner Depot.

Source de l’article sur Webdesignerdepot

Our profession evolves every year, whether through the introduction of a new tool, a new cloud service, or a new working method. This constant evolution requires the establishment of a learning culture to continuously share experiences and ideas, thus encouraging everyone to gain new knowledge each year.

Obviously, this demands a portion of our working time and an online library of training resources maintained by entities with authority in the domain. These entities are responsible for updating the content to allow us to continuously improve our skills, sometimes to advance in our career in order to aim for an internal or external evolution. Therefore, relying on trusted education partners is important to ensure the highest-quality learning content.

Source de l’article sur DZONE

Websites as we know them are going to change very soon. The days of text, images, and basic interactions in a 2D browser window have served us well, but virtual, augmented, and mixed reality experiences are getting better all the time. Developers and designers need to think beyond the browser window and prepare for an immersive future.

Many have been very skeptical about VR and AR in the past because despite grand promises about what they would achieve, they’ve mostly failed to deliver on the scale that the industry hoped for.

But it’s different this time: industry leaders like Meta, Apple, and Microsoft are pursuing a range of different mixed reality projects; they see the opportunity and are dropping hints about what’s next.

In a survey from Perkins Coie LLP and the XR Association, nearly 9 in 10 respondents said that by the year 2025, immersive technologies—including augmented reality, virtual reality, and mixed reality — will be as ubiquitous as mobile devices.

That’s a bold prediction, but it could be our new reality.

Use Cases

VR and AR aren’t a logical fit for every website, and that’s fine. There’s no need to force an immersive experience on something better suited to a standard viewing experience.

But when they’re done right, 3D experiences can add a lot to your website. Check out the demo experience from Mozilla, the 3D tours from Matterport, and the immersive storytelling from Within.

Here are a few areas where these technologies shine:

  • Retail – VR can be used to provide a virtual showroom where customers browse through products. AR can even bring the products into your home by showing you how a piece of furniture will fit in your room, what a painting will look like on your wall, or in Apple’s case, how a product will look on your desk.
  • News – Coverage of events can be enriched by providing a 360-degree view and placing viewers in the center of the story.
  • Training – AR can generate virtual overlays over physical equipment so employees can have hands-on training that’s more effective.

Define Your Platform

Adding immersive experiences to your website will require various skills based on what you’re trying to create. Whether you’re new to web development or are a seasoned developer with many years of experience, the main difference from classic web development is that you’re switching from a 2D to a 3D experience. Development in VR/AR is much closer to developing 3D video games than creating web applications.

First of all, you need to decide on the hardware that you’re building for. Are your viewers mainly using computers, smartphones, or a headset like the Oculus Quest? Each hardware category offers a different set of capabilities for what’s possible.

Next, when we look at 3D engines and frameworks on the market, some big names like Unity, Unreal Engine, and CRYENGINE stand out. Most of these engines were spun out of game development and are based on programming languages like C, C++, or C#. While very powerful, they’re overkill for anyone trying to create a basic immersive web experience.

The good news for web developers is that the WebXR Device API is an open standard specified by the W3C with a JavaScript API that makes immersive experiences possible in the browser. So if you already have a background in web development, you can use your knowledge of JavaScript to get started.

There are some useful frameworks and platforms that make working with WebXR more convenient:

  • A-Frame – A web framework for building 3D experiences.
  • React 360 – A framework for the creation of interactive 360-degree experiences that run in the web browser. As the name already suggests, it builds on React and reuses the concepts you already know.
  • Amazon Sumerian – A managed service that lets you create and run 3D, AR, and VR applications. Since it’s integrated into the AWS ecosystem, it’s also possible to add AI-enabled elements into your generated world.

Create Your Content

No one wants to read long blocks of text in 3D. Since we’re talking about visual experiences, it’s logical that the emphasis should be on creating content that is pleasing to the eye and interesting to look at. What works on a normal website probably isn’t going to feel natural in a 3D environment, so you need to decide what visuals you should create to suit the format.

What high-resolution images and assets do you need? Can you add videos? How about 360-degree videos? Will viewers just be looking at something, or will they be able to interact with it?

You also can’t forget about sound because it’s a critical part of immersive experiences. What music and sounds should you create to make the content come alive?

Not everyone is going to have the latest and greatest device or 5G coverage. The requirements for bandwidth and transmission quality are much higher with 3D content. A few milliseconds of latency can go unnoticed on a typical website, but in a VR/AR setting, it can make the experience laggy or unusable.

Try to optimize your content to be the highest quality it can be within a reasonable file size. If the experience starts to suffer from too many assets downloading at the same time, it’s better to create a more streamlined experience that maintains a high performance rate.

It’s important to consider your hosting infrastructure, as well. This shouldn’t be a big problem, but it is worth mentioning that you need to add new content types to your configurations, and your CDN needs to support these new types, too.

Make Your Content Flexible

When we’re talking about getting your website ready for immersive experiences, we’re not just talking about having people scroll through your regular website in VR. That isn’t compelling for your audience.

The idea is to take some content that’s already on your website and separate it from the presentation layer so you can use it in a 3D environment or any other platform that you want. Classic content management takes place in silos, which means you cannot easily reuse the content from your website.

This separation can be achieved by using a classic database, but if you want developers and content teams to collaborate, a headless CMS is front-end agnostic and more user friendly.

Start Experimenting Today

Building 3D content experiences may seem intimidating, but as we’ve seen, you likely already have the web development skills necessary to get started and try out some different ideas.

What you build today will prepare you for the 3D future of tomorrow.


Featured image via Pexels.

Source

The post How to Prepare for the Immersive Web first appeared on Webdesigner Depot.

Source de l’article sur Webdesignerdepot

As a UX designer, you get to work on creative, rewarding, even life-changing projects. It’s an industry with flexible working and countless opportunities. All this, and you get paid well too.

It doesn’t matter if you’re not a creative prodigy, or a tech grandmaster; you can learn to become a UX designer with the right mindset, a few tools you pick up along the way, and some committed learning.

By the time you’ve finished reading this post, you’ll be well on your way to designing your new career.

You can do this, let’s get started…

What is a Career in UX like?

Every career is different, but generally speaking, a UX designer works on making a user’s interaction with a product or service (normally websites) as intuitive as possible.

Just as a golf architect designs the layout of a golf course to flow through greens, tees, and holes, with buggy paths for access, and the odd bunker to add a challenge; so a UX designer creates the optimum experience for a site. A golf architect doesn’t need to reinvent the game of golf, and neither does a UX designer need to reinvent websites.

A golf architect will not design a course with a 360-degree sand bunker surrounding a tee (well, they might, but they really really shouldn’t), or a hole too small for a golf ball. In the same way as a UX designer, you’re not going to design an ecommerce site with a cart in the bottom left, a non-existent search feature, or hidden pricing.

The best thing about being a UX designer is that you don’t need to spend years in formal education to get qualified. The flipside is that if you want to be a great UX designer, it’s not a walk in the park.

Every designer is different, but some of the main traits of successful UX designers are: an enjoyment of problem-solving; good listening skills; curiosity; open-mindedness; attention to detail; creativity; communication skills; process-driven; and adaptability.

Before committing to this career path, check out a few podcasts, and read a few blog posts, to dip your toe in the water.

Still interested? Excellent, the next step is…

Getting Certified as a UX Designer

UX design is a practical skill. It’s all well and good knowing the theory, but without practice putting the theory into action no one will give you a chance to prove what you can do. So how do you get practical experience? You get certified, and there are three popular options: online, in-person training, or self-taught.

A good UX syllabus will include portfolio-building projects, tool mastery, networking opportunities, and even 1-2-1 mentorship. As well as learning the fundamentals of UX, you’ll cover user research and strategy, analysis, UI design, and more.

Option A: Online Course

Online courses tend to be much easier on the bank balance, as well as being flexible, which means you can fit them around your current job. You can work at your own pace, and in many cases choose modules that interest you, once you’ve completed the basic introduction.

There are many online course providers, including Coursera, Udemy, Skillshare, and Career Foundry.

Whatever option you choose, it is a good idea to get as broad a perspective as possible, so consider following more than one course — perhaps mix and match a paid course with a free one.

Option B: In-Person Training

This could be a university course, or a local boot camp where you physically sit in with an instructor and classmates.

This is more expensive, but it provides benefits that nothing else does. Firstly, you’ll have classmates you can bounce ideas off, collaborate with, keep motivated, inspired, and accountable. You can also get real-time, intensive coaching and advice from someone who’s been there, done that, bought the T-shirt (and redesigned it so it fits better).

Seach local boot camps and workshops, check out workshops at local conferences, and ask your local college what courses they offer.

Option C: Self-Taught

Being self-taught is the cheapest of all options. Work at your own pace, where, and when you want to. Watch YouTube videos, read blogs, garner information anywhere you can find it.

This option involves a lot of stumbling around in the dark. The biggest challenge is that you don’t know what it is that you don’t know. For this reason, it can pay to follow the syllabus of a local college course, even if you’re not enrolled and don’t attend lectures.

In reality, all education is self-taught to an extent, even the most prescribed courses need self-motivation.

Some of the most in-demand UX designers in the world are self-taught, so why not? Start exploring UX blogs like Nielsen Norman Group articles, Google Design,  UX Planet, and UX Matters.

Mastering UX Tools

Recruiters and hiring managers will seek your technical ability and your experience using popular tools from user research, to wireframing, to prototyping. When you get your first job in UX, the tools you use will be determined by your project manager, so it’s a good idea to have a passing familiarity with the most popular. These will include Maze, Userzoom, Sketch, XD, Figma, Marvel, and Hotjar.

If you’re following a guided course you should get an introduction to at least a couple of important tools. Once you understand one, you can probably pick the others up quite quickly… because, after all… they should be intuitive.

You do not need to know how to code, but understanding the roles, and restrictions of HTML, CSS, and JavaScript is very beneficial. When you get your first UX job, you’ll need to be able to talk about how technologies fit into the plan.

Building a UX Portfolio

Your portfolio is your résumé. The golden ticket. The silver bullet. Amassing a content-rich portfolio is paramount. You don’t need a real-world job to build your portfolio, and you should already have content to add from your course.

You need to demonstrate knowledge of UX tools and processes (what future employers will look for). Case studies that incorporate research, problem-solving, strategy, imagination, and (if possible) results are the best way to do this.

There are a variety of ways of building a portfolio, but the best is taking a real website, and redesigning it. Don’t worry if your first few projects aren’t the best; as long as you demonstrate improvement and growth, that counts for something.

You can showcase your portfolio on sites such as Behance, Dribbble, or preferably create your website.

Landing Your First Job in UX

Start combing the job boards to see which companies are looking for UX designers. There’s a global shortage of qualified UX designers, so if you can’t find anything you’re looking in the wrong place! Make sure your whole network, from your Mom’s hairdresser to the barista at your favorite coffee place know that you’re looking; you never know where a good lead will come from.

Some companies are looking for UX skills as part of other roles. Others are looking for full-time UXers.

Don’t be disheartened if “Junior UX Designer” positions require 2 years of experience; HR just throws this in as a pre-filter. If you think you can do the job, apply anyway, if your portfolio’s good you might get an interview regardless, and if you get an interview they think you’re worth taking the time to meet.

If you don’t get the job, don’t be downhearted. Remember: every time someone else gets a job, that’s one less person you’re competing with for the next job.

Quick Prep on Some Common UX Interview Questions:

  • What’s your interpretation of a UX Designer?
  • What has inspired you to become a UX Designer?
  • How do you take constructive feedback and non-constructive feedback?
  • Who, or what companies, do you look up to in this industry, and why?
  • What’s your process with a new project?

Good Luck!

So, now you know what it takes to get into the field, it’s time to start applying yourself to this newfound and richly rewarding career. As the great writer Anton Chekov said, “Knowledge is of no value unless you put it into practice.” So get out there and practice, practice, practice. Add and add and add to your portfolio.

To become a UX Designer, enroll in a great course, build your portfolio, network, apply for roles, and always be learning. Always be open to new ideas and suggestions. There’s a lot of leg work, but the juice will be worth the squeeze.

Featured image via Unsplash.

The post How to Kickstart Your UX Career in 2022 first appeared on Webdesigner Depot.

Source de l’article sur Webdesignerdepot

_____________________________________________

Another excellent guide to help people to prepare for job interviews to give them the best possible chances of success and not make some common mistakes can be find here : https://www.ireviews.com/interview-resources/

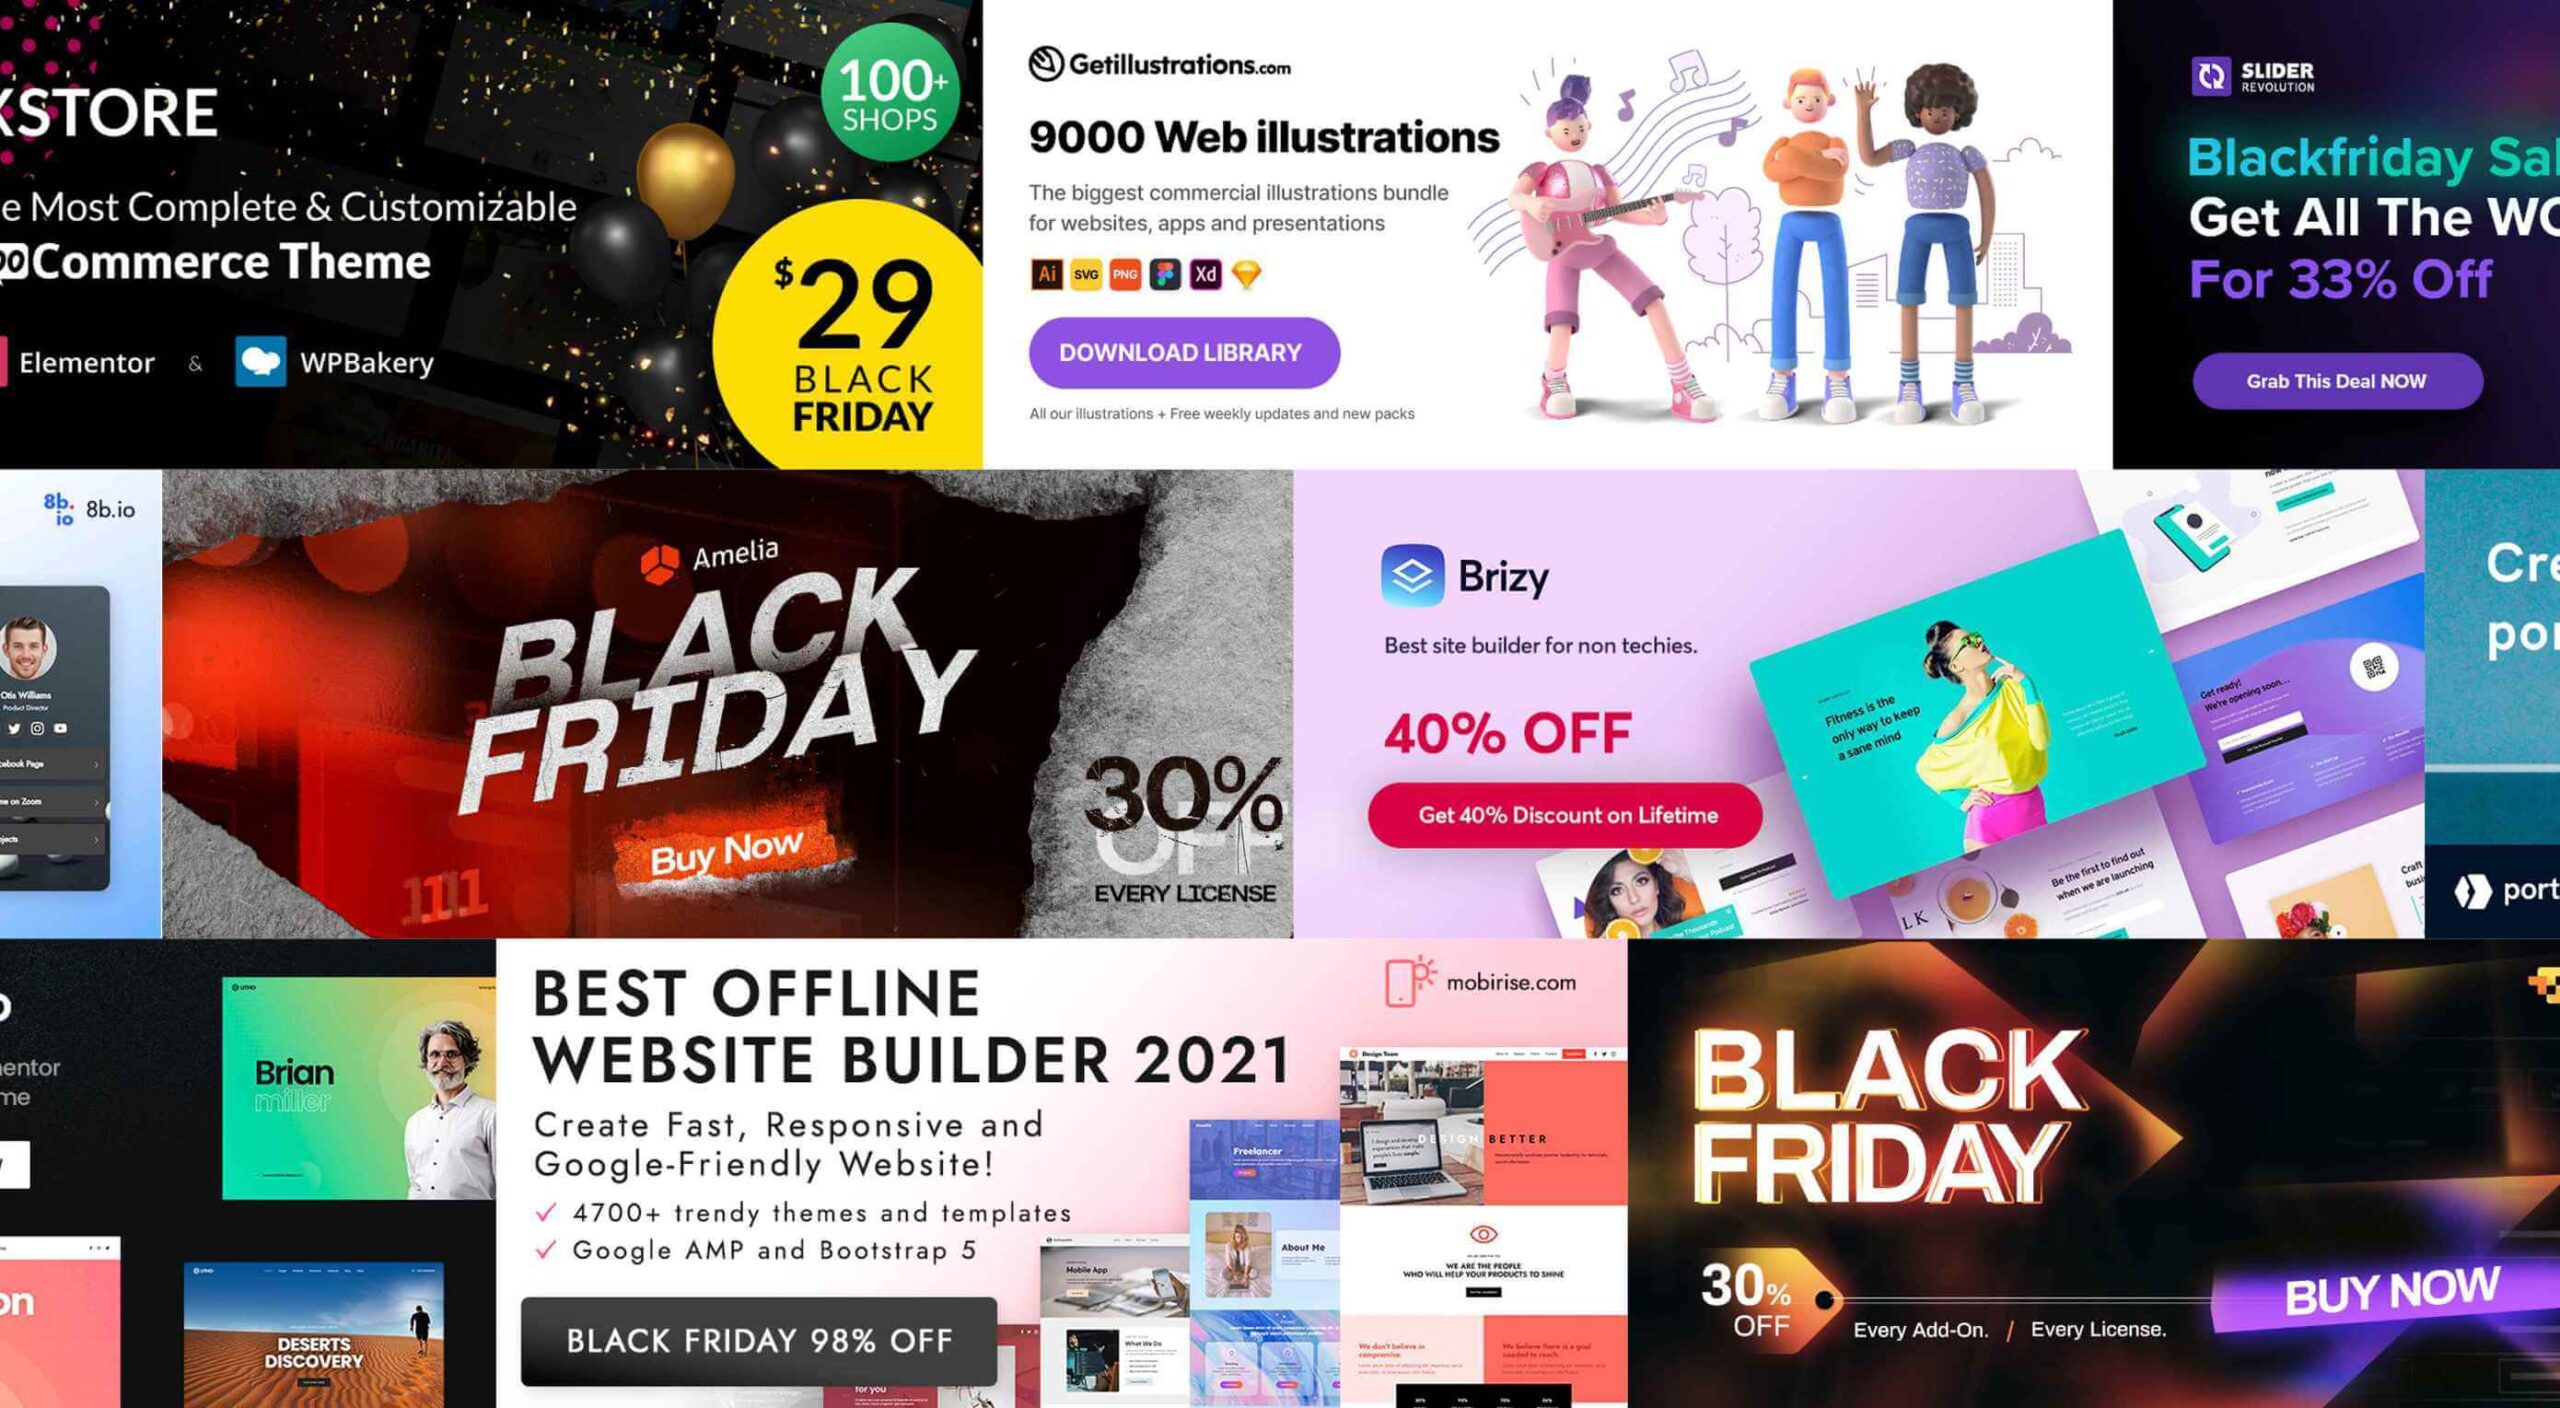
It’s that time again. Black Friday. November 26, to be exact. And the many enticing deals you’ve been looking forward to at this time of the year are here as well.

There are three types of Black Friday shoppers. Those who are successful because they have prepared. Those who are successful because they got lucky. And, those who let some good deals simply slip away.

Your best bet, of course, is to be prepared, which is the purpose of this guide.

As you go down this list, you’ll find discounts, some pretty amazing offers, a few surprises perhaps – and plenty of inspiration.

We’ve been keeping close tabs on the various Black Friday discounts and promotions, and we’ve corralled the best of the bunch for you.

Starting with:

1. Brizy – The No-Code Website Builder For Non-Techies

Brizy is a fast and easy-to-use website builder for designers and agencies. Take advantage of Brizy’s Black Friday special and tap into the skills of a team that has been creating website-building tools for over 11 years.

This premier website builder gets better with each update.

  • Web designers can choose between Brizy for WordPress and the Brizy Cloud website builder, which includes hosting;
  • Agencies can choose among several white-label options;
  • Brizy brings power to the novice; use the pre-made designs or start with a blank page and let the imagination be the guide.

Black Friday is a time to take advantage of great deals, and this year is no different.

  • Big discounts are available on Brizy’s white label agency plans;
  • Participate at no cost to win a MacBook PRO;
  • Partner perks and discounts;
  • And exclusive new designs.

Design or coding experience is not a requirement to use Brizy’s drag and drop visual builder.

Click on the banner to take advantage of these great Black Friday specials.

2. Portfoliobox

A 50% discount on any portfolio website builder would seem like a good deal. On the other hand, getting one at 50% off that enables you to quickly create a portfolio website that reflects your creative personality and will truly set you apart from the crowd is definitely worth taking advantage of.

Portfoliobox offers:

  • Mix and match templates to help achieve a unique look;
  • Powerful eCommerce functionality built right into the platform;
  • Safe and secure private client galleries;
  • An included Domain (custom domain with Pro plans);
  • Fantastic 24/7 support to keep problems to a minimum;
  • Affordable, transparent pricing plans that let you know what you are getting before you buy.

Click on the banner to find out more about this fast, affordable, and easy to work with a portfolio website builder for creatives.

3. wpDataTables

wpDataTables is a popular, power-packed plugin that can manage vast amounts of data in seconds and organize it to build a table or chart the way you want.

  • wpDataTables and charts are responsive, customizable, and easy to edit and maintain;
  • wpDataTables readily accepts data from a variety of data sources, from multiple database connections, and in the most used formats;
  • Tables and charts can be configured to nicely blend in with other website content and a website’s overall design, plus it is easy to add spice to a table or chart by using colors, adjusting font sizes, and highlighting key data using conditional formatting.

wpDataTables features Elementor and Gutenberg integration, provides the ability to connect WordPress tables with Google API, allows cascade data filtering, and much more.

Click on the banner to take advantage of the 30% off Black Friday special.

4. Amelia WordPress Booking Plugin

Amelia can be a genuine time and money saver for a variety of business types. Amelia automates and streamlines a business’s booking process.

  • Amelia relieves business owners and managers from the task of managing multiple appointments and events;
  • Clients and customers love the ability to make and manage their appointments 24/7;
  • Bookings and events are managed from a single platform, even when multiple locations are involved.

Annual and lifetime subscriptions are available.

5. Mobirise Free Website Builder

As it is an offline builder, Mobirise does not tie you to any platform, you can host it anywhere, and you have total control over creating the website you have in mind.

Mobirise:

  • is drag and drop and easy and simple use;
  • is based on the latest Google AMP or Bootstrap 5, so your site will be mobile-friendly and crazy fast;
  • comes with eCommerce, huge selections of themes, blocks and templates, and a shopping cart.

Mobirise is free for both personal and commercial use.

6. Slider Revolution

There is a difference between an “interesting” website and one whose WOW effects cause it to stand far above the competition.

Slider Revolution specializes in WOW effects that can take any website to the next level, and it can be yours on Black Friday at a 33% discount on all licenses.

The Slider Revolution package includes:

  • Innovative templates and add-ons;
  • Advanced automation and special effects tools.

Grab the Black Friday offer now.

7. Getillustrations Bundle – Commercial illustrations for the web

Digital illustrations help attract attention to and pique interest in your website.

Getillustrations.com features a package of more than 9000 commercial web and app illustrations in a wide range of topics.

  • This package features all the design formats you’re likely to need, e.g., Ai, SVG, PNG, Figma, Sketch, and more;
  • Great illustrations to spice up landing pages are included.

The package is available at a 25% discount. Use coupon code EliteDesingers25.

8. Litho – Multipurpose Elementor WordPress Theme

Litho is a creative, modern, and highly customizable theme that can be used for any type of business niche as well as for creating eCommerce, blog, and portfolio websites.

This multipurpose Elementor WordPress theme’s features include –

  • 36+ ready home pages, 200+ creative elements, and a 300+ template library;
  • One-click demo import;
  • Top loading speed and SEO result capabilities.

Litho also features detailed online documentation and top-of-the-line customer support.

9. 8bio – Linktree Alternative

Instagram and TikTok enthusiasts, take note!

With the 8bio tool at your fingertips, you can add a clickable URL to your social media platform profiles so visitors can visit your website, product page, or any other important page.

8bio offers:

  • Beautiful skins and catchy animated backgrounds;
  • The ability to link to your own domain or to *.8b.io;
  • Powerful SEO and tracking options.

The 8bio tool can also be used for your Twitter, Facebook, and YouTube posts.

10. XStore – Highly Customizable WordPress WooCommerce Theme

XStore is designed to work with the best page builders on the market and is fully compatible with the Elementor and WPBakery builders.

The XStore package includes

  • $510 worth of carefully handpicked Premium Plugins for WooCommerce;
  • More than 110+ awesome Prebuilt Shops;
  • A built-in AMP for WooCommerce, a Full Ajax Shop, multi-vendor support, and much more.

Become one of XStore’s more than 60,000+ happy customers by taking advantage of the Black Friday special.

Knowing that it’s the early bird that gets the worm, we’ve worked hard to place before you and your fellow website designers and agencies this enticing selection of the best Black Friday offers.

You will no doubt find some of the products familiar. A few might not be. In either case, the opportunities are here for you to get some great deals on some premier products.

Happy shopping!

Source

The post Live Now: Top 10 Black Friday 2021 Deals for Designers and Agencies first appeared on Webdesigner Depot.

Source de l’article sur Webdesignerdepot

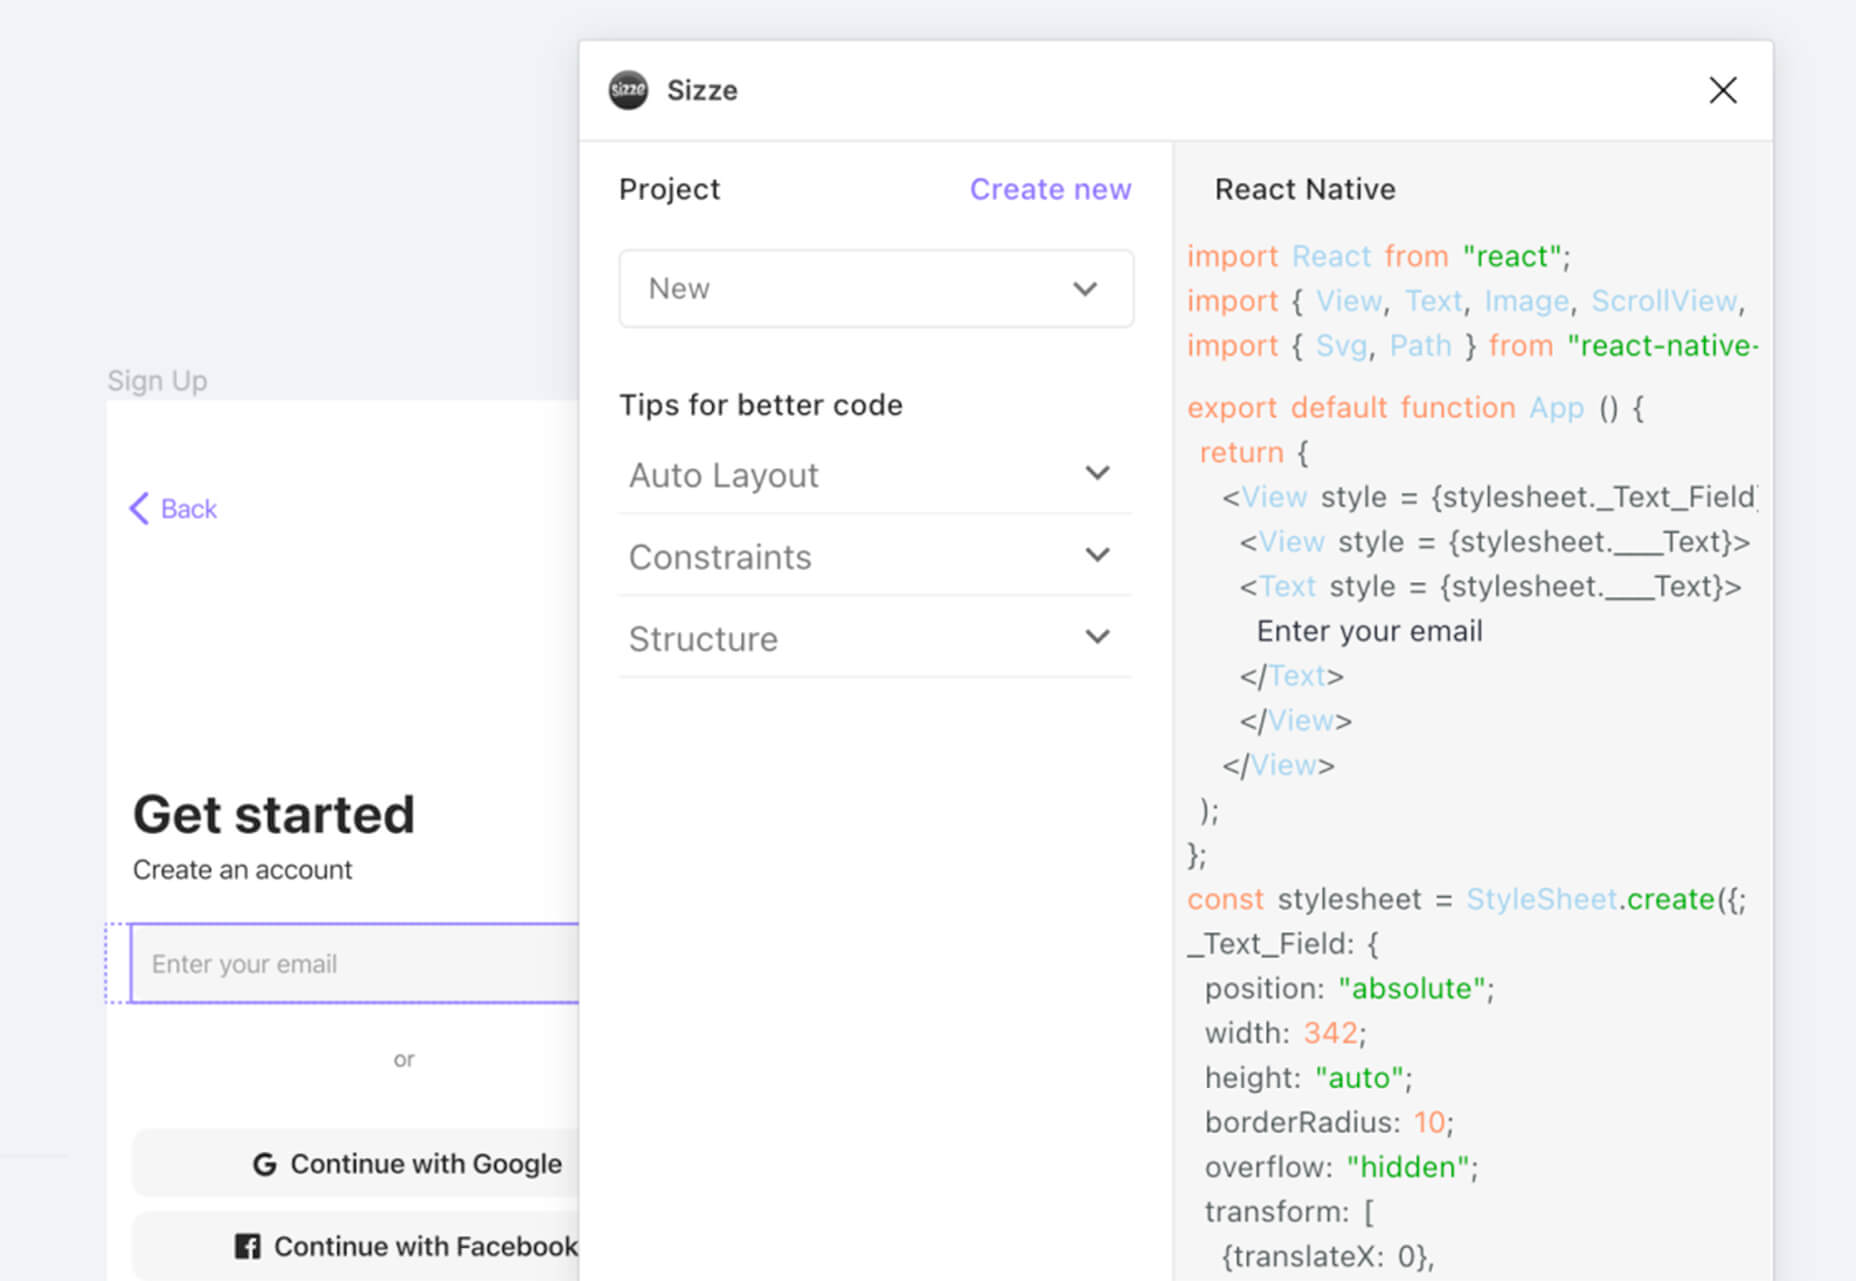
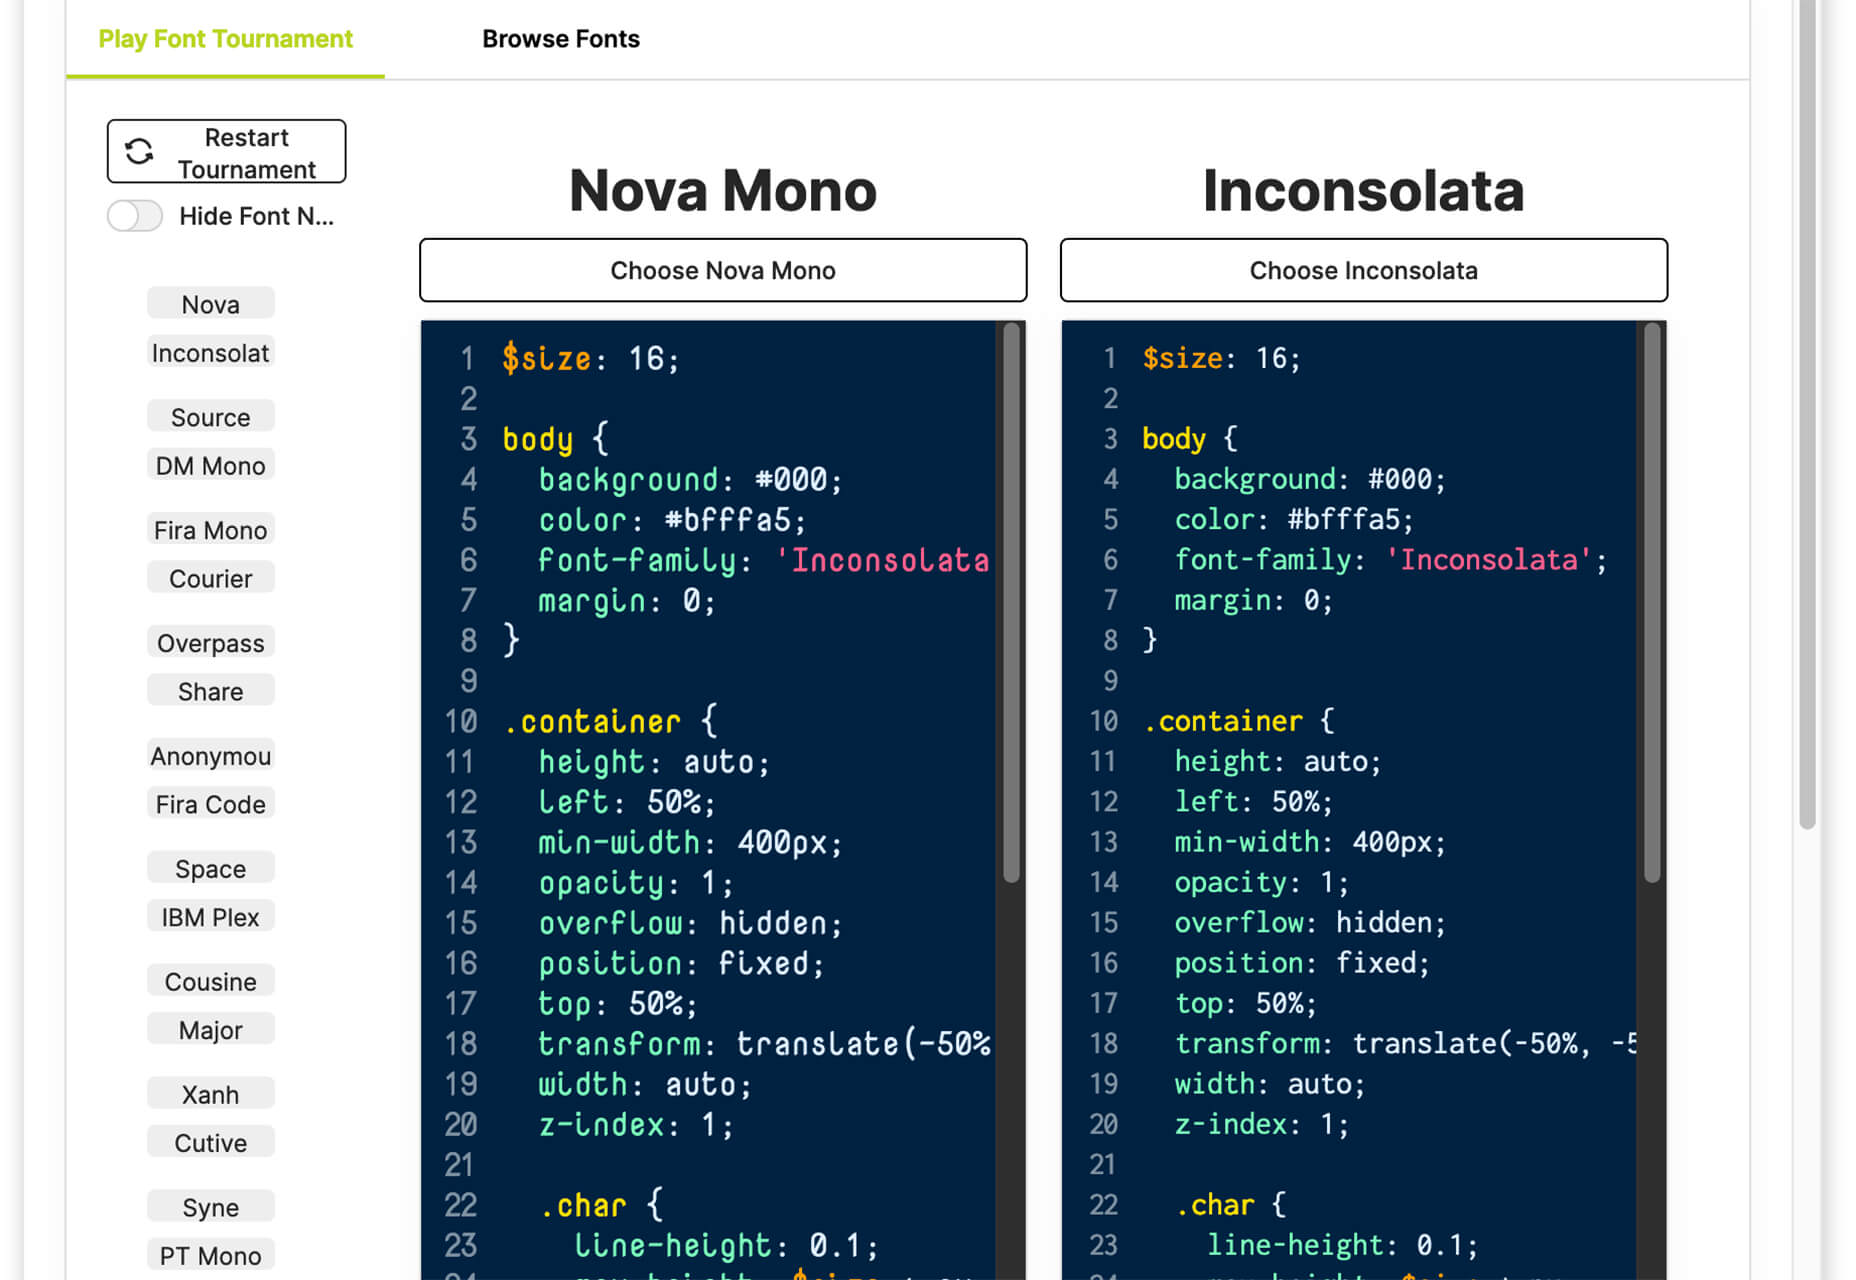
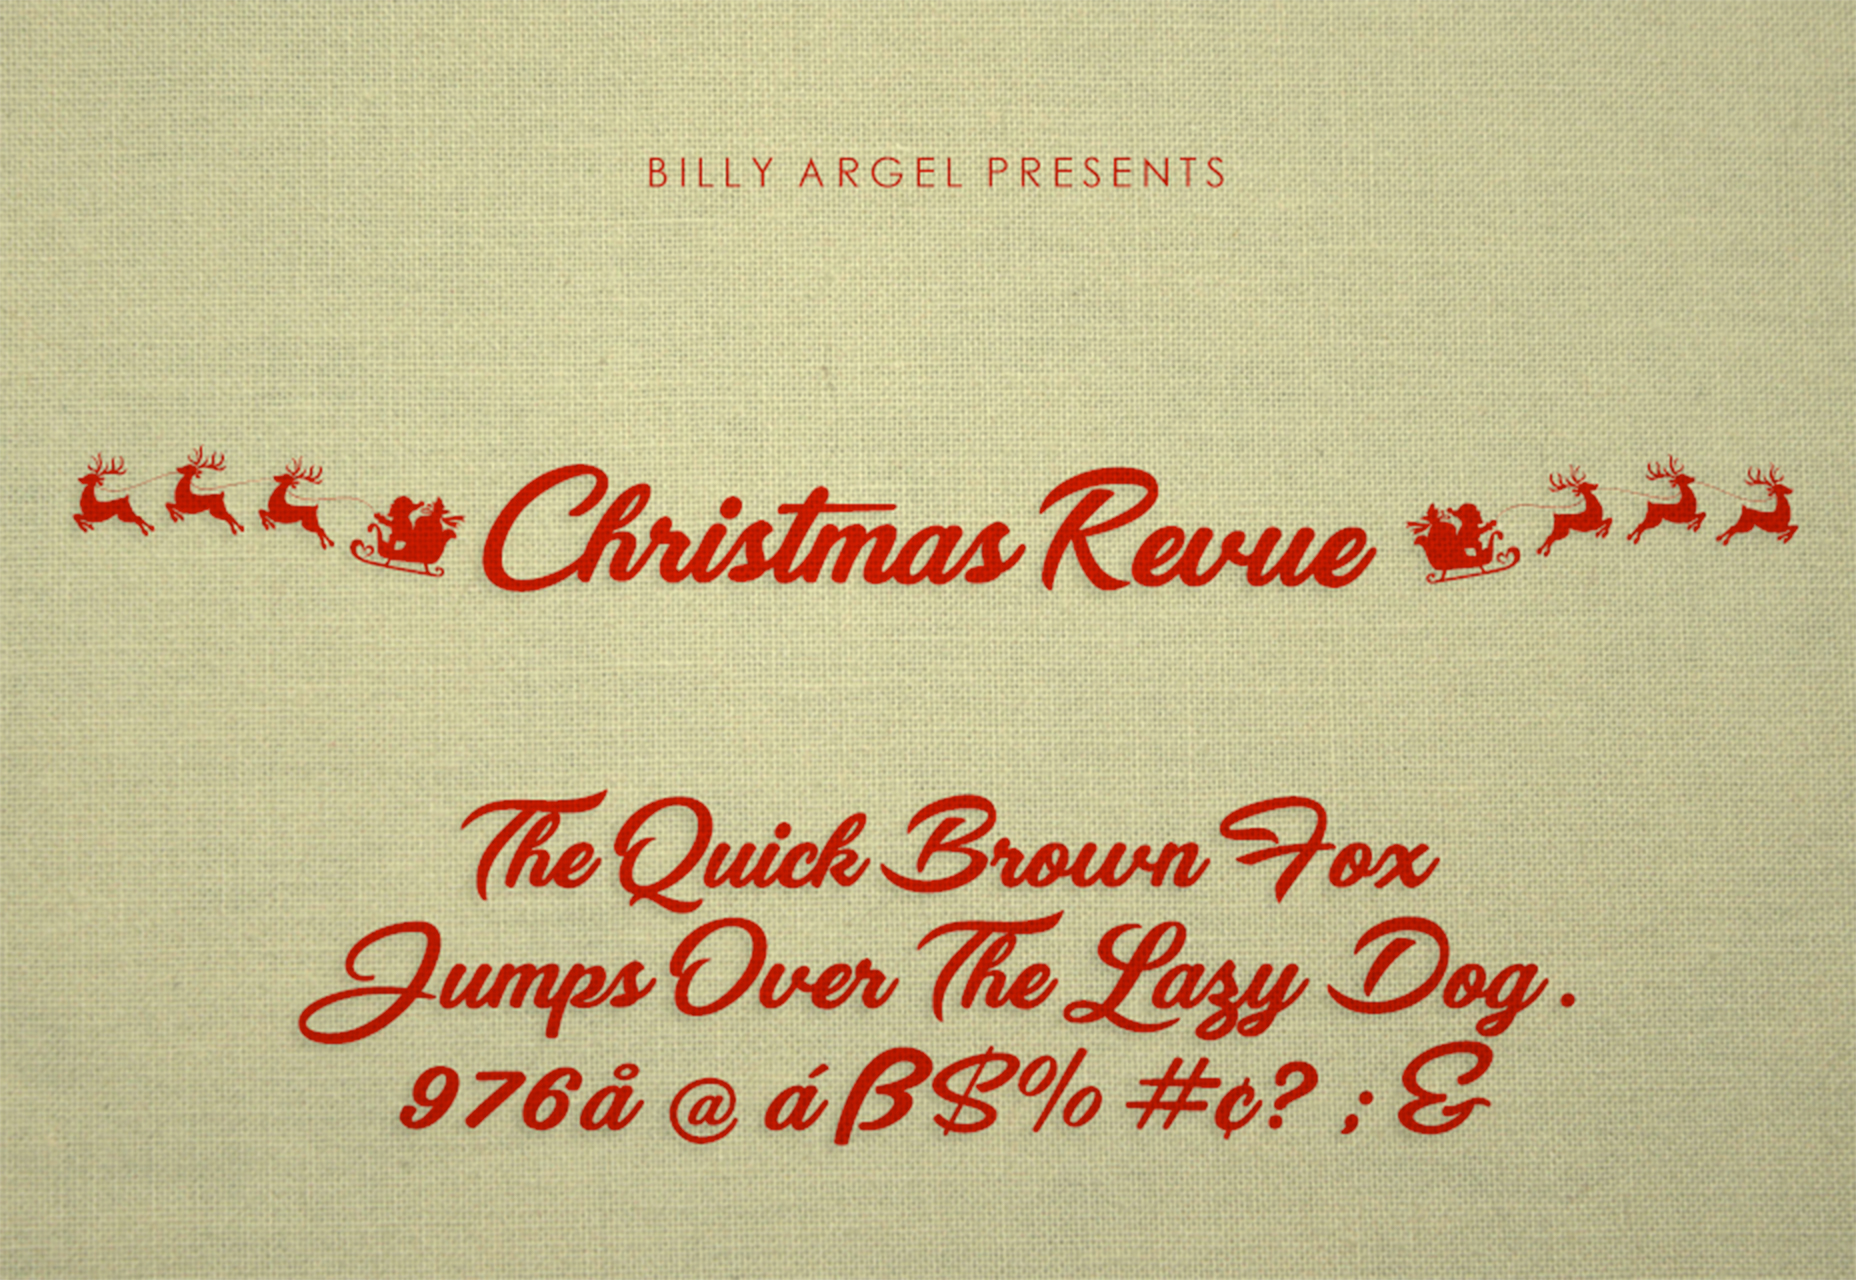
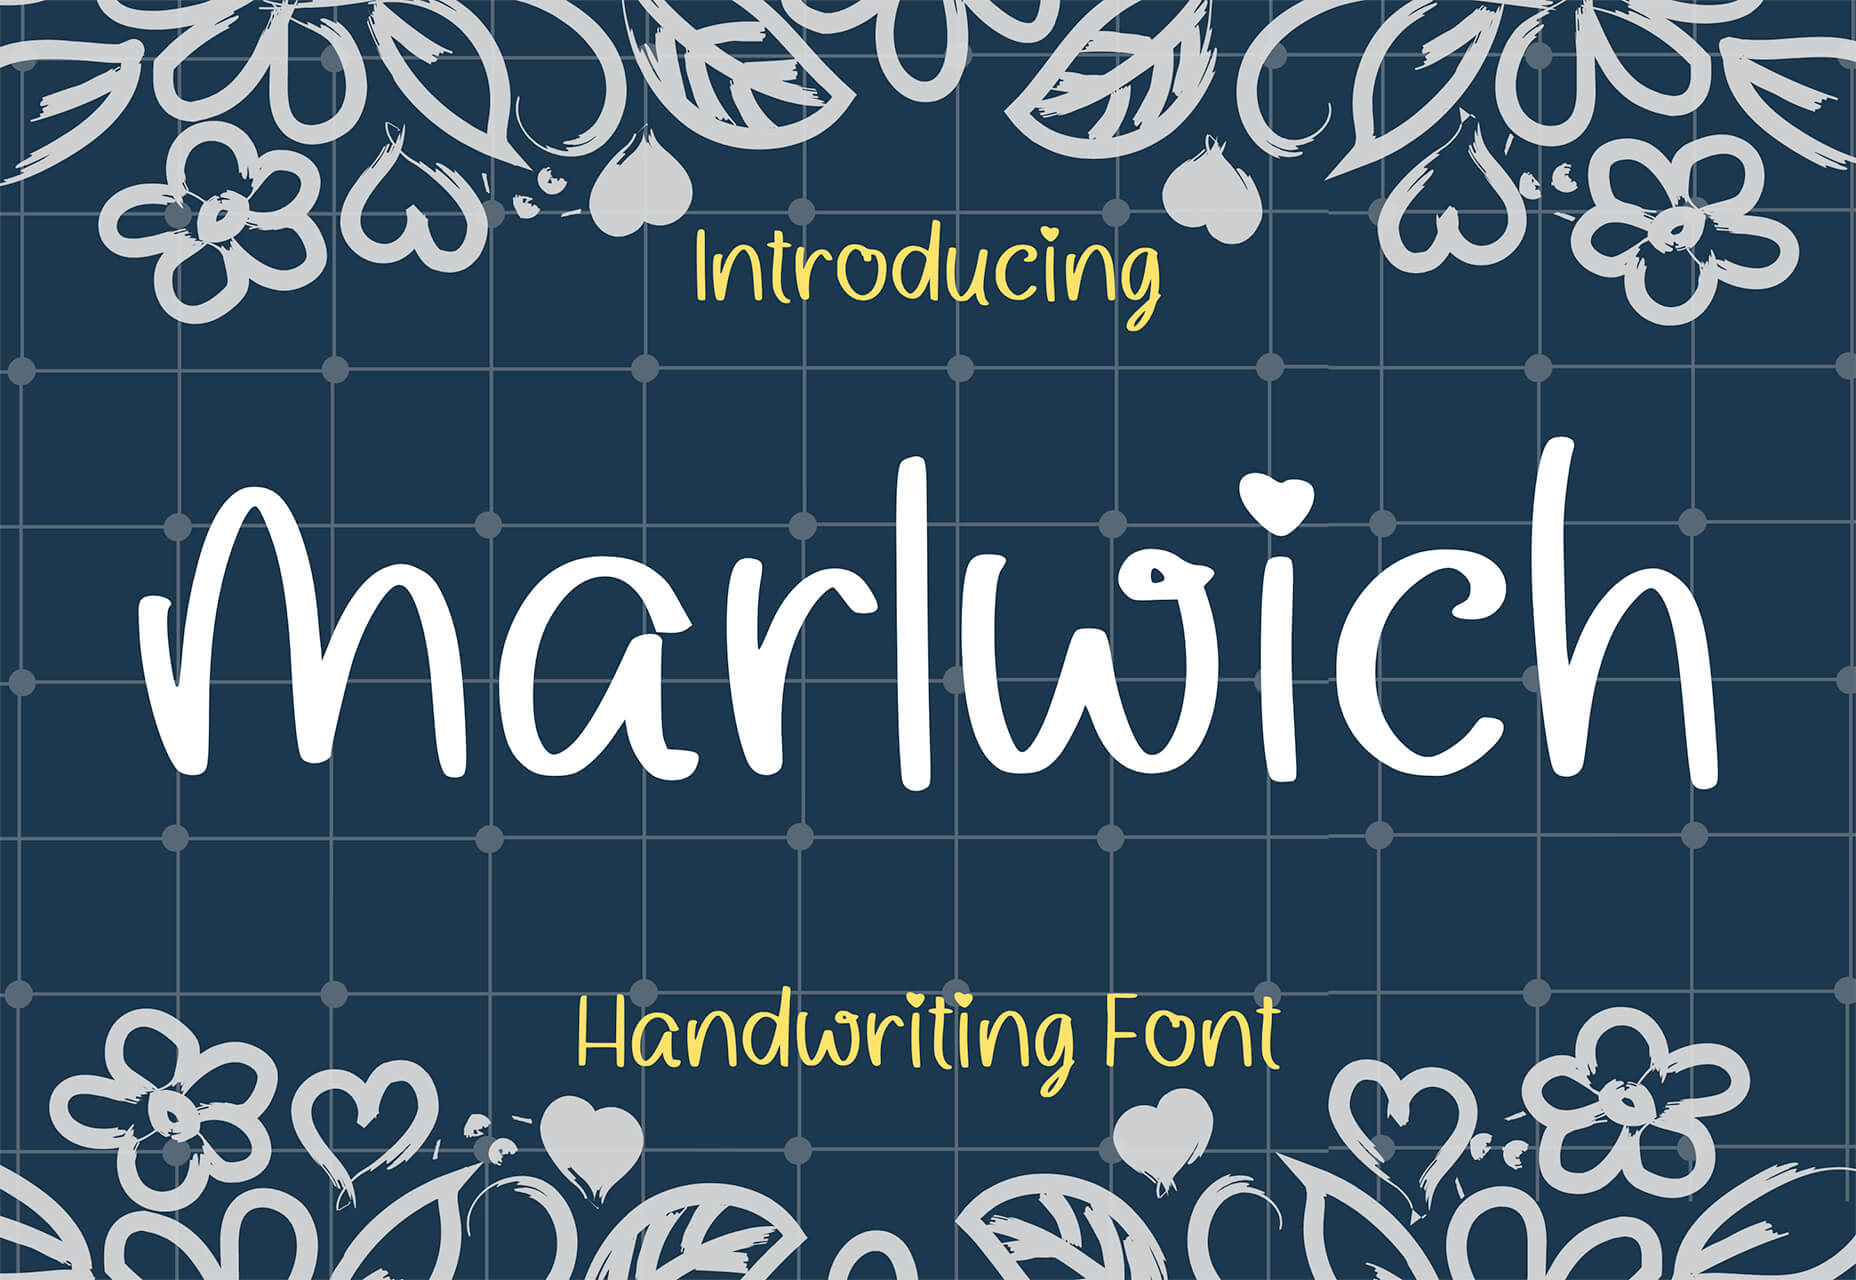
With the holidays fast approaching, there are plenty of fun gifts for you in this roundup of new tools and resources for web designers. Make sure to share anything you find helpful with others to spread additional holiday cheer.

Here’s what is new for designers this month…

Volley

Volley, billing itself as Snapchat for work, is a new way to collaborate with remote teams. The tool addresses the two main problems of remote teams (lack of communication and loneliness) with an async video messaging app with interactive transcriptions neatly organized into workspaces. Volley emphasizes talking over typing (76% of volleys sent are video), doesn’t require you to coordinate schedules (it’s 100% asynchronous), and lives in a threaded conversation with context that’s neatly organized. Plus, the tool is free to use.

Upnext

Upnext is a new type of reading list. It’s designed to help you save, organize, and focus on fantastic content while expanding your knowledge on your favorite topics. You can create playlists with almost any type of content that you can refer to later and follow “thinkers” that you love. Search and filter content, focus on reading, integrate videos, and even highlight and note specific content in your customized library. This brand-new web app has a waitlist that you can join to get access soon.

Startup 5

Startup 5 is a new version of the popular website builder, and it’s a perfect tool to create your online presence. With Startup, it’s fast and easy to get your business online with pre-designed blocks. It includes a visual editor with 150+ blocks with pre-designed and pre-coded elements and styles you can easily customize in a drag and drop interface. It’s an easy tool for building a website quickly without a coding background. Most users can publish a website quickly and easily.

Flatmap

Flatmap generates Mapbox Vector Tiles from geographic data sources like OpenStreetMap. It is memory-efficient so that you can build a map of the world in a few hours on a single machine without any external tools or database. Vector tiles contain raw point, line, and polygon geometries that clients like MapLibre can use to render custom maps in the browser, native apps, or a server. Flatmap packages tiles into an MBTiles (SQLite) file that can be served using tools like TileServer GL or even queried directly from the browser.

Cleanup.Pictures

Cleanup.Pictures is a web-based tool to remove objects, people, text, or other defects from your images before using them in projects. It’s an AI-based alternative to other photo-editing software.

Linkz.ai

Linkz.ai helps you make smart link preview popups for your website to help encourage greater engagement and interaction for links. It works with a line of code you can install quickly and easily, and then you get smart link previews (in two style options) for every link on your site.

Llline

Llline is an SVG generator that helps you create smooth and organic lines and strokes with plenty of customization options for almost any application. This tool helps create graphic elements in just a few clicks, allowing you to add a few points to a canvas and then draw a smooth curve using these points. You can then tweak the resulting SVG graphic by rotating it, changing its color, giving it a gradient, making it a dashed line, and then you can download or copy the SVG markup.

Lorem.Space

Lorem.Space is a valuable placeholder image tool. With just a little bit of code, you can pop cool placeholder images – from movie posters to shoes – right in your website mockup so that the design is easier to visualize. It’s a great solution that’s fun and keeps you from having to put empty boxes throughout the design. And everything can be randomized, so you don’t spend time looking for placeholders.

Huetone

Huetone can help you create more accessible color palettes by making use of the Advanced Perceptual Contrast Algorithm. The contrast ratios and color combinations show on one screen to help you quickly develop palettes and combinations. Plus, the tool has hotkeys that make it easy to change hues, toggle, and adjust quickly. Then you can export everything to Figma.

Rowy

Rowy is an open-source tool to build on the Google Cloud Platform. You can manage Firestore data in a spreadsheet-style user interface, write Cloud Functions in the browser, and connect to third-party platforms.

AdCreative.ai

AdCreative.ai uses artificial intelligence to help create better ad creative. To get started, you upload logos and color files, connect social and other accounts, pick the sizes you need, write text, pick a background, and upload product images, and let the AI do the work. Once you have the creative you like, you can connect to your online ad accounts for easy use. This is a premium tool that’s free to try.

Flowrift

Flowrift is a tool to browse and then copy and customize Tailwind CSS blocks in groups of collections. Filter by block type and then experiment with the options. It even has e-commerce blocks.

Layout Patterns

Layout Patterns is a collection of layout patterns built using modern CSS APIs to help you build common interfaces such as cards, dynamic grid areas, and full-page layouts.

You.com

You.com is a new private search engine that summarizes the web. The tool is in open beta and includes superior privacy choices, actionable results, extensible apps, and personalization through preferred sources.

3D Icons

3D Icons is a fun set of three-dimensional, full-color icons that are free for all uses. (Donations are accepted.) They integrate with pretty much any web design tool you are using and come in four color styles – clay, gradient, color, and premium – so you can get just the right look for your project. Each icon also includes three rendering views – dynamic, side, and isometric.

Arco Design

Arco Design is a comprehensive React UI components library based on the Arco Design system. It includes a customizable theme and more than 60 crafted components that you can use out of the box.

Seekvectors.com

Seekvectors.com is a search tool to find free resources in five different formats, PNG, SVG, JPG, EPS, and AI.

Outline to Single Stroke

Outline to Single Stroke is a tool in the Figma community that works just like the name implies. Select a filled vector on the canvas, and then you can outline it to a single stroke and adjust the line weight if you like.

Codeamigo

Codeamigo is a new self-paced platform to help you learn coding skills. It’s packed with various lessons for different languages and templates and has something for every level from beginner to advanced.

Sizze

Sizze is a Figma to React Native export tool to create app prototypes and instantly export to code.

CodingFont

CodingFont is an excellent game that can help you pick a font to use for coding that you like! If you spend a lot of time looking at code each day, the right font can help reduce eye strain and make the work a little easier to see.

Christmas Revue

Christmas Revue is the first in a trio of holiday typefaces that you can use this season. This SCG color font is fun and perfect for the holidays with exciting glyphs. It is free for personal use only.

Hotsnow

Hotsnow is a fun display font that has interesting fills and shapes in an all-caps character set. It is free for personal use.

Marlwich

Marlwich is a feminine handwriting-style typeface that has the feel of signing a holiday letter or card. It contains upper- and lower-case characters and is only for non-commercial use for free. (A paid option is available for commercial projects.)

Source

The post Exciting New Tools For Designers, December 2021 first appeared on Webdesigner Depot.

Source de l’article sur Webdesignerdepot

Wireframes are a powerful tool, especially for UX designers; whether you are developing a new app, a website, or anything else, the initial steps of any project can be tackled with this robust approach.

There are many occasions when we get stuck or overwhelmed for hours in front of a new project. This is where creating wireframes can be beneficial. A wireframe is nothing more than a diagram of your ideas for the flow of a project.

This post will analyze what wireframes are, and why they are so crucial for user mapping. Then, we will reveal the steps you need to follow to create an efficient wireframe. Let’s dive in…

What Is A Wireframe?

In a few words, a wireframe is a drawing created in the early stages of a UX project. Wireframes are a brilliant and effortless way to create a blueprint for the structure of a page.

In such a drawing, you can include valuable information about the UI and UX of the page you want to design.

You can think of wireframing as a process of visualizing the initial ideas you have about a project. It does not matter if you are comfortable with drawing; you can design wireframes on paper or digitally.

In either case, drawing a wireframe is not about your artistic skills. Instead, wireframes are about structuring your project and identifying the fundamental interactions you want to build out.

Why Is Wireframing Important For UX Designers? 

If you are an experienced UX designer, you have already come across concepts like user mapping and user journeys. Mapping the entire user experience is crucial. And that’s the main reason why wireframing is a must for a UX project.

Since you need to provide a top-notch user experience, wireframing is a great way to ensure this from the earliest stages of your design. But what is the process you need to follow when designing wireframes?

And how can you ensure that your wireframes are efficient? Let’s find out…

Creating An Effective Wireframe In 5 Simple Steps

Creating a good wireframe will allow you to construct your project. You will think it through, prioritize some fundamental interactions and consider alternatives.

1. Research

Although this is not a wireframing step per se, it is critical to the efficiency of your wireframes. How can you start drafting without doing user research? Well, you can not. That’s why the first thing you need to do is analyze your project.

All you have to do is seek similar products/services and check them out. Look at what your competitors are doing right and what they are doing wrong. This way, you will be ready for the next step.

2. Create Personas

You have already selected the best practices and ruled out other guidelines you believe will not be effective on this project. Now it’s time to think about user flow: How many screens will you put on a page? Where are users coming from, and where do you want them to go after reading this page?

By mapping your user flow, you can create a user persona. Then all you have to do is figure out what information to include. 

Mapping the information correctly is crucial because it will help you ensure that users do not get frustrated or overwhelmed when they visit your final page.

Once you do that, you are good to go. 

3. Start Sketching

It’s time to reach for your fine pen, pencil, eraser, and paper. Visualizing your ideas needs to be quick and efficient. Try to avoid fine details because this step is not about creating a high-fidelity wireframe on paper. 

All you need to do here is sketch out basic features and formats.

Since most of us designers are perfectionists, you can use a timer. Set the timer to 4-5 minutes and force yourself to finish the wireframe by that time. Repeat this step until you have created a few wireframes with which you are happy.

Finally, expand and polish your favorite mockups for a few minutes and prepare for the hard part.

4. Ask for Feedback

There is nothing more important than feedback when it comes to wireframing. Discuss your project with your colleagues. Just let them know how each mockup helps you with the project and what idea it visualizes.

Try to sincerely listen to what they have to say about your designs. Once you have gathered all the information and advice, start modifying the wireframe accordingly.

5. Add Details and Create Prototypes

It’s been a long road, but you are now at the point where you feel most comfortable as a UX designer: prototyping. Plenty of software (Adobe XD, Framer, Proto.io, etc.) can help you with this step. 

Start by turning your low-fidelity sketch into a high-quality prototype. Once you are happy with the result, test your prototype’s screens and see if the result serves the user flow. Platforms like UsabilityHub and Prott can help you with this.

Valuable Tips to Keep in Mind While Creating a Wireframe

Keep your Wireframes Simple: Creating a wireframe is not about fine details; try to manage the time you spend on it well. All you need is a clear and simple visualization of your page. You will have all the time you need for prototyping.

Don’t Worry About Your Artistic Skills: Anyone can draw. It’s as simple as that. You do not have to be an artist to create a clear wireframe to help you visualize your ideas. Be confident and make sure you include all the information you need.

Always Think of the User Personas You Created: Creating a wireframe is a smart way to ensure that the page you create meets the user’s needs. Therefore, you should always keep in mind what users will do when they open this page and whether it meets their needs and goals.

The Bottom Line

Creating a wireframe is not as difficult as you might think. All you need to do is research, find out what users need from this page, and create a map. By following these simple steps, you’ll ensure that the wireframes you design deliver a top-notch user experience.


Featured image via Pexels.

Source

The post 5 Simple Steps To Effective Wireframing first appeared on Webdesigner Depot.

Source de l’article sur Webdesignerdepot

As a web designer, you’re responsible for a lot of things. Your client is relying on you to ensure that their website is user-friendly, accessible, eye-catching, and even good enough on the back-end to capture the attention of the search engines. 

However, what many business leaders and clients don’t realize is that they also have a part to play in ensuring that they get the right results from their site; there’s more to the client and contractor relationship than an exchange of funds. 

Today, we’re going to examine some of the most common mistakes that clients make when they begin working with a website designer for the first time. After all, when a client makes a mistake, it’s up to you to show them how to get back on track. 

Client Mistake 1: Providing Minimal Insight

Creativity, for the most part, is the responsibility of the designer in any web-building project. You know best what you can do for a client. 

When you’re discussing an upcoming project with a business owner, you can walk them through concepts like dark mode design or strategies for digital accessibility. However, you’re still reliant on your client to let you know if there’s anything specific they need. 

An insufficient brief in a web design project usually means that you waste time on a project because you have to go back and forth multiple times, making updates and edits. Getting a brief ironed out properly from day one can reduce misunderstandings and mistakes. 

To get your client started, ask them to share some details like:

  • Who’s the target audience? Do they have a user persona they can share?
  • What specific features does the site need? Landing pages, forms, widgets, etc.?
  • Competitor sites they like: What do they appreciate about those designs?
  • Brand colors and assets: What kind of hues and shades should you use?
  • Technical feature requirements: Does the site need to have its own app, integrate with APIs, or have a checkout solution, for instance?

Client Mistake 2: Underestimating The Workload

Perhaps one of the most common mistakes that clients make when seeking help from a designer is that they have no idea how much work it will take to create the kind of site they want. If they haven’t provided a great brief in the first place, they might not have had a chance to see all the work they’re asking for written down. Walking your client through the brief process can help here. 

On the other hand, if your client has already provided a brief, along with an unrealistic deadline for completion, you might need to have a discussion with them about what you need to do. Walking your client through some of the processes involved in creating their website could give them an insight into how long it will realistically take to bring their ideas to life. 

Additionally, ensuring that your customers fully understand the amount of work you’re taking on could also mean that they can better grasp why you’re charging a certain price for your services. That brings us neatly to the next mistake…

Client Mistake 3: Not Having The Right Budget

Pricing your design services can be a complicated process for web designers. You need to make sure that you’re charging enough to cover the cost of things like essential software and hardware for your company. At the same time, with so many other designers out there, you also need to ensure that your costs are competitive. 

After you’ve gone through the hard work of figuring out what your pricing structure should be, you also need to be capable of justifying that expense to your client. It’s common for many customers to go into their work with a web designer expecting that they’ll be able to get an entire website, blog, and app for less than a couple of hundred dollars. 

Make sure that your client is aware of your pricing immediately to avoid any confusion. If possible, have a pricing page on your website or portfolio which highlights the cost of different packages and precisely what your clients are going to get. 

If your customers can see the value in your services and even equate to an hourly workload or skillset, they might be better equipped to set the proper budget. 

Client Mistake 4: Making Too Many Technology Decisions

You’ll find that you work with many different types of client during your time as a web designer. Sometimes, you’ll have people who come to you not really knowing what they want or need. This means that you may need to spend some time speaking to them about their expectations and discussing what’s possible. 

On the other hand, there’s always a chance that you could work with a client who thinks that they should be making all of the decisions themselves. While it’s true that your client should have some control over things like the style of their website and what features it has, it’s up to you to make technical decisions like what kind of tools you’re going to use. 

If your client tries to dictate everything you do and how you’re going to do it, this could make it difficult for you to deliver your best work. Explain your processes to your customer in advance and find out why they want you to use specific technology. 

For instance, if your client wants to use a specific kind of website builder because they’ve heard it’s “the best,” you can explain what you like most about the product you’re already using. 

Client Mistake 5: Being Too Attached To An Idea

This is a problem that happens in a lot of creative industries. A client goes out and finds something that they like on another website. It might be an attractive landing page or a specific checkout process. They’re so excited by what they see there that they refuse to compromise on that idea when working with their designer – even if the concept isn’t suitable. 

For instance, your client might come to you wanting a website that’s full of dynamic animations and videos. However, if they only have a limited amount of bandwidth from their hosting provider, this could mean that they end up with a slow site that aggravates their customers. 

The best thing you can do when this happens is to present the issue to your client in a way that they can understand. For instance, if you’re worried something will slow down their website, talk to them about how speed is essential to good customer experience. You could even share some page speed stats like: if a page takes more than 3 seconds to load, over half of all visitors will abandon it. 

Seeing the stats for themselves could mean that your clients are more likely to change their minds. 

Client Mistake 6: Working With The Wrong Designer

Finally, one of the biggest mistakes any client can make is working with the wrong website designer. There are a lot of professionals out there, each with their unique skills to offer in things like UX design, ecommerce page creation, and so much more. However, it’s not always easy to know what you need as a business owner getting online for the first time. 

The good news for web design clients is that there’s a lot of information out there that you can use to get informed fast. The bad news for designers is that this means you’re going to need to work at keeping your skills on the cutting edge if you want to attract the widest selection of customers. 

To ensure that you’re more likely to be the right designer for your customers, stay up to date with the latest web design standards, and check out what’s trending in your industry. Webinars, articles, and even TED talks can be an excellent way to brush up your knowledge and make your portfolio much more appealing. 

Strengthen Your Client/Designer Relationships 

Succeeding as a web designer isn’t just about building a robust portfolio full of excellent websites where you can showcase your skills. While it’s true that you need to stay on the cutting edge with your design talents, you also need to make sure that you can create positive relationships with every client that comes to you. 

Like designers, clients can make mistakes too, but not knowing what they want, trying to take too much control, or simply failing to understand the scope of a product. Rather than letting those mistakes hold you back, prove your mettle as a designer by helping your clients navigate these issues. The result will be more streamlined project experiences, happier customers, and better reviews for your company. 


Featured image via Unsplash.

Source

The post Protect Your Design Clients From These 6 Easy Mistakes first appeared on Webdesigner Depot.


Source de l’article sur Webdesignerdepot

Is sketching essential to UX and UI designers? Well, if you think of sketching as a way to explore problems and record potential solutions, then yes, it absolutely is.

One of the most challenging tasks of any design process is capturing the initial idea. We’ve all spent countless hours thinking through an innovative solution to a project, only to lose the idea again. It turns out that sketching is a brilliant solution to this problem.

In this guide, you’ll learn how to improve your UX designs using sketching as a tool. First, we’ll answer the question of how sketching benefits design, then we’ll look at the tools you need, and finally what an efficient sketching process looks like. By the end of this 3-minute read, you’ll have valuable new knowledge that will help you as a designer.

Why Sketching Is Important For Designers

When you start working on a project, it’s tempting to jump straight into high-resolution wireframes. But in doing so, you run the risk of spending hours on each little detail, only to discover that the overall concept doesn’t work.

Sketching — unlike drawing, which is about communicating an idea — is a free-flowing, process that allows you to get your ideas down on paper (yes, paper!) fast.

If there’s one thing you take away from this guide, let it be this: sketches aren’t for clients, or colleagues, or Dribbble, sketches are just for you. They’re a non-written way of rapidly making notes. Sketches will help you recall all the possible routes to consider.

Sketching is all about visualizing your ideas quickly and efficiently. When you’re sketching, you don’t have to worry about details, and you don’t have to worry about communicating with anyone else.

By sketching ideas without detail, you can quickly explore numerous solutions for a project. It’s fascinating how sketching can help you visualize an idea and revise it again and again along the way with minimal effort.

So, what revolutionary new tools do you need?

What Tools Do You Need For Sketching?

Designers love new tools, but when it comes to sketching there are relatively few, and you probably already have them to hand.

First, you’re going to need paper. A notebook is fine, it doesn’t have to be high-quality paper; in fact, you will probably feel freer and less restrained if you make sure that it is cheap.

You’ll need something to make a mark on the paper. A pencil is fine, as is a pen, a biro, and just about anything else. Don’t worry about an eraser, sketching isn’t about correcting mistakes, but you will need a sharpener if you’re using a pencil — never draw with a blunt pencil!

Whatever implement you choose, it’s a good idea to have a heavy marker, like a Sharpie, to pick out an important detail, and perhaps a fine pen to add small detail (if required).

Finally, make sure you have a timer to hand. A chess clock is perfect for an old-school aesthetic, but a timer on your phone is perfectly fine. The timer is to make sure you don’t spend too long on one sketch, so you don’t have time to get wrapped up in perfecting the details.

Sketching 101: A Step-by-Step Process

When you’ve been sketching for a while, you’ll discover your own process, and preferred methods. But for anyone new, here’s how to get started.

1. The Initial Idea

As with designing a wireframe, the most challenging step is getting started. Usually, at the beginning of a project, we are overwhelmed. This is because there are so many ideas, and we do not know where to start. For this reason, a detailed analysis of the project is essential.

You can start by thinking about the most important interactions you need to create. This way, you will find out the most important and exciting aspects of the project.

Since most of us get caught up in the fine details, it is beneficial to think of sketching as a brainstorming session. This session is simply about coming up with an innovative solution for a project and visualizing it.

It’s fine to have an idea that you’ll ultimately disregard. This is not the time to edit yourself.

2. Start Sketching

Take a piece of paper and use your sketching tool to divide it into six sections. Set your timer for 5 minutes and start drafting mockups for the first interaction.

Often, designers struggle with this step, and fall back on what they’re used to, i.e. wireframing and high-res mockups. If you find that you’re struggling to start sketching, start by making a mark on the paper; any mark at all. Then, make a second mark. With the third mark, try to position it in a way that says something to you about the project, by its size, weight, position — anything at all. Keep going, and before you know it you’ll have a complete sketch.

It’s vital that you do not exceed the time you give to yourself because sketching is not about fine details. The time is better spent exploring multiple ideas, even if those ideas only serve to confirm that the first idea was the most promising.

Repeating this step can be very valuable. Once you are happy with the results, you can move on to the next and final step.

3. Self-Editing

Unfortunately, you can not take away every concept you have outlined. This step is about choosing your most effective ideas and expanding on them.

Most designers want to create top-notch, detailed designs, and that’s fine. However, sketches are only really helpful for the early stages of a project, and creating perfect sketches in the first stages of a project may not be productive — in fact, it can be restrictive.

It’s often a good idea to combine some of your designs. Redraw them together, and once you’ve done that expand and refine them.

Improve Your Design With Sketching

It doesn’t matter if you think you’re bad at sketching — no one is going to see your sketches except you. Many of us would struggle to sing in public, but are absolutely fine singing in the shower.

Remember that sketching is not about your artistic skills; it’s about capturing an idea and expanding on it. After all, once you have your final design, you will recreate it digitally.

You don’t have to be an artist to be a designer. And since sketching can improve your UX designs, there are many reasons you should give it a try.

Once you’re comfortable with sketching, you’ll find it an invaluable tool for identifying sticking points in a project, and solving them before you reach the wireframe stage.


Featured image via Pexels.

Source

The post How To Improve UX With Sketching first appeared on Webdesigner Depot.


Source de l’article sur Webdesignerdepot