Articles

The WordPress themes and plugins you choose for your clients’ sites don’t just impact how the interface looks or how well it works. They also impact your ability to build them.

The point in using WordPress themes and plugins is to make your life easier, not to create more work for yourself or limit what you’re able to do. If you’ve struggled to find WordPress tools you can rely on from job to job, BeTheme might just be the total package you’ve been looking for.

BeTheme has it all:

  • A backend builder
  • A frontend builder
  • A WooCommerce builder
  • 600+ pre-built websites

There’s nothing extra to pay with BeTheme. One fee gets you all the tools you need to easily build professional-grade websites for your clients.

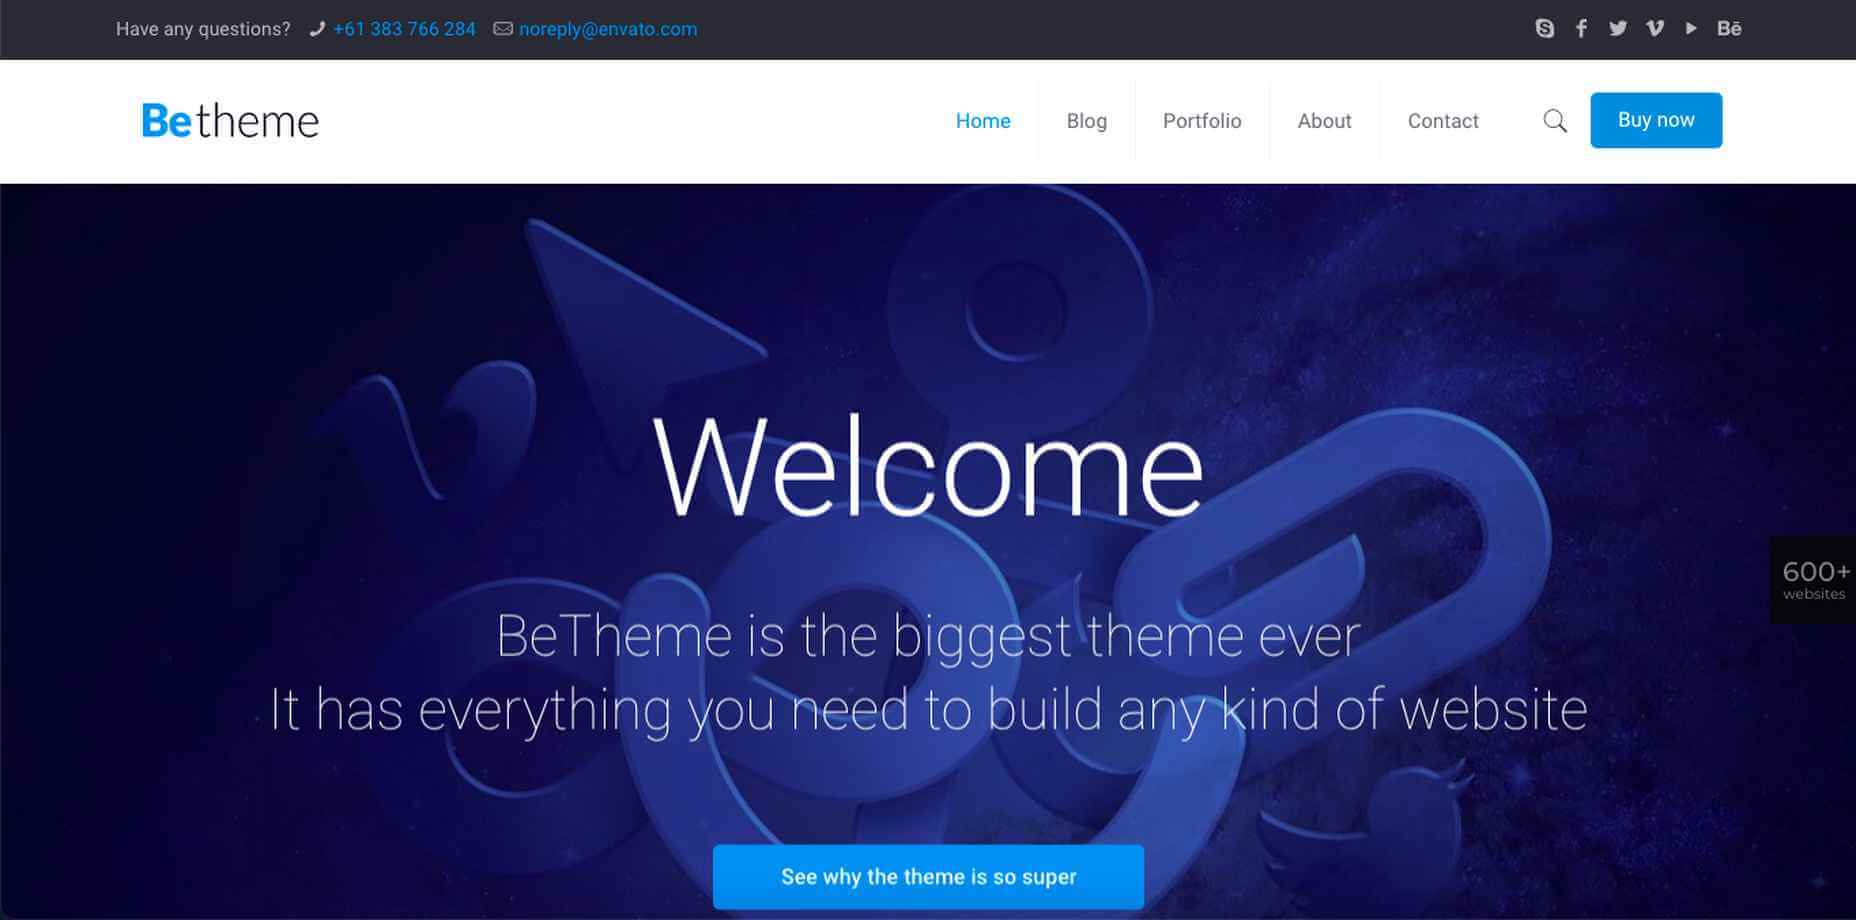
Get to Know BeTheme’s All-In-One WordPress Solution

Want to see how the BeTheme powerhouse works? Check it out:

1. Build and Manage the Backend With Muffin Builder 3

Let’s be honest, WordPress page builder plugins leave something to be desired. While they all have their strengths, it’s hard to find one that offers different tools for how you want to work.

Many of them offer a visual drag-and-drop builder, leaving designers with little flexibility in how they build websites. With BeTheme, you don’t have to compromise.

Muffin Builder 3 is the intuitive backend editor that gives you full control. And if you want to code it all by hand? You can. If you’d prefer to tap into BeTheme’s wide array of templates, pre-built sections, and predefined settings? You can do that as well.

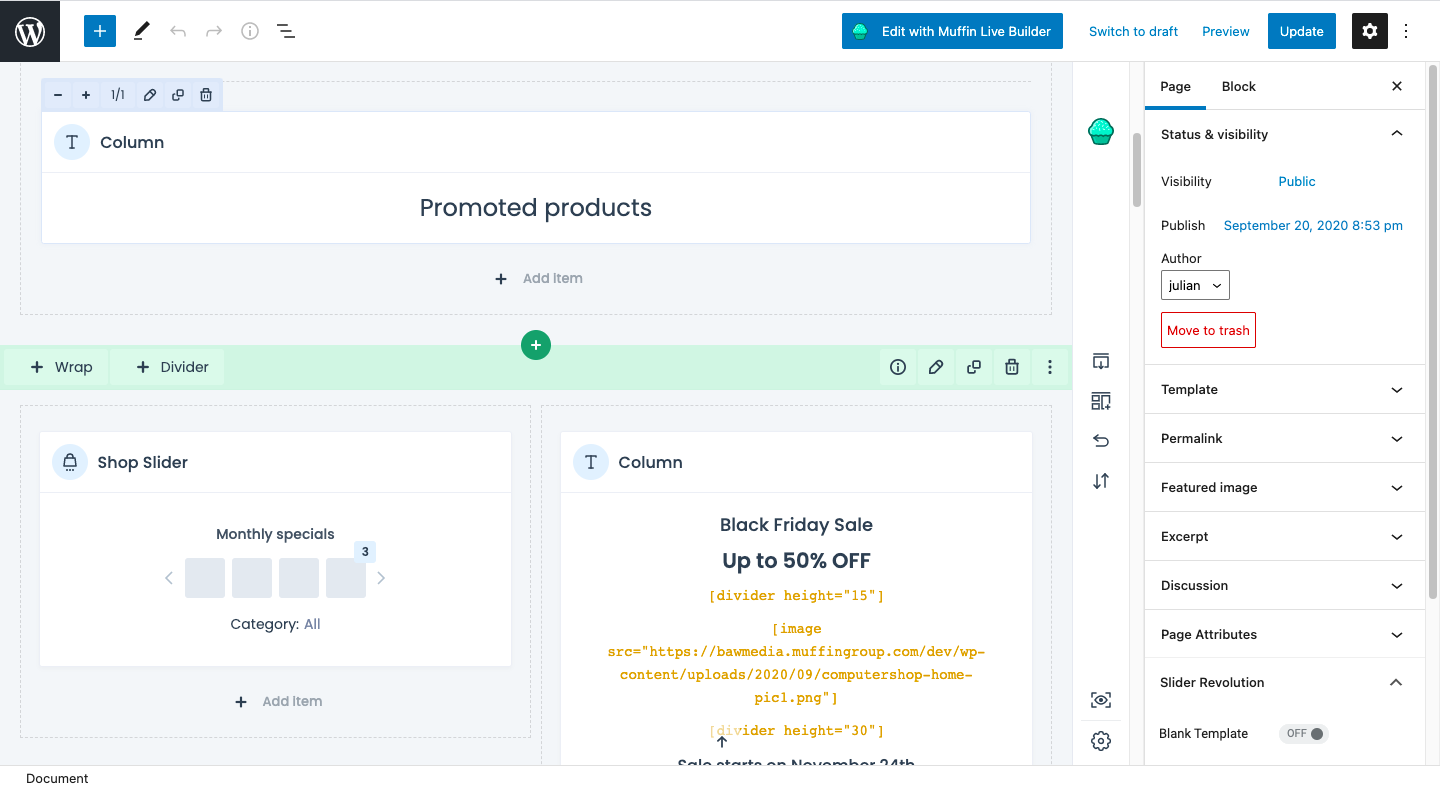
What’s more, the backend builder makes it easy to add sliders to your website, optimize your pages for search, and more.

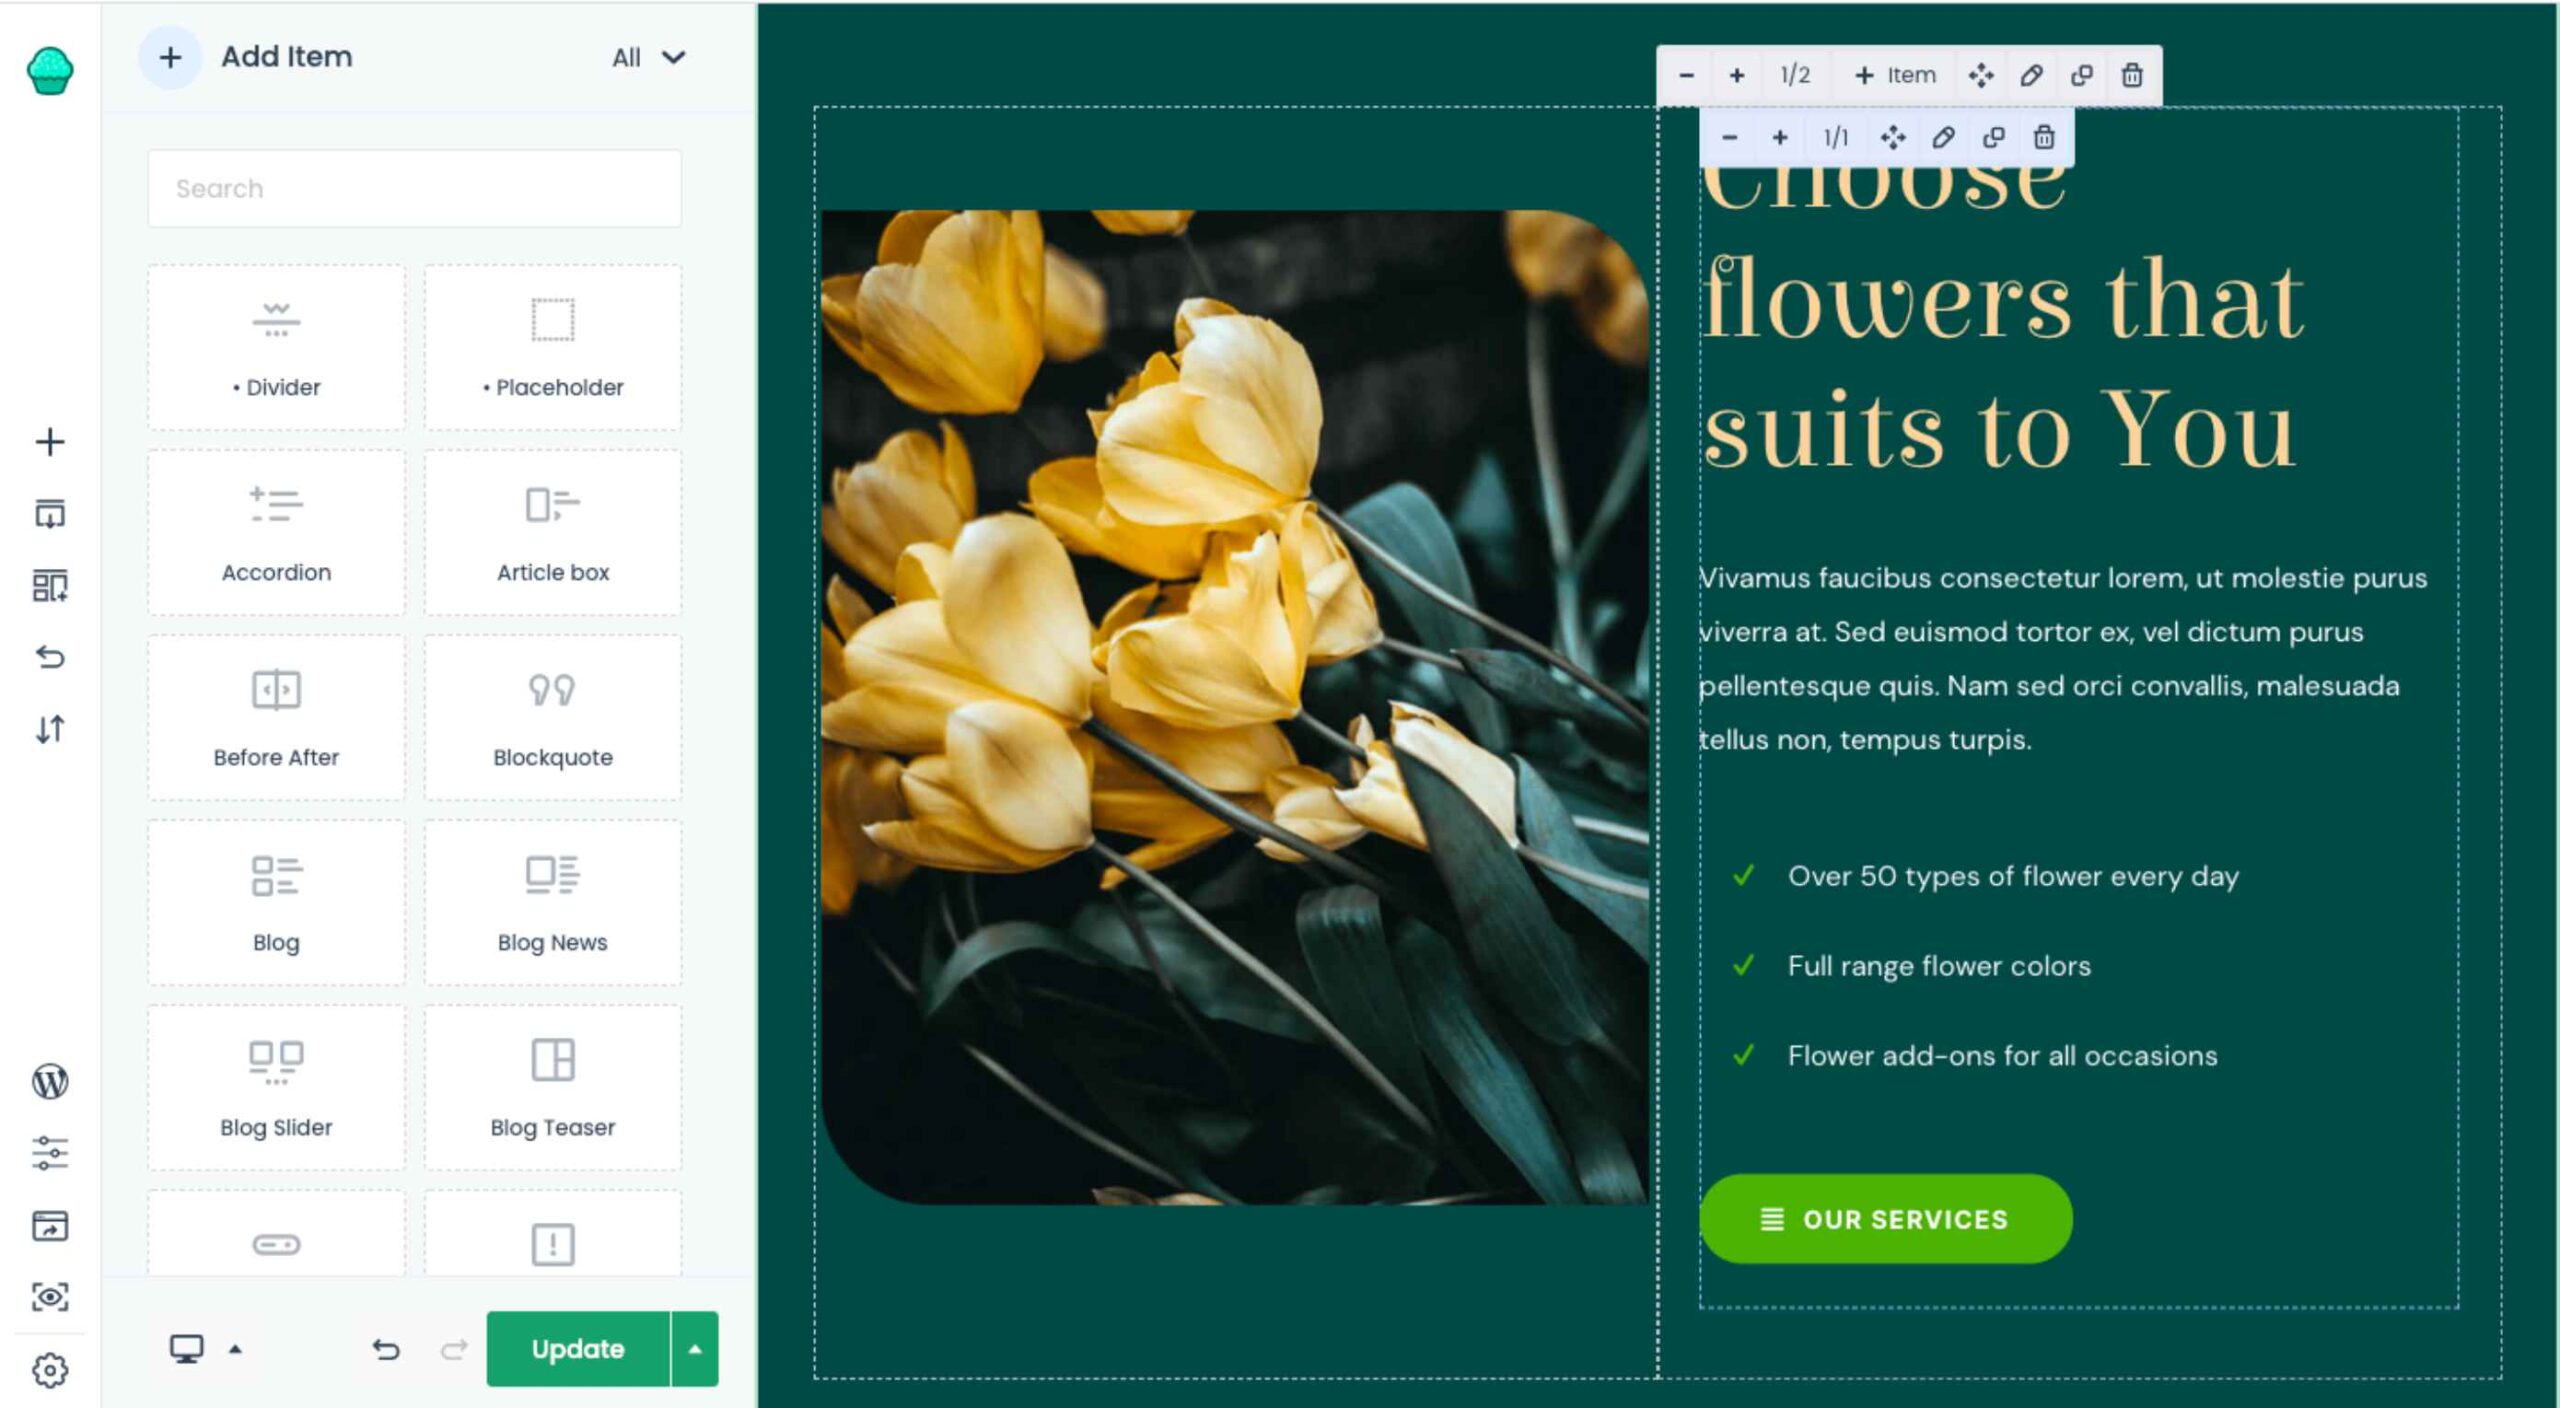
2. Design and Perfect Your Site on the Frontend with Muffin Live Builder

One of the reasons why drag-and-drop website builders have become so popular in recent years is because they empower everyone — from the DIY business owner to the professional web designer — to build websites visually. There’s just one problem:

While it’s great that developers both inside and outside of the WordPress ecosystem are creating these intuitive builders, they sometimes come at a cost.

One thing that tends to get sacrificed is speed. Because they take the editing out of the WordPress dashboard and onto the frontend of the website, many of them can take a while to load. (Some of them are known for stalling out on occasion, too.)

Another thing that gets sacrificed is how much you’re allowed to customize. You either have to design your website with the features and settings available from your page builder plugin or you have to do all the work inside of WordPress.

Muffin Live Builder doesn’t suffer from these issues.

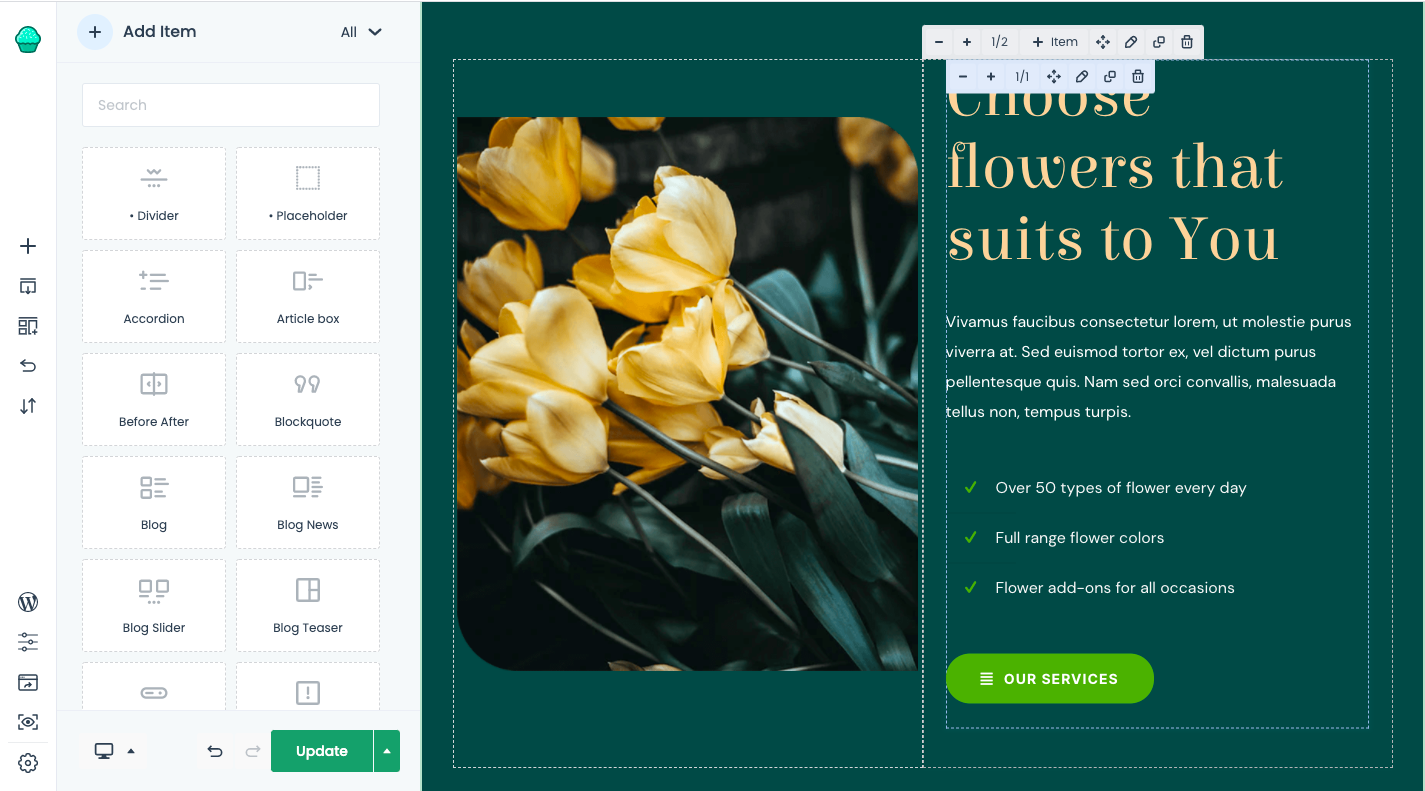
For starters, the visual builder is lightweight, so it won’t keep you waiting around for pages to load or changes to reflect on the frontend.

Also, you don’t have to choose which builder you want to use. If you want to primarily build sites with the backend editor and then perfect the designs on the frontend, you can. With BeTheme, you don’t have to pick-and-choose which editor you want to use.

3. Create Great Looking Monetized Sites with the Muffin Woo Builder

Many page builders are built for one purpose: To help WordPress users visually design websites so they can see their work reflected on the site in real-time.

That said, many page builder plugins haven’t accounted for the ecommerce piece.

Users can design and customize the regular pages on their websites with the visual builder, like the Home, About, and Contact pages. However, their ecommerce pages — Shop, Products, Cart, Checkout, and more — have to be managed through WooCommerce’s interface.

WooCommerce is a great ecommerce plugin. However, it’s not ideal having to design different parts of your site with different tools.

Be now has a solution for this: Muffin Woo Builder.

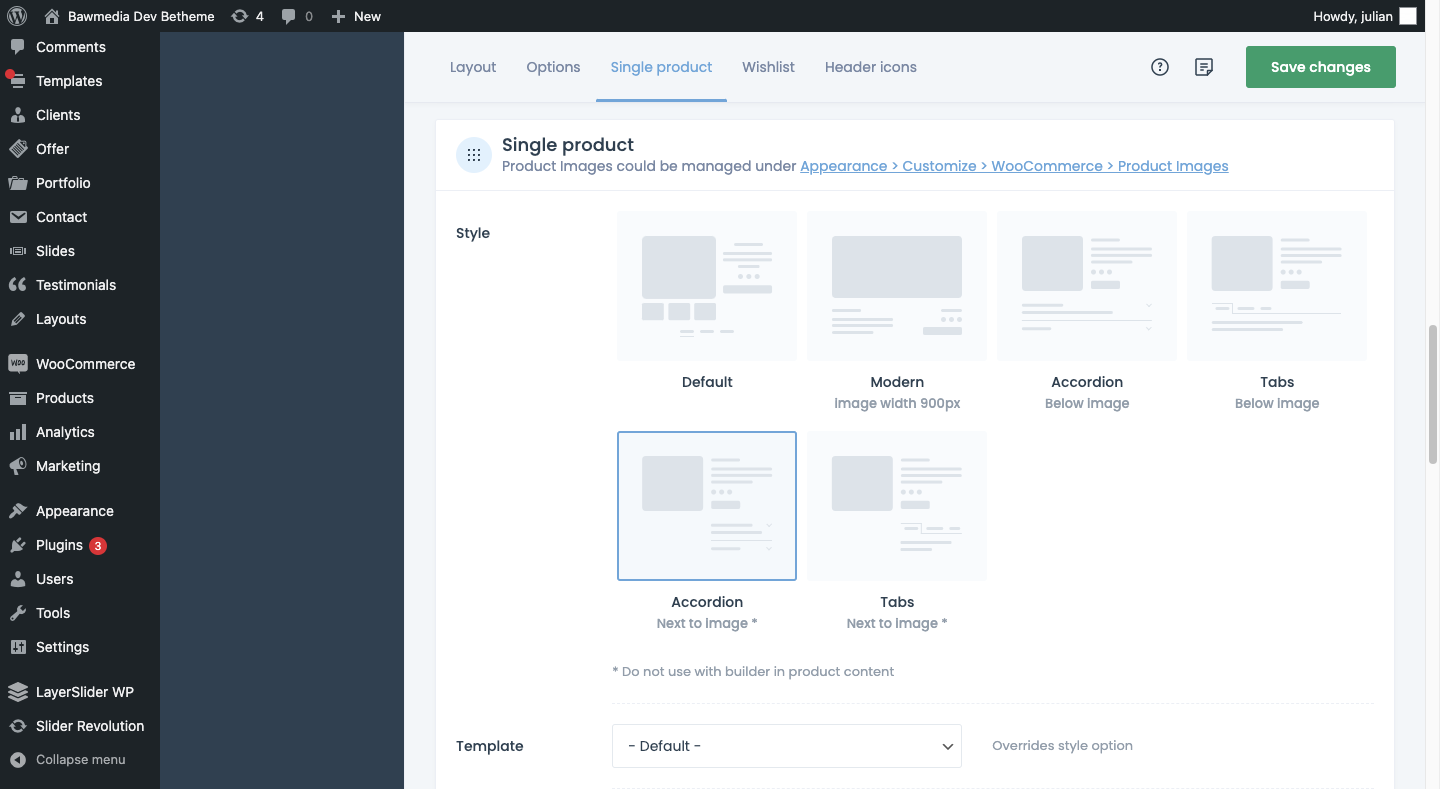
The Muffin Woo Builder allows designers to build their own single product and shop templates instead of just customizing the default ones provided by WooCommerce or the theme.

It also gives you design editing capabilities that no other page builder plugin can. For example:

  • Create design rules for your ecommerce pages
  • Choose from 11 product gallery styles
  • Switch between Shop and Catalogue mode
  • Set custom variation swatches
  • Show or hide the cart button
  • Add a sidebar
  • Configure settings for how product images render
  • Enable a Wishlist
  • Pick and choose which icons appear in the header

If you want this level of control over the layout and look of your ecommerce pages, you have to install other plugins or custom-code those changes into the backend. So, this is definitely a unique feature amongst page builders.

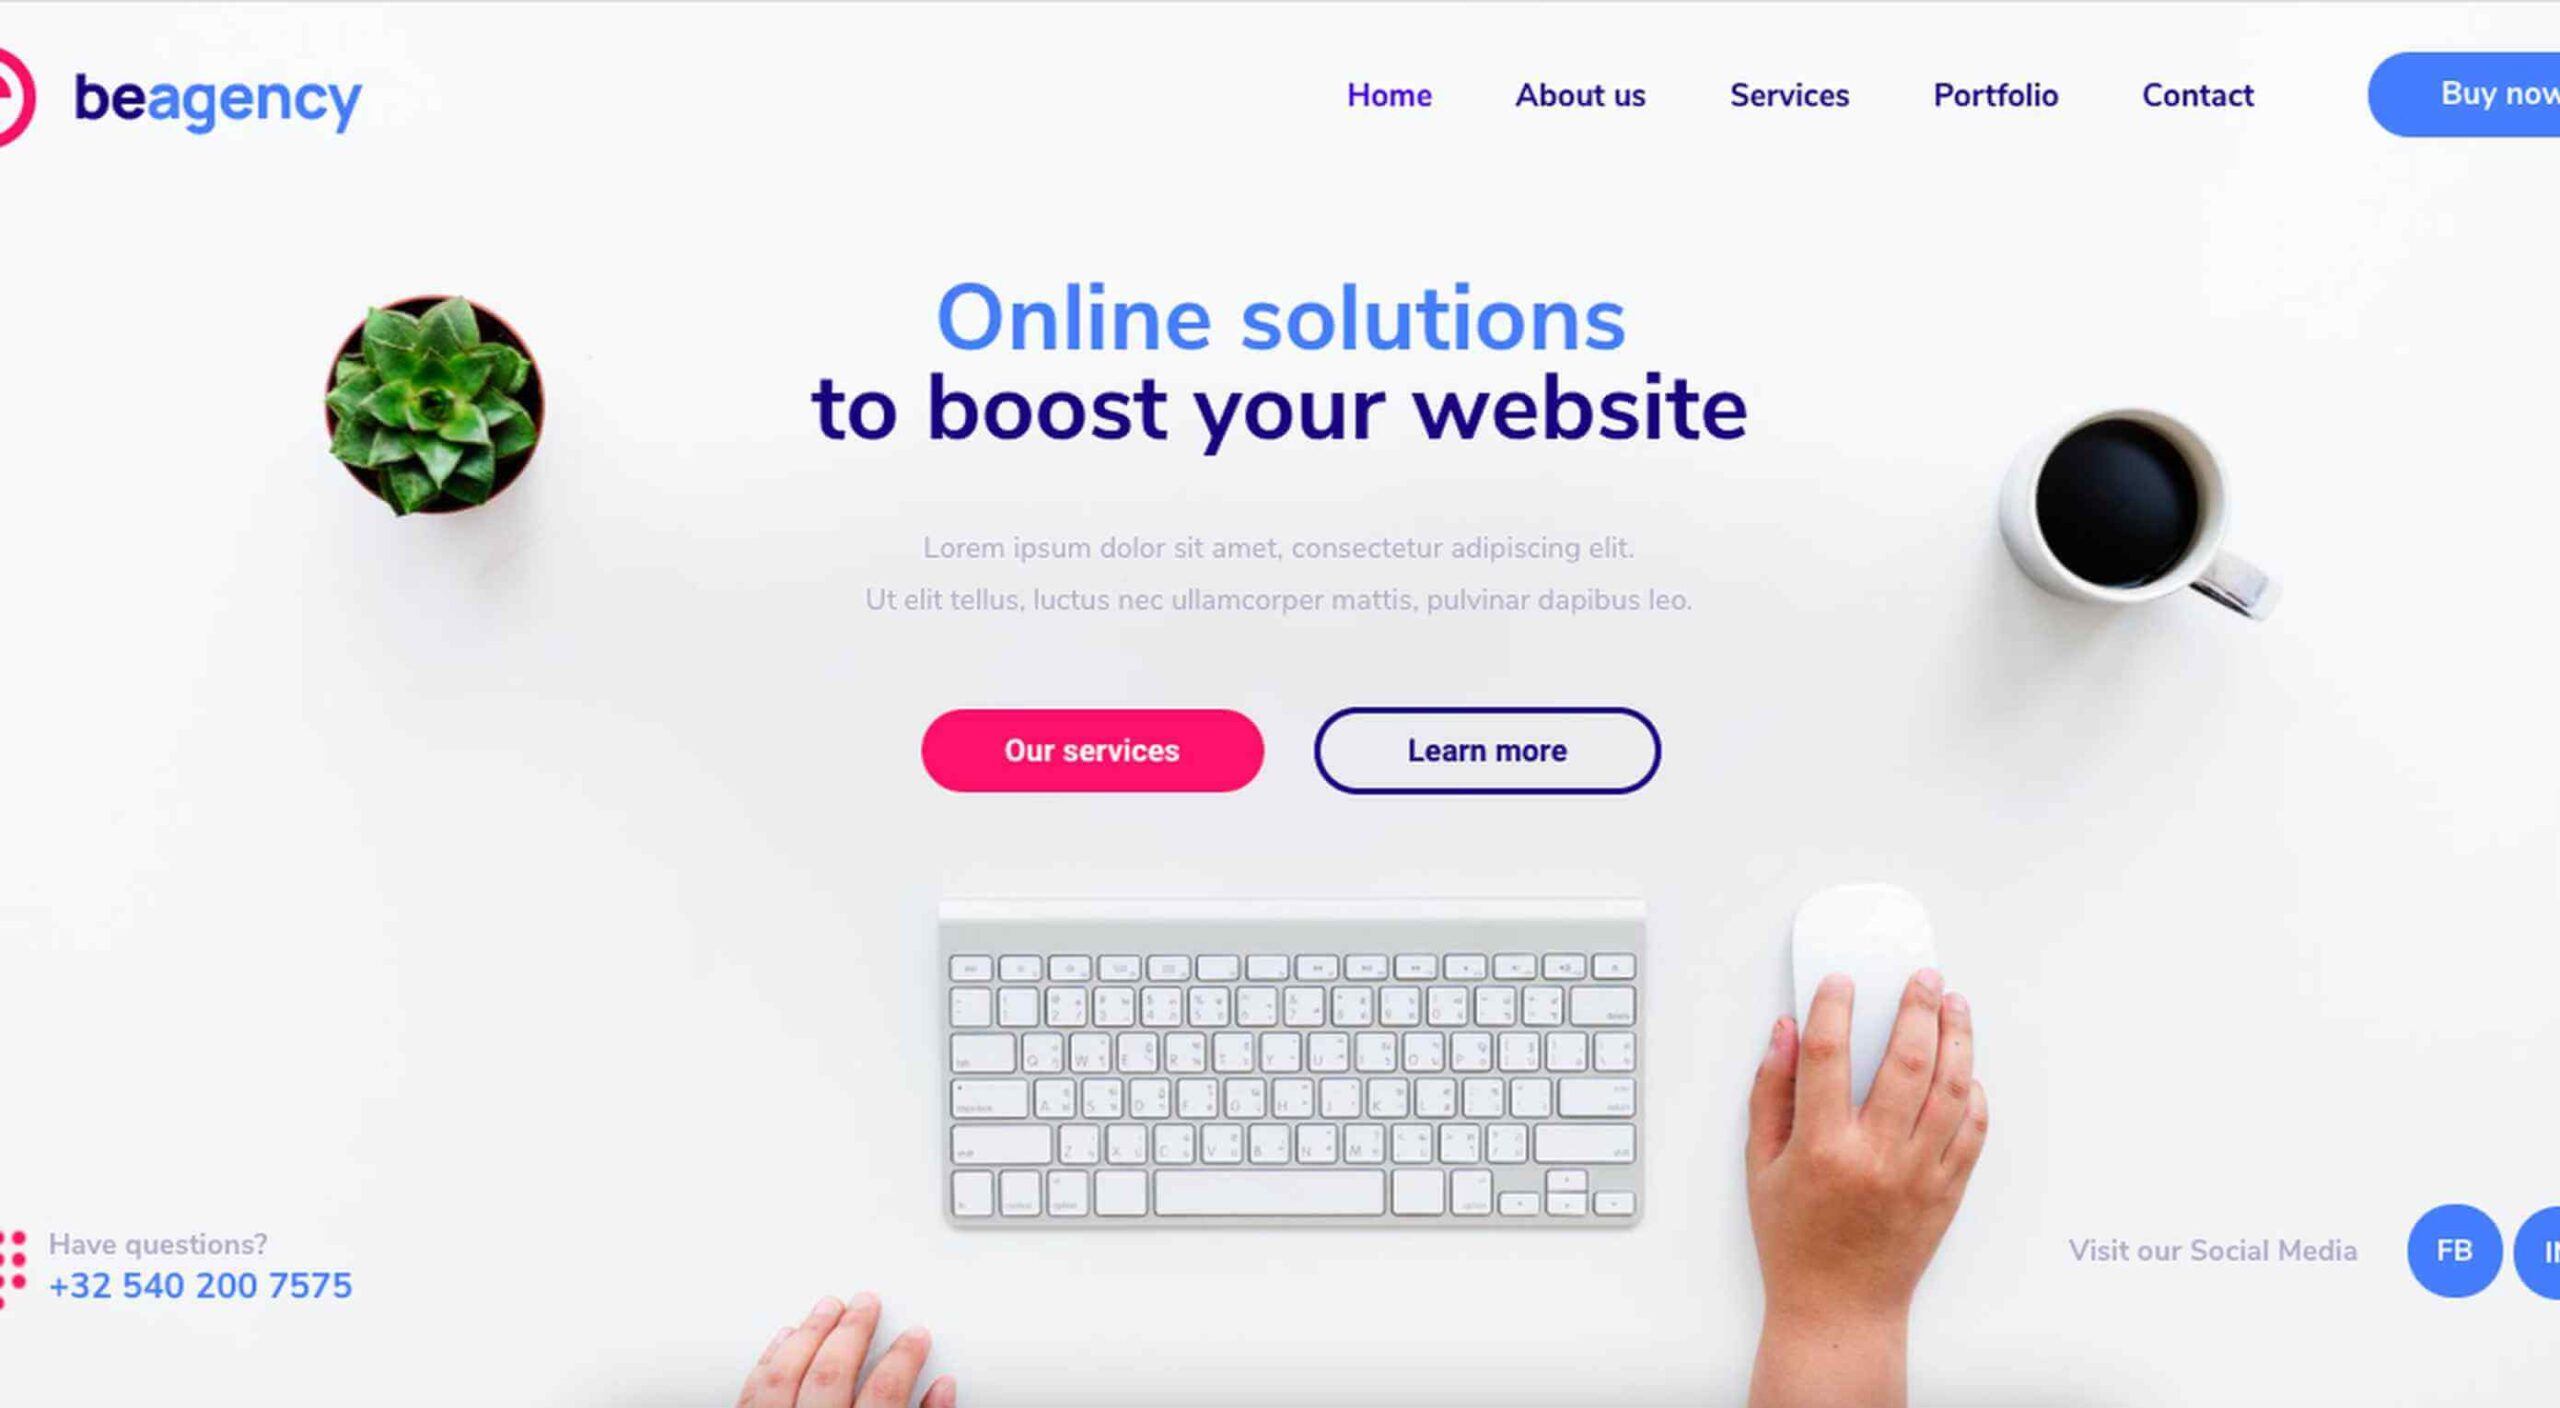
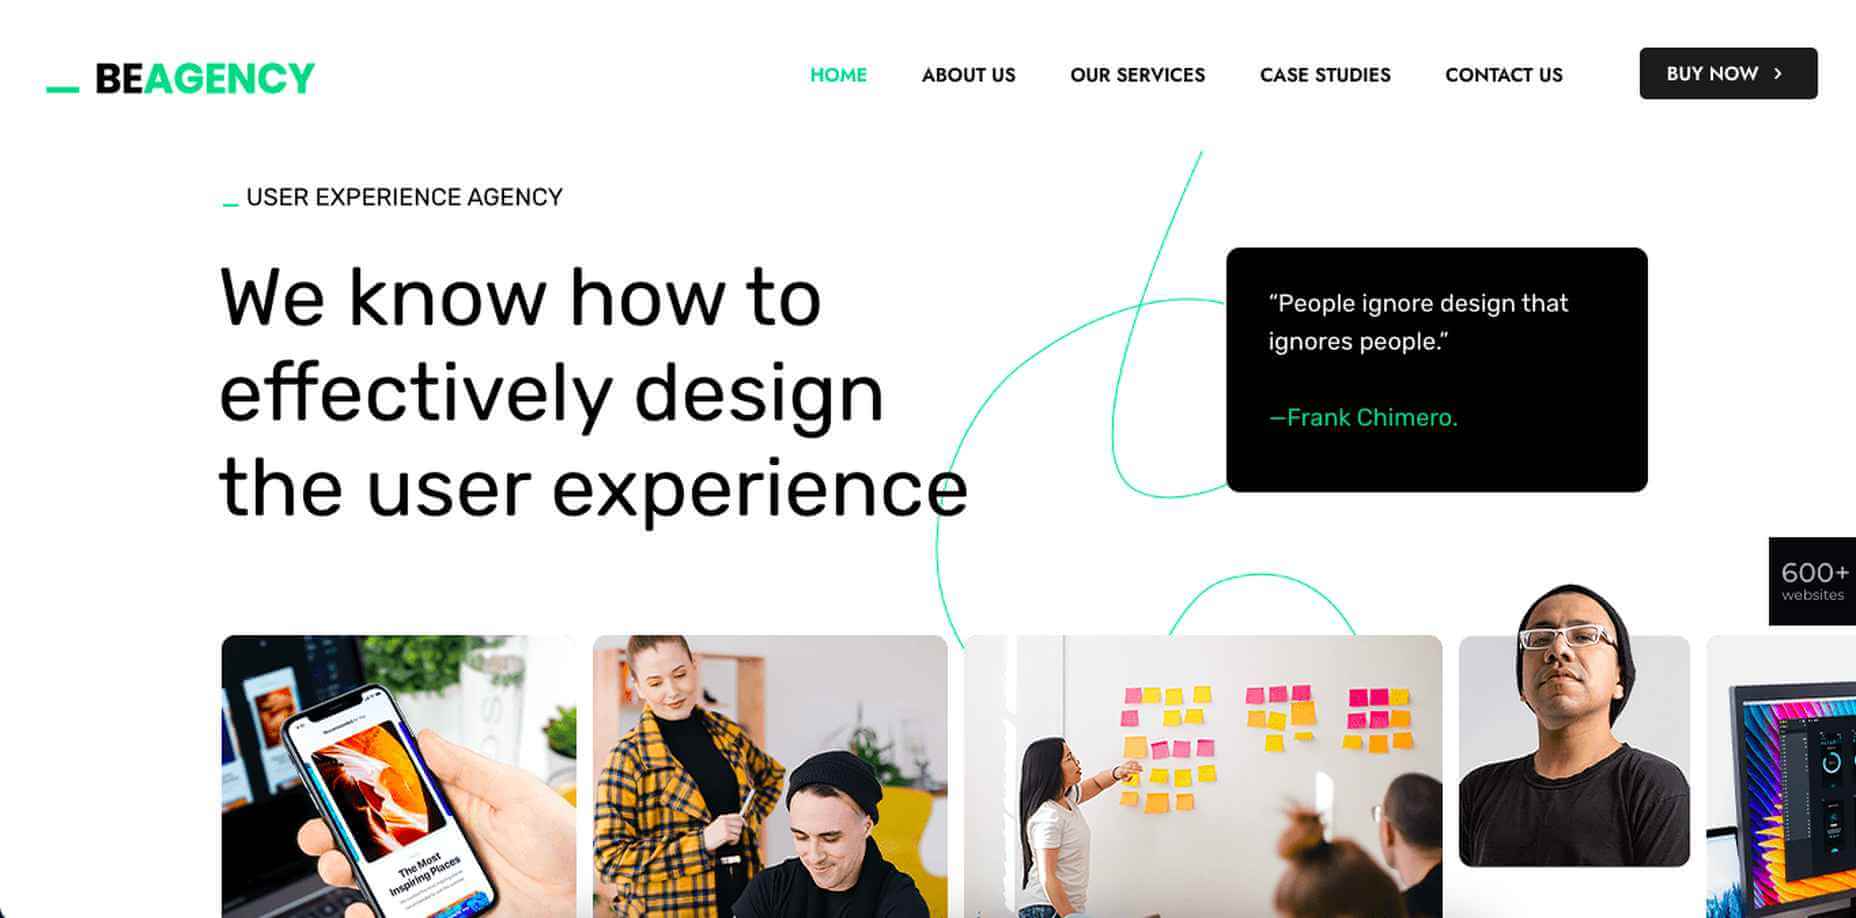
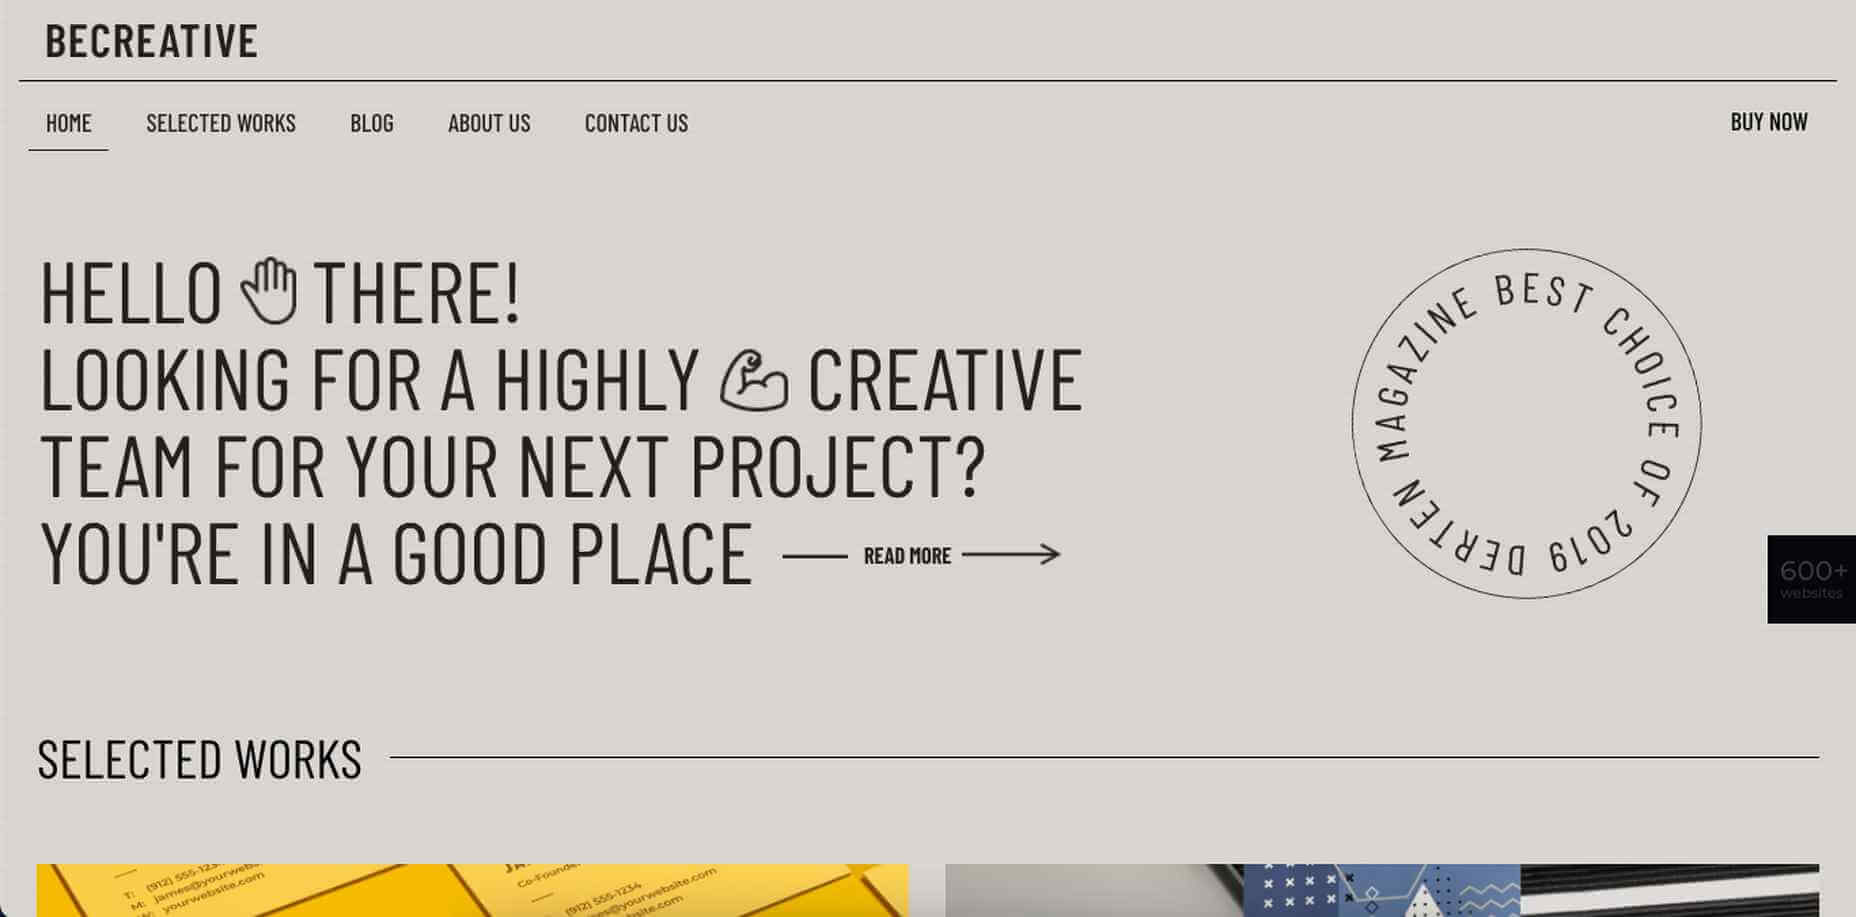
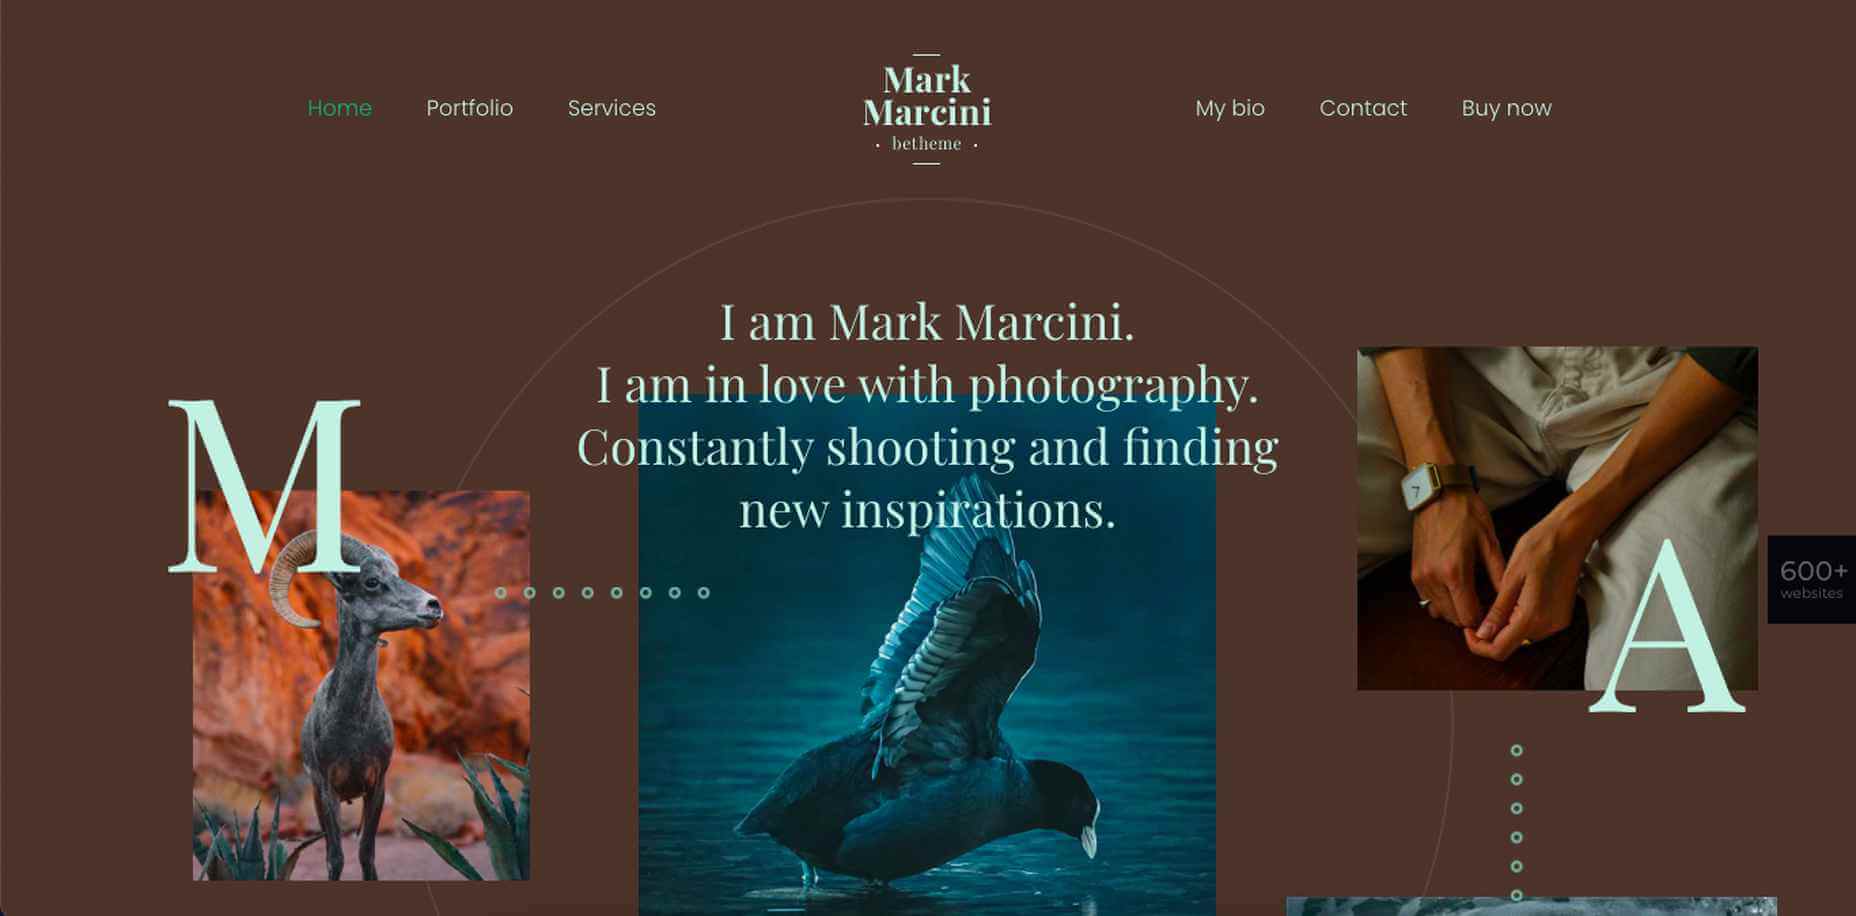
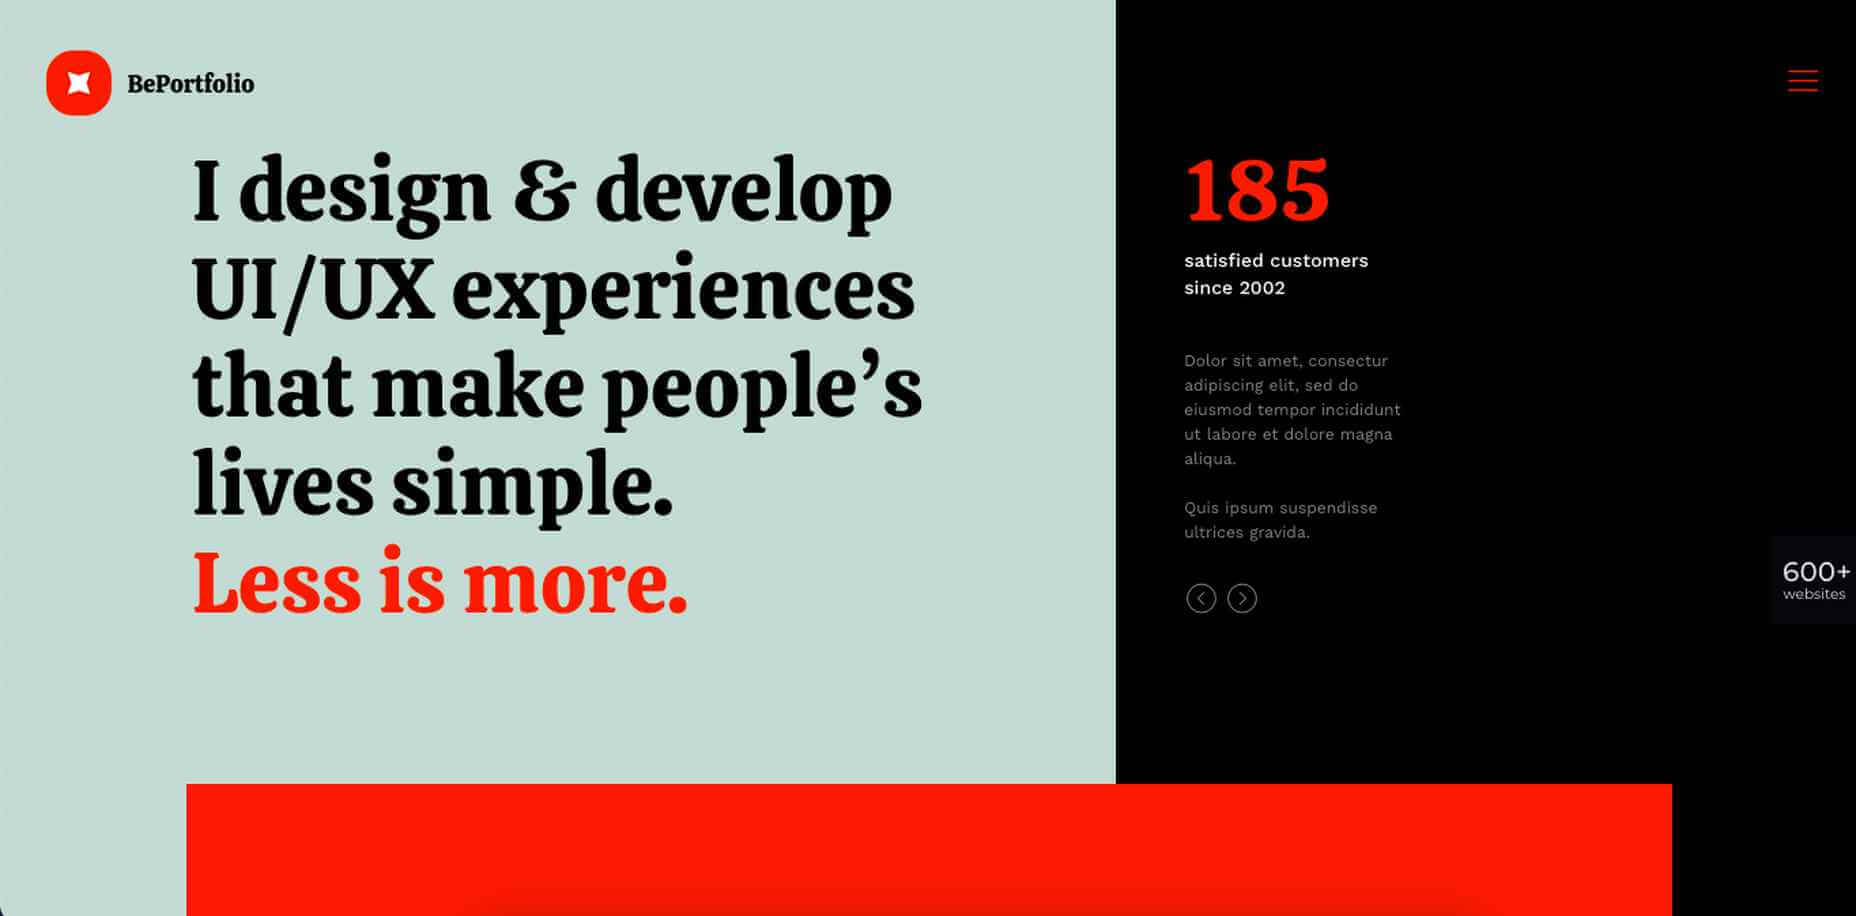
4. Instantly Design an Attractive Website With One of 600+ Pre-Built Sites

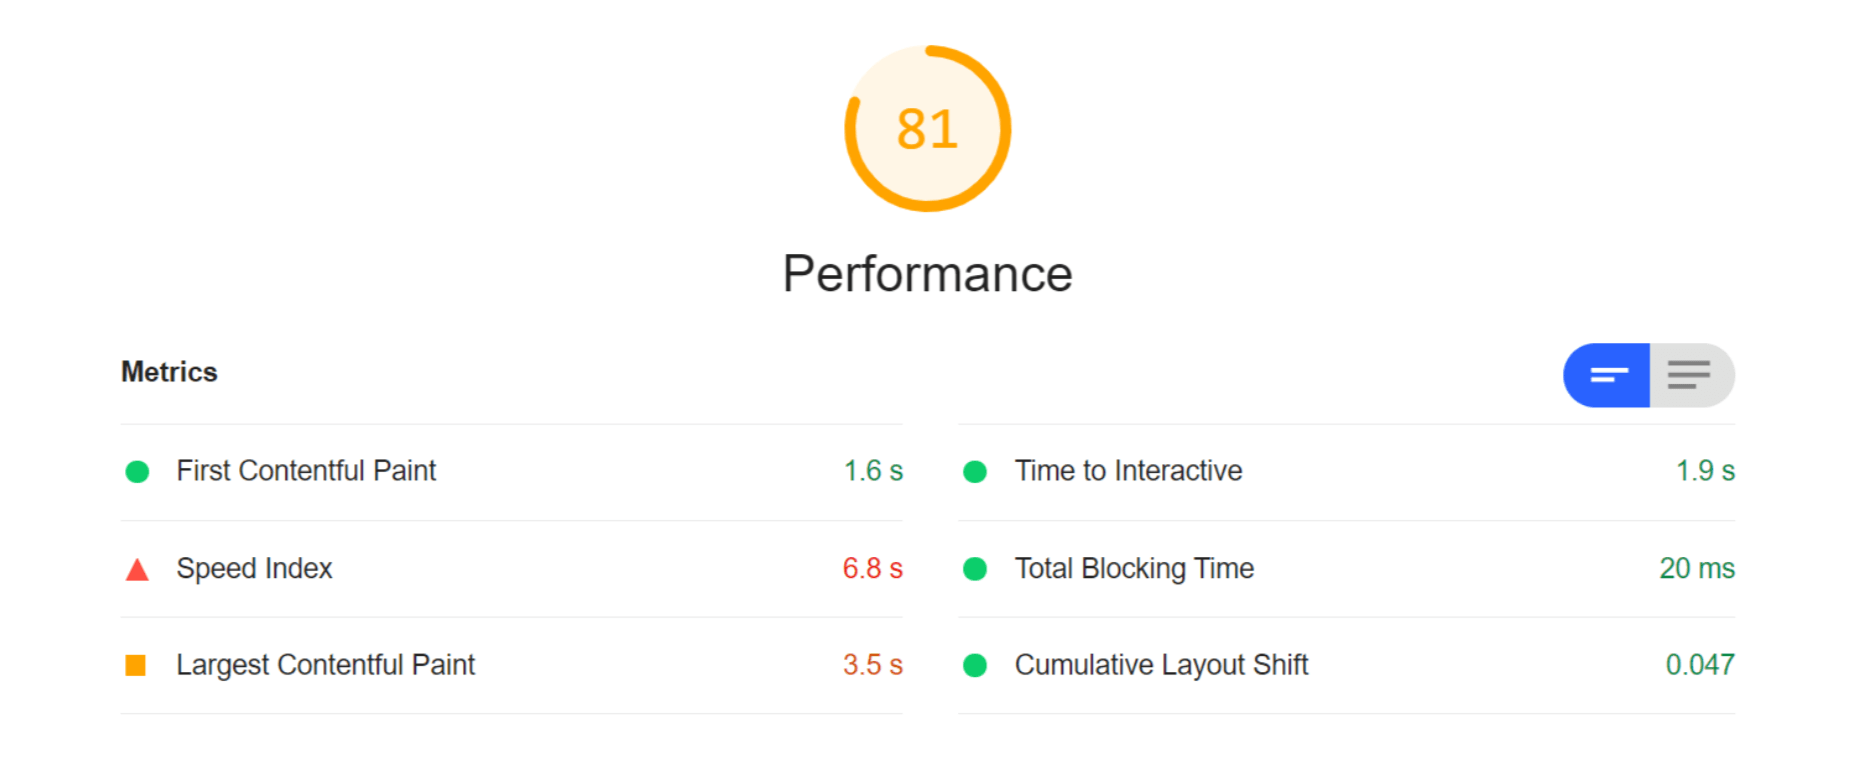
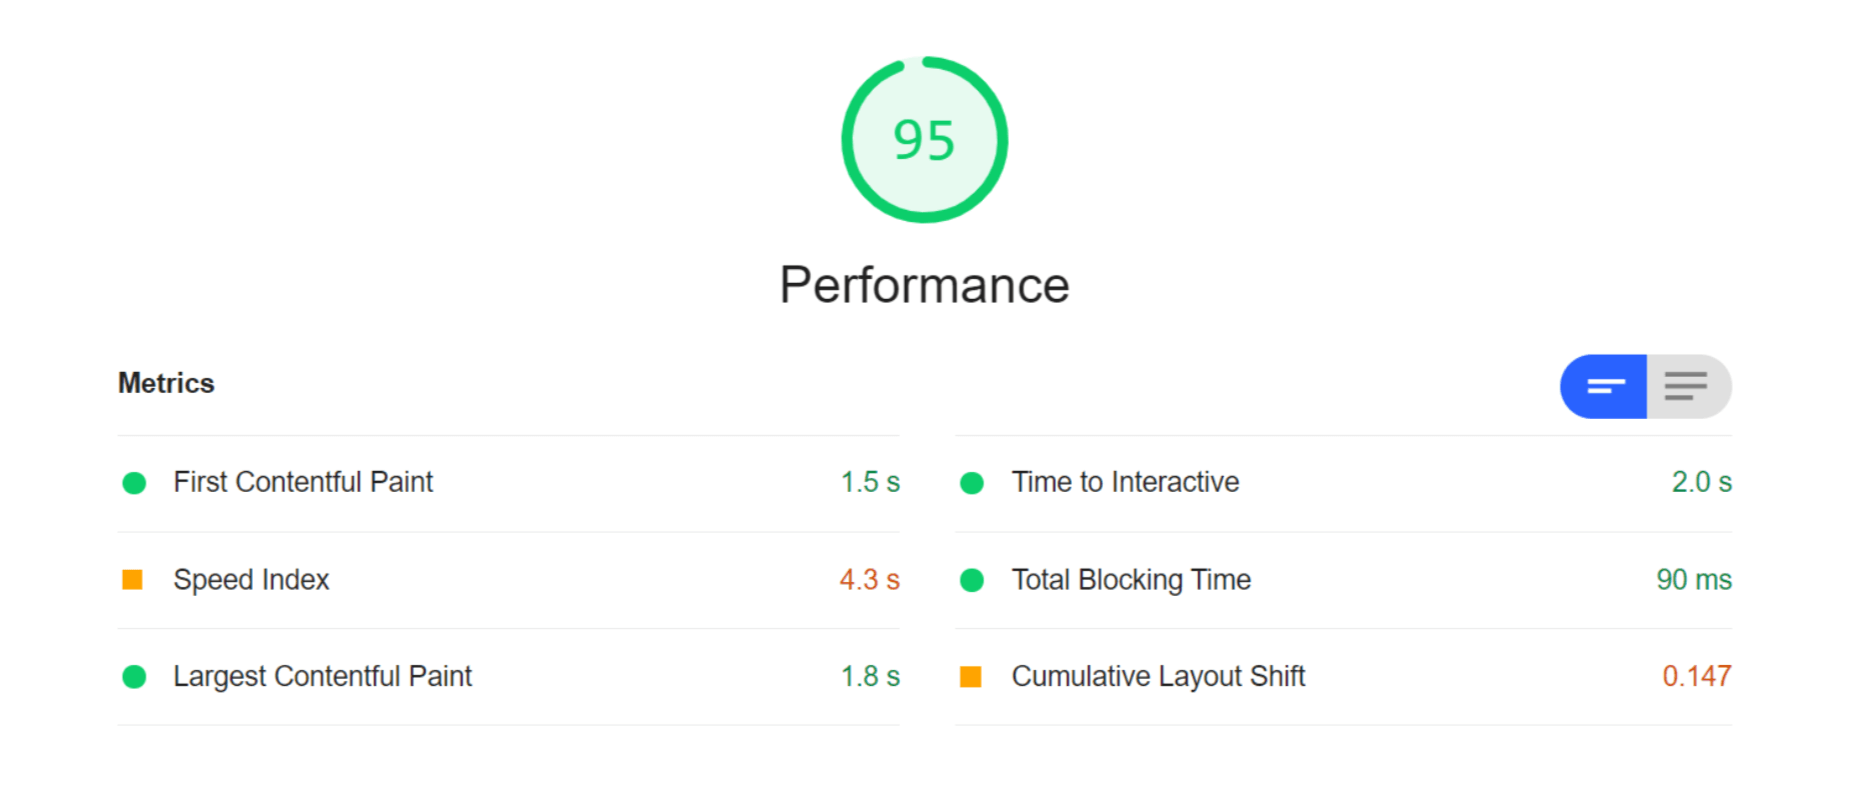
BeTheme isn’t just the fastest WordPress builder because it’s lightweight or because there are various builder options that allow you to work the way that’s best for you.

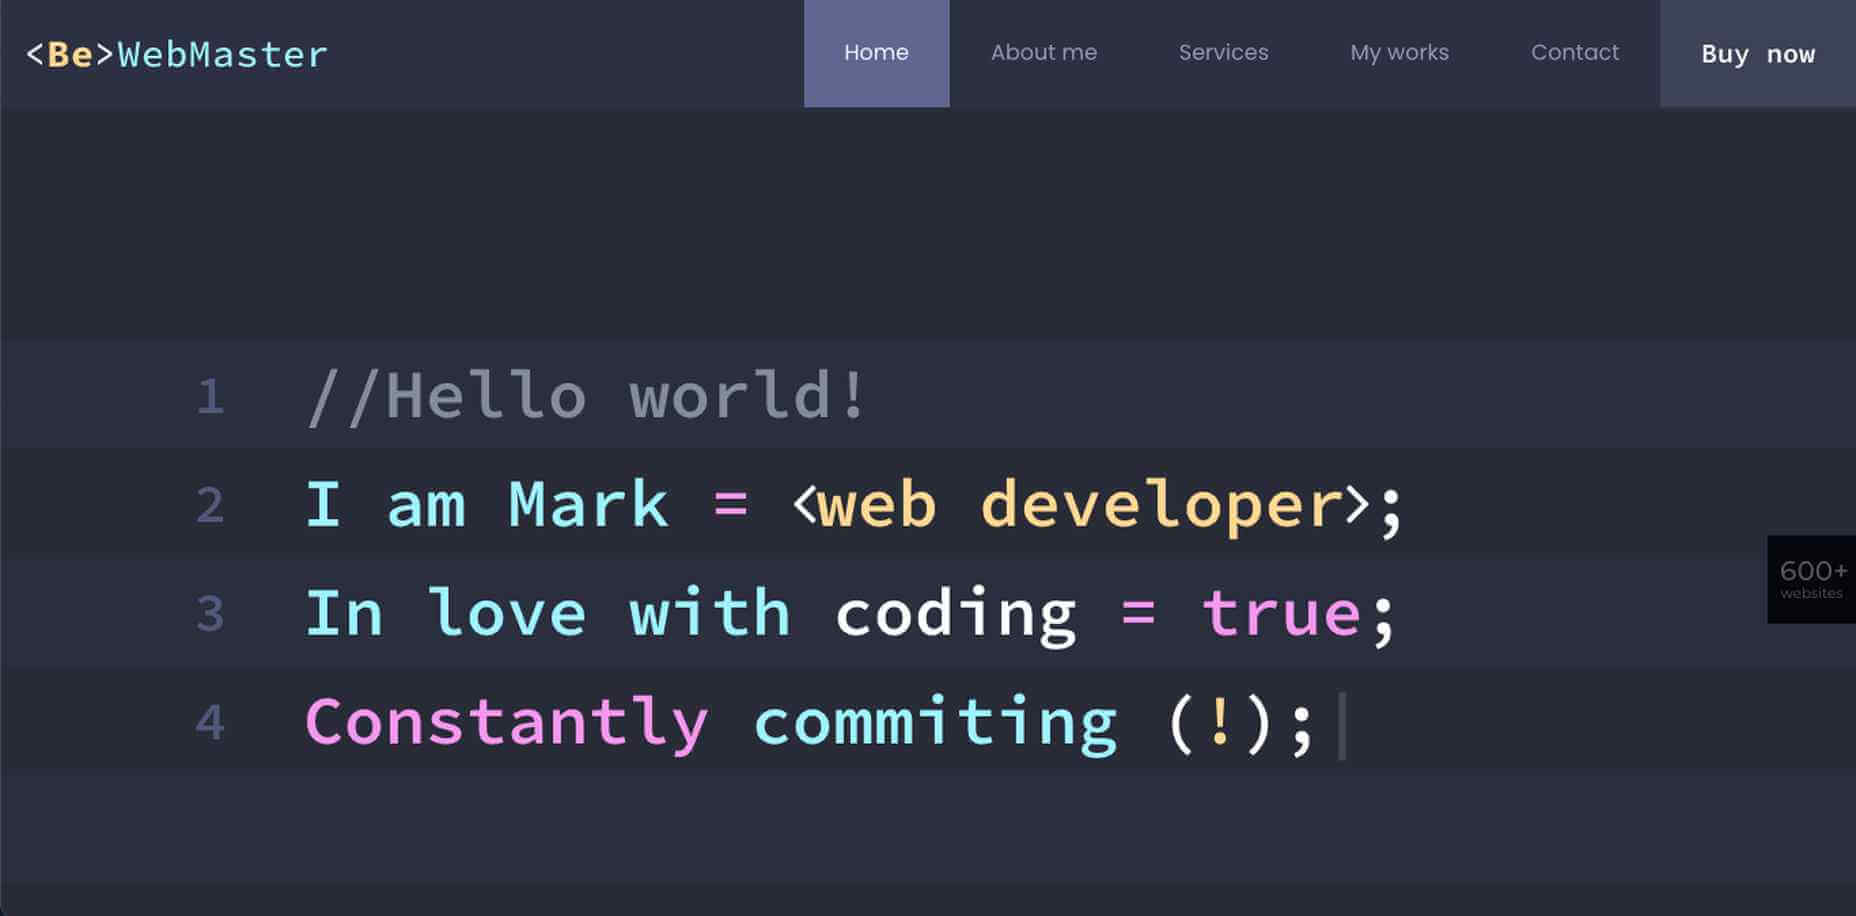
BeTheme also comes jam-packed with 600+ pre-built websites, with new ones released every week.

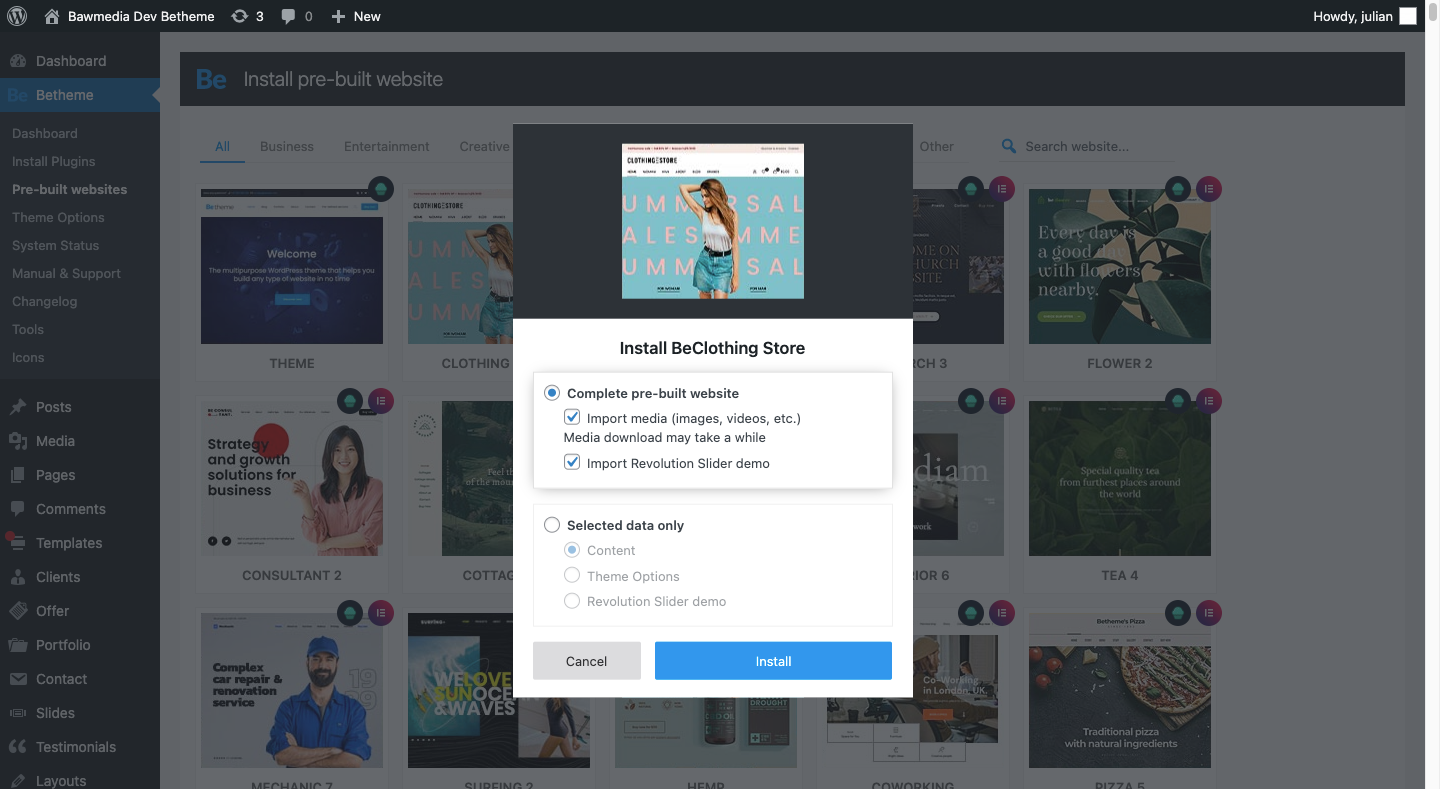
When you install a pre-built site, BeTheme is going to do a number of things for you:

  • Install all the specific plugins you need for the site
  • Load a fully designed and fully functioning website into your WordPress installation
  • Add placeholder content and imagery throughout so you can easily swap in your own

That’s going to save you a lot of time. Think about the cost savings, too. You get access to more than 600 pre-built websites without having to pay anything extra for them.

Is BeTheme the total design package? You bet it is!

It can’t be overstated what a game-changer BeTheme is for WordPress designers. Two page builders, one WooCommerce builder, and 600+ pre-built sites all rolled into one?

Everything you need to design high-quality websites is baked in.

That’s something you rarely see in any product or service, let alone in WordPress.

If you’re ready to say “Goodbye!” to page builder plugins and transform the way you work, get the BeTheme powerhouse now.

Source

The post Design Faster & Smarter with BeTheme’s 3 Builders & 600+ Pre-Built Sites first appeared on Webdesigner Depot.


Source de l’article sur Webdesignerdepot

Ready to take your business online but not sure where to start? It’s a surprisingly simple process, made all the easier by the tagDiv Newspaper theme that can shoulder the burden of code, leaving you to be creative.

Professional web designers normally begin with broad brushstrokes, roughly hewing a site, before finessing on the finer details; that’s exactly what tagDiv’s Newspaper theme lets you do, with innovative tools and a huge selection of pre-built options to choose from.

What is the Newspaper Theme?

Newspaper is the best-selling magazine theme from tagDiv. In constant development over the last twelve years, it’s been used to create world-beating sites for clients as diverse and demanding as United Nations, ShareAmerica, The Rackspace Blog, Bitcoin News, Uber Engineering, and Tech Explorist.

As the name implies, the Newspaper theme is primarily a magazine or blog theme, but you can use it for any kind of site, in any type of industry.

Packed with intuitive features that make personal web development not just possible but enjoyable, it will have your site ready to launch in no time.

It is fully compatible with Gutenberg, WordPress’ drag-n-drop site builder; it also comes with its own WYSIWYG, tagDiv Composer. All the sites built in Newspaper are fully flexible, responsive, mobile-friendly, and retina-ready. Newspaper is even fully integrated with WooCommerce so that you can transform your magazine site into a fully-featured ecommerce store.

Newspaper has been carefully coded to make the most of the upcoming Core Web Vitals update from Google, so your new site will be well-placed to rank highly on search engines.

Now that you know a little about the background of the Newspaper theme let’s look at how we can use it to build a WordPress site.

Pre-Built Websites

Sometimes it’s not just your coding skills but your design skills that are lacking; you know what kind of site that you want, you’re just hazy on the details.

This is where tagDiv’s Newspaper theme comes into its own. With a single click, you can install an entire pre-built website. And the process is so fast and convenient that you can try out as many as you like and pick the one that matches your vision.

You can even import a whole ton of pre-written content for testing the sites out, so you can see how it will look with your content without spending hours typing or copying and pasting text out of a Word doc.

There are 120 different designs covering all kinds of different industries. This means no matter what kind of site you’re building, one click, and you’re ready to go live.

Cloud Library

One step up from a full pre-built website is tagDiv’s Cloud Library. If you’ve installed one of the pre-built websites, this is probably where you want to go next.

The Cloud Library is a collection of 1600 different design elements that can be mixed and matched with live-editing to fast-track your site creation. You’ll find content blocks like headers, footers, testimonials, banners, and featured items. You can mix-n-match them however you please to create the site of your dreams.

Putting the “Cloud” into the Cloud Library are tagDiv’s servers, storing the code for each of these elements, so your installation only needs to load the code you actually use. This provides a huge boost in performance.

Composer

Lastly, the Newspaper theme provides tagDiv Composer, a specialist WordPress builder — like Gutenberg — that allows you to customize your website with absolutely no coding skills whatsoever. It’s a powerful yet simple-to-use tool that allows you to edit the elements of the Cloud Library and adapt them to your own purposes.

With Composer, you can create your own headers, footers, banners, text blocks, and more without any of the limitations of cookie-cutter design.

tagDiv Composer gives you the ultimate control over your site. You’ll find all the essential elements you need, from text and buttons to images and videos. All you have to do is drag and drop them into place.

Building a Site With tagDiv Newspaper Theme

As you can see that the fastest way to an engaging and original website is, to begin with, a pre-built site, then add the different blocks of code you want from the Cloud Library, and finally customize them with the Composer.

To make this possible, tagDiv has brought together experts from multiple disciplines, including brand strategy, project management, and web development.

It’s a slick system for quickly publishing high-quality sites that are unique to you and your business. Trusted by more than 130,000 customers worldwide, the Newspaper has earned tagDiv the status of Power Elite Author on ThemeForest and Top Author on Envato.

The Newspaper theme costs just $59, which includes six months of support from tagDiv, but for just $17.63, you can extend support to 12 months for added peace of mind.

tagDiv Newspaper is the simplest way for you to take your business online using WordPress.


[— This is a sponsored post on behalf of tagDiv —]

Source

The post Build Your Site The Easy Way With TagDiv Newspaper first appeared on Webdesigner Depot.


Source de l’article sur Webdesignerdepot

One of the most challenging stages of a design project is laboriously producing all those assets that bring it to life.

Whether you’re a web designer in need of icons, or a brand designer looking for mockups, it’s a smart move to fall back on stock assets to speed up your turnaround, reduce costs, and enliven your designs.

With so many stock sites to choose from, which should you opt for? Today we’re going to take a look at DesignBundles.net and ask if it’s the right choice for your project.

What is Design Bundles?

Design Bundles is exactly what it sounds like: sets of design assets that you can download for free or at huge reductions on RRP.

Launched five years ago, Design Bundles is brought to you by the same team that delivers Font Bundles.

Over two million customers are already enjoying the benefits of Design Bundles’ weekly updates.

What Can You Download From Design Bundles?

There are currently over 800,000 products listed on Design Bundles, and the collection is growing all the time.

The files have been produced by 6,500 of the world’s leading independent designs. Because the products are top-quality, you can really make them work: scale them, flip them, distort them, recolor them; just about anything is possible when you’re using high-quality raw ingredients.

What’s really impressive is the range of products that are in the collection. You’ll find backgrounds, logos, icons, textures, patterns, and clip art. For product designers, there are mockups and web elements. Print designers will love the huge range of cards, invites, flyers, posters, and brochures. And if you’re looking for standard stock images, you’ll find a gargantuan range under popular themes such as technology, architecture, travel, and business.

Because Design Bundles is relatively new, you won’t find its collection padded out with out-of-date Gifs. In fact, Design Bundles is one of our favorite places for free SVGs, the best format for graphics on the web.

All the products are royalty-free and licensed for personal and commercial use, so you can relax knowing that you’re fully covered.

What Makes Design Bundles Different?

There are a lot of design bundles services online, so what makes Design Bundles different? Well, firstly, the quality; Design Bundles has a consistently high level of designs. We love the freebies. They make a huge difference and are great for trying out ideas you might not be ready to invest in.

Design Bundles differs from other stock sites because it offers curated bundles of complementary assets — you don’t just download a vector file; you download a set of vector files. This innovative approach means you don’t have to go hunting for matching images; once you’ve found the right download for your project, you have a whole range to enjoy.

The whole process of using Design Bundles is simple, from browsing through the available assets to choosing a design and through to the fast, simple checkout process. It’s all designed to make including design assets into your projects as simple as possible.

The website is user-friendly, and in the unlikely event that you’ll need them, the support team is friendly, helpful, and prompt to handle queries.

Is Design Bundles Good Value?

We’d be lying if we said that cost wasn’t a big bonus of using Design Bundles. Design Bundles offer up to 96% discounts on regular prices, meaning that you can get the same incredible assets that top design agencies use at a fraction of the price.

In terms of time-saved, inspiration-delivered, and graphics-acquired, your Design Bundles subscription will more than pay for itself.

Alongside the daily and weekly deals, you’ll find products you can try for free. For example, design Bundles provide a whole heap of free SVGs. And not just sample files. There are thousands of files to download and use in projects. You can’t get better value than free!

There are new freebies every week, so it’s worth subscribing just to ensure you don’t miss anything.

For freelancers, the licensing model is particularly attractive. Because there’s no limit on the places you can download design resources once you’ve bought them, you can download files at home, in the office, or at a client’s workspace — whatever is convenient. Meaning you carry a huge library of resources with you wherever you go.

Oh, and if you want to make the most of your new Design Bundles assets, don’t forget to check out its YouTube channel, where you can learn tons about how to create effects, edit images, and complete creative projects.

Should Designers Use Design Bundles?

When you’re designing a project, whether you’re a digital artist, a web developer, or a crafter, the result relies on the quality of its component parts.

Design Bundles offers you the chance to work with high-quality assets from some of the web’s top designers at a fraction of the price of creating them yourself.

We’re confident that if you give Design Bundles a go, you’ll quickly see the benefits for yourself. But if you’re still not sure, why not sign up for its newsletter and check out some of the daily and weekly deals and the freebies that are available to you.

Design Bundles is a recipe for success that you’ll be happy you discovered.


[— This is a sponsored post on behalf of Design Bundles —]

Source

The post Review: Should Designers Use Design Bundles? first appeared on Webdesigner Depot.


Source de l’article sur Webdesignerdepot

Productivity is a crowded space, with countless apps and services promising to make your life and business easier and more profitable. Of all the apps that make that promise, very few deliver, but we’ve found one that does: Taskade.

Flexible Planning With Taskade

Every problem is unique, and part of what defines us as creative professionals is the different ways we approach problems. What suits one person in one situation doesn’t suit another in another. This is where many planning apps fall down: they adopt one singular approach and expect users to fit around the app.

Taskade is different. Like the love-child of Trello, Notion, and Slack, Taskade uses a template approach to create a flexible planning system that you can use in whatever way you prefer.

When you open up Taskade, you’ll see some quick options: ‘blank,’ ‘weekly planner,’ ‘meeting agenda,’ and so forth. But there’s also a ‘more’ option that will give you access to the hundreds of templates Taskade supplies. There are dozens of template categories, and each category contains multiple templates that you can use to drive your planning process.

Whether you’re looking for a task list for launching on Product Hunt, a design system checklist, or a project scrum board, you’ll find the template ready and waiting for you.

If none of the predesigned options are right for the task at hand, Taskade gives you the option to create your own template from the basic building blocks of boards, actions, mind maps, charts, and lists.

Team Collaboration With Taskade

One of Taskade’s main strengths is its ability to work equally well for individuals and teams.

It makes sense when you’re evaluating a product that you do it on your own. But we encourage you to bring team members on board early in the trial because it’s when working with teams that Taskade really excels as a collaborative tool.

Once you’ve created a new planning project, you can invite your team, either by email or — if they’re already registered — by tagging them with their Taskade username.

You can assign tasks to individuals or multiple individuals (a much better option than the free-for-all you find in some to-do apps). You can also set deadlines for tasks so that everyone knows what the schedule is.

Team Chat on Taskade

Another area that Taskade excels for teams is the built-in real-time live chat. You can communicate with team members right in the project instead of jumping onto Slack or email.

For teams working remotely, or even just multi-tasking throughout the day, it’s a great way of ensuring that everyone has the information they need. As a result, mistakes are minimized, and best of all, there’s a written record that can be referred back to at any time.

Chat can be sent to the whole team, or direct messaged to an individual, so you don’t need to worry about filling up everyone’s notifications with messages that don’t apply to them.

Project Management With Taskade

If you’re working on a single project, then you probably know exactly where it is at all times. But for anyone working on multiple projects, it can be hard to keep track of everything. So Taskade has several different options for project managers.

The Mindmap section is one of the most useful parts of Taskade because it gives you a complete overview of everything in your project. You can see what has been completed and how much time it took — that way, you can assess how viable the timeline for your other tasks is.

Another great feature of Taskade is the activity feed. When one of your team makes a change to a project, it will pop up in your activity feed, and the next time you log in, you’ll see the status of your projects with a single glance.

Multi-Platform

One of our favorite aspects of Taskade is that it works equally well across different platforms. As well as the desktop web app, you’ll also find native apps in the iOS app store and the Android play store.

Syncing your account over different apps is awesome because ideas often occur at inconvenient times — on your commute, walking the dog. Even when you’re at your desk, it’s much handier to grab your phone and make notes than it is to switch to your browser and visit a site.

Easy Registration

If you’re feeling the pressure of a bulging inbox, or to-do lists on multiple post-its, then the last thing you need is another complex, confusing task to add to the pile.

Taskade is super-easy to get started with. Just click the ‘Sign up’ link in the top right of the site, and you’ll have three options: Sign up with Google, sign up with your email, or you can continue as a guest.

If you’re not sold yet, then continue as a guest — essentially a free trial — you can sign in properly later once your curiosity is satisfied.

Free to Use

Taskade is free to use on a limited basis. The free plan comes with 500Mb of storage and a maximum 25Mb file size. You can create individual tasks or whole projects, workflows, and custom templates and share tasks and projects with your team. That’s enough to help you make the most of Taskade for $0.

If you find that the generous free plan isn’t quite enough, paid plans start at just $5 per month. The paid plan gives you unlimited storage and bumps the maximum file size up to 250Mb. You have the same core features as the free plan; it’s just that they’re unlimited, which means you can do even more planning. In addition, the paid plan adds some handy extra features that are great time-savers, such as sorting tasks, creating repeat tasks, and bulk assigning tasks. Just look at how Taskade compares to similar tools.

Most professionals will get along with the free plan just fine, but $5 per month for unlimited storage is a great deal. On top of that, you have future premium features to look forward to, including a project revision history and a calendar view.

You can sign up to Taskade for free now, as a guest, with your email, or with Google.


[– This is a sponsored post on behalf of Taskade –]

Source

The post Collaborative Task Management with Taskade first appeared on Webdesigner Depot.


Source de l’article sur Webdesignerdepot

You have been looking for a theme for your website. You haven’t yet settled on all the design details or come across a specialty theme that appears to have what you might need. Then, a multipurpose theme would be a wise choice.

Multipurpose WordPress themes have become extremely popular because of the flexibility they offer. Also, because of their relative ease of use and the powerful tools, you will usually find built into them.

With a good multipurpose theme at your fingertips, you are usually in a position to build anything. You can build a simple personal blogging site or a complex multifunctional site for a client. To make life a little easier, most multipurpose WordPress themes have features to help you get started quickly and in the right direction.

Here is a superb collection of 7 of the top multipurpose WordPress themes on the market today. These themes can help you build virtually any kind of website.

1. Betheme – Website Builder for WordPress with 600+ Pre-Built Websites

BeTheme has long been one of the most popular multipurpose WordPress themes. Not content to rest on their laurels, BeTheme’s authors took suggestions from their customers and created a better builder.

The Live Builder is 60% faster. Its UI is so intuitive that you won’t waste time learning how to use it. It features exciting new and powerful capabilities and performs familiar page-building features better than ever.

With the Live Builder, you can –

  • Edit live content visually without switching between backend and frontend; you can view an element and customize it simultaneously.
  • Use the Revisions feature to create, save, and restore what you want; no more lost changes thanks to the Autosave, Update, Revision, and Backup options.
  • Access the Pre-built Sections Library: find the section or block you need and add it to your page.
  • Select from the large and diverse selection of Items; categories include typography, boxes, blocks, design elements, loops, etc., to help you create exactly what you have in mind.

Click on the banner to learn more.

2. Total WordPress Theme

The introduction emphasized the ease of use and flexibility most multipurpose themes provide. Total has both in abundance thanks to its drag and drop frontend page builder and hundreds of built-in styling options.

Highlights include –

  • An advanced version of the WPBakery page builder.
  • 40+ single click importable demos, 100+ page-building modules, and 500+ styling settings to help you create exactly what you want.
  • Dynamic Template and Pre-styled Theme Cards to tailor dynamic templates for your posts.
  • Templatera and Slider Revolution plugins plus full WooCommerce compatibility.
  • A selection of developer-friendly hooks, filters, and snippets for future theme customization.

Even though Total was designed with perfection in mind, or perhaps because of it, it is the right choice if you need to get a high-quality website up and running in a short period of time. Total’s 47,000+ customers seem to agree.

Click on the banner to learn more.

3. Avada Theme

The fact that Avada is the all-time best-selling WordPress theme with more than 450,000 sales to date might be all the reason you need to choose it, but there are plenty of other good reasons for doing so as well.

For example –

  • Avada’s drag and drop page builder, together with the Fusion Page and Fusion Theme options, makes building a website quick and easy.
  • Single-click import demos, stylish design elements, and pre-built websites are there to help speed up your project’s workflow and impart a high level of quality to the finished product.
  • Avada’s Dashboard organizes your work, and its Dynamic Content System gives you maximum flexibility and full control over your project.

Click on the banner to find out more about this fast, responsive, and WooCommerce-compatible theme.

4. Uncode – Creative Multiuse & WooCommerce WordPress Theme

Uncode will be an ideal choice for building creative, magazine, and blogging websites and for building agency sites as well. This fast, sleek, pixel-perfect multipurpose theme has sold more than 80,000 copies to date.

Uncode’s impressive features include –

  • More than 450 Wireframe section templates that can easily be modified and combined.
  • A Frontend Editor on steroids coupled with the WooCommerce custom builder.
  • A “must-see” gallery of user-created websites.

5. TheGem – Creative Multi-Purpose High-Performance WordPress Theme

TheGem is literally a Swiss Army knife of website building tools that make it ideal for creating business, portfolio, shop, and magazine websites.

Among the many gems included in the package are these –

  • The popular and industry-leading WPBakery and Elementor front-end page builders.
  • 400+ beautiful pre-built websites and templates together with 300+ pre-designed section templates.
  • A splendid collection of WooCommerce templates for shop-building projects.

6. Impeka – Creative Multipurpose WordPress Theme

With Impeka, flexibility is almost an understatement. This intuitive, easy-to-work-with multipurpose theme gives beginners and advanced users alike complete freedom to dream up their ideal website and then make it happen – and fast.

You can –

  • Choose among the Enhanced WPBakery, Elementor, and Gutenberg page builders.
  • Select from 50 handcrafted design elements and Impeka’s 10 custom blocks.

Impeka is perfect for building every website type, from blogging and online stores to commercial businesses and corporations.

7. Blocksy – Gutenberg WordPress Theme

Blocksy is a blazing fast and lightweight WordPress theme that was built with the Gutenberg editor in mind and is seamlessly integrated with WooCommerce.

  • Blocksy is responsive, adaptive, translation ready, and SEO optimized.
  • Blocksy plays well with all the popular WordPress page builders, including Elementor, Beaver Builder, and Brizy.

This popular multipurpose WordPress theme can be used to create any type of website in no time.

Of all the design choices a WordPress user needs to make, choosing a WordPress theme for the task at hand is perhaps the most important.

That choice, more often than not, involves a multipurpose theme. Most multipurpose WordPress themes are extremely flexible. So, you can avoid the tedious and time-consuming task of trying to find exactly the right one for your niche and for the job.

Multipurpose themes work for any website niche and offer whatever an admin might need.

Choose one from these 7 Best Multipurpose WordPress Themes, and you should be able to create your website with relative ease.

Source

The post  7 Top Multipurpose WordPress Themes You Should Check Out first appeared on Webdesigner Depot.


Source de l’article sur Webdesignerdepot

If you have a WordPress website, you’re obviously aware of the benefits this premier open-source website-building platform brings to the table.

But are you aware of the legion of website and business enhancement tools lying in wait among the thousands of cool WordPress plugins currently on the market; one or more of which could easily take your site or business to the next level?

What’s out there? Quite a bit, obviously. 

Which useful WordPress plugins are “must-haves” for me? It could take you a ton of time to find the answer to that one. 

That’s what we’re here for.

10 essential WordPress plugins are admittedly a small sample size. But these are 10 of the very best, and we’re guessing that one or more of them could be just what you’ve been looking for.

1. Amelia WordPress Booking Plugin

This game-changing booking plugin fully automates your business’s interaction with existing and potential clients and allows you to focus on key business operations instead of having to constantly interrupt your workflow to manage appointments.

  • Installing and configuring Amelia can be done with just a few clicks. You don’t have to know anything about coding.
  • Amelia can manage an unlimited number of appointments for an unlimited number of clients, an unlimited number of employees, and at multiple locations.
  • Clients can book appointments 24/7 and manage their own appointments as well as their profiles from the front end.
  • Amelia accepts deposit payments, sends out appointment reminders, and can charge different rates for different appointments.
  • If you have a global clientele, Amelia takes into account customer time zones as well as manages translated notifications if you have a multilingual site.
  • Amelia also manages event bookings, whether they are recurring or one-time.

In the unlikely event you encounter a problem with Amelia, the customer support team stands ready to help.

2. wpDataTables

The wpDataTables WordPress plugin allows users to quickly and easily create responsive, interactive, and highly customizable tables and charts from large amounts of data.

Key features include:

  • The ability to create tables that allow front-end editing, whether they are created manually or are MySQL-based
  • Advanced filtering capabilities that enable front-end users to filter table data by single or multiple column values
  • Automatic syncing of created and published Google Sheets
  • Simple wpDataTables wizards to access the HighCharts, Chart.js, and Google free charts libraries

wpDataTables’ many other features include:

  • Connection support to MySQL, MS SQL, and PostgreSQL databases
  • Responsive design from any data source
  • Creating tables from CSV, JSON, MySQL, and Excel and Google spreadsheet data
  • Formidable Forms plugin support
  • Sorting by single or multiple columns
  • Data color-coding using conditional formatting

More than 50,000 companies and individuals have placed their trust in wpDataTables.

3. Visual Composer Website Builder

Visual Composer is a new, ReactJS-based intuitive drag and drop website builder that enables you to create a website quickly, easily, and hassle-free.

This website-building popular plugin:

  • Enables business owners to showcase their brand online with its drag and drop editor and professional templates.
  • Its feature-rich design controls enable designers to achieve pixel-perfect perfection as they bring their projects to life.
  • Its top-of-the-line marketing content elements give its users the ability to create high-conversion landing pages, integrate with social platforms, and more.
  • Makes building a beautiful WooCommerce-based online store a piece of cake.
  • Features a library of 500+ content elements and templates that is downloadable from the cloud
  • Offers free and premium versions for business owners to start easily and scale their online presence

Your site will be SEO-friendly, fast, and responsive, and the support is terrific. Free and Premium versions (Starting at $49) are available.

4. Slider Revolution

Slider Revolution can do more than create sliders. A lot more.

  • It can add impressive (read that WOW) effects to an already notable website design.
  • It can give you new and unusual visual editing capabilities without requiring any coding on your part.
  • With its collection of hero blocks, sliders, WooCommerce carousels, and more, it brings beauty to any WordPress website.

5. Logic Hop

Logic Hop lets you customize your site’s content for individual customers or customer types.

  • Logic Hop supports personalizing your site in response to dozens of criteria so you can tailor your content to address a unique audience.
  • Logic Hop works with Gutenberg, Divi, Elementor, Beaver Builder, and every other page builder.

Any design or content element you can customize in WordPress can be customized in Logic Hop in minutes.

6. Stacks

The Stacks drag and drop native mobile app builder offers a full package of features to help you design your website or mobile app without coding.

  • Stacks works perfectly with WooCommerce and WordPress
  • Certificates required for Google Play Store or Apple Appstore are automatically generated
  • It takes but a single click to generate and upload the Android & iOS Application Package (APK & IPA)
  • Notifications to customers are easy to generate and send, and Stacks utilizes WooCommerce payment gateways.

7. Heroic Inbox

The Heroic Inbox plugin enables a business to manage all of its emails in shared inboxes right inside WordPress.

  • Customer data is presented on the sidebar next to your ongoing chat or message.
  • Key performance metrics are tracked so the team and overall company performance can be assessed.
  • Zero Inbox status can be quickly achieved and maintained.

8. Tablesome

This powerful WordPress table plugin allows you to quickly create a table and embed it in a post or page.

  • Tables can be imported from CSV and XLSX files.
  • Types of tables that can be created include large data tables, product catalogs, comparison tables, sports statistics, and more.
  • A shortcode builder for table and table element customizing is included

Tablesome is performance-optimized and SEO friendly and works smoothly with any WordPress theme.

9. Ads Pro Plugin – Multi-Purpose WordPress Advertising Manager

Ads Pro is the best ad manager for WordPress you are likely to come across.

Ads Pro features:

  • An intuitive backend Admin Panel that allows you to manage an unlimited number of ad spaces
  • A frontend User’s Panel from which you can control access to manage ads
  • 25+ user-friendly and responsive Ad Templates in 8 categories
  • 20 ad display options
  • 3 Billing Models (CPC, CPM, CPD) and 4 Payment Methods (PayPal, Stripe, Bank Transfer, WooCommerce)

10. Static Pages

Static pages/sites do not require any web programming or database design.

  • The Static Pages plugin allows you to publish any static page on a WordPress website in a matter of seconds.
  • You can improve sales by adding a beautiful landing page to your existing shop or blog or add a page with a Mailchimp subscribe form.
  • Or use Static Pages as an easy way to test something quickly and easily.

Have you been searching for a top-of-the-line WordPress plugin that will help you take your business to the next level?

There are 58,000+ useful WordPress plugins for you to choose from. That would be good news, except you could easily be overwhelmed trying to find just the right plugin for your website.

This post features a collection of top plugins for WordPress websites. Chances are good, you’ll find something here that will make your day.


[– This is a sponsored post on behalf of BAW media –]

Source

The post 10 Cool WordPress Plugins You Should Check Out first appeared on Webdesigner Depot.


Source de l’article sur Webdesignerdepot

DevConf.US 2021 has kicked off their call for papers this last month and of course it will be a virtual event (hopefully for this one last time) hosted on September 2-3. It’s the 4th annual, free, Red Hat sponsored technology conference for community project and professional contributors to Free and Open Source technologies coming to a web browser near you!

There is no admission or ticket charge for DevConf.US events. However, you are required to complete a free registration. Talks, presentations and workshops will all be in English.

Source de l’article sur DZONE

Asset management and website performance optimization are two of those unavoidable headaches faced by every website owner.

A digital asset management (DAM) platform can provide centralized asset repositories with intuitive dashboards to help you manage assets. On the other hand, an image CDN can help you get rid of that messy responsive syntax and provide dynamic asset optimization with huge performance boosts.

The problem is that website performance has become such a competitive factor that DAMs with other priorities tend to fall short. On the other hand, specialized image CDNs don’t solve the problems associated with image management, particularly within organizations.

With that in mind, I propose solving these problems for good by putting together image management and optimization stack using ImageEngine and Cloudinary. Instead of being a comparison between these two tools, this article describes the benefits of using them to complement each other.

Features and Asset Management Capabilities

As a DAM, Cloudinary provides you with a visual interface to store, manage, and edit your image and video assets. In that way, it’s not much different from any other professional image managing software such as Adobe Bridge, except that it’s an online, browser-based service.

Using the Media Library, you can upload, delete, and organize images in folders, for example. The visual image editor allows you to make advanced transformations and image touch-ups and see the results instantaneously using tools like sliders, dropdowns, etc. You can even chain transformations together for multi-layered effects.

Cloudinary also allows you to manipulate images and videos this way using their URL-based API.

Cloudinary has additional auxiliary features that make asset management easier (especially in organizations), such as backups, role-based multi-user admin, and feature extensions via third-party integrations and add-ons.

This is something most image CDNs don’t provide. Instead, they allow you to access and transform images using URL manipulation. Transformations are usually made using string-based parameters or directives. A serverless, headless DAM, if you will.

However, the advantage of using a dedicated image CDN like ImageEngine, is that it can usually provide enhanced asset optimization. ImageEngine, for example, is an intelligent image CDN that uses WURFL device detection to finely read the context an image is accessed from (device model, PPI, OS, browser, resolution, etc.) and then chooses the optimal image for that configuration.

This frees up website owners from having to do any additional optimization. This business logic is also built-in to all of their global PoP servers, and ImageEngine specifically delivers cache-hit ratios close to 100%. The following performance section will illustrate the difference this can make in practice.

Check out the key differences between ImageEngine and Cloudinary. And, for a deeper insight, see the comparison with other similar CDNs, like imgix and Cloudflare

Performance

Just to cover our bases and prove that this is an effective asset management and optimization stack, I’m also going to affirm it using a Lighthouse performance audit. Here is a quick summary of the results:

For this test, I built a web page with a tonne of images with overly large file sizes. In this first Lighthouse audit, I didn’t apply any optimization to the images. Here’s the result:

As you can see, we had some major problems when it came to the loading time of our assets. Overall, the page took more than 10 seconds to load. One of Google’s crucial user-centric performance metrics, LCP, scored a miserable 7.5s. Lighthouse suggested that some of the main problems encountered were the asset file size, inefficient cache policies, using non-optimal image formats, and improperly sized images.

Both Cloudinary and ImageEngine are supposed to address all of these factors with their auto image optimization. In the next audit, I used the same page and content but served my images via Cloudinary:

As you can see, there is improvement in most factors. FCP is now in the green, and both the Speed index and LCP times have almost halved. Even TTI and CLS improved slightly. That being said, it’s still nowhere near optimal, and we’re still falling short of the all-important 3-second loading time ceiling.

So, finally, let’s do another Lighthouse audit – this time using ImageEngine on top of Cloudinary. Here are the results:

With ImageEngine, I finally scored in the green with 95. All the metrics that have to do with the sheer speed at which image content loads improved. The Speed Index and LCP, which is the most important, improved dramatically. CLS scored worse, but this typically varies from test to test.

You can find another and more extensive breakdown of the performance and pricing comparison here.

Transformations, Bandwidth Utilization, and Cost

Cloudinary’s pricing plans work on a credit-based system. Starting with the free account, you get 25 credits/month. Each credit can be used for 1,000 transformations, 1 GB of storage, or 1 GB of net viewing bandwidth. The other two packages cost $99 for 225 credits and $249 for 600 credits, respectively.

You should plan to generate a minimum of 5 transformations per image. In effect, that limits you to around 200 images with the free plan, excluding whatever manual transformations you make.

ImageEngine’s Basic plan costs $49 and provides you with 100 GB of Smart Bytes. Smart Bytes are based on optimized image content and translate to roughly 400-500 GB of raw images.

So, with Cloudinary, you have to compromise between bandwidth and storage usage as well as the number of transformations you can make. Transformations for Cloudinary are counted as they are dynamically generated on-demand.

However, if you use ImageEngine for optimization, you can switch off Cloudinary’s auto-optimization. When a new image variant is needed, it will be generated and delivered via ImageEngine. Considering variant count isn’t limited by ImageEngine, this will drastically cut down on the number of credits you’ll need to spend on transformations.

Effectively, that means you could use the bulk of your Cloudinary credits purely for storage and specific transformations. For example, advanced cropping, applying effects, or color adjustments. These are, after all, the main functions of a DAM.

With this setup, ImageEngine’s Basic plan and Cloudinary’s free plan should be adequate for most websites, saving around $50 a month.

How to Implement Cloudinary with ImageEngine

Signing up for Both Services

As it will house all of your image assets, the logical place to start would be to sign up with Cloudinary.

Create a (free) account, and make sure to take note of your “cloud name” during the setup wizard. This will be the name of your designated storage location on the Cloudinary platform and is usually a garbled string like di2zgnxh0 by default. However, you can change this to something more meaningful.

Once you’ve signed up, you can start uploading your image assets and creating different versions/transformations of them. Setting up Cloudinary integration on a CMS, like WordPress, is usually straightforward. Just indicate the CMS you’ll be using, copy the API key, install the plugin, and activate it.

Next, sign up for a free trial with ImageEngine. There will also be a short setup wizard during which you will:

  1. Provide ImageEngine with the website where your images will be delivered.
  2. Supply your image origin (in this case, your Cloudinary web folder). For now, you can only add the Cloudinary, e.g., res.cloudinary.com.
  3. Get your ImageEngine image-serving domain, e.g., {randomstring}.cdn.imgeng.in

When in your ImageEngine dashboard, you’ll see this domain listed under “Engines” as well as an entry for Cloudinary under “Origins.” Edit the latter and under “Advanced,” add your Cloudinary folder to the “PATH” field.

That’s it, you should now be able to store and manage images via Cloudinary and serve them via the ImageEngine CDN.

Dynamically Loading Specific Image Variants

Let’s take a look at a use case for loading different transformations of individual images on your site. This example will showcase how you can use Cloudinary’s advanced image editing tools to transform images while still reaping the optimization rewards of using ImageEngine as your image CDN.

A popular practice today is to use rounded images for team, client, or profile portraits. Using Cloudinary, you can load this transformation using the following URL:

https://res.cloudinary.com/myimages/image/upload/w_400,h_400,c_crop,g_face,r_max/w_200/profile.jpg

This will resize the image to 400 by 400px, focus on the face, and apply the maximum amount of radial cropping around it – to a width of 200px.

The same image can then be accessed via your ImageEngine delivery engine simply by swapping out the domain:

https://images.myimageengine.com.imgeng.in/image/upload/w_400,h_400,c_crop,g_face,r_max/w_200/profile.jpg

NOTE: I added my Cloudinary folder designation (“myimages”) as the path to my image origin. With that config, I don’t need to include it every time I use the image URL.

For example, you can set up the origin like this:

And, then under advanced:

If I specifically wanted to load the profile picture in WebP format (for transparency support, for example), I could add the ImageEngine directive f_webp:

https://images.myimageengine.com.imgeng.in/image/upload/w_400,h_400,c_crop,g_face,r_max/w_200/?imgeng=/f_webp/profile.jpg

ImageEngine and Cloudinary – The Wrap Up

Both ImageEngine and Cloudinary are superb platforms that can make managing image and video assets easier and improve your website maintenance. However, both services have their specialty in which they outperform each other.

For ImageEngine, it’s delivering blisteringly fast image loading times in next-gen formats and with a minimal loss of visual quality.

For Cloudinary, it’s providing a visual interface to organize, store, and edit your image and video assets.

As a further incentive, letting each of these services handle what they’re best at can lead to lowering your long-term operating costs.


[– This is a sponsored post on behalf of ImageEngine –]

Source

The post Start Using a Smart DAM and Image Optimization Stack first appeared on Webdesigner Depot.


Source de l’article sur Webdesignerdepot

WordPress powers nearly 40% of all websites, thanks to its commitment to making publication possible for everyone, for free. Combined with premium plugins and themes, it’s possibly the ultimate tool for building attractive, unique, and feature-rich websites without any coding or design experience.

However, you do pay the price for this experience, with WordPress and its third-party products not always being built for performance – whether it’s page loading times or SEO.

Image optimization is a particularly big concern. Images are one, if not the largest, contributors to page weight, and it’s growing significantly by the year. So, while images are crucial for beautifying your website pages, they are also one of the biggest factors slowing it down.

In terms of image optimization, WordPress+Elementor brings very little to the table. WordPress core now comes with both responsive syntax and lazy-loading. Elementor itself also only comes with responsive syntax out-of-the-box. However, these are baseline techniques for image optimization that will deliver the bare minimum of improvements.

This means that, while Elementor makes it easy to design sweet-looking WordPress pages (with tonnes of creatively utilized images), you will probably pay the price when it comes to performance. But don’t worry. We will show you how to dramatically improve web performance by over 30 points on scoring tools like Google’s PageSpeed Insight

Why Optimize Your Elementor Images with ImageEngine?

In general, image CDNs use various techniques to get image payloads as small as possible and deliver image content faster, all while minimizing the visual impact. ImageEngine is no different in that regard.

Firstly, ImageEngine, when used in auto mode, will apply all of the following optimizations that web performance tools like Google’s PageSpeed Insight recommend. For example:

  • Properly size images – ImageEngine automatically resizes images for optimal size-to-quality ratios depending on the screen size of the user device. ImageEngine supports Retina devices.
  • Efficiently encode images – Applies different rates of compression depending on the PPI of the user devices. For example, ImageEngine adapts and more aggressively compresses on higher PPI devices without losing visual quality.
  • Next-gen format conversion – Automatically converts images to the optimal next-gen format according to the browser, device, or OS. ImageEngine can convert images to WebP or JPEG-2000 as well as GIFs to MP4 or WebP.  AVIF is also available in a manual directive mode.
  • Strip unnecessary metadata

While these features are standard for most image CDNs, ImageEngine is unique for its use of WURFL device detection. This gives ImageEngine much deeper insight into the user device accessing a website page and, by extension, its images. Using the screen size, resolution, PPI, etc., ImageEngine can make more intelligent decisions regarding how to reduce image payloads while maintaining visual quality.

This is why ImageEngine brands itself as an “intelligent, device-aware” image CDN and why it can reduce image payloads by as much as 80% (if not more).

ImageEngine also provides a proprietary CDN service to accelerate image delivery. The CDN consists of 20 globally positioned PoPs with the device-aware logic built-in. This allows you to deliver image content faster in different regions while also serving images straight from the cache with a ~98% hit ratio.

ImageEngine also supports Chrome’s save data setting. If someone has a slow connection or has activated this setting, ImageEngine will automatically compress image payloads even more, to provide a better user experience on slower connections.

How to Use ImageEngine with WordPress and Elementor

If you’re using WordPress and Elementor, then chances are you want to spend as little time on development and other technicalities as possible. Luckily, ImageEngine is a highly streamlined tool that requires little to no effort to integrate or maintain with a WordPress site.

Assuming you already have a WordPress website with Elementor, here are the step-by-step instructions to use ImageEngine:

  1. Go to ImageEngine.io and sign up for a 30-day free trial.
  2. Provide ImageEngine with the URL of the website you want to optimize.
  3. Create an account (or sign up with your existing Google, GitHub, or ScientiaMobile account).
  4. Provide ImageEngine with the current origin where your images are served from. If you upload images to your WordPress website as usual, then that means providing your WordPress website address again.
  5. Finally, ImageEngine will generate an ImageEngine delivery address for you from where your optimized images will be served. This typically takes the form of: {randomstring}.cdn.imgeng.in. You can change the delivery address to something more meaningful from the dashboard, such as myimages.cdn.imgeng.in.

Now, to set up ImageEngine on your WordPress website:

  1. Go to the WordPress dashboard and head to Plugins -> Add New.
  2. Search for the “Image CDN” plugin by ImageEngine. When you find it, install and activate the plugin.

  1. Go to Settings -> Image CDN. OK, so this is the ImageEngine plugin dashboard. To configure it, all you need to do is:

a. Copy the delivery address you got from ImageEngine above and paste it in the “Delivery Address” field.

b. Tick the “Enable ImageEngine” box.

That’s literally it. All images that you use on your WordPress/Elementor pages should now be served via the ImageEngine CDN already optimized. 

ImageEngine is largely a “set-it-and-forget-it” tool. It will provide the best results in auto mode with no user input. However, you can override some of ImageEngine’s settings from the dashboard or by using URL directives to manipulate images.

For example, you can resize an image to 300 px width and convert it to WebP by changing the src attribute like this:

<img src="https://myimages.cdn.imgeng.in/wp-content/uploads/2021/03/banner-logo.png?imgeng=/w_300/f_webp">

However, use this only when necessary, as doing so will limit ImageEngine’s adaptability under different conditions.

What Improvement Can You Expect?

Let’s see what results you can expect from using an image CDN to improve your page loading times.

For this, I created two identical WordPress pages using the Elementor theme. The one page purely relied on WordPress and Elementor, while I installed and set up ImageEngine for the other. The page had some galleries as well as full-size images:

The pages used many high-quality images, as you might expect to find on a professional photography gallery, photography blog, stock photo website, large e-commerce site, etc. I then ran page performance tests using Chrome’s built-in Lighthouse audit tool, choosing scores representing the average results I got for each page.

For thoroughness, I tested both the mobile and desktop performance. However, I focused on the mobile results as these showcase more of the image CDN’s responsive capabilities. Mobile traffic also accounts for the majority share of internet traffic and seems to be the focus for search engines going forward.

So, first of all, let’s see the mobile score for the page without ImageEngine:

As you can see, there was definitely a struggle to deliver the huge amount of image content. Google has shown that 53% of mobile users abandon a page that takes more than 3s to load. So, clearly, this page has major concerns when it comes to user experience and retaining traffic.

The desktop version fared much better, although it still left much to be desired:

When digging into the reasons behind the slowdown, we can identify the following problems:

Most of the issues related somehow to the size and weight of the images. As you can see, Lighthouse identified a 3.8 MB payload while the total image payload of the entire page was close to 40 MB.

Now, let’s see what kind of improvement ImageEngine can make to these issues by looking at the mobile score first:

So, as you can see, a major improvement of 30 points over the standard WordPress/Elementor page. The time to load images was cut down by roughly 80% across the key core web vital metrics, such as FCP, LCP, and the overall Speed Index.

In fact, we just reached that critical 3s milestone for the FCP (the largest element on the visible area of the page when it initially loads), which creates the impression that the page has finished loading and will help you retain a lot of mobile traffic.

The desktop score was also much higher, and there was further improvement across the key performance metrics.

If we look at the performance problems still present, we see that images are almost completely removed as a concern. We also managed to bring down the initial 3.8 MB payload to around 1.46 MB, which is a ~62% reduction:

An unfortunate side effect of using WordPress and WordPress plugins is that you will almost inevitably face a performance hit due to all the additional JavaScript and CSS. This is part of the reason why we didn’t see even larger improvements. That’s the price you pay for the convenience of using these tools.

That being said, the more images you have on your pages, and the larger their sizes, the more significant the improvement will be.

It’s also worth noting that lazy-loaded images were loaded markedly faster with ImageEngine if you quickly scroll down the page, again making for an improved user experience.

Thanks to its intelligent image compression, there was also no visible loss in image quality, as you can see from this comparison:

Conclusion

So, as you can see, we can achieve significant performance improvements on image-heavy websites by using the ImageEngine image CDN, despite inherent performance issues using a CMS. This will translate to happier users, better search engine rankings, and an overall more successful website.

The best part is that ImageEngine stays true to the key principles of WordPress. You don’t have to worry about any of the nuts and bolts on the inside. And, ImageEngine will automatically adjust automation strategies as needed, future-proofing you against having to occasionally rework images for optimization.

Source

The post Create Beautiful WordPress Pages with Optimized Images Using Elementor and ImageEngine first appeared on Webdesigner Depot.


Source de l’article sur Webdesignerdepot