Articles

After an application is deployed to production, developers should lock down its underlying infrastructure to prevent accidental changes. Some of the common accidents that can affect the availability of an application in production are: moving, renaming, or deleting the resource crucial to the function of the application. You can use locks that prevent anyone from performing a forbidden action to avoid such mishaps.

Creating Locks

Almost every resource in Azure supports locks, so you will find the lock option in the settings section of nearly all resources in the portal. For example, the following screenshot illustrates locks on resource groups:

Source de l’article sur DZONE

MySQL semi-synchronous is a plugin mechanism on top of asynchronous replication that can offer better durability and even consistency. It helps in high availability solutions, but can in itself reduce availability. In this article, we will look at some basics and follow up to present scenarios requiring higher-level intervention to ensure availability and avoid split-brains.

Overview

As a quick recap, semi-synchronous replication is a mechanism where a commit on the primary does not apply the change onto the internal table data and does not respond to the user until the changelog is guaranteed to have been persisted (though not necessarily applied) on a preconfigured number of replicas. We limit our discussion to MySQL 5.7 or equivalent.

Source de l’article sur DZONE

User experience is one of the most important principles of web design. There’s no doubt that you focus on UX with every page you design on the web, whether it’s a portfolio, a profile page, or an entire website. 

Unfortunately, what many experts forget is that UX doesn’t just apply to digital pages. That means that you need to discover the right UX strategies for everything from your website homepages to your email marketing messages and even your listings on Google. 

Today, we’re going to explore ways you can apply UX principles to your client’s image on search engines. 

Why Your Search Engine Listing Matters

Let’s start with the basics…

89% of customers start their purchasing process with a search engine. 

That means that whether you’re creating a portfolio to sell your services or building a website for a client, the first connection a customer has with your design isn’t on the homepage.

Developers and designers know that first impressions count when it comes to succeeding online. However, they assume that those first impressions happen on a social media channel, a landing page, or a home page. 

The truth is that most of the time, you’re driving a specific experience for an end-user before you even realize it. Before you can wow an audience with a beautiful site design or a fantastic CTA offer, you need to convince them to click on your Google link.

Just as UX on a website is all about giving your audience what they need in an informed and strategic manner, UX in search engine results works the same way. 

How to Make Your Search Listing Stand Out with UX

So, how do you begin to apply the principles of UX to your Google Search results?

It’s much easier than you’d think. 

Step 1: Show Immediate Value 

Delivering an excellent experience on a website often means providing end-users with the information they need as quickly as possible. Imagine designing a landing page; you wouldn’t want your audience to scroll forever to find what they need. Instead, you’d make sure that the value of the page was immediately apparent. 

When creating an image for your search engine listing, you’ll need to take the same approach. This often means thinking carefully about two things:

  • Your headline
  • Your meta description

Around 8 out of 10 users say that they’ll click a title if it’s compelling. That means that before you do anything else to improve your SEO strategy, you need to make sure that the title of your web page is going to grab the audience’s attention. 

The best titles deliver instant value.

Immediately, these titles tell the audience exactly what they’re going to get when they click onto the page. The promise drives action, while clarity highlights the informed nature of the brand. 

The great thing about using an excellent title for a page is that it doesn’t matter where you’re ranked on the search results. Whether you’re number 2 or number 5, your customers will click if they find something they want. 

It’s just like using a CTA on a landing page. Make sure your titles are:

  • Informative: Show your audience value immediately
  • Optimized for mobile: Remember, your audience might not see your full title on some screens. That means that you need to make the initial words count.
  • Easy to read: Keep it short, simple, and straightforward. Speak the end-user’s language

Step 2: Build Trust with Your URLs

Trust factors are another essential part of good UX

When designing a website for a new brand, you know that it’s your job to make visitors feel at ease. Even in today’s digital world, many customers won’t feel comfortable giving their money or details to a new company. 

Within the website that you design, you can implement things like trust symbols, reviews, and testimonials to enhance brand credibility. In the search engines, it all starts with your URL. 

Search-friendly URLs that highlight the nature of the page will put your audience’s mind at ease. When they click on a page about “What is SEO” in the SERPs, they want to see an URL that matches, not a bunch of numbers and symbols

Use search-friendly permalink structures to make your listing seem more authoritative. This will increase the chances of your customer clicking through to a page and make them more likely to share the link with friends. 

Once you decide on a link structure, make sure that it stays consistent throughout the entire site. If a link doesn’t appear to match the rest of the URLs that your audience sees for your website, they may think they’re on the wrong page. That increases your bounce rate. 

Step 3: Be Informative with Your Meta Description

To deliver excellent UX on a website, you ensure that your visitor can find all the answers to their most pressing questions as quickly as possible. This includes providing the right information on each page and using the correct navigational structure to support a visitor’s journey. 

In the SERPs, you can deliver that same informative experience with a meta description. Although meta descriptions often get ignored, they can provide a lot of value and help you or your client make the right first impression. 

To master your meta descriptions:

  • Use the full 160 characters: Make the most of your meta description by providing as much useful information as you can within that small space. 
  • Include a CTA: Just as CTAs help guide customers through the pages on a website, they can assist with pulling in clicks on the SERPs. A call to action like “read about the” or “click here” makes sense when you’re boosting your search image. 
  • Focus on value: Concentrate on providing your customers with an insight into what’s in it for them if they click on your listing.

Don’t forget that adding keywords to your meta description is often helpful too. Keywords will boost your chances of a higher ranking, but they’ll also show your audience that they’re looking at the right result. 

Step 4: Draw the Eye with Rich Snippets

You’ve probably noticed that the search engine result pages have changed quite a bit in the last couple of years. As Google strives to make results more relevant and informative, we’ve seen the rise of things like rich snippets. Rich snippets are excellent for telling your audience where to look. 

On a website, you would use design elements, like contrasting colors and animation, to pull your audience’s attention to a specific space. In search engines, rich snippets can drive the same outcomes. The difference is that instead of telling a visitor what to do next on a page, you’re telling them to click on your site, not a competitor’s. 

When Google introduced rich snippets, it wanted to provide administrators with a way of showcasing their best content. Rich snippets are most commonly used today on product and contact pages because they can show off reviews. 

Install a rich snippet plugin into your site if you’re a WordPress user or your client is. When you enter the content that you need into the website, use the drop-down menu in your Rich snippet tool to configure the snippet.

Ideally, you’ll want to aim for the full, rich snippet if you want to stand out at the top of the search results. Most featured snippets have both text and an image. You need to access both of these by writing great content and combining it with a relevant image. 

Step 5: Provide Diversity (Take Up More of the Results)

As a website designer or developer, you’ll know that different people will often be drawn to different things. Some of your visitors might immediately see a set of bullet-points and use them to search for the answer to their question. Other visitors will want pictures or videos to guide them. So, how do you deliver that kind of diversity in the SERPS?

The easiest option is to aim to take up more of the search result pages. Google now delivers a bunch of different ways for customers to get the answers they crave. When you search for “How to use Google my Business” on Google, you’ll see links to blogs, as well as a list of YouTube Videos and the “People Also Ask” section. 

Making sure that you or a client has different content rankings for the same keywords can significantly improve any customer’s experience on the search engines. Often, the process of spreading your image out across the SERPs is as simple as creating some different kinds of content. 

To access the benefits of video, ask your client to create YouTube videos for some of their most commonly asked questions or most covered topics. If you’re helping with SEO marketing for your client, then make sure they have an FAQ page or a way of answering questions quickly and concisely on articles, so they’re more likely to appear in “People Also Ask”.

Step 6: Add Authority with Google My Business

Speaking of Google My Business, that’s another excellent tool for improving UX in the search results. It allows business owners to manage how information appears in the search results. 

With this service, you can manage a company’s position on Google maps, the Knowledge Graph, and any online reviews. Establishing a company’s location is one of the most important things you can do to help audiences find a business quickly. Remember, half of the customers that do a local search on a smartphone end up visiting the store within the same day. 

Start by setting up the Google Business listing for yourself or your client. All you need to do is hit the “Start Now” button and fill out every relevant field offered by Google. The more information you can add to Google My Business, the more your listing will stand out. Make sure you:

  • Choose a category for a business, like “Grocery store.”
  • Load up high-quality and high-resolution images
  • Ensure your information matches on every platform
  • Use a local number for contact
  • Encourage reviews to give your listing a five-star rating

Taking advantage of a Google My Business listing will ensure that your audience has all the information they need to make an informed decision about your company before they click through to the site. This means that you or your client gets more warm leads and fewer people stumbling onto your website that might not want to buy from you. 

Step 7: Use Structured Data Markup to Answer Questions

If you’re already using rich snippets in your Google listings, you should also have a plan for structured schema markup. Schema markup on Google tells the search engines what your data means. This means that you can add extra information to your listings that will more accurately guide your customers to the support they need. 

Providing additional schema markup information to your listings gives them an extra finishing touch to ensure that they stand out from the competition. For example, you might add something like a “product price” to a product page or information about the product’s availability.

Alternatively, you could provide the people who see a search result with other options. This could be an excellent option if you’re concerned that some of the people who might come across your listing might need slightly different information. 

For instance, you can ask Google to list other pages along with your search results that customers can “jump to” if they need additional insights.

Baking structured data into your design process when you’re working on a website does many positive things. First, it makes the search engine’s job easier so that you can ensure that you or your client ranks higher. Additionally, it means that your web listings will be more thorough and valuable.

Since UX is all about giving your audience the best possible experience with a brand, that starts with making sure they get the information they need in the search results. 

Constantly Improve and Experiment

Remember, as you begin to embed elements of UX into your search engine listings, it’s essential to be aware of relevant evolutions. Ultimately, the needs of any audience can change very rapidly. Paying attention to your customers and what kind of links they click on the most will provide you with lots of valuable data. You can use Google analytics to A/B test things like titles, pictures, featured snippets, and other things that may affect UX. 

At the same time, it’s worth noting that the Google search algorithms are constantly changing too. Running split tests on different pages will give you an insight into what your customers want. However, you’ll need to keep an eye on the latest documentation about Google Search if you want to avoid falling behind the competition. 

Like most aspects of exceptional UX, mastering your SERP position isn’t a “set it and forget it” strategy. Instead, you’ll need to work on constantly expanding your knowledge if you want to show clients that you can combine UX and SEO effectively. 

Make sure you have plenty of tools set up to offer reports and insights into the kind of changes that you may need to make to align with search engine expectations. 

Making the Most of UX in the SERPS

It’s easy to forget that there’s more to UX than making your buttons clickable on mobile devices or ensuring that scrolling feels smooth. For a designer or developer to deliver excellent UX for a brand, they need to consider every interaction that a company and customer has. 

This means starting with the way a website appears when it’s listed on the search engines most of the time. Getting your SEO listing right doesn’t just boost your chances of a good ranking. This strategy also improves your reputation with your audience and delivers more meaningful moments in the buyer journey. 

Don’t underestimate the power of UX in SERPs. 


Featured image via Pexels.

Source

The post 7 UX Principles to Boost SERPs first appeared on Webdesigner Depot.


Source de l’article sur Webdesignerdepot

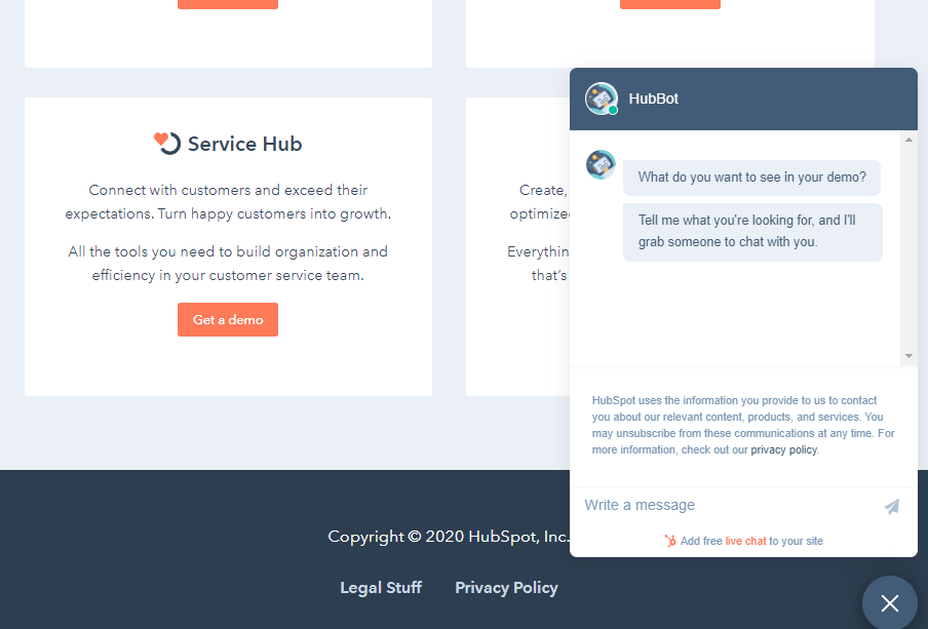
Not so long ago, customers only had a couple of ways to interact with brands. 

If you had an issue with a product or service, you could reach out through the customer service phone number or send an email. Occasionally, sites would introduce dedicated forms on their website that allowed consumers to send support tickets straight to the service desk – but that was it.

The problem with this kind of service was all the waiting. 

Send an email or ticket, and you have no idea when the company is going to get back to you. Customers end up refreshing their inbox all day, waiting for a response. Call the company, and 9 times out of 10, you’ll be placed on hold. You can’t exactly do much when you’re stuck listening to hold music, so customers are gradually getting more frustrated as they wait for a response. 

Fortunately, the evolving digital age has introduced a new solution: live chat.

Transforming Your CX With Live Chat

Live chat is a quick and convenient way for your customers to contact your business and get a response immediately. The result is happier clients, better customer satisfaction scores, and even opportunities for bigger sales. 

More than 41% of customers say they expect to see live chat on a site. 

Even if you don’t have an agent on hand to answer a chat message immediately, you can create an automated system that notifies your customer when someone is available. That means they can go and do other things while they’re waiting for a response. Live chat solutions with bots can even allow your customers to fix problems for themselves. That’s pretty convenient!

Widgets equipped with answers to commonly asked questions can automatically deal with customer queries or help them find solutions to their problems before passing them over to an agent. This means that your customer gets a solution faster, and your agents don’t have as much pressure to deal with. It’s a win-win – as long as you get it right. 

Unfortunately, a lot of companies don’t know how to implement live chat experiences correctly. 

Kayako’s study into 400 customers found that 47% couldn’t remember the last time they’d had a positive experience through a live chat tool.  

How to Upgrade Live Chat CX

The evidence shows that customers love the idea of live chat, but the reality of how businesses implement this technology isn’t always ideal. 

However, since 86% of customers say they’re willing to spend more on a better customer experience, it’s worth figuring out what separates a good live chat interaction from a bad one. 

1. Set Expectations Instantly

Setting the right expectations is crucial if you want to generate better satisfaction for your customers at a later date. When customers know what to expect from your live chat strategy, they can also make more informed decisions about which support channels they’re going to use, and whether they want to hang around for someone to answer their messages. 

The first thing you should do is showcase your agent’s availability. In this example from Help Scout, you can see whether the team is active, online, and ready to talk. The company also sets expectations for how quickly you can get an email response if you don’t want to chat.

Other ways to set expectations include:

  • Showing your opening hours: List when team members are usually available to answer questions if you’re not currently online. 
  • Topics: Offer your customers some topics that they can ask about or use the welcome message on your chat tool to direct your customers to an FAQ page. 
  • Restrictions: If there’s anything you can’t deal with over live chat, like changing a customer’s password, let them know in advance so they don’t waste time.

2. Leverage Pre-Chat Forms

Pre-chat forms are some of the most important parts of the live chat experience. They ask your customer to explain their issue to your chatbot so that they can be directed towards the right agent. Using these forms correctly ensures that your agent has all the information they need to solve a problem fast. 

You can even set up automated systems that direct customers to different agents and teams based on their needs. For instance, the live chat app on Outgrow.co gives customers the option to fill out different forms depending on whether they want answers to a question, a demo, or something else.

The button you click on dictates which professional you’ll get through to. Although filling out a form can seem like an extra friction point for your customer at first, it helps to streamline the customer journey. After all, if you can direct the customer to the right agent the first time, there are fewer chances that they’ll need to explain their issue to various different people. 

Here are a few things you can ask for in the live chat form to make it more effective:

  • The customer’s name: This will help to personalize the conversation. It could also be an opportunity to track down any background information you have about an existing customer and the orders that they may want to speak to you about.
  • An email address: Having an email address will allow you to bring up a customer’s record on your CRM. It also means that you can send any information that the customer needs to their email inbox at the end of the conversation.
  • A brief explanation: Ask your customers to share what they’re reaching out to you about and use keywords in their message to assign the chat to the right agent or professional. You could even add a drop-down menu of topics for them to choose from. 

Remember, don’t ask for too much information straight away, or you’ll risk your clients feeling that the service experience is too complicated. 

3. Make Sure It Works Everywhere

We’ve reached the point now where every customer expects a brand’s website to be responsive on any device. Most web-building templates automatically work on mobile tablets and smartphones. Additionally, it’s becoming increasingly easy for companies to transform their website and online store experiences into dedicated apps too. 

However, while most businesses know that their site needs to be responsive, they often forget about the mobile element when it comes to live chat. If your live chat function is only available on the web browser version of your website, then this is going to end up making your mobile customers pretty unhappy. They don’t want to have to stop browsing on their phone just to connect with you. 

Ideally, you’ll want to create a separate component for your mobile app where your customers can easily access the same live chat functions they’d have on your browser-based site.

If you’re just offering live chat through a mobile version of your website, make sure that it’s easy for your customer to click into the chat section and send messages without accidentally ending up on a different tab or page. It might also be worth setting up functions that allow your chat app to send push notifications to your customer’s phone whenever they get a new message. 

Being able to put their smartphone down or switch to another app while they wait for a response will provide a much more intuitive experience for your audience. 

4. Make Sure You Support All the Right Languages

You’d think that this CX tip for live chat would be obvious, but it’s shocking how many companies fail to offer support for all the languages that their customers might use. If you’re selling your products throughout the world, and you know you have customers in China, then it doesn’t make much sense to only offer live chat in English. 

Some of the available live chat apps on the market today come with features that allow you to automatically translate languages when your agents are talking to foreign customers. For instance, LiveChat currently supports 45 languages

If you’re creating your own chat app from scratch, then you’re going to need to work with your developer or designer to make sure that the right languages are supported. Remember, you don’t have to cover everything, but at least make sure that you can connect with the most common groups of customers in your CRM. 

Ensure that if you are using multiple languages, your customers know how to switch to their preferred option too. Usually, the best way to do this is with a drop-down menu. You could also use little flag icons of the countries that you support. 

5. Find Ways to Reduce First Response Time

Speed is probably one of the biggest advantages of live chat, and the main reason that customers like it so much. According to the CMO council, fast response time is the number one thing that a customer looks at when measuring satisfaction. 

While you might not be able to have someone on-hand to answer your customers 24/7, you can improve the way they perceive your load times in a variety of ways. For instance, start by making it clear when your people are online to talk to your customers. Setting expectations on when you’ll be available to immediately respond should help to avoid frustration.

  • Keep all chats in the same place for agents: Having a combined contact center solution on the back-end makes responding to queries much easier for your agents. If they can see all of your brand’s live chat, social, and email conversations in one place, they don’t have to waste time jumping between different platforms and tabs. 
  • Set routing queues: Use an automated system to send every message you get to the most appropriate agent available. You can intelligently route conversations based on the issues that your customers have or the things they want to discuss. It’s also worth ensuring that your system prioritizes routing conversations to the first agent available. 
  • Send notifications: Make sure that you set your live chat system up to send push notifications to agents when a new message is waiting. It’s also with notifying your customer when they have a response, just in case they’ve switched to another tab. 

The notifications you send to your agents could come with access to a customer’s CRM file, so that your agent can go into a conversation with the context they need. Agents that instantly get context on a conversation don’t have to waste as much time tracking down the right information. Giving your agents context also means that they don’t have to ask repetitive questions, which could annoy your customer. 

6. Make the Chat Experience On-Brand

Every company wants to give their customer a slick experience with live chat. The solution you build needs to be easy to use, and responsive across every device. However, it also needs to be something that your customer associates with your brand. 

Companies generally have a lot of options for how a live chat window can look. You can adjust the appearance to suit your brand by picking specific colors, tweaking button shapes, and even changing the available fonts. 

Working the visual elements of your brand into the design of the live chat experience is the best way to make your customers feel comfortable and confident that they’re dealing with your company. For instance, Hubspot uses matching colors, rounded edges on chat bubbles, and even a fun illustration to make their chat experience more “branded.”

Remember, when you’re creating a Live Chat experience that’s “on brand”, it’s also a good idea to think about things like voice and tone. Infusing live chat with the unique personality of your brand will make the experience more memorable. 

If you usually stick with informal language and use a lot of slang, then it makes sense to continue that in live chat – even when you’re sending automated messages. To make sure your brand identity really shines through:

  • Write scripts for your automated messages in your brand’s tone of voice
  • Write guidance scripts for employees that highlight your tone for agents
  • Provide training on brand tone of voice for your support team
  • Encourage support agents to connect with customers on a personal level
  • Remember to set guidelines on how to use things like gifs, slang, and emojis too!

7. Make a Checklist For Security and Tech Issues

One of the most significant things that will affect the experience your customer has with your live chat service, is technical and security issues. Choose the right developer or designer to help with your app, and the risk of problems dwindle. You can also address the issue of having to constantly maintain, check, and update your live chat experience by using a pre-existing solution, like Intercom.

No matter how you choose to approach live chat, these are the things you’ll need to check for most:

  • Page load times: Page load times are crucial for user experience and SEO, so you should be taking them seriously already. Check your web chat software isn’t dragging down the performance of your page or causing unnecessary problems.
  • Cross-channel conversations: If your website has various subdomains, make sure that moving through these in chat won’t mean you lose the session. Customers don’t want to have to repeat themselves!
  • Functionality with browsers: Your chat app needs to work just as well on every browser and operating system – including mobile devices. 
  • Data management: Under things like GDPR, you need to ensure that you’re controlling user information safely. Ensure you have a DPA in place, and make sure that your web channel doesn’t affect any PCI-DSS compliance systems you have in place. Your chat solution may need to automatically mask credit card information, for instance.

Time to Enhance Your Live Chat Strategy

Ultimately, whether you like it or not, your customers love live chat technology, and they’re not going to stop looking for it on your website. Today’s consumers expect you to serve their interests by delivering customer support on the channels that they choose. Unfortunately, most companies just aren’t living up to expectations.

Following the tips above could help you to transform the way that you interact with your clients and improve your chances of better satisfaction overall.

Source

The post 7 Tips for Transforming CX with Live Chat first appeared on Webdesigner Depot.


Source de l’article sur Webdesignerdepot

Choosing to work for free, pro bono, gratis, without charge is something that most of us find ourselves doing at one time or another. Whether we’re filling a hole in our portfolio, there’s a friend or relative we feel beholden to, or because there’s an opportunity to aid a cause we value.

Recently, I agreed to take on some work, free of charge, for a charity whose goals I share. Because it’s a cause I believe in, I enjoyed the idea of being able to contribute in a more meaningful way than donating money. But my initial goodwill rapidly diminished as the project spiraled out of control, leaving me resenting the time I spent on it.

No one should feel obliged to give away their time for free, but if you do choose to, there are rules you can apply to ensure that everything runs smoothly and you’re left with a positive experience.

1. Be Specific in What You’re Donating

The most obvious problem with working pro bono is that there is no correlation between cost and value.

Budget reins in project ambitions in a regular designer-client relationship; the more you ask for, the more it costs. Everyone encounters clients who want an ecommerce store “just like Amazon,” only to then rapidly downscale their plans when the actual development cost of a site on that scale is made clear.

working pro bono…there is no correlation between cost and value

But when there is no development budget, ambitions quickly escalate. Clients do not necessarily understand the work involved, and if they’re not footing the bill, there’s no incentive to learn.

As the professional, you need to guide them. Set limits on what you’re expecting to donate, and use that to frame what is reasonably achievable.

“I’m donating 40 hours of my time, which normally costs $3000.” Or, “I’m donating my SEO package, which is enough to meet your initial goals as discussed.” They are both perfectly fine.

The purpose is not to highlight your generosity; it’s to establish clear boundaries to prevent scope creep.

2. They’re Not Doing You a Favour

Any client who suggests that their project will be good for your portfolio or gain you “exposure” knows they’re underpaying you. When you hear it from a pro bono client, walk away immediately.

The client needs to understand you are donating your expertise, not because you need to, not because you’re expecting something in return, but because you’re an awesome human being who wants to make the world a little better.

A client who thinks you’re getting something out of the arrangement does not understand your commercial value and will treat you as a novice. Your evidence will become guesses, your decisions will become suggestions, and the client will have little faith in the project outcome.

Clients, whether paying or not, need guidance. If they don’t respect you and believe in your guidance, they will start to cast around for other opinions to the detriment of the project outcome and your relationship.

This brings us neatly on to…

3. Everyone’s an Expert

Q. What’s the difference between an amateur and a professional? A. Professionals get paid.

You’re not getting paid, so in the client’s eyes, you’re now an amateur. Hey, guess what? Their 12-year-old daughter is an amateur too, and her views are now equally valid.

When you’re working pro bono, you can expect a lot of “help.” You’ll find that someone’s niece is planning to major in graphic design…when she graduates high school…in four years. You’ll find that someone’s partner has a hiking blog, read an SEO article, and is happy to “give it a try.” You may even find that the client themselves fancies a career switch to web design and doesn’t think it looks too hard.

Shut that **** down immediately. Smile, be gracious. Explain that, of course, you’re happy for contributions, and then avoid them like the coronavirus.

You’re donating a professional service that you’ve spent years developing, and you’re donating it to a cause that you value. You’re not there to increase someone’s chance of getting into college or to distract someone from their boring day job. If you do want to mentor people, there are places you can do that.

Everyone Actually Is An Expert

The nature of pro bono work is that more often than not, the people involved actually are experts. The simple truth is that people who aren’t experts in something tend to be in low-paying employment and are too busy trying not to be in low-paying employment to donate their time.

Like you, the people volunteering their time are doing so because they can afford to. For example, you may find that the organization’s head of accounts spends Monday–Friday as a tax advisor; the head of outreach is a project manager at a construction firm; the head of safeguarding is a school teacher.

People bring transferable skills to pro bono roles. Be sensitive to the fact that just as you are an expert in your professional context, so may they be. Simply not being an expert in design does not make them an idiot.

4. Do Not Foot the Bill

It’s tempting to simply donate everything to do with the project: the domain name’s going to cost $10? Well, it’s only $10; hosting’s $5/month? Well, it’s not too arduous to set up a small space on your own server.

imparting your experience sets the organization up for future success

However, when you give everything away, the client doesn’t understand the cost or value they’re receiving. As a professional, it’s part of your job to educate the client on the costs of a project like this; imparting your experience sets the organization up for future success.

Be clear at the start of the project that the client will be responsible for all expenses.

If you wish to — and you should not feel obliged — you are always free to make a financial donation equivalent to the expenses.

5. Stick to Office Hours

When you agree to do pro bono design work, the chances are that you know the person or organization you’re doing the work for. There’s almost always a personal connection of some kind, which means that the person or organization doesn’t see you in the professional context that normal clients see.

All good clients will respect the fact that you don’t answer emails on a Sunday morning. Not so the charity client. Not only will the charity client assume that you’re available outside of office hours, they may even think they are doing you a favor by not disturbing you during your regular office hours.

It’s important that you find some downtime outside of work to live your life. If you don’t want your evening out with friends to descend into an impromptu planning meeting (you don’t), set clear boundaries about when and how you’re prepared to work on the project.

Unless you’re self-employed, you can’t donate time when you should be working; what you can do is append pro bono work to your paid employment — do an hour after work, on weekday evenings, for example.

If you are literally doing this in your spare time, then allocate a specific time slot, such as a Saturday afternoon, and stick to it.

7. Stick to the Plan, and the Deadline

It is a universal truth that projects run better when there’s a structured approach. It doesn’t matter if it’s lean, agile, waterfall, or whatever you want to dub it. What matters is that you have a plan that works for you and is suitable for the project goals.

A structured approach, especially one that includes a timeline, will combat most disruptions. On the project I was working on recently, I was preparing for final sign-off when one volunteer announced it was time to “start thinking about what pages we need on the site.” 🤨

Discipline is crucial in pro bono work because different stakeholders will have different levels of commitment; some people will be full-time volunteers, others will be donating an hour per week. What matters is that the project that you are responsible for runs on your schedule.

8. You Have Zero Availability

Non-profits tend to talk to one another. When your friends and family see what you’ve done for Joe’s startup, they will start having ideas of their own. The client you’re completed the project for will have other projects lined up. When you aren’t charging, there’s no shortage of clients.

be prepared to say, “no,” at some point

Before you agree to do any pro bono work at all, be prepared to say “no,” at some point.

The simplest way out is to say you have zero availability: you’re already booked up with paying work, or your boss has let you know she needs you for overtime next month.

Don’t feel bad about it. It’s probably true. There are only so many hours in the day, and even if you do have some time to spare, doesn’t your partner, dog, or social life deserve some attention?

There’s No Profit In Non-Profits

Working for free is not transactional. It probably won’t benefit your portfolio. It definitely won’t lead to paying work. Any skills or experience you acquire probably won’t be transferable. (It might give you the topic for a blog post.)

If the work were meant to benefit you, it would be called personalis bono.

Nevertheless, many of us will find ourselves agreeing to do pro bono work, either out of obligation or idealism. It’s not something to shy away from; changing the world — whether for a group or an individual — is a noble pursuit.

The key is that while you will not profit, neither should you suffer a loss. Volunteering your time, skills, and experience should be a sustainable process. One that you will not come to regret.


Featured image via Unsplash.

Source

The post How to Work for Free Without Wrecking Your Career first appeared on Webdesigner Depot.


Source de l’article sur Webdesignerdepot

PostgreSQL is an open-source, versatile, and most popular database system around the world. However, it does not have any features for high availability.

Enter Patroni.  Patroni is a cluster manager tool used for customizing and automating deployment and maintenance of high availability PostgreSQL clusters. It is written in Python and uses etcd, Consul, and ZooKeeper as a distributed configuration store for maximum accessibility. In addition, Patroni is capable of handling database replication, backup, and restoration configurations.

Source de l’article sur DZONE

Developers are working with new applications every day using Apache Kafka as the backbone to implement an event-driven architecture (EDA) to support distributed systems. However, this adds new challenges when sharing across teams, even within the same organization. What endpoints are available? What is the structure of the message? That’s why payload examples became critical to speed up development. For this reason, having a reliable and enterprise-grade service to mock Apache Kafka should be an item in your EDA checklist. This post will do a quick review of the Microcks General Availability (GA) version and their support to Kafka.

What is Microcks?

Source de l’article sur DZONE


Introduction

While many of us are habituated to executing Spark applications using the ‘spark-submit’ command, with the popularity of Databricks, this seemingly easy activity is getting relegated to the background. Databricks has made it very easy to provision Spark-enabled VMs on the two most popular cloud platforms, namely AWS and Azure. A couple of weeks ago, Databricks announced their availability on GCP as well. The beauty of the Databricks platform is that they have made it very easy to become a part of their platform. While Spark application development will continue to have its challenges – depending on the problem being addressed – the Databricks platform has taken out the pain of having to establish and manage your own Spark cluster.

Using Databricks

Once registered on the platform, the Databricks platform allows us to define a cluster of one or more VMs, with configurable RAM and executor specifications. We can also define a cluster that can launch a minimum number of VMs at startup and then scale to a maximum number of VMs as required. After defining the cluster, we have to define jobs and notebooks. Notebooks contain the actual code executed on the cluster. We need to assign notebooks to jobs as the Databricks cluster executes jobs (and not Notebooks). Databricks also allows us to setup the cluster such that it can download additional JARs and/or Python packages during cluster startup. We can also upload and install our own packages (I used a Python wheel).

Source de l’article sur DZONE


Introduction

Ever since Patrick Debois coined the word DevOps back in 2009, teams and organizations have been clamoring to adopt relevant practices, tools, and a sense of culture in a bid to increase velocity while maintaining stability. However, this race to incorporate “DevOps” in software development practices has resulted in a perversion of the concept. This does not mean that there are no successful practices of teams adopting DevOps practices, but the word overall has become a buzzword. As per the DORA 2019 State of DevOps report, team managers are more likely to proclaim that their teams are practicing DevOps compared to the actual frontline engineers and developers.

Therefore, this piece aims to realign the meaning of DevOps as well as highlight the need for considering debugging as a core element of the practices and cultures that enable DevOps for teams. The argument for debugging as a core component in the DevOps pipeline is a result of the evident need for a shift-left in the way we build and release software, empowering developers to adhere to the intrinsic principle of you build it you run it.

Source de l’article sur DZONE