Articles

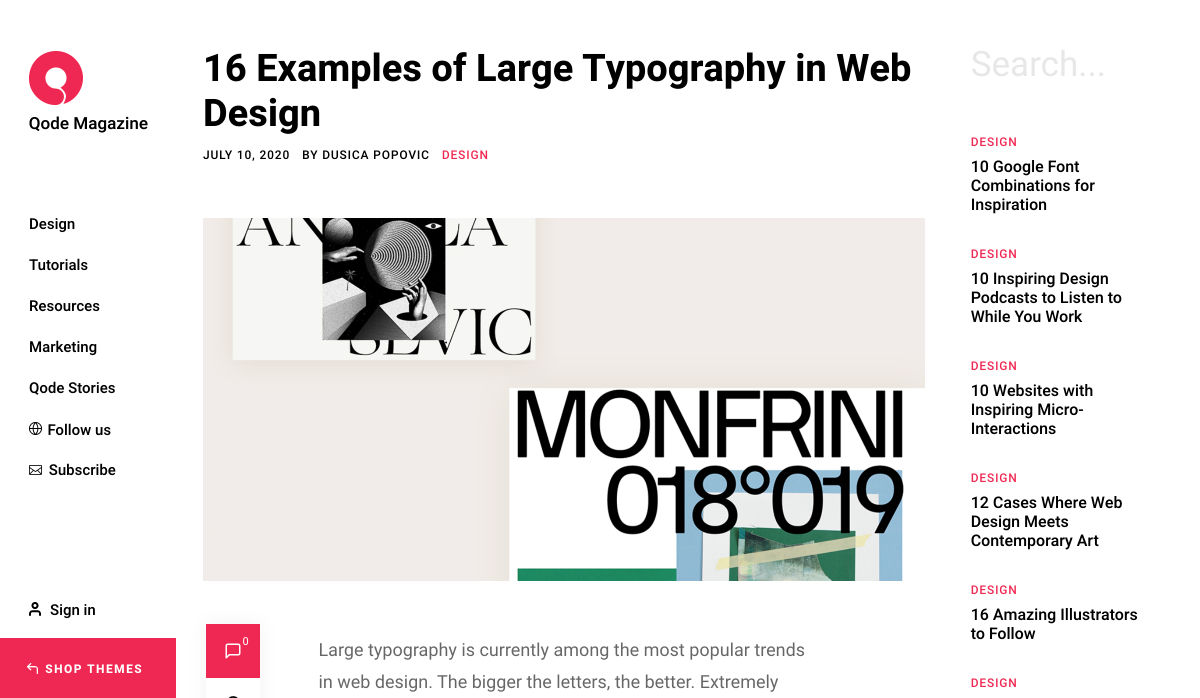
Most of the information we consume happens through reading, so it makes a lot of sense to pay attention to the words when designing. There are many aspects to typography, but one of the things that helped improve the quality of my design was letter-spacing.

Letter-spacing is about adding and removing space between letters. Some people confuse it with kerning, but these two are different; letter-spacing affects the whole line of text, whereas kerning adjusts the space between two individual letters at the time. Kerning is best left to type designers, besides which, unlike letter-spacing there is currently no way to control kerning in CSS.

I believe that practice and a lot of observation will change the way you treat letter-spacing in your work as well.

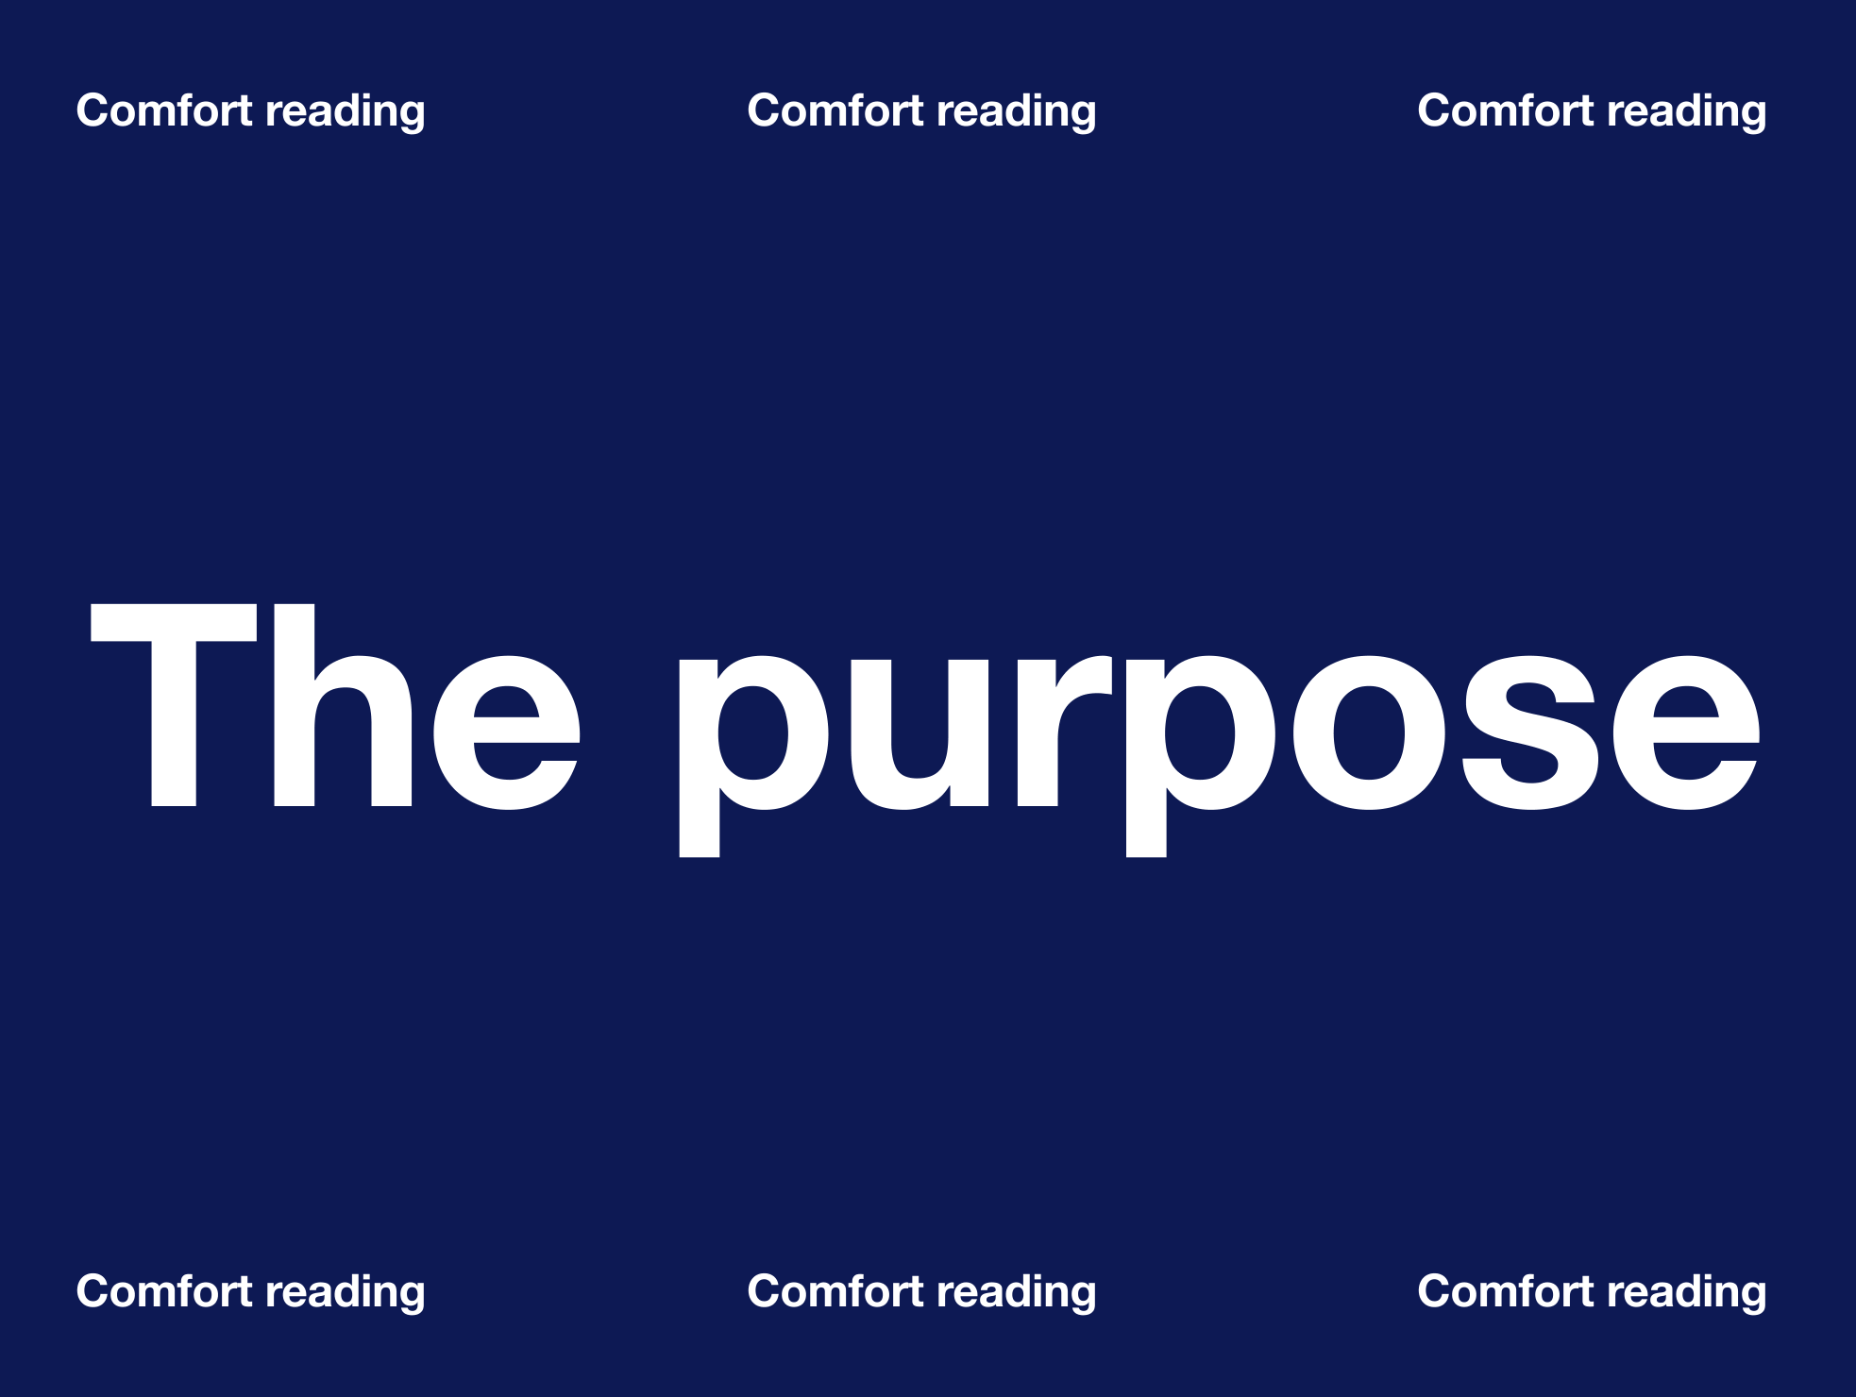
The Purpose of Letter-Spacing

The main purpose of letter-spacing is to improve the legibility and readability of the text. Words act differently depending on their size, color, and the background they are on. By adjusting letter-spacing to the environment you are working with you will help readers consume your information faster, and more efficiently. The fun part is that they won’t even notice it — that’s the whole point of the job.

Bear in mind that typographers think about letter-spacing and kerning when designing a typeface. It means you don’t have to apply it to all your text, but in order to have an understanding when it’s necessary, you should know some basic principles, and use good typefaces.

How Letter-Spacing Affects Legibility and Readability

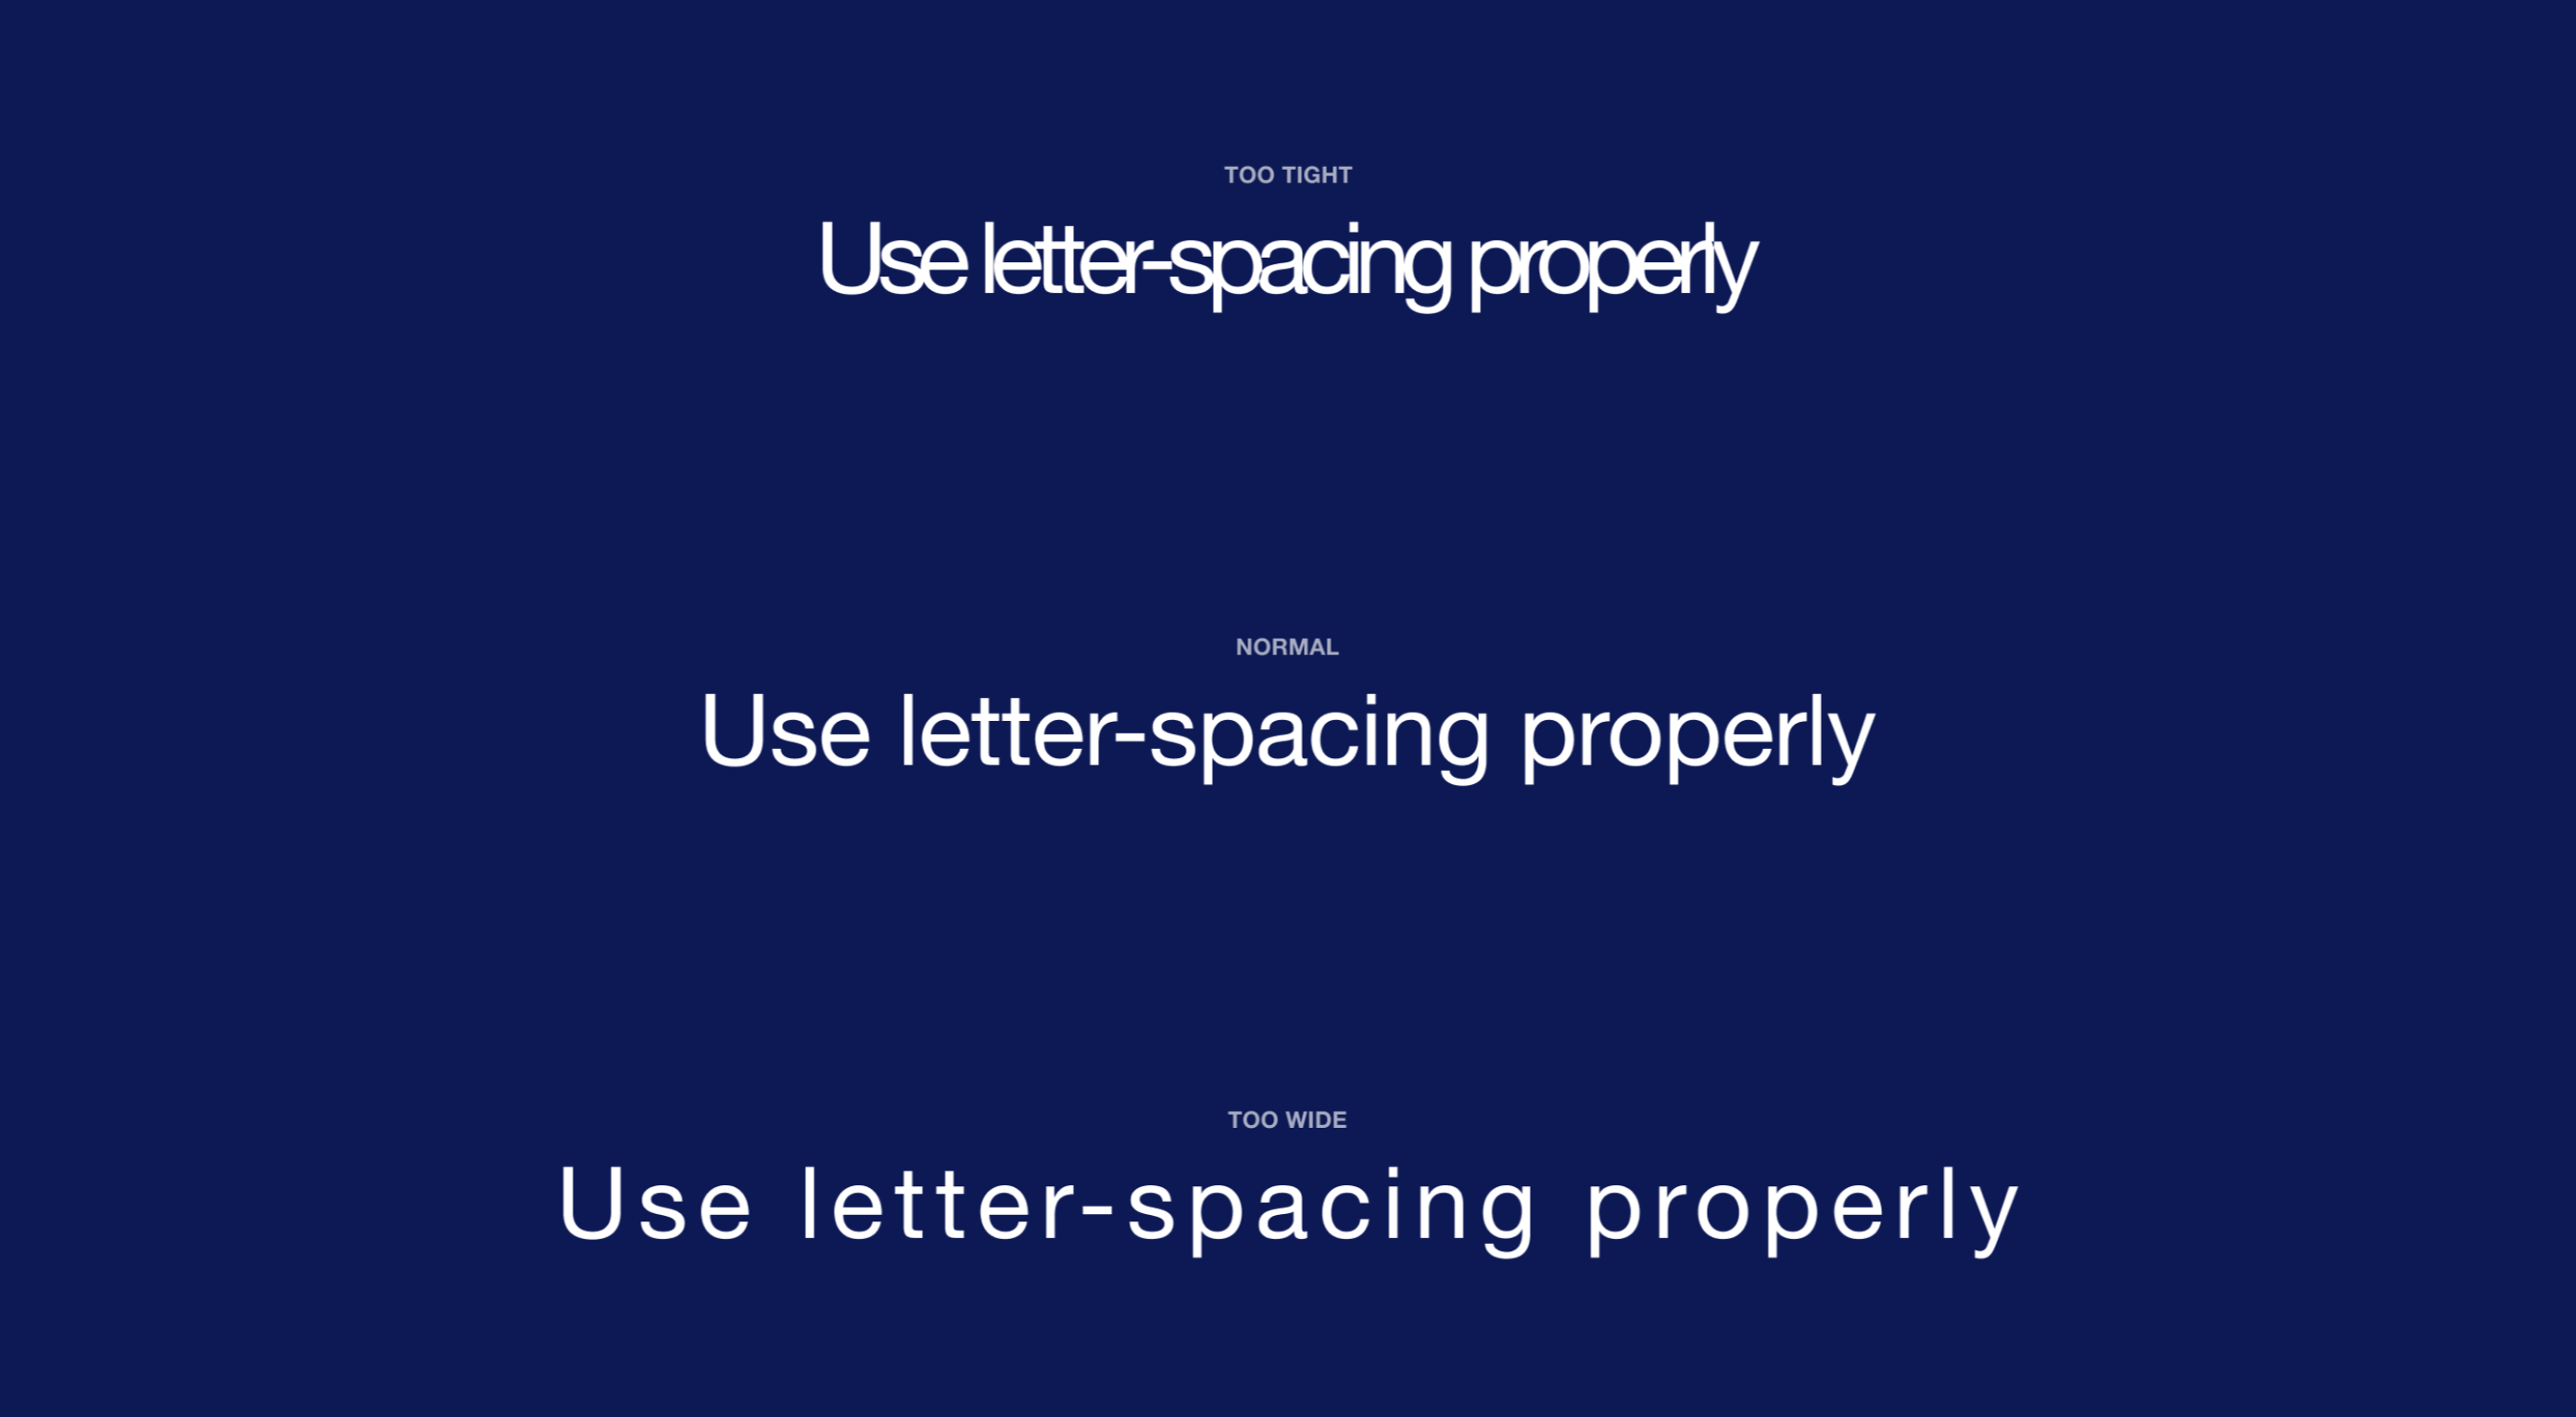
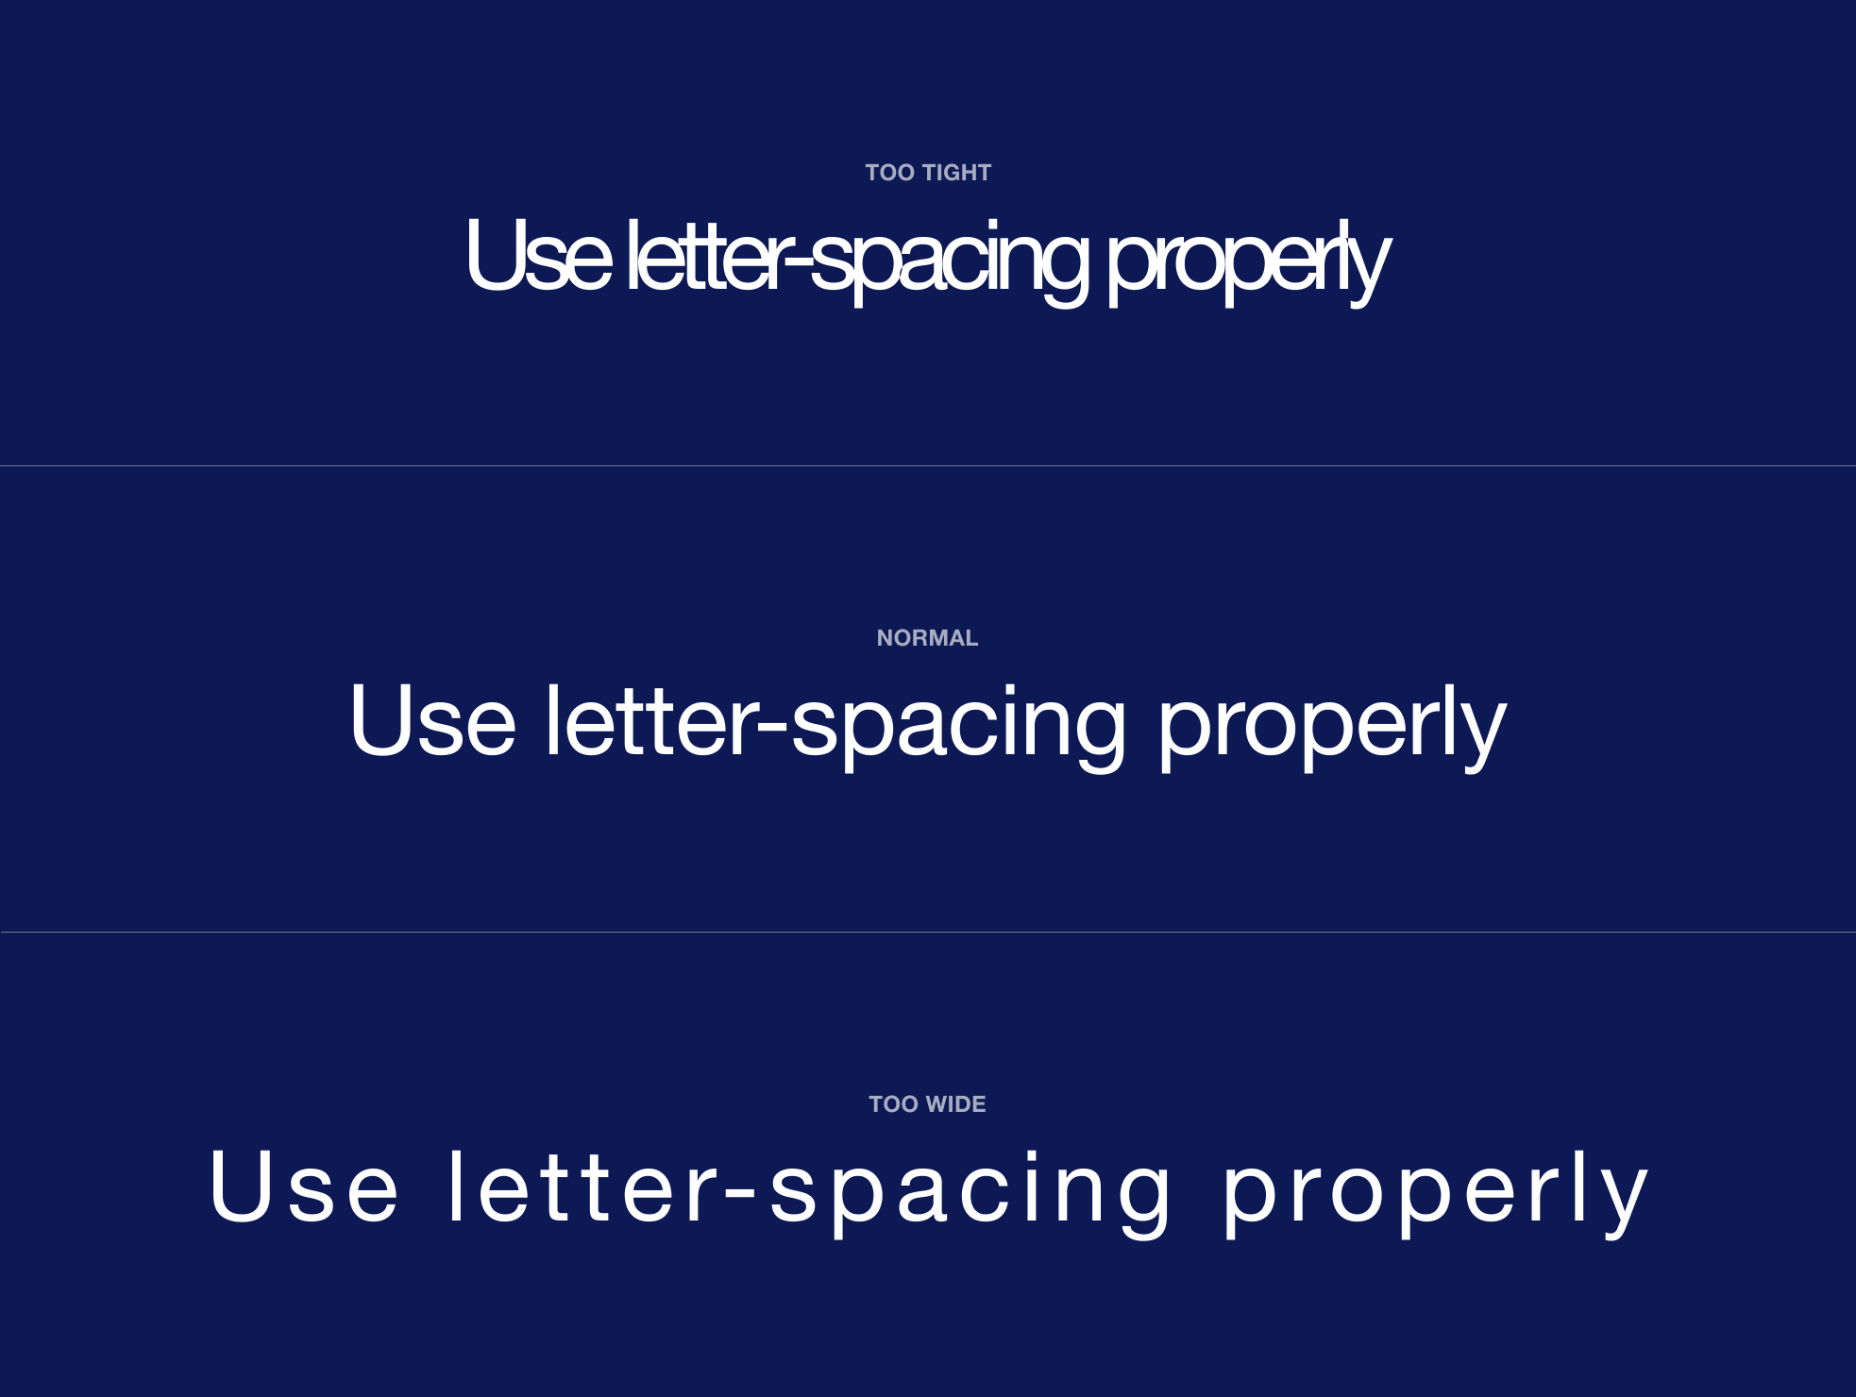
The legibility and readability of your text depend on things like line-height, paragraph length, font size, typeface choice, letter-spacing, and much more. Regarding letter-spacing, if you are just getting into typography, the best thing you can do is not overuse it. What I mean by that is simply don’t make the distance between letters too big or too small; even if you think it looks good, people will struggle reading it, and that will ruin their experience.

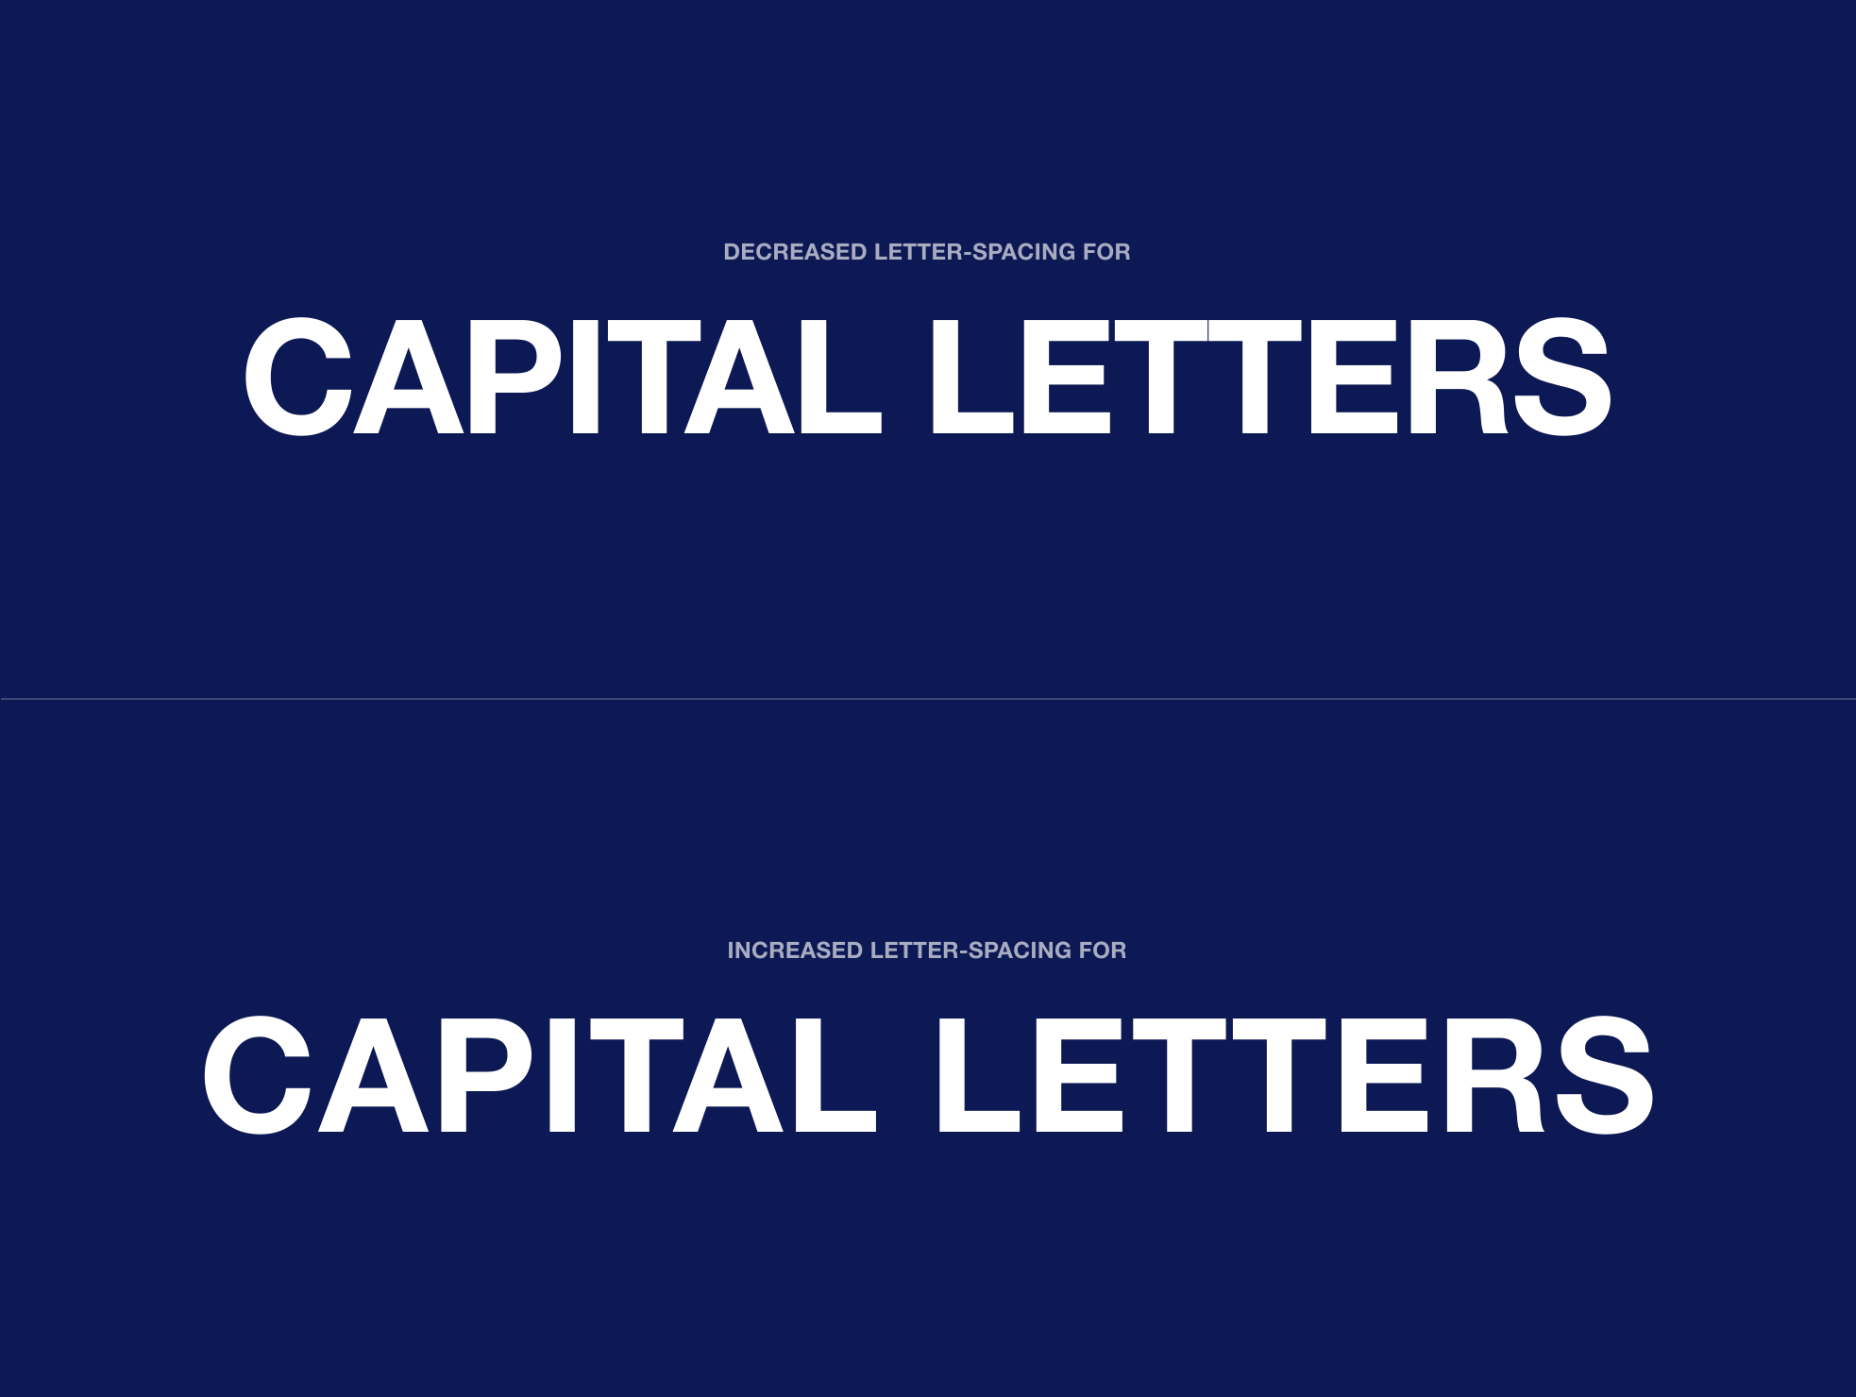
Letter-Spacing Capital Letters

Capital letters are designed with the intention that they will appear at the beginning of a sentence or proper noun, in combination with lowercase letters. When capital letters are next to each other, the space between them is too tight. So in order to achieve better readability, space needs to be increased. This applies to both large and small font sizes.

Letter-Spacing Headlines

If you are using well designed fonts, you can be sure that they are calibrated well, and you won’t need to make any major adjustments to them. However, the problem with headlines is that at larger scales the space between letters looks unbalanced. It can be fixed by increasing or decreasing the letter-spacing value.

There are no strict rules for letter-spacing — there are a lot of typefaces and all of them require an individual approach — but if you look at how big companies like Google and Apple treat their typefaces, you can find a lot of valuable information there.

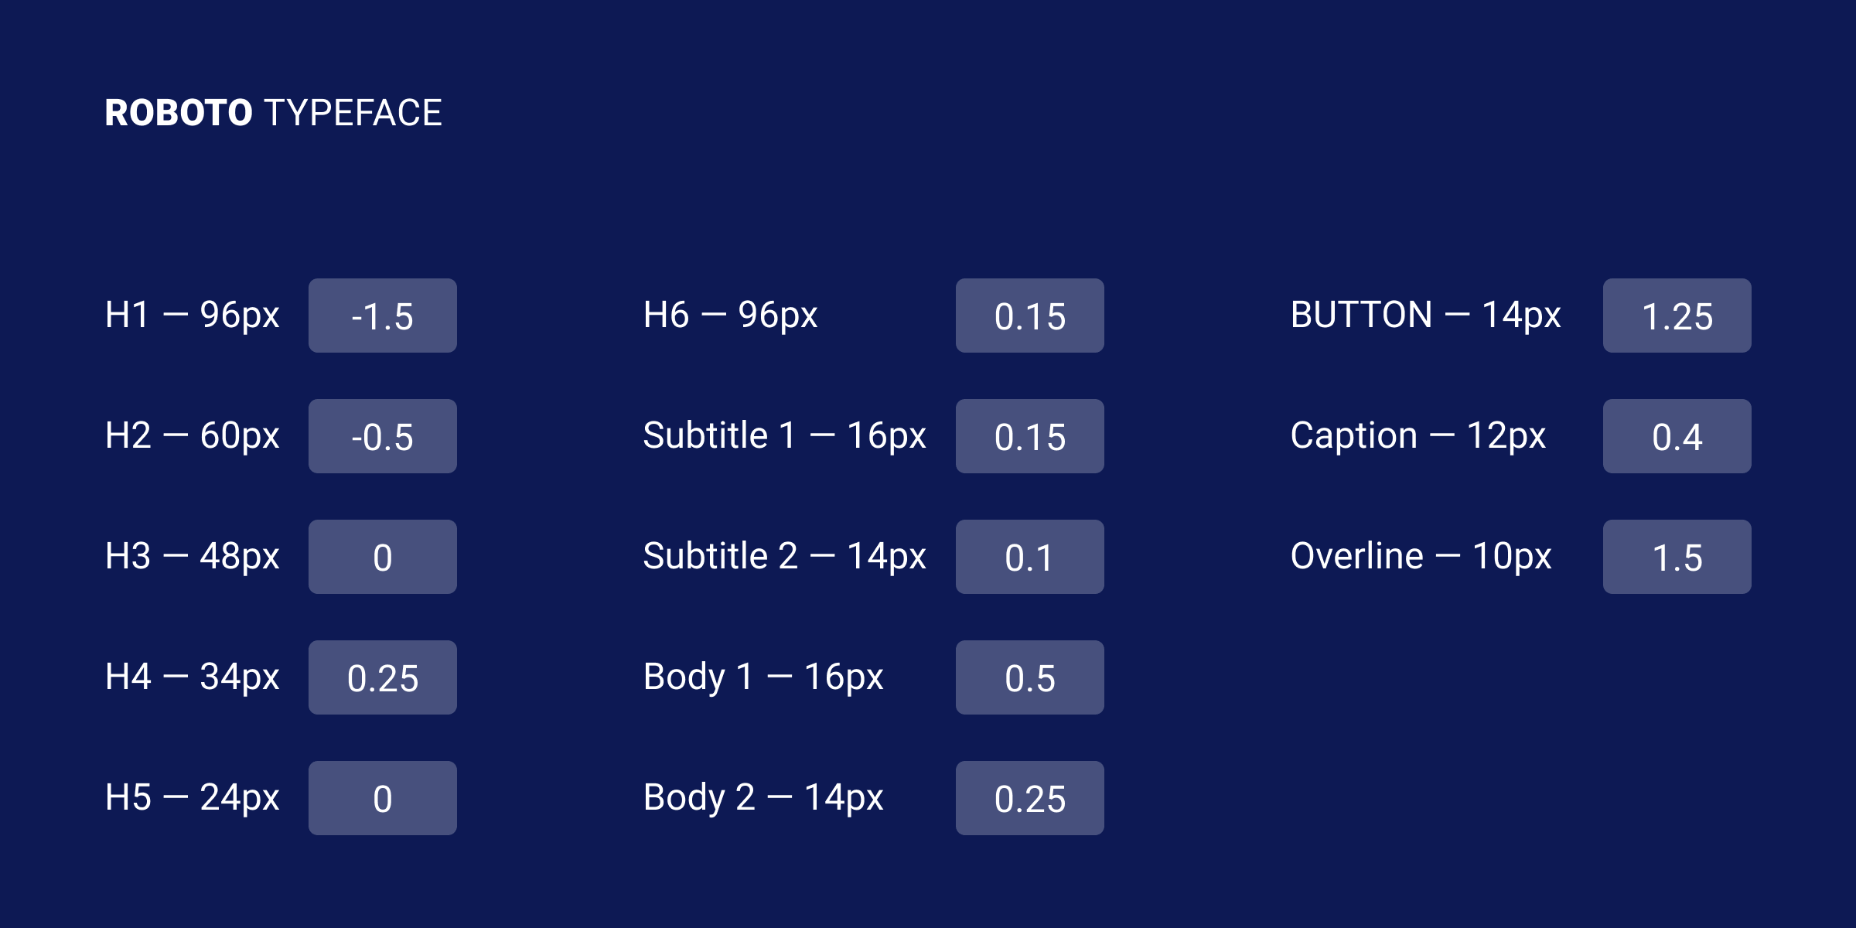
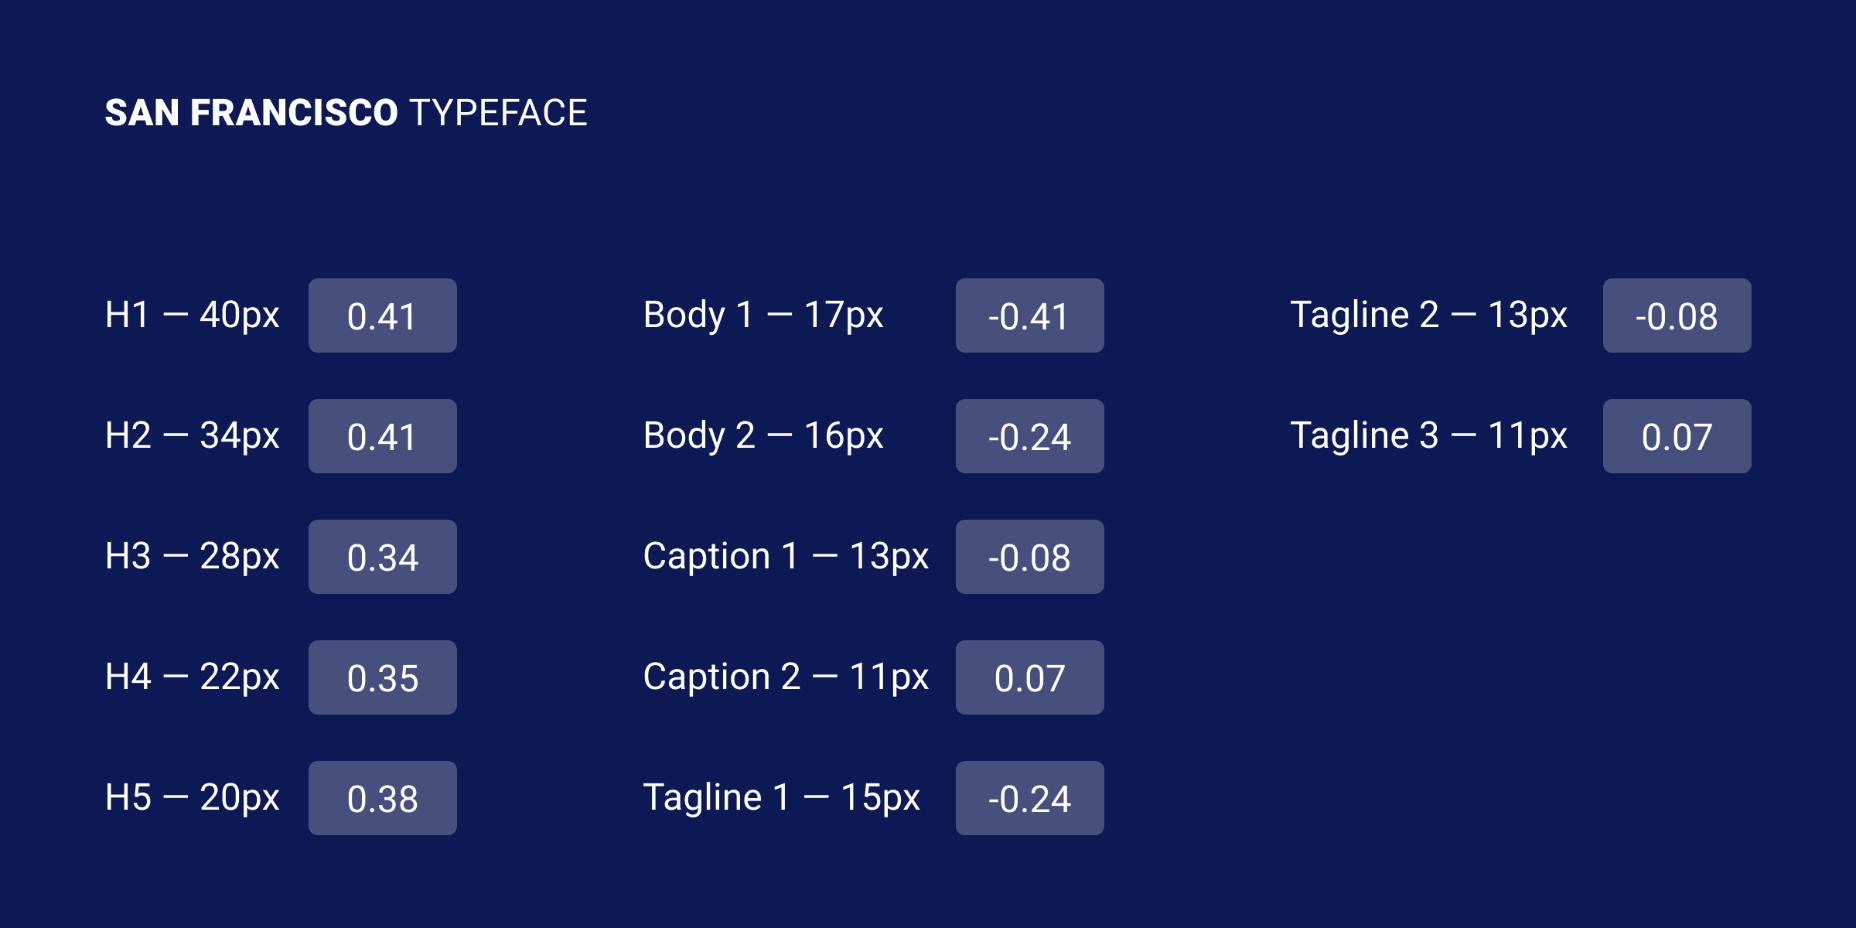
Let’s take a look at the “Roboto” and “San Francisco” typefaces (the first one is used in Material Design and the second one in Apple’s ecosystem). Headlines from 20 to 48 pixels have either a positive letter-spacing value or none. If the font size is bigger, letter-spacing becomes negative. These exact numbers are not going to work that well for other typefaces, but after trying different approaches I can state that it’s a common pattern.

I’ve tested several guidelines for letter-spacing and the one that was published by Bazen Agency works for a lot of popular typefaces. It will be a good starting point for you, but you can always apply additional adjustments:

  • H1 — 96px — -1.5%
  • H2 — 60px — -0.5%
  • H3 — 48px — 0%
  • H4 — 34px — 0.25%
  • H5 — 24px — 0%
  • H6 — 20px — 0.15%
  • Subtitle — 16px — 0.15%

If you happen to design a lot of apps or you’re planning to do that, one thing that helps me is using the default Material Design and Apple guidelines for their typefaces. They are well balanced and it saves a lot of time.

Letter-Spacing Body Text

If you ever read anything about letter-spacing, you’ve probably have seen this popular wisdom from typographer Frederic Goudy: “Anyone who would letter-space lowercase would steal sheep”. (There’s an argument that he was only referring to blackletter fonts.) Some designers took it as a hard rule and now never adjust the letter-spacing of lowercase text.

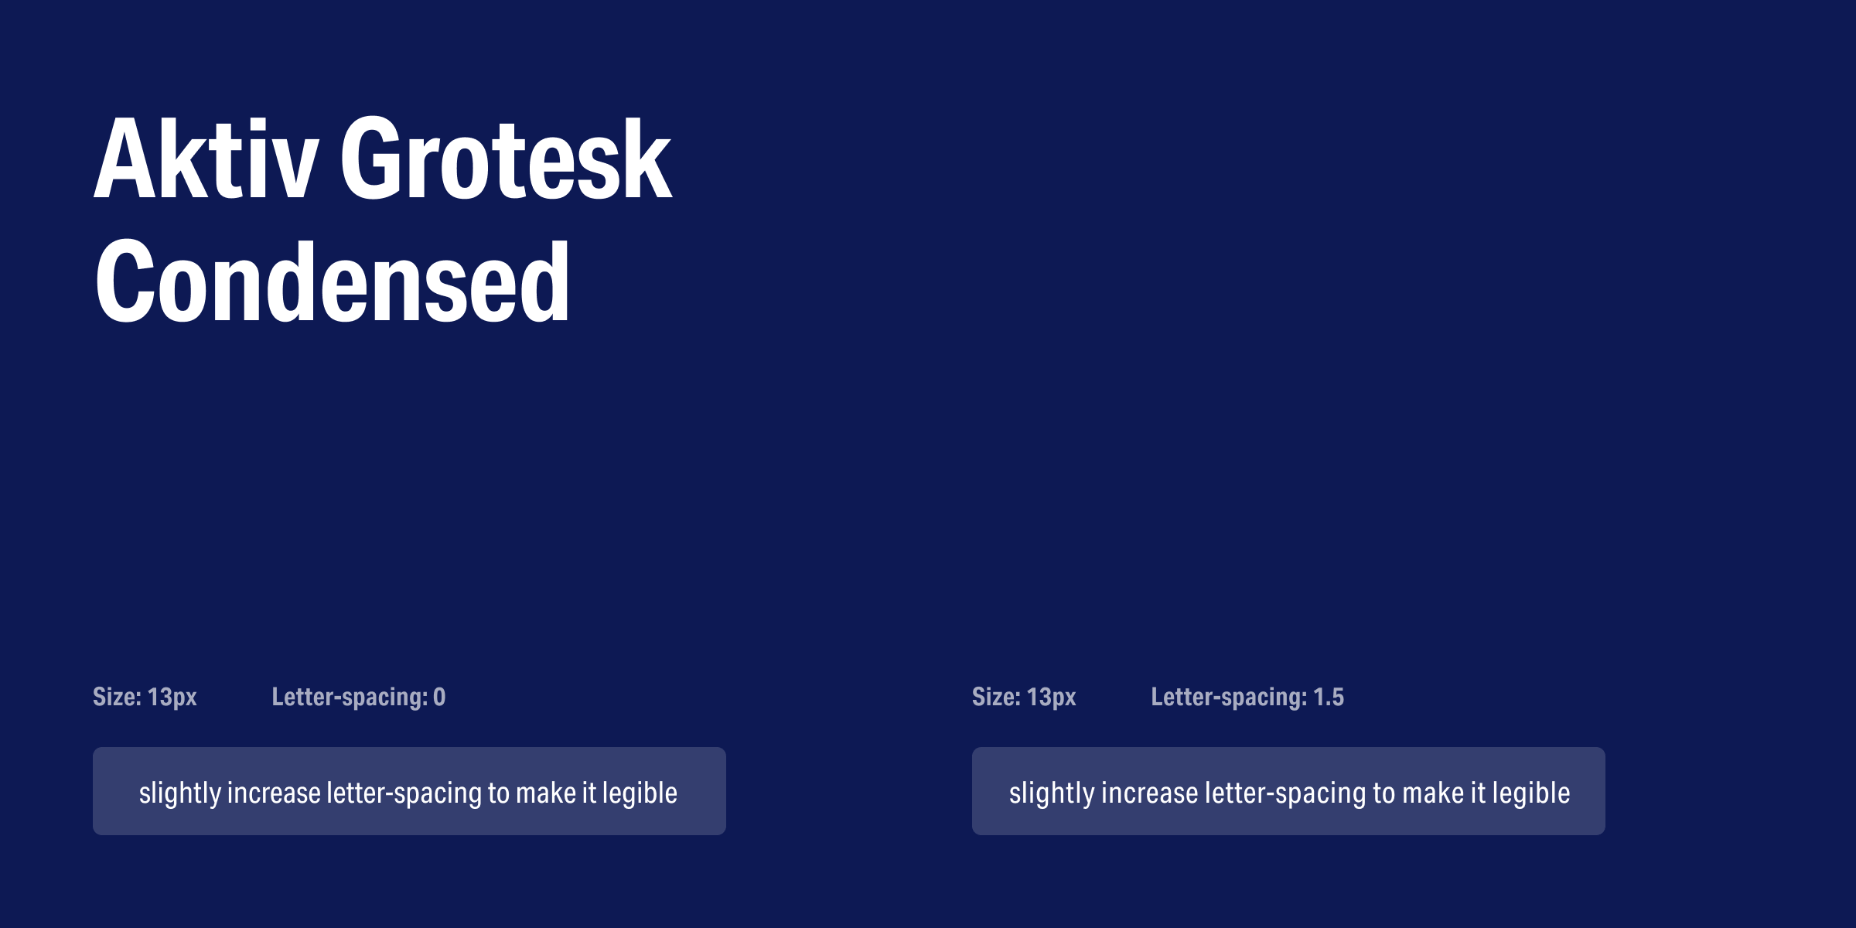
Based on my practice and by looking at the work of designers I can’t agree with Goudy, because sometimes small changes can make a big difference in how your text performs. Let’s take, for example, condensed fonts. At a small size, the letters are too close to each other, which leads to poor legibility. By increasing letter-spacing by 1.5% you will see that the text is now easier to read.

If we look at my previous example, in the guidelines for “Roboto” and “San Francisco” typefaces, letter-spacing is applied to body text; even though San Francisco has a dedicated “SF Pro Display” for headlines and “SF Pro Text” for body text, letter-spacing is still used to refine them.

There are a lot of different typefaces and a single rule doesn’t apply to all of them. Experiment with letter-spacing and do what seems right to you. There are some simple guidelines that will lead you in the right direction, especially when working with body text:

Keep in Mind Line-Height

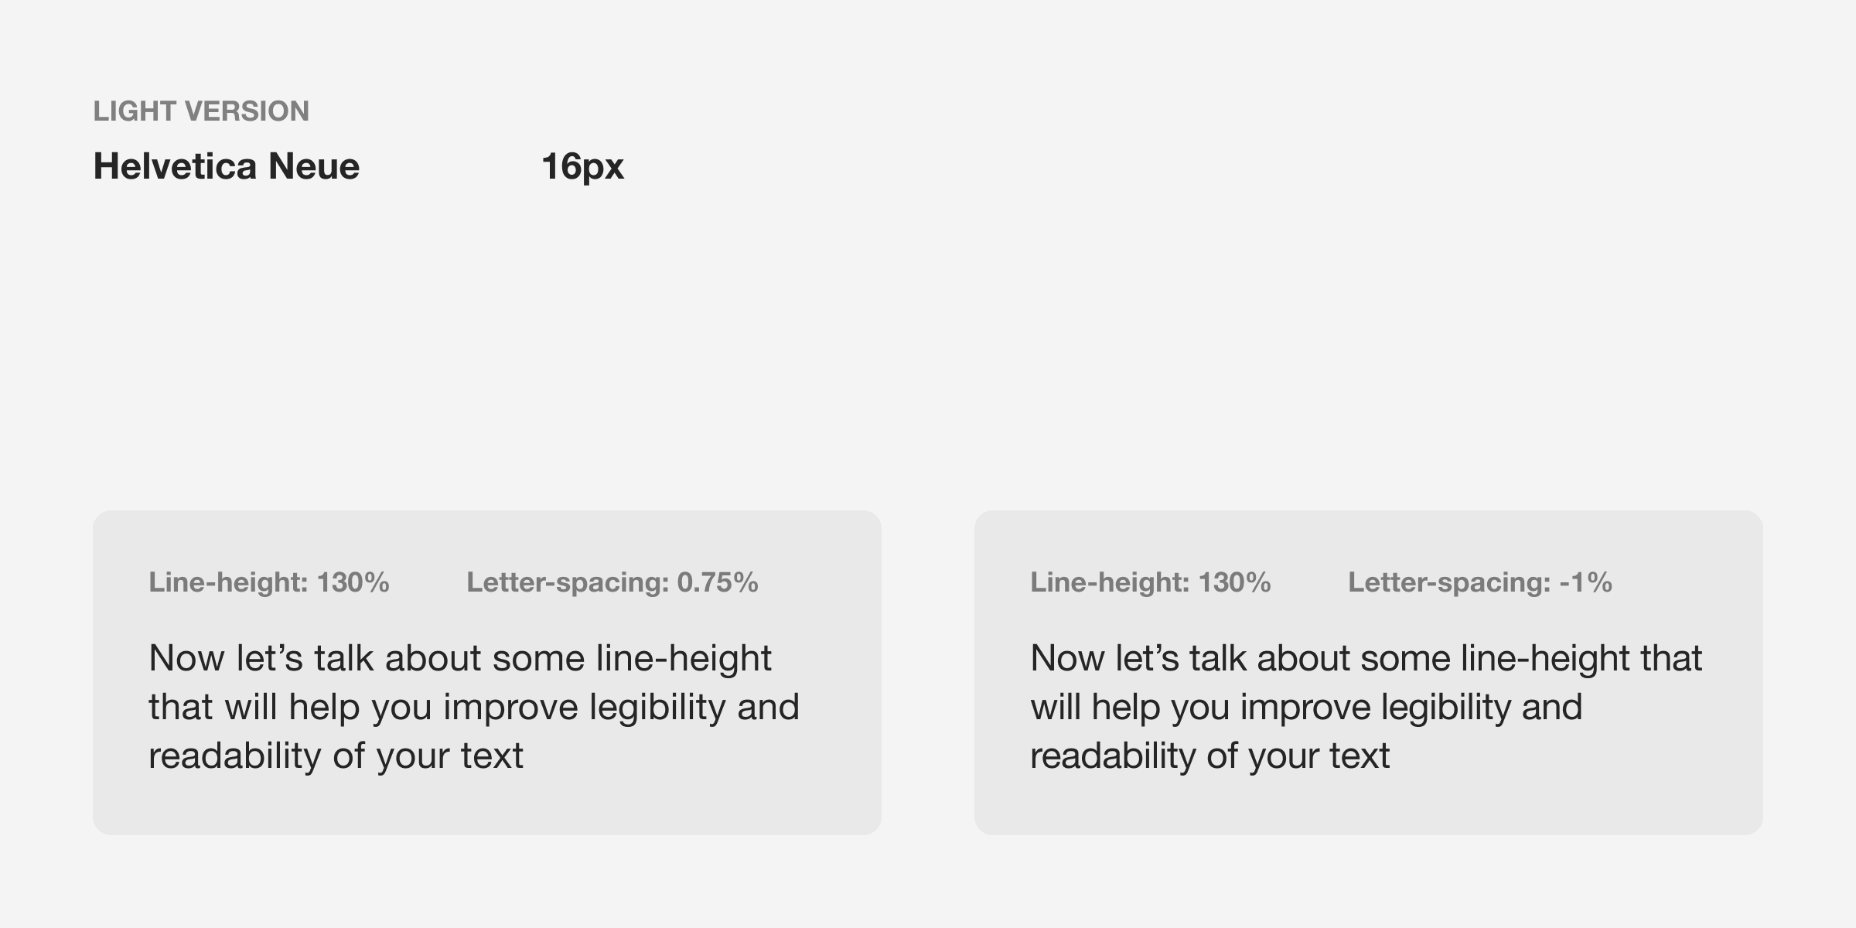
If you have a line-height greater than 120%, most likely negative letter-spacing will lead to an unbalanced look to the paragraph. To refine it you would need to either keep it at 0% or only slightly increase it.

Light Text on Dark Background

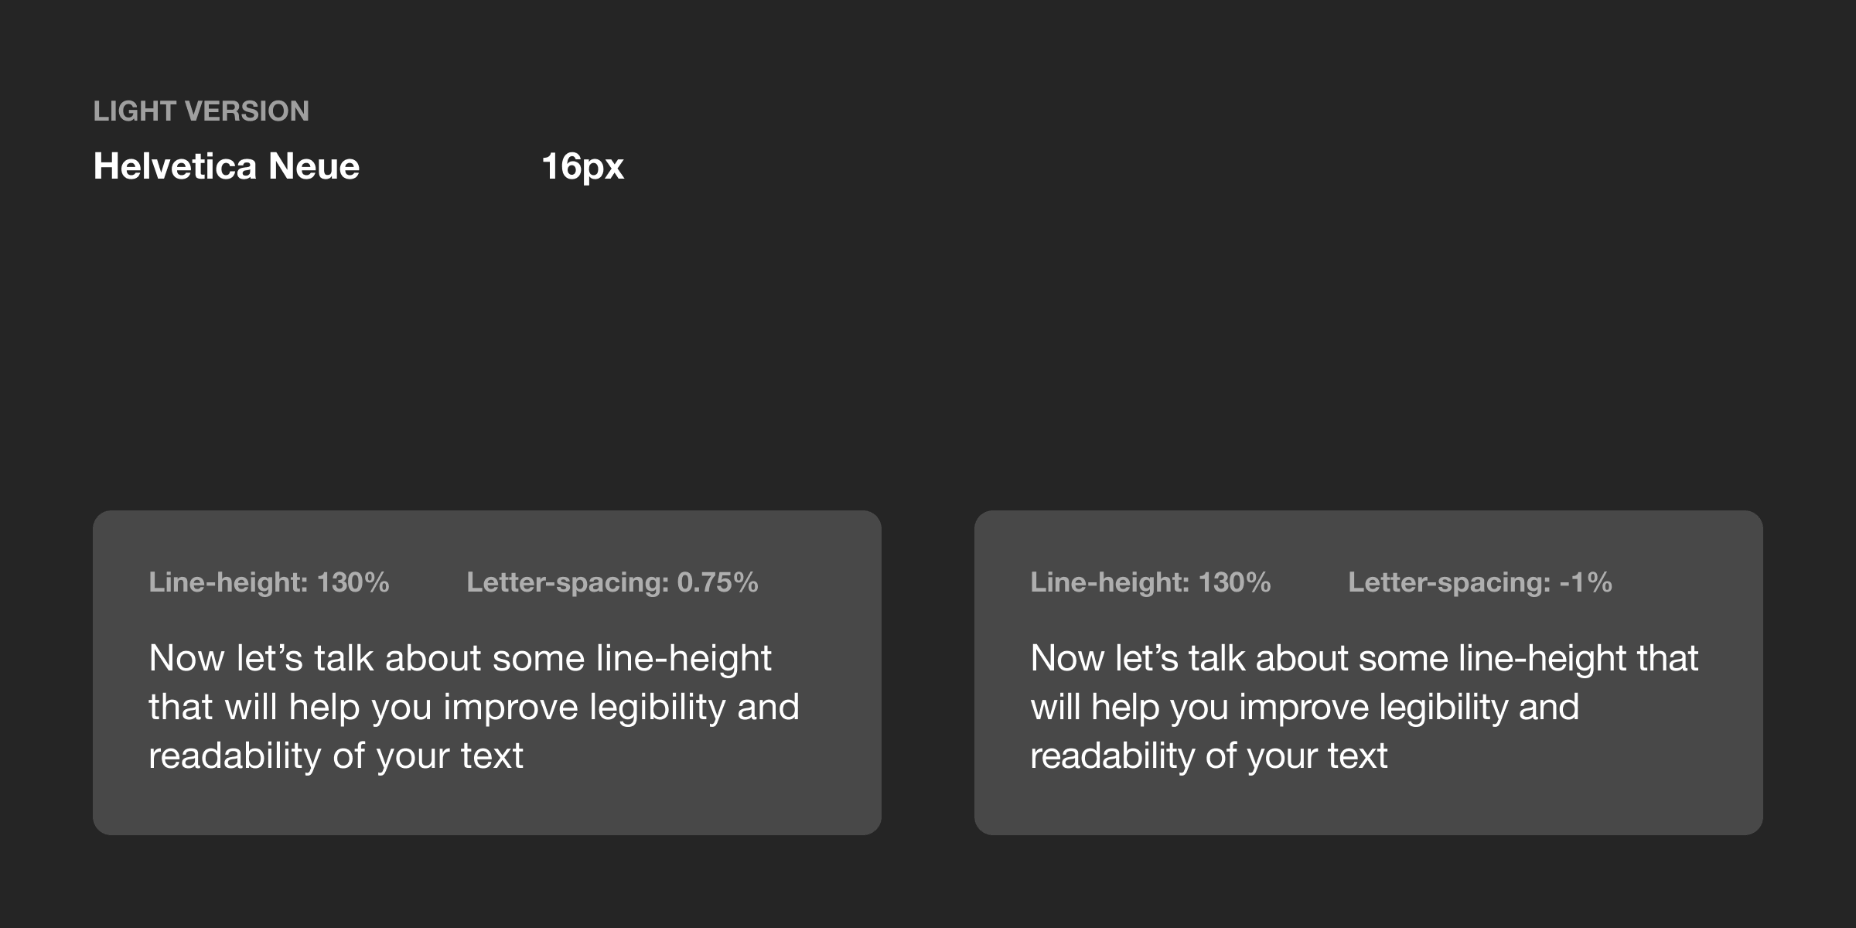
On a dark background, white text looks overexposed and therefore letters appear too tight. To make it more legible, I would suggest you increasing letter-spacing a small amount.

General Values for Body Text

You can use the following guidelines for body text, which I have tested with several typefaces:

  • Body 1 — 16px — 0.5%
  • Body 2 — 14px — 0.25%

Letter-Spacing Captions

Unlike headlines and body text, smaller font sizes don’t have many variations in letter-spacing. It’s a common practice when a font size is lower than 13px to increase the space between letters to make it legible. But there are always exceptions (“SF Pro Text” guidelines suggest using positive letter-spacing only when a font size is 11px or below). Make sure you experiment with settings.

You can use the following values as a starting point and then edit them to what seems right to the typeface of your choice:

  • Caption — 12px — 0.5%
  • Overline — 10px — 1.5%

Final Tip

One of the things that helped me improve my skills in typography was looking at other designers and especially type foundries. By decoding their work you might notice some nuances of how they treat typography and it will help you in future projects.
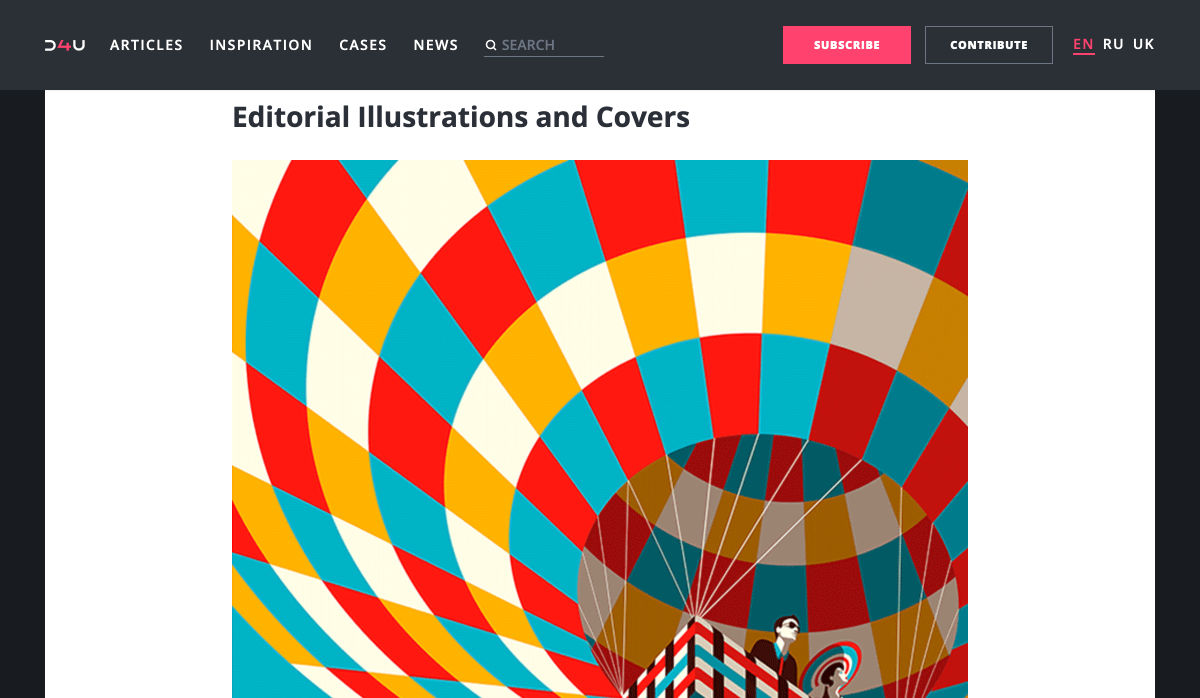
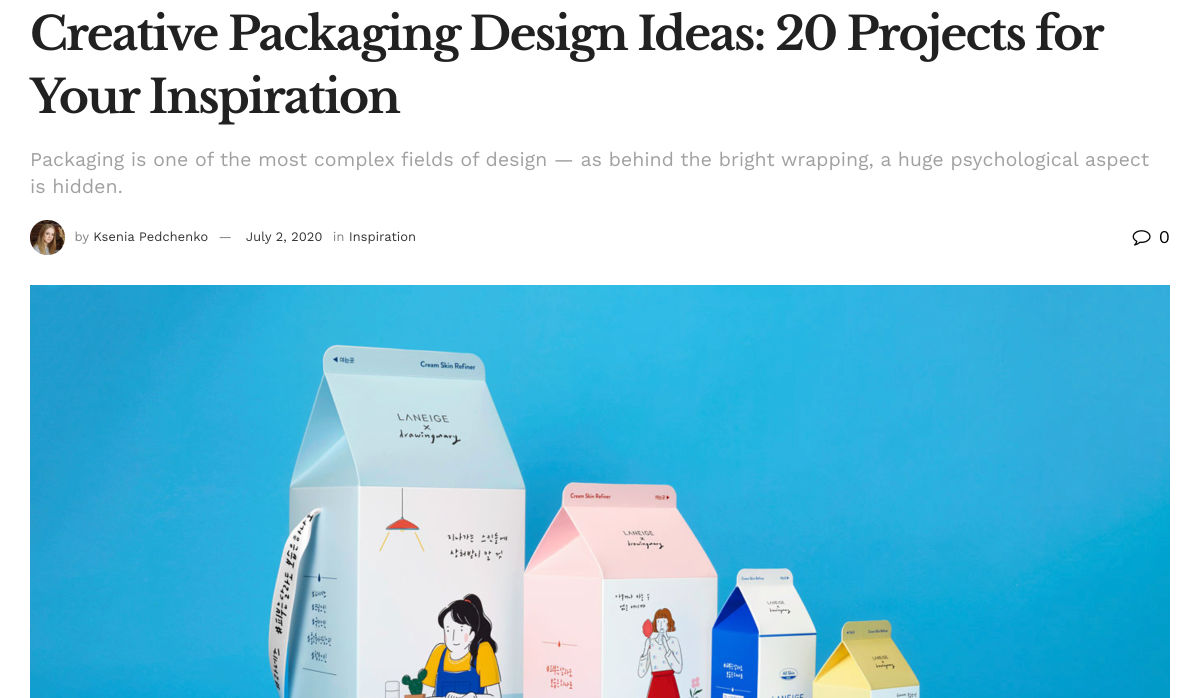
Source


Source de l’article sur Webdesignerdepot

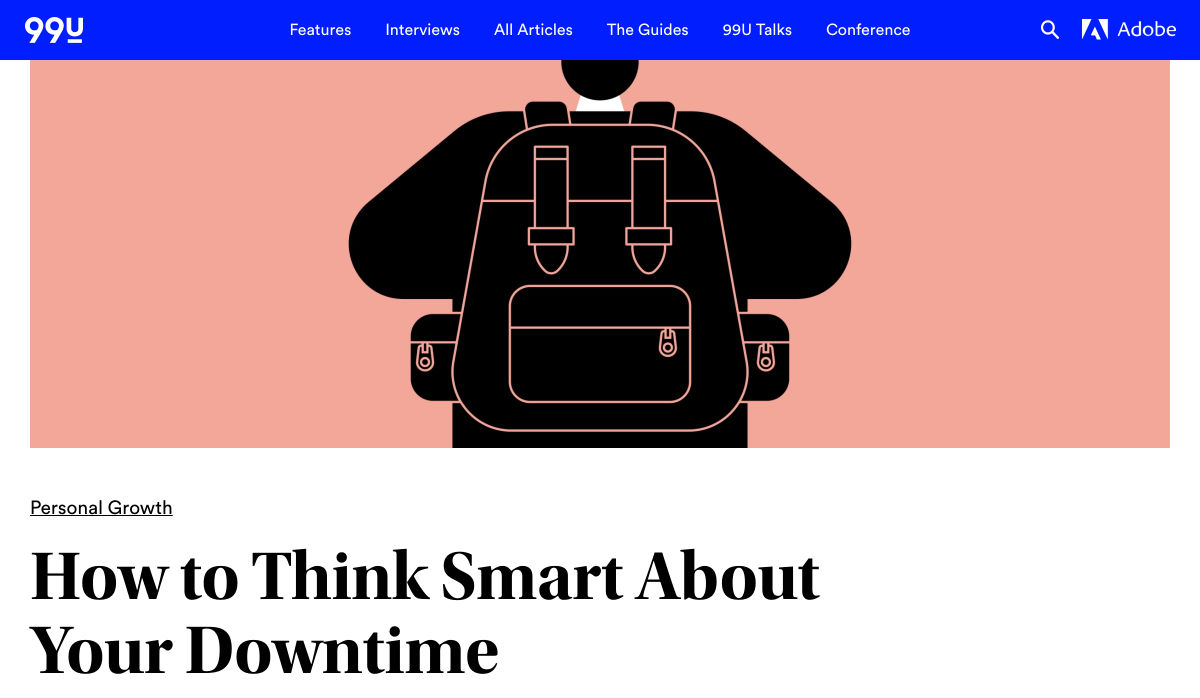
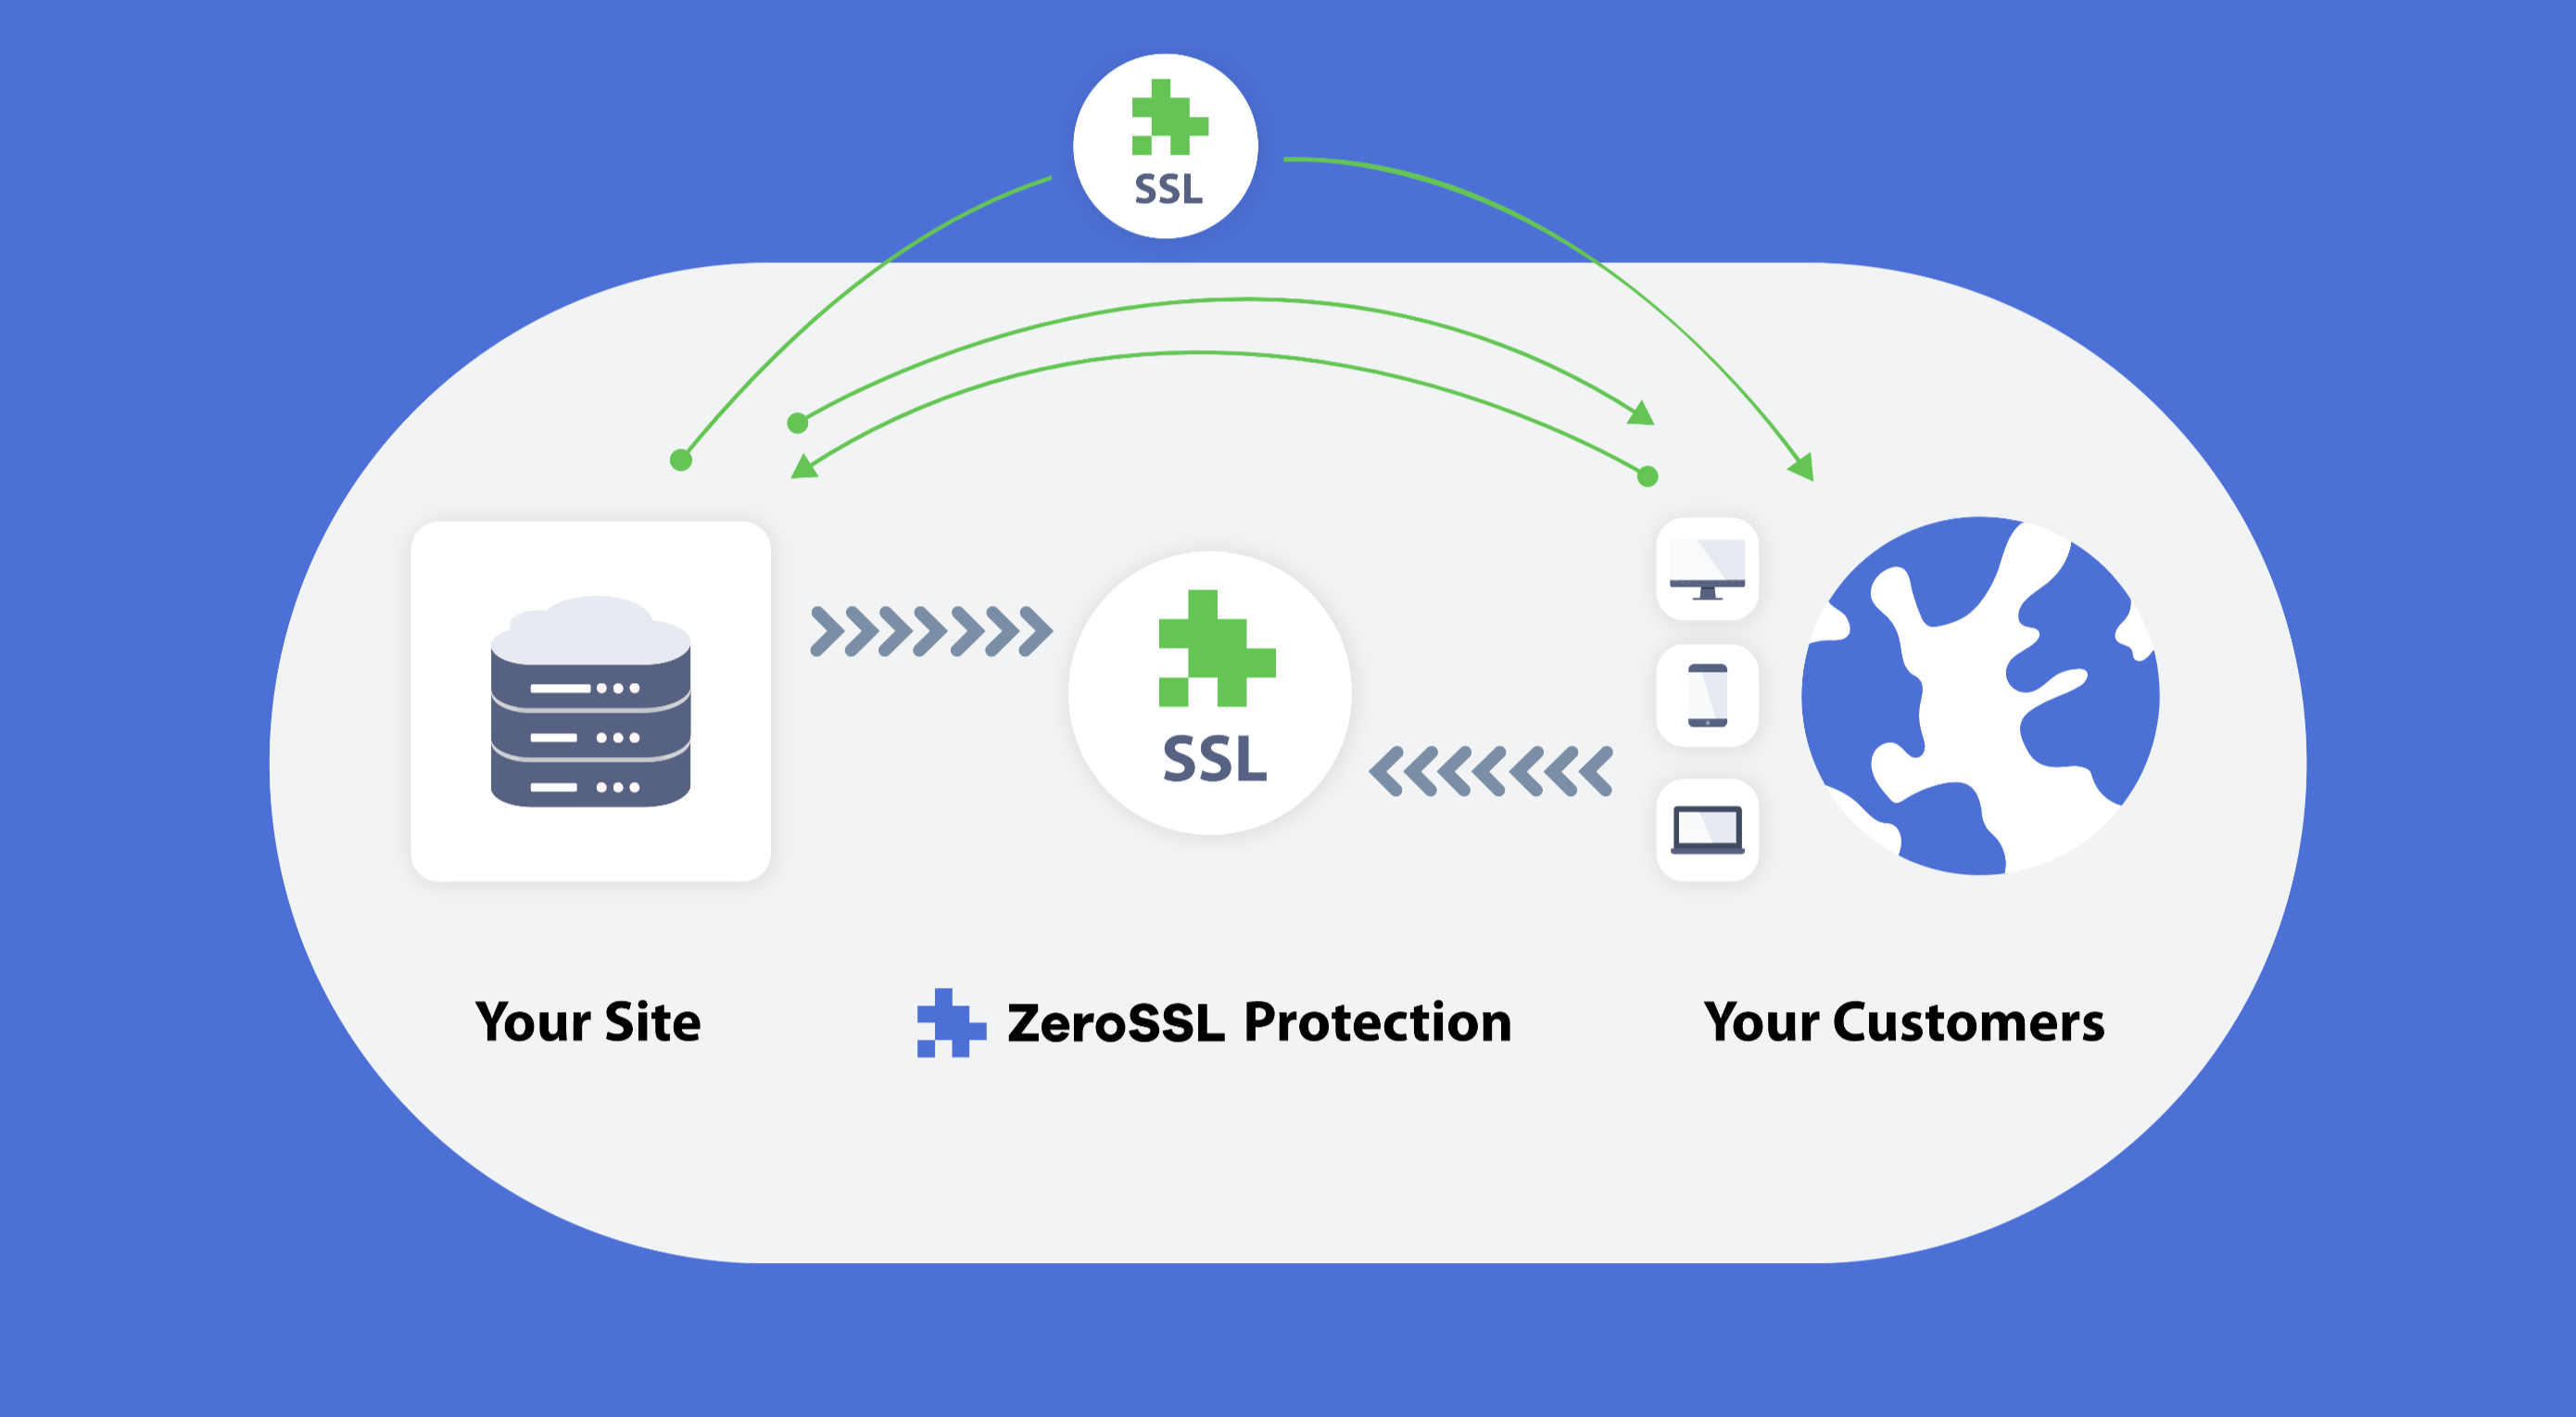
Like it or not, we’re slowly edging towards a two-tier web: those sites that are secure, and…everything else.

There was a time on the web, when we didn’t have SSL certificates, and lots of people’s data got stolen. To address the problem, and regain users’ trust SSL certificates were introduced to secure sites handling sensitive data. And because they were initially a niche technology, you paid through the nose for them.

(An SSL certificate, for those that don’t know, is the difference between http:// and https://)

Then, thanks in part to privacy initiatives, and in part to high-profile data breaches, a few big players decided that all data should be protected. And the next thing you know, Google’s using SSL certificates as a ranking factor. And then suddenly browsers are warning people that non-SSL certified sites are insecure and they should “Get Out of Here!” And before long your hobby blog about cat-friendly board games is being billed hundreds of dollars a year just to be seen on the web.

Choosing whether to jump on the SSL bandwagon is simple: you have to have one. Finding an affordable SSL certificate, now that’s a challenge.

Most hosting companies will provide you with an SSL certificate as an add-on, and they’ll charge you anything up to $200 per year for it.

That’s why we’re blown away by ZeroSSL, because ZeroSSL is the first practical opportunity to grab an SSL certificate for your site, for free!

Get an SSL Certificate for Free

Now, it must be said that ZeroSSL isn’t the first place to offer a free SSL certificate. Plenty of hosts offer a “free” SSL certificate for the first year, when you pay for premium hosting. And there’s Let’s Encrypt which offers free certificates if you can work out how to access them.

ZeroSSL is just the first place to offer a genuinely free SSL certificate that you don’t need a post-grad degree in server engineering in order to use.

Get a Free SSL Certificate from ZeroSSL

Using ZeroSSL’s free-forever plan you can register three 90-day certificates entirely free. You’ll never need to pay for them, just renew every few months.

ZeroSSL also offers a variety of packages for simplifying your SSL management. The Basic package for example starts at $8/month and offers unlimited 90-day certificates, and even three 1-year certificates so you can renew annually and forget about them the rest of the time.

ZeroSSL also scales; if you need unlimited 1-year certificates — because you have, erm, unlimited websites? — that’s possible too.

Where ZeroSSL Excels

ZeroSSL offers a number of benefits over its competitors.

Firstly there’s the full-featured management console, that makes SSL management transparent. It sounds like a little thing, but with many other suppliers the first thing you know about your SSL certificate expiring is your site breaking.

ZeroSSL…makes managing your certificates…insanely easy.

ZeroSSL has an easy-to-use REST API, which can be used with the language of choice: PHP, Ruby, ASP, anything. It makes managing your certificates for multiple sites insanely easy.

Verifying SSL certificates can be confusing, and technically difficult. But ZeroSSL streamlines the process with automatic CSRs and one-step email validation (even for multiple domains) — considerably faster and easier than industry standard DNS validation. There’s even a one-click check to make sure your certificate is installed correctly.

Most importantly, ZeroSSL offers superb technical support on all of its paid plans. So if you’re one of the many people who started reading this post without fully understanding what an SSL certificate is, you can be confident that if you run into difficulties getting set up, there’s someone available 24/7 to dig you out of the hole.

Getting Started with ZeroSSL

If by now you’re planning to try ZeroSSL, the best place to start is the free-forever plan. ZeroSSL allows you to upgrade, downgrade, or cancel at any time, so it makes sense to start with the no-credit-card option and upscale if you need it.

Using ZeroSSL’s dashboard you can create a free 90-day SSL certificate in minutes, and the step-by-step installation instructions will guide you all the way through.

ZeroSSL’s 1-year certificates are the gold-standard of SSL protection

ZeroSSL auto-generates certificates in different formats depending on your choice of platform, to speed up installation.

You can register certificates for multiple domains — you will have to verify each domain individually, but it’s simple to setup. Premium plan users can even use wildcards, allowing you to secure a site with multiple sub-domains, from a single certificate.

ZeroSSL’s 1-year certificates are the gold-standard of SSL protection and are the option that most site owners will come to rely on.

If you’re running an agency and you’re responsible for maintaining multiple client sites, ZeroSSL is made for you. ZeroSSL’s dashboard gives you one central location to monitor the status of all of your SSL certificates, and you can set expiry reminders to notify you by email when a certificate is about to expire.

Automated SSL Renewal with ZeroSSL

If that sounds too much work, and you’d like to automate your SSL certificates, ZeroSSL has you covered.

ZeroSSL works with both its own dedicated ACME Certbot, and more than ten other third-party ACME clients to fully automate your SSL certificates absolutely free, on a rolling 90-day schedule.

If you really know what you’re doing, you might even consider the ZeroSSL’s REST API. It enables certificate creation, validation, renewal, and management using HTTPS Get calls and JSON responses. The API handles millions of requests per month using 256-bit bank-level HTTPS encryption. You can access the API for free, and the Pro plan offers unlimited access.

Go Get Certified

There are millions of sites that drop traffic every month because they lack an SSL certificate.

Whatever your site, it’s not a question of whether you need an SSL certificate, it’s how you can affordably manage to create, install, and monitor a certificate.

ZeroSSL solves all of the problems of SSL certificate management, and for the majority of users, its free-forever plan is all you’ll ever need.

Head over to zerossl.com today to boost your traffic with a free SSL certificate.


[– This is a sponsored post on behalf of ZeroSSL –]

Source


Source de l’article sur Webdesignerdepot

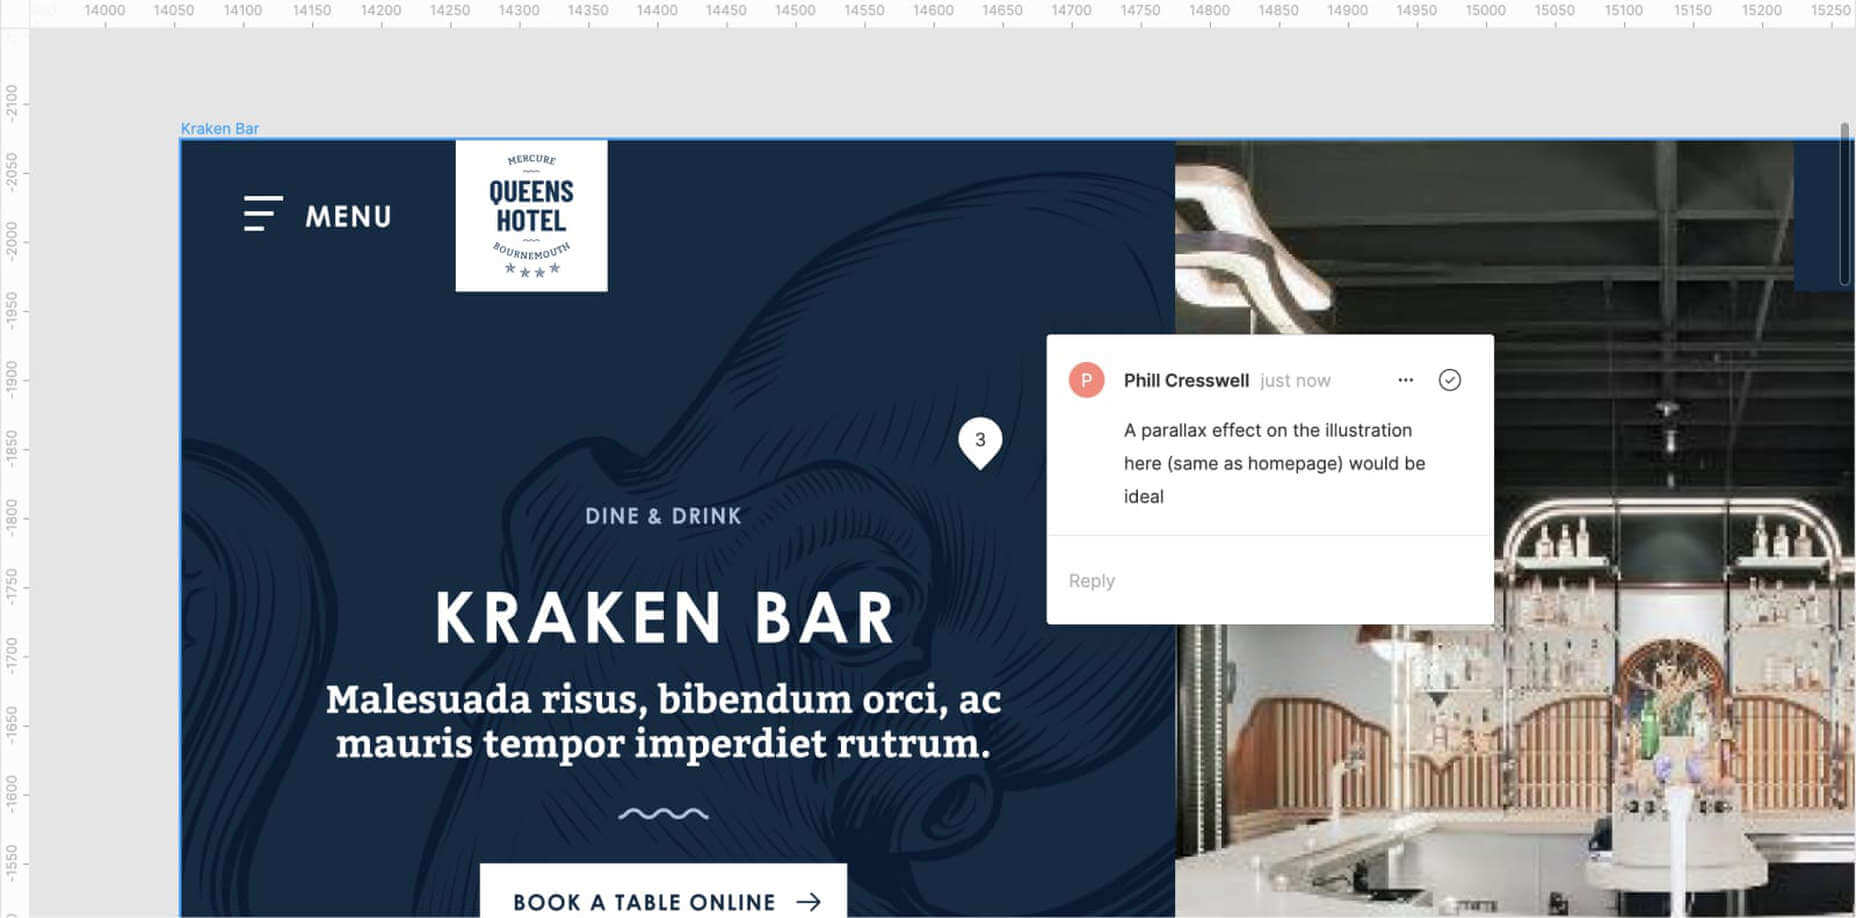
You’ve been working away at your latest design project, and the client has given the go-ahead on your lovingly created digital concepts. Now it’s time to bring those designs to life, and you have a developer queued up to do just that.

So your part’s done, right? Not quite. You’re going to want to make sure your developer has the best head start they can in order to create the site as you imagined.

Below are a few tips to make that handover process a little easier.

Communicate to Make It Great

Get Talking

Scheduling a face-to-face meeting with your developer to talk over your project’s specifics and ambitions will help align your expectations and make the intent behind your concepts more clear. It’s quite likely they’ll even ask questions and request assets you haven’t even thought of yet!

It’s not just a one-and-done thing either, your developer’s going to have questions or requirements that arise as the project progresses. Deciding on a communication channel to allow easy discussion will help you both immensely.

Annotating Your Concepts

Developers might seem like magicians with the way they bring your websites to life, but they’re not clairvoyant! Annotating your concepts where advanced functionality is required reduces ambiguity and makes it more likely that your cool, quirky idea is going to make it to production. If it’s a feature that’s particularly unusual, you might want to find an example of a website or code sandbox that does something similar.

An example of Figma’s comment tool in use to make developer notes.

Figma and Sketch both have comment functionality in order to make annotations a little easier, also allowing multiple parties to comment. If dealing with PDFs, there is also an annotation tool available through Adobe Acrobat.

Specify the Basics

The basis of modern front end development revolves around DRY thinking. Some might argue thinking about code can be pretty dry, but we’re not talking about that – in this case, DRY stands for Don’t Repeat Yourself.  Most developers will tackle a project by starting with defining variables: what colors, font sizes, grid columns… anything that can be reused! Good, consistent design follows this same principle – although it’s a habit that can be hard to get going at first.

Tip: It’s always easier to define variables if this mentality is approached towards the start of the project!  

Colors

Make a style guide that specifies the colors you’ve used in your designs. Think about their logical applications to help signpost how they might work as a variable – for example, what colors did you use for paragraph text, hyperlinks and backgrounds? Did you consider colors to convey status messaging, such as successes, warnings and errors?

Typefaces

Which fonts have you used for your project? Is there a consistent set of font sizes you used throughout? If you haven’t already, maybe consider a ratio-based type scale – I like to use ModularScale to help with this.

Basic HTML Elements

Think about general styling for these basic html tags:

  • Paragraphs <p>
  • Headings <h1–h6>
  • Bullet lists <ul> and numbered lists <ol>
  • Emphasized text <b>, <strong> and <em>

Buttons

How about buttons and links? What should they do when they’re hovered over, focused (using the tab key on a keyboard) or disabled?

Forms Fields and Inputs

What should form fields look like? Is there any validation checking that should occur when a form is submitted?  How about checkboxes and radio buttons?

It’s unlikely that you’re going to be able to cover absolutely every single eventuality – allow your developer to use some common sense to fill in the gaps, and be available to them if they have any questions. In the words of John Maxwell and your aunt’s home office wall sticker, teamwork makes the dream work.

Get Your Favic-on

Favicons are widely recognized as the small icon that appears to the left of the site title on your browser’s tab bar. Nowadays, the application of your site’s favicon is much further reaching, showing up in Google search results and app tiles. There’s also extra theming options available, such as the ability to customize the color of Google Chrome Android’s browser bar color for your site.

Using a generator site such as realfavicongenerator takes the pain out of much of this decision-making, allowing you to upload specific graphics as desired, creating silhouettes of your icon for Windows Metro tiles and macOS Safari pins, and packaging everything into easy-to-use files and code.

 Compress Your Images

Nobody wants to load a 20MB image when they’re on a slow connection or a data plan – it pays dividends to plan ahead and downsize your images so that they’re production-ready for the web. If you’re worried image compression is going to harm your image quality, fear not – you can go a long way with image compression before quality is seriously compromised.

  1. Start by reducing the image resolution – for batch jobs, I use Adobe Photoshop’s image processor script to downsize images to fit 1920 x 1200 pixels
  2. Alternatively, if you’re working on a static project – where specific images will be used only in specific places – you could use your design software (nearly all mainstream UI software allows you to do this now) to export your images at 2x size to support devices with high pixel densities.
  3. I also convert my image color profiles to SRGB to ensure consistency across most modern display types (this one’s optional)
  4. I then take my newly downsized images and run them through imageOptim at 80% quality. Generally I would aim to get my images under 300kb – if there are any that are still significantly over this target once compressed, I’d run these through again at 70% quality (I wouldn’t recommend going lower than this, though).

Don’t forget you can also do this for PNGs! Enabling PNGCrush in imageOptim will let you significantly reduce the size of PNGs… just be ready for it to take a while.

Make Your Vectors SVG-Easy to Use

If your design contains graphics or illustrations you created using vector software, it can be used on the web as an SVG file. Usually, these files will be a lot smaller than JPGs or PNGs. You can export graphics in most (if not all) vector software in this format.

Optionally, you could use imageOptim or SVGOMG to compress the SVG code without sacrificing quality. Your developer might already use a script that does this automatically when processing the site for production, so it may be worth asking ahead.

Get Your Licenses in Check

If you’re using premium fonts, make sure you’ve purchased a webfont license so you can hand over the correct files to the developer. I’d recommend doing this sooner rather than later – although not often, occasionally web versions of fonts can have slightly different bounding boxes to their desktop counterparts, making it a real pain for developers to work with further down the line.

If you’ve been using samples of stock photos (or if you’ve been going crazy lifting whatever you can find on Google Images), make sure everything is kosher before you go live. Make sure you purchase licensed photos, and if certain photos you want to use require attribution, make the developer aware of this.

Source

p img {display:inline-block; margin-right:10px;}
.alignleft {float:left;}
p.showcase {clear:both;}
body#browserfriendly p, body#podcast p, div#emailbody p{margin:0;}

Source de l’article sur

The overheated IT labor market, where the number of open positions is larger than the number of eligible candidates, demands different approaches when salary is no longer a key advantage in the battle for real IT professionals. Such popular methods of motivation and remuneration as additional leave time, certificates, and other rewards are not enough anymore. Companies have to come up with creative ways to attract new workers and retain them.

Where should one search for IT specialists?

Source de l’article sur DZone (Agile)

Voici tout ce que vous devez savoir avant de réparer, réinstaller ou mettre à niveau Windows 10, y compris des précisions sur l’activation et les clés produit.
Source de l’article sur ZDNet

Vous avez un nouveau PC (ou pas) fonctionnant sous Windows 10 Familial. Vous voulez passer à Windows 10 Pro. Voici comment obtenir cette mise à niveau gratuitement. Tout ce dont vous avez besoin est une clé produit Pro/Ultimate d’une précédente version de Windows (7, 8 ou 8.1).
Source de l’article sur ZDNet