Articles

Joel Spolsky’s once prolific blogging output dried up years ago, but Things You Should Never Do, Part I is still a classic after 22 years. He wrote it as an outsider’s postmortem following the first beta release (6) of Netscape’s browser, three years after the previous major release 4. There never was a version 5. The team had decided on a full rewrite, and the resulting delay probably cost them their competitive advantage over Microsoft’s Internet Explorer. 

If Netscape actually had some adult supervision with software industry experience, they might not have shot themselves in the foot so badly”, he closes. 

Source de l’article sur DZONE

Dealing with a database is one of the biggest challenges within a software architecture. In addition to choosing one of several options on the market, it is necessary to consider the persistence integrations. The purpose of this article is to show some of these patterns and learn about a new specification proposal, Jakarta Data, which aims to make life easier for developers with Java.

Understanding the Layers That Can Make Up Software

Whenever we talk about complexity in a corporate system, we focus on the ancient Roman military strategy: divide and conquer or divide et impera. To simplify the whole, we break it down into small units.

Source de l’article sur DZONE


WordPress is by far the world’s most popular CMS. Not only does it dominate the CMS market with a 64% market share, but it also powers 39.6% of all websites. It has taken the internet by storm by democratizing the web for all. Now, anyone can build, manage, and host a successful website without needing a college degree or coding expertise.

However, while WordPress is great at managing many technical aspects, it still can’t do everything for you. Built mostly on PHP, there are often concerns regarding how performant WordPress is. And, with performance impacting everything from bounce rates to SEO rankings to conversions, it’s something that should be on your radar too.

If you don’t know it yet, images are one of the main causes of slow-loading websites. In recent years, WordPress has stepped up its efforts to try and help users with image optimization out-of-the-box.

Still, as we’ll show, it’s not a total solution, and there is still plenty you can do to deliver better experiences on your WordPress website through image optimization.

What is WordPress Image Optimization? Why is it Important?

Simply put, image optimization is anything you do to make images load faster on your website pages. Almost all websites that use images can benefit from some form of image optimization, even those using WordPress.

Why?

Well, performance is a hugely significant factor when it comes to the competitiveness of your website today.

Google has also made performance an increasingly important factor when it comes to SEO rankings. In fact, performance is a direct ranking signal that carries significant weight.

Google’s Page Experience Update that went live in 2021 has been the biggest move in that direction yet. Soon, Google might even use visual indicators in SERP results to distinguish high-performing websites from the rest.

In Google’s own words, “These signals measure how users perceive the experience of interacting with a web page and contribute to our ongoing work to ensure people get the most helpful and enjoyable experiences from the web.”

So, Why Should We Target Images For Performance Optimization?

According to Google, images are the largest contributor to page weight. Google has also singled out image optimization specifically as the factor with the most untapped potential for performance optimization.

This problem isn’t going away soon. According to data by the HTTP Archive, there are roughly 967.5 KB bytes of image data on desktop web pages and 866.3 KB of image data on mobile pages. This is an increase of 16.1% and 38.8%, respectively, over the last five years.

Thanks to popular e-commerce tools like Woocommerce, it’s estimated that up to 28% of all online sales happen on WordPress websites.

And don’t forget, images are both a key part of conveying information to the user and integral to the design of your website. If they take significantly longer to load than your text, for example, it will negatively impact the user experience in a variety of ways.

In summary, optimized images help your WordPress website by:

  • Improving user satisfaction.
  • Improving various traffic metrics, like bounce rates, time-on-page, etc.
  • Boosting your SEO rankings.
  • Contributing to higher conversions (and sales).

How Does Image Optimization in WordPress Work?

WordPress is so popular because it’s a CMS (content management system) that allows anyone to build, design, and manage a website without any coding or advanced technical experience. Advanced features can be installed with just a few clicks, thanks to plugins, and you rarely have to touch the code behind your website unless you want to make some unique modifications.

In short, using a CMS like WordPress shields you from many of the day-to-day technicalities of running a website.

WordPress Image Optimization: What It Can Do

As we mentioned, one of the main reasons WordPress is so popular is because it takes care of many of the technical aspects of running a website. With that in mind, many think that WordPress should also automatically take care of image optimization without them having to get involved at all.

Unfortunately, that’s not really the case.

True, WordPress does offer some built-in image optimization. Whenever you upload an image to WordPress, it currently compresses the quality to about 82% of the original (since v4.5).

In v4.4, WordPress also introduced responsive image syntax using the srcset attribute. This creates four breakpoints for each image you upload according to the default WordPress image sizes:

  • 150px square for thumbnails
  • 300px width for medium images
  • 768px max-width for medium_large images
  • 1024px max-width for large images.

Here you can see an example of the actual responsive syntax code generated by WordPress:

<img loading="lazy" src="https://bleedingcosmos.com/wp-content/uploads/2021/12/33-1024x683.jpg" alt="" class="wp-image-9" width="610" height="406" srcset="https://bleedingcosmos.com/wp-content/uploads/2021/12/33-1024x683.jpg 1024w, https://bleedingcosmos.com/wp-content/uploads/2021/12/33-300x200.jpg 300w, https://bleedingcosmos.com/wp-content/uploads/2021/12/33-768x512.jpg 768w, https://bleedingcosmos.com/wp-content/uploads/2021/12/33-1536x1024.jpg 1536w" sizes="(max-width: 610px) 100vw, 610px">

Depending on the screen size of the device from which a user visits your webpage, WordPress will let the browser pick the most appropriately sized image. For example, the smallest version for mobile displays or the largest for 4K Retina screens, like those of a Mac.

While this may seem impressive, it’s only a fraction of what can be achieved using a proper image optimization solution, as we’ll show later.

Lastly, WordPress implemented HTML native default lazy loading for all images starting with version 5.5.

So, in short, WordPress offers the following image optimization capabilities baked-in:

  • Quality compression (limited)
  • Responsive syntax (up to 4 breakpoints)
  • Lazy loading

WordPress Image Optimization: What it Cannot Do

There are other issues many have with both the implementation of image compression and responsive syntax as it’s used by WordPress. This leads to some users even purposefully deactivating WordPress’ built-in image optimization so they can fully take control of it themselves.

Here are some of the reasons why:

  • WordPress uses a very basic form of quality compression. It does not use advanced technologies like AI and machine learning algorithms to compress images while maintaining maximum visual quality. It’s also lossy compression, so the quality is lost for good. You can clearly see the difference between an original HD image and the compressed version created by WordPress.
  • WordPress only compresses most images by up to 20%, while advanced image optimization tools can reduce all image sizes intelligently by up to 80%.
  • Responsive syntax can provide significant performance improvements over simply uploading a single HD image to be served on all devices and screens. However, it’s still only limited to a set number of breakpoints (typically 3 or 4). Since it’s not dynamic, a whole spectrum of possible image sizes is not created or used.
  • Responsive syntax code is not scalable and can quickly lead to code that’s bloated, messy, and hard to read.
  • WordPress doesn’t accelerate image delivery by automatically caching and serving them via a global CDN, although this can be done using other tools.

Another important optimization feature that WordPress does not have is auto-conversion to next-gen image file formats. Different image formats offer different performance benefits on different devices. Some formats also enable higher levels of compression while maintaining visual fidelity.

Next-gen formats like WebP, AVIF, and JPEG-2000 are considered to be the most optimal formats on compatible devices. For example, until recently, WebP would be the optimal choice on Chrome browsers, while JPEG-4000 would be optimal on Safari browsers.

However, WordPress will simply serve images in the same formats in which they were originally uploaded to all visitors.

How to Measure the Image Performance of a WordPress Website?

As the undisputed king of search engines, we’ll base most of our performance metrics on guidelines established by Google.

Along with its various performance updates, Google has released a number of guidelines for developers as well as the tools to test and improve their websites according to said guidelines.

Google introduced Core Web Vitals as the primary metrics for measuring a web page’s performance and its effect on the user experience. Thus, Core Web Vitals are referred to as “user-centric performance metrics.” They are an attempt to give developers a testable and quantifiable way to measure an elusive and abstract concept such as “user experience.”

Combined with a number of other factors, Core Web Vitals constitute a major part of the overall page experience signal:

You can find a complete introduction to Core Web Vitals here. However, they currently consist of three main metrics:

  • LCP (Largest Contentful Paint): The time it takes the largest above-the-fold element on your page to load. This is typically a full-sized image or hero section.
  • FID (First Input Delay): The delay from the moment a user first interacts with an element on the page until it becomes responsive.
  • CLS (Cumulative Layout Shift): The visual stability with which the elements on a page load.

Here is an illustration of how these metrics are scored:

While these are the three most important metrics to optimize, they are not the only ones. Google still measures other metrics like the FCP (First Contentful Paint), SI (Speed Index), as well as the TTFB (Time to First Byte), TBT (Total Blocking Time), and TTI (Time to Interactive).

A number of these metrics are directly affected by the images used on your web pages. For example, LCP, FCP, and SI are direct indicators of how fast the content of your web page loads and depends on the overall byte size of the page. However, it can also indirectly affect FID by keeping the main thread busy with rendering large amounts of image content or the perceived CLS by delaying the time it takes large images to load.

These metrics apply to all websites, whether they are custom-made or built using a CMS like WordPress.

When using tools like Lighthouse or PageSpeed Insights, you’ll also get scored based on other flags Google deems important. Some of them are specific to images, such as properly sizing images and serving images in next-gen formats.

If you only use built-in WordPress image optimization, you’ll get flagged for the following opportunities for improvement:

Some of the audits it will pass, however, are deferring offscreen images (lazy loading) and efficiently coding images (due to compression):

A Better Way to Optimize WordPress Images: ImageEngine

Billions of websites are all vying for prime real estate on Google SERPs, as well as the attention of an increasingly fussy internet-using public. Every inch matters when it comes to giving your website a competitive advantage.

So, how can you eliminate those remaining performance flags and deliver highly optimized images that will keep both your visitors and Google happy?

Sure, you could manually optimize images using software like PhotoShop or GIMP. However, that will take you hours for each new batch of images. Plus, you still won’t benefit from any automated adaptive optimization.

A more reasonable solution in today’s fast-paced climate is to use a tool developed specifically for maximum image optimization: an image CDN like ImageEngine.

ImageEngine is an automated, cloud-based image optimization service using device detection as well as intelligent image compression using the power of AI and machine learning. It can reduce image payloads by up to 80% while maintaining visual quality and accelerating delivery around the world thanks to its CDN with geographically dispersed PoPs.

Why is ImageEngine Image Optimization Better Than WordPress?

When making a head-to-head comparison, here are the reasons why ImageEngine can deliver better performance:

  • Device Detection: ImageEngine features built-in device detection. This means it picks up what device a visitor to your website is using and tailors its optimization strategy to what’s best for that specific device.
  • Client hints: By supporting client hints, ImageEngine has access to even more information regarding the device and browser to make better optimization decisions.
  • Next-gen formats: Based on optimal settings, ImageEngine automatically converts and serves images in next-gen formats like WebP, AVIF, JPEG2000, and MP4 (for GIFs).
  • Save data header: When a Chrome user has save-data mode enabled, ImageEngine will automatically compress images more aggressively to save on data transfer.
  • CDN with dedicated edge servers: ImageEngine will automatically cache and serve your optimized image assets using its global CDN. Each edge server has device awareness built-in to bring down latency and accelerate delivery. You can also choose to prioritize specific regions.

So, the key differentiator is that ImageEngine can tailor optimizing images for what’s optimal for each of your visitors. ImageEngine is particularly good at serving mobile visitors thanks to WURFL device detection, which can dynamically resize images according to most devices and screen sizes in use today. As of now, this is a completely unique capability that none of its competitors offer.

It allows for far better and more fine-tuned optimization than WordPress’ across-the-board approach to compression and responsive syntax.

If you want, you could turn off WordPress responsive syntax and compression, and you would still experience a performance increase using ImageEngine. However, ImageEngine also plays nice with responsive syntax, so it’s not completely necessary unless you want to serve the highest-fidelity/low-byte-size images possible.

How Does ImageEngine Work with WordPress?

The process ImageEngine uses to integrate with WordPress can be broken down into a few easy steps:

  • Sign up for an ImageEngine account: ImageEngine offers three pricing plans depending on the scale and features you need as well as a no-commitment 30-day free trial.
  • Specify your image origin: This tells ImageEngine where to find the original versions of your images. For a WordPress website, you can just use your domain, e.g., https://mywordpresswebsite.com. ImageEngine will then automatically pull the images you’ve uploaded to your WordPress website.

  • Copy the Delivery Address: After you create an account and specify your image origin, ImageEngine will provide you with a Delivery Address. A Delivery Address is your own unique address that will be used in your <img> tags to point back to the ImageEngine service. Delivery Addresses may be on a shared domain (imgeng.in) or customized using a domain that you own. A Delivery Address typically looks something like {random_string}.cdn.imgeng.in. If your images are uploaded to the default WordPress folder /wp-content/uploads/, you can access your optimized images from ImageEngine simply by changing your website domain. For example, by typing {imageengine_domain}.cdn.imgeng.in/wp-content/uploads/myimage.jpg into your browser, you’ll see the optimized version of that image. Just press the copy button next to the Delivery Address and use it in the next step configuring the plugin.

  • Install the ImageEngine Optimizer CDN plugin: The plugin is completely free and can be installed just like any other plugin from the WordPress repository.
  • Configure and enable ImageEngine Plugin in WordPress: Just go to the plugin under “ImageEngine” in the main navigation menu. Then, copy and paste in your ImageEngine “Delivery Address,” tick the “Enabled” checkbox, and click “Save Changes” to enable ImageEngine:

Now, all ImageEngine basically does is replace your WordPress website domain in image URLs with your new ImageEngine Delivery Address. This makes it a simple, lightweight, and non-interfering plugin that works great with most other plugins and themes. It also doesn’t add unnecessary complexity or weight to your WordPress website pages.

ImageEngine vs Built-in WordPress Image Optimization

So, now let’s get down to business by testing the performance improvement you can expect from using ImageEngine to optimize your image assets.

To do this test, we set up a basic WordPress page containing a number of high-quality images. I then used PageSpeed Insights and the Lighthouse Performance Calculator to get the performance scores before and after using ImageEngine.

Importantly, we conducted this test from a mobile-first perspective. Not only has mobile internet traffic surpassed desktop traffic globally, but Google themselves have committed to mobile-first indexing as a result.

Here is a PageSpeed score using the Lighthouse calculator for WordPress with no image optimization:

As we can see, both Core Web Vitals and other important metrics were flagged as “needs improvement.” Specifically, the LCP, FCP, and TBT. In this case, both the LCP and FCP were a high-res featured image at the top of the page.

If we go to the opportunities for improvement highlighted by PageSpeed, we see where the issues come from. We could still save as much as 4.2s of loading time by properly resizing images and a further 2.7s by serving them in next-gen formats:

So, now let’s see how much ImageEngine can improve on that.

The same test run on my WordPress website using ImageEngine got the following results:

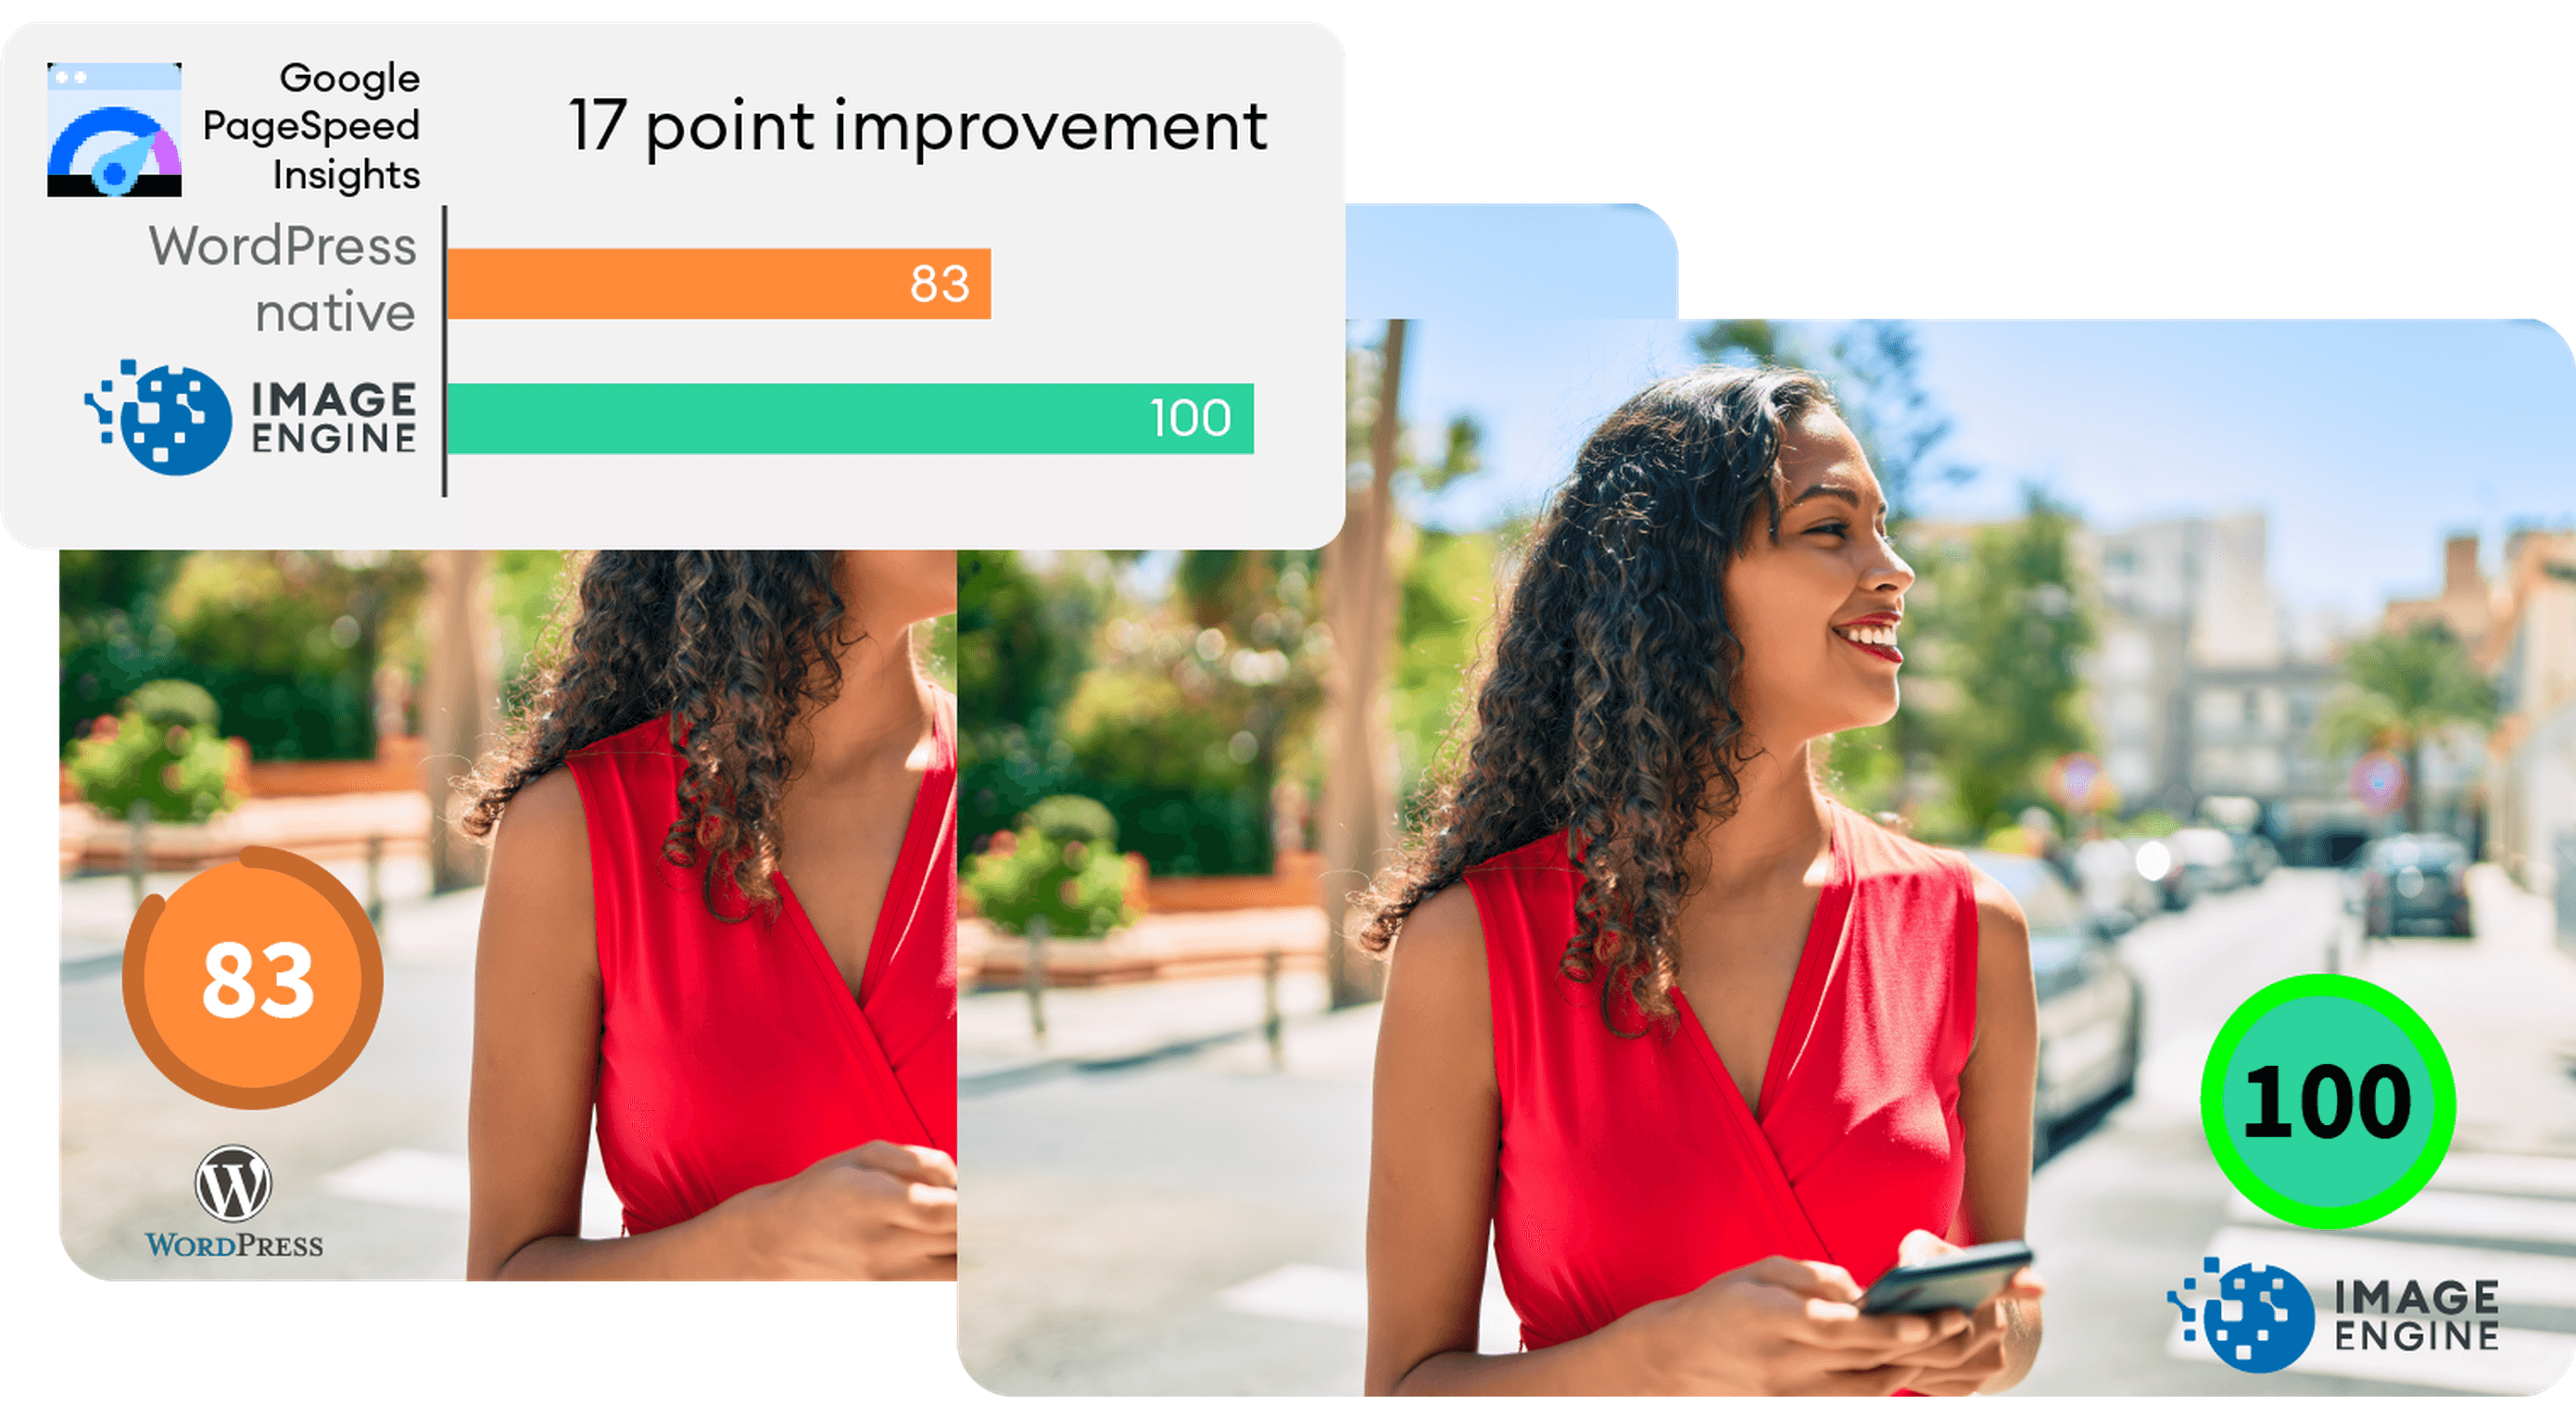
As you can see, we now have a 100 PageSpeed score. I saved roughly 2.5s on the SI (~86%) as well as roughly 1.7s on the LCP (~60%). There was also a slight improvement in the FCP.

Not only will you enjoy a stronger page experience signal from Google, but this represents a tangible difference to visitors regarding the speed with which your website loads. That difference will lead to lower bounce rates, increased user satisfaction, and more conversions.

There was also a 53% overall reduction in the total image payload. This is impressive, considering that it’s on top of WordPress’ built-in compression and responsive syntax.

Conclusion

So, as someone with a WordPress website, what can you take away from this?

Well, first of all, WordPress does feature some basic image optimization. And while not perfect, it should help you offer reasonable levels of performance, even if you use a lot of image content.

However, the caveat is that WordPress applies aggressive, across-the-board compression, which will lead to a noticeable reduction in visual quality. If you use WordPress for any type of website where premium quality images are important, this is a concern — for example, as a photography portfolio, exhibition, or image marketplace like Shutterstock.

By using ImageEngine, you can reduce image payloads and accelerate delivery even further without compromising too harshly on visual quality. What’s more, ImageEngine’s adaptive image optimization technology will provide greater improvements to more of your visitors, regardless of what device(s) they use to browse the web.

Whether or not you still want to use WordPress’ built-in optimizations, ImageEngine will deliver significant improvements to your user experience, traffic metrics, and even conversions.

Plus, true to the spirit of WordPress, it’s extremely simple to set up without any advanced configuration. Just sign up for ImageEngine in 3 easy steps, install the plugin, integrate ImageEngine by copy/pasting your image domain, and you’re good to go.


[ This is a sponsored post on behalf of ImageEngine ]

Source

The post WordPress Website Analysis: Before & After ImageEngine first appeared on Webdesigner Depot.

Source de l’article sur Webdesignerdepot

What stands out as an incredible web design project for you? Do you count your creation as a success if it’s modern, minimal, and accessible? Maybe you’re the kind of designer that’s constantly experimenting with the latest dynamic design tools or state-of-the-art technology. Perhaps your websites are vivid, animated, and brimming with unique components?

Sometimes, creating the ideal design means thinking carefully about what you want to accomplish for your client. The purpose of your web creation has a significant impact on the components that you need to consider. For instance, if you’re hoping for a highly emotive and human design, it may be worth combining some of your sleek lines and graphics with hand-drawn elements. 

The Value of Hand-Drawn Graphics in Web Design

Hand-drawn elements are just like the other components of web design; that way may use to express individuality in a cluttered digital environment. In a world where everyone focuses on futuristic and virtual creations, hand-drawn elements can pull attention back to the importance of humanity in your content. 

As web designers, we know that visual components often impact people more than text-based content. Illustrations are highly engaging functional elements that capture audience attention and convey relevant information. 

The main difference between hand-drawn elements and graphics built with vectors and other digital components is that one appears to be more influenced by the human hand than the other. Even if your illustrations are created on a screen, just like any other web design component, it pushes an audience to see something more straightforward, more natural, and authentic. 

For a brand trying to convey innocence and humanity in its personality, hand-drawn design can speak to the part of the human psyche that’s often unappreciated by web design. Perhaps more than any other visual, the content reminds your audience that there’s a human behind the web page

The Value of Hand-Drawn Features in Web Design

Any image can have a massive impact on the quality of your web design. Visuals deliver complex information in an easy-to-absorb format. In today’s world of fast-paced browsing, where distractions are everywhere, visuals are a method of capturing attention and delivering value fast. 

However, with hand-drawn elements, you go beyond the basic functionality of images to embrace the emotional side of the content. Benefits include:

  • A memorable experience: Web illustrations are becoming more popular among leading brands like Innocent Smoothies and Dropbox. However, the time that goes into these components means that they’re still scarce. If you want to stand out online, illustrations can help you do that. 
  • Brand personality: One of the most significant benefits of hand-drawn web design is showcasing your brand personality. The blocky lines of imperfect content that go into illustrated images highlight the human nature of your company. So many businesses are keen to look “perfect” today to make the human touch much more inviting. 
  • Differentiation: As mentioned above, hand illustrations are still rare in the digital design landscape. If you’re struggling to find a way to make your brand stand out, this could be it. Although there needs to be meaning behind your design, the result could be a more unique brand if you can convey that meaning properly. 

Tips for Using Hand Drawn Elements in Web Design 

Hand-drawn components, just like any other element of visual web design, demand careful strategy. You don’t want to overwhelm your websites with these sketches, or you could end up damaging the user experience in the process. 

As you work on your web designs, pulling hand-drawn elements into the mix, think about how you can use every illustration to accomplish a crucial goal. For instance:

Create Separation

Hand-drawn design components can mix and match with other visual elements on your website. They work perfectly alongside videos and photos and help to highlight critical points. 

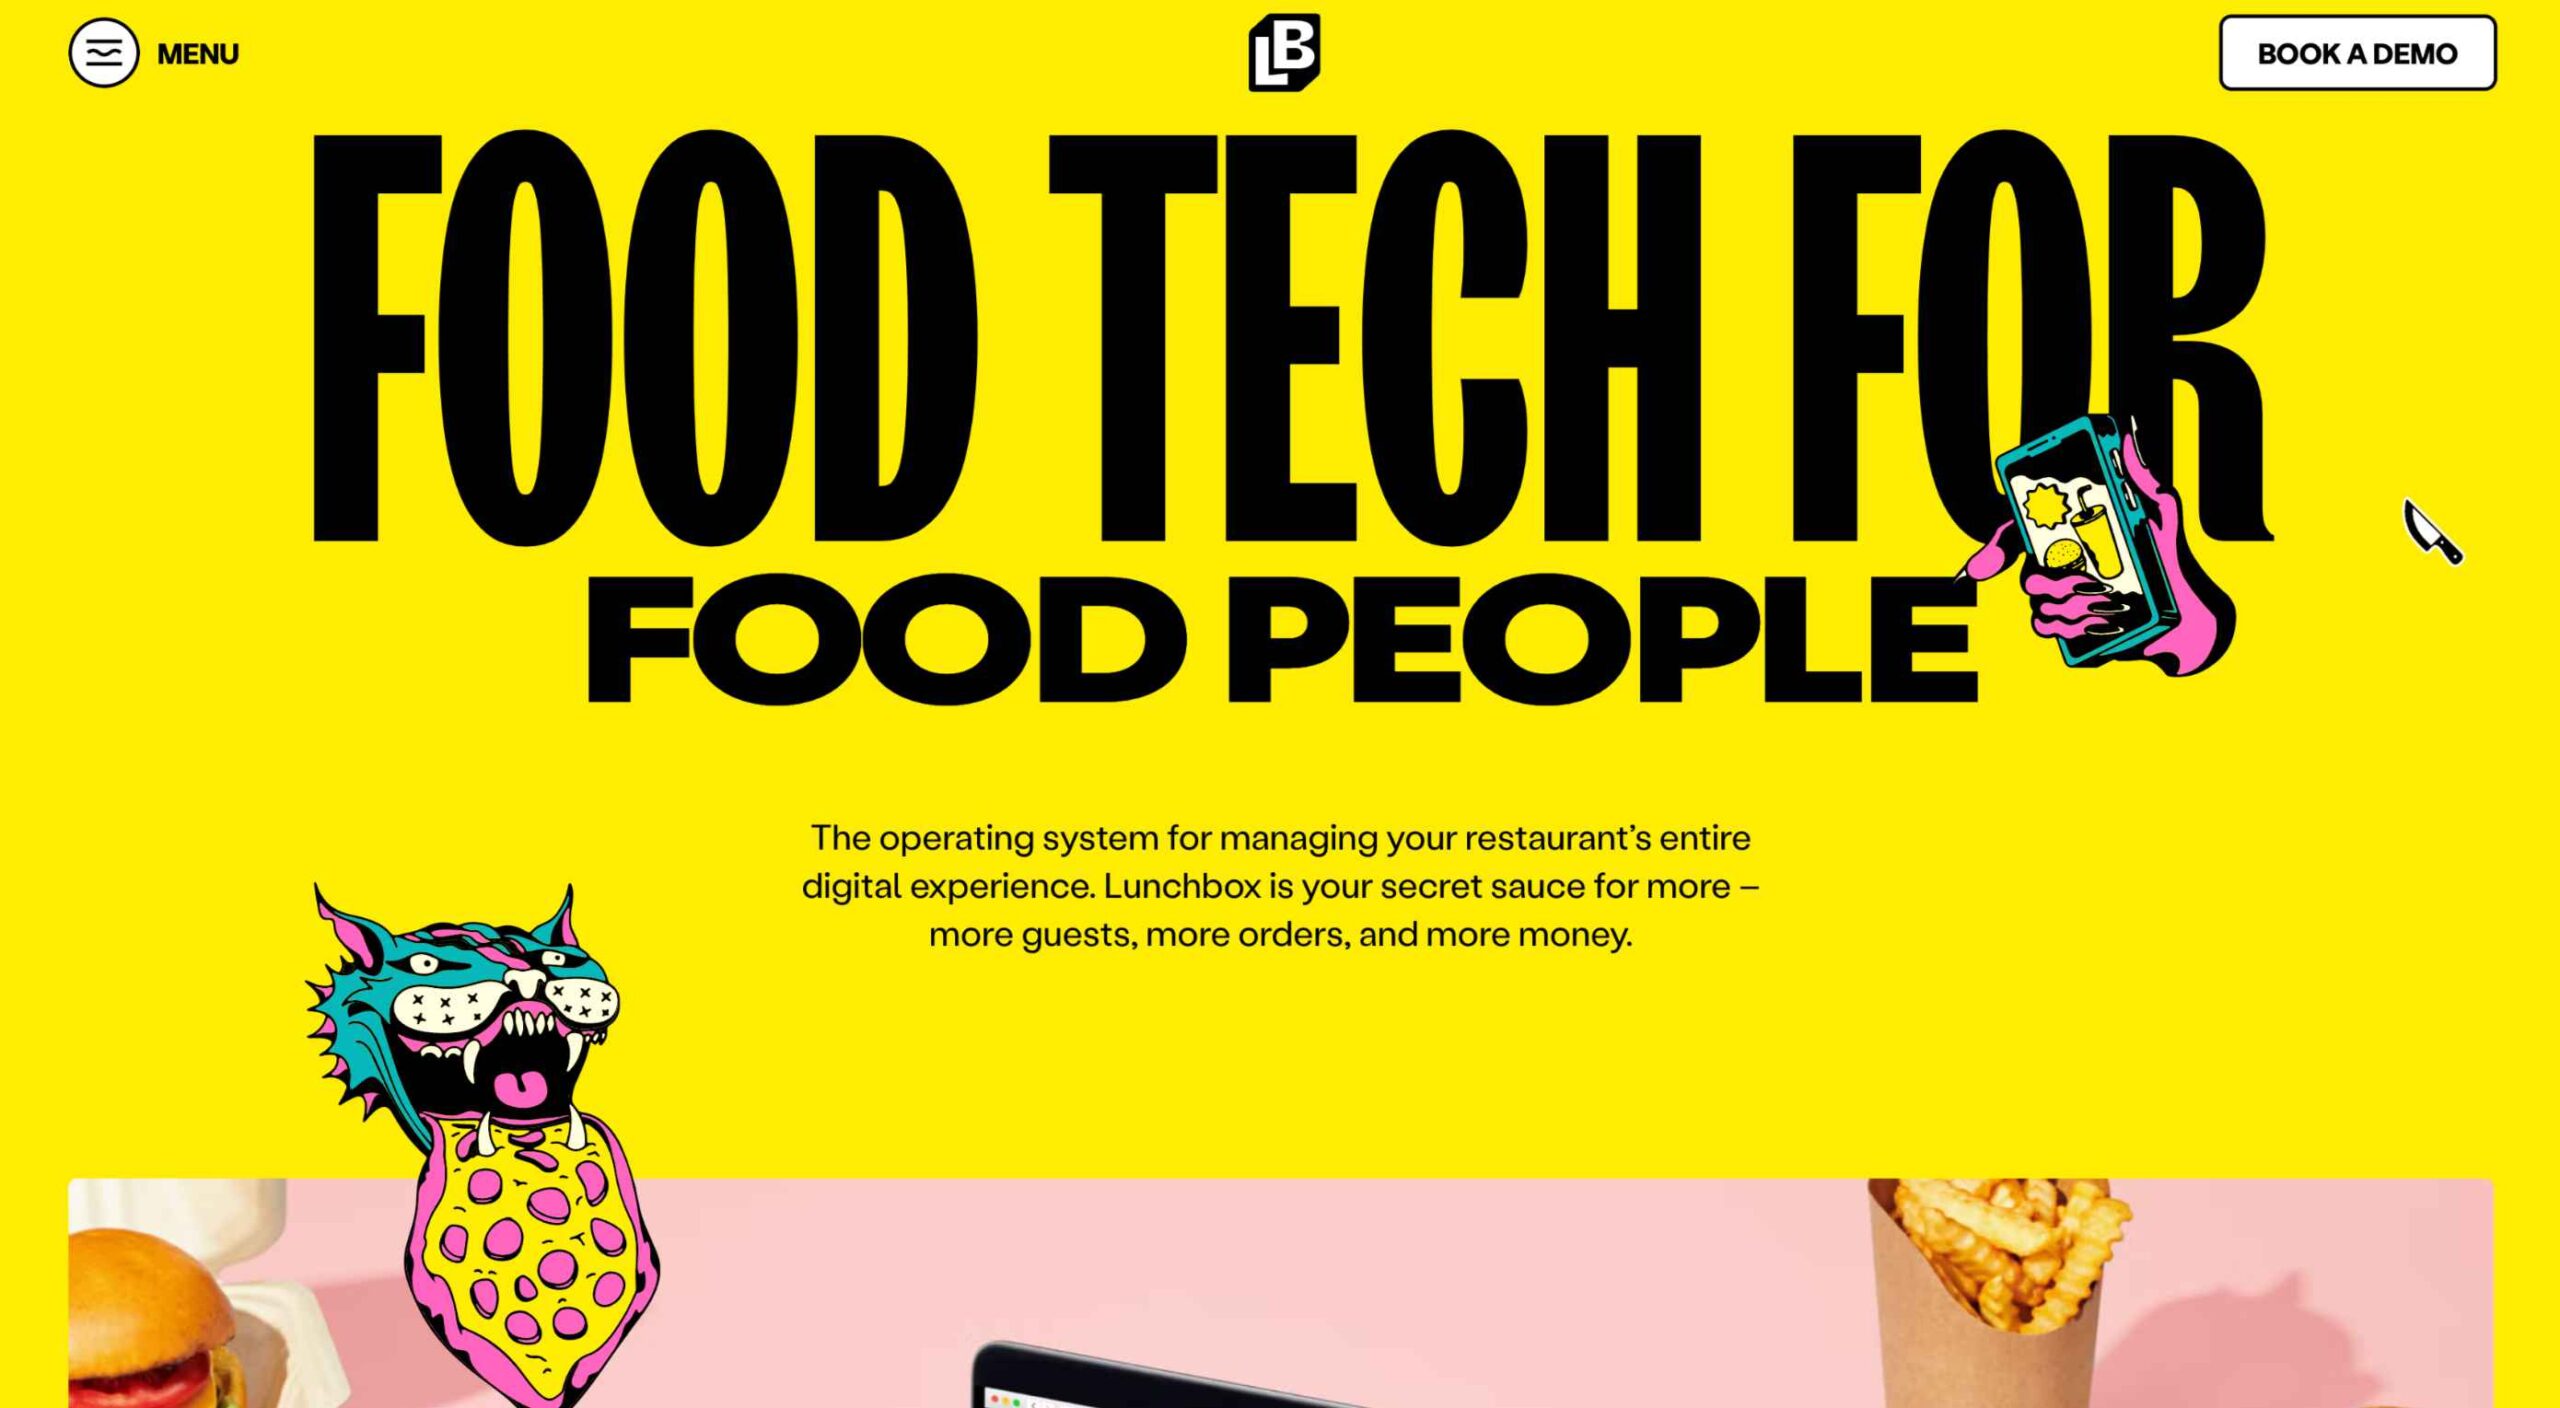
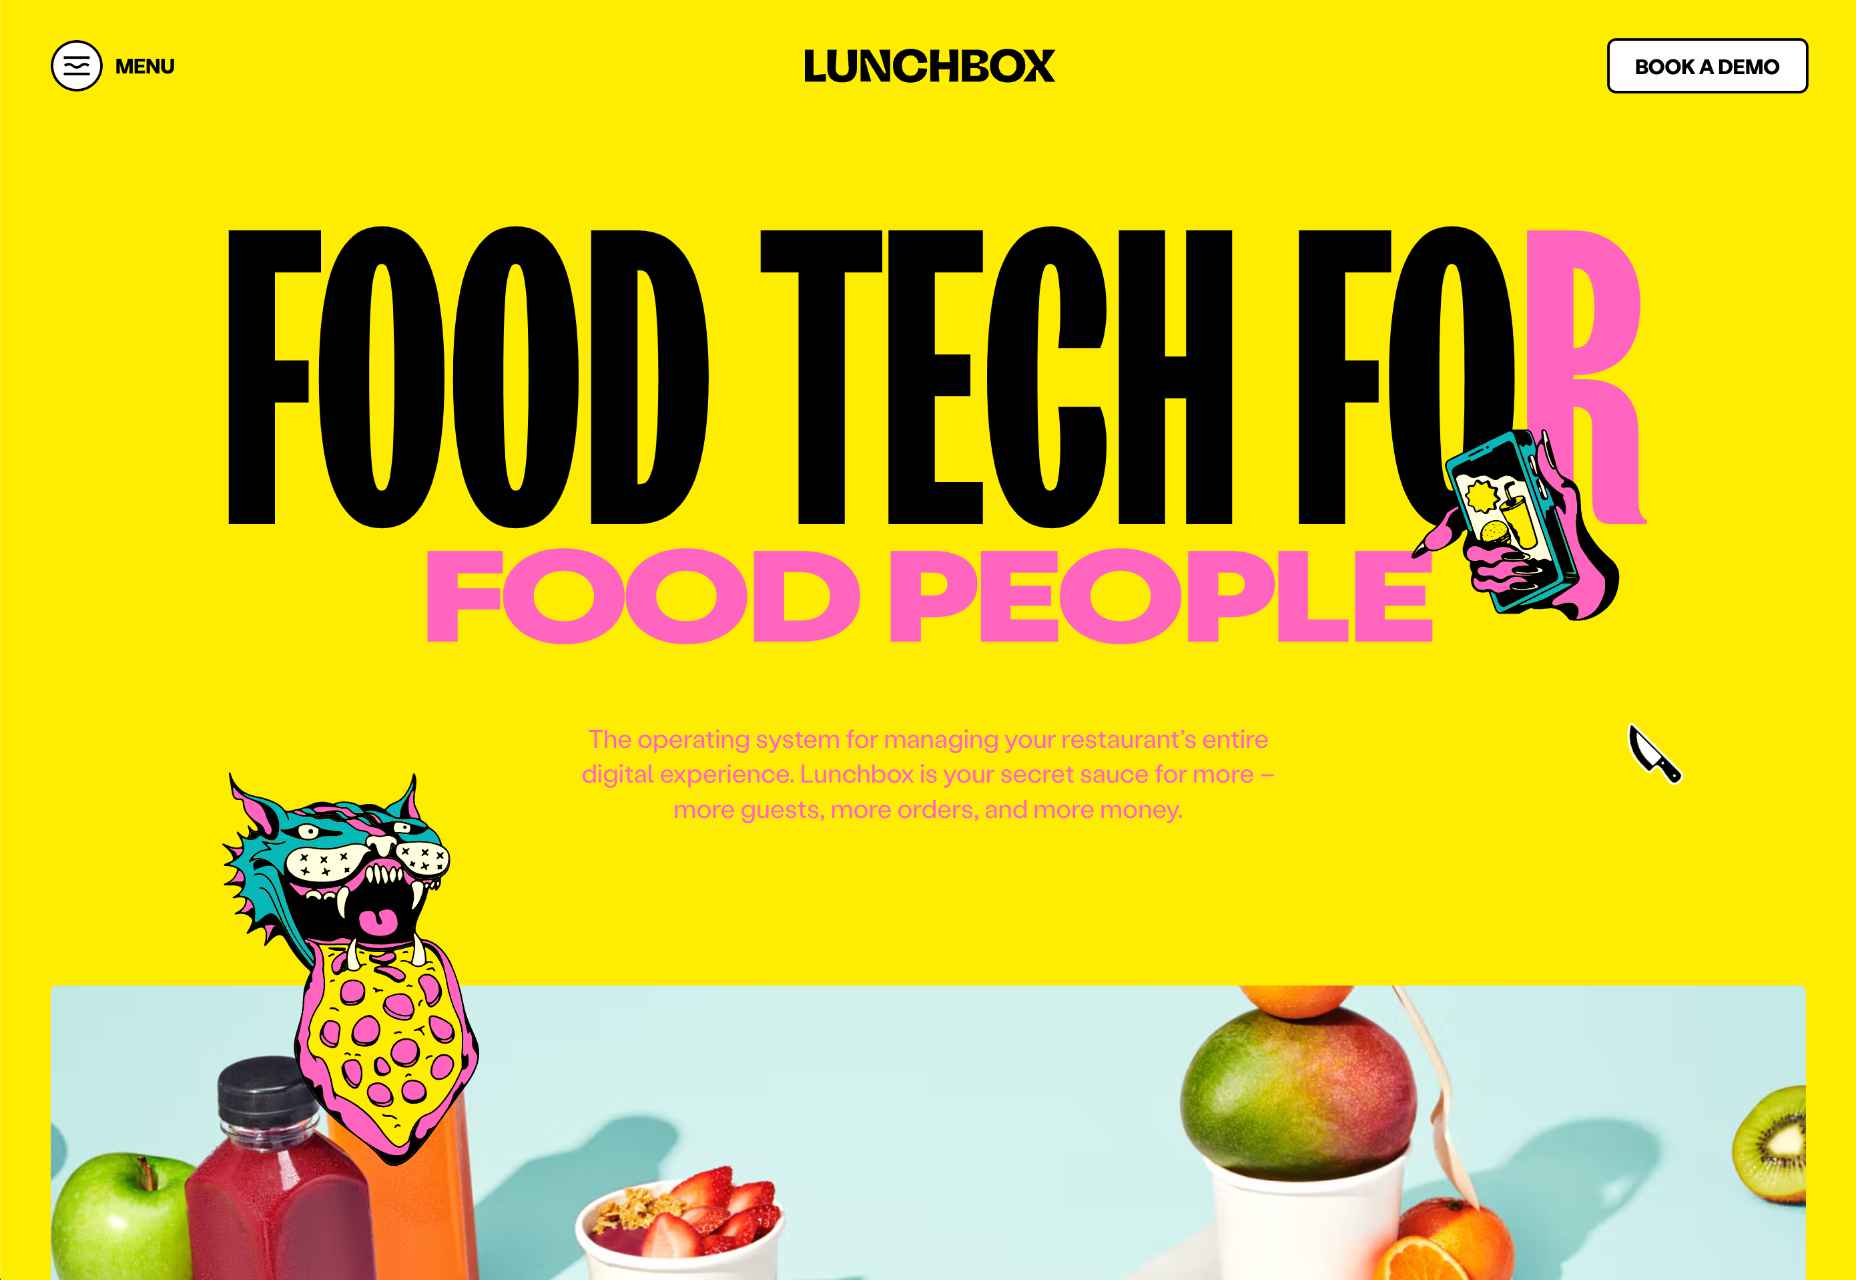
On the Lunchbox website, the company uses hand-drawn elements. This helps make the site stand out, and it provides additional context for customers scanning the website for crucial details.

Engage Your Audience

Sometimes, hand-drawn elements are all about connecting with end-users on a deeper, more emotional level. One of the best ways to do this is to make your hand-drawn elements fun and interactive pieces in the design landscape. 

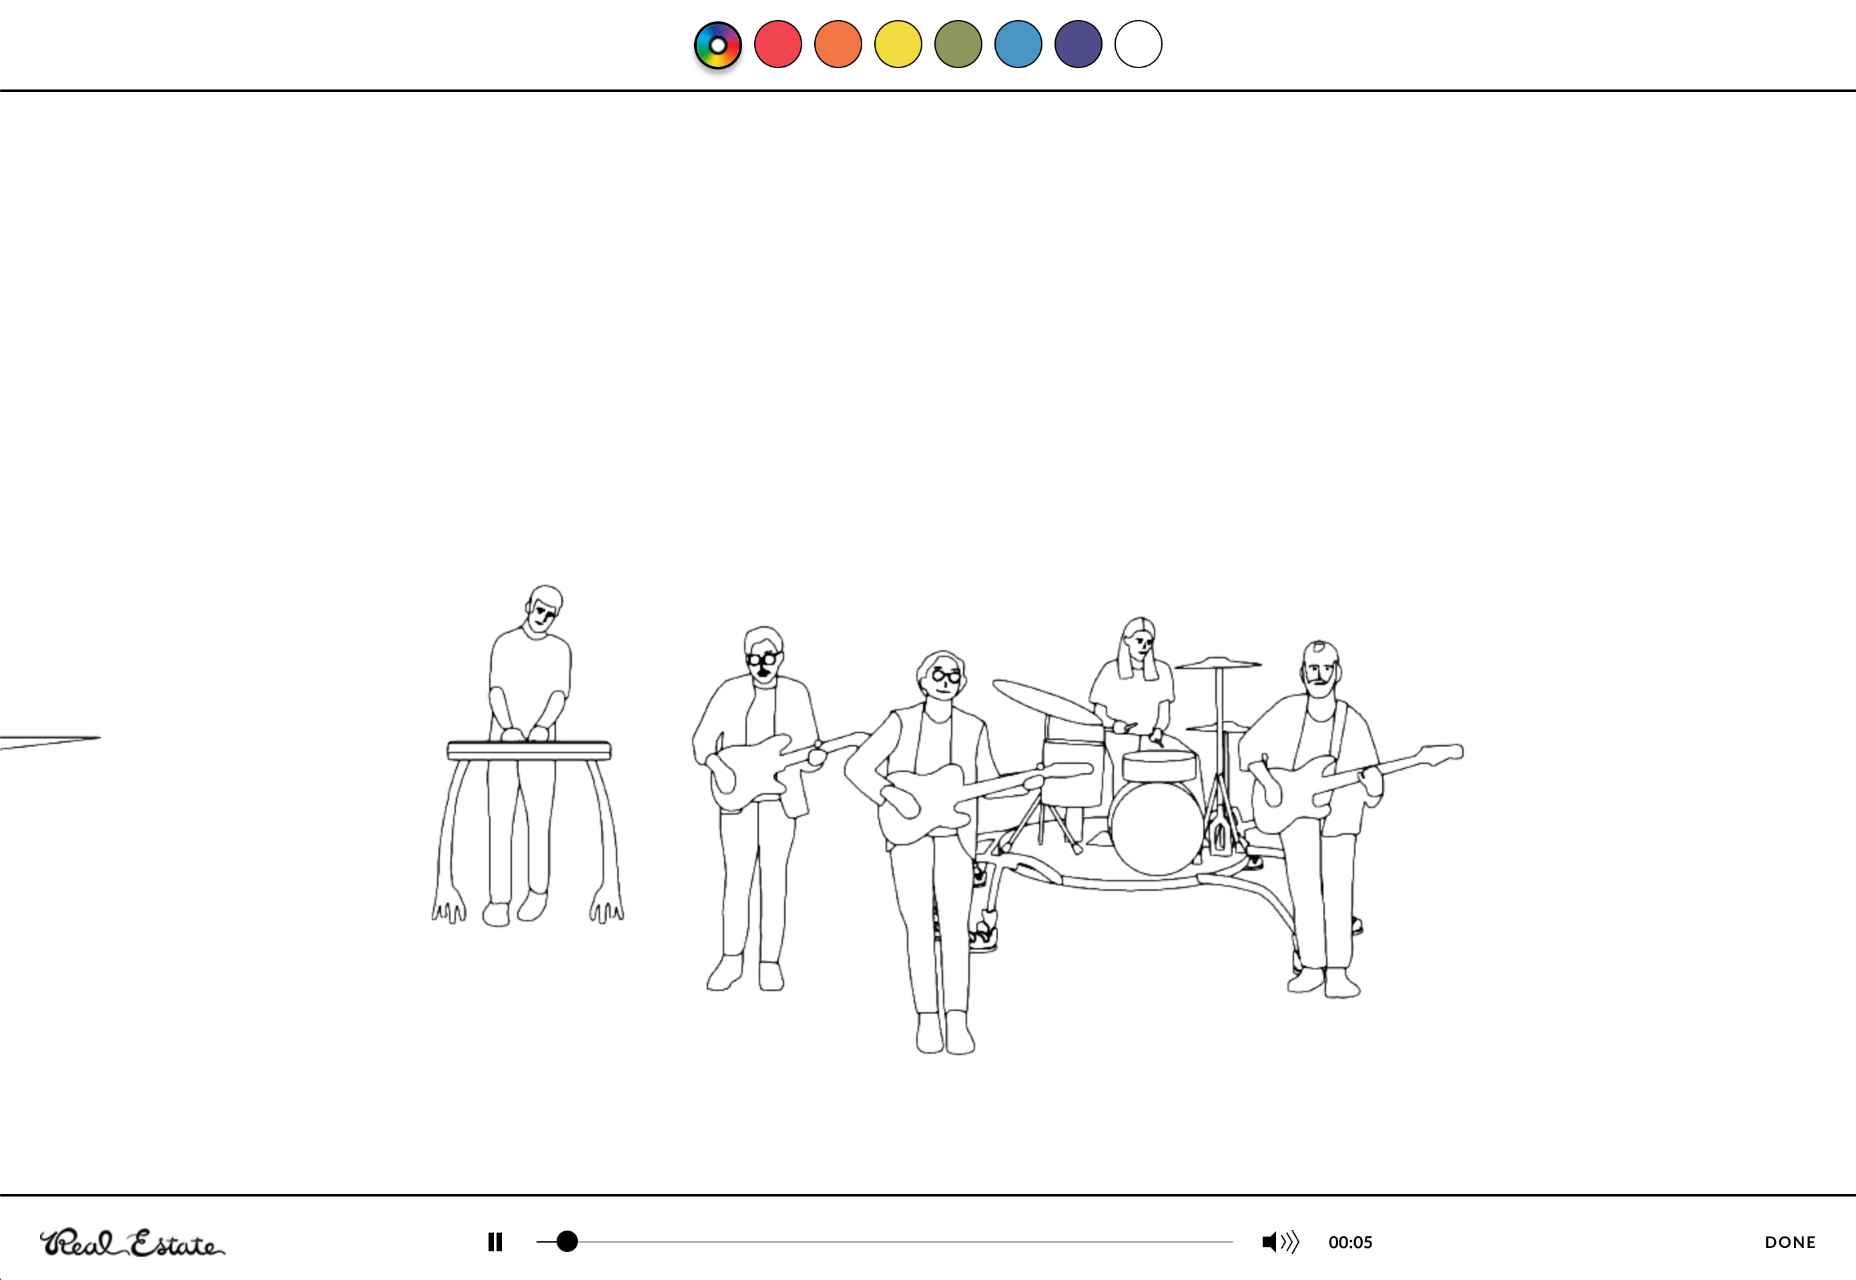
One excellent example of this is in the Stained Glass music video here. This interactive game combines an exciting web design trend with creative interactive components so that users can transform the web experience into something unique to them.

Highlight Headers with Typography

Sometimes, the best hand-drawn elements aren’t full illustrations or images. Hand-drawn or doodle-like typography can also give depth to a brand image and website design. 

Typography styles that mimic natural, genuine handwriting are excellent for capturing the audience’s attention. These captivating components remind the customer of the human being behind the brand while not detracting from the elegance of the website. 

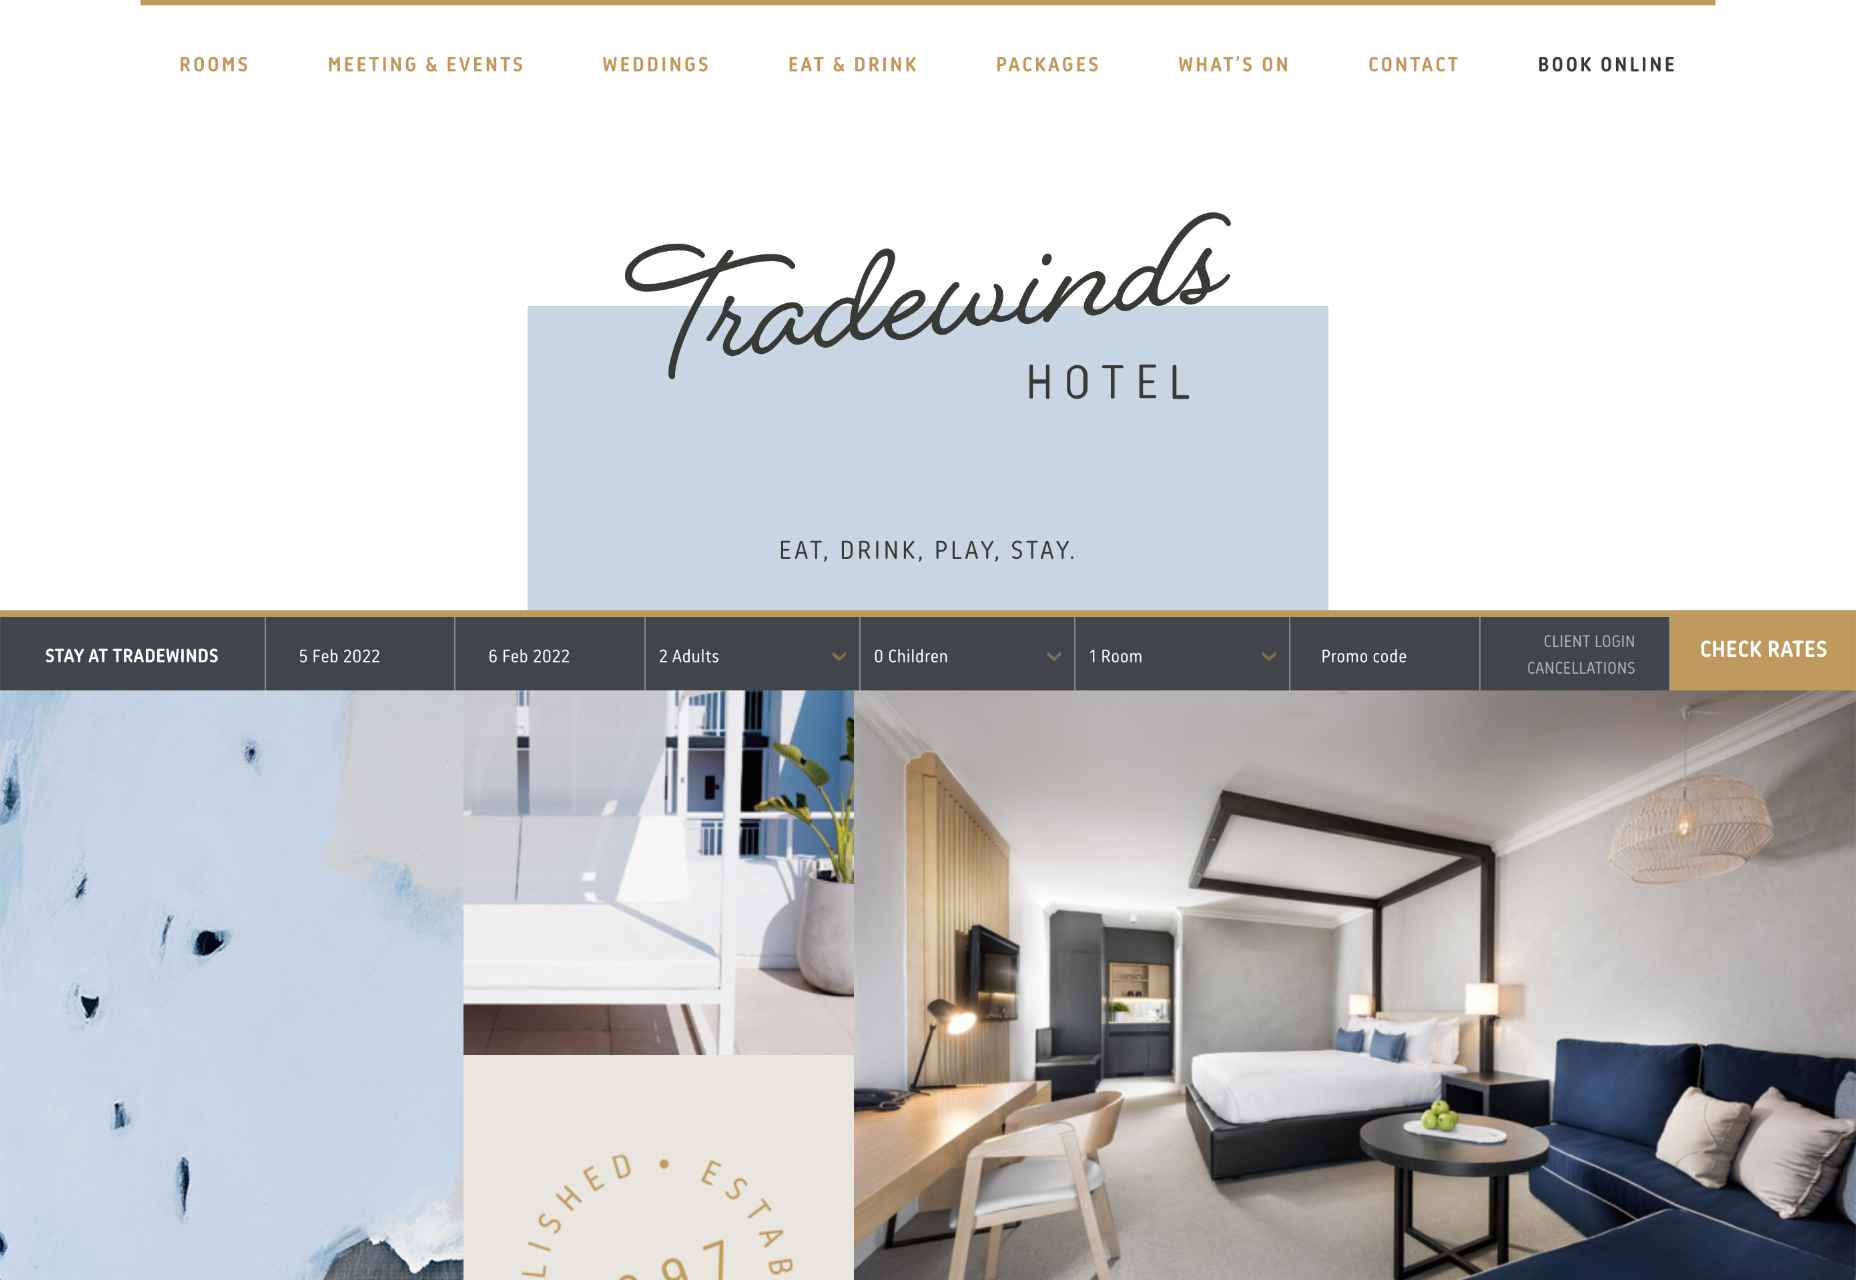
This example of hand-drawn typography from the Tradewinds hotel shows how designers can use script fonts to immediately capture customer attention. Notice that the font is still easy to read from a distance, so it’s not reducing clarity. 

Set the Mood

Depending on the company that you’re designing for, your website creation choices can have a massive impact on the emotional resonance that the brand has with its audience. Hand-drawn elements allow websites to often take on a more playful tone. They can give any project a touch of innocence and friendliness that’s hard to accomplish elsewhere. 

A child-like aesthetic with bright colors and bulky fonts combines with hand-drawn elements on the Le Puzz website. This is an excellent example of how web designers can use hand-drawn elements to convey a mood of creativity and fun.

Animated Elements

Finally, if you want to combine the unique nuances of hand-drawn design with the modern components of what’s possible in the digital world today, why not add some animation. Animated elements combined with illustrations can help to bring a website to life. 

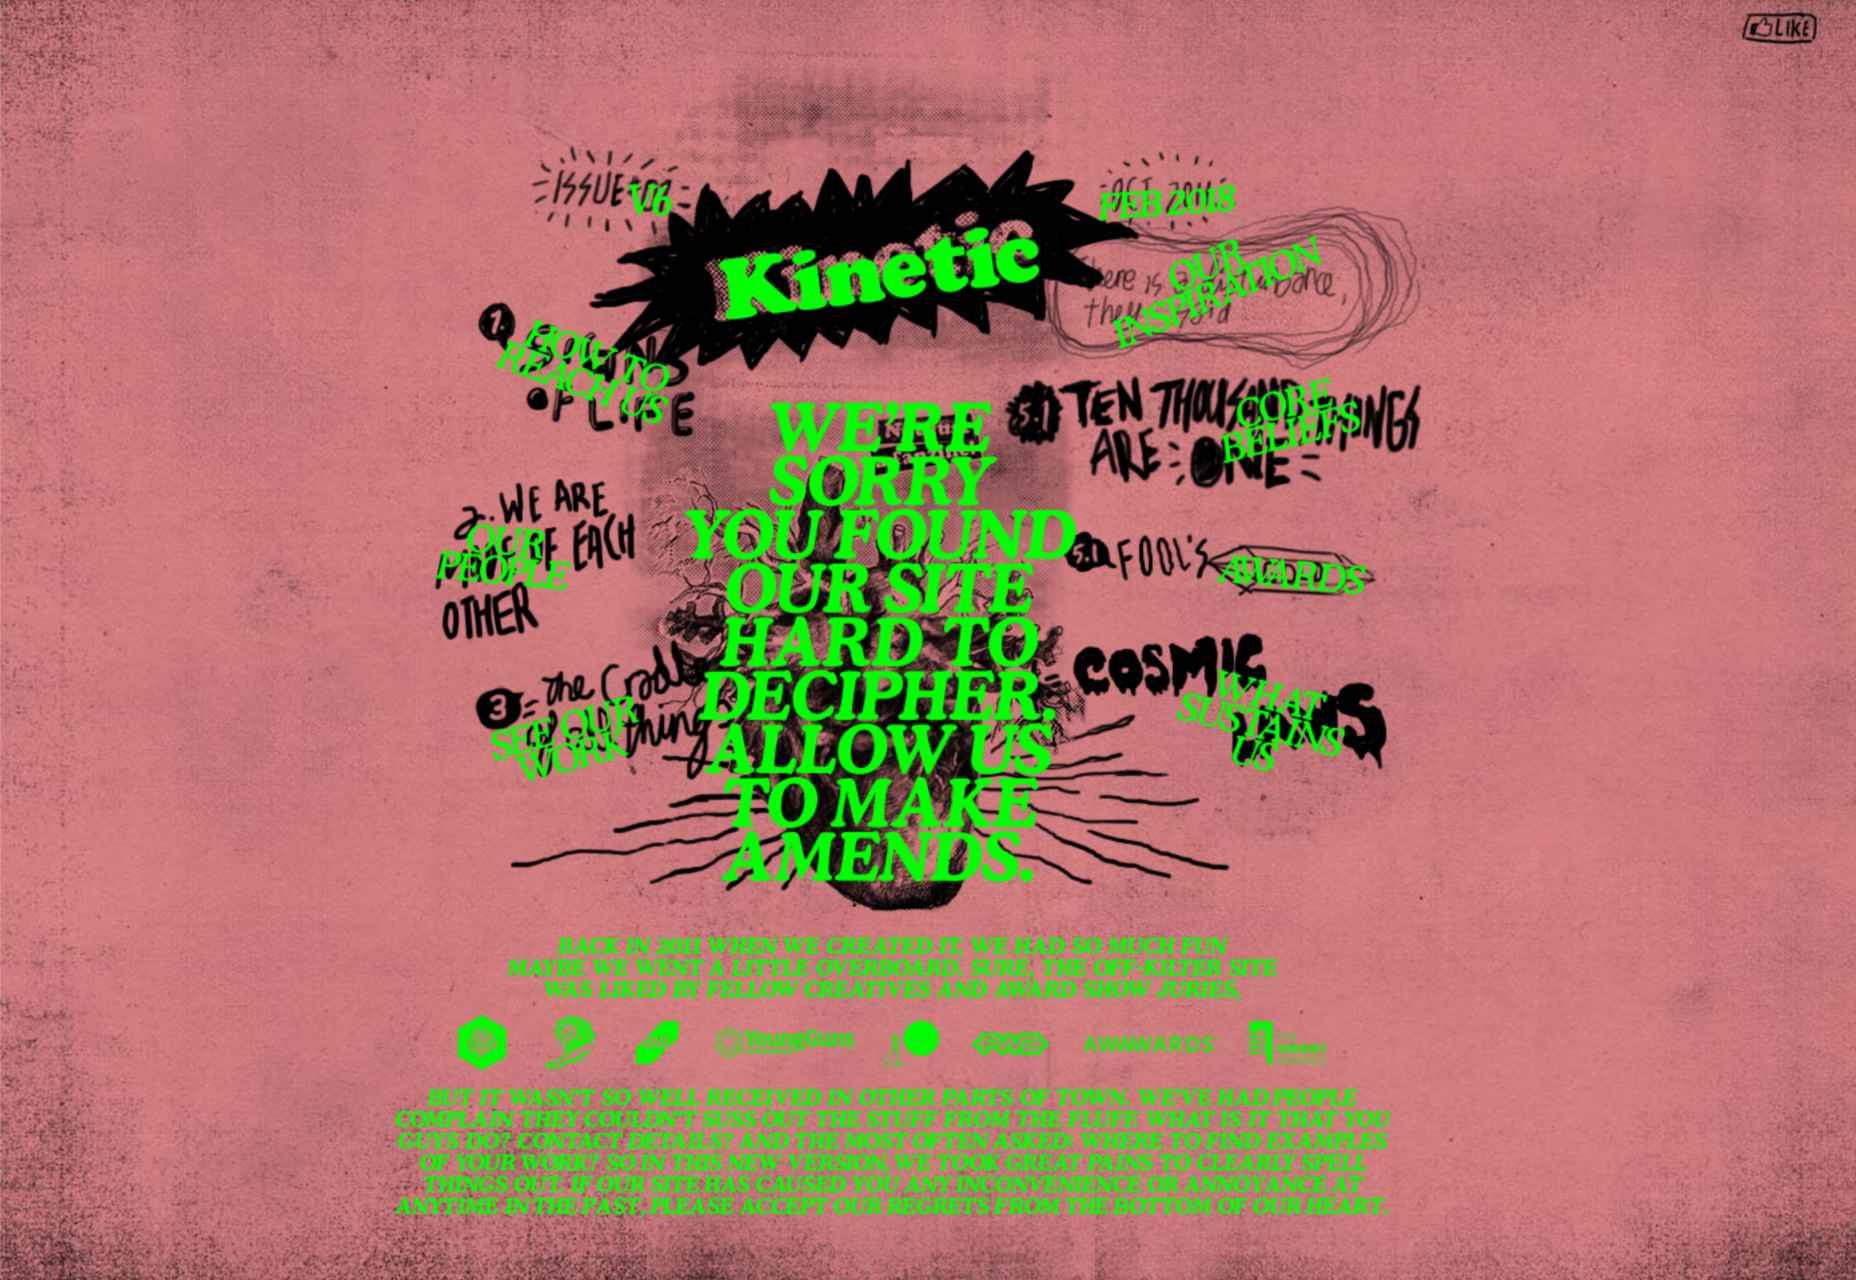
In the Kinetic.com website, the animated illustrated components help to highlight the punk-rock nature of the fanzine. It’s essential to ensure that you don’t go too over-the-top with your animations here. Remember that too many animations can quickly slow down a website and harm user-friendliness.

Finishing Thoughts on Hand-Drawn Elements

Hand-drawn elements have a lot to offer to the web-design world. 

Even if you’re not the best artist yourself, you can still simulate hand-drawn components in your web design by using the right tools and capabilities online. 

Although these features won’t fit well into every environment, they can be perfect for businesses that want to show their human side in today’s highly digitized world. Hand-drawn components, perhaps more than any other web design feature, showcase the innocence and creativity of the artists that often exist behind portfolio pages and startup brands. 

Could you experiment with hand-drawn design in your next project?

Source

The post How to Use Hand-Drawn Elements in Web Design first appeared on Webdesigner Depot.

Source de l’article sur Webdesignerdepot


This is an article from DZone’s 2021 Kubernetes and the Enterprise Trend Report.

For more:

Read the Report

In the modern technology landscape, Kubernetes is a widely adopted platform that enables organizations to deploy and manage applications at scale. The container orchestration platform simplifies infrastructure provisioning for microservice-based applications, which empowers efficient workload management through modularity. Kubernetes supports various deployment resources to help implement CI/CD pipelines using updates and versioning. While Kubernetes offers rolling updates as the default deployment strategy, several use cases require a non-conventional approach to deploying or updating cluster services. 

Source de l’article sur DZONE

Yesterday’s creativity won’t keep pace with tomorrow’s requirements; businesses need speed and agility without sacrificing creative quality.

“The creativity that was needed in the past is not the creativity that is needed today,” according to Matthew Rayback, a creative director at Adobe. He’s not talking about the function of creativity but rather about the process of creative management in a marketing context. 

What is needed today? Speed and agility without sacrificing quality. 

Why? Because the pace of change has accelerated. As Rex Salisbury, a deal partner for the venture firm a16z noted early in the pandemic, “Businesses of all kinds are experiencing two years’ worth of digitization compressed into months.”

This accelerated digital transformation has put pressure on marketing teams to turn campaigns around faster. In turn, that places pressure on creative teams to generate the requisite creative for those campaigns. Leaders need to sharpen their awareness of the unfolding creative management trends to keep pace. To that end, below are five such trends to watch in 2022. 

1. In-House Creative Teams Continue to Grow

Companies have been building in-house creative teams for the better part of a decade. A 2018 study by Forrester Research and the In-House Agency Forum (IHAF) found the number of in-house teams has grown 22% in the last ten years or so. As The Wall Street Journal reported, more than half of advertisers (64%) have shifted their creative organizations to an in-house team.  

According to a more recent version of that same study, the in-housing movement didn’t stop throughout the pandemic. It revealed, “80% of respondents said they have brought more marketing assignments in-house since the onset of the pandemic, with 50% saying the increase was directly triggered by the events of the past two years.”

Businesses seem well-satisfied with the results because the urge to in-house is poised to grow beyond creative teams. For example, a recent survey by the customer intelligence company Axciom found about 50% of respondents believe the “in-housing is currently a top marketing objective, and 40% expect it will remain a top priority in the coming years.”

2. Outside Agencies Hired for Specialized Skills

Despite the in-housing trend, there is still opportunity for agencies, consultants, and freelancers, particularly those with specialized skills. Even the consumer-packaged goods giant Proctor & Gamble, a leading example of brands bringing marketing and creative teams in-house, still needs outside service providers.

Indeed, while in-house creative teams produce the lion’s share of creative work, the vast majority (86%) also continue to partner with agencies and freelancers; according to our own research, published in our 2021 Creative Management Report, which was facilitated by Lytho (formerly inMotionNow) and based on a survey of 400 creatives and marketers. 

When the survey asked creatives why they hire outside resources, the top reason was access to specialized skills (60%). That was followed in a distant second by a need for increased capacity (44%), help with developing strategy (24%), and, lastly, to get work done faster (20%). 

“It is very unusual for an in-house team to have no outside resources that they lean on,” wrote Alex Blum of Blum Consulting Partners, Inc. in a written assessment of the survey results.

He says there are two primary ways to partner with agencies. “First, for overflow capacity. There is always a need for more creative resources, and agencies can offer that flexibility without the cost of maintaining larger teams,” he wrote. “Second, in-house teams can divide areas of ownership with an agency based on the skill sets they have in-house.”

3. The Creative Process Evolves

Marketing today is dominated by an insatiable thirst for fresh content, produced and polished by creative teams. The demand for that content continues to explode. 

What does this portend for creative teams? Despite adding headcount, creative requests exceed the creative team’s capacity to produce it – even as lead times shrink. Matthew Rayback, the creative director at Adobe, suggested the creative process must evolve. 

He likens creatives to an auto factory, where “creatives used to be the assembly line to make a single car.” However, today, creatives are tasked with creating more cars, each with unique adjustments such as personalization. 

“The assembly line we built can’t accommodate that speed or volume,” he says. So the whole factory – the entire creative process – must be overhauled to adapt. 

4. Quantitative Measurement Drives Creative Priorities

Current methods for measuring the value of creative teams center on outputs. That is to say, the metrics tracked tend to quantify the number of creative projects in progress, the rounds of review, and the number of projects completed over time. 

These metrics are important, but alone they are insufficient. A complementary way to prioritize large volumes of creative requests is focusing on those tasks most likely to move the business needle. The barrier to achieving this is that most creatives aren’t kept informed as to the outcomes of marketing campaigns fueled by their creative efforts. This must change.

With the growing demand for content, the margin of error for applying creative resources to projects that don’t correlate to business results shrinks. Marketing organizations must build a feedback loop that brings quantitative results back to the creative team. In turn, creative teams must learn to use the data to drive their work priorities in collaboration with marketing. 

5. Creative Resource Management Becomes Essential

Resource management is both a leadership concept and technology (or a combination of technologies). It’s a means to plan, track, collaborate and measure creative operations, including people, processes, and budgets.  

Traditionally, planning and tracking of all things creative and marketing occurred in a spreadsheet. It works well when the future is generally predictable – yet cliché as it may be to say it – we are living in a state of uncertainty. 

Like many trends over the last 18-24 months, the global pandemic “forced virtual experiences, disrupted marketing channels and campaigns, and accelerated companies’ transition to digital marketing,” according to Forrester. The research firm calls resource management “essential” because it helps move “planning from static spreadsheets to a dynamic and real-time environment.” 

Final Thoughts

Yogi Berra paraphrased an old Danish proverb when he said, “It’s tough to make predictions, especially about the future.” Even so, the pandemic has accelerated trends that were already underway, and these five trends are good examples. More than just watching them, creative and marketing leaders should take steps now to get ahead of them.


Featured image via Pexels.

Source

The post 5 Creative Management Trends to Watch in 2022 first appeared on Webdesigner Depot.

Source de l’article sur Webdesignerdepot
Few things are more important to a web designer or developer’s chances of success than having the proper workflow. The term “workflow” applies to the set of standardized steps you or your company uses to create, test, and deploy designs or products.

Over the years, as development processes have evolved, so too have the workflows experts use to bring their ideas to life. The MVP workflow, or “Minimum Viable Product” strategy, is one of the most popular options in 2022.

Here’s what you need to know about the MVP workflow and how it differs from some of the other standard workflows developers may be used to.

What is the Designer/Developer Workflow?

As mentioned above, the designer/developer workflow is a series of steps used by experts in the web design world to achieve a creative goal. The process includes the steps taken to start a project, evolve it, and finish it. Since software is never developed without tools, the technology you’ll access throughout the development process is also considered in most workflows.

An example of a standard development workflow might look like this:

  • Scaffolding: This is the stage wherein you start your new web project, creating a git repo, downloading libraries, preparing file structures, and completing other tasks to make sure your product is ready to roll out into the world.
  • Develop: This is where you’ll spend most of your time writing code for your application or website. The development process may include various specific tools and support from other staff members.
  • Test: In this stage, you examine the functionality of your code to determine if everything works as it should. If there are errors or issues, you can go back and develop fixes to the potential problems. Your code may go through the development/test process several times before you can move to the next stage.
  • Integrate: This is when you merge the code for your part of the development process with the rest of the team. You can also integrate your code into websites and existing apps at this point. If you’re working solo, you can skip this process.
  • Optimize: You prepare all your assets for use on a production server during the optimization stage. Files are generally optimized to ensure your visitors can view your site easily or access your applications with ease.
  • Deploy: In the deployment stage, developers push code and assets up into the server and allow for changes to be viewed by the public.

What is MVP? (Minimum Viable Product)

Now you know what a developer workflow looks like, you can begin to assess the concept of the “MVP” workflow. The term “MVP” stands for Minimum Viable Product.

The idea of “Minimum Viable Product” applies to a range of industries, from education to healthcare and government entities. This term comes from lean start-up practices and focuses heavily on the value of learning and changing during the development process.

When you adapt your workflow to focus on an MVP, you’re essentially adjusting your focus to a point where you can create a stripped-back version of something new – like an app or a website. The MVP is built just with the core features (the minimum), so you can bring the idea to market and test it as quickly as possible.

For instance, if your goal were to create an attractive new website for a client, an MVP would focus on implementing the crucial initial tools, and nothing else. While you may create checkout pages, product pages, and other aspects of the site, you wouldn’t populate it with content or start experimenting with bonus widgets and apps.

So, how does this offer a better alternative to the standard workflow?

Simply put, an MVP workflow is quick, agile, and easy. The idea is you can validate key concepts with speed, fail quickly, and learn just as fast. Rather than having to build an entire app and almost start over from scratch every time you find an error, you can race through the iteration and development process.

MVP workflows are also highly appealing to start-ups and entrepreneurs hoping to validate ideas without a massive amount of upfront investment.

Examples of MVP Workflows

Still confused? The easiest way to understand how an MVP workflow works is to look at an example.

Let’s start with a conceptual example. Say you were building a voice transcription service for businesses. The desired features of this product might include the ability to download transcription, translate them into different languages, and integrate them into AI analytics tools.

However, using the MVP approach, you wouldn’t try to accomplish all of your goals with your software at once. Instead, you’d focus on something simple first – like the ability to download the transcripts. Once you confirm you can do that, you can start a new workflow for the next most important feature for the app.

One excellent example of a company with an MVP approach is Airbnb. The entrepreneurs behind this unicorn company, Joe Gebbia and Brian Chesky, didn’t have a lot of cash to build a business with at first. They had to use their own apartment to validate the idea of creating a website where people could share their available “space” in a home or apartment with the public.

To begin, Airbnb only created a very basic website, published photos of their property, and waited to see the results. After discovering people were genuinely interested in renting another person’s home, the company was able to begin experimenting with new ideas to make a site where people could list their properties for travelers.

The Pros and Cons of an MVP Workflow

There are a lot of benefits to the MVP workflow – particularly when it comes to gaining agility and developing new products quickly. However, there are downsides too.

Pros

  • With an MVP approach, you can maximize your learning opportunities and create a more innovative, successful product at speed. You get to test every step of the way.
  • You release iterations or versions of your product quickly, which means you discover problems faster, allowing you to quickly solve these issues.
  • You build on the benefits of customer fans, “evangelists” in the marketplace who are keen to help your product or service grow.
  • An MVP gives you more freedom to try out unique ideas and “risks” you might otherwise avoid with a traditional workflow.
  • Because you’re focusing on creating only the “minimum viable product,” you don’t have to spend a fortune on initially setting up your workflows.

Cons

  • Agile work with an MVP flow requires a lot of effort in collecting constant feedback from customers and releasing iterations.
  • You’ll need to dedicate yourself to releasing many small and frequent product releases on a tight schedule.
  • You might have to revise the functionality of your product or app a number of times.

Creating Your MVP Workflow

If you believe an MVP workflow might be effective for you, the first step is defining your “Minimum Viable Product.” The app, website, or product you design needs to align with your team’s strategic goals, so think about what your company is trying to achieve at this moment – before you get started. If you have limited resources, or specific purposes, like improving your reputation as a reliable company, now might not be the right time to develop a new MVP.

Ask what purpose your minimum viable product will serve and what kind of market you’re going to be targeting. You’ll need to know your target customer to help you test the quality and performance of each iteration of your MVP. Once you know what your ideal “product” is, ask yourself what the most important features will be.

You can base these decisions on things like:

  • User research
  • Competitive analysis
  • Feedback from your audience

For example, if you’re producing an AI chatbot that helps companies to sort through customer inquiries, the most important “initial feature” may be the ability to integrate that bot into existing websites and apps owned by the company.

MVP Approach Guidelines

Once you have your hierarchy of most valuable features for your minimum viable product, you can translate this into an action plan for development. Remember, although you’re focusing on the “minimum” in development, your product still needs to be “viable.” In other words, it still needs to allow your customer to achieve a specific goal.

  • Review your features: Reviewing your prioritized product requirements and the minimum level of functionality you can deliver with each of these “features.” You need to ensure you’re still providing value to your customer with anything you produce.
  • Build your solution: Build your minimum set of features for the product or service. Remember to build only what is required. You can use methodologies like the agile or waterfall method to help guide your team during this process.
  • Validate your solution: Release your offering into the market, and ensure you have tools in place to gather feedback from early adopters. Use beta programs, focus groups, and market interviews to understand how your solution works for your customers and where you can improve on your current offer.
  • Release new iterations: Based on what you learn from your target audience, release improvements to your product quickly. Use your validation strategies to collect information from your audience with each release.
  • Review again: Go back to your product requirements and desired features and start the process over again, this time focusing on the next most valuable functionality. Over time, the value of your minimum viable product will increase.

Using the MVP Workflow Approach

While the MVP workflow approach might not be the right solution for every development or design team, it can work very effectively in the right circumstances. The MVP approach doesn’t minimize the importance of understanding market problems and delivering value. Instead, the focus is on delivering quick value that gradually increases and evolves over time.

As many developers and designers know, the most useful form of product validation in most cases is real-world validation. When your customers have had an opportunity to use a product on a day-to-day basis, they can provide much more effective feedback.

Just keep in mind that committing to the MVP approach also means changing your workflow and committing to iterations – otherwise, other features may never be completed. You’ll need to be willing to work quickly and in small bursts without getting too heavily caught up in one feature or functionality.


Featured image via Pexels.

Source

The post How to Get Started with the MVP Workflow first appeared on Webdesigner Depot.

Source de l’article sur Webdesignerdepot

There was a point at which I was very close to losing my business, and I didn’t realize how close.

I wasn’t always a good planner, and I didn’t plan to start an agency. One day I was a freelance graphic designer, my job list grew, I hired some help, and suddenly I was managing a team.

There isn’t a guidebook for new business owners, you have to learn on the job, and there’s no one-size-fits-all approach. We expanded rapidly from two to four people, then seven, and suddenly we hit 16 employees in just 18 months. It was pretty scary and felt like driving on the freeway without brakes. A client shared a story that they were turning over $20m, and the owner was only taking home $30k. It felt like where I was headed. At that point, I could easily have lost it all.

I took a hard look at the numbers and realized that we were barely breaking even, let alone profitable. That needed to change to stabilize the business and regain control of my operations. The change wasn’t easy, and there were some hard lessons, but 11 years later, with a strong local team and 40+ awards for our work, I’m thankful for that wake-up call.

There are other people in my position struggling with the same issues I faced, so I’d like to share the four key things I did that helped turn things around and move us from surviving to thriving.

1. Don’t Diversify Your Services

I wanted to do it all, and as the business owner, it was hard to turn down a new client. Our instincts are to help, and declining opportunities feels wrong. In our industry, digital agencies, especially web design agencies, try to cover all bases from marketing, SEO, adwords, design, photography, and coding. Everyone wants to be a one-stop shop for clients. I used to be that person: I would wash your car and shine your shoes if I could.

Do not give in to that fear.

When you’re a generalist, you spread yourself too thin. I know: a decade ago, we were offering dozens of services outside of the web design realm: packaging, branding, copywriting, sticker design, SEO, hosting, analytics, you name it, we provided it. We used over seven different CMS for our projects. If a client wanted it, we tried to offer it, no matter how unsuitable it was for us.

On the surface, we fulfilled our projects, and our clients were always thrilled with the results. But below the surface, our operations were dissolving into a mess. Our eyes weren’t on the prize; we were always chasing after each little job for cash. It took too much time to learn new skills. When I looked at our timesheets and deducted the unbillable hours, our projects would hardly break even.

What hurt us even further is that with diversifying, we had to manage multiple workflows, software, and systems: Sketch, Illustrator, Photoshop, WordPress, Joomla, Drupal, Google Analytics, Final Cut Pro, etc. It was expensive with minimal return. It was like an Olympic swimmer signing up for a swimming-diving-ice-skating club when their passion is swimming.

So I took a step back. I boiled it down to what we enjoyed and excelled at. Ask yourself: for what do you want to be known? For us, it was psychology-driven, conversion-focused web design. This was the service our team had the most skills in and collectively could give the best value to our clients. Once I’d figured that out, it was easy to eliminate those other services and specialize.

You can niche down by service or industry and be the specialist in what you offer.

2. Know Your Numbers

The first red flag that my business was in trouble was when I said to my accountant, “I feel like my business is doing great.” He replied, “I don’t care how you feel. The facts are in the numbers. Show me your accounts, and I’ll tell you if you’re actually doing well.” As an intuition-driven guy, it was a real eye-opener; I’d only ever relied on gut instinct.

At one point, we had a ton of work coming in, so I hired a few juniors to help the rest of the team. The team grew to 16, and the vibes in the studio were great, but the numbers weren’t. Instead of increasing efficiency, projects took 40 hours longer than they should have done. Why? The seniors and mid-level designers were taking time out to train the juniors! Reassessing the team showed me I needed to hire experienced staff, so projects ran on time and budget. It was a hard decision but a necessary one to keep us afloat.

The crucial numbers for any design agency are your timesheets, where bottlenecks lie, how much you’re spending, how long a project takes; these determine your actual margins. Setting up quantitative software like Toggl, Gantt, and Asana were a game-changer for us. They gave our project management real purpose and potential. Knowing the average hours our primary type of project took made it easy to give clients realistic deadlines, anticipate the need for fresh hiring, and know when our plates were full. You do not want to bite off more than you can chew.

3. Become The Best Fit For Your Target Market

You can’t please everyone, and frankly, you shouldn’t be trying to. One type of bait won’t attract every kind of fish. First, identify the type of fish you want to catch, the pond where this type of fish lives, and finally, bait your hook with something that type of fish can’t resist.

Your sales team should be able to identify them instantly, and all you then need to do is streamline your team, process, and systems towards being the best fit for them.

4. Double Down On Marketing That Works

There are many different marketing avenues you can go down, but go down too many, and it becomes a tangled web of confused messaging.

Remember, just because your competitors are doing it does not mean it’s the most effective approach for your target market.

There are really only inbound and outbound types of strategies, and it’s a great idea to list out the pros and cons (and the ROI of each) concerning your target market. Or, you can approach marketing based on your existing skillset — for example, if you detest being in front of a camera and don’t want to do video marketing, then just don’t do it.

Identify what works for you, and then be consistent. Consistency is the secret to a successful marketing strategy.

Source

The post How I Saved My Design Agency & Tripled My Profits first appeared on Webdesigner Depot.

Source de l’article sur Webdesignerdepot

If you’re an engineer who’s been tasked with planning out your application’s communication strategy, this post will help you map out the landscape. You’ll come away understanding the three core types of user communication APIs and in which circumstances you should use them to create the best possible end-user experience.

As modern applications have become increasingly feature-rich and performant, user expectations are at an all-time high. Failure to communicate key information or displaying out-of-date information frustrates users and causes a loss of trust. Think about the last time you ordered something online: if you didn’t receive your order confirmation within seconds, you probably began to worry that something went wrong. Users require product transparency for consistent use.

Source de l’article sur DZONE

AR (Augmented Reality) continues to build as one of the most exciting technology innovations to appear in recent years. More accessible than virtual reality experiences, since no specialist headset is required, AR has quickly emerged as a crucial tool for building unique experiences.

Although interest in AR as a tool for customer interaction and experience has been growing, demand has skyrocketed in recent years. In addition, since the pandemic of 2020, companies no longer have the same in-person opportunities available to create meaningful relationships with customers.

To ensure a client is fully invested in your brand today, you need to find a new way of building that emotional link. As an immersive, experience-led solution for brand building, AR can improve a company’s chance of earning brand loyalty. What’s more, around 71% of consumers say they would shop more often if AR technology were available.

The question is, how do you develop your own AR branded experiences?

Creating Branded Experiences in AR

For an augmented reality experience to be effective, you need more than just the right technology; you need a strategy for how you’re going to engage, empower, and support your target audience.

The best AR branded experiences aren’t just multi-dimensional advertisements; they’re tools intended to engage, inform, and entertain your audience in a new, highly immersive realm. Before you can begin to work on your AR app, you need to think about what kind of branded experience you want to develop. Here are some excellent examples to get you started.

AR Try-Before-You-Buy Interactions

Globally, ecommerce sales are growing at an astronomical pace. Going forward, there’s no question that the digital landscape will become the new platform for shopping and transactions. But, unfortunately, there are some limitations when it comes to shopping online.

While the right website developer or designer can create a stunning site packed with information about a product or service, there’s only so much that a webpage can do. Delivering a truly immersive user experience for your target audience involves replicating the kind of in-person experiences they would get in a digital format.

The best example of this is the “try-before-you-buy” AR app. Most commonly seen in the clothing and beauty industries, this app allows customers to use AR filters to see what everything from a new hair color to a shade of lipstick might look like on them. The experience is highly accessible and engaging because it builds on customers’ familiarity with filters and similar effects on social media channels like TikTok and Instagram.

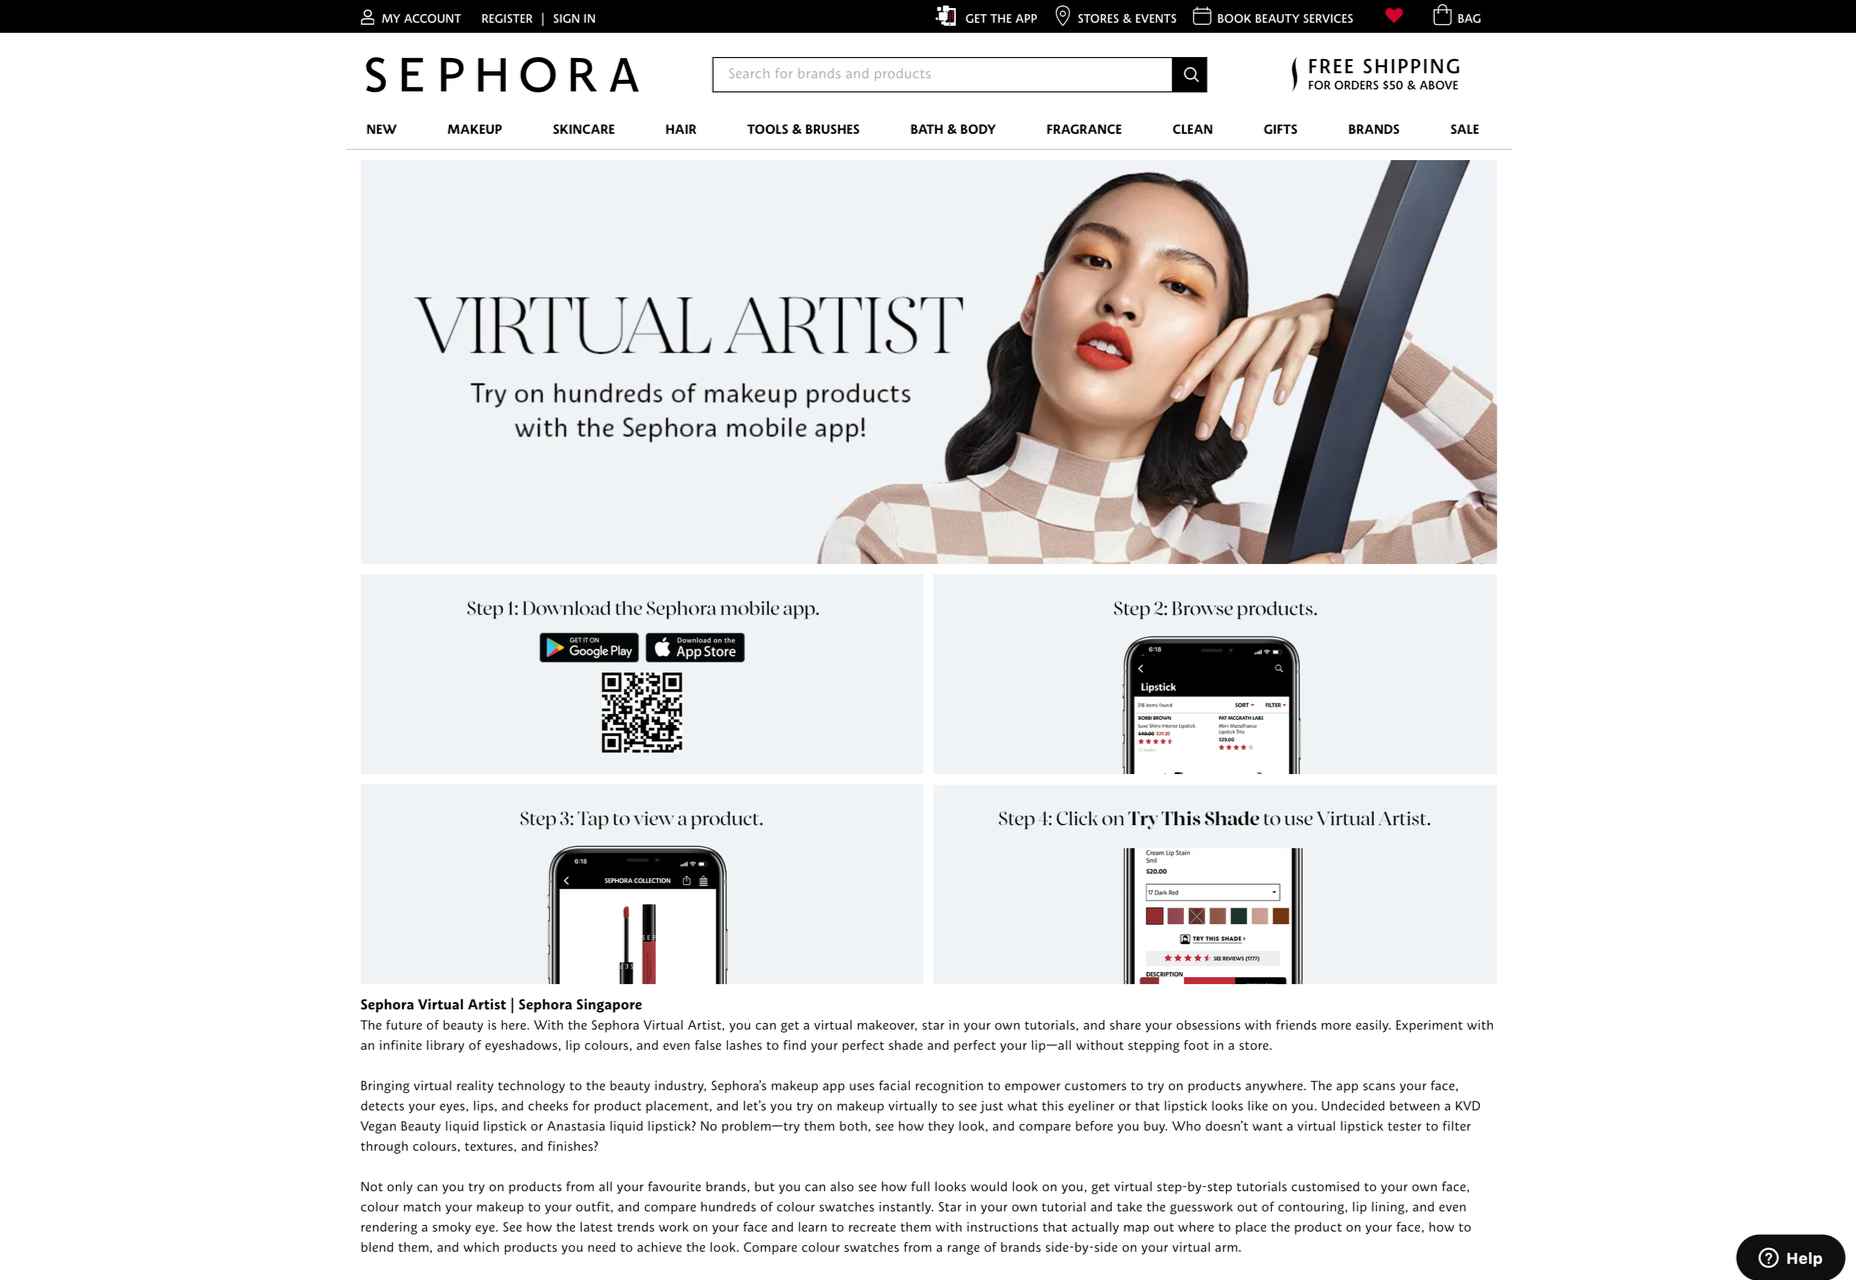
A popular example of an AR try-before-you-buy experience comes from Sephora, with the “Virtual Artist” application. Originally installed within the Sephora app in 2016, the technology uses Modiface to scan and track the eyes and lips of the customer using a smartphone camera. After that, the system can overlay eye-shadows, lipsticks, and other products, to give the customer idea of what they might look like in real-life.

As AR applications become more mainstream, new solutions are emerging for companies concerned about things like privacy. Consumers who don’t want to load their image into a system for try-before-you-buy experiences can still access the benefits of AR with the right tools.

For instance, ASOS created the new “See My Fit” service in 2020 to help customers shop for clothing during the pandemic. The solution allows users to see what clothing will look like on a model with a similar body type to their own. This helps to show shoppers how products realistically look in similar bodies while reducing the risk of returns.

ASOS certainly saw the benefit of this innovation, with an increase in revenues of around 24% in the six months leading to the end of February 2021.

AR for Product Catalogs and Visualization

We all remember what it was like to flick through the glossy pages of a magazine or catalog for our favorite stores. Unfortunately, in today’s digital age, these paper brochures are far from the most efficient tool for shopping. We need a more digital experience that allows us to select products, see what they will look like, and add them to our virtual baskets.

One excellent example of how companies can use AR to improve the overall shopping and visualization experience for customers comes from Home Depot. The brand was one of the first to upgrade its user experience strategy with a new Project Color application in 2015. Although this app might seem a little outdated by today’s standards, it’s still an excellent insight into what companies can do to improve their customer’s brand experience.

The Home Depot app used AR to scan a room and implement the color a customer chose for their walls into that space, considering things like furniture, shadow, and lighting, to allow for a more realistic insight. The app has updated significantly over the years to become increasingly immersive.

Visualizing products in a real, contextual space is hugely beneficial for a customer’s purchasing experience and perception of a specific brand. If your customer sees buying the right product from you as simple and convenient, they’re more likely to stick with your organization long-term.

The product catalog and visualization approach to AR in brand development has grown increasingly popular in the last two years, perhaps driven by the demand for more online shopping opportunities. In 2020, Wayfair announced the release of an updated version of its “View in Room” app, which now uses LiDAR technology to provide enhanced utility when shopping for home products.

According to Wayfair, the LiDAR technology and “RealityKit” software give customers a more authentic and realistic view, so they can make better decisions about what they want to buy. According to Apple, customers are 11 times more likely to buy an item of furniture if they have seen how it looks in their home using AR.

Creating Unique Brand Experiences

AR is one of the technology innovations in our current landscape, helping blur the lines between digital worlds and reality. In a future defined by the rise of the metaverse, AR could have a significant impact on how we spend our time in a more virtual world.

Already, companies are taking advantage of this, with things like virtual pop-up shops and temporary experiences intended to differentiate their brands. For instance, Machine-A, a London-based concept store, is usually committed to showcasing contemporary fashion designs.

When it became apparent that London fashion week for 2020 would be virtual, Machine-A came up with a virtual boutique enabled by AR. By scanning a QR code embedded into billboards and posters across London, users could enter the boutique virtually from their phones and experience the designs themselves.

The concept created by Machine-A has opened the minds of countless business brand teams and marketers to new methods of increasing engagement and awareness among customers. In a world where you can’t necessarily interact with your top customers in person, providing them with a new and immersive experience can be a great way to generate loyalty.

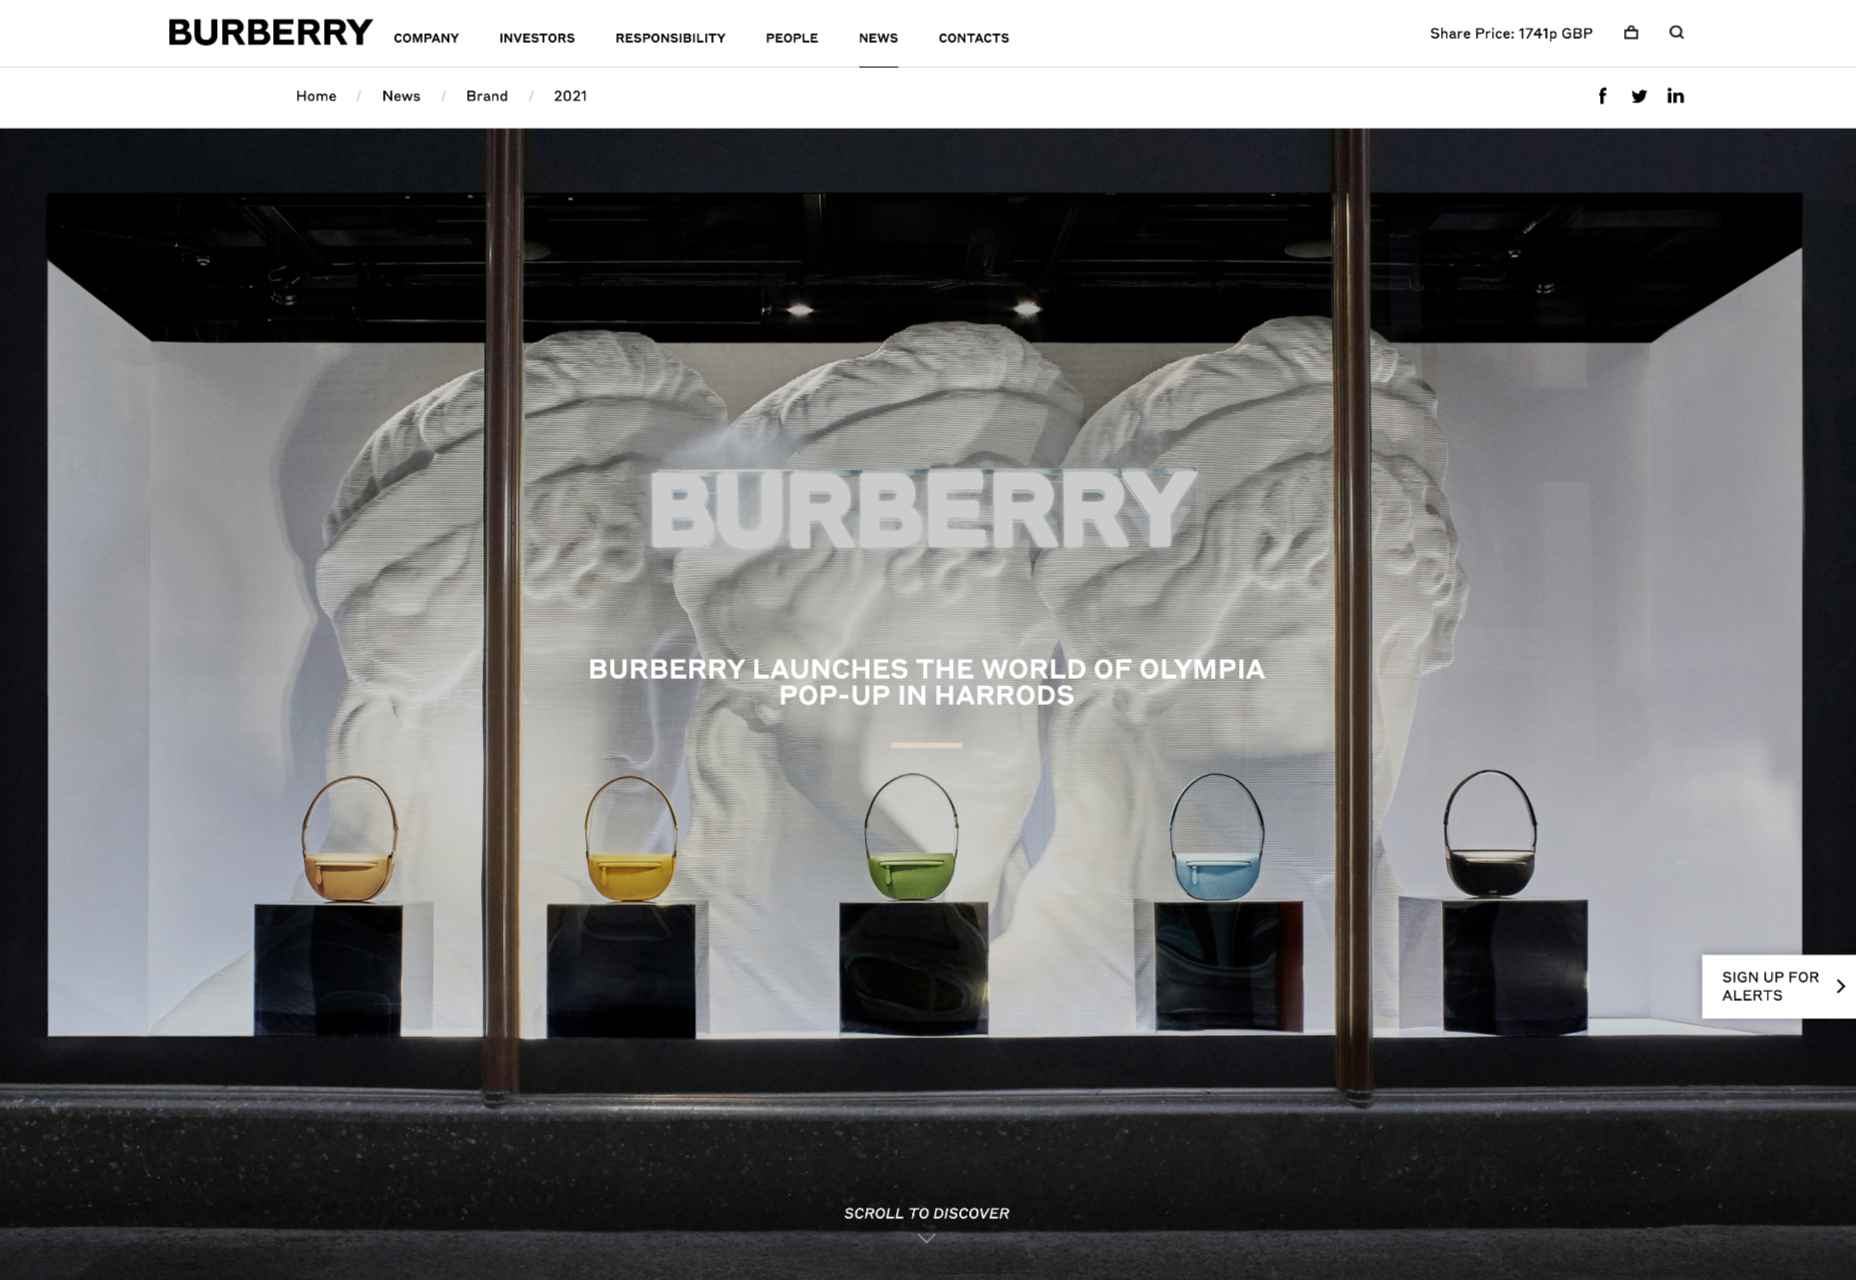
The companies more willing to invest in innovative solutions like AR are also more likely to stand out as innovators in their field. Other companies have experimented with similar “pop-up” experiences and unique ways to capture audience attention. For example, Burberry placed a QR code in a Harrods store, which customers could scan to visit a branded experience, where an Elphis statue walked around in their surroundings through the lens of their smartphone camera.

It’s even possible to use AR experiences to attract the attention of new audience groups. For instance, the retail brand, Pull & Bear launched an AR game created with Facebook to help the company reach the 90% of Gen Z customers who identify as “gamers.”

Provide New Levels of Customer Support

As many of today’s businesses know, memorable branding isn’t just about having the right image or website; it’s also about providing the correct level of customer service and support. Most purchasing and brand loyalty decisions made today are based on customer experience.

Providing customers with unique experiences to improve their shopping journey is sure to make your company stand out in the new digital age. But it’s also possible to go even further with AR in your brand CX strategy too.

Amazon Salon, for instance, the first bricks-and-mortar hair salon created by Amazon, was partially established to test new technology. The “point and learn” service, for example, allowed customers to point a product they were interested in on a display or shelf and immediately access educational content. Users could also scan QR codes to visit the product page on the QR site.

This helps customers immediately get to the product they want to buy without relying on input from human services agents. In a similar vein, AR could be an excellent way to onboard a customer, learning how to use a new product for the first time.

Imagine having a user’s manual your customer can enjoy scanning through, thanks to AR technology. All your customer needs to do is scan the QR code on the back of a product, and they can see the item they need to build or install coming to life in front of them. This reduces the risk of customers having to call for help from tech support and means clients can see the value in their purchases a lot faster.

Companies can embrace AR as a virtual learning experience, helping users collect information and learn how to do things through an immersive first-hand experience. This kind of immersive technology could help to make any brand stand out as more user-experience-focused. Even car companies could essentially provide their customers with a complete virtual HUD showing them how each button and dial on their dashboard works.

Upgrade Website Design

Perhaps the most common way companies will be using AR to create branded experiences today is by updating their website. You’ve probably already seen examples of AR being used in a host of retail sites, with new experiences designed specifically for the age of augmented reality.

360-degree images, for instance, allow customers to essentially “look around” a product, and see it from different angles, just like they would if they were looking at the item in-store. We can see an excellent example of this on the BMW build-your-own web page, where vehicle browsers can see their vehicles from every angle.

The 360-degree product viewing experience lets you check everything from the side molding to the sculpted edges in perfect detail.  

QR codes and app downloads can also allow customers to take their AR experience even further, looking at things like what life would be like behind the wheel of one of these virtually augmented vehicles.

As AR becomes more commonplace and the tools available for designers in this arena continue to expand, there will be even more opportunities available to bring AR into the website experience. Even essential website upgrades today might include allowing customers to upload pictures of themselves or their homes, then using augmented reality technology to implement parts of a product catalog into the space.

AR Virtual Events

Finally, when it comes to exploring all the unique ways you can build a better brand experience and excellent customer relationships with AR, it’s worth looking at the event space. The event landscape has struggled significantly over the last couple of years. The pandemic forced most live events to be canceled, and although the post-pandemic era holds new hope for upcoming in-person experiences, the landscape will be very different.

Going forward, most companies plan to avoid a complete shift back to in-person events by creating “hybrid” experiences and augmented reality events instead. Augmented and virtual reality tools allow customers to step into an event arena from wherever they are.

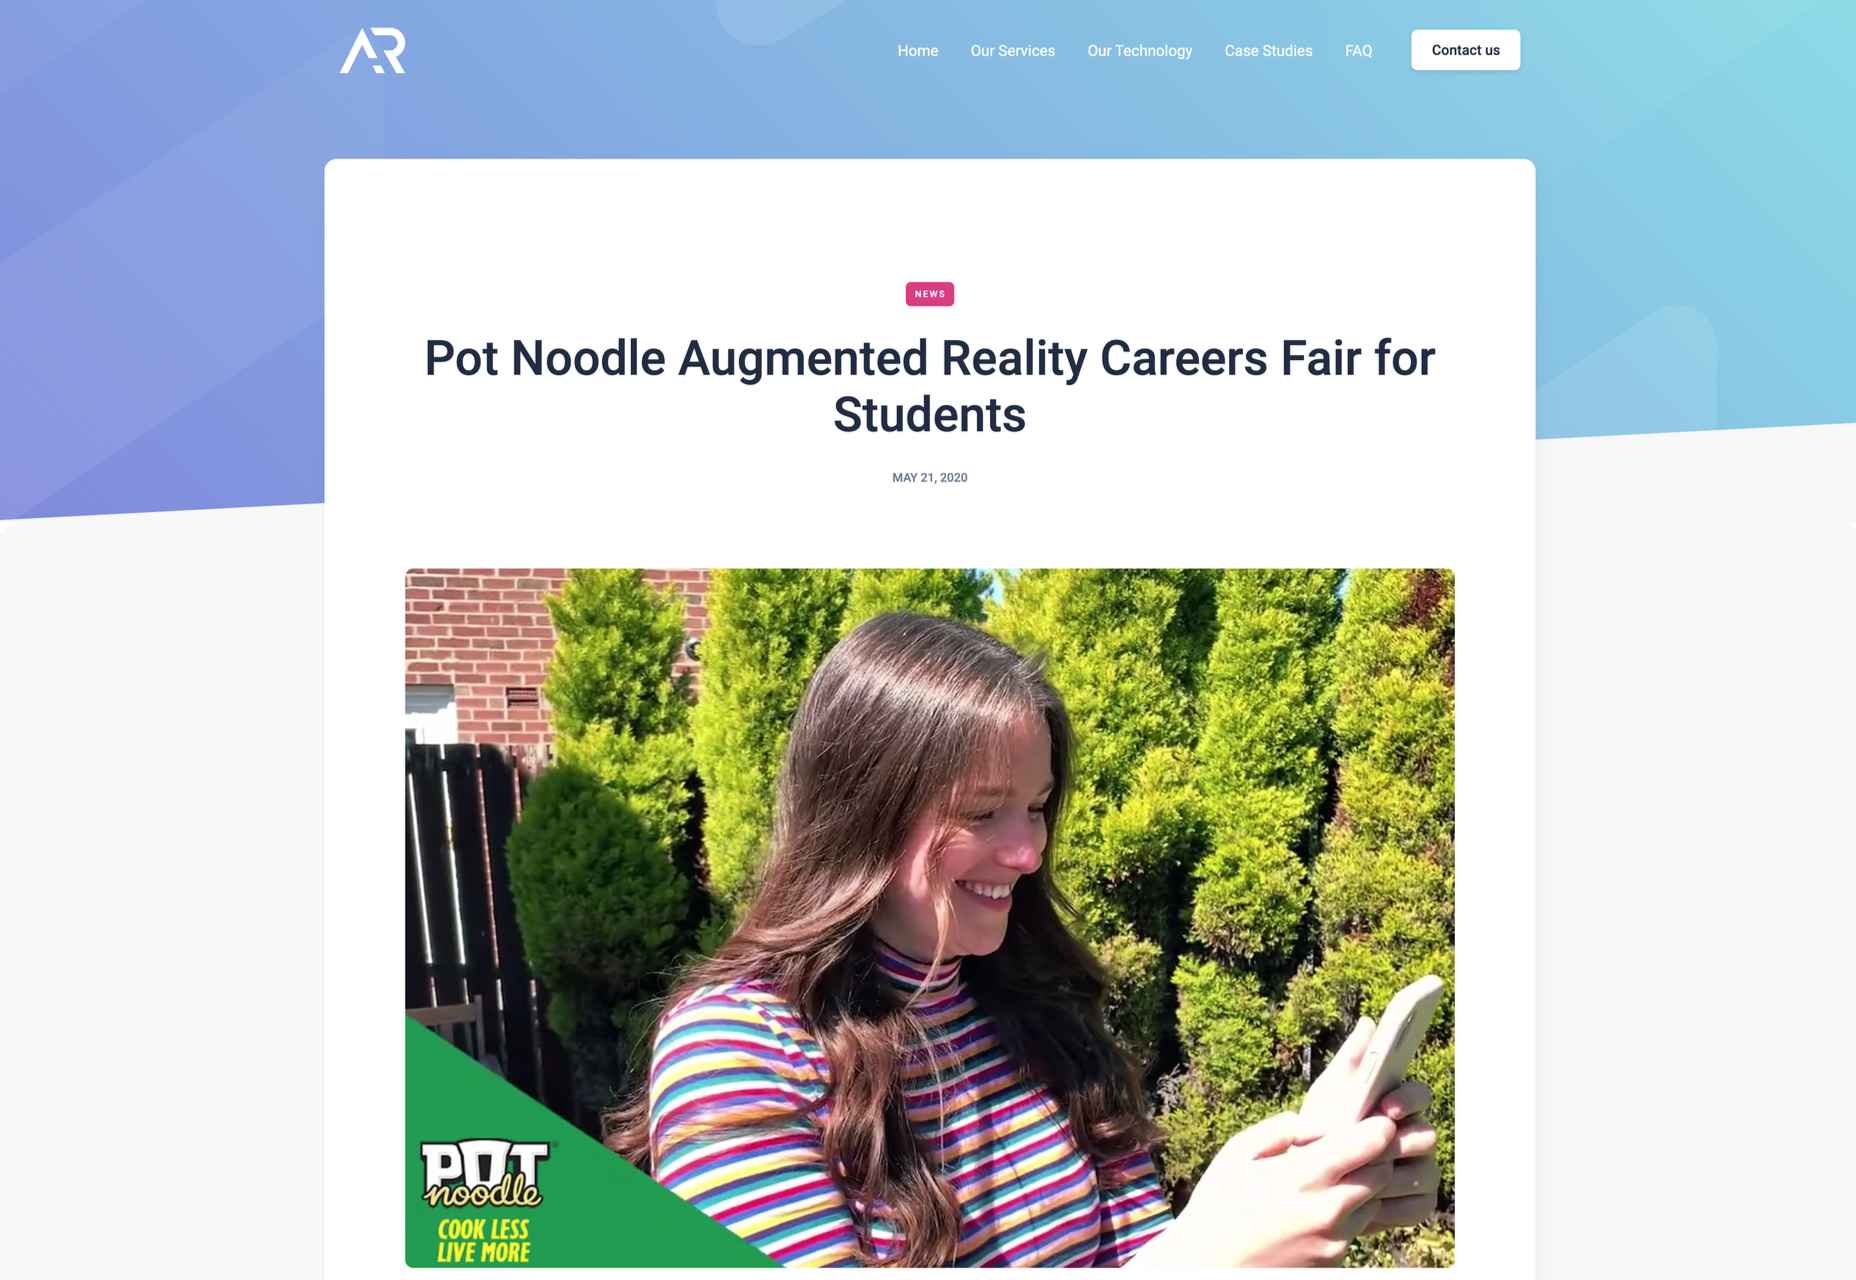
For instance, the Pot Noodle Unilever brand hosted a virtual alternative careers fair in AR, where people could use their phones to navigate through a range of graduate employer booths. The unique career fair experience was designed to replace the more common in-person interactions graduates might have as they approached the end of their education.

The custom-developed 3D booths featured a range of different employers, and students could tap on the booth screen they were interested in to see a video from each employer. As an added bonus, the connection to the Pot Noodle AR careers fair website meant that students could also instantly apply for any of the jobs they were interested in.

Similar events could help brands recreate some of the meaningful experiential experiences that their customers have been missing out on in the last couple of years. They could also act as a valuable tool for bringing together people in a hybrid event, where someone visiting an in-person demo table could scan a QR code to send virtual demonstrations of a product back to their team.

This would reduce the number of people who needed to be present in an event environment at any given time, reducing the risk of health issues.

Bringing Brands to Life with AR

In the new consumer landscape, brand relationships are more important than ever. As a result, customers are making more careful choices about who they purchase from, based on their understanding of that company’s values and differentiators.

Now that you won’t always have an opportunity to interact with customers in-person to earn their trust, AR could be the solution for a lot of companies in search of new engagement tools. All you need to do is figure out how you’ll leverage all the benefits AR can offer.

Will you be creating an app, building a new website with enhanced 360-degree photos, or designing in-person experiences? Hopefully, these examples have inspired you to start exploring your options.


Featured image via Unsplash.

Source

The post How to Use AR in Brand Experiences first appeared on Webdesigner Depot.

Source de l’article sur Webdesignerdepot