Articles

User experience is one of the most important aspects of web design, but many experts overlook that UX doesn’t just apply to web pages. User experience as a concept encompasses all aspects of end-user interaction with a company.

That means you need to discover the right UX strategies for everything from your homepage to your email marketing and even your listings on Google.

Today, we’re going to explore some of how you can apply UX principles to your client’s image on search engines.

Why Your Search Engine Listing Matters

Let’s start with the basics: 89% of customers start their purchasing process with a search engine. That means that whether you’re creating a portfolio to sell your services or building a website for a client, the first connection a customer has with your design isn’t on the homepage.

Most of the time, you’re driving a specific experience for an end-user before you even realize it. Before you can wow an audience with a beautiful site design or an amazing CTA offer, you need to convince them to click on your Google link.

When you invest in user experience, you think carefully about the journey that an end-user goes through when interacting with a brand. This often means considering things like the user’s intent, their needs, and their pain points.

Those same principles apply to create an impressive search engine listing.

UX on a website is all about giving your audience what they need in an informed, and strategic manner; UX in the search engine results works the same way.

How to Make Your Search Listing Stand Out with UX

So, how do you begin to apply the principles of UX to your Google Search results?

It’s much easier than you’d think.

Step 1: Show Immediate Value

Delivering an excellent experience on a website often means providing end-users with the information they need as quickly as possible. Imagine designing a landing page; you wouldn’t want your audience to scroll forever to find what they need. Instead, you’d make sure that the value of the page was immediately obvious.

When creating an image for your search engine listing, you’ll need to take the same approach. This often means thinking carefully about two things: your headline and your meta description.

Around 8 out of 10 users say that they’ll click a title if it’s compelling. That means that before you do anything else to improve your SEO strategy, you need to make sure that your web page’s title is going to grab your audience’s attention.

The best titles deliver instant value. These titles tell the audience exactly what they’re going to get when they click onto the page. The promise drives action, while clarity highlights the informed nature of the brand.

The great thing about using an excellent title for a page is that it doesn’t matter where you’re ranked on the search results. Whether you’re number 2 or number 5, your customers will click if they find something they want.

It’s just like using a CTA on a landing page. Make sure your titles are:

  • Informative — show your audience value immediately;
  • Optimized for mobile — remember, your audience might not see your full title on some screens; this means that you need to make the initial words count;
  • Easy to read — keep it short, simple, and clear, speak the end-users’ language.

Step 2: Build Trust with Your URLs

Trust factors are another essential part of good UX.

When you’re designing a website for a new brand, you know that it’s your job to make visitors feel at ease. Even in today’s digital world, many customers won’t feel comfortable giving their money or details to a new company.

Within the website that you design, you can implement trust symbols, reviews, and testimonials to enhance brand credibility. On search engines, it all starts with your URL.

Search-friendly URLs that highlight the nature of the page will put your audience’s mind at ease. When they click on a page about “What is SEO” in the SERPs, they want to see an URL that matches, not a bunch of numbers and symbols

Use search-friendly permalink structures to make your listing seem more authoritative. This will increase the chances of your customer clicking through to a page and make them more likely to share the link with friends.

Once you decide on a link structure, make sure that it stays consistent throughout the entire site. If a link doesn’t appear to match the rest of the URLs that your audience sees for your website, they may think they’re on the wrong page. That increases your bounce rate.

Step 3: Be Informative with Your Meta Description

To deliver excellent UX on a website, you ensure that your visitor can find all of the answers to their most pressing questions as quickly as possible. This includes providing the right information on each page and using the correct navigational structure to support a visitor’s journey.

In the SERPs, you can deliver that same informative experience with a meta description. Although meta descriptions often get ignored, they can provide a lot of value and help you or your client make the right first impression.

To master your meta descriptions:

  • Use the full 160 characters — make the most of your meta description by providing as much useful information as you can within that small space;
  • Include a CTA — just as CTAs help to guide customers through the pages on a website, they can assist with pulling in clicks on the SERPS; a call to action like “read about the” or “click here” makes sense when you’re boosting your search image;
  • Focus on value — concentrate on providing your customers with an insight into what’s in it for them if they click on your listing.

Don’t forget that adding keywords to your meta description is often helpful too. Keywords will boost your chances of a higher ranking, but they’ll also show your audience that they’re looking at the right result.

Step 4: Draw the Eye with Rich Snippets

You’ve probably noticed that the search engine result pages have changed quite a bit in the last couple of years. As Google strives to make results more relevant and informative, we’ve seen the rise of things like rich snippets. Rich snippets are excellent for telling your audience where to look.

On a website, you would use design elements, like contrasting colors and animation, to pull your audience’s attention to a specific space. On search engines, rich snippets can drive the same outcomes. The difference is that instead of telling a visitor what to do next on a page, you’re telling them to click on your site, not a competitor’s.

When Google introduced rich snippets, it wanted to provide administrators with a way of showcasing their best content. Rich snippets are most commonly used today on product pages and contact pages because they can show off reviews.

Install a rich snippet plugin into your site if you’re a WordPress user or your client is. When you enter the content that you need into the website, use the drop-down menu in your Rich snippet tool to configure the snippet.

Ideally, you’ll want to aim for the full, rich snippet if you want to stand out at the top of the search results. Most featured snippets have both text and an image. It would help if you aimed to access both of these by writing great content and combining it with a relevant image.

Step 5: Provide Diversity (Take Up More of the Results)

As a website designer or developer, you’ll know that different people on a website will often be drawn to different things. Some of your visitors might immediately see a set of bullet-points and use them to search for the answer to their question. Other visitors will want pictures or videos to guide them. So, how do you deliver that kind of diversity in the SERPS?

The easiest option is to aim to take up more of the search result pages. Google now delivers a bunch of different ways for customers to get the answers they crave. When you search for “How to use Google my Business” on Google, you’ll see links to blogs, as well as a list of YouTube Videos and the “People Also Ask” section.

Making sure that you or a client has different content ranking pieces for the same keywords can significantly improve the experience any customer has on the search engines. Often, the process of spreading your image out across the SERPs is as simple as creating some different kinds of content.

To access the video’s benefits, ask your client to create YouTube videos for some of their most commonly asked questions or most covered topics. If you’re helping with SEO marketing for your client, then make sure they have an FAQ page or a way of answering questions quickly and concisely on articles, so they’re more likely to appear in “People Also Ask”:

Step 6: Add Authority with Google My Business

Speaking of Google My Business, that’s another excellent tool that’s perfect for improving UX in the search results. GMB is a free tool provided by Google. It allows business owners to manage how information appears in the search results.

With this service, you can manage a company’s position on Google maps, the Knowledge Graph, and online reviews. Establishing a company’s location is one of the most important things you can do to help audiences quickly find a business. Remember, half of the customers that do a local search on a smartphone end up visiting the store within the same day.

Start by setting up the Google Business listing for yourself or your client. All you need to do is hit the “Start Now” button and fill out every relevant field offered by Google. The more information you can add to Google My Business, the more your listing will stand out. Make sure you:

  • Choose a category for a business, like “Grocery store”;
  • Load up high-quality and high-resolution images;
  • Ensure your information matches on every platform;
  • Use a local number for contact;
  • Encourage reviews to give your listing a five-star rating.

Taking advantage of a Google My Business listing will ensure that your audience has all the information they need to make an informed decision about your company before they click through to the site. This means that you or your client get more warm leads and fewer people stumbling onto your website that might not want to buy from you.

Step 7: Use Structured Data Markup to Answer Questions

If you’re already using things like rich snippets in your Google listings, you should also have a structured schema markup plan. Schema markup on Google tells the search engines what your data means. This means that you can add extra information to your listings that will guide your customers more accurately to the support they need.

Providing additional schema markup information to your listings gives them an extra finishing touch to ensure that they stand out from the competition. You might add something like a “product price” to a product page or information about the product’s availability.

Alternatively, you could provide the people who see a search result with other options. This could be an excellent option if you’re concerned that some of the people who might come across your listing might need slightly different information. For instance, you can ask Google to list other pages along with your search results that customers can “jump to” if they need additional insights.

Baking structured data into your design process when you’re working on a website does several positive things. It makes the search engine’s job easier so that you can ensure that you or your client ranks higher. Additionally, it means that your web listings will be more thorough and useful.

Since UX is all about giving your audience the best possible experience with a brand, that starts with making sure they get the information they need in the search results.

Constantly Improve and Experiment

Remember, as you begin to embed UX elements into your search engine listings, it’s important to be aware of relevant evolutions. Ultimately, the needs of any audience can change very rapidly. Paying attention to your customers and what kind of links they click on the most will provide you with lots of valuable data. You can use things like Google analytics to A/B test things like titles, pictures, featured snippets, and other things that may affect UX.

At the same time, it’s worth noting that the Google search algorithms are always changing. Running split tests on different pages will give you an insight into what your customers want. However, you’ll need to keep an eye on the latest documentation about Google Search if you want to avoid falling behind the competition.

Like most exceptional UX aspects, mastering your SERP position isn’t a set it and forget it strategy. You’ll need to constantly expand your knowledge if you want to show clients that you can combine UX and SEO effectively.

It’s easy to forget that there’s more to UX than making your buttons clickable on mobile devices or ensuring that scrolling feels smooth. For a designer or developer to deliver wonderful UX for a brand, they need to consider every interaction that a company and customer have. Most of the time, this means starting with the way a website appears when it’s listed on the search engines. Getting your SEO listing right doesn’t just boost your chances of a good ranking. This strategy also improves your reputation with your audience and delivers more meaningful moments in the buyer journey.


Featured image via Unsplash.

Source


Source de l’article sur Webdesignerdepot

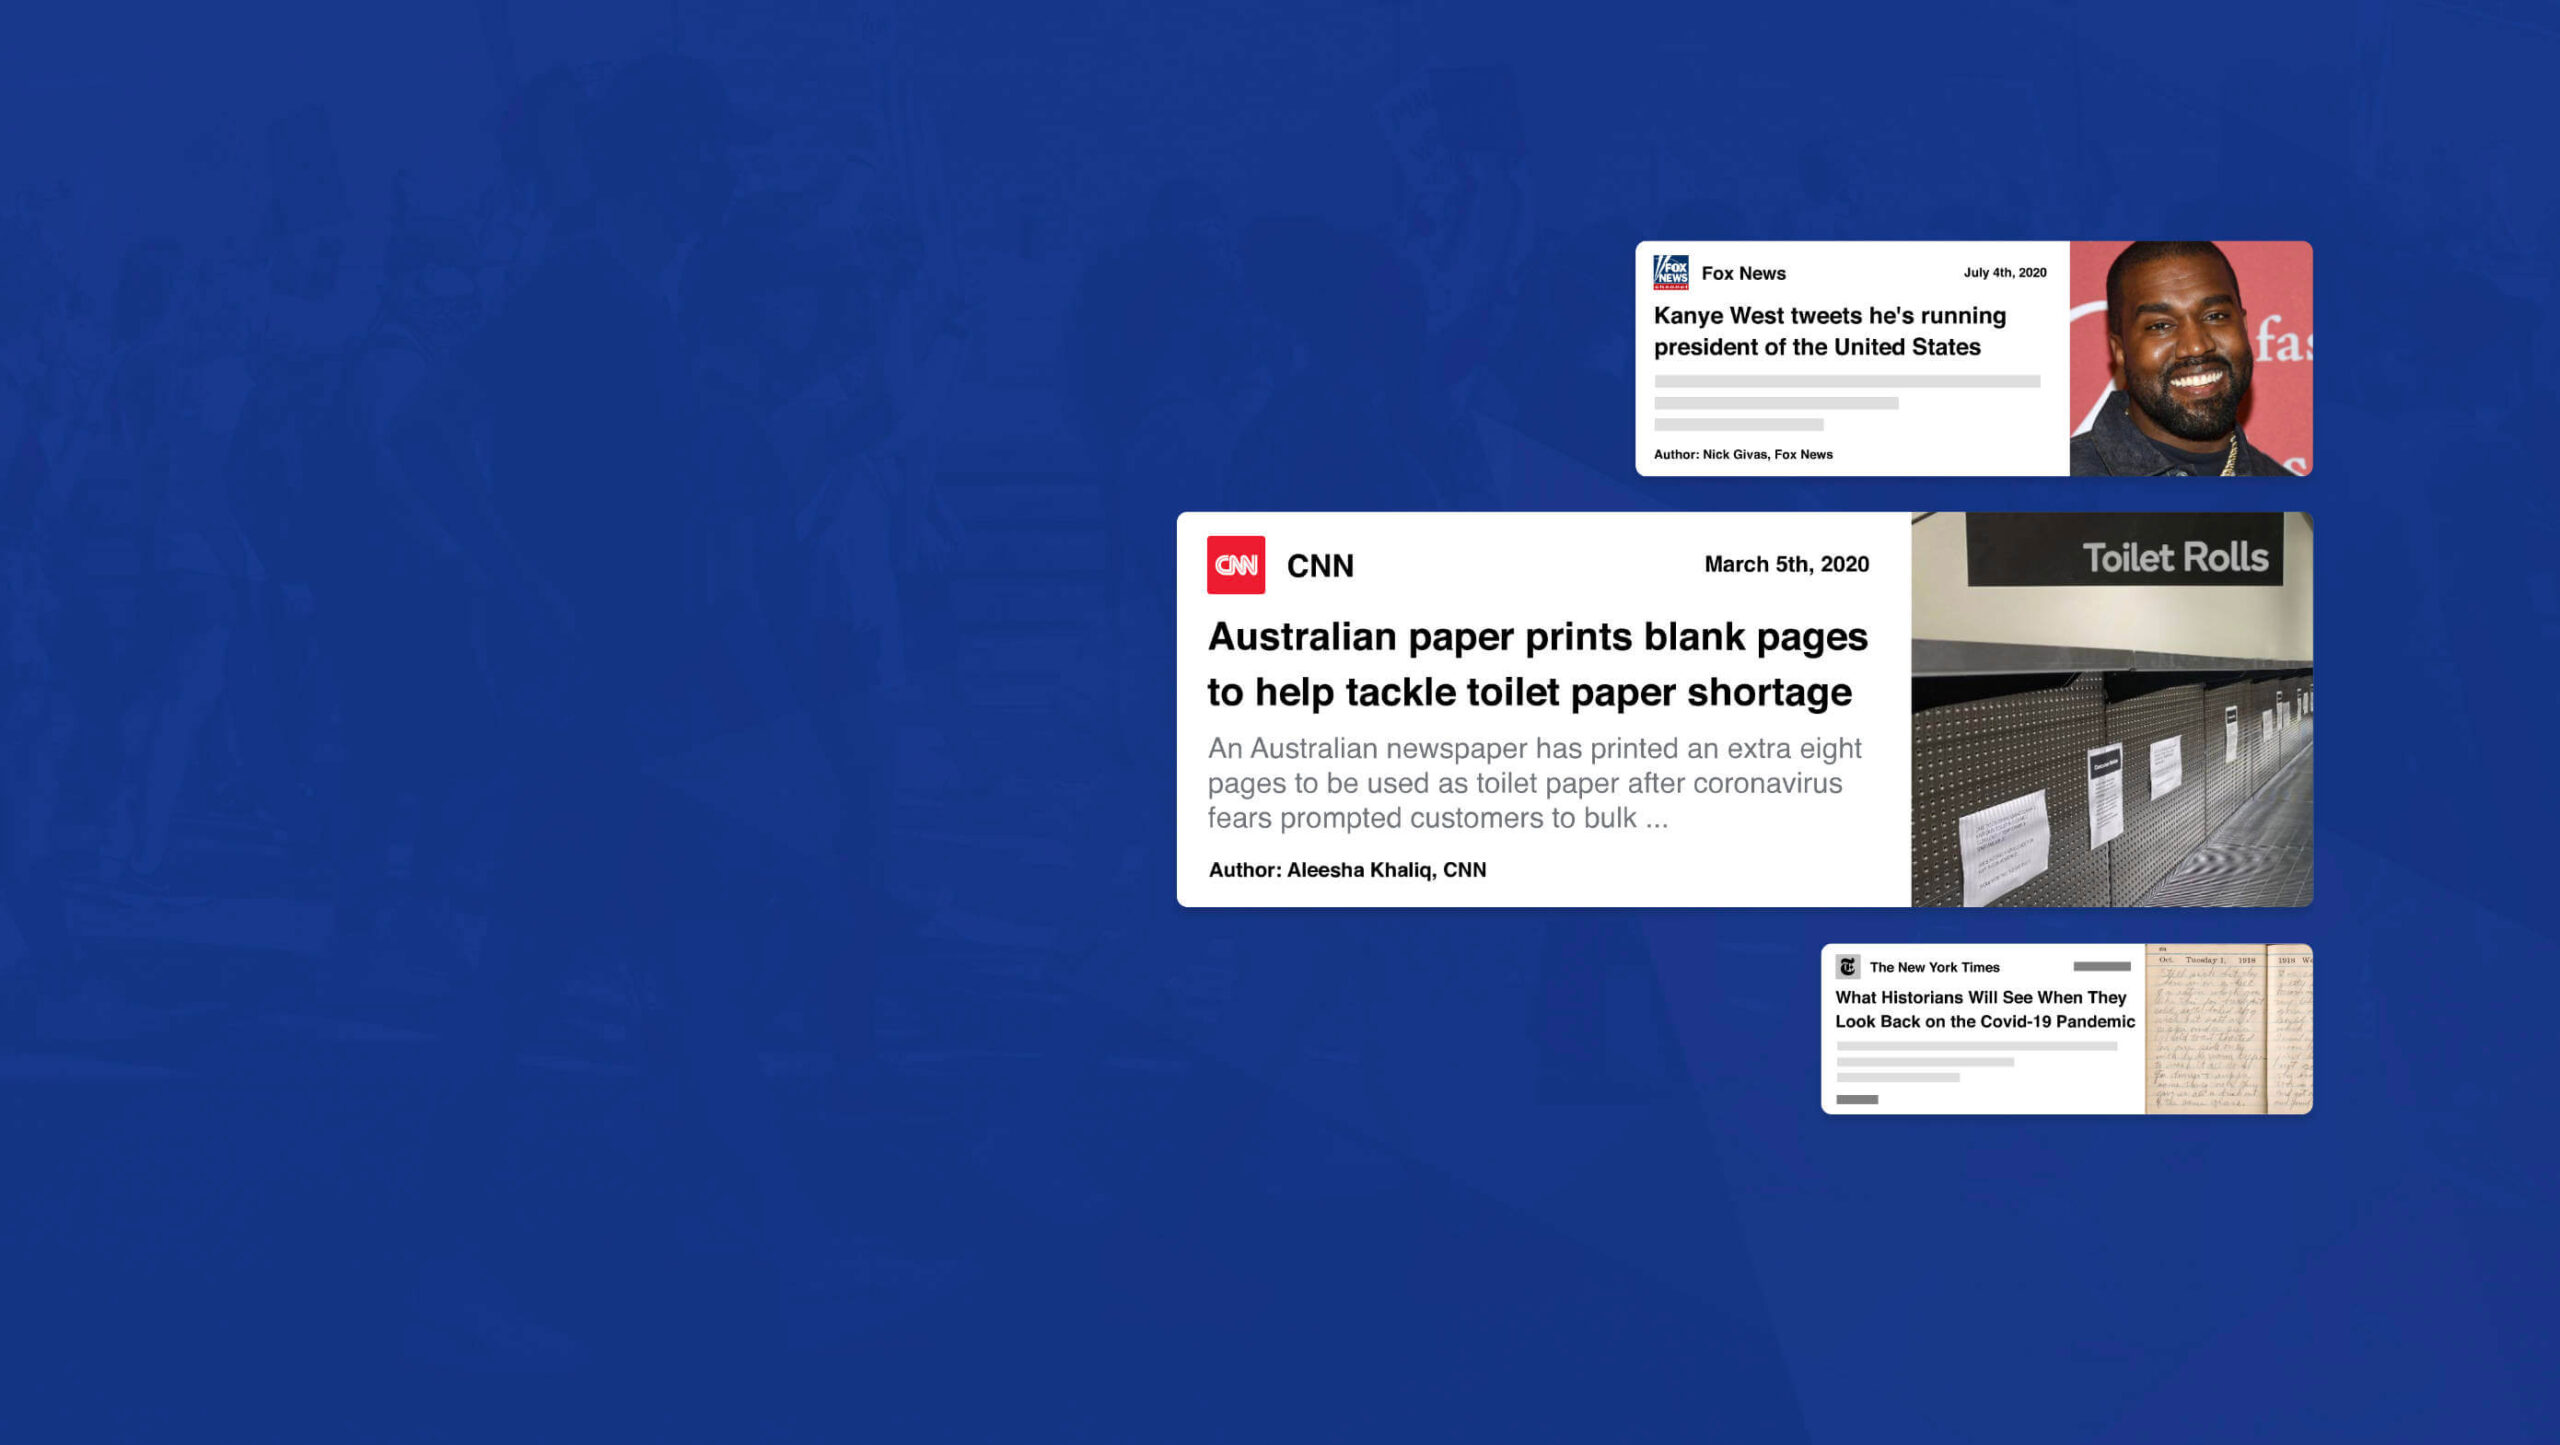
What an extraordinary year 2020 has been for the news! From the ongoing coronavirus crisis, to a turbulent US election, to the unrelenting march of Bitcoin, this year like no other we’ve been glued to our phones micro-analyzing every tidbit of news.
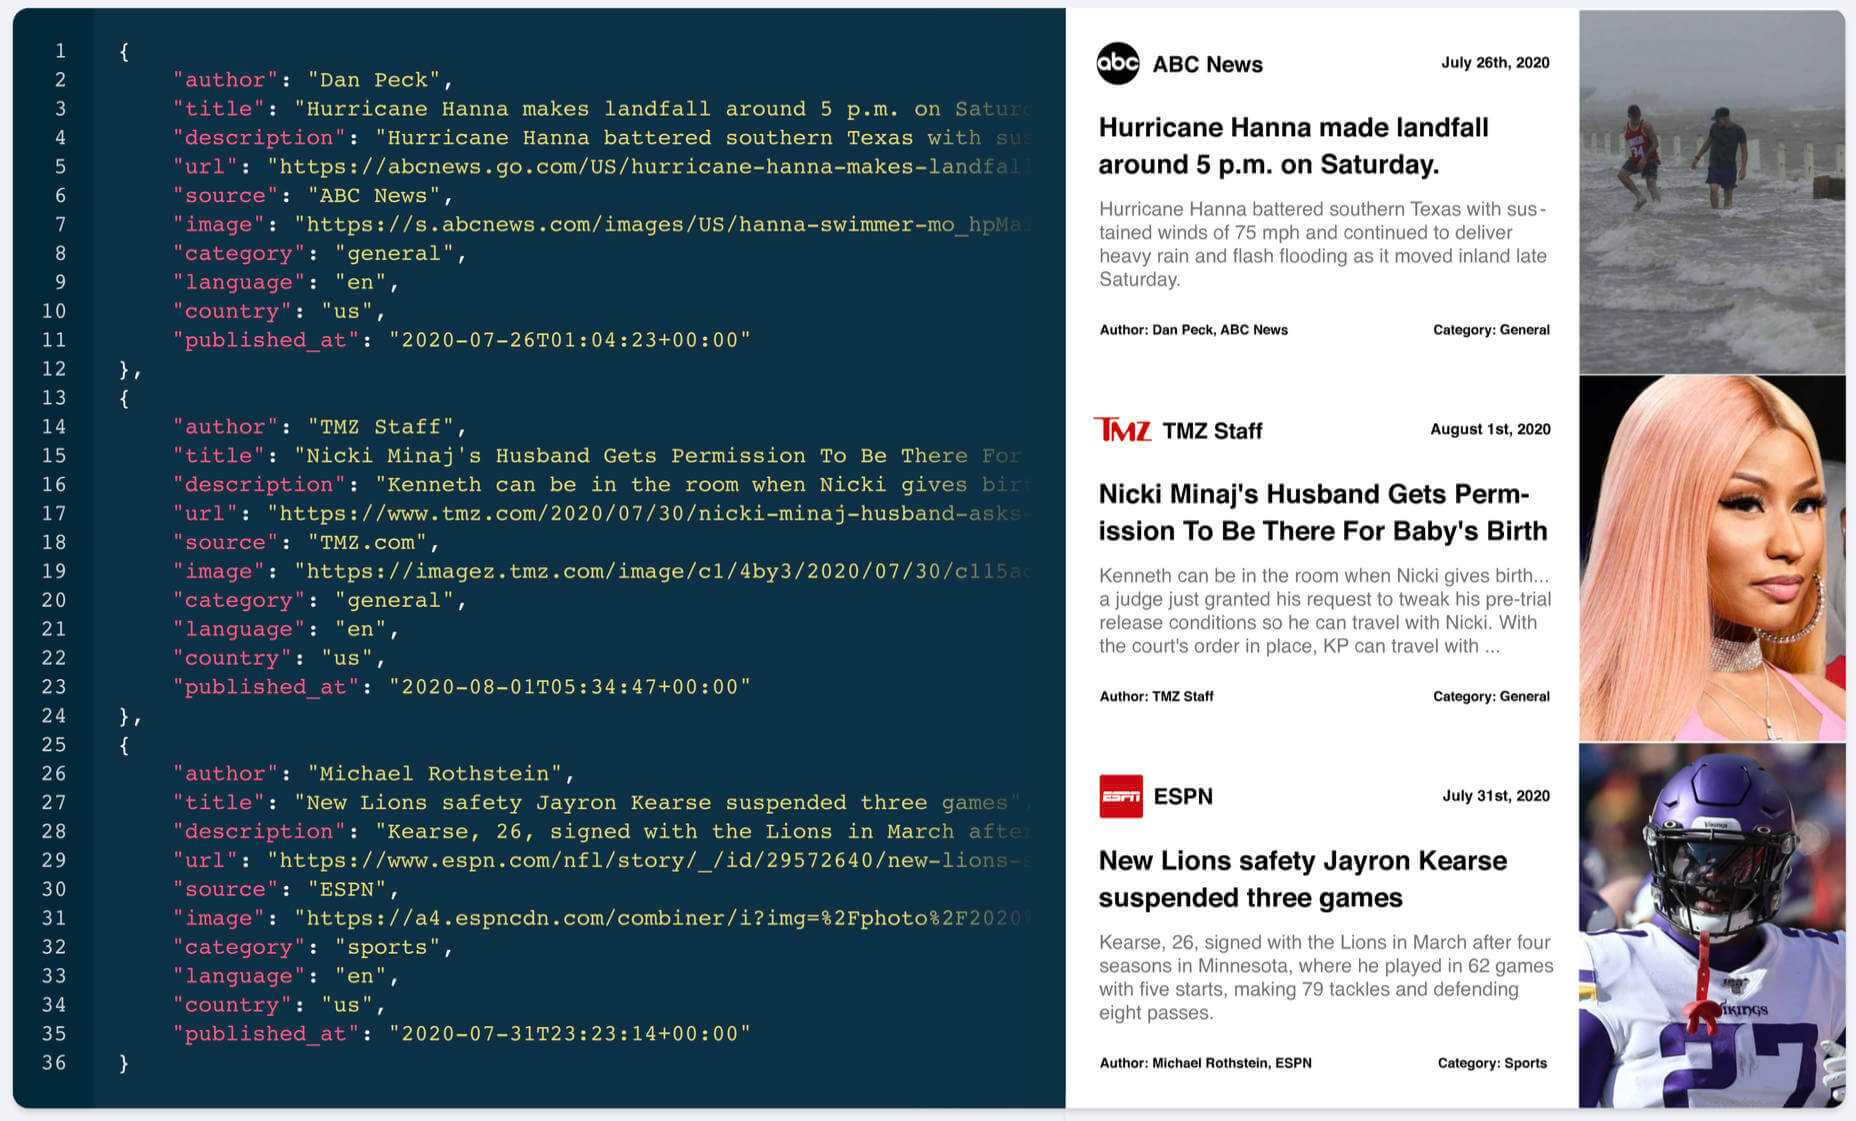
Which makes this the perfect time for mediastack, an awesome REST API that allows you to embed a customizable news feed, sourced from the world’s top news agencies, and updated by the minute, right on your site.

Integrating Global News with Your Site

News is the beating pulse of so many global industries. From political decisions that affect stock prices, to natural disasters that interrupt goods and services, to the whims of celebrities who overnight transform brands from unknown to must-have.

Whether you’re building a site for a non-profit in Louisiana that cares deeply about both Washington politics, and hurricanes in the Caribbean; or you’re building an app for a golf course in Halkidiki that’s focused on both local news, and golf around the world; delivering real-time news content to those users elevates UX.

Tightly integrating the news with your site makes it a hub for users hungry for that very news. The only limit is your creativity.

Display Up-to-Date News on Your Site

When news breaks around the world the top networks scramble to catch up; they simply can’t maintain correspondents in every town and city in the world, and so they rely on affiliates. mediastack pulls in news from over 7,500 different sources in over 50 countries worldwide, giving you access to exactly the same affiliates frequently used by big news organizations like CNN, MSNBC, BBC, or ABC.

When it’s one of the big players in news that breaks a story first, mediastack still has you covered because as will as covering smaller, lesser-known sources mediastack delivers real-time news from CBS, Sky News, The Guardian, Al Jazeera, USA Today, and a host of trusted names across the industry.

If your site targets users that are only interested in certain types of story — like sports, or Hollywood celebrities — then you can even pull in stories from ESPN, TMZ, or Fox News.

Get Started Quickly with mediastack

Getting started with mediastack couldn’t be simpler, and there’s a free plan that’s more than enough to prototype your project.

Full documentation is provided with code examples for PHP, Python, jQuery, Go, and Ruby. To start integrating all you need to do is register for a free access key.

Once you have your free access key, you connect to the API, then customize the results you receive with simple parameters. You can specify the types of news, the precise sources (including omitting sources), languages, countries, and most importantly your keywords.

For example here’s how you’d request science news from CNN, but not TMZ:

https://api.mediastack.com/v1/news
?access_key=[ INSERT YOUR ACCESS KEY HERE ]
&categories=science
&sources=cnn,-tmz

Let’s say you want to display Spanish language crypto news on your site, it couldn’t be easier:

https://api.mediastack.com/v1/news
?access_key=[ INSERT YOUR ACCESS KEY HERE ]
&categories=business,technology
&languages=es
&search=crypto,bitcoin,btc,xrp,ripple,etherium,altcoin

The API sends back simple JSON data that’s easy to run through. Each news item includes the author, title, description, url, source, image, category, language, country, and a published_at timestamp that records when the story was posted.

Once the feed is setup, sit back and relax. It’s all automated from now on.

The Best Source of News for Your Website

mediastack is delivered by apilayer, quite rightly one of the most trusted names in APIs, and is capable of handling millions of requests simultaneously.

Fast, updated by the minute, highly customizable, reliable, and sourced from the biggest names in the news industry, mediastack is an amazing API.

There’s a free-forever plan that allows you to use the API without charge, for up to 500 API calls per month, that’s perfect for trying it out.

For commercial use, plans start at just $19.99/month, and can handle up to 250,000 calls per month. Commercial plans also include HTTPS encryption, live news delivery, access to historical data, and — should you ever need it — technical support.

Head over to mediastack today, to prepare your site for whatever events 2021 throws at us.


[– This is a sponsored post on behalf of mediastack –]

Source


Source de l’article sur Webdesignerdepot

Jumpstart your next design project or speed up a workflow with some of these new tools and resources. With so many new tools being developed all the time, you are almost certain to find something that can help you with projects.
Here’s what new for designers this month.

Everypixel Patterns

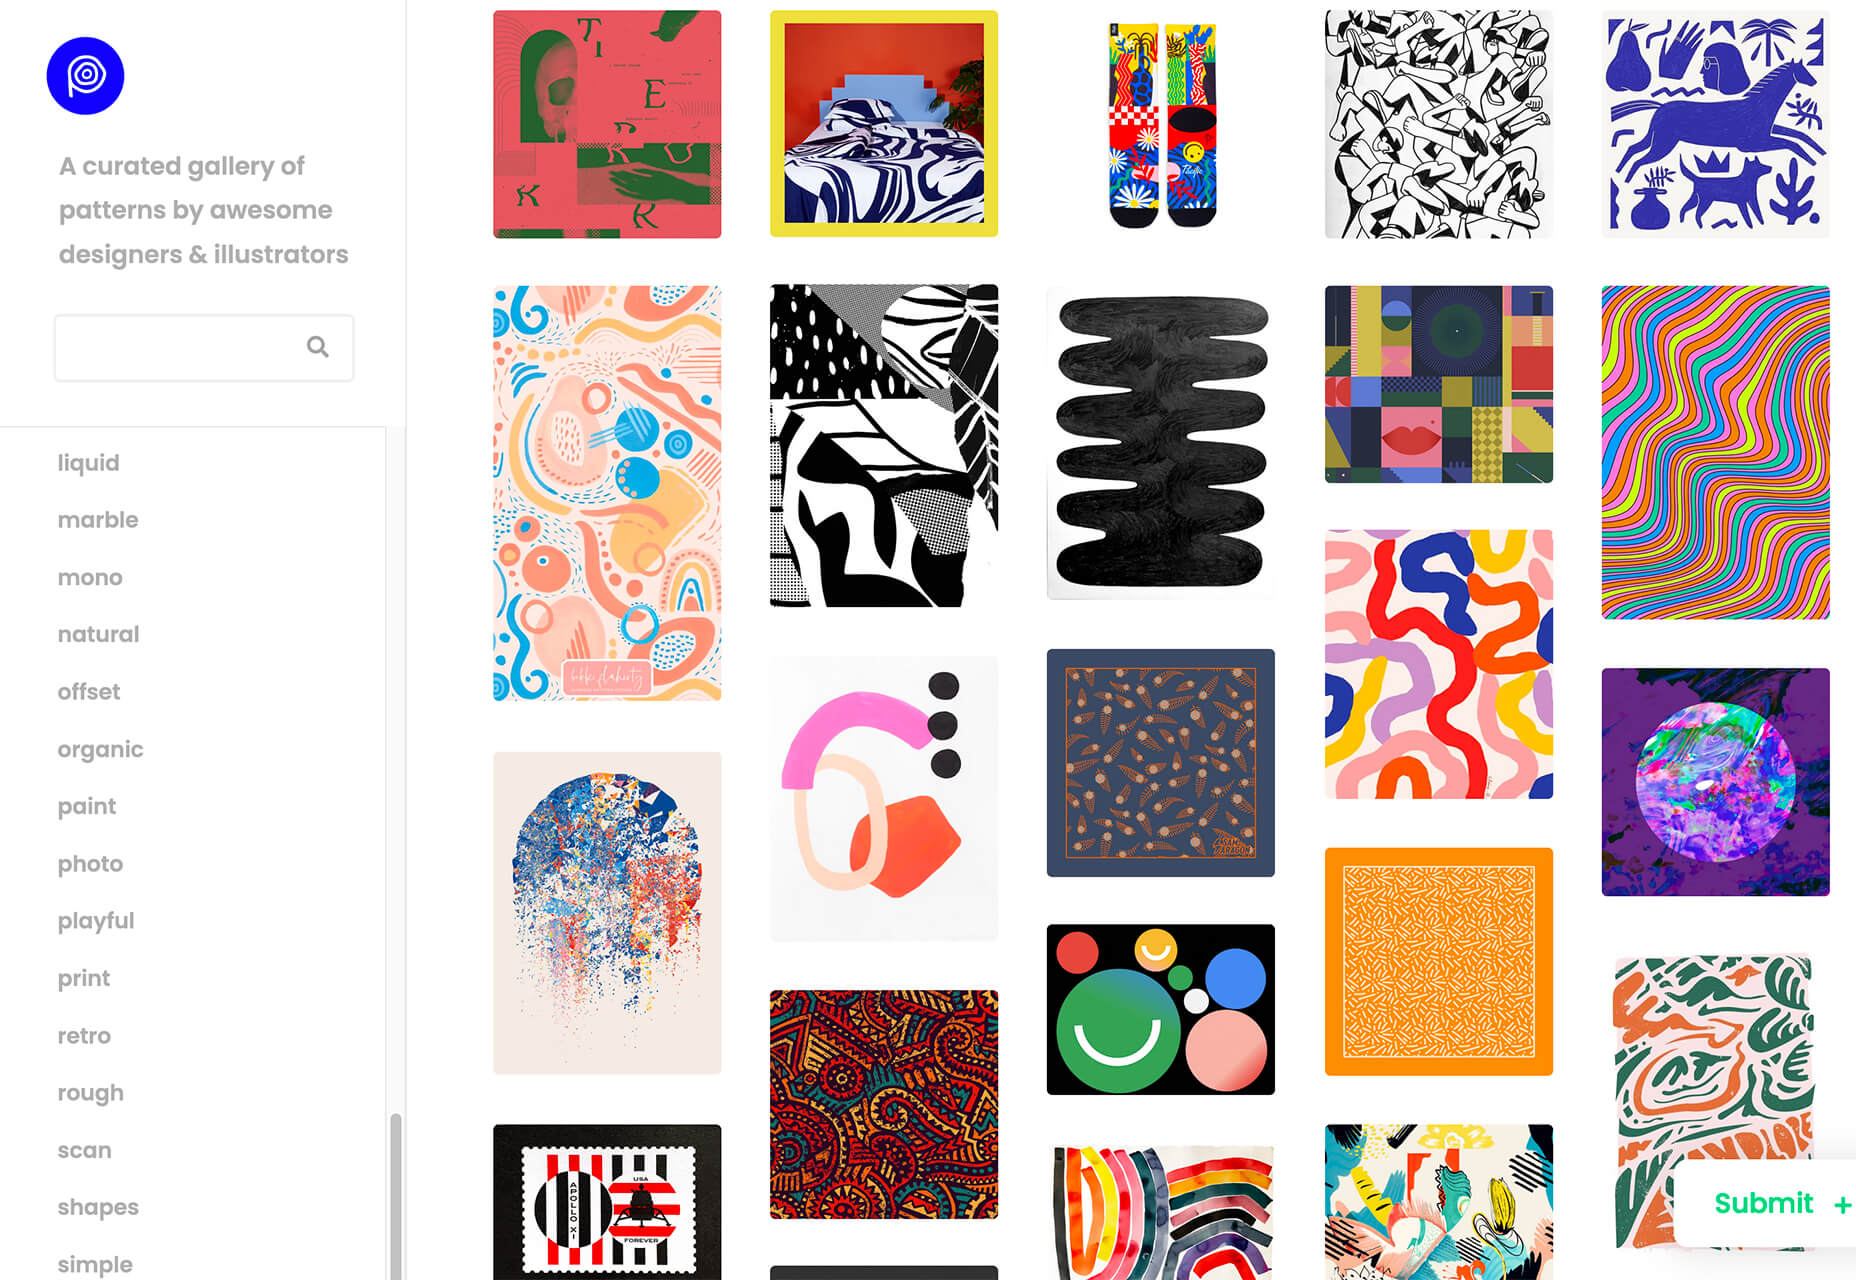
Everypixel Patterns solves a common design problem: Creating seamless patterns with graphic editors is such a long and exhausting process. That’s why some people choose to get patterns from stock websites but that can be a challenge too (and difficult to search). This tool makes getting patterns less time-consuming. It includes a gallery of well-designed content, which you can customize and edit as needed.

Multiavatar

Multiavatar is a free and open-source multicultural avatar maker. Type something in the input field and generate one of 12 billion avatars. (Everything is randomly generated and free to use.)

Lobe

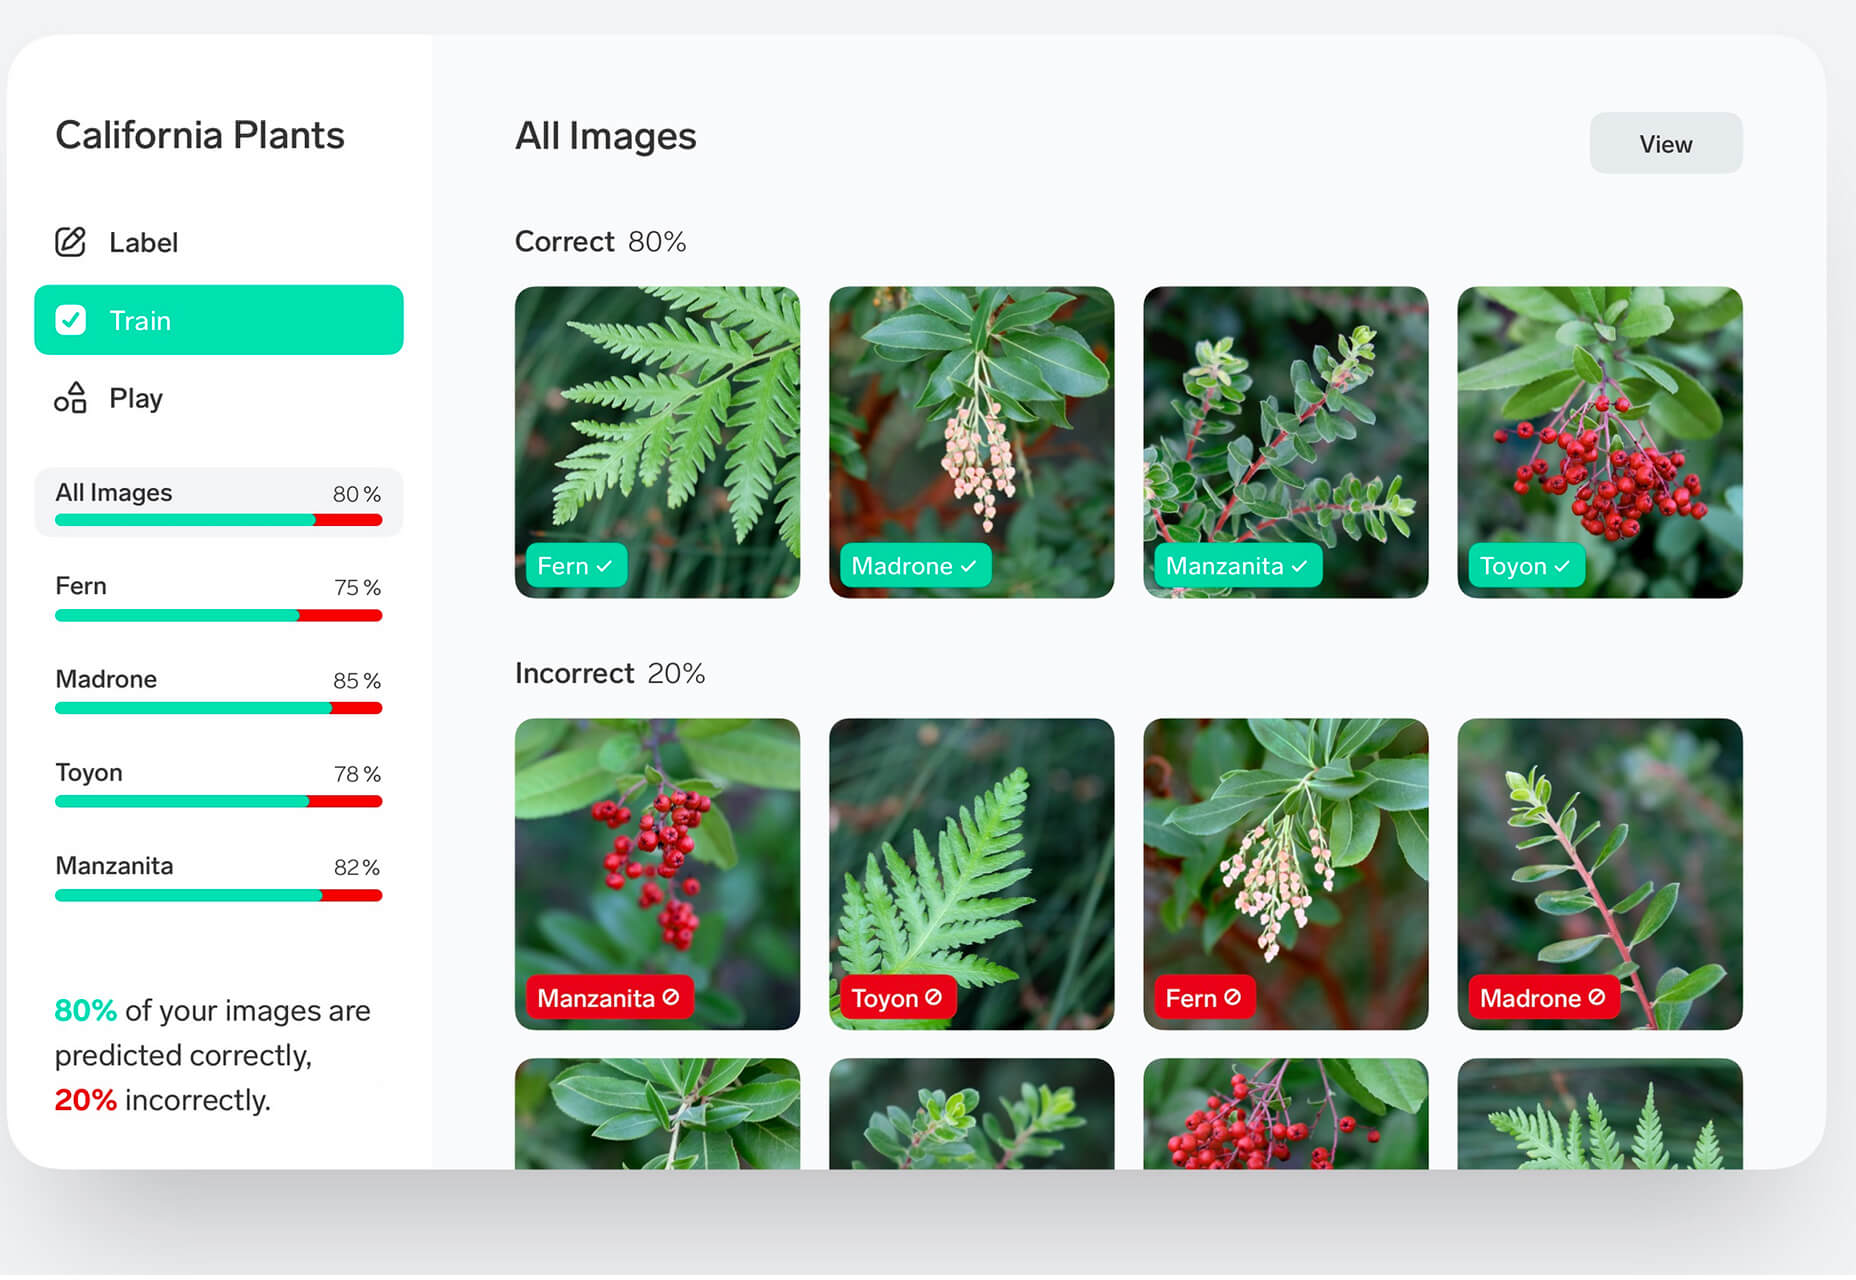
Lobe is a machine learning app from Microsoft that helps you create and train models. Start by showing the app examples of what you want it to learn and it will train a model for you. The tool is pretty easy to understand and you don’t need or experience or code knowledge to use it and you can train an app for free on your computer.

Laser Cat

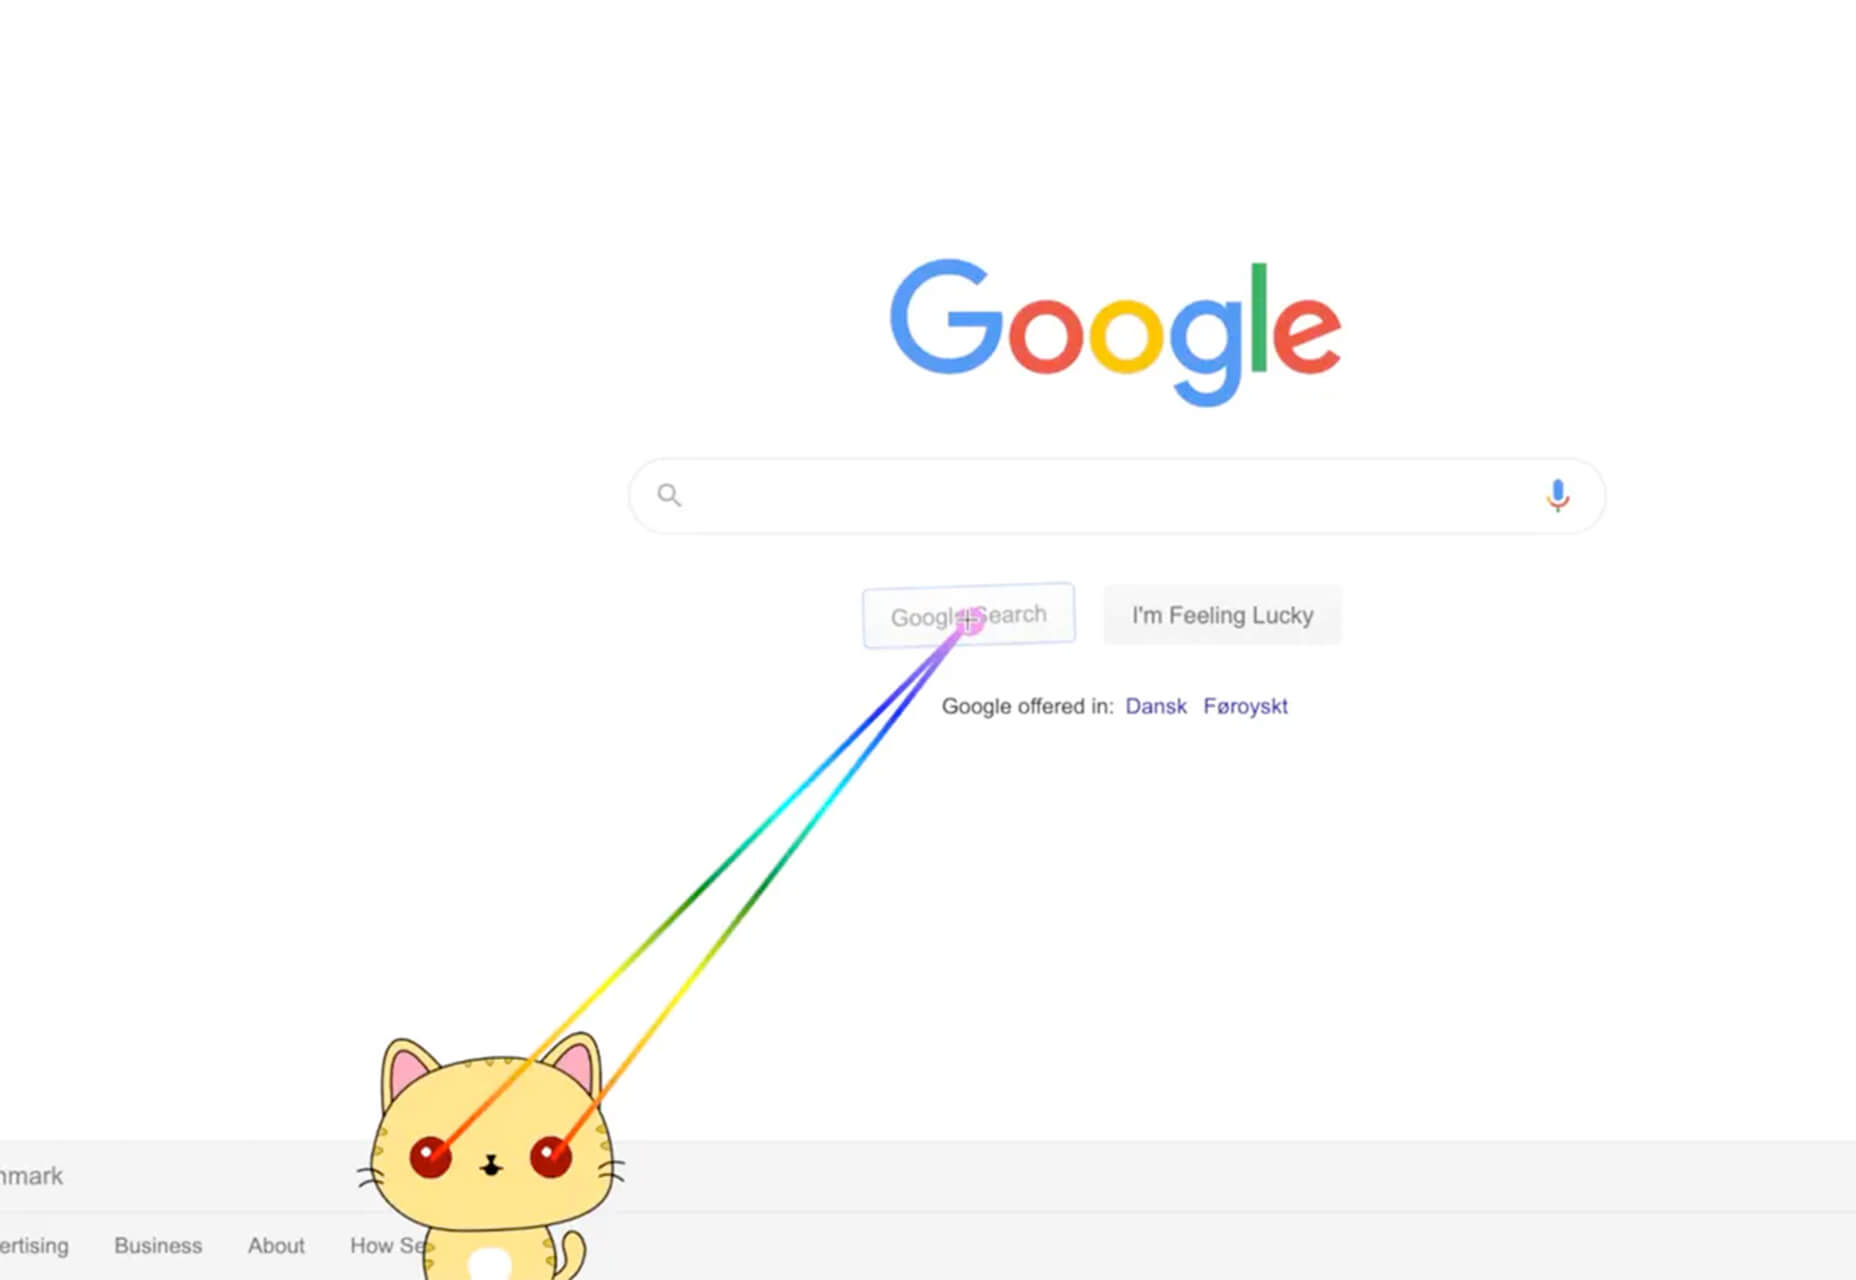
Laser Cat is a silly and fun Google Chrome extension that adds a cartoon cat to your browser that allows you to zap away anything you want to remove in the browser window. It’s light and fun. Go play!

Pattern Collect

Pattern Collect is a curated gallery of patterns by various designs and illustrators. You can download patterns for use in projects or submit your own to share with the design community. The library is searchable and you can get new patterns via email if you subscribe.

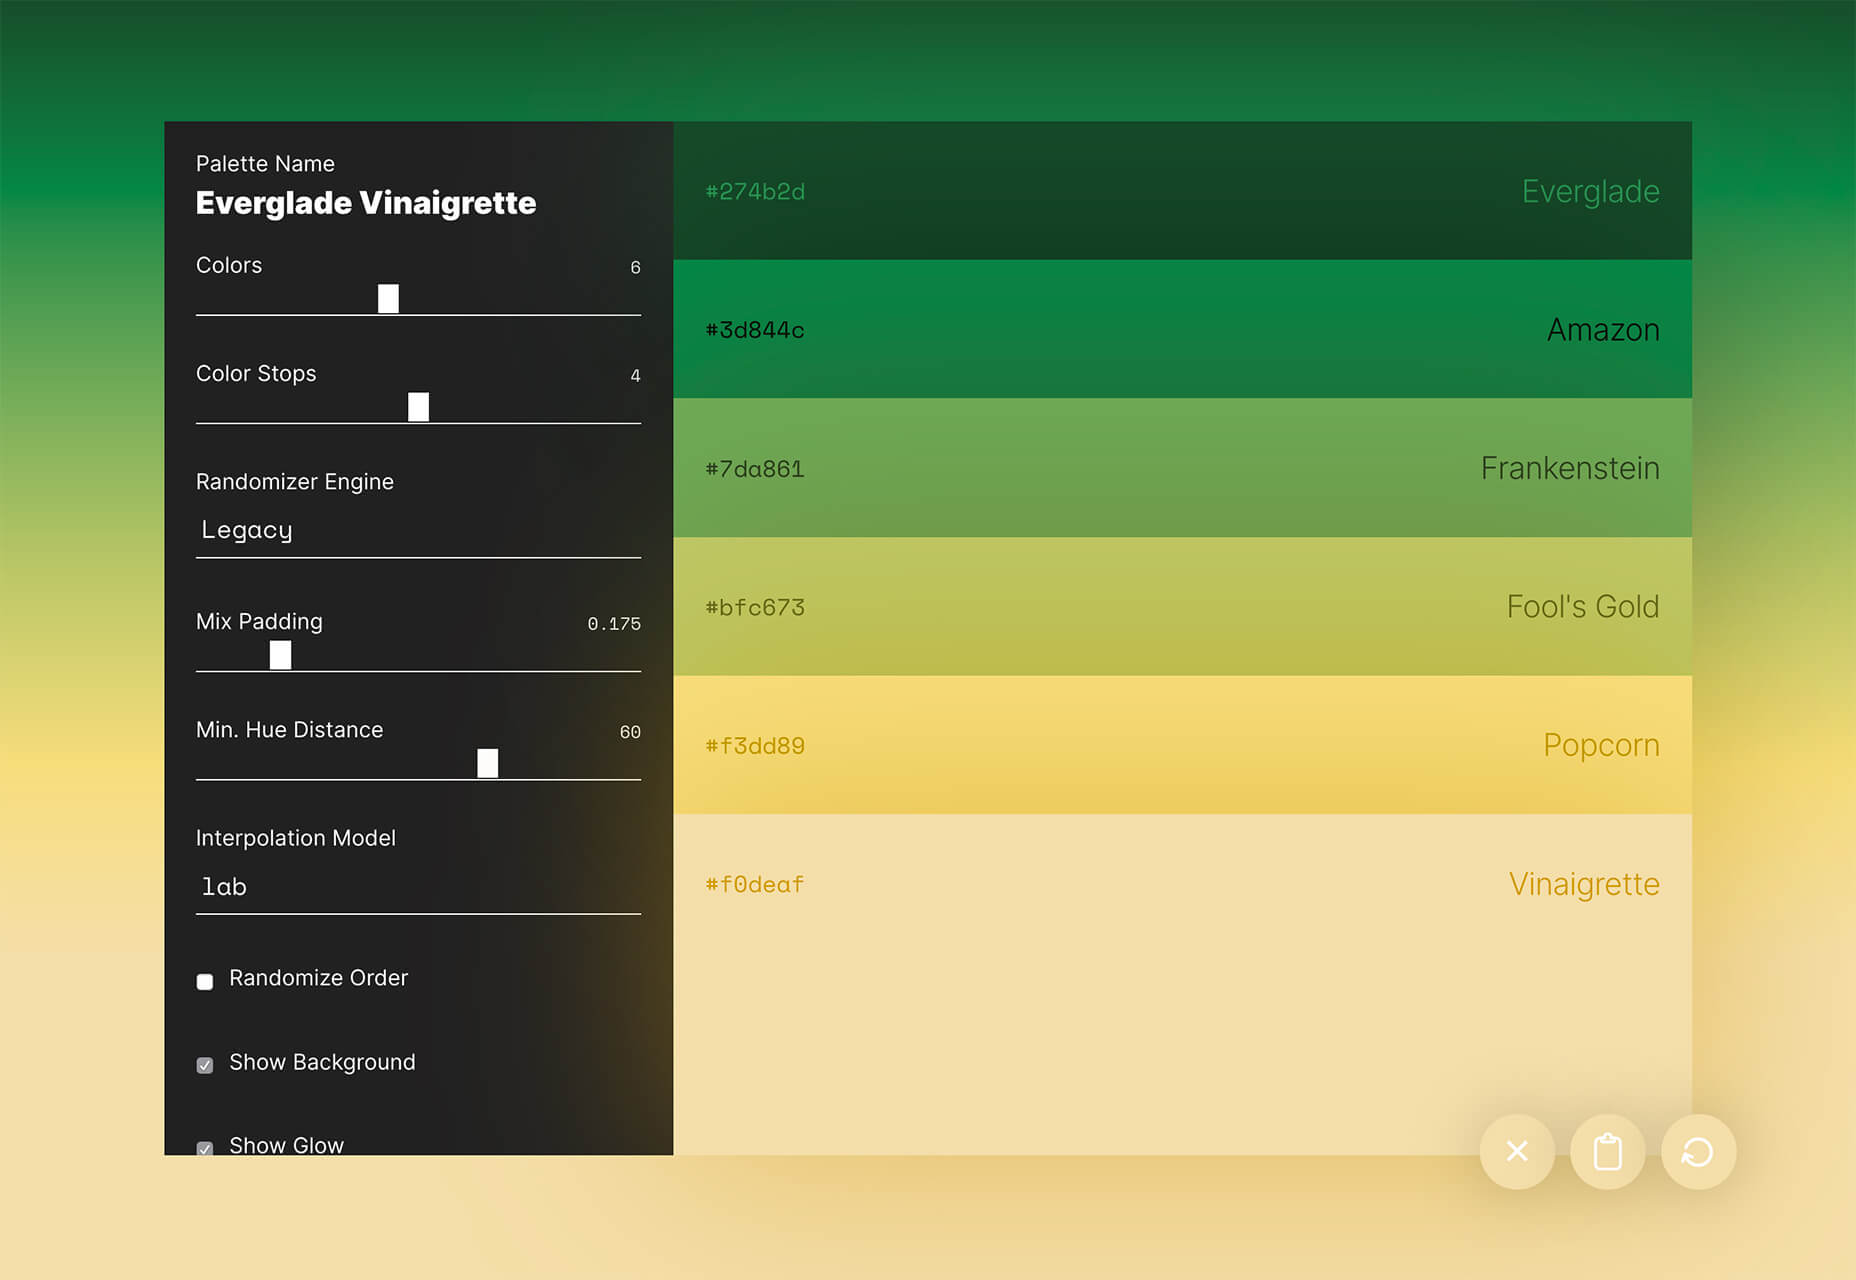
FarbVelo

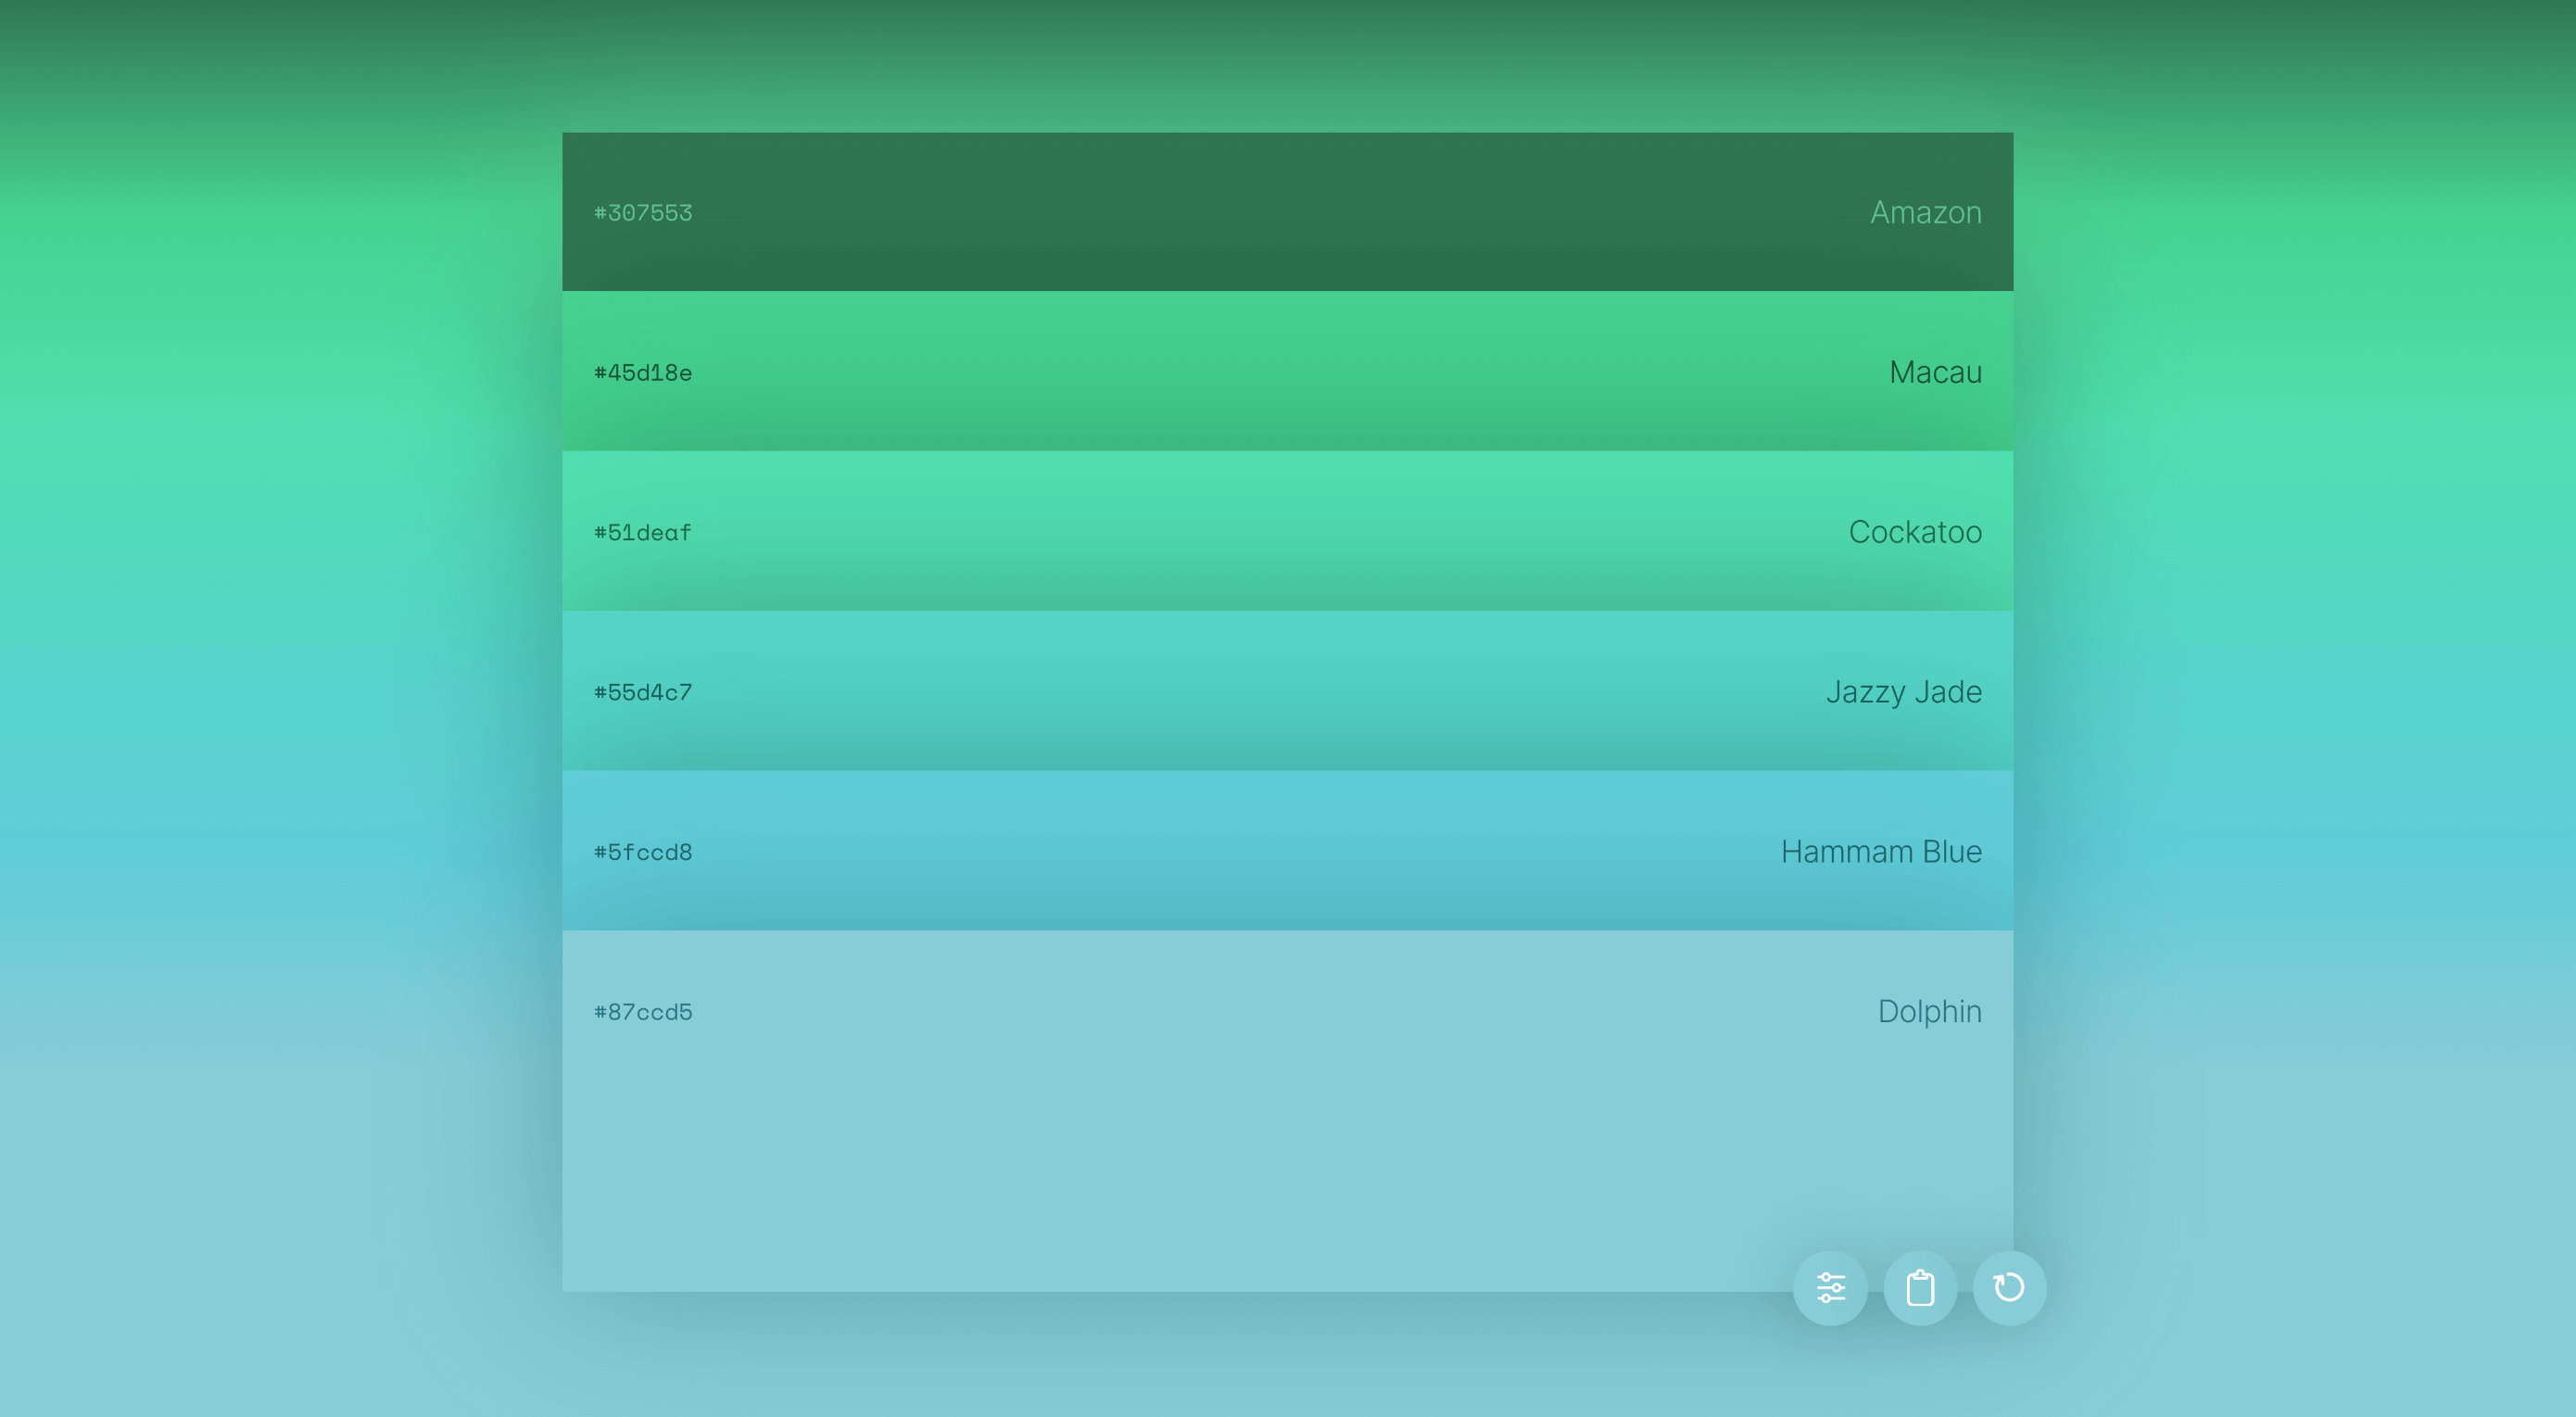
FarbVelo is a color palette generator that shows a new and random scheme with every refresh. The color choices are fresh and could work for a variety of projects, too.

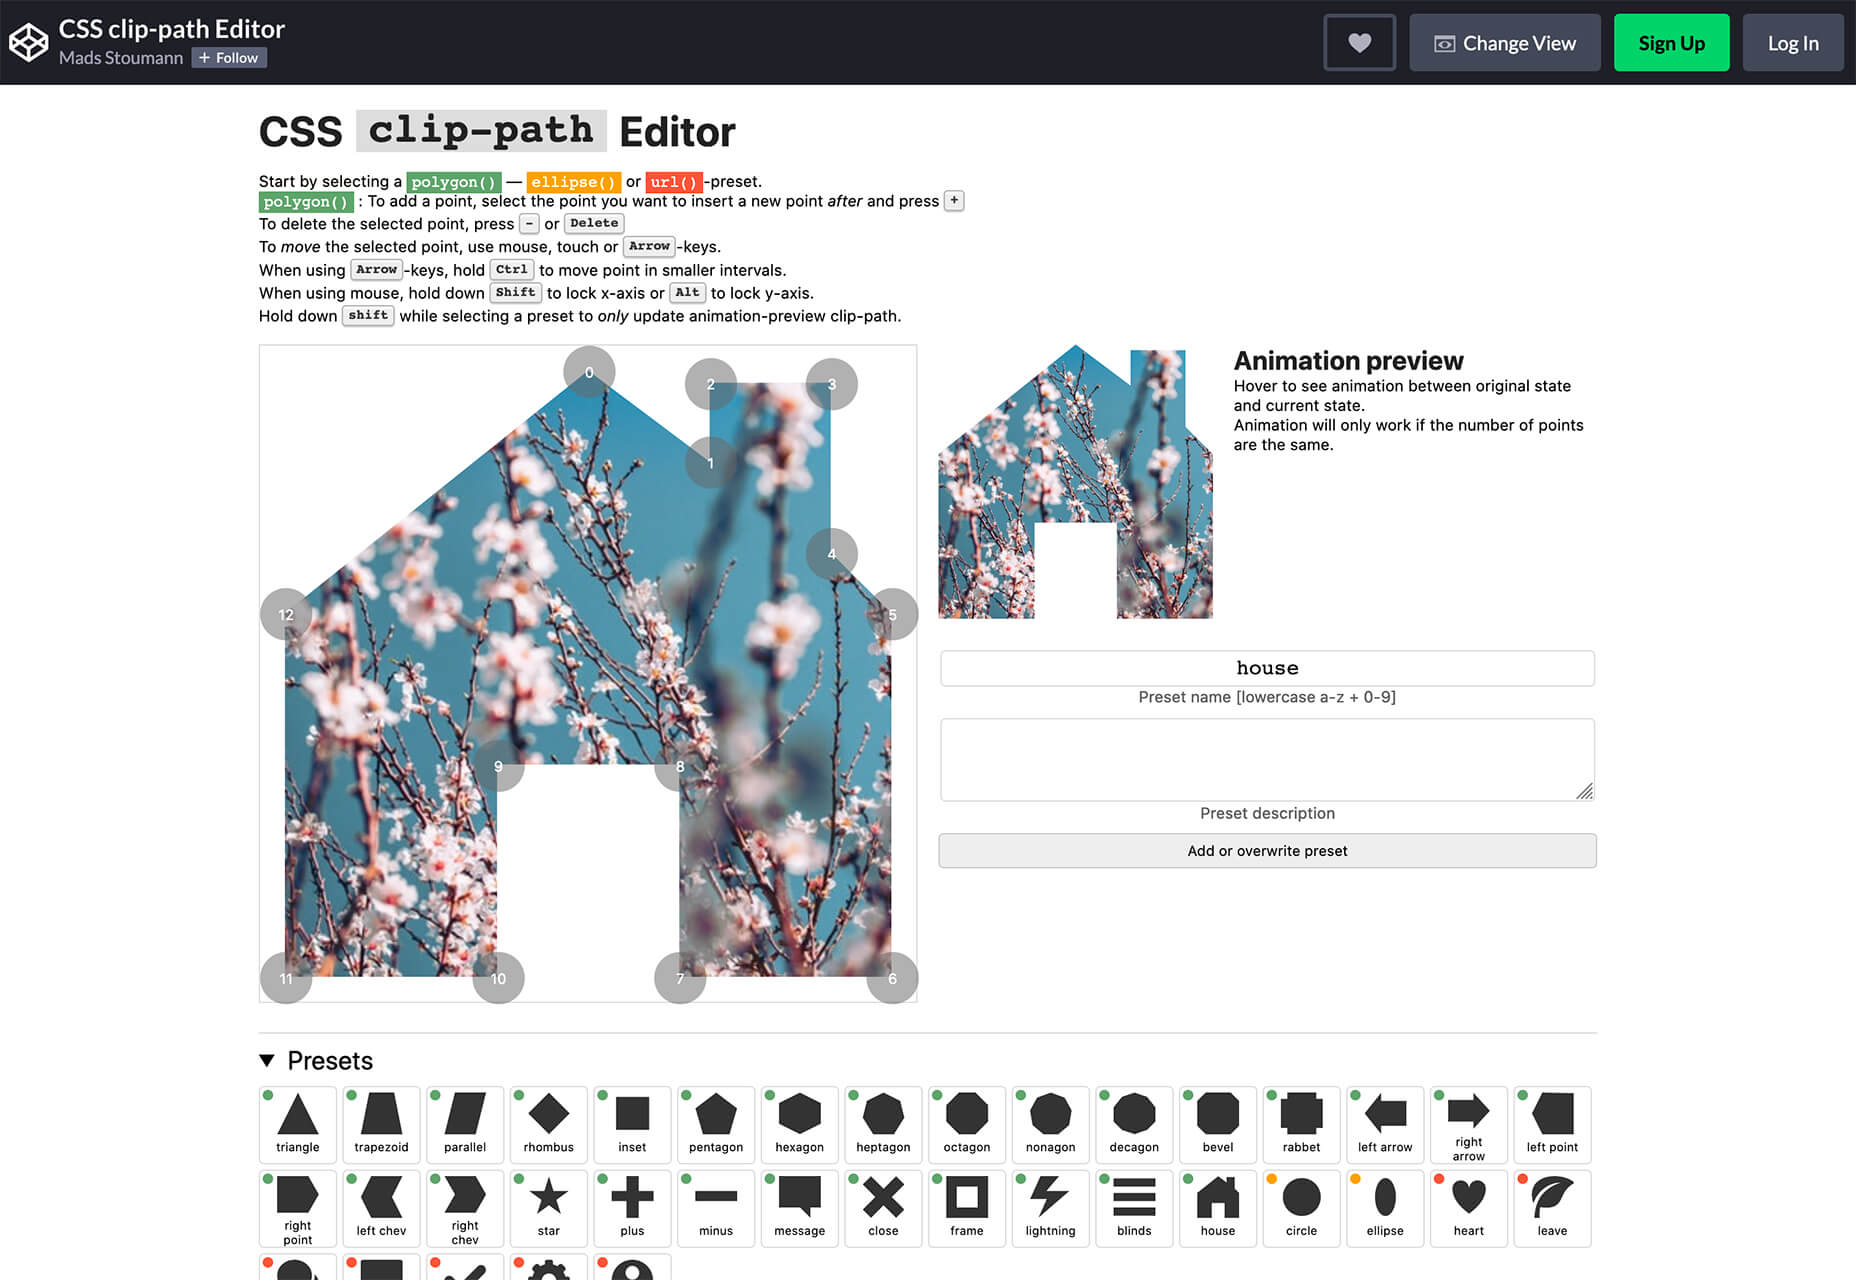
CSS Clip Path Editor

CSS Clip Path Editor is a cool little pen by Mads Stoumann that puts an image inside of almost any clip path you can imagine. There are presets to choose from or you can adjust the settings and paths to create your own image shape.

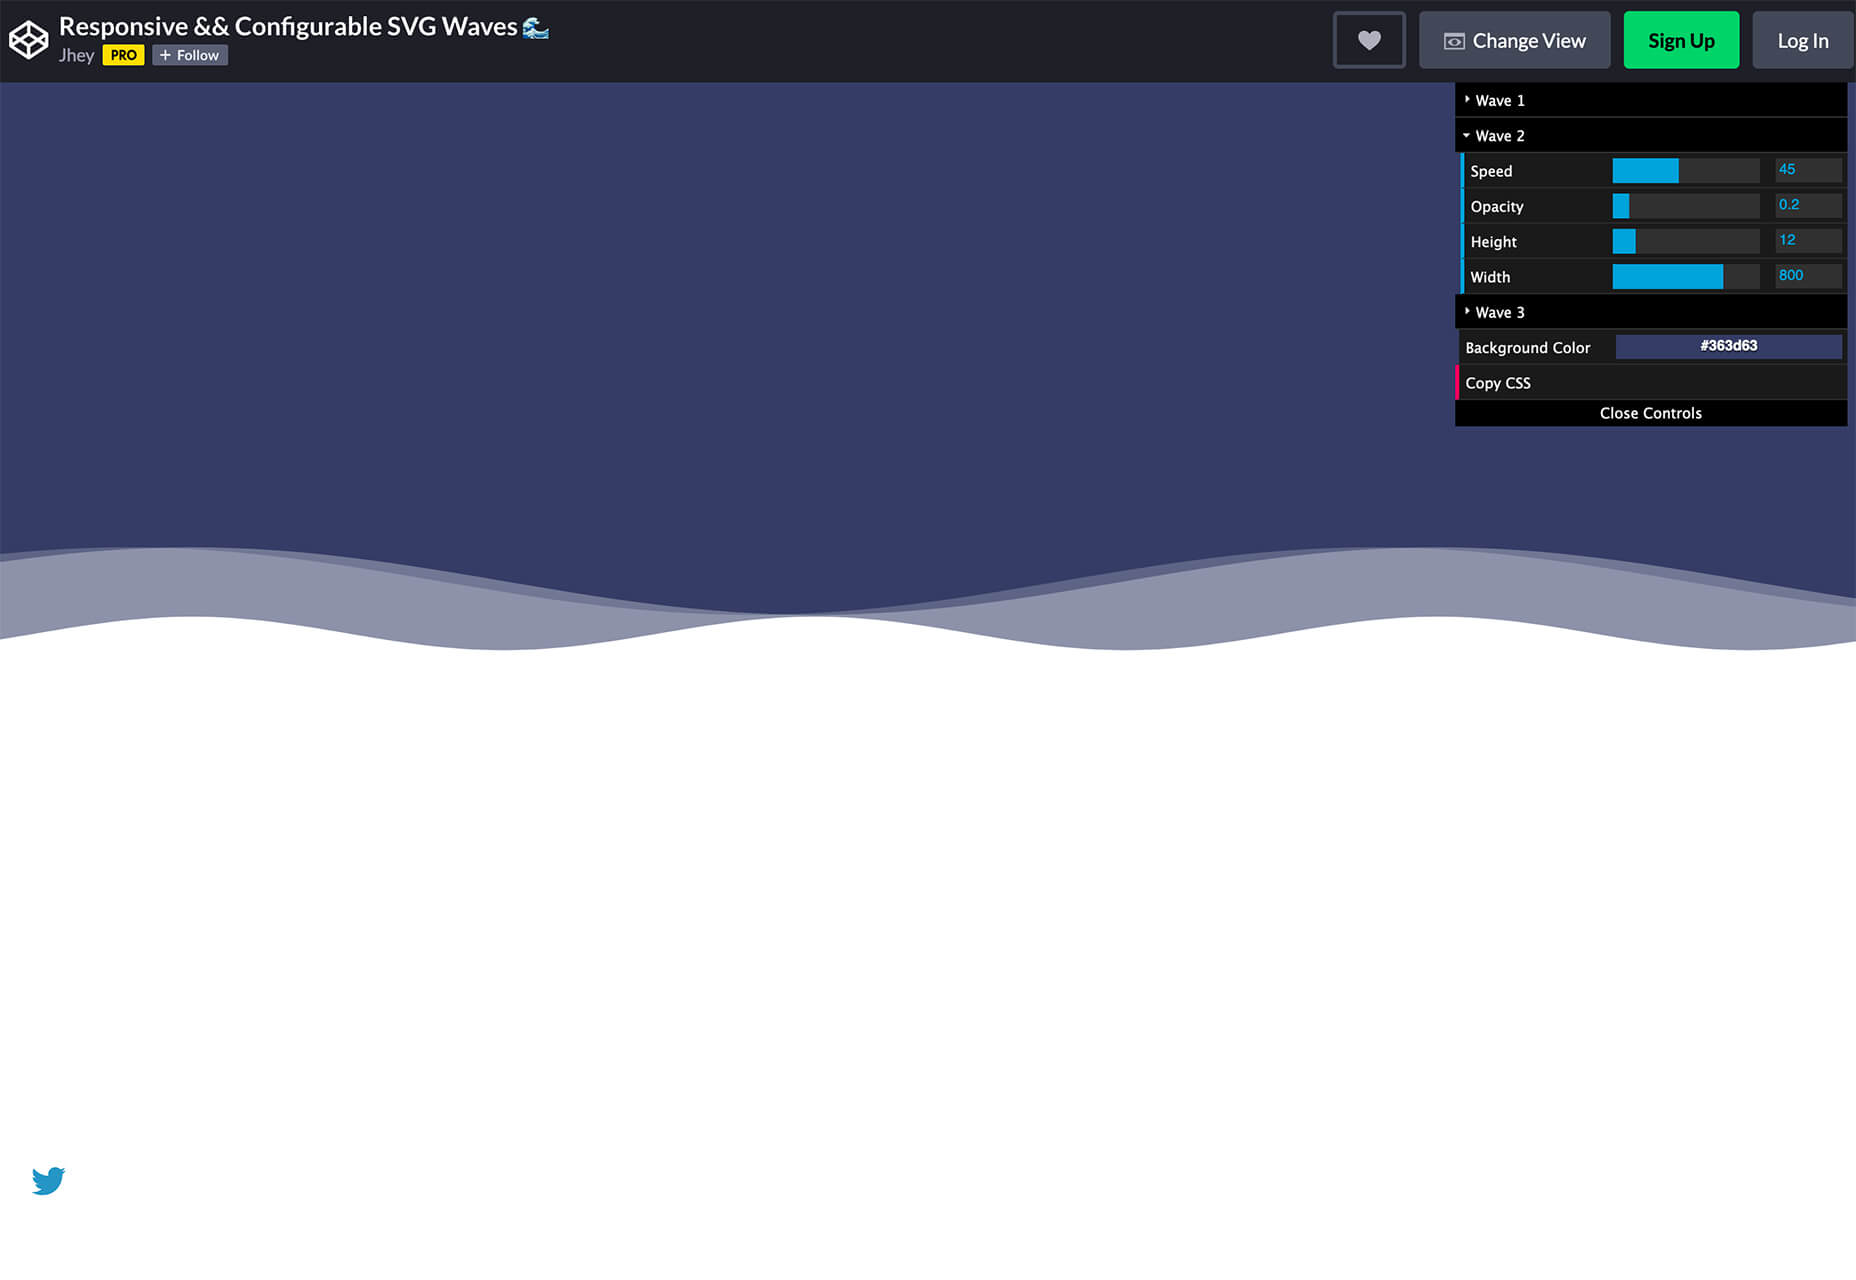
Responsive & Configurable SVG Waves

Responsive & Configurable SVG Waves is a soothing pen by Jhey. Change the background and wave elements for a simple and cool animation in SVG.

Veed

Veed lets you host, edit, and deliver videos in the cloud using a REST API. It works on any browser, device, and bandwidth, and keeps your website light, even when delivering heavy video content.

Overlay

Overlay is a plugin for Figma or Sketch that transforms components and symbols into clean and reusable React, Vue, or HTML code. The benefit? Use it to create more consistent websites and design systems more quickly and in a pixel-perfect manner.

List.js

List.js is a library for adding search, sort, filters, and flexibility to tables, lists, and other HTML elements. It is built so that it will work on existing HTML and be invisible. Plus, it is simple to install and use.

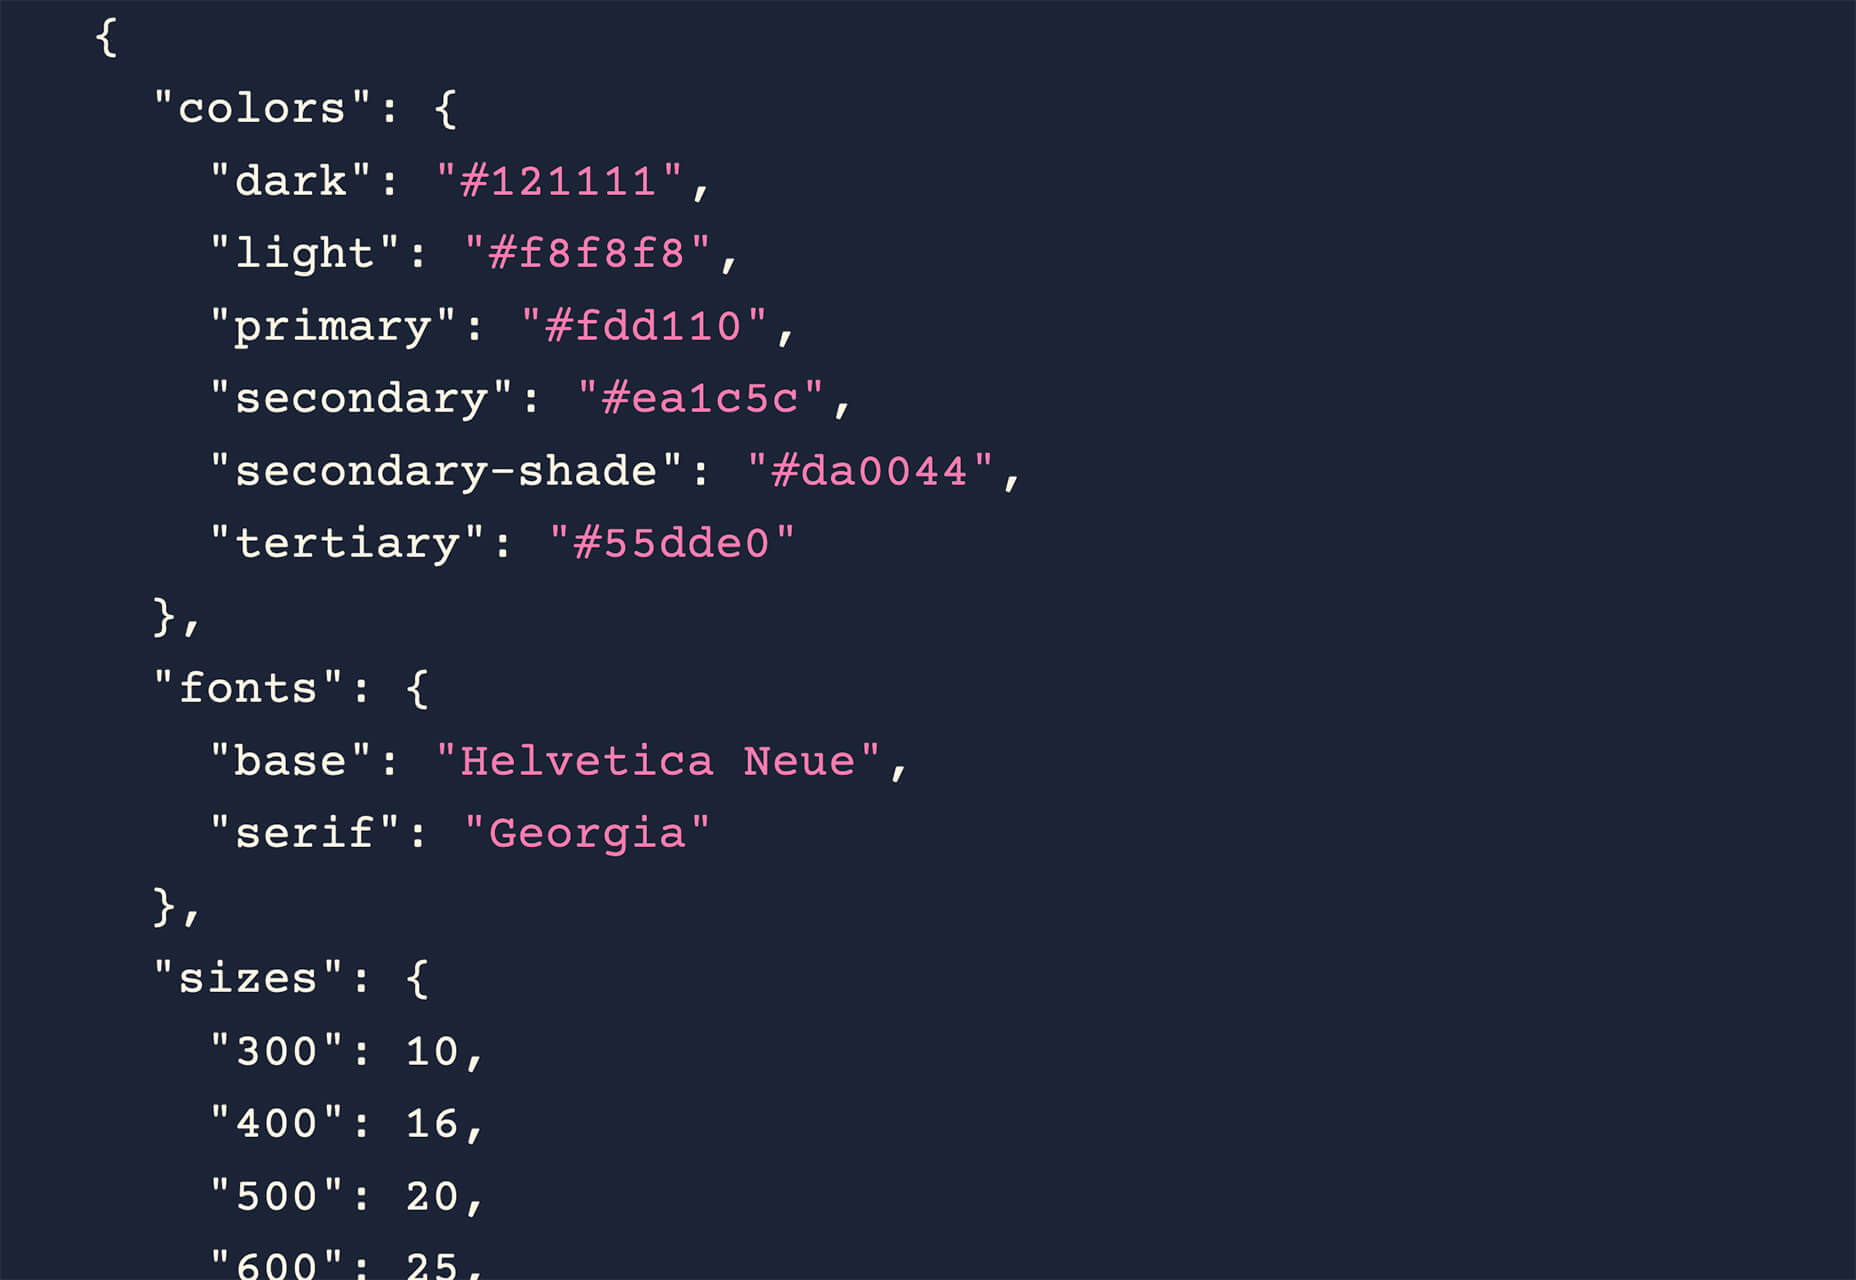
What Are Design Tokens?

Design tokens are a “hot term” says Andy Bell. So, he wrote an explainer that breaks down what they are and how they might look in a standard data format like JSON. Read the explainer and you’ll be able to identify design tokens and understand them.

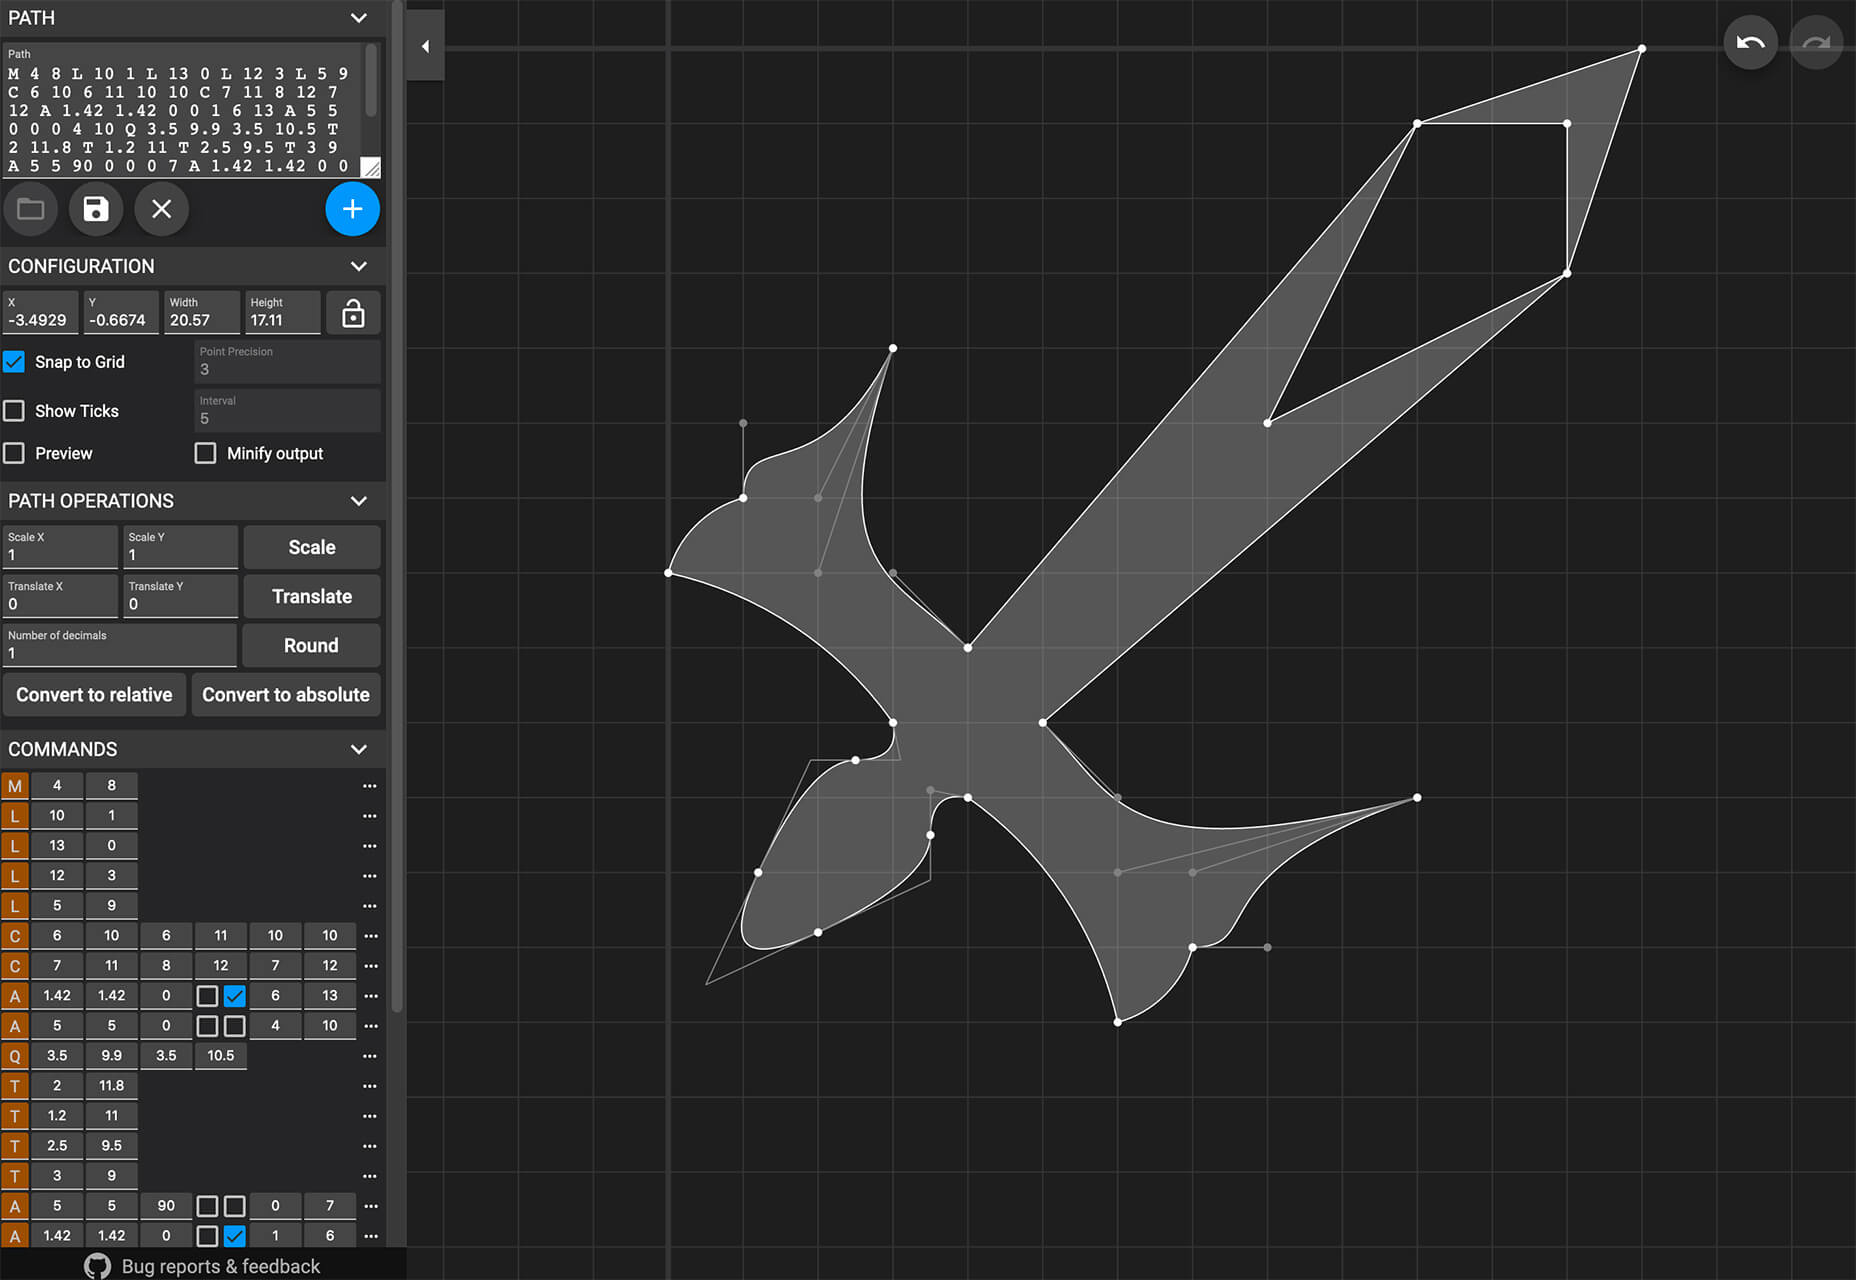
SVG Path Editor

SVG Path Editor makes it easy to manipulate paths for any SVG element. The grid – if you choose to use it – helps edits stay symmetrical and easy to manage.

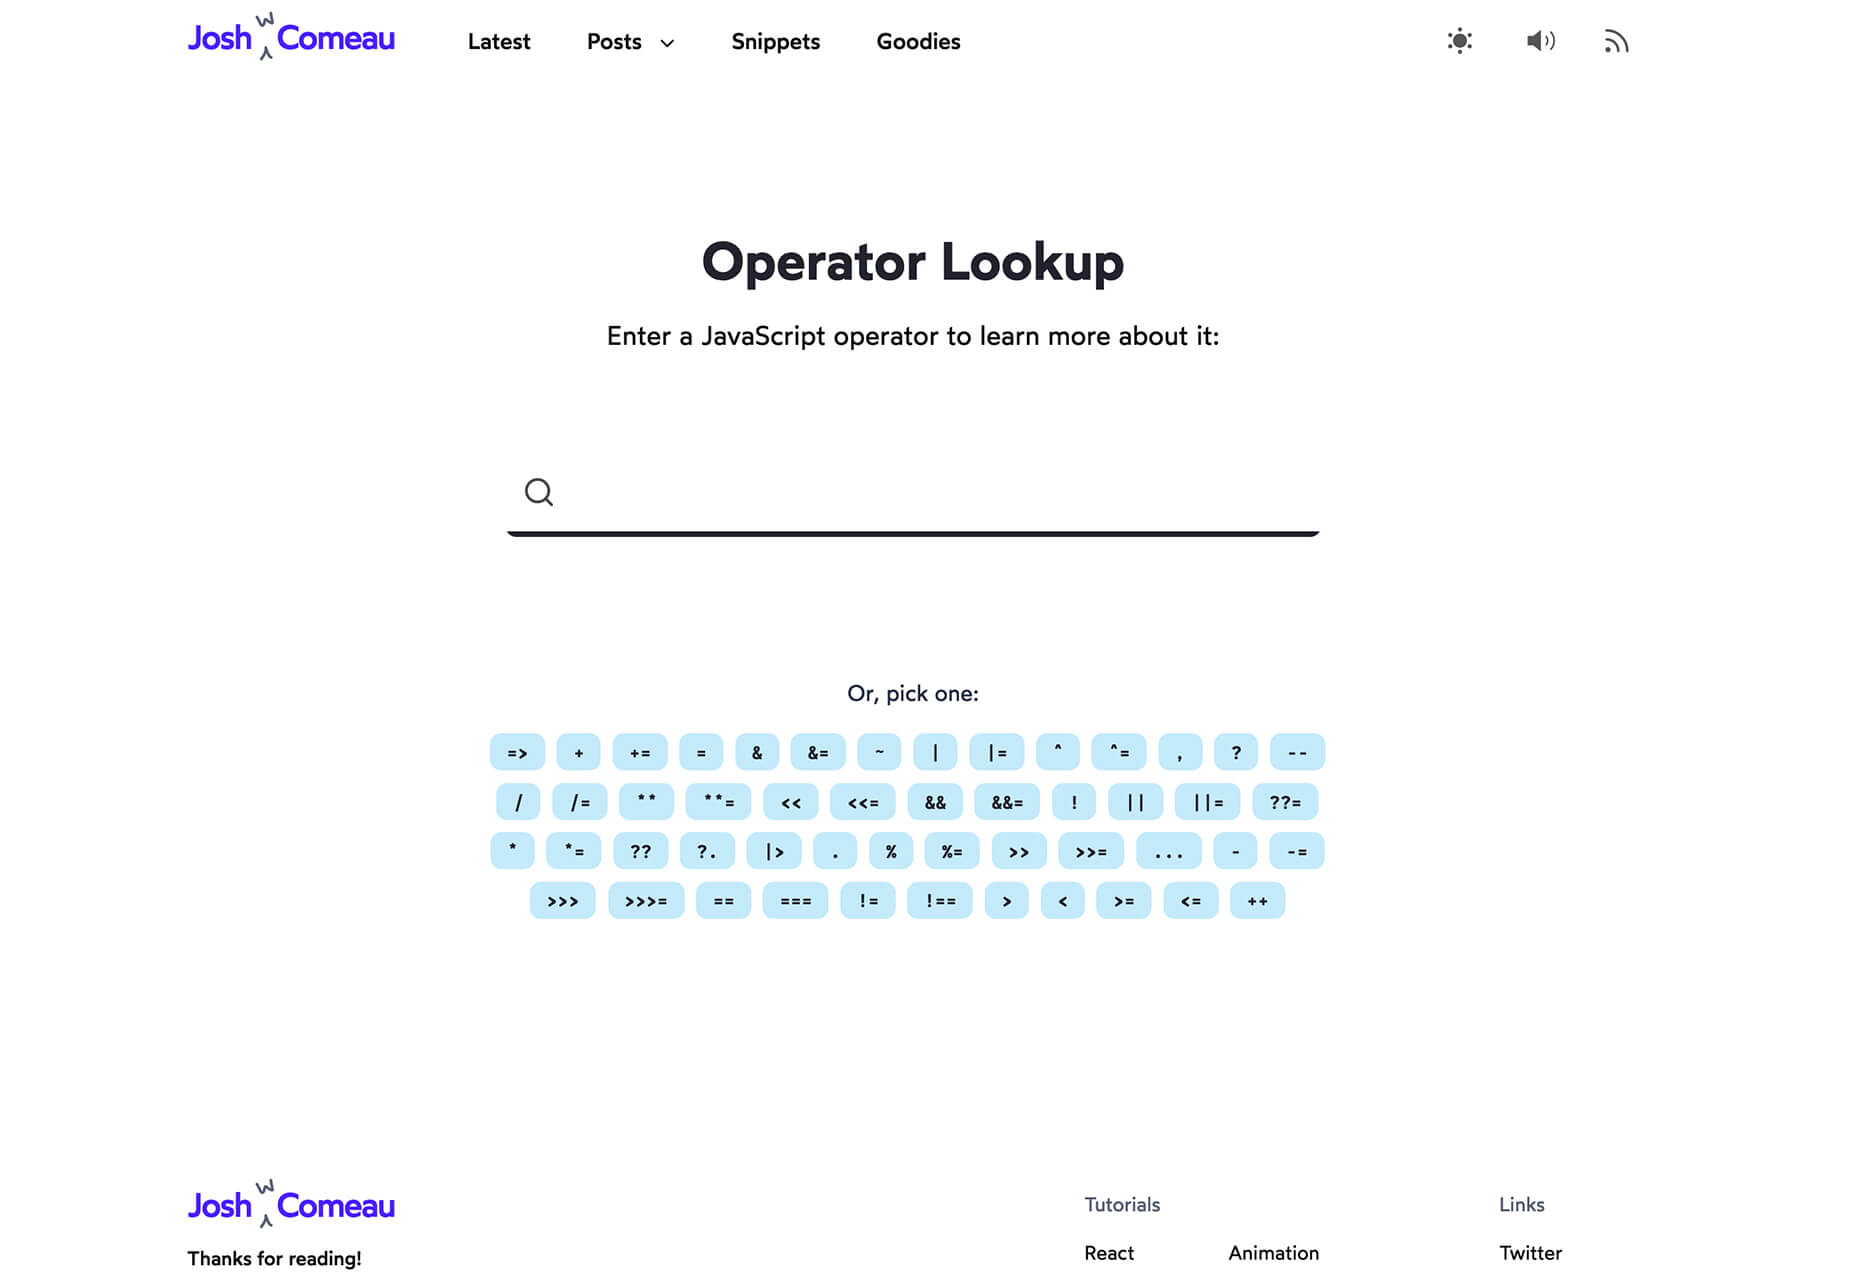
Operator Lookup

Operator Lookup is a practical and fun tool. Enter a JavaScript operator in the search box to learn more about what it does. (You can also choose from a “keyboard” of options.) Thanks for the tutorial, Josh W. Comeau.

Beacon

Beacon is a tool designed to help you write, run, and share SQL in Slack. It makes collaboration easy so you can work on and run queries, debug, and resolve issues all in a single platform.

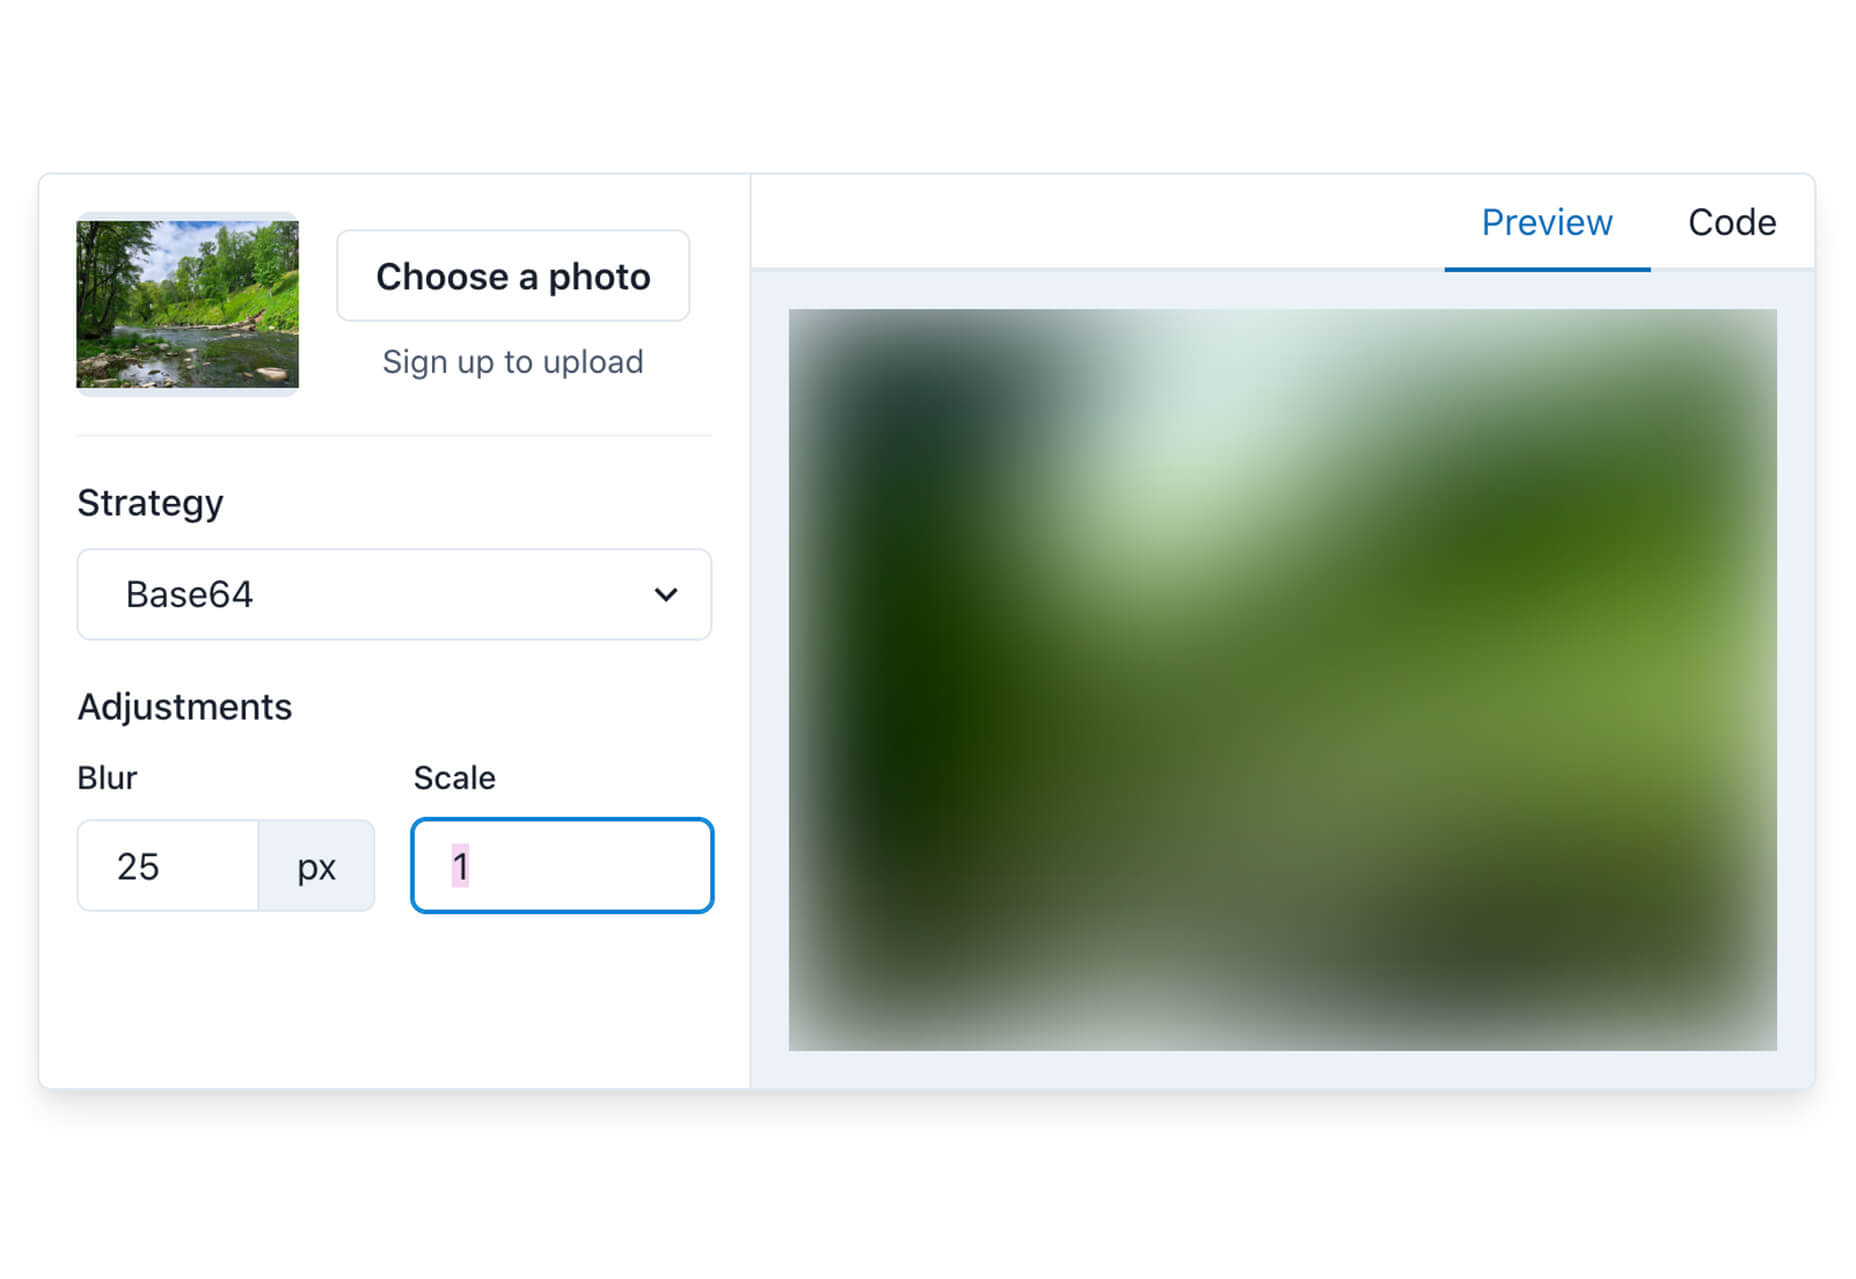
Plaiceholder

Plaiceholder transforms your images into lightweight placeholders using pure CSS or SVG.

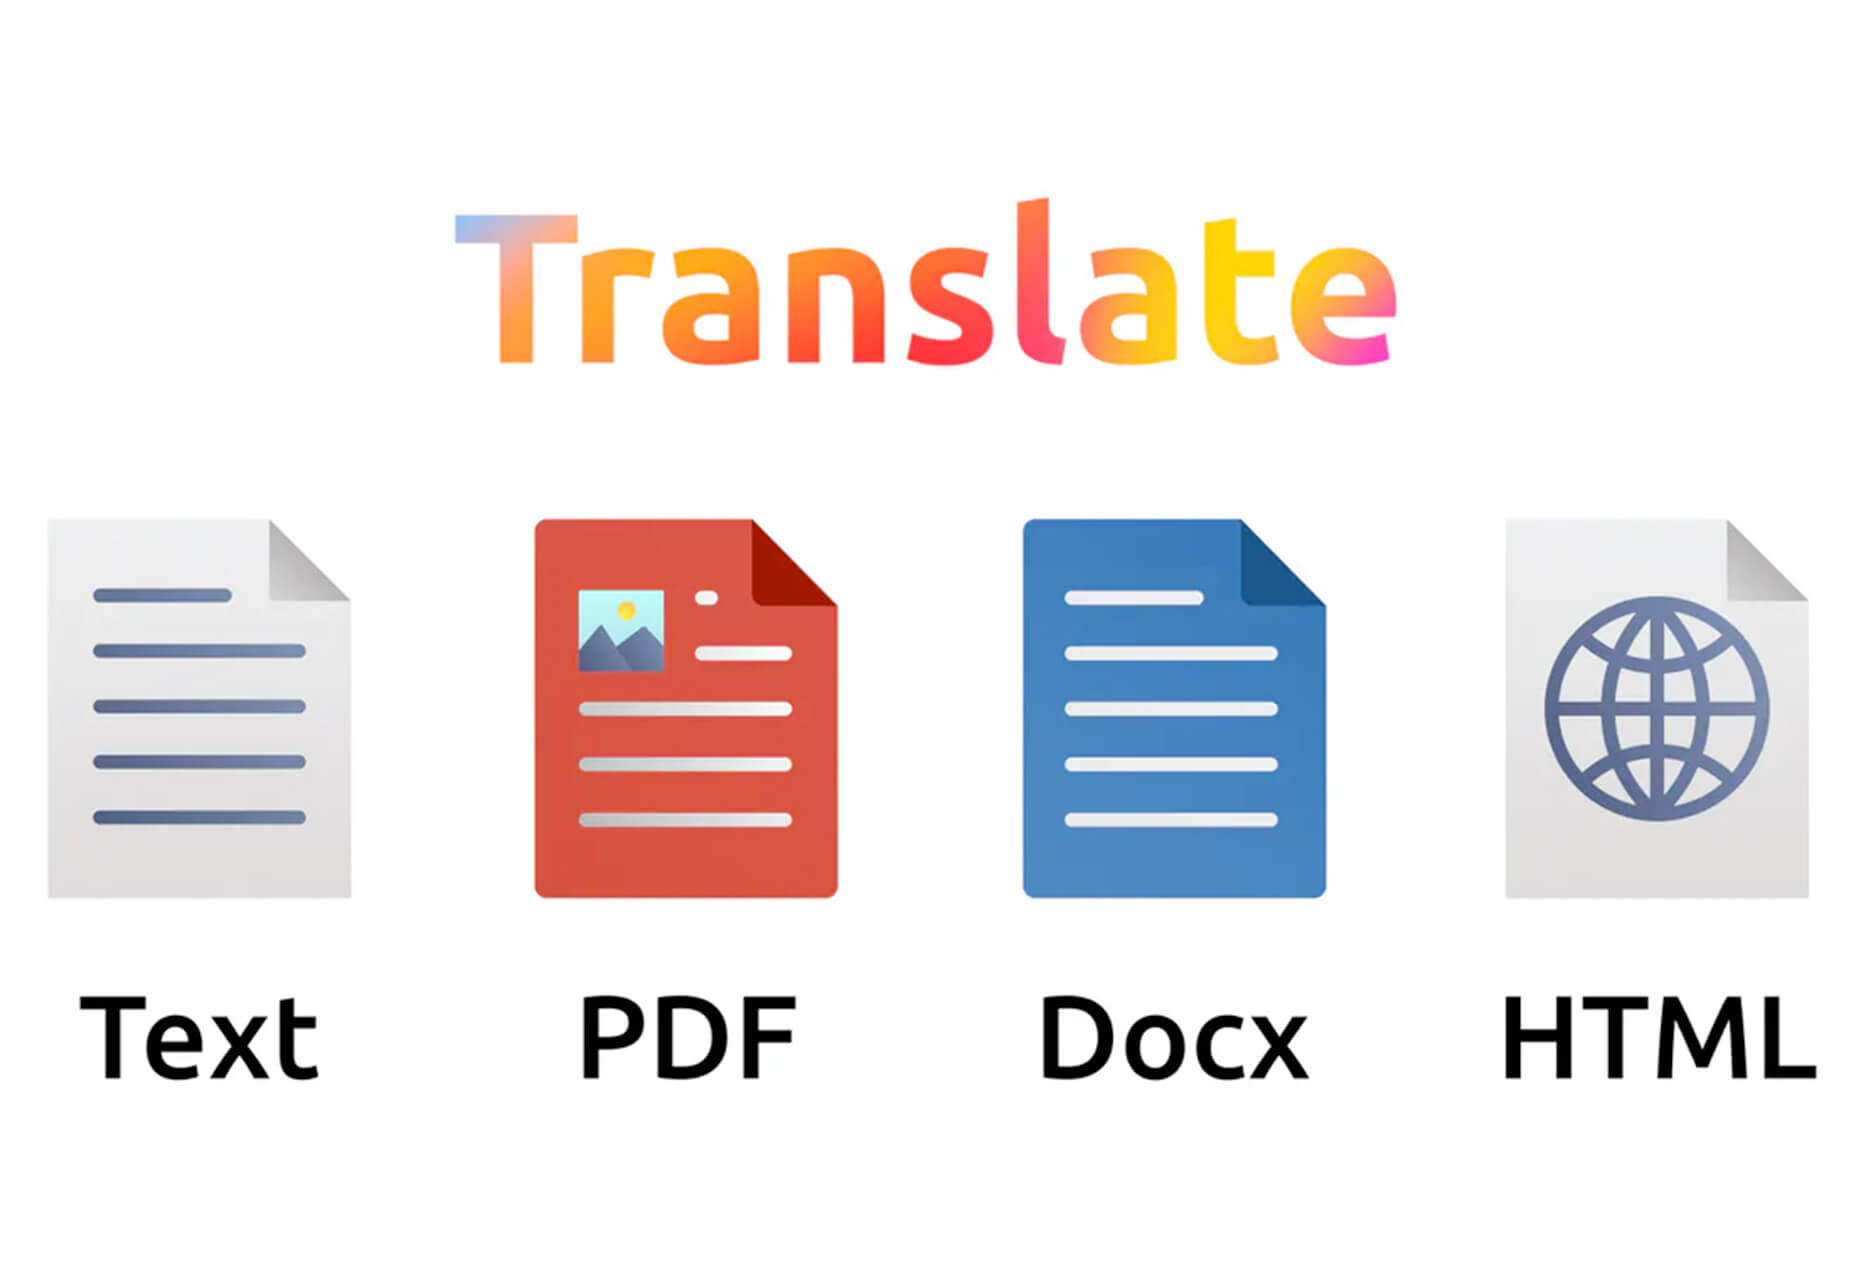
Machine Translation

Machine Translation is available as Cloud API, on-premise translation server, and SDK that can be easily integrated into lots of business cases. Both solutions work with 110 languages.

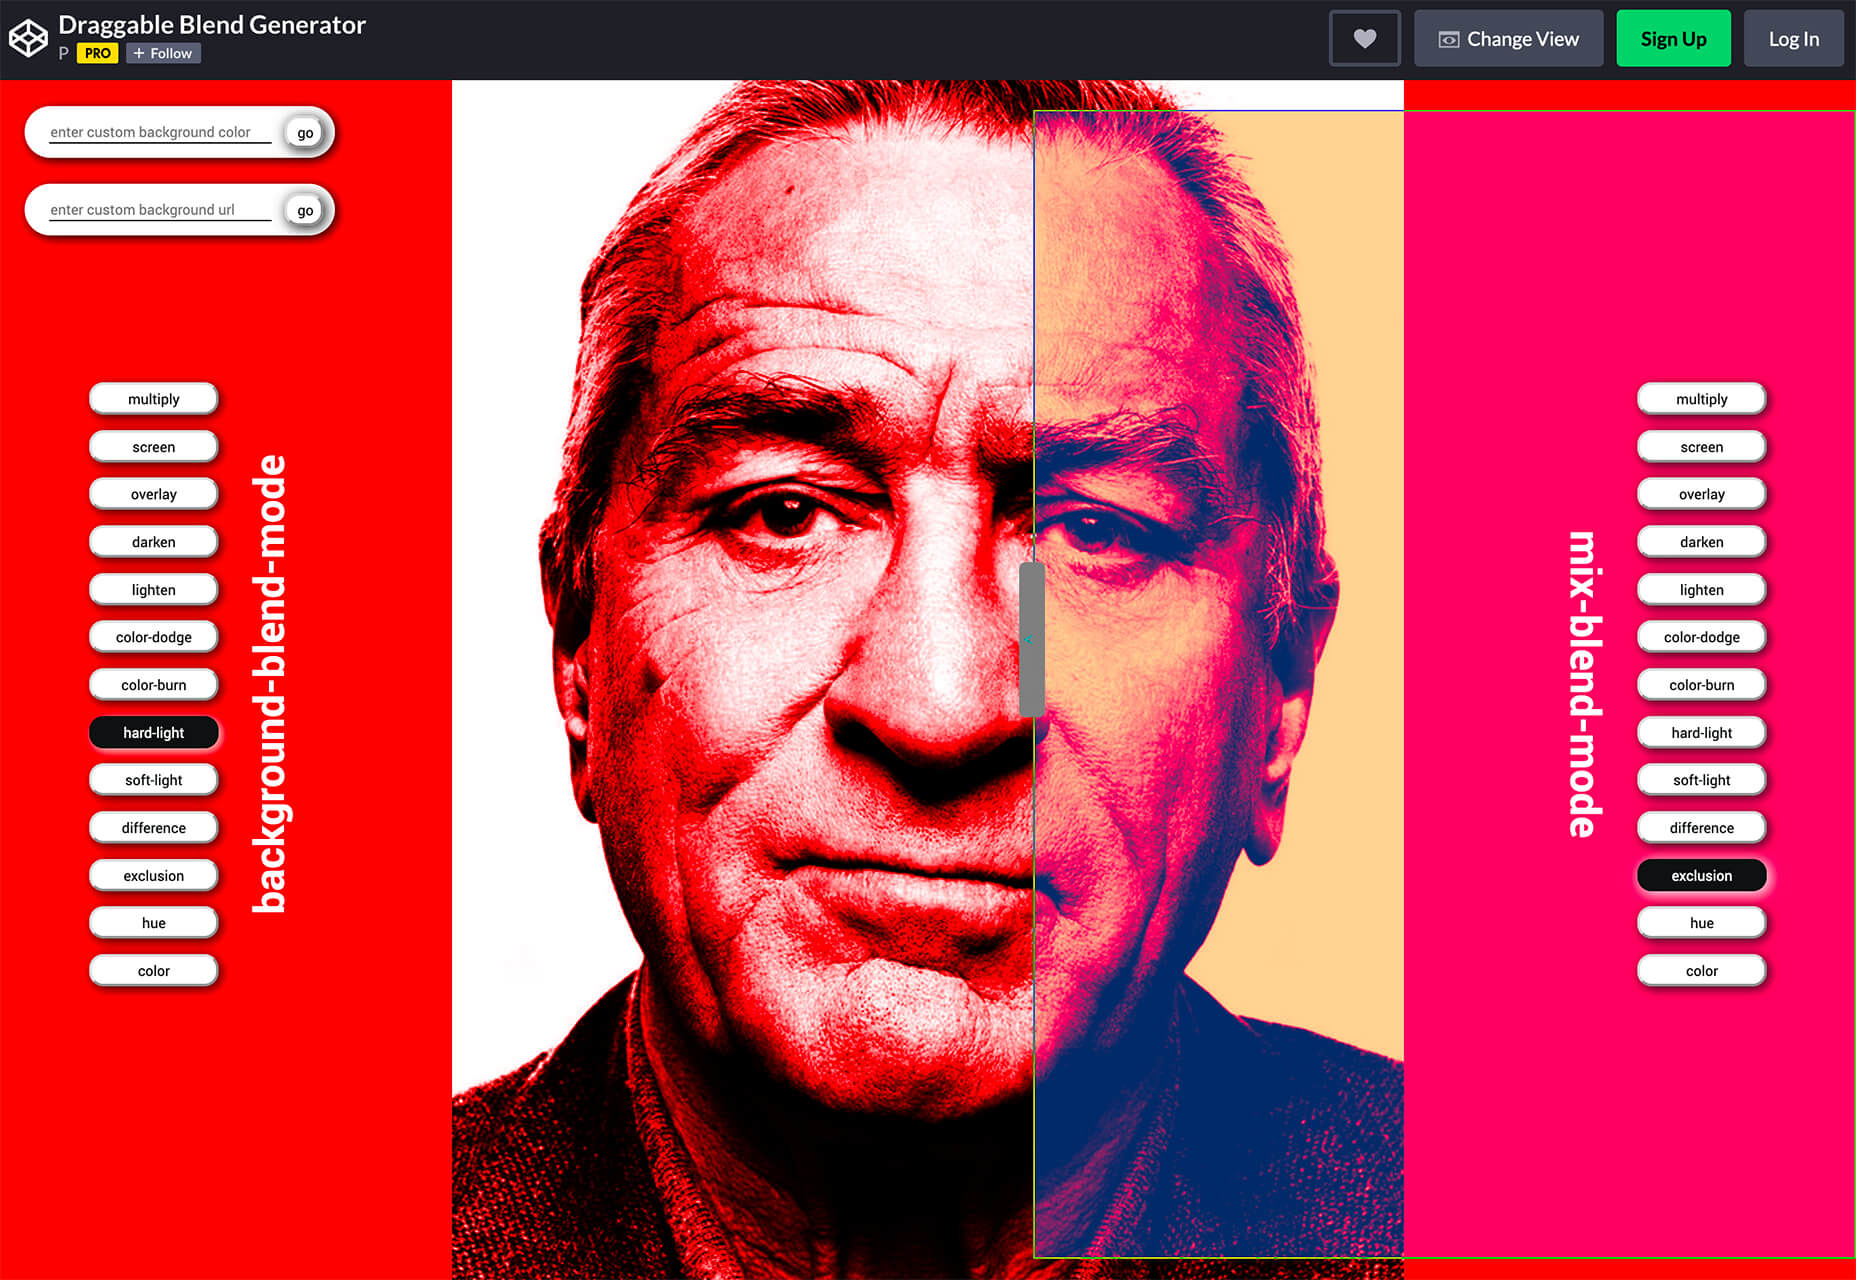
Draggable Blend Generator

Draggable Blend Generator does just what the name implies. Change the blend mode of a background and foreground using a draggable tool so that you can see the changes in real time. Just enter the URL of a background image or pattern and color swatch and you are ready to go.

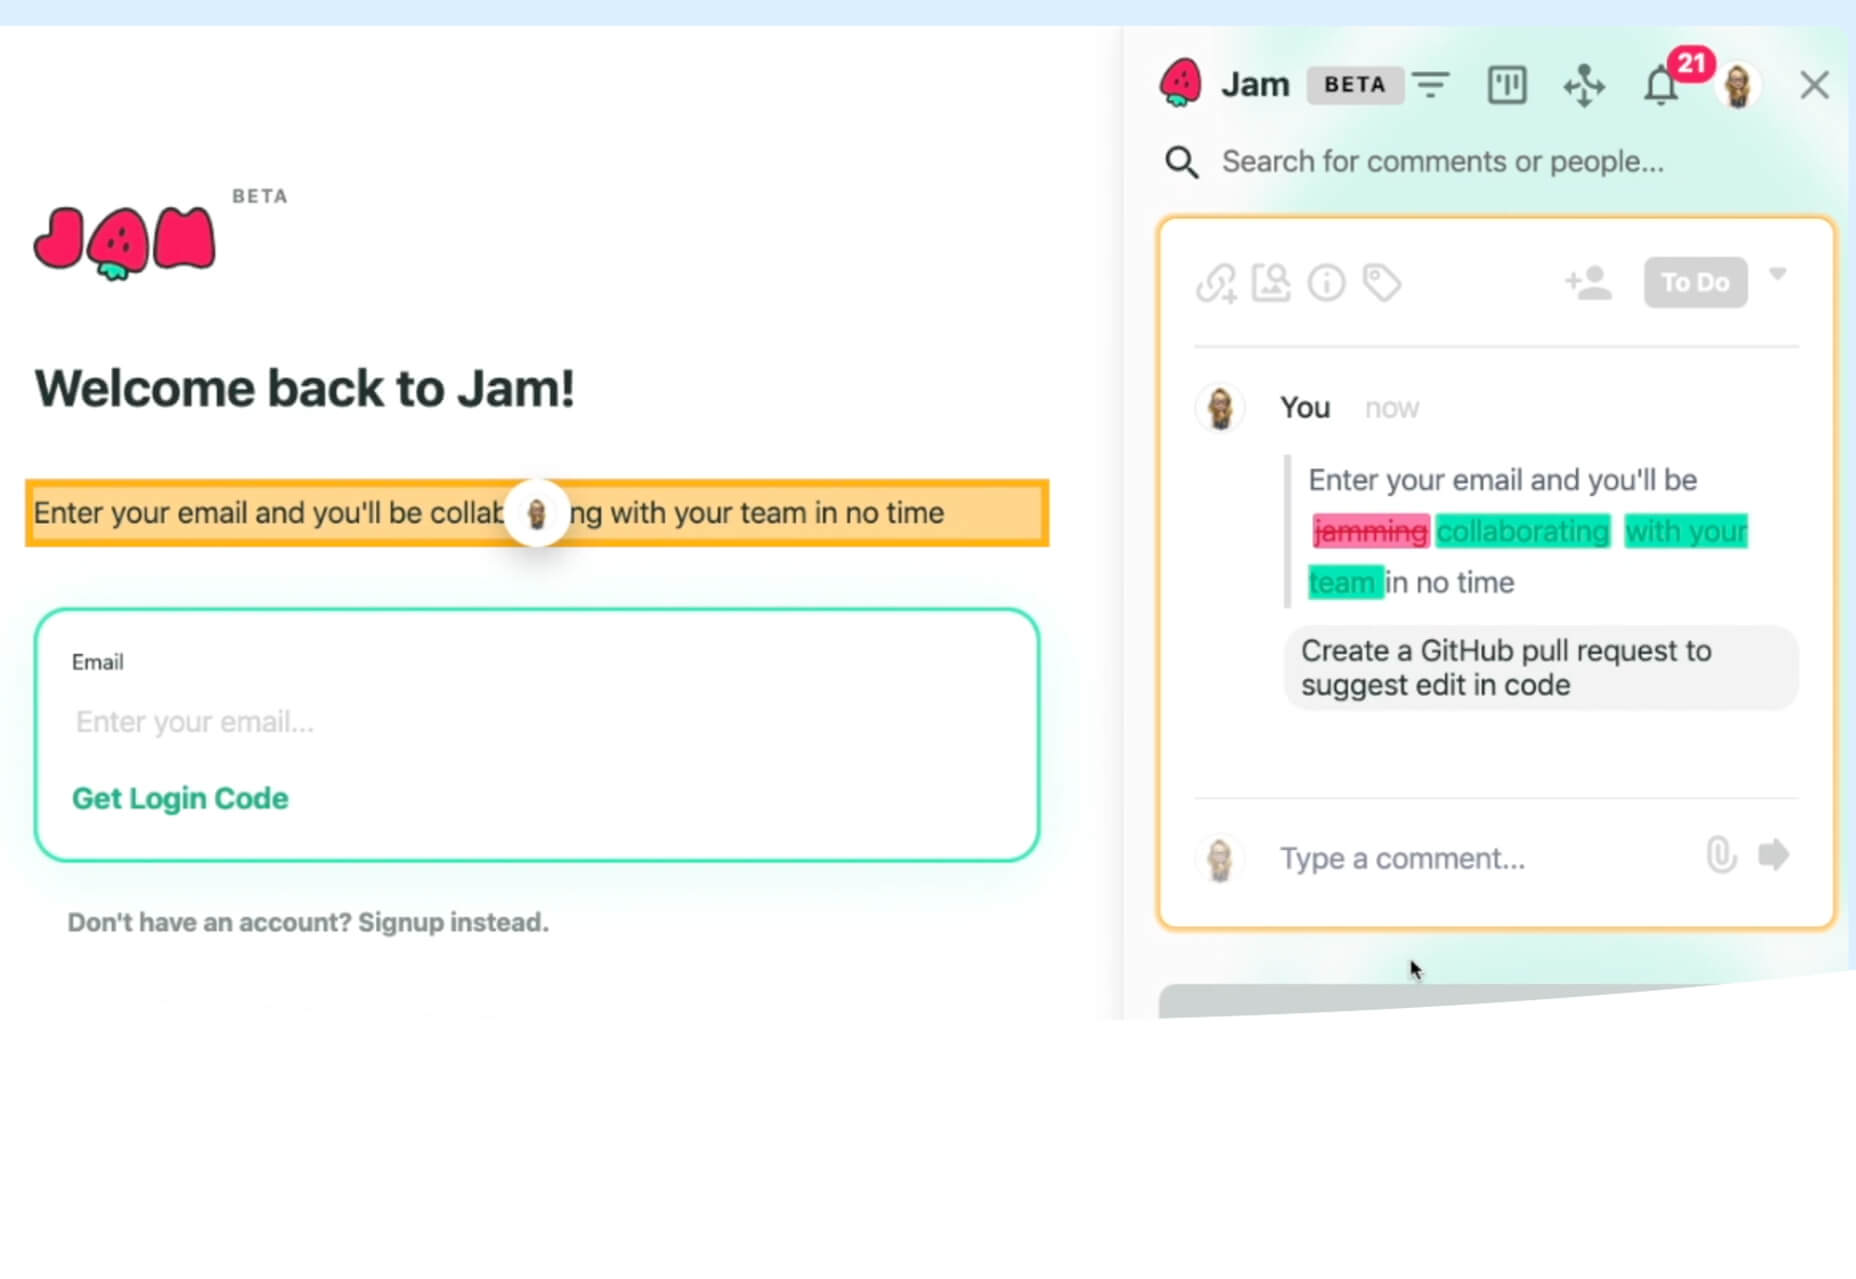
Jam Wand

Jam Wand is a “magic wand” for making changes on your website, starting with copy. Click on any text, edit it, and submit the change to GitHub to be merged into the code. Copy changes as easy as click, type, and click again. (This tool is still in beta.)

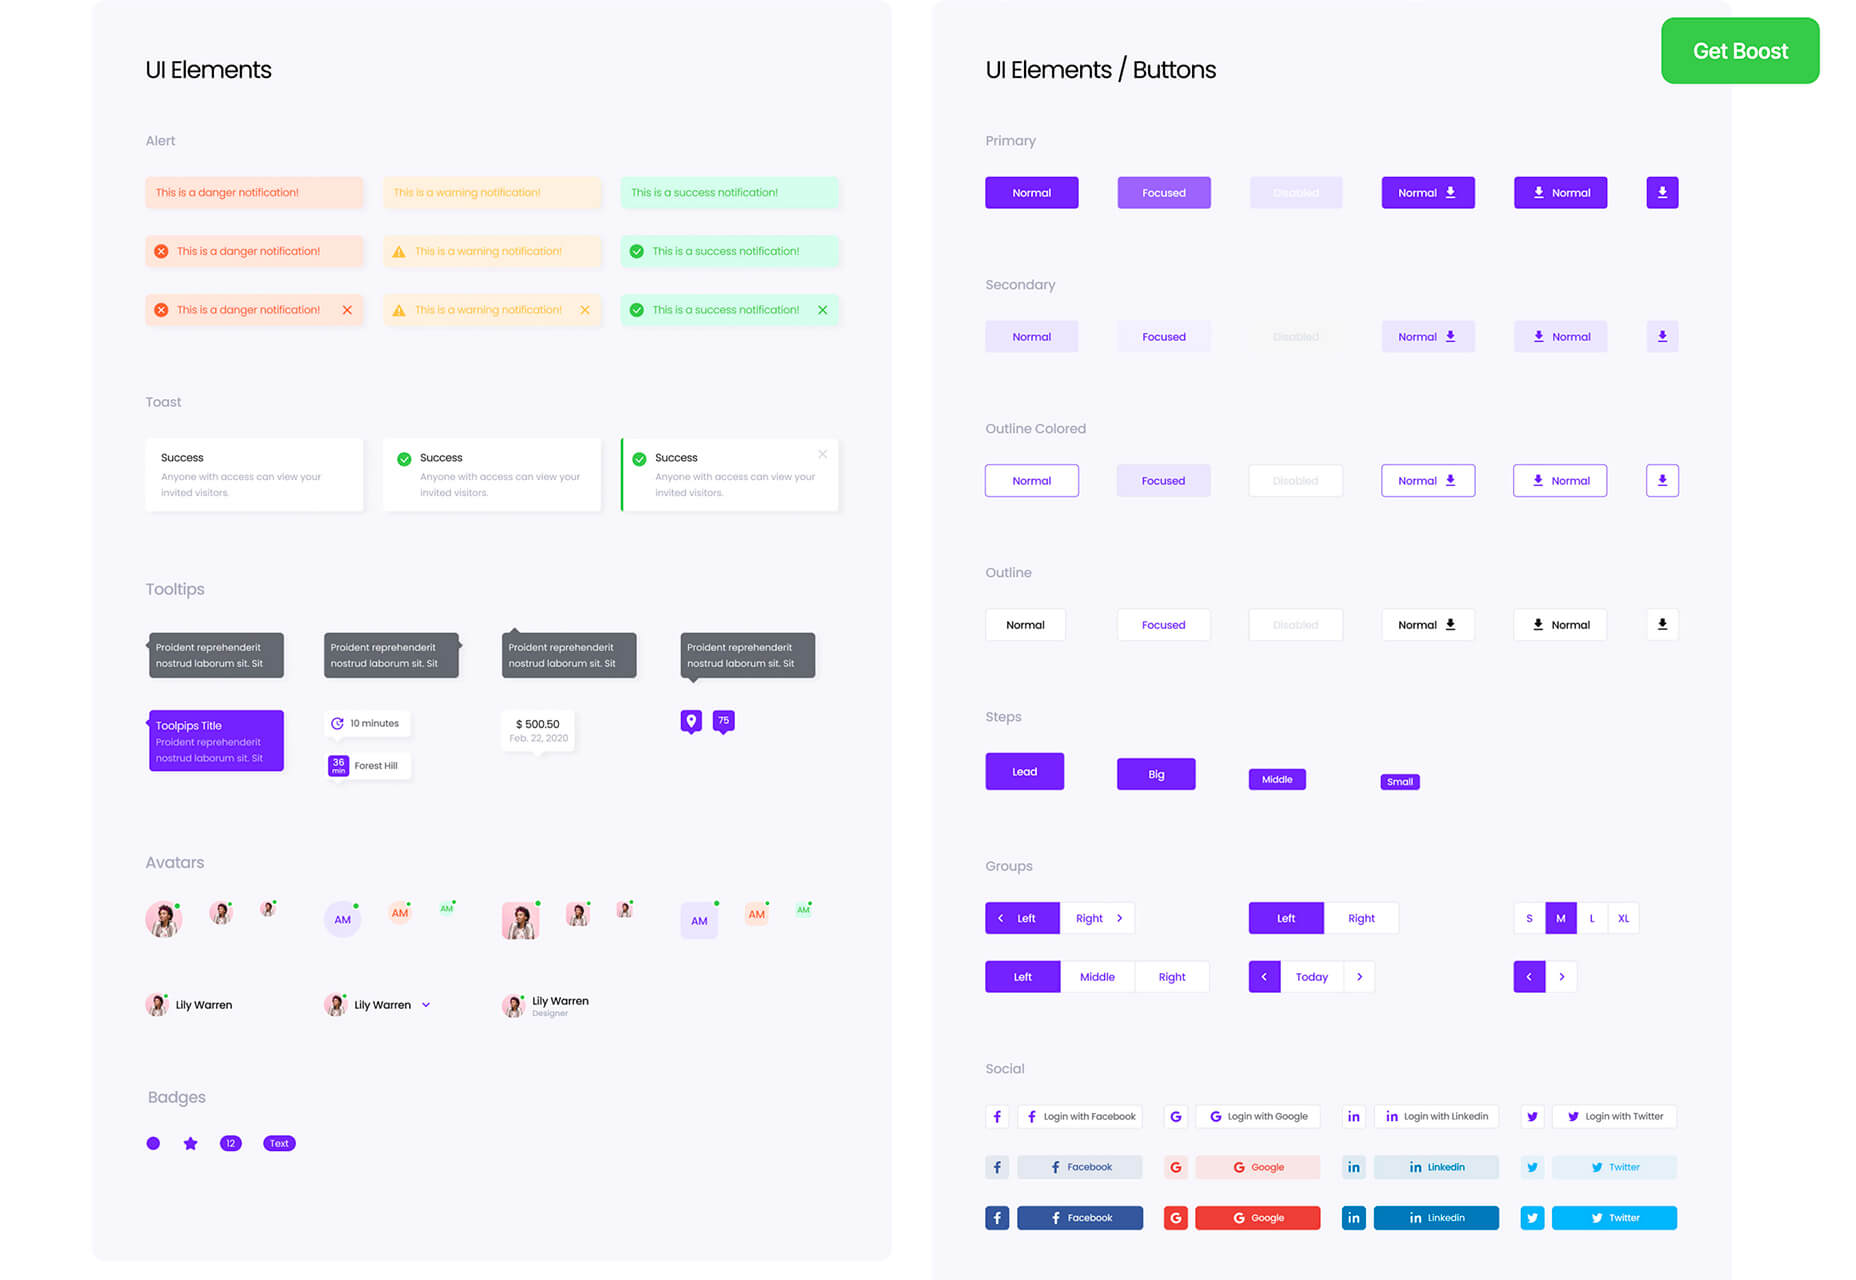
Boost UI Kit

Boost UI Kit is a collection of elements and components that will help you finish website design projects using a bright and airy style. It works with Figma for easy integration.

Romanizer

Romanizer is a fun game that tests your knowledge of Roman numerals. With two modes – a randomizer and a challenge you can participate in – you’ll learn to convert numbers visually in minutes.

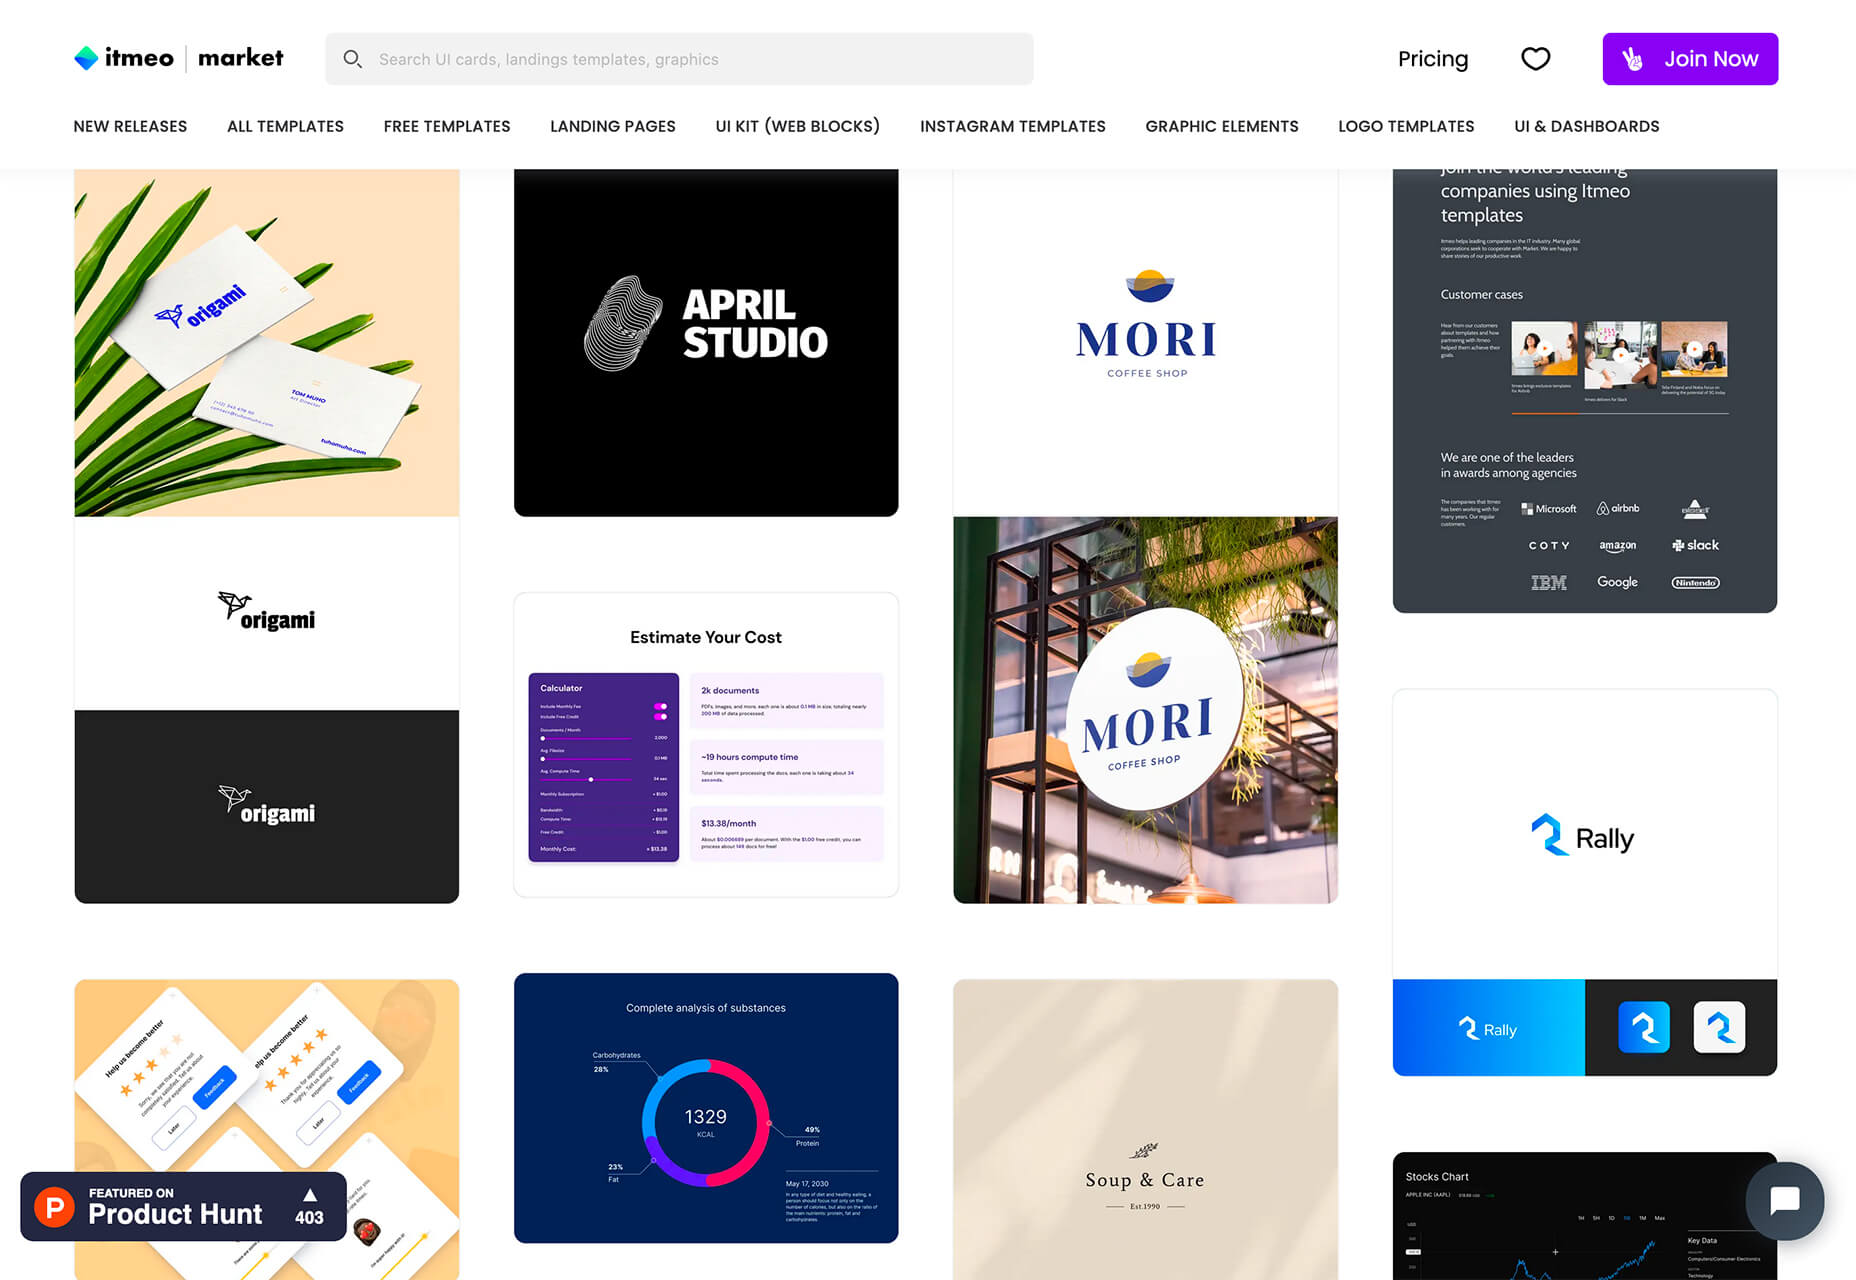
Itmeo Market

Itmeo Market is a new online graphics marketplace with exclusive and ready-to-use templates for a variety of projects. Templates include elements for logos, UI kits, graphic elements, Instagram templates, landing pages, and more. (This is a paid/subscription-based resource.)

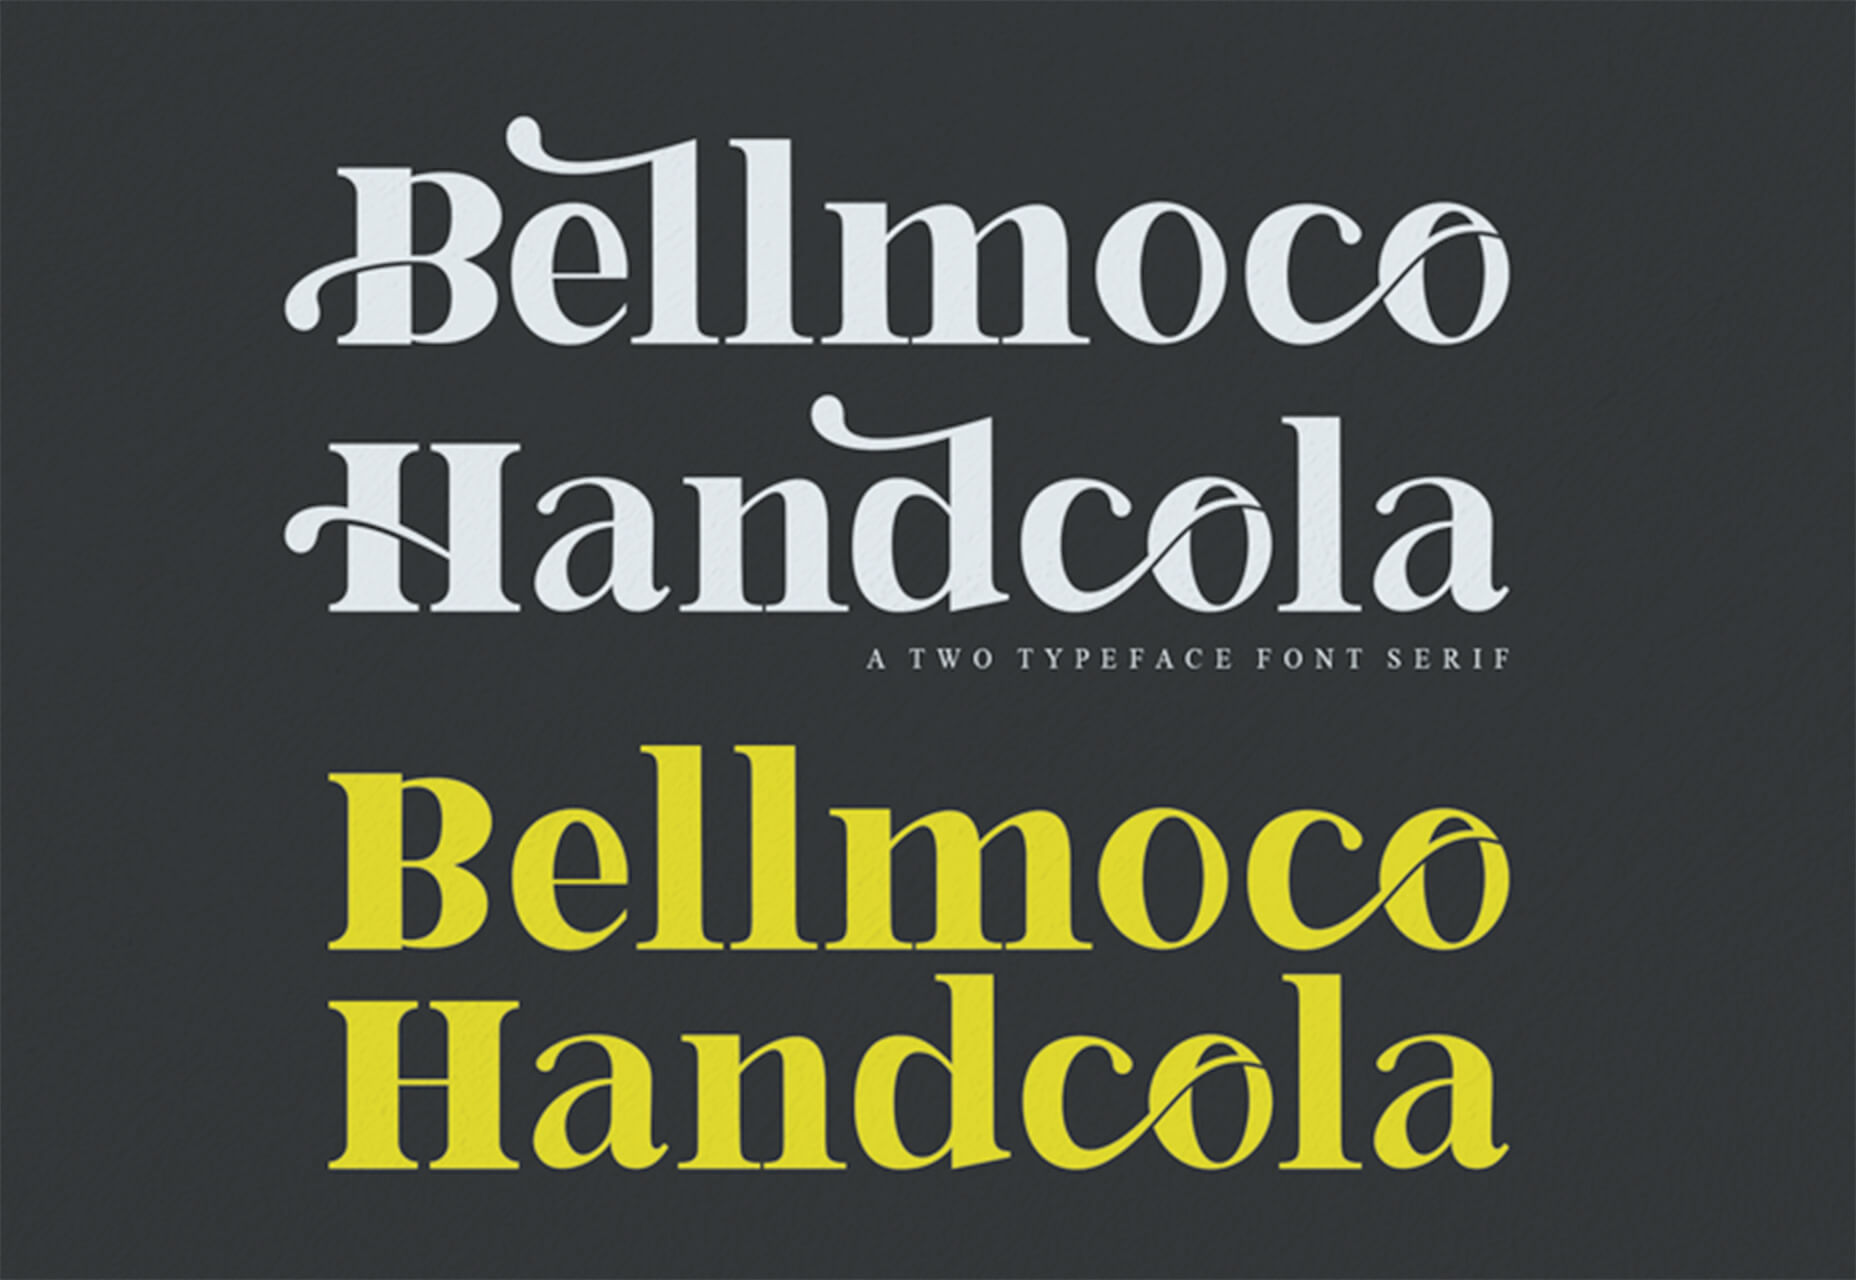
Bellmoco Handcola

Bellmoco Handcola is a beautiful decorative typeface with fun swashes and serifs. The free version is for personal use only.

Bondie

Bondie is a handmade brush typeface with fills in many of the letterforms. It contains 106 characters and is free for personal use.

Bovino

Bovino has multiple weights that can work for display or body text. The modern serif is free for personal use.

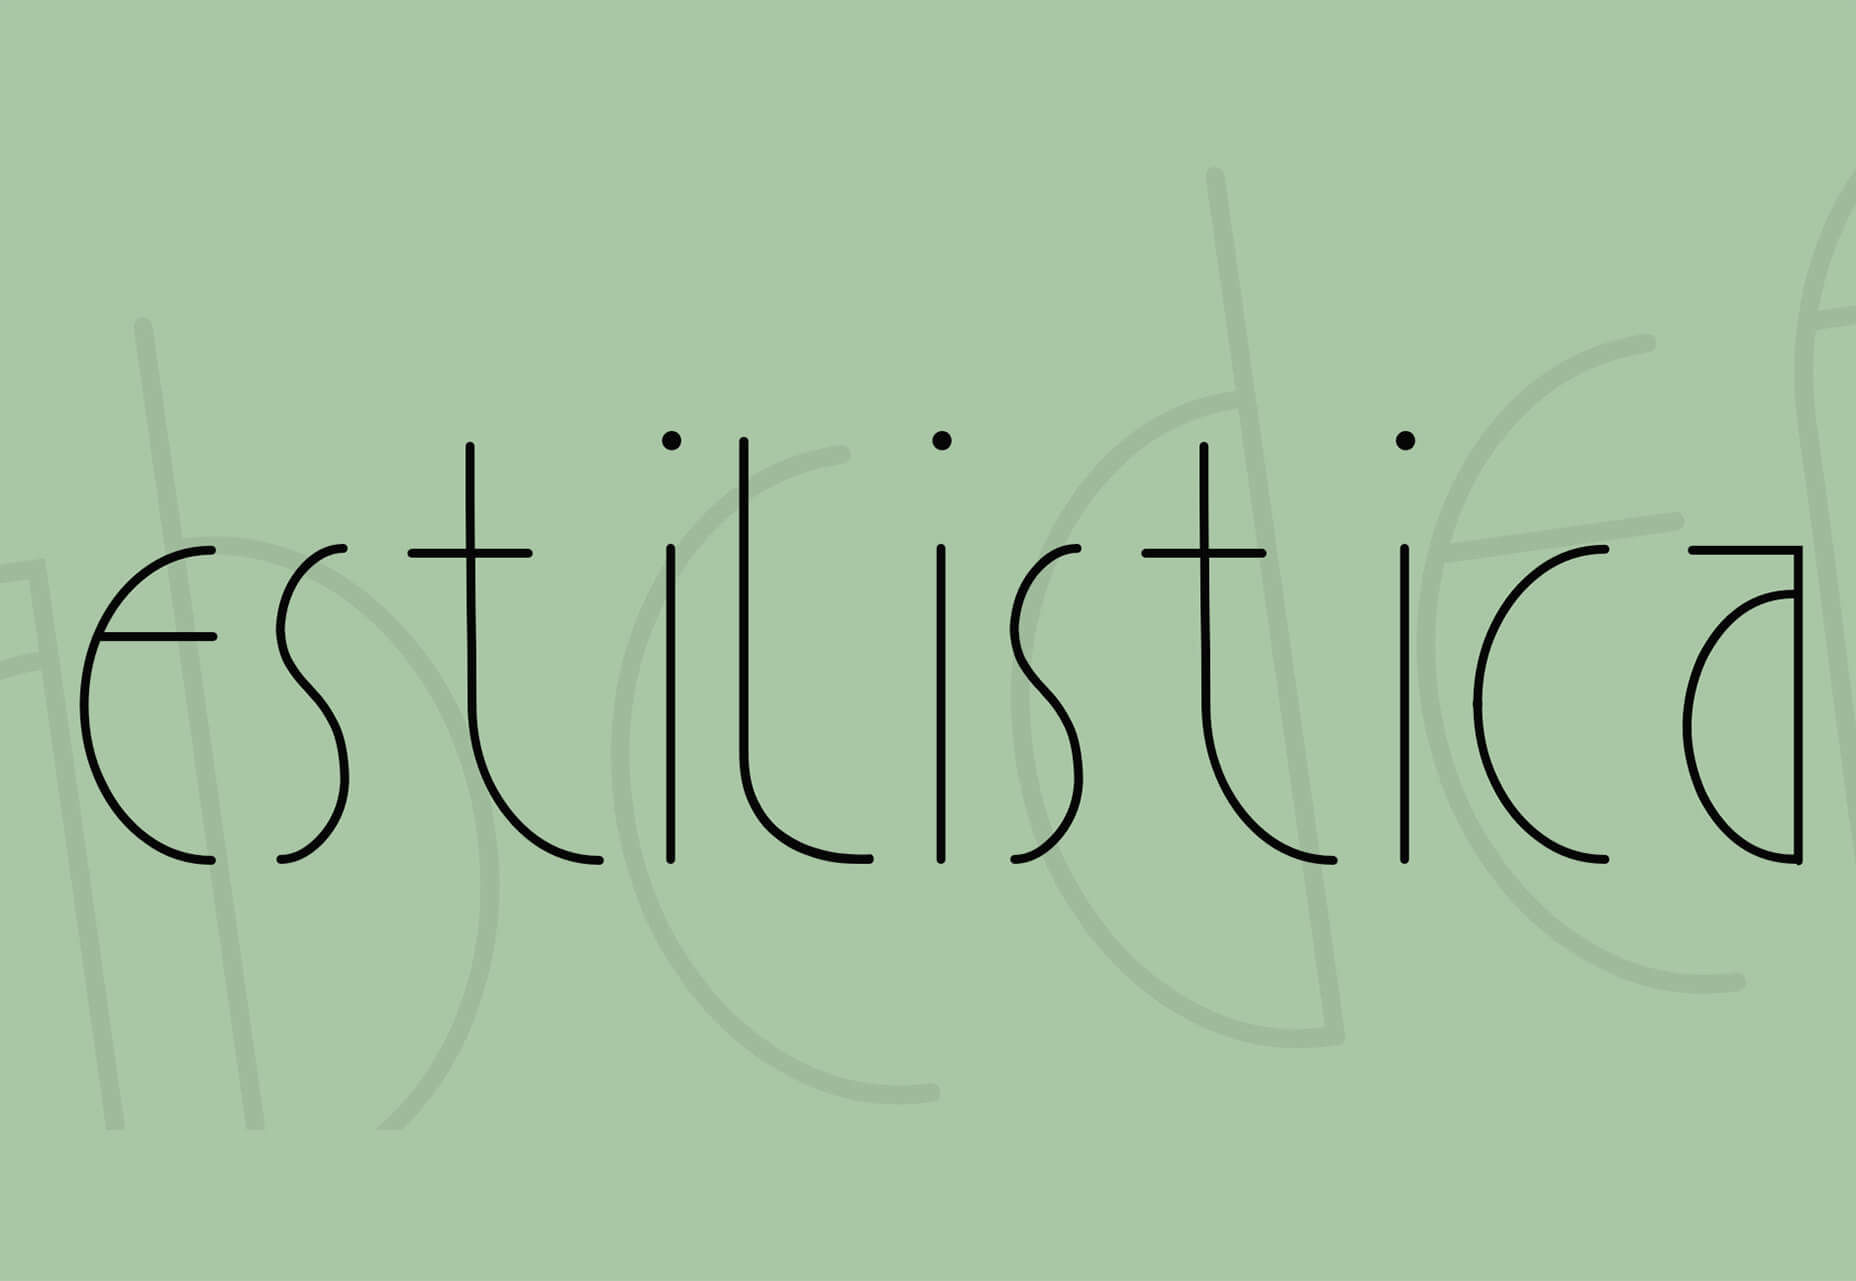
Estilistica

Estilistica is a thin modern style sans serif with smooth lines and a vertical profile. It is best suited for display use and is free for personal use.

Source


Source de l’article sur Webdesignerdepot

Since there are so many CMS plugins out there, it can be overwhelming to choose the best ones for your website. We’ve done the research for you; this list contains the top new CMS plugins for November 2020. You’ll find useful plugins for WordPress, Craft, Shopify, and Joomla.

Let’s get started…

WordPress

404 Page Editor

404 Page Editor is a simple WordPress plugin that helps you add custom text to the default 404 page on your website. The plugin comes with seasonal and industry-related 404 templates. One useful feature of the plugin is that it backups your current 404 page before changing it. So you can restore the backup page anytime you choose. The plugin duplicates your current 404.php page to wp-content/uploads/404-page-editor/ so you can easily find it. You can also change the text on the plugin to fit your local dialect. 

UnusedCSS Power-Up

Most WordPress themes and plugins load their CSS in the wrong areas of your website. This can slow down your site. A slow website will reduce user experience and lead to increased bounce rates.

UnusedCSS will help reduce the size of your website’s CSS files by up to 95%. The best part is that the plugin works automatically. It will remove any unused CSS when visitors view any page on your website. UnusedCSS will automatically reduce your website’s load times by reducing your CSS files and page size. The plugin also optimizes the performance of other WordPress plugins and extensions. UnusedCSS also works with WooCommerce themes and plugins.

Simple Redirects

Simple Redirects is a WordPress plugin that helps you to automatically redirect requests to another page on your site or any other place on the web. The plugin allows you to easily redirect users from your old web pages to new pages using 301 or 302 redirects. You don’t have to worry about losing backlinks or page rank. Any incoming links to the old web page will be automatically passed along to the new page. The page rank on the old page is also transferred to the new page. The plugin is useful when migrating a WordPress site when don’t want to retain the URL structure. 

HTML Validation

HTML Validation plugin helps you identify any HTML validation errors on your website. The plugin works automatically in the background of your website and will send you regular reports. There is a progress bar on the report screen to show you the progress of the scan. The plugin uses WordPress Cron to scan the content of your website. There is also an option for the plugin to automatically fix any HTML validation issues on your website. You can also choose to fix the issues manually. 

Just Highlight

Just Highlight is a simple WordPress plugin that helps you highlight text in your posts or pages. You can use this plugin to highlight any portion of the page you want to draw the reader’s attention to. You can highlight the background of the page and also add animation to the highlighted text. In the WordPress admin area, you can change the speed and color of the animation. The plugin is compatible with Gutenberg, and the WordPress classic editor. 

DeviantArt Embed

DeviantArt Embed is a simple plugin that helps you embed any work from Deviant Art into a post. The plugin provides a block for the WordPress block editor so you can easily embed the image. It uses a DeviantArt oEmbed API to pull the images and their descriptions, and creates an embedded image. 

Static Optimizer

Static Optimizer is a static file optimization plugin that serves and optimizes static files on your website. The plugin will help you increase your website speed by automatically compressing your static files. It is easy to set up, you just need an API key to get started. Other useful features that the plugin offers include automatic JS and CSS minification, automatic image optimization, and processing of responsive images. You don’t have to worry about losing your files if their server is down. The plugin automatically backs up your files and will load your original files when their servers are down (either because of an upgrade, maintenance, or outage).  By default, only images are compressed when you activate the plugin; you can also choose to optimize fonts, CSS, and JS files. 

RankBear

RankBear is a keyword rank tracker plugin that helps you analyze your SEO efforts. With RankBear, you can track the keywords for each of the posts and pages on your site. While the plugin has a paid plan, you can track up to five keywords for free. On the free plan, you will receive weekly reports on each keyword you are tracking. You can search for the rank and volume of a keyword in every location supported by the Google search engine. RankBear is a lightweight software-as-a-service plugin hosted by Amazon Cloud Services. The plugin also offers the option to download the keyword reports to CSV. 

Table of Contents Block

Table of Contents Block is a plugin that allows you to easily create a Table of Contents for your WordPress posts. The plugin is lightweight and will automatically add a Table of Content in your website’s posts and pages. You can select the heading tags you want to add to the Table of Content. It also has a dedicated support team to assist you. The plugin works fine with all standard WordPress themes. 

Markease For WooCommerce

Markeaze is an all-in-one communication plugin that allows you to add live chat to your online stores. The plugin will help you improve your customer service by decreasing your response times. With the plugin, you can collect your visitor’s contact information via a widget. This feature is useful in building a subscriber database. You can also use the plugin to track customer behavior on your site, inform customers about new products, help customers with active orders, and collect customer feedback. You can also use the auto-reply function to answer commonly asked questions. 

Craft CMS

Image Toolbox

Image Toolbox is a Craft CMS plugin that offers image-related tools for your templates. The plugin will automatically create a WebP variant of the images you upload. It also has a fallback for browsers that do not support WebP images. Other useful features the plugin offers include automatic creation of placeholder images and generation of responsive images with multiple variants. The plugin also supports Imager-X (or old Imager). 

Element Panel

Element Panel plugin allows you to add elements and an eager-loading panel to the debug toolbar. This feature will help you benchmark your templates in Craft CMS. For elements, the panel has a dashboard that shows how many elements are populated. It also shows how many elements are duplicates. The plugin also shows you how many eager-loading elements are detected. Duplicate elements are grouped by field name. 

Shopify 

VStore Shoppable Videos

VStore Shoppable Videos is a Shopify plugin that allows your customers to shop directly from your videos. The plugin allows you to embed your products into any video. Since videos have a high engagement rate, this plugin will significantly improve your store’s conversion rates. 

ProofMotion Video Testimonials

ProofMotion Video Testimonials plugin helps you to easily collect video testimonials. The plugin sends an automated email or SMS requests to customers asking for their satisfaction feedback after making a purchase. The responses are analyzed to determine whether the customer had a negative or positive experience. Customers that offer negative feedback are sent to customer care to help them with the problem they encountered. Happy customers are prompted to make video testimonials of their positive shopping experience. ProofMotion guides the customer through the interview so they can give the best testimonial. They also offer an on-site widget so you can easily share your testimonials. 

Real ID

Real ID is a Shopify plugin that allows you to verify customers’ real identity using a photo ID and facial biometrics. The plugin is perfect for orders that have an age restriction, verifying flagged fraud goods, and selling expensive goods. Real ID will help you identify whether a government-issued-ID is fake during fulfilment. All the customer needs to do is take a selfie on their phone. This way, even if a customer has access to a stolen physical ID, they won’t still be able to make any purchase. The plugin can verify documents such as passports, visas, national IDs, driver licenses, and more. Real ID will help you handle GDPR compliance. The plugin is available in hundreds of countries around the world. 

Joomla

Accessibility

Accessibility is a Joomla plugin that allows your website visitors to easily access your website content. The plugin will remove any barrier between the visitor and your Joomla site. There is no coding required and you can customize the plugin directly from the module manager. The plugin has a useful feature called Dyslexic Readability; this feature allows your visitors to set the entire document font to a dyslexic-friendly font. Visitors can also grayscale the page, resize the fonts, and resize the word space. From the backend module, you can add any custom CSS and JS. The plugin is also available in 12 different languages. 

Reading Time

Reading Time is a simple plugin that will help you easily show the reading time of your Joomla articles. The plugin is easy to set up and does not require any coding. You can customize every parameter, including the text, in minutes. You can also choose to exclude categories, articles, and menu items. Reading Time also allows you to easily add custom CSS code from the plugin parameters. 


Featured image via Pexels.

Source


Source de l’article sur Webdesignerdepot

Domain Authority (DA) is a ranking metric that predicts how well a site will rank online. It goes by a scale of 1 to 100 — the closer you are to 100, the better your odds of ranking in search engine result pages (SERPs), thus giving you more clicks.

To see how your site currently ranks, visit Moz’s free Link Explorer to test your DA. Just type your website URL in the search bar and click “Analyze”. Just remember: don’t kick yourself if your DA is smaller than 30 to 50. If you follow these 9 tips today, you’ll most definitely see your DA score improve.

1. Domain Name Age

You know that old saying, right? Wisdom comes with age. Well, guess what? The same is true for your domain name. If your domain name doesn’t have an ‘old’ age, then it’ll rank lower, and users online might not see your site as legitimate.

But with an older domain name, not only will users see your site as more legitimate, but it’ll also have a much higher DA score than younger domain names. In other words, every time you change your domain, you might be doing more harm than good to it, since you’re actually knocking down the credibility you’ve built up over the years by starting from scratch.

Therefore, pick an easy-to-remember domain name that’s not only relevant to your niche, but it’s also something that you’re willing to keep for a very long time.

2. On-Page Optimization

Then, it’s time to optimize all the following on your pages:

  • Code;
  • Content;
  • Site structure;
  • Metatags;
  • Other on-page elements (H1, Title tags, Image alt tag, Site architecture, etc.).

Improving your DA with optimization can make your site be more search-engine-friendly.

3. Create Great Content

Want to attract high-quality links from multiple domains in your niche? Good news! More attraction to your site comes from creating high-quality content that appeals to your target audience. Otherwise, poor-quality content will only scare people away.

So, in providing the best content possible, that will definitely help you improve your DA score (and even give you many additional SEO benefits).

4. Internal Link Improvement

Why worry about earning external links when your internal links need the most attention? Yes, focusing too much on external links can make you lose sight of linking internally.

So, why internal links? These links help nudge visitors to what they’re trying to look for on your website. In that way, visitors are getting the best user experience, while you reap the rewards of having an increased DA score.

5. Link Profile Clean-Up

Having a clean link profile is essential, since it helps you obtain and maintain a great DA score. So, to clean up your link profile, you must remove the bad links from it.

In this process, you can use tools like:

These tools help you figure out any inappropriate or unwanted links.

After the link audit is complete, contact the website owners to have them either delete the link or add the “nofollow tag” (devalues the link). If this doesn’t work, use the Google Disavow tool to remove said links from your profile.

6. Know Your Niche

When running a site, it’s important for you to be the expert in what you have to offer online – and your DA is no exception to this. Becoming an authoritative figure in your niche allows you to gain the confidence of readers, while providing expert advice to the community.

If you have amazing content (i.e. guest blogs on industry-related forums) and clever ways to engage your target audience, then people will see you as an authority to your niche. This not only enhances your brand, but also increases your DA score.

7. Be Mobile-Friendly

Nowadays, people are on their phones, tablets, etc. Whatever device that they can use on the go, they’ll use. In other words, mobile isn’t just the way of the future – it’s happening right now, outpacing laptops since 2014. So, if your website isn’t mobile-friendly yet, then now is the time to fix that!

If your website hasn’t been optimized for mobile use yet, not only will it hurt your search rankings (since Google favors mobile-friendly sites), but you’ll also lose out on users visiting your site to begin with.

So, go to Google’s Mobile-Friendly Test, and then run a test for your domain. Afterwards, Google will give you a detailed report of how mobile-friendly your site is, and what you can do to improve it.

8. Improve Page Speed

Let’s face it: No one likes to wait for a webpage to load; they want quick results. So, if your site isn’t loading fast enough, then users will get frustrated and most likely go to another site. So, why not improve your page speed?

First, find the cause of your website running slower than it should. You can do this by running your website through Google’s PageSpeed Insights; it’ll analyze the speed of your site. And then, it will identify some effective ways for you to make your site faster and consequently improve your DA score.

9. Utilize Social Media

Finally, it’s important to increase your social signals, when it comes to gaining more authority with your domain. While search engines like Google won’t insist that sites make social signals a priority to increase their rankings, site runners must still take advantage of social media to do the following:

  • Promote their sites;
  • Promote their products and services;
  • Tell people about any events and contests.

As a result, sites are more likely to get likes, shares, and tweets through social media, versus going solo in search engines.

Conclusion

Domain authority is extremely important for your site. First, DA allows you to analyze how well your website does in the search space. Plus, it allows you to compare the performance of your website with that of your rival sites, thus showing you where you stand in search engine results.

So, why not get your site thriving today by improving and maintaining your DA score today? Your site will thank you for it!


Featured image via Unsplash.

Source


Source de l’article sur Webdesignerdepot

Web accessibility is important for two reasons:
  1. Being ADA & WCAG compliant is required by law (we’ll explain this further) so if your website isn’t compliant, you can get sued.
  2. It allows people with disabilities to browse your website, which increases your potential audience and it is the decent thing to do.

In this accessiBe review, we’ll cover:

How Does accessiBe Work

accessiBe is an automated solution that combines two applications to achieve full compliance.

Foreground application: the accessibility interface. This is the accessibility menu that allows users with disabilities to adjust the various UI and design elements on your website so it meets their unique needs.

Background application: proprietary AI technology that’s responsible for the ‘heavy lifting’, screen-reader, and keyboard navigation optimization.

The combination of these two applications is unique for accessiBe for a few reasons. While most available accessibility solutions offer just one of the two or rely on manual remediation, accessiBe checks both boxes and does it in a fully automated way.

Additionally, and most importantly, accessiBe continuously scans your website, every 24 hours, identifying and fixing new accessibility issues as they arise. Websites are dynamic – meaning, keep updating constantly with new content, pages, images and so on; being ADA and WCAG compliant is an ongoing concern, not a one-time fix.

How to Install and Setup accessiBe

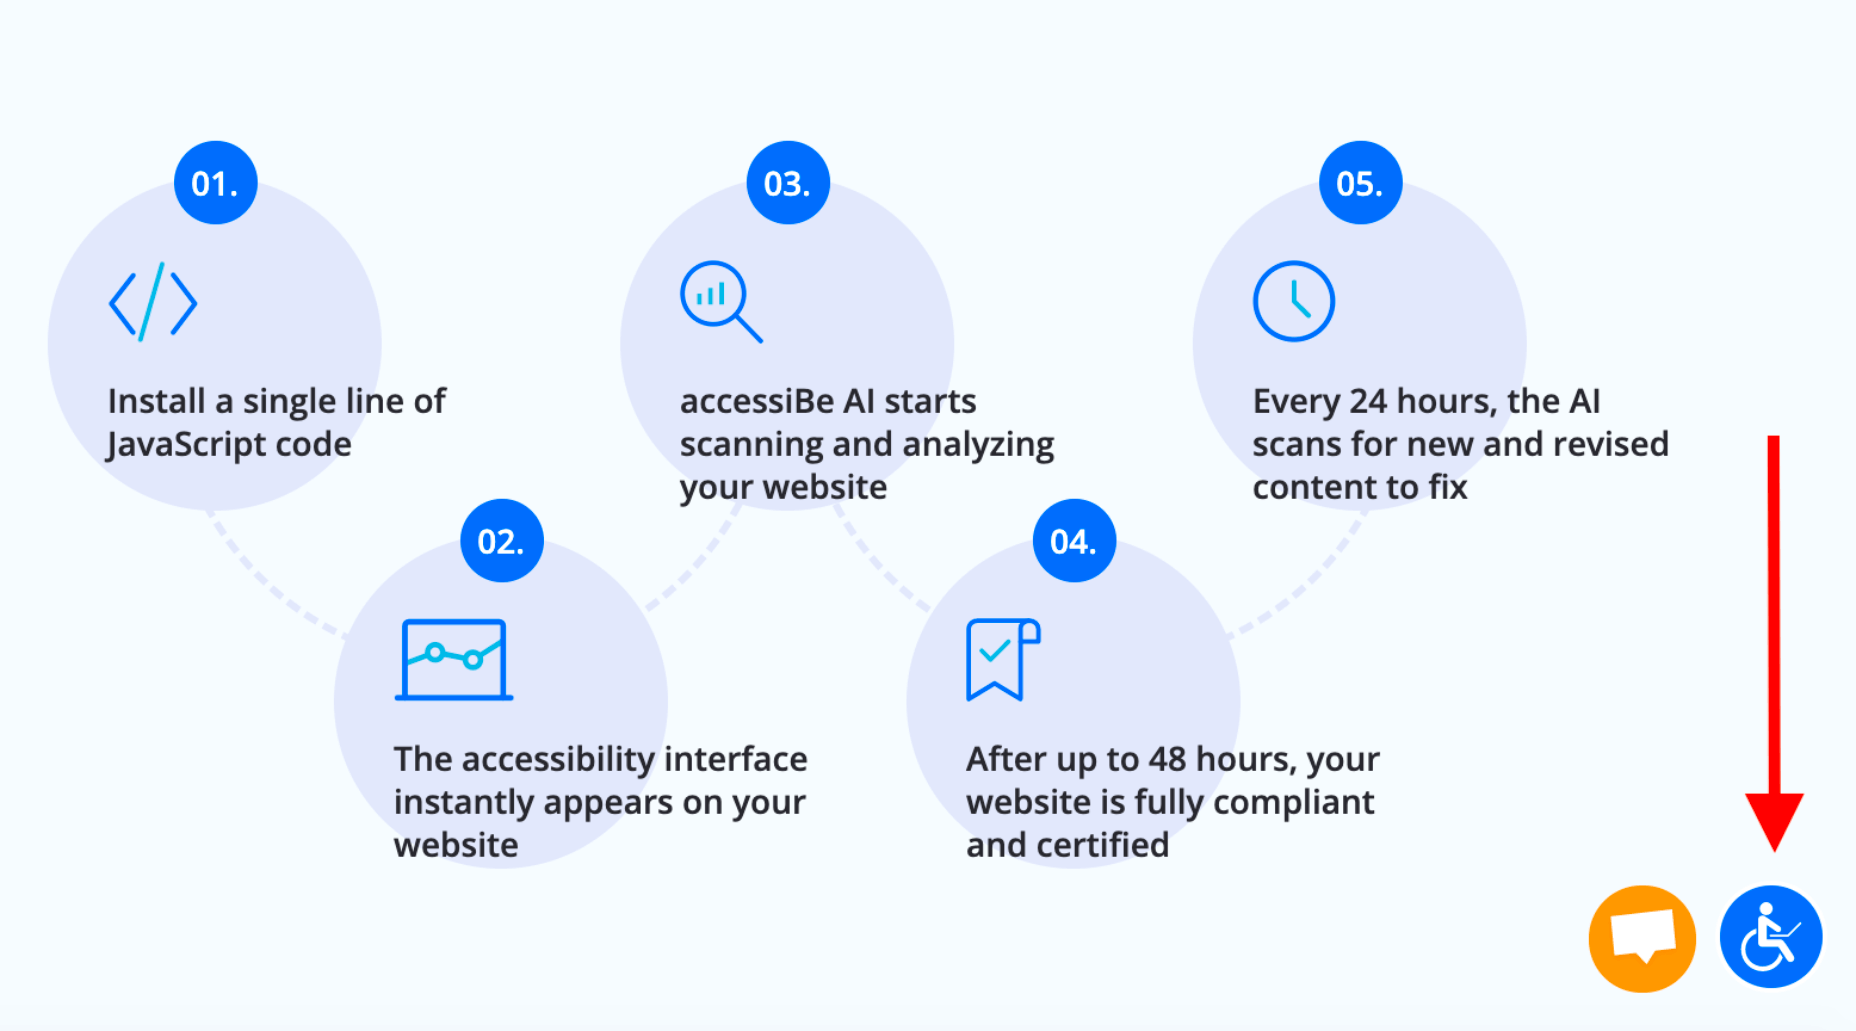
You install accessiBe by inserting a single line of code on your website.

From your end, that’s all it takes.

The first thing that happens is that the accessibility interface appears on your website. The menu is available via the accessibility icon (that also appears automatically.)

Source: accessiBe website

Next, the AI application scans and analyzes your website for accessibility issues and compatibility with screen-readers and keyboard navigation requirements and fixes them. This automated process takes 48 hours.

Once the initial 48 hours have elapsed, your website is compliant.

From here on, accessiBe automatically scans your website every 24 hours to identify and fix new accessibility issues as they arise due to website updates.

Why Ongoing Compliance is Important

We’ve mentioned this already, but it’s important to stress this point.

Whether you have an e-commerce website or a company website, you keep updating and changing your website; new items go up for sale, new videos and content pieces are added. Every addition or removal from your website has the potential of creating accessibility gaps (like missing alt text for images.)

By continuously scanning and fixing your website, accessiBe ensures that you stay compliant. An accessibility audit remediates your website for the specific point in time the audit took place. Meaning, you’ll need to audit your website periodically to remain compliant, which is a costly affair. With accessiBe you don’t need to worry about this.

accessiBe Front End Features – The Accessibility Interface

The accessiBe accessibility interface (the menu that is available for users) is installed automatically on your website once you insert the line of code. Let’s look at the various features that are available for people with disabilities.

Accessibility Profiles Explained

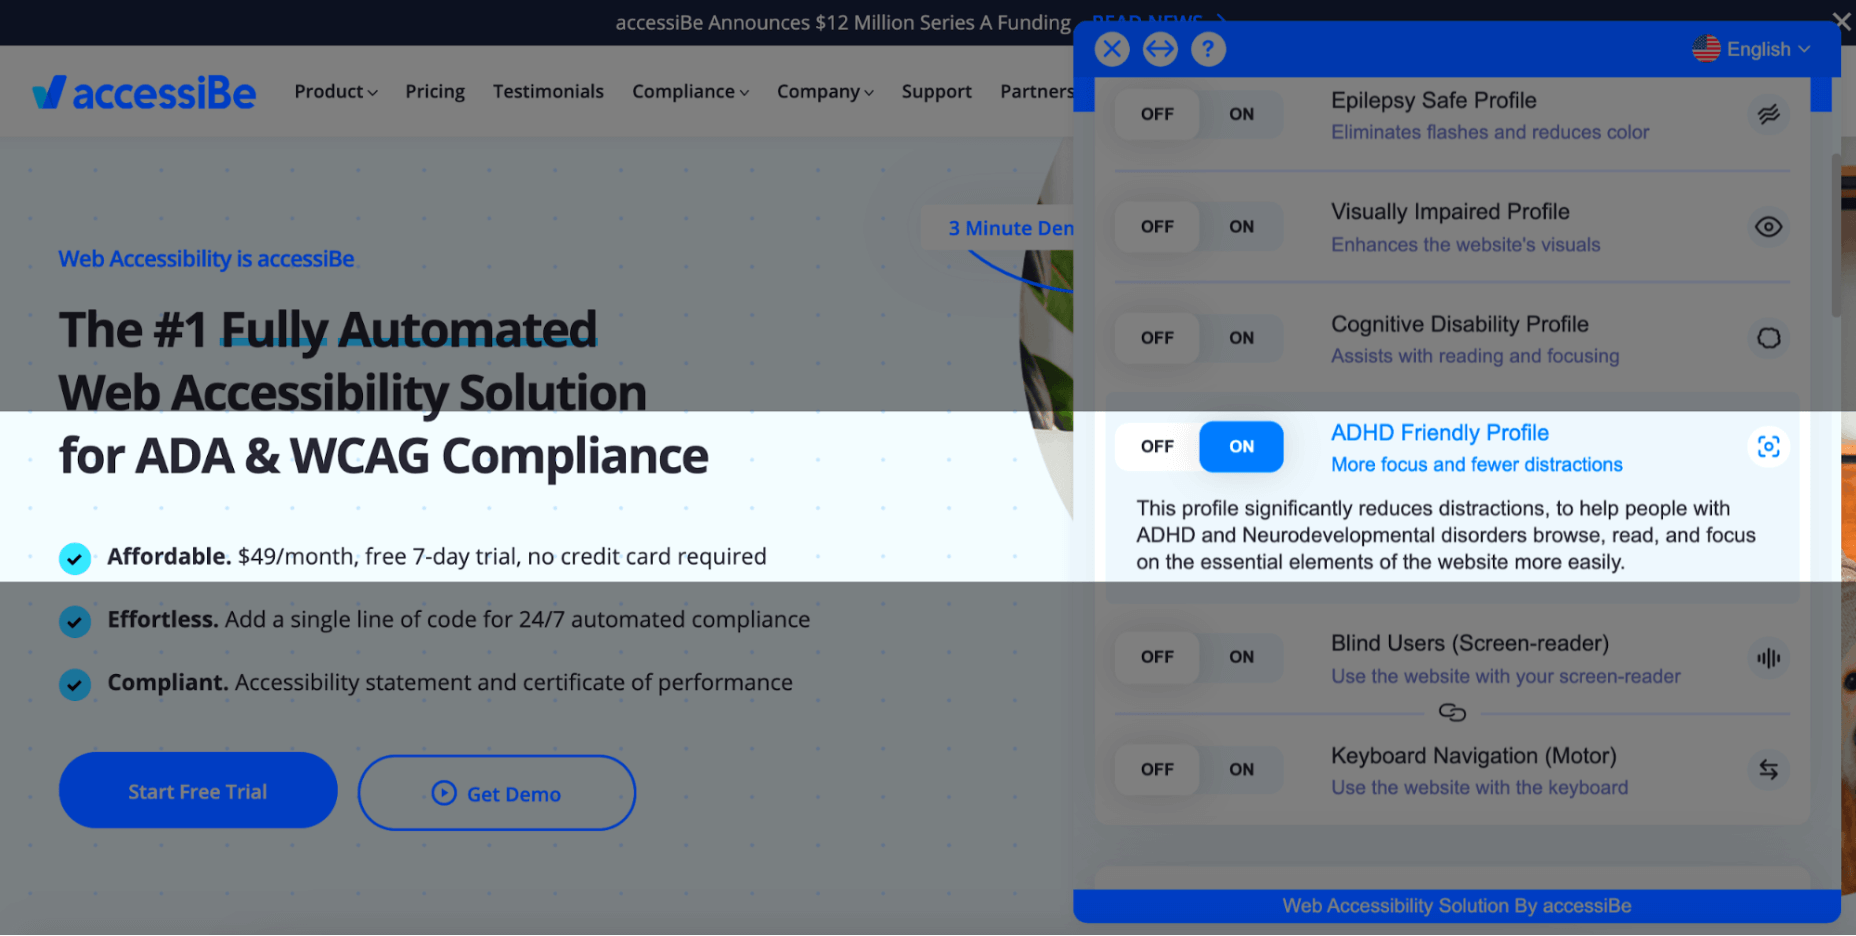
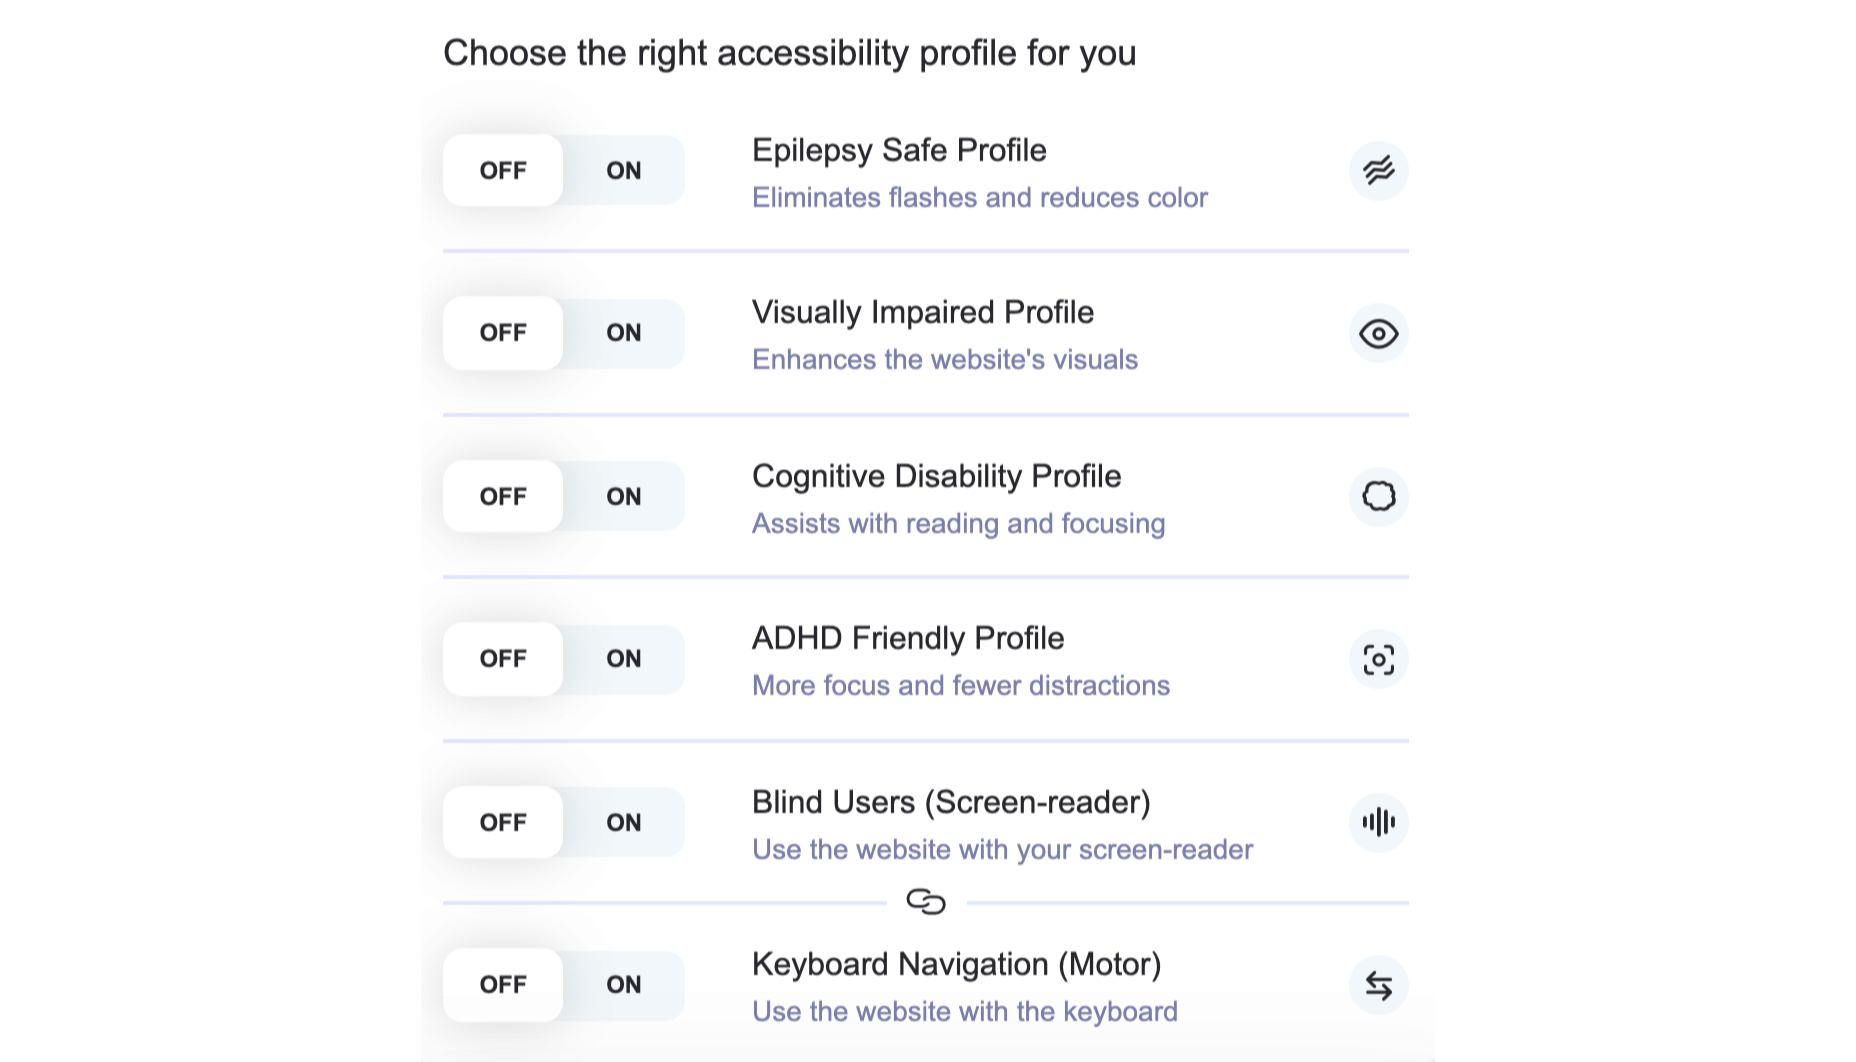
First, it allows you to choose from a pre-defined set of profiles optimized for various disability needs:

When one of the profiles is selected, the required adjustments are instantly applied to your entire website.

For example, The ADHD Friendly Profile creates a reading mark that follows your mouse movements that diminish distractions and allows better focus:

The Cognitive Disability Profile frames all the elements in bounding boxes and adds an ‘reading cursor’ that acts as your mouse to allow enhanced orientation:

Each of the predefined profiles includes a suite of features that target the unique accessibility needs of the disability; the Epilepsy Safe Profile prevents videos from playing automatically, dims all the colors on your website and eliminates flashing and blinking animations; the Visually Impaired Profile enhances all your website’s visuals, enlarges all fonts to allow most visual impairments conditions (degrading eyesight, tunnel vision, cataract, glaucoma and more) to be able to browse your website with ease.

The last two profiles, Blind Users and Keyboard Navigation, work in unison. They allow blind and motor-impaired individuals to browse and use your website as they are used to, through screen-readers and keyboard functionality, respectively.

Two things need to be mentioned here:

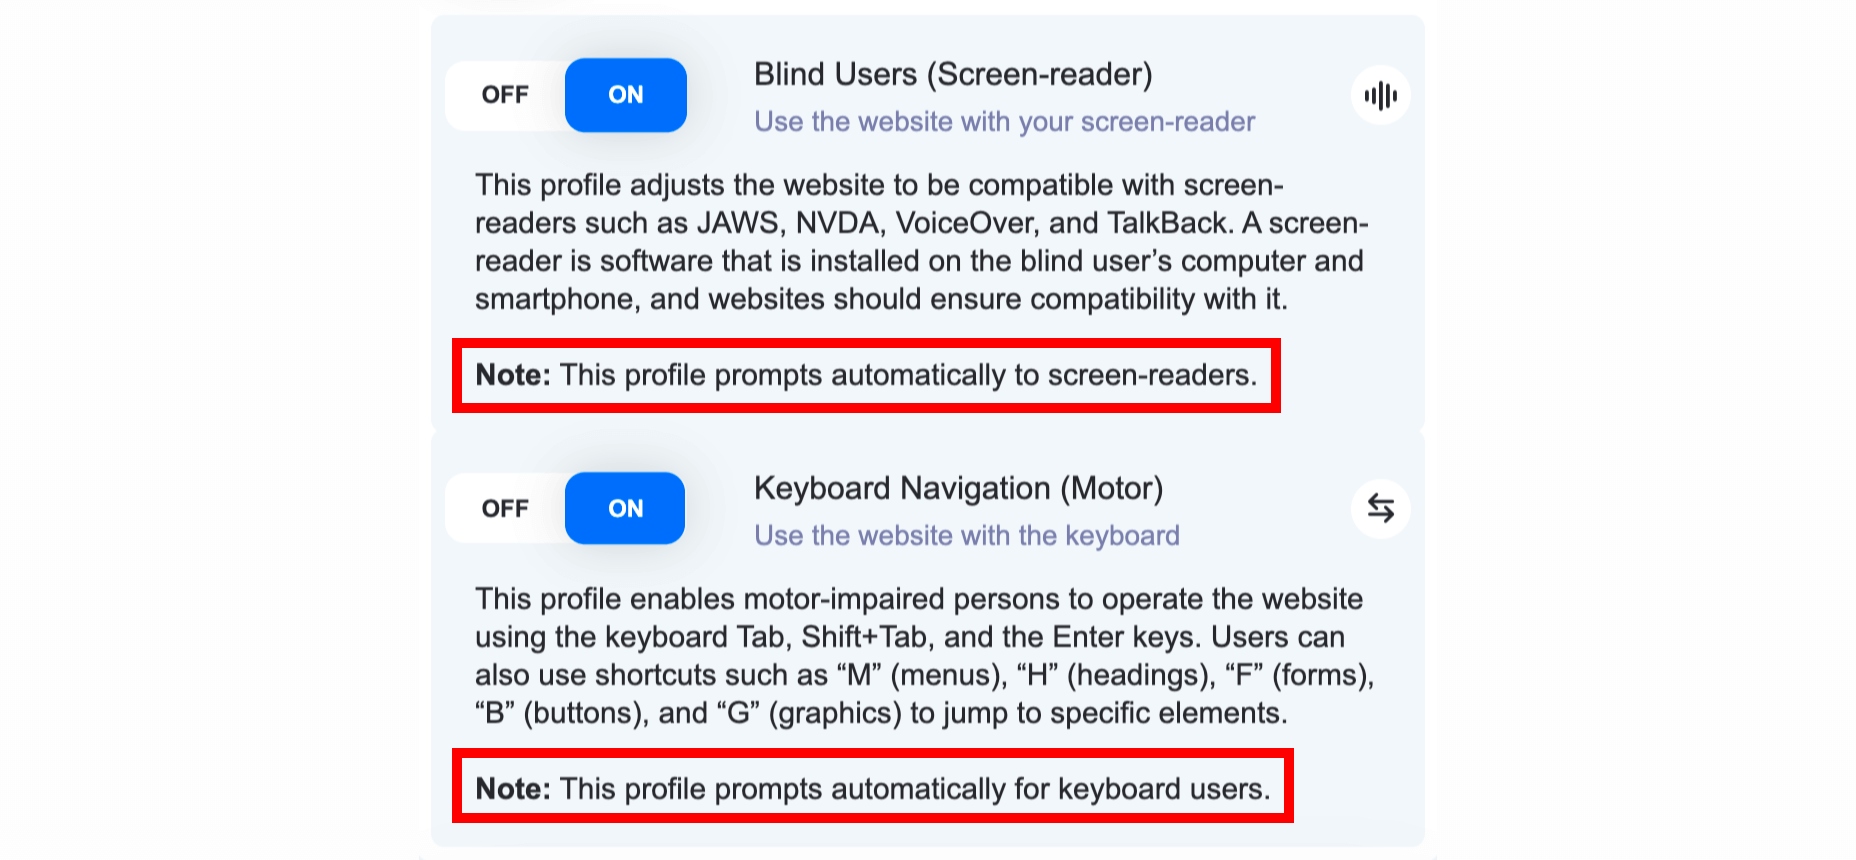
  1. Blind individuals have screen-readers installed on their computers in the OS-level, meaning, on the hard drive of the computer. They use them to navigate the internet by having the software read for them every text that appears on the screen. As can be seen in the screenshot above, the Blind User profile is ‘launched’ automatically once accessiBe detects that the user is using a screen-reader. This is a crucial functionality since obviously blind users aren’t able to locate the accessibility icon.
  2. The same goes for individuals that are using the keyboard instead of a mouse to navigate the web, both the motor-impaired and the blind. accessiBe detects and automatically enables keyboard navigation on your website.

On top of the predefined accessibility profiles, accessiBe’s interface allows for further adjustments that can be controlled specifically to allow a personalized browsing experience according to the user’s needs. Let’s look at these adjustments.

Accessibility Content Adjustments Explained

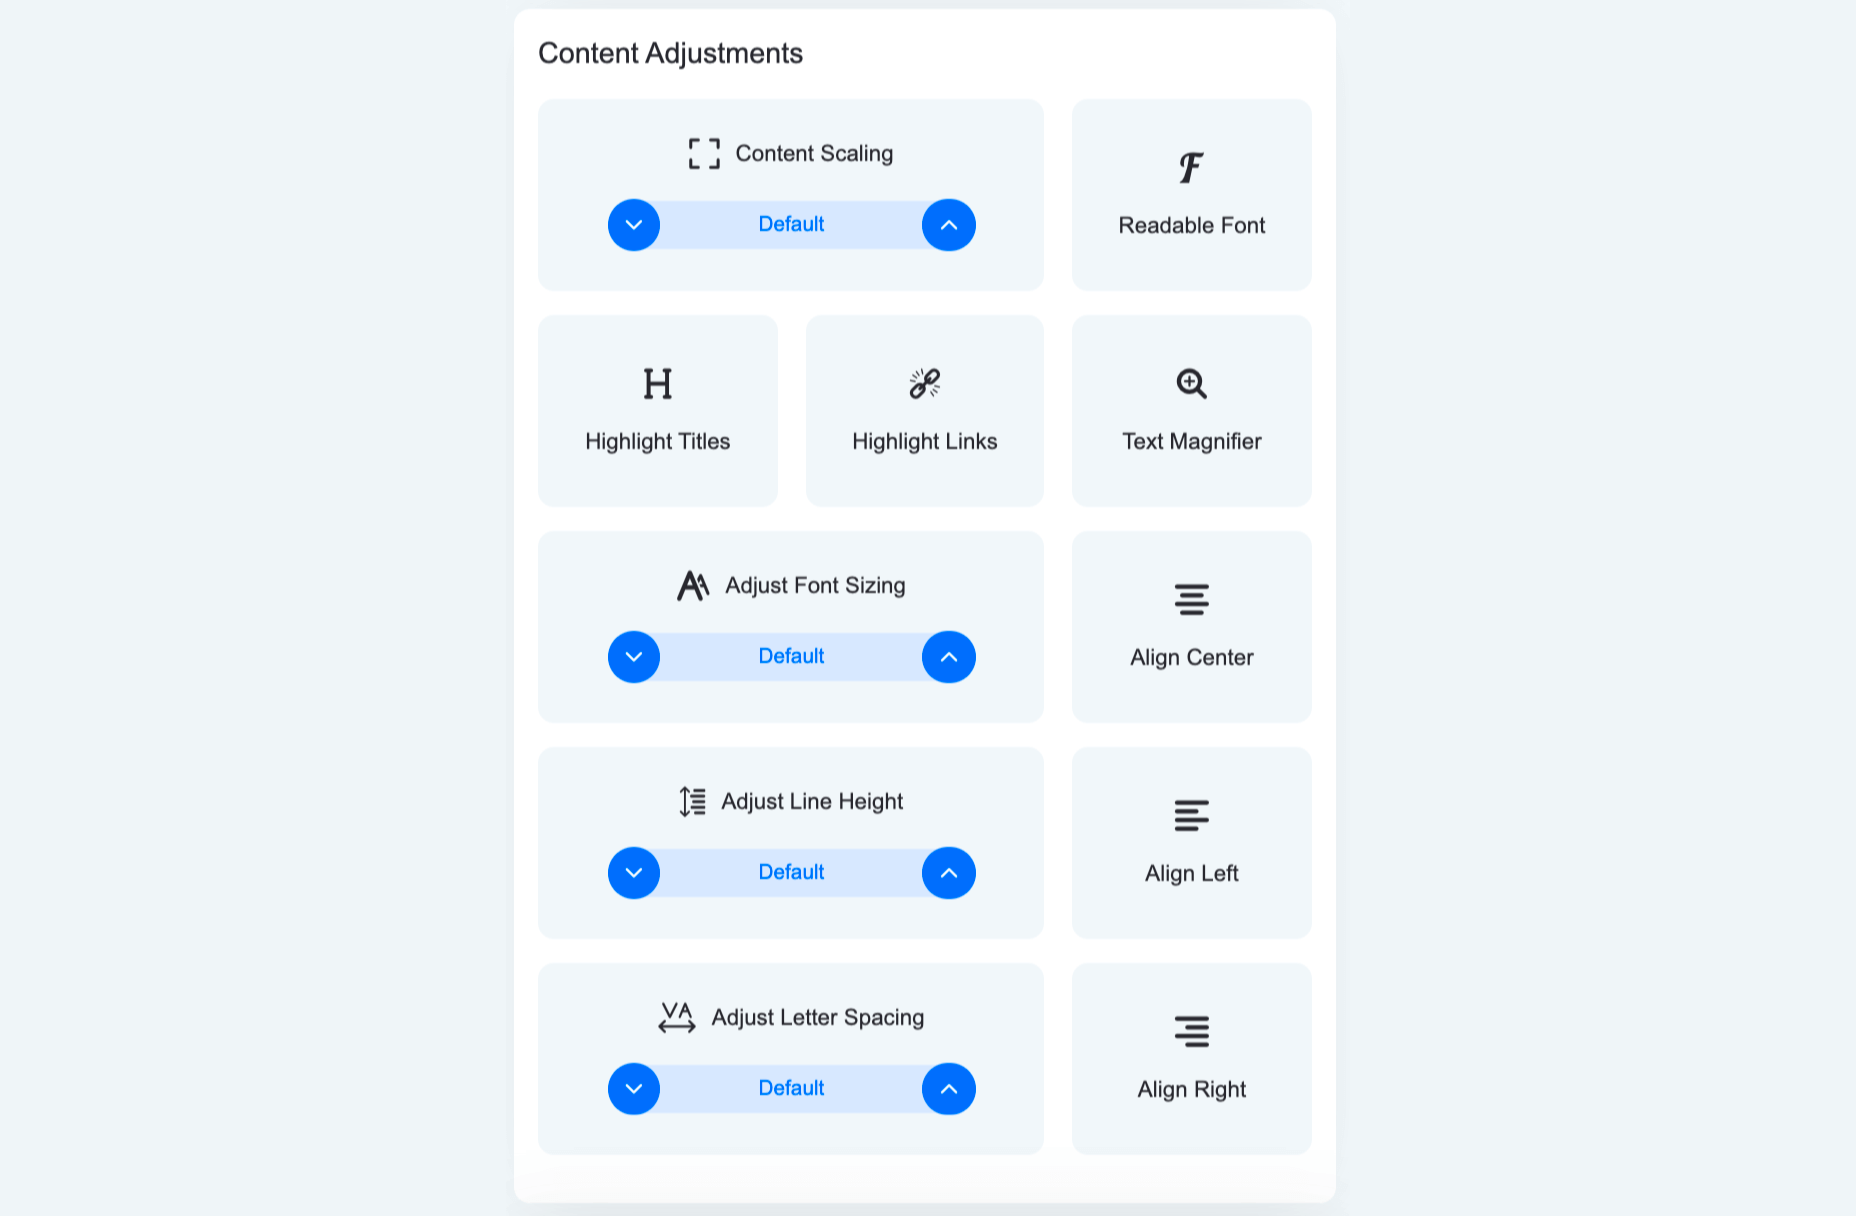
The content adjustments allow you to control every aspect of the written content on your website. The menu looks like this:

Each of these elements allows for granular control of the way content, or text, is presented. From altering the entire website’s text to a readable, sans-serif font that is easier to follow, to highlighting titles and links, to adjusting font size, the spacing between lines and letters and using a text magnifier that follows your cursor on the screen.

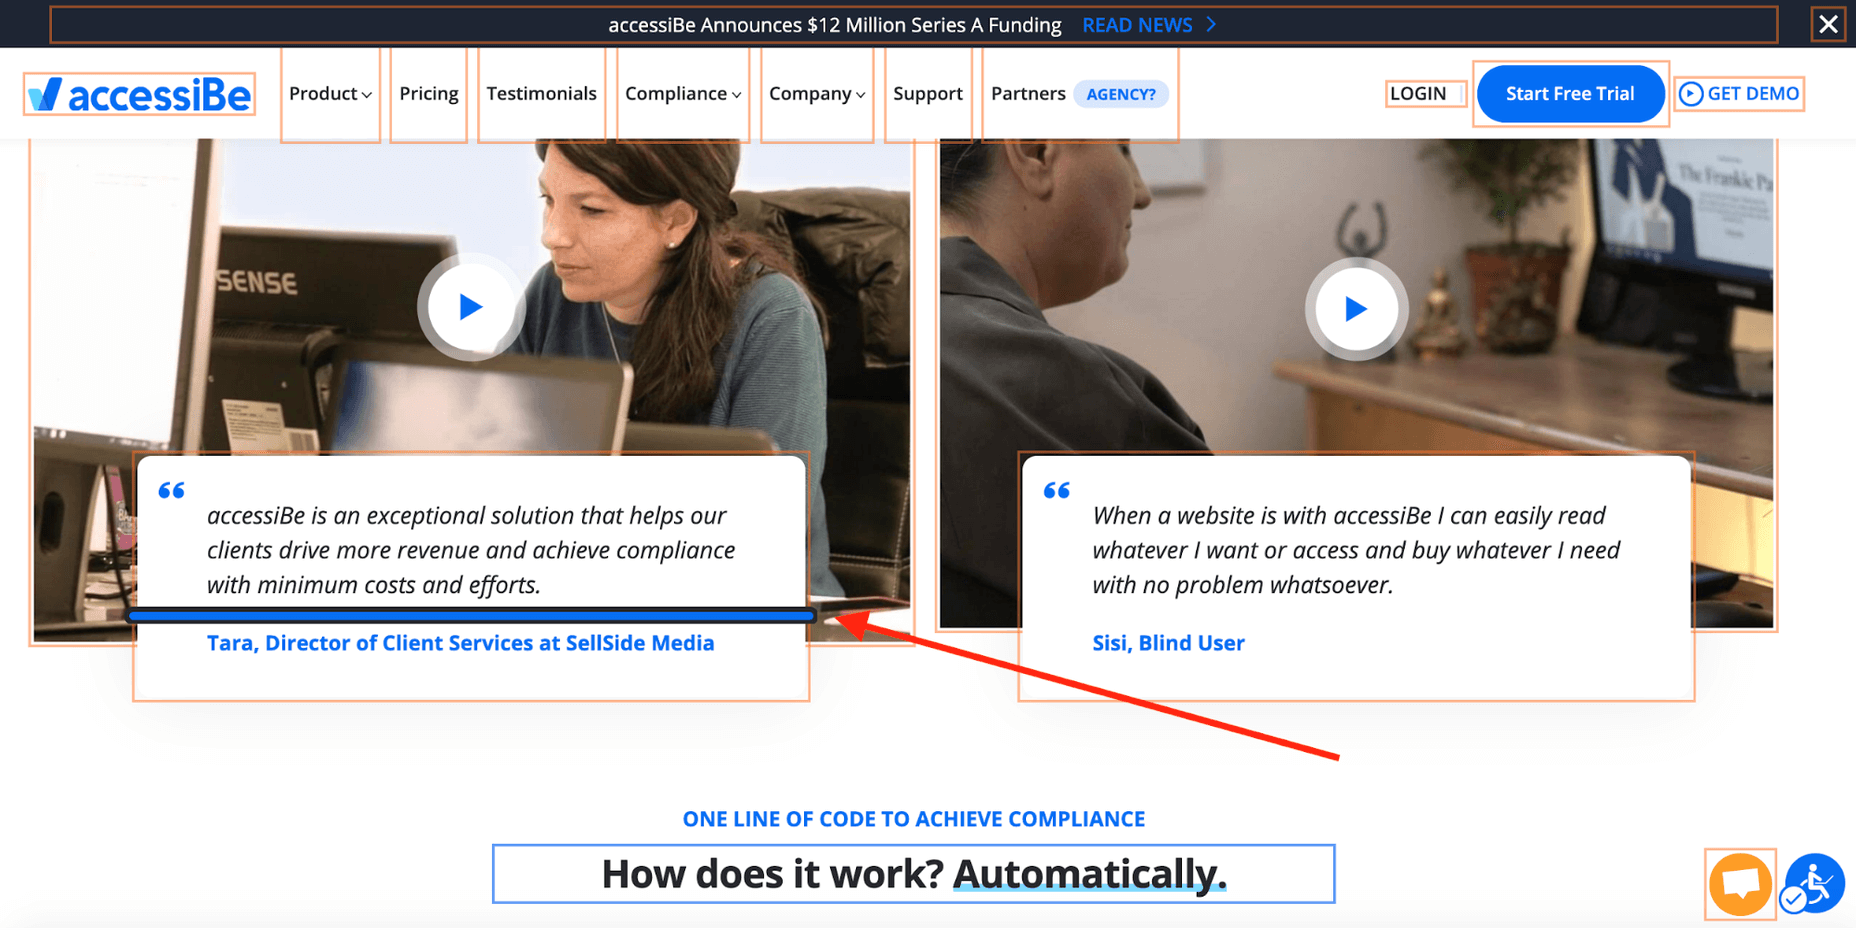
Here’s how it looks with Highlight Titles and Highlight Links turned on:

You can see all the links are highlighted with an orange bounding box while all titles are highlighted with a blue bounding box.

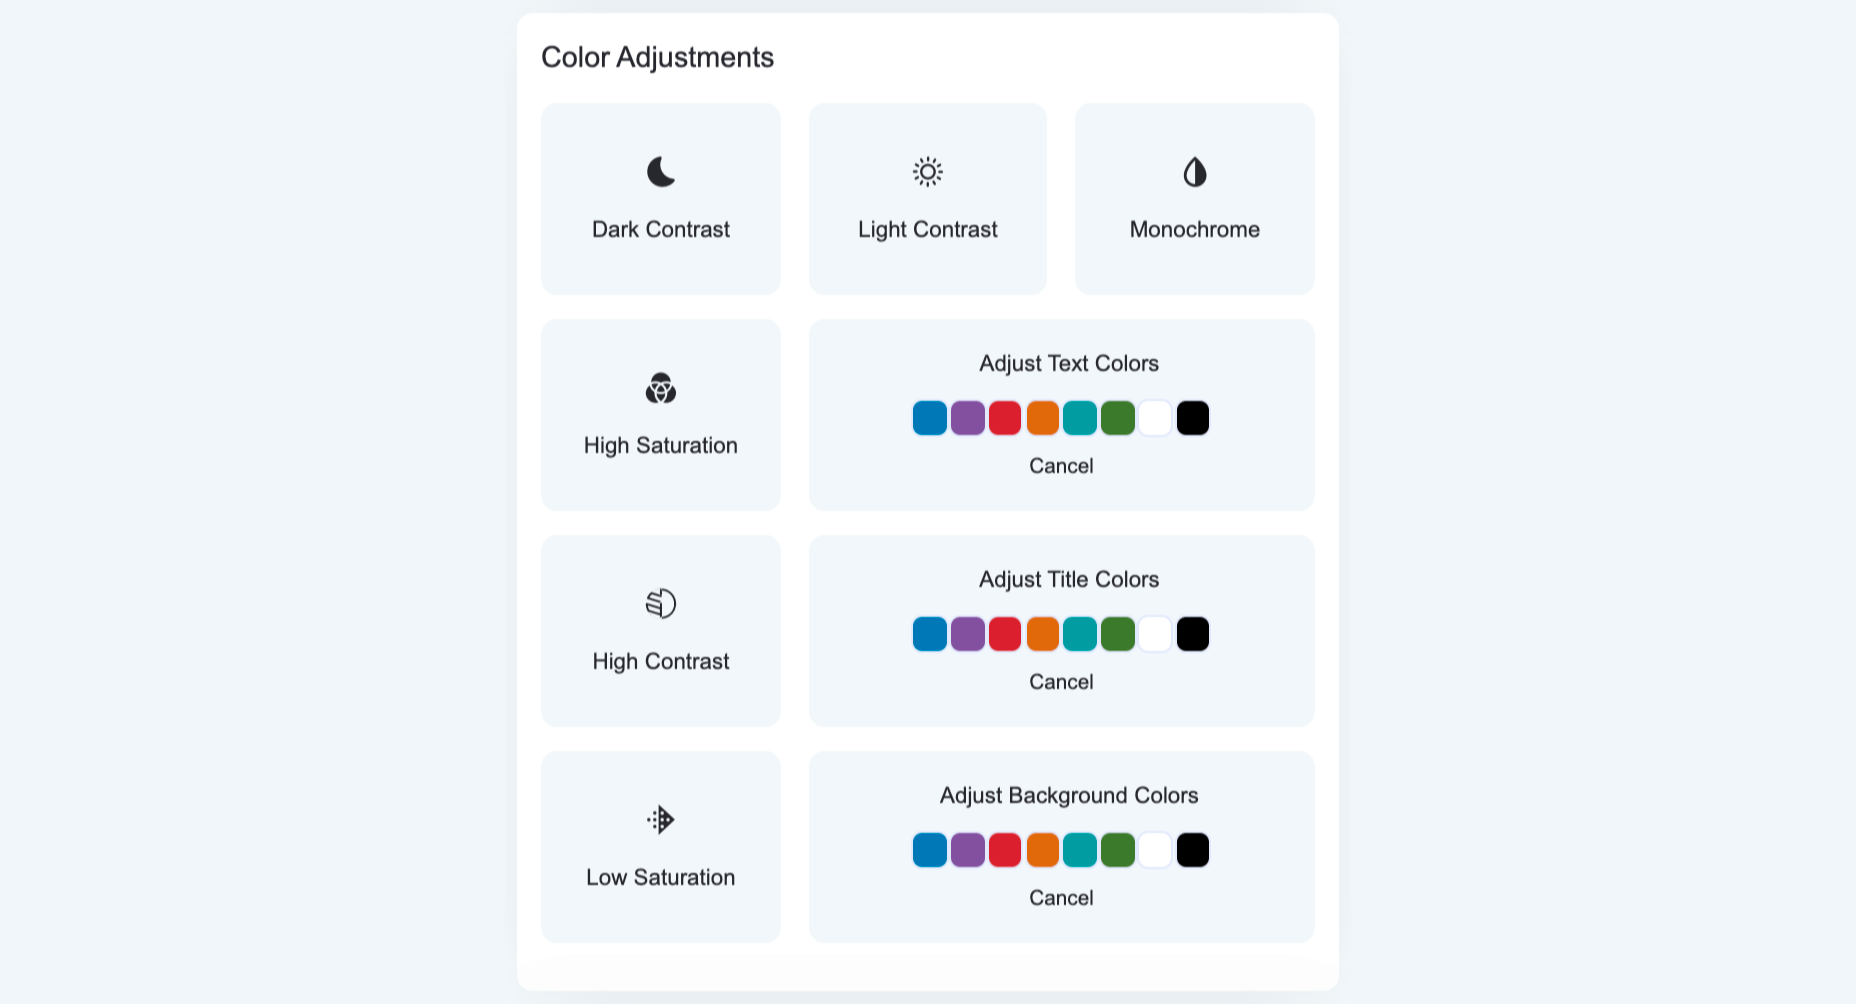
Accessibility Color Adjustments Explained

The color adjustments allows users to control every aspect of the color scheme on the website:

From adjusting contrast and saturation, to switching the entire website to a monochrome color scheme, to adjusting textual elements and background colors. Let’s look at a few examples.

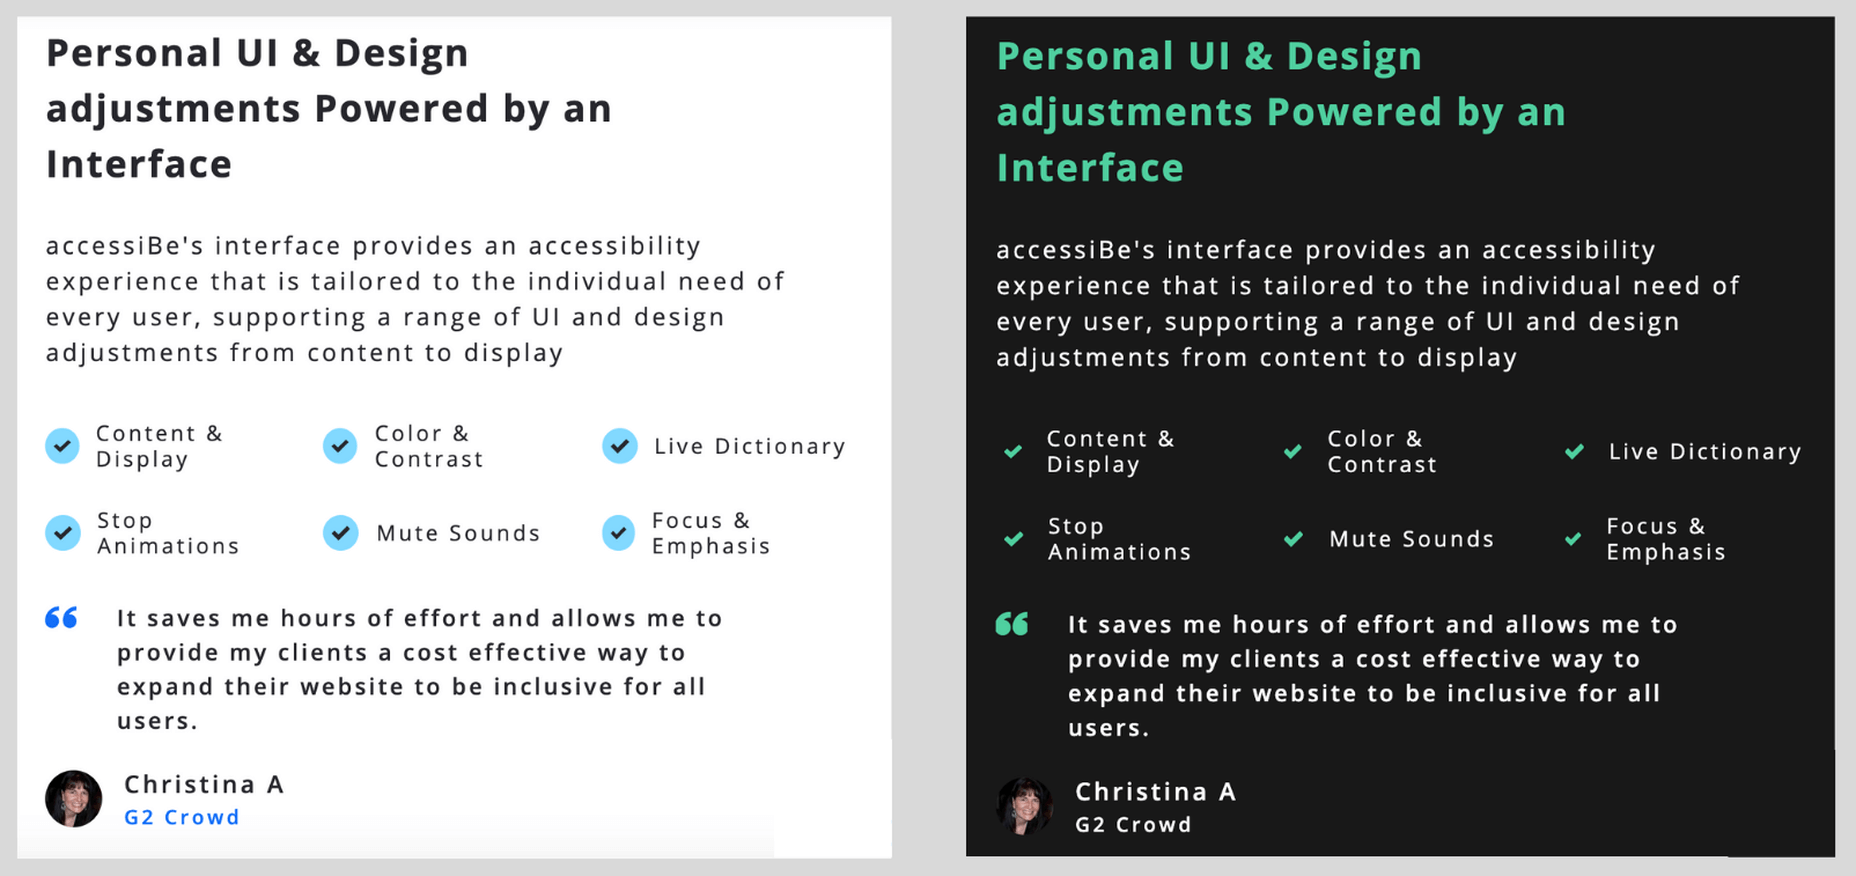
Here’s a side-by-side of default appearance and the Dark Contrast adjustment turned on:

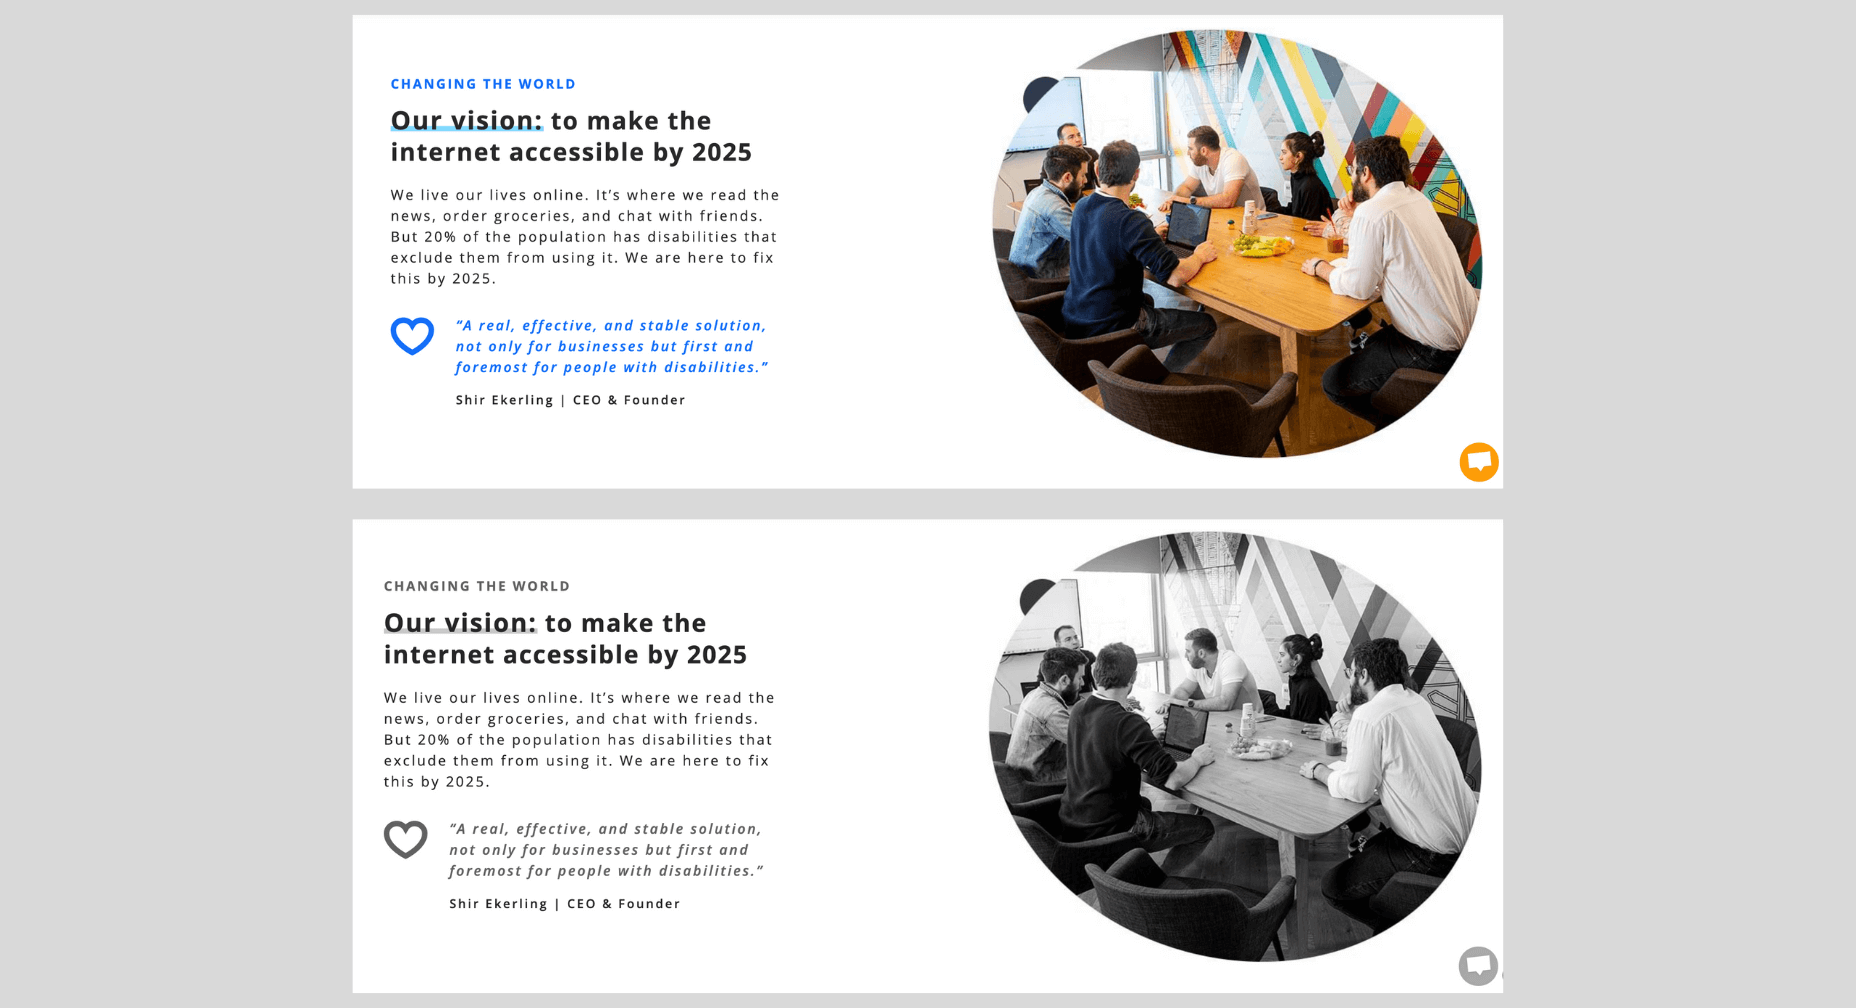
And here’s how it looks with the Monochrome adjustment turned on:

Accessibility Orientation Adjustments Explained

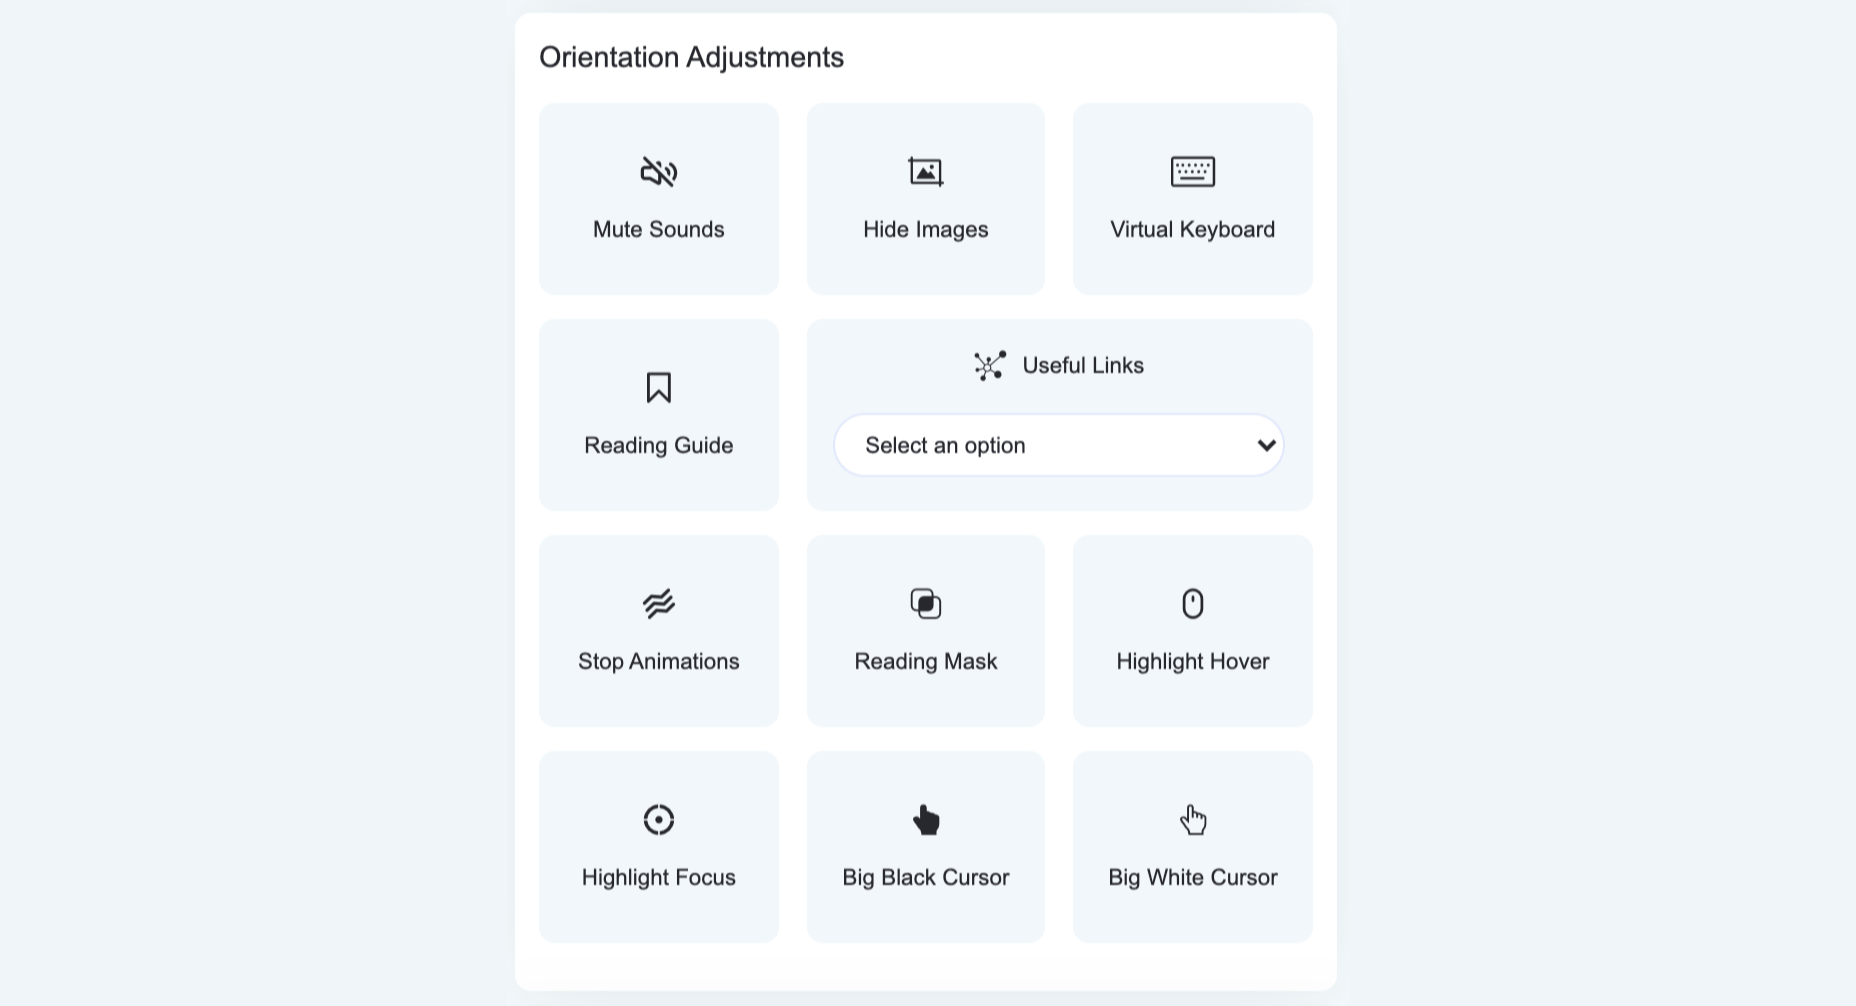
The orientation adjustments allow full control of ‘distractions’ that make it hard for individuals with epilepsy, ADHD, and cognitive disability to browse the web:

As such, the orientation adjustments allow users to mute sound, hide images, stop animations and additional ‘focus’ features such as an enlarged cursor and reading assistance that highlights the text being read.

Here’s how the Remove Images adjustment works:

accessiBe Back End Features

Unlike ‘accessibility plugins’ (more on that later) accessiBe provides a comprehensive back end treatment to your website – automated, AI-powered analysis of compatibility with accessibility requirements and fixing of the elements that need adjustment.

It should be noted that 70% of the WCAG compliance requirements deal with screen-reader and keyboard navigation compatibility and all these requirements are not answered by installing an accessibility interface widget that merely makes UI and design adjustments.

For example, an accessibility widget will enable you to enlarge the font on your website, to adjust the saturation or to highlight links, but it won’t enable a blind individual to differentiate between a shopping cart icon and a checkout icon, nor will it enable a motor impaired individual to easily navigate a menu.

This is a crucial consideration to make when choosing a web accessibility solution. Being WCAG compliant is a YES / NO situation. Your website is either compliant or it’s not, there is no middle ground here.

accessiBe’s back end features come to solve and answer all these compatibility issues that enable full screen-reader and keyboard navigation functionalities.

Screen Reader Compatibility Explained

Screen Reader is a software for blind individuals to use computers and browse the web. As the name suggests, the software reads aloud what is seen on the screen for blind individuals.

The screen reader software is installed on the computer. But in order for it to work with websites, the website needs to be compatible with the software. To achieve compatibility with screen reader software, WCAG requires that a website should adhere to a set of attributes called Accessible Rich Internet Applications (ARIA) that are installed within the website’s code, allowing it to ‘communicate’ with the screen reader.

Let’s take social icons as an example. We are all familiar with those icons – Facebook, Twitter, Instagram – they are instantly recognizable for us visually. A screen reader software doesn’t actually ‘see’ elements on the screen, rather it scans the website’s code to understand what appears on the screen. As such, a Facebook icon code simply says ‘link’ and has the URL that directs the user when clicking the link.

So with a website that isn’t compatible with a screen reader, that doesn’t have ARIA tags implemented, the screen reader will read to the blind person “link” for the Facebook icon; not very helpful, is it?

When ARIA tags are implemented, additional information is added to the Facebook icon – and any other visual link on the website – that describes what is the link. So the screen reader will read to the blind person “Facebook link”.

It’s not difficult to imagine the scope and effort of the work needed in order to implement ARIA tags on your entire website.

Keyboard Navigation Compatibility Explained

Keyboard navigation means that motor-impaired individuals are using their computers only through their keyboard, rather than a mouse. Scrolling, clicking links and menu buttons, opening and closing tabs – everything is done using designated keys.

There are many issues relating to keyboard navigation as today’s websites are highly complex, layered with content elements, and react dynamically to user behavior. Any element of the website must be compatible to allow full keyboard navigation.

Let’s look at a popup as an example.

Popups can be triggered for a variety of reasons. For mouse users, it is a simple occurrence; you can bring the cursor to the area of the popup, click on one of the fields to input details or click the X to close the popup.

But how do you handle the popup using only the keyboard? How do you differentiate between ‘regular’ functionalities of the website and that of the popup? How do you ‘shift the focus’ of the keystrokes to a layered element? You need to allow unique keystrokes to operate the popup, keystrokes that are activated only when a popup appears.

It’s one example of the many challenges making your website compatible with keyboard navigation. The list of WCAG requirements for compatibility with keyboard navigation is a long one, and understandably so as it needs to enable motor-impaired individuals to navigate your website with the same ease as the rest of us using a mouse.

How accessiBe’s Background Processing Achieves Screen Reader and Keyboard Navigation Compatibility

Without getting too technical, what accessiBe does is scan the entire code of your website and adds keyboard functionalities and ARIA tags to various elements on your website directly. It won’t interfere with your site’s code, but rather add an additional ‘layer’.

accessiBe’s AI ‘learned’ all of ARIA’s tags and keyboard functionalities required by WCAG and when scanning your website’s code implements all the required adjustments to achieve full compliance.

How accessiBe Makes Menus Accessible

Menus are a good example for understanding what the accessiBe background processing does and the benefits it provides.

We recognize menus on websites instantly, because we saw thousands and thousands of them. We know how they look, we know what their functionality is, and we know where to hover and click in order to reach the various pages of the website.

But if you remember, we said that screen readers don’t ‘look’ at the screen, but rather scan the site’s code to understand structure, identify links and read them aloud with all the text that appears on the page.

So menus are coded as a list structure, because in a way they are. A screen reader will announce a menu as a list, which might be confusing for a blind user. Additionally, many menus have drop-down sub-menus, accessible via a hover or by clicking a little triangle. Without proper ARIA tagging, a screen reader will miss the sub-menu.

What accessiBe does is adding readable tags for every element in the menu so a screen reader will recognize and announce each element properly. The ‘list’ code structure will get a “menu” tag, and the sub-menu will get a tag for ‘sub-menu’, thus allowing the blind individual to utilize the full functionality of the website.

Additionally, accessiBe alternates the tags on-the-fly while the site is being browsed. Once a sub-menu has been opened, a tag that says “sub-menu open” will be added to indicate to the screen reader what has happened, and will be changed with the tag “sub-menu close” once the sub-menu has been closed.

Image Recognition

One of the key elements of accessibility compliance with screen readers is to provide accurate alternative descriptions for images, known as alt text.

accessiBe utilizes various image, object and character recognition technologies (OCR and Iris) to provide highly descriptive and accurate depictions of images displayed on the website. Without adding screen-reader compatible alt tags to images a blind individual would simply not be aware of the existence of images, and miss out on the information usually displayed on images.

Let’s look at the following banner images from an e-commerce website:

As you can see, valuable information is communicated via the images – sales and discounts – the kind of information any shopper would want to know.

This is the descriptive text that accessiBe’s AI assigned to these images, completely automated with no human intervention (from left to right):

  • Image contains: shopping,  shorts, woman, ashion; image text: extra 50% off shorts
  • Image contains: shopping, red top, woman, jeans, fashion; image text: 50% off bottoms
  • Image contains: shopping, blue jumpsuit, woman, fashion, bed, ; image text: 50% off jumpsuits & rompers
  • Image contains: shopping, shoes, ocean, woman, fashion; image text: 50% off shoes

Again, doing this kind of work for the hundreds to thousands of images that are displayed on every e-commerce website requires a lot of time and effort. accessiBe achieves this in a completely automated way, and every image added to your website instantly gets its alt text.

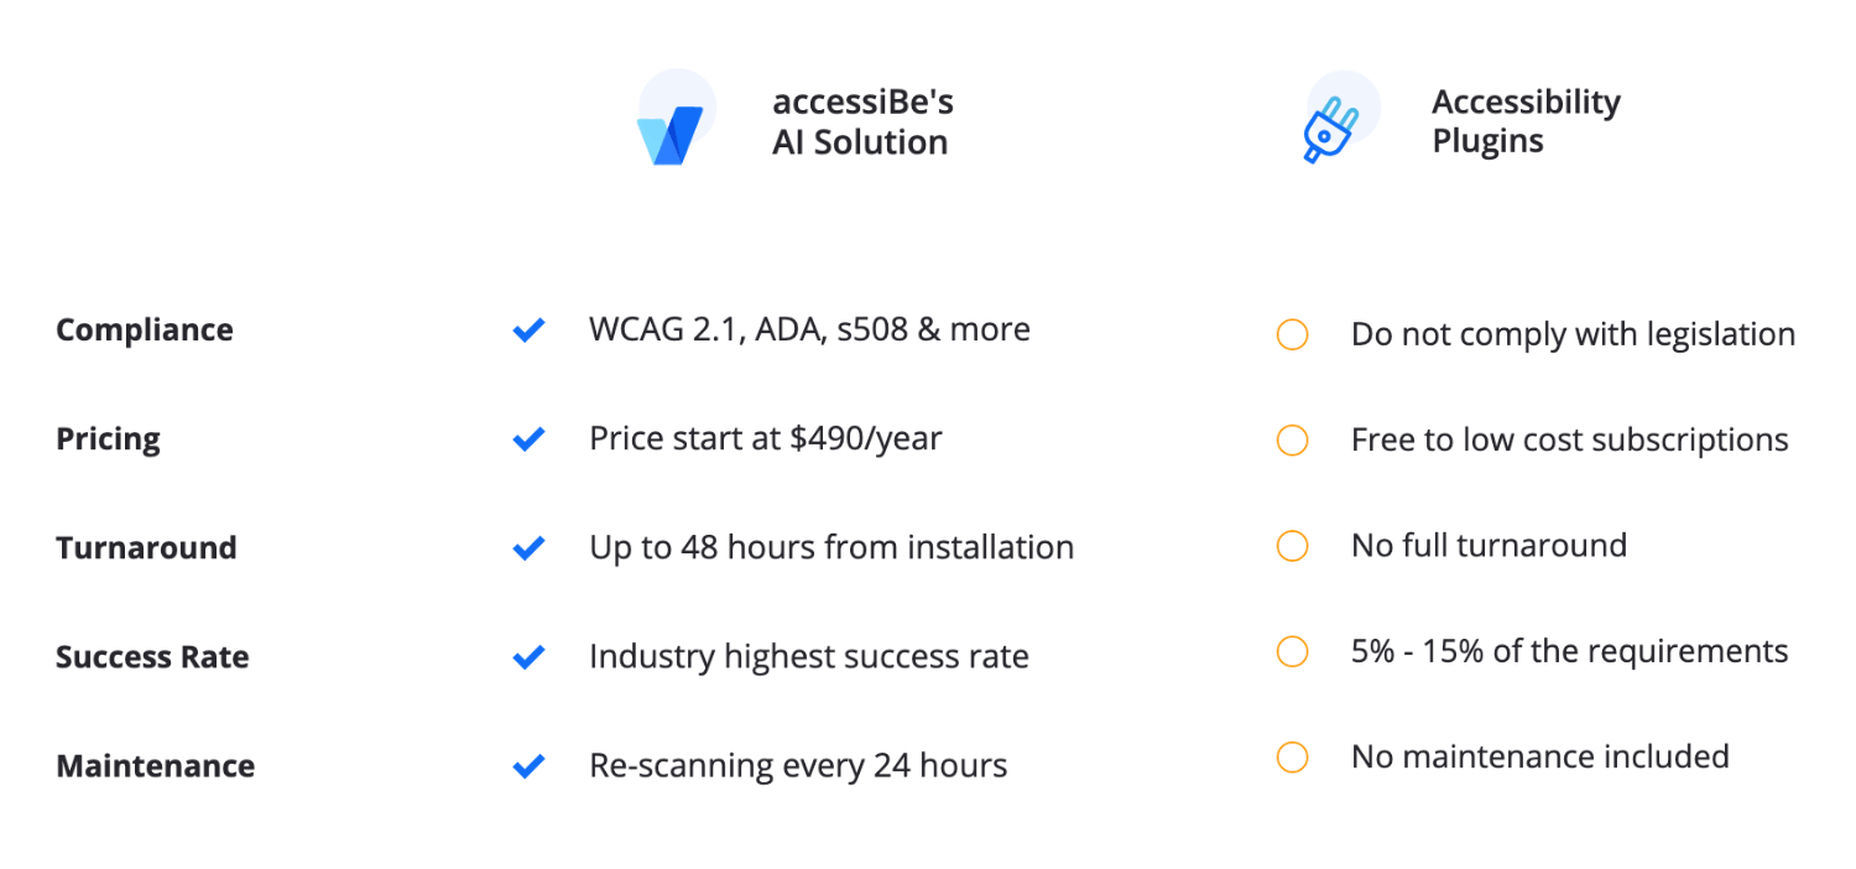
Comparison of accessiBe with Accessibility Plugins

There are many web accessibility plugins out there. They offer a ‘quick fix’ for ADA and WCAG compliance – add an accessibility menu and you’re done.

As tempting as it may sound, the distinction between an accessibility menu and being fully compliant must be made.

As we’ve mentioned earlier, there are two parallel tasks that need to handle in order to achieve ADA and WCAG compliance:

  • Front end – UI and design adjustments, achieved by the Accessibility Interface (the visible menu for content, font, color and orientation adjustments)
  • Back end – screen-reader and keyboard navigation compatibility, achieved by implementing ARIA tags and further code adjustments

Reminder: 70% of accessibility compliance requirements deal with back end adjustments, meaning, screen-readers, and keyboard navigation compatibility.

Accessibility plugins, whether free or paid, only answer the front-end requirements. Meaning, after installing an accessibility plugin, you are just 30% compliant. Since accessibility compliance is not a scale (you don’t ‘get points’ for making it halfway through) you’ll need to turn to an additional provider to do the back end work.

accessiBe, on the other hand, provides a full accessibility compliance solution, covering both UI and design requirements through the accessibility interface AND screen-reader and keyboard navigation compatibility requirements through it’s automated AI technology that analyzes and makes adjustments in the code-level of the website.

Benefits of Using accessiBe Over Accessibility Plugins

  • Achieving complete accessibility compliance
  • Dealing with a single provider, rather than two or more
  • Cost-efficiency (manual audit and remediation service are expensive)
  • Complete compatibility with screen-readers and keyboard navigation
  • Enabling true accessibility to individuals with disabilities

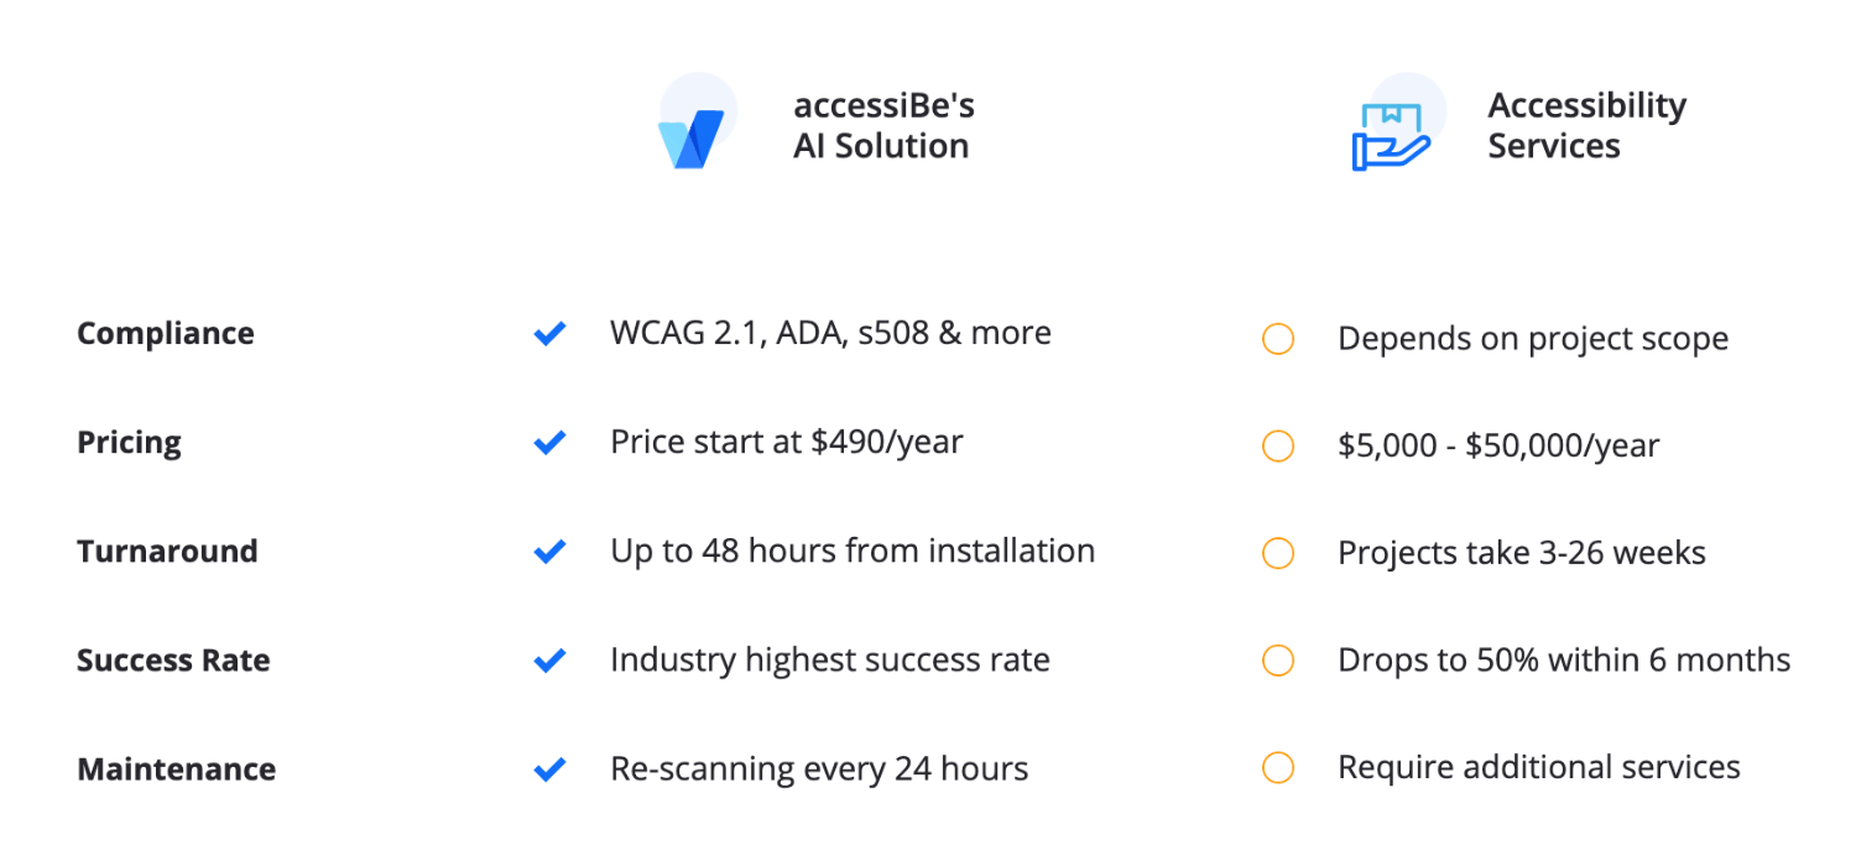
Comparison of accessiBe with Manual Accessibility Services

Manual accessibility services can help you achieve full accessibility compliance, but it comes with two major disclaimers:

  1. You’ll still need an additional solution for an accessibility interface, which the service companies don’t provide
  2. The compliance achieved is for the point in time the audit and remediation were performed. Let’s explain this point further.

Companies that offer a manual accessibility service assign a team of accessibility experts to do an audit of your website. The result of this audit is a lengthy document detailing all the accessibility faults that your website has. It is a valuable document as it gives you a precise depiction of what needs to be fixed in order to achieve compliance.

From here there are two possible paths:

You can either take the audit results to your development team and have them remediate your website accordingly.

Or, some of the service companies offer a remediation service, meaning, they’ll assign their own engineers to manually make the necessary changes in your website. Needless to say this extra service isn’t given for free.

In both cases, you are looking at a process that takes weeks if not months (depending on the number of pages your website has.)

Additionally, since it is a manual process done by experts, it comes with a hefty price tag.

But most importantly, the audit and remediation hold for the time they were done. Unless you have a 100% static website, meaning, you do not make any changes to your website – never add or remove products, never update content – the ‘effect’ of the audit and remediation fades away with time.

Since the process was manual, any changes you make to your website must be handled manually accessibility-wise. You added a new banner with a link to items on sale, you’ll need to go into the code and add ARIA tags. You added a new image, you’ll need to go into the code and add alt text compatible with screen-readers. And so on.

Some of the manual accessibility service companies offer maintenance services as well. They will periodically audit your website (manually) and provide a remediation document that will need to be implemented (manually) either by your development team or by theirs for an additional cost.

These costs add up. Having your website audited and remediated for compliance on an ongoing basis takes time, effort, and money. But you don’t have a choice. Being ADA and WCAG compliant is an ongoing task, since websites are dynamic and being updated regularly.

accessiBe, on the other hand, offers a 100% automated and ongoing compliance solution. The initial audit and remediation process is carried out – with no human intervention – in 48 hours (compared to weeks or months by a manual provider). Then, your website is scanned every 24 hours to identify and fix accessibility issues using accessiBe AI technology. Meaning, compliance maintenance is constantly carried out ‘in the background’ keeping you ADA & WCAG compliant at all times.

Which brings us to another crucial point regarding manual accessibility services. They make it extremely hard for you to scale up. Every business has a constant aim to grow, but with a manual accessibility service, scalability becomes a pain point. The more you grow the more time, effort and money you need to put in to remain compliant. You want to add another section to your website, you want to launch an additional website? Using a manual accessibility service will hold you back. You’ll need to account for additional time before going live to manually enable accessibility and additional funds. For fast-moving companies, time becomes a serious burden.

Since accessiBe offers an automated and ongoing accessibility solution, scalability is not an issue.

Benefits of Using accessiBe Over Manual Accessibility Services

  • Time-efficient
  • Cost-effective
  • 100% automated
  • Ongoing compliance
  • Infinite scale
  • Single provider for full compliance (front end and back end)

How to Check Your Web Accessibility Compliance Level

Before you get started on your path to being ADA & WCAG compliant it’s important to understand the current state of accessibility your website provides.

Obviously, if you’ve never taken any steps to make your website accessible to individuals with disabilities, there’s no need for this – your website isn’t accessible in any way.

This is actually highly important if you have taken steps to make your website accessible, like for example, installing one of the accessibility plugins. You might be under the impression that by doing so your website is both compliant and accessible to individuals with disabilities.

There’s a simple and quick way to face the accessibility reality.

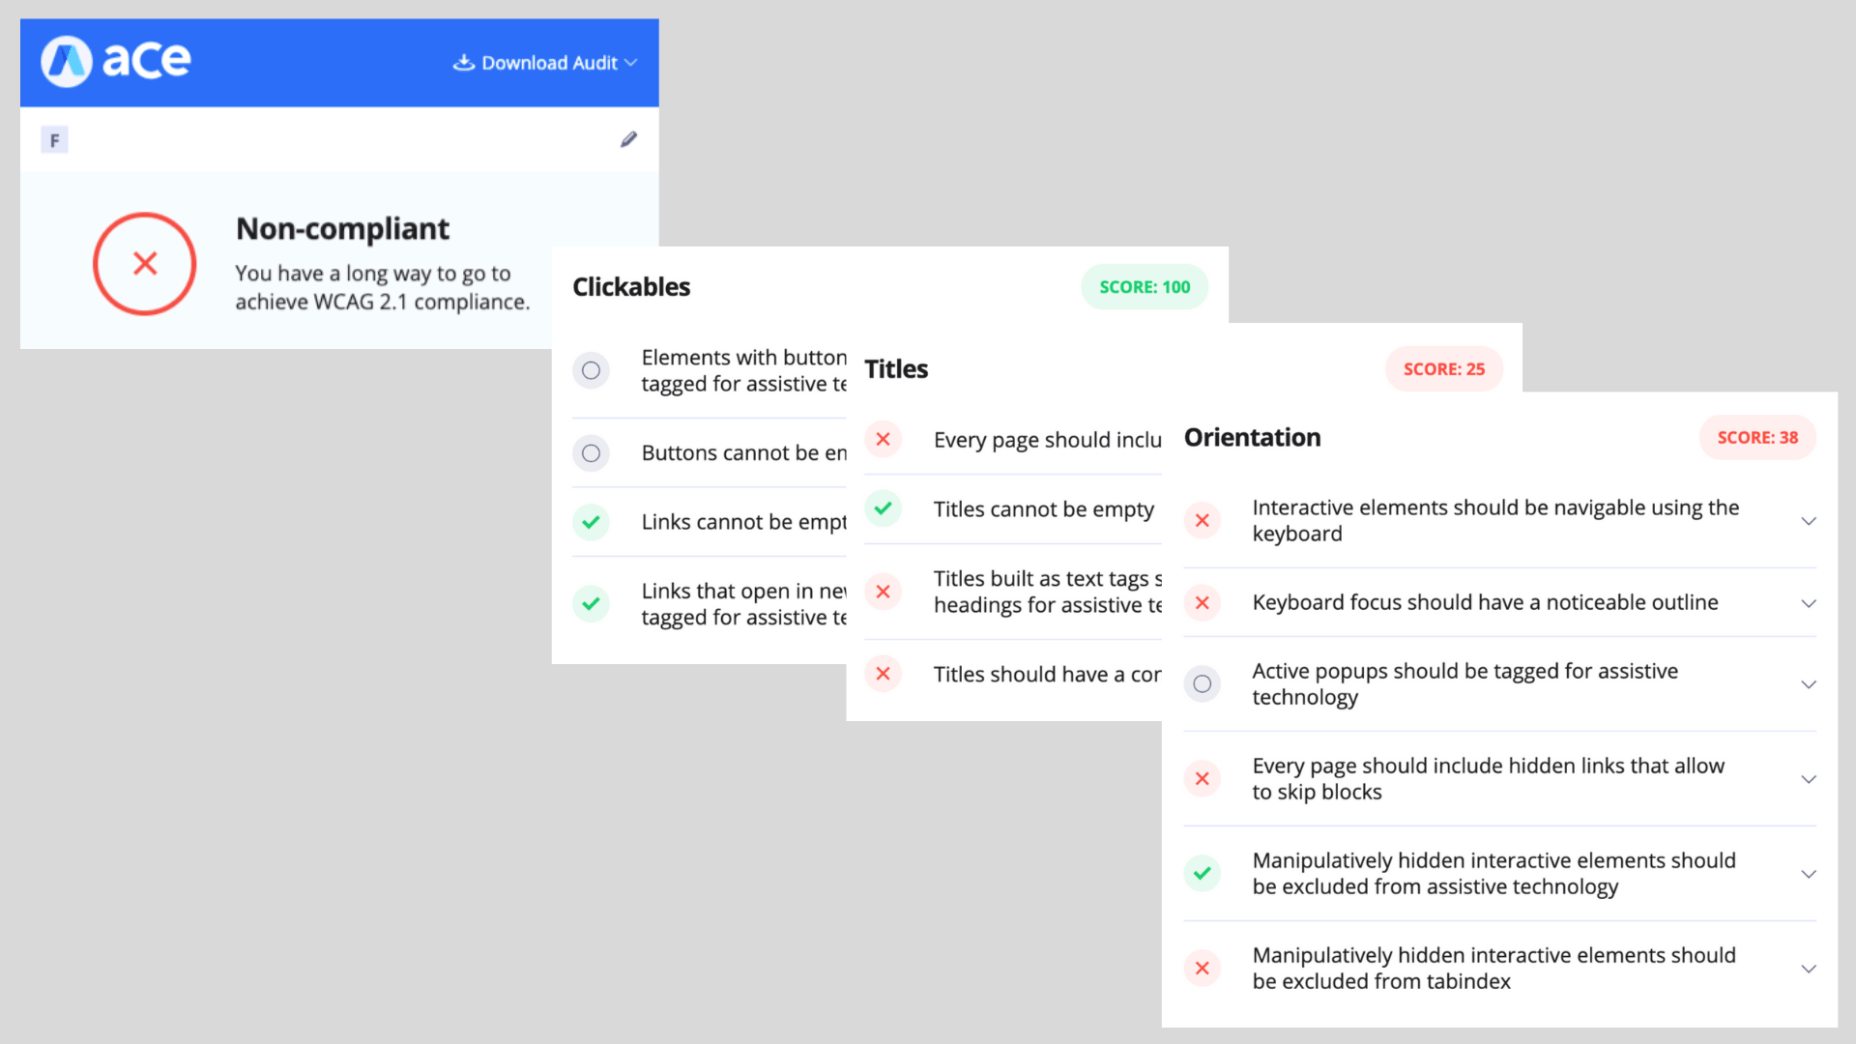
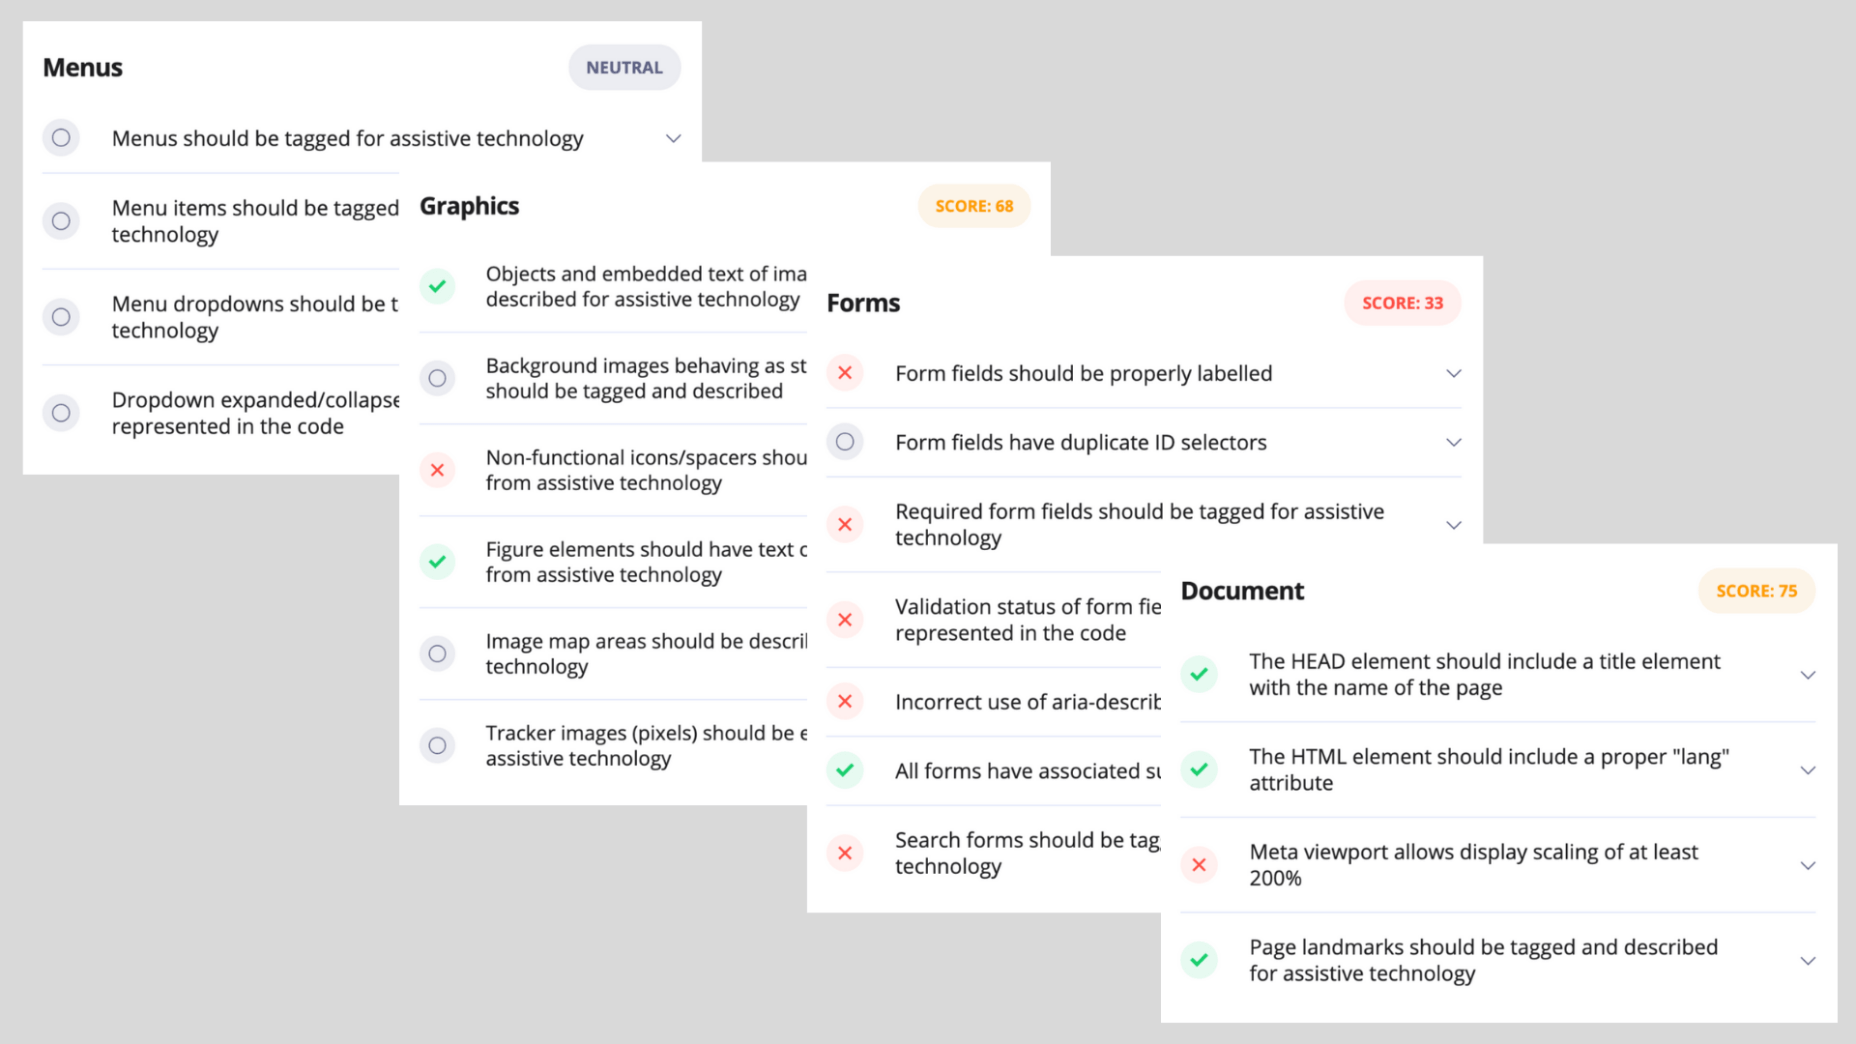
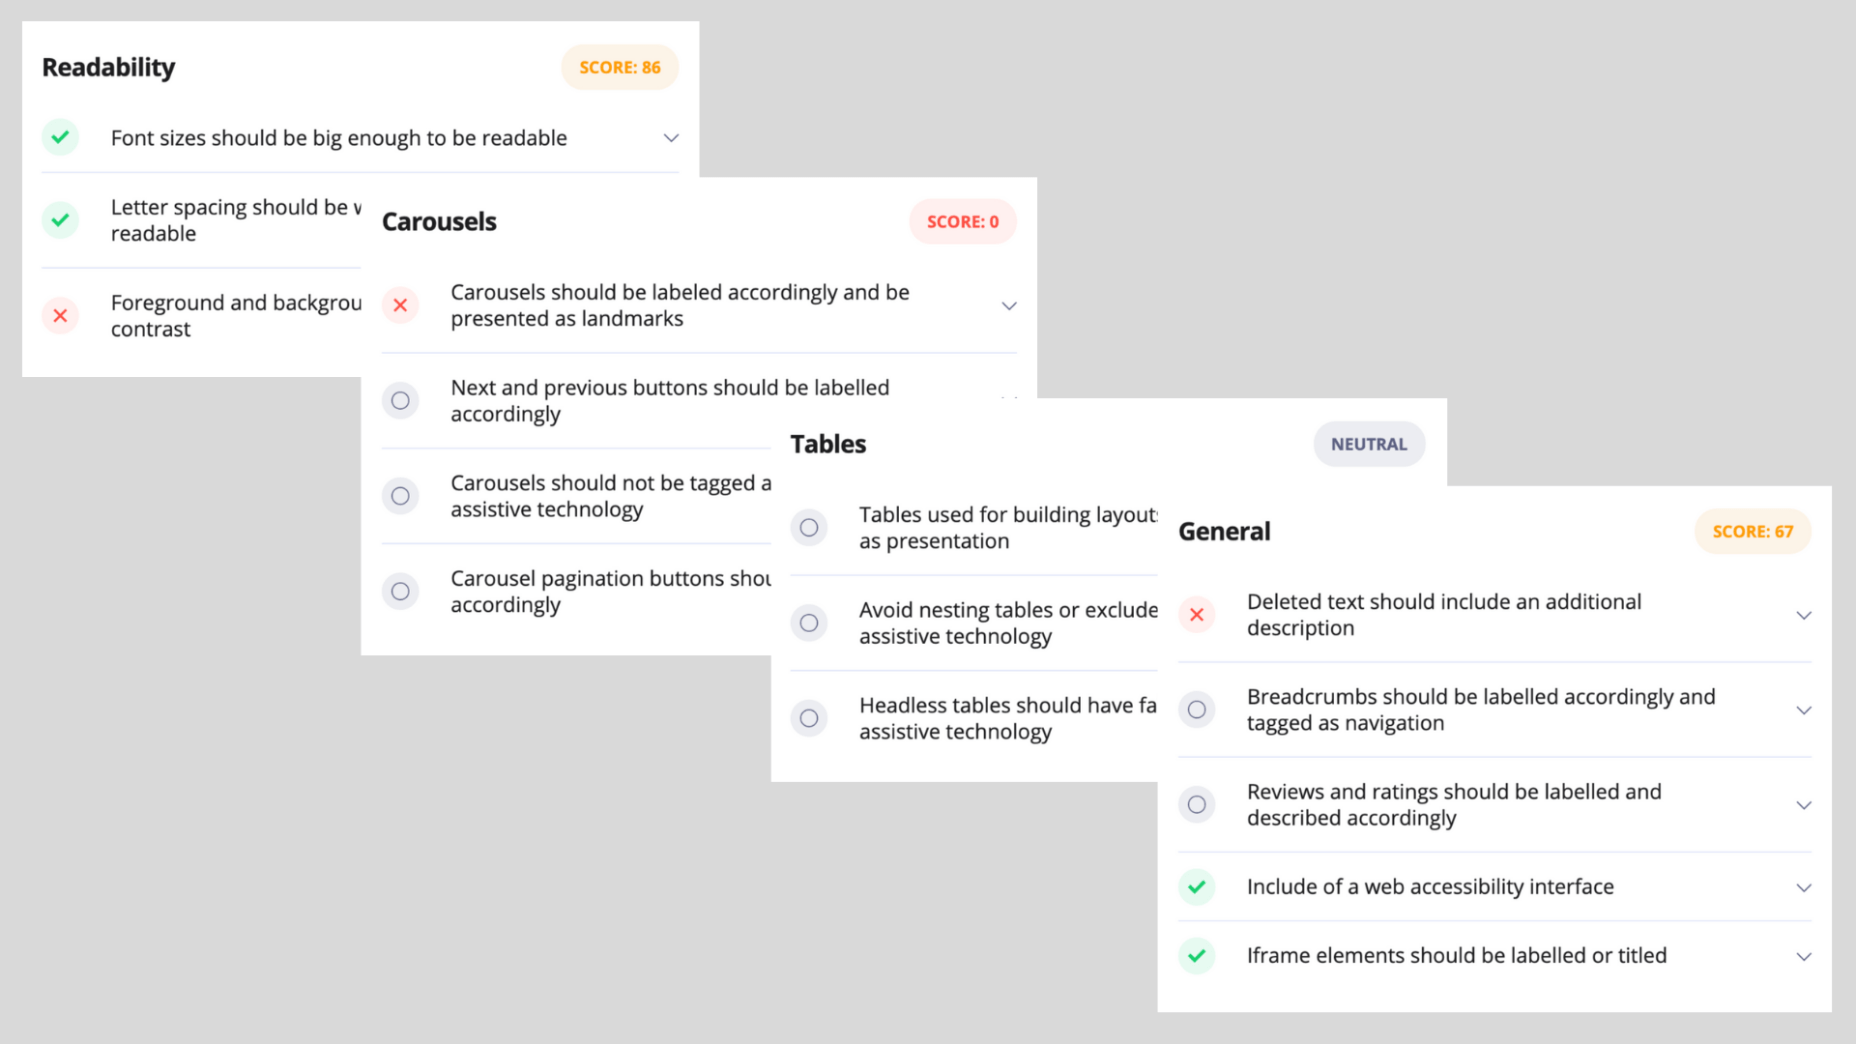
accessiBe offers a free, automated compliance audit tool available online named aCe. It uses accessiBe AI technology to scan your site, detect accessibility issues and provide quite a detailed report on the various elements that impact your website’s accessibility, and those include:

  • General score
  • Clickables
  • Titles
  • Orientation
  • Menus
  • Graphics
  • Forms
  • Documents
  • Readability
  • Carousels
  • Tables

Each of these elements is given a score and some explanations to the specific issues that need attention within the context of these elements.

In addition to gaining a compliance audit with the remediation steps needed to be taken in order to fix these issues, aCe gives you a very clear idea of where you stand and what needs your attention in order to achieve compliance.

We gave it a try. We ran a website that has installed one of the accessibility plugins (which was recognized, by name, by the aCe audit tool) and the results cement the point that these plugins aren’t comprehensive enough of a solution for true ADA & WCAG compliance.

Here are the results:

As can be expected, the UI and design side got relatively high scores, due to the accessibility plugin installed on the website, but anything that has to do with back end compatibility with screen readers and keyboard navigation got a failing score.

Conclusion

accessiBe is an automated and comprehensive web accessibility solution that achieves ongoing compliance with ADA and WCAG regulations for your website.

It offers a unique combination of front end and back end compatibility, meaning, it provides an end-to-end solution for both user-facing accessibility interface, and compatibility with screen readers and keyboard navigation.

The solution offered by accessiBe is a no-touch, no-code, continuous compliance utilizing proprietary AI technology that audits and remediates your website.

It is by far one of the most affordable web accessibility solutions, starting at $490 for websites with up to 1,000 unique pages.

When compared to accessibility plugins, accessiBe’s offering is robust and comprehensive, delivering full compliance that plugins aren’t able to.

When compared to accessibility manual services, accessiBe offers a speedy and automated audit and remediation process compared to the lengthy, manual and highly expensive offering of the service companies. Additionally, accessiBe, unlike accessibility manual services, delivers ongoing compliance and the ability to scale with ease and speed.

The combination of AI-based audit and remediation, the most comprehensive accessibility interface on the market, ongoing compliance, scalability, and a highly affordable plan makes accessiBe stand out from the competition by offering a unique end-to-end solution for achieving ADA and WCAG compliance in a fast and simple way.

Featured image via Unsplash.

Source de l’article sur Webdesignerdepot

Google resembles an iceberg: there’s the part above the water we can see and use everyday; there’s also the part beneath the water, that we don’t see and know little about.
While many of us are concerned about the aspects of Google we don’t see — the parts that threaten our privacy, or monopolize the web — there’s no denying that Google offers some amazing products and tools, many of them free, all from the convenience of a single login.

Today we’re going to take a look at 12 tools from Google that really do bring something positive to the table.

1. Polymer

Polymer is an open-source JavaScript library from Google for building web applications using Web Components. The platform comes with a ton of libraries and tools to help designers and developers unlock the web’s potential by taking advantage of features like HTTP/2, Web Components, and Service Workers. 

The main feature of Polymer is Web Components. With Web Components, you can share custom elements to any site, work seamlessly with any browser’s built-in elements, and effectively use frameworks of all kinds. Products like LitElement (a simple base class for creating fast, lightweight web components) and PWA Starter Kit make Polymer easy to use. If you like, you can build your app entirely out of Web Components.

2. Lighthouse

Google Lighthouse is an open-source, automated tool for improving the quality of web pages. The software allows you to audit web pages for performance, SEO, accessibility, and more. You can run Lighthouse using ChromeDevTools, directly from the command line, or as a Node module. 

To use Lighthouse in Google Chrome, just go to the URL you want to audit (you can audit any URL on the web), open ChromeDevTools, and click the Audits tab. After you have run the audit, Lighthouse will give you an in-depth report on the web page. 

With these reports, you will see which parts of your web page you need to optimize. Each report has a reference doc that explains why that audit is important and also shows you the steps you can take to fix it. 

You can also use Lighthouse CL to prevent regression on your sites. Using Lighthouse Viewer, you can view and share reports online. You can also share reports as JSON or GitHub Gists. 

Lighthouse also comes with a feature called Stack Packs that allows Lighthouse to detect what platform a site is built on. It also displays specific stack-based recommendations.

3. Google Analytics

Google Analytics is the gold standard of analytics services. Google analytics can be installed on your site for free with a small amount of JavaScript and allows you to see all kinds of details about your site visitors, like what browser they’re using, and where they’re from.

By using Google Analytics you can make decisions about your site based on science, and therefore be somewhat confident that the decisions you make will result in the outcome you are expecting.

4. Flutter

Flutter is Google’s UI toolkit for building natively compiled applications for mobile, web, and desktop from a single codebase. The toolkit is open source and free to use. The best part of Flutter is that it works with existing code. 

The toolkit has a layered architecture that allows for full customization, which results in fast rendering and flexible designs. It also comes with fully-customizable widgets that allow you to build native interfaces in minutes. With these widgets, you will be able to add platform features such as scrolling, navigation, icons, and fonts to provide a full native performance on both iOS and Android.

Flutter also has a feature called hot reload that allows you to easily build UIs, add new features, and fix bugs faster. You can also compile Flutter code to native ARM machine code using Dart native compilers. 

5. Google API Explorer

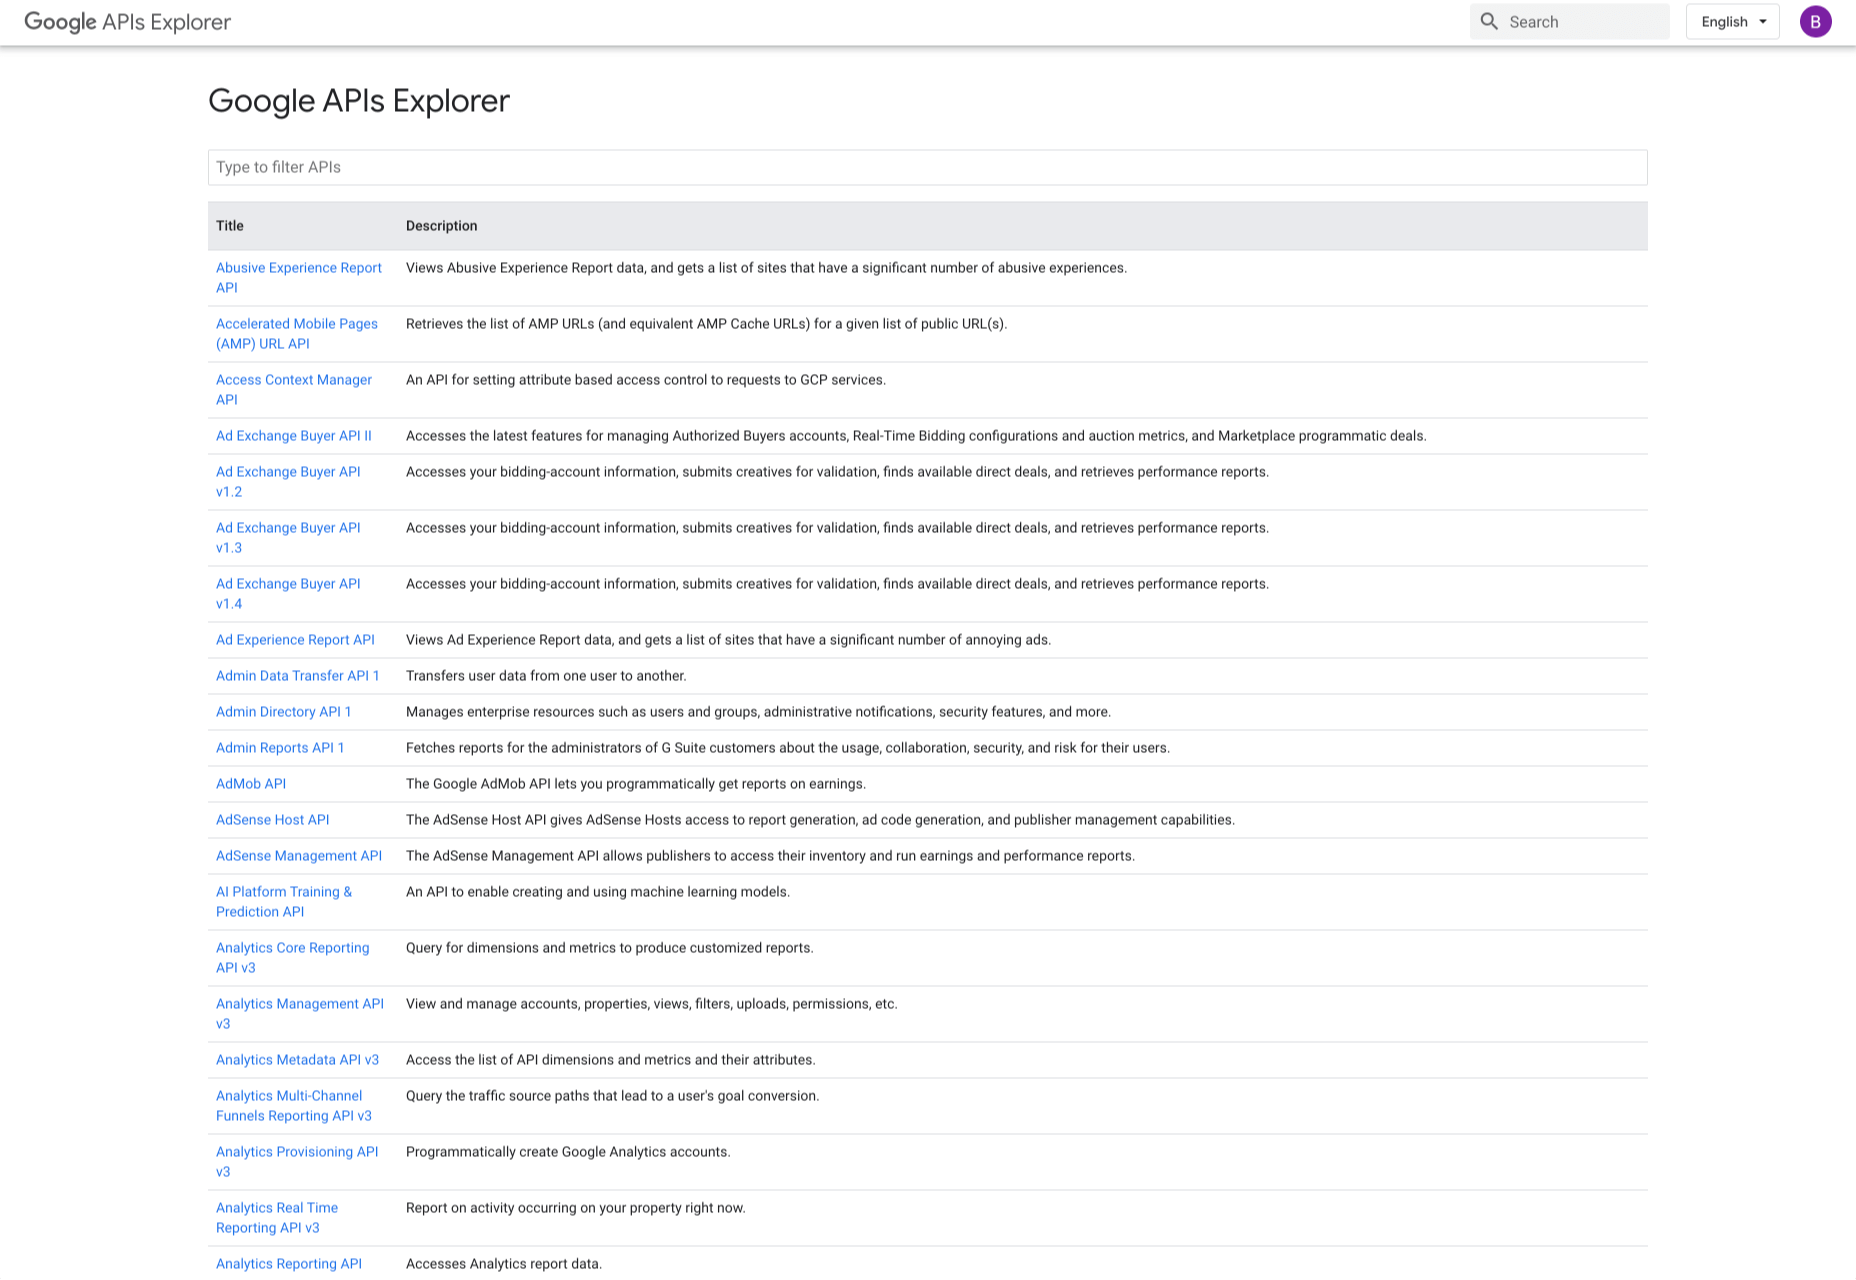
Google has a huge library of APIs that are available to developers but finding these APIs can be difficult. Google API Explorer makes it easy for developers to locate any API. On the Google API Explorer web page, you will see a complete list of the entire API library. You can easily scroll through the list or use the search box to filter through the API list. 

The best part of Google API Explorer is that each link to a reference page comes with more details on how to use the API. API Explorer is an excellent way to try out methods in the Monitoring API without having to write any code.

6. Puppeteer

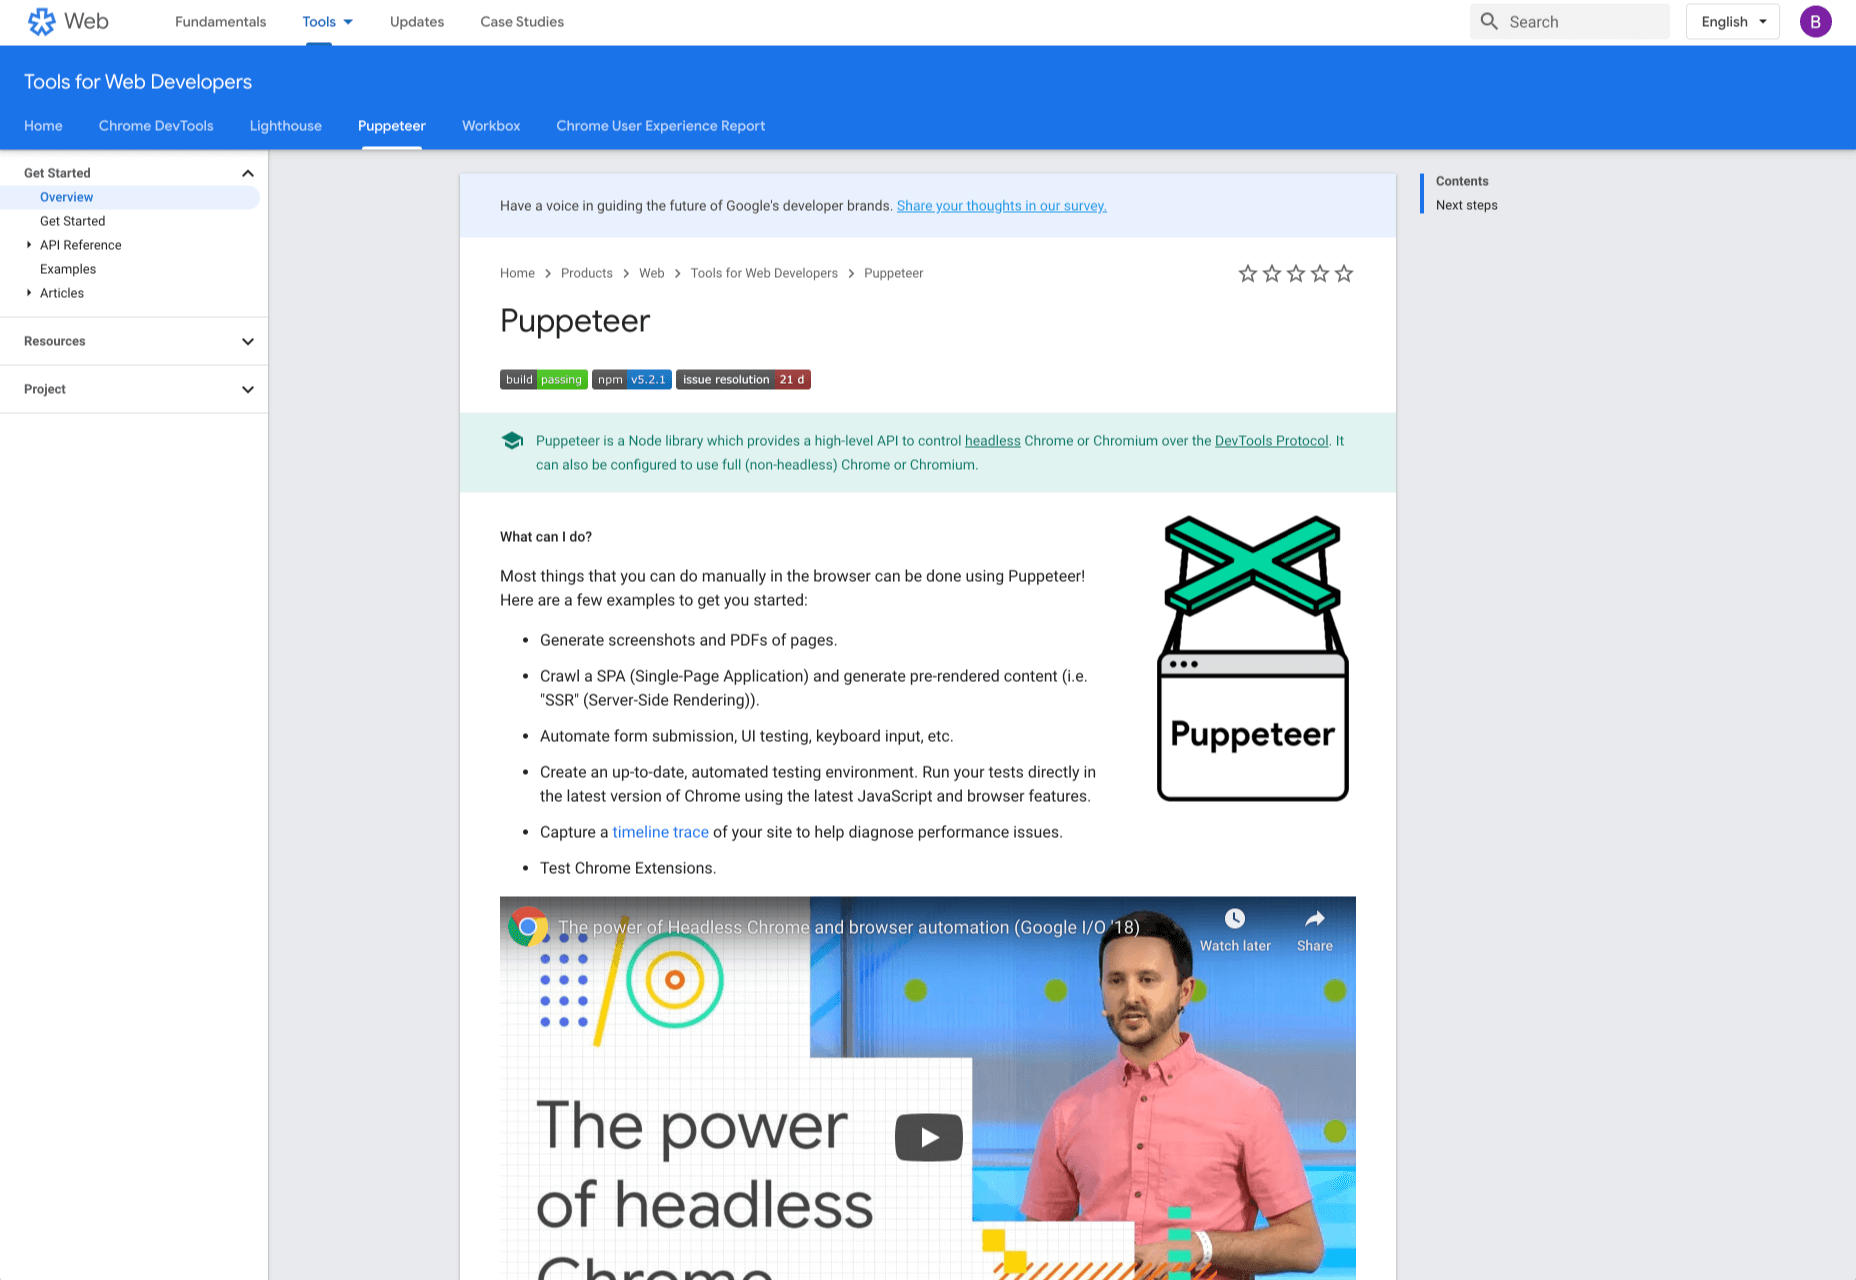
Puppeteer is a project from the Google Chrome team. The platform enables web developers to control a Chrome (or any other Chrome DevTools Protocol based browser) and execute common actions, much like in a real browser. Puppeteer is also a Node library and it provides a high-level API for working with headless Chrome. It is also a useful tool for scraping, testing, and automating web pages. 

Here are some things you can do with Puppeteer: generate screenshots and PDFs of pages, UI testing, test Chrome Extensions, automate form submission, generate pre-rendered content, and crawl Single-Page Applications. 

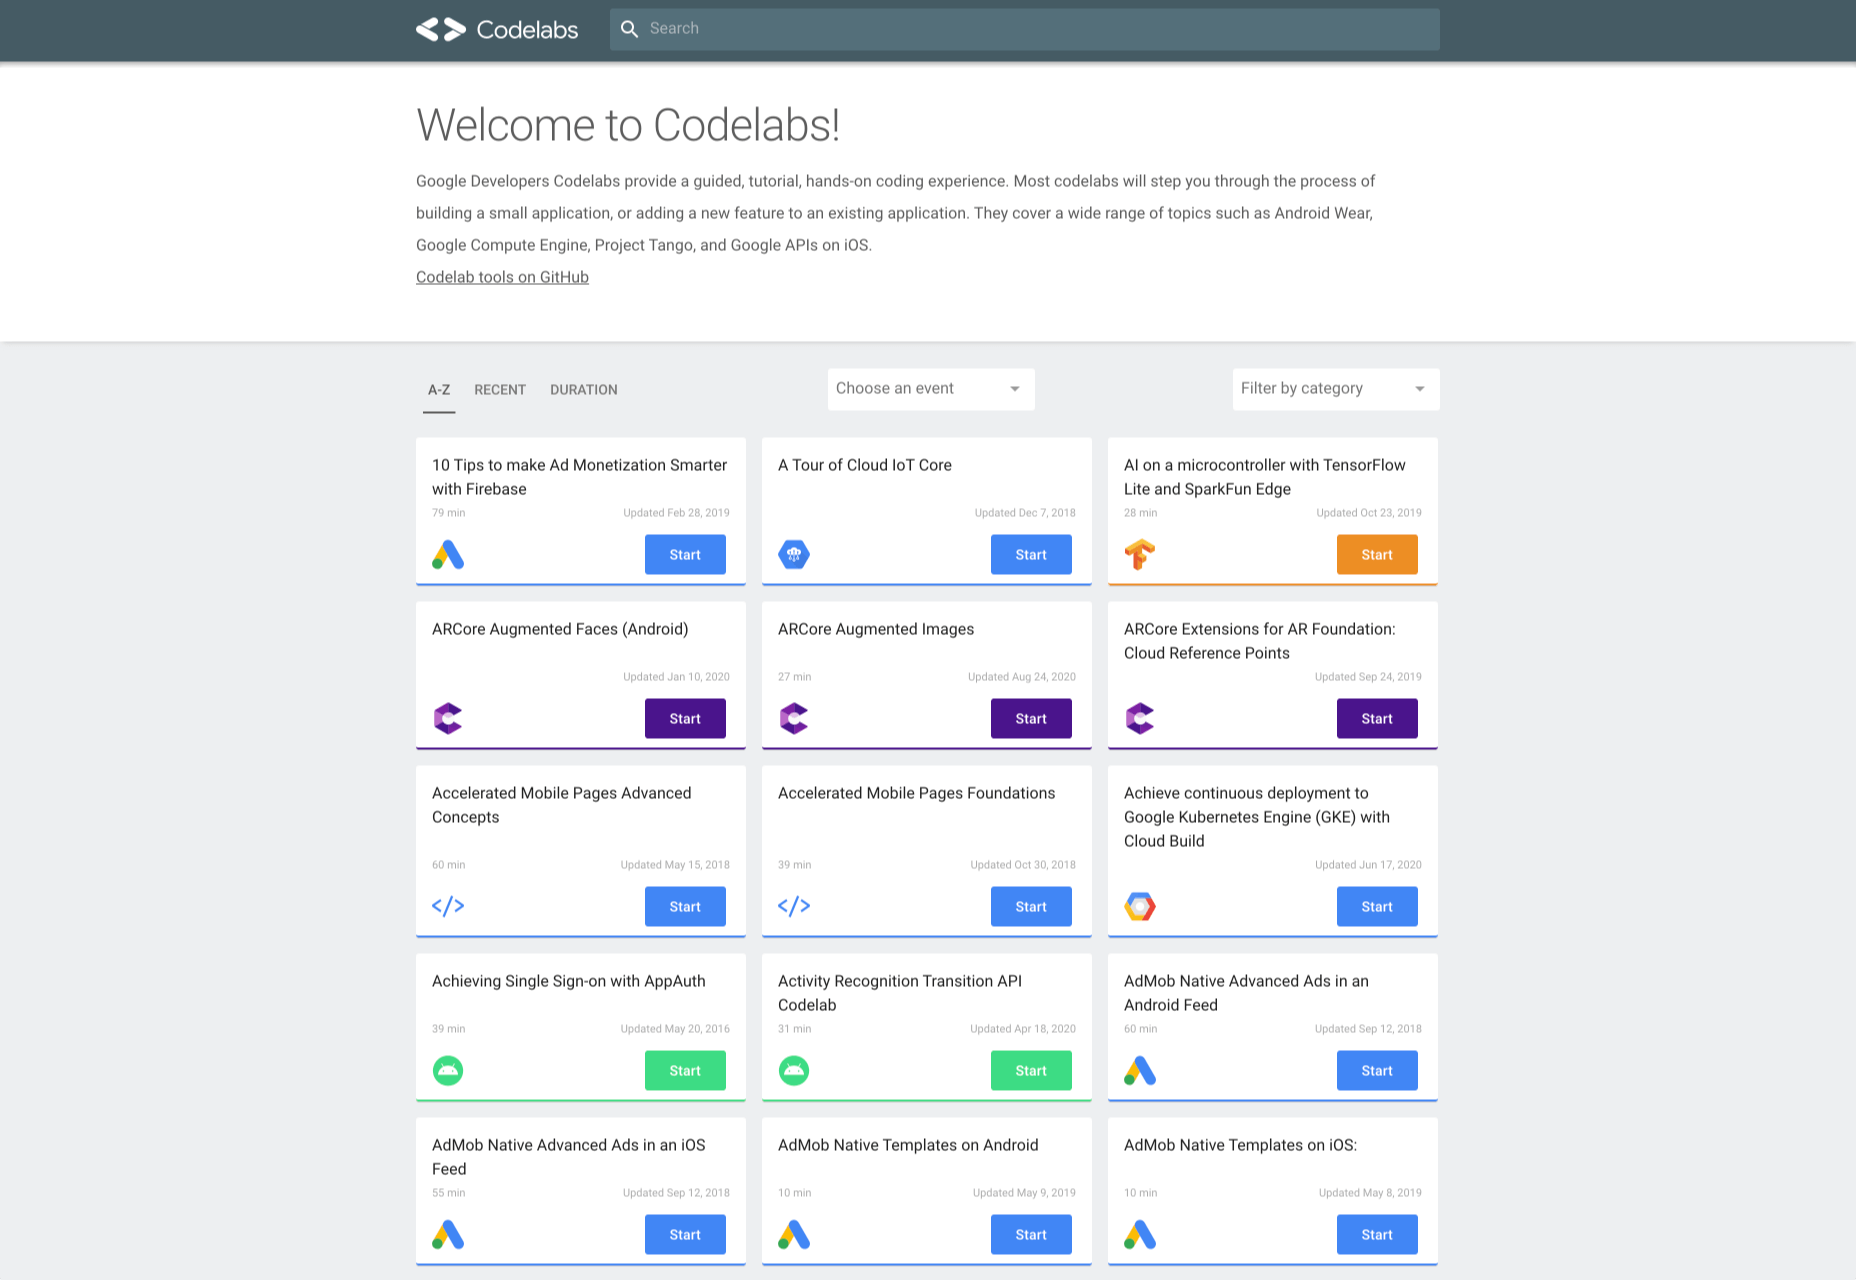
7. Codelabs

Google Developer Codelabs is a handy tool for beginner developers and even advanced developers who want to improve their knowledge. Codelabs provide a guided, tutorial, hands-on coding experience. Codelabs’ site is broken down into several tutorial sessions on different topics. 

With the tutorials on Codelabs, you can learn how to build applications from scratch. Some of the tutorial categories include Augmented reality, TensorFlow, Analytics, Virtual Analytics, G Suite, Search, Google Compute Engine, and Google APIs on iOS. 

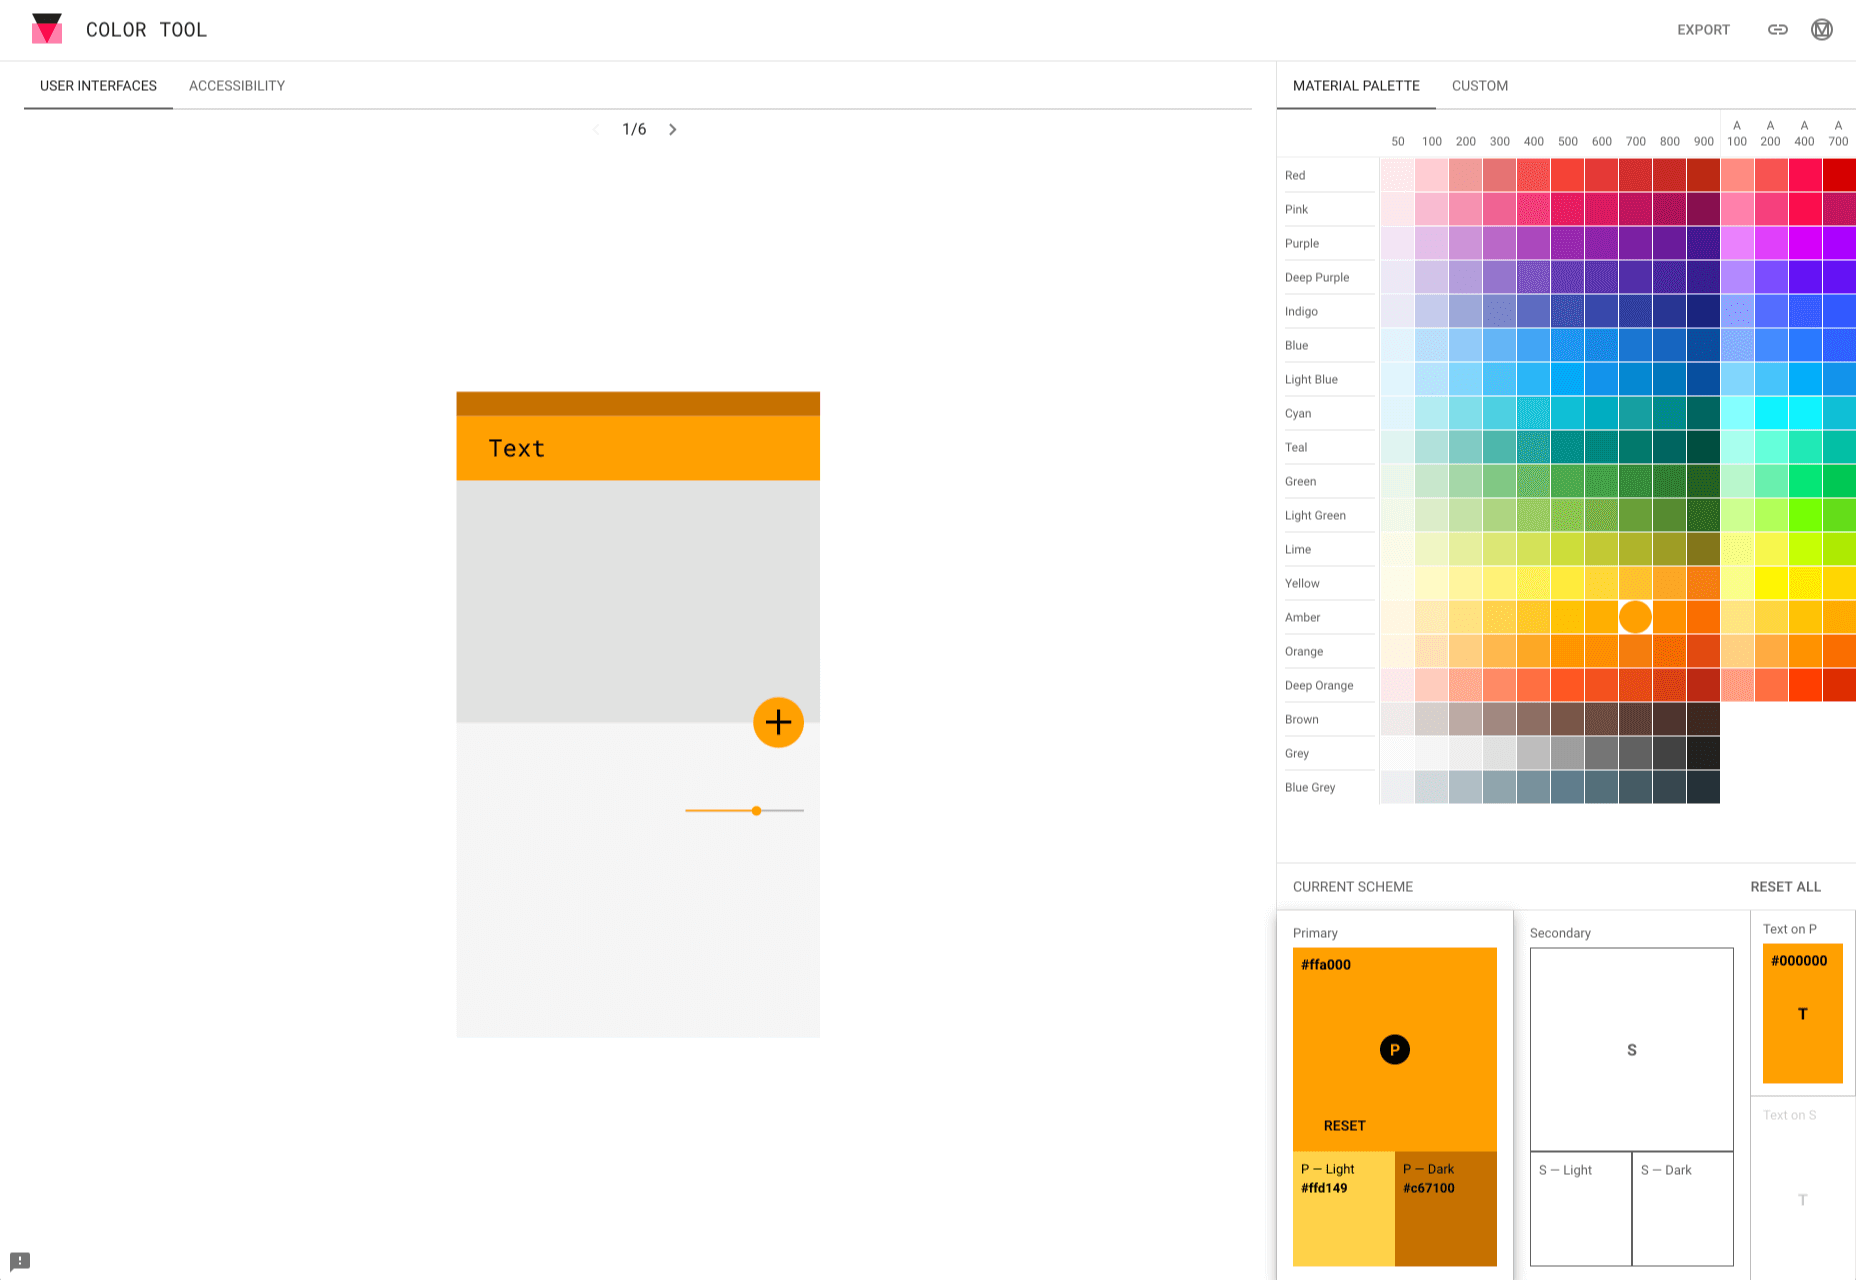
8. Color Tool

Color Tool makes it easy for web designers to create, share, and apply colors to their UI. It also measures the accessibility level for any color combination before exporting to the palette. The tool comes with 6 user interfaces and offers over 250 colors to choose from. 

The tool is also very easy to use. All you need to do is pick a color and apply it to the primary color scheme; switch to the secondary color scheme, and pick another color. You can also switch to Custom to pick your own colors. After you have selected all your colors, use the Accessibility feature to check if all is good before exporting it to your palette. 

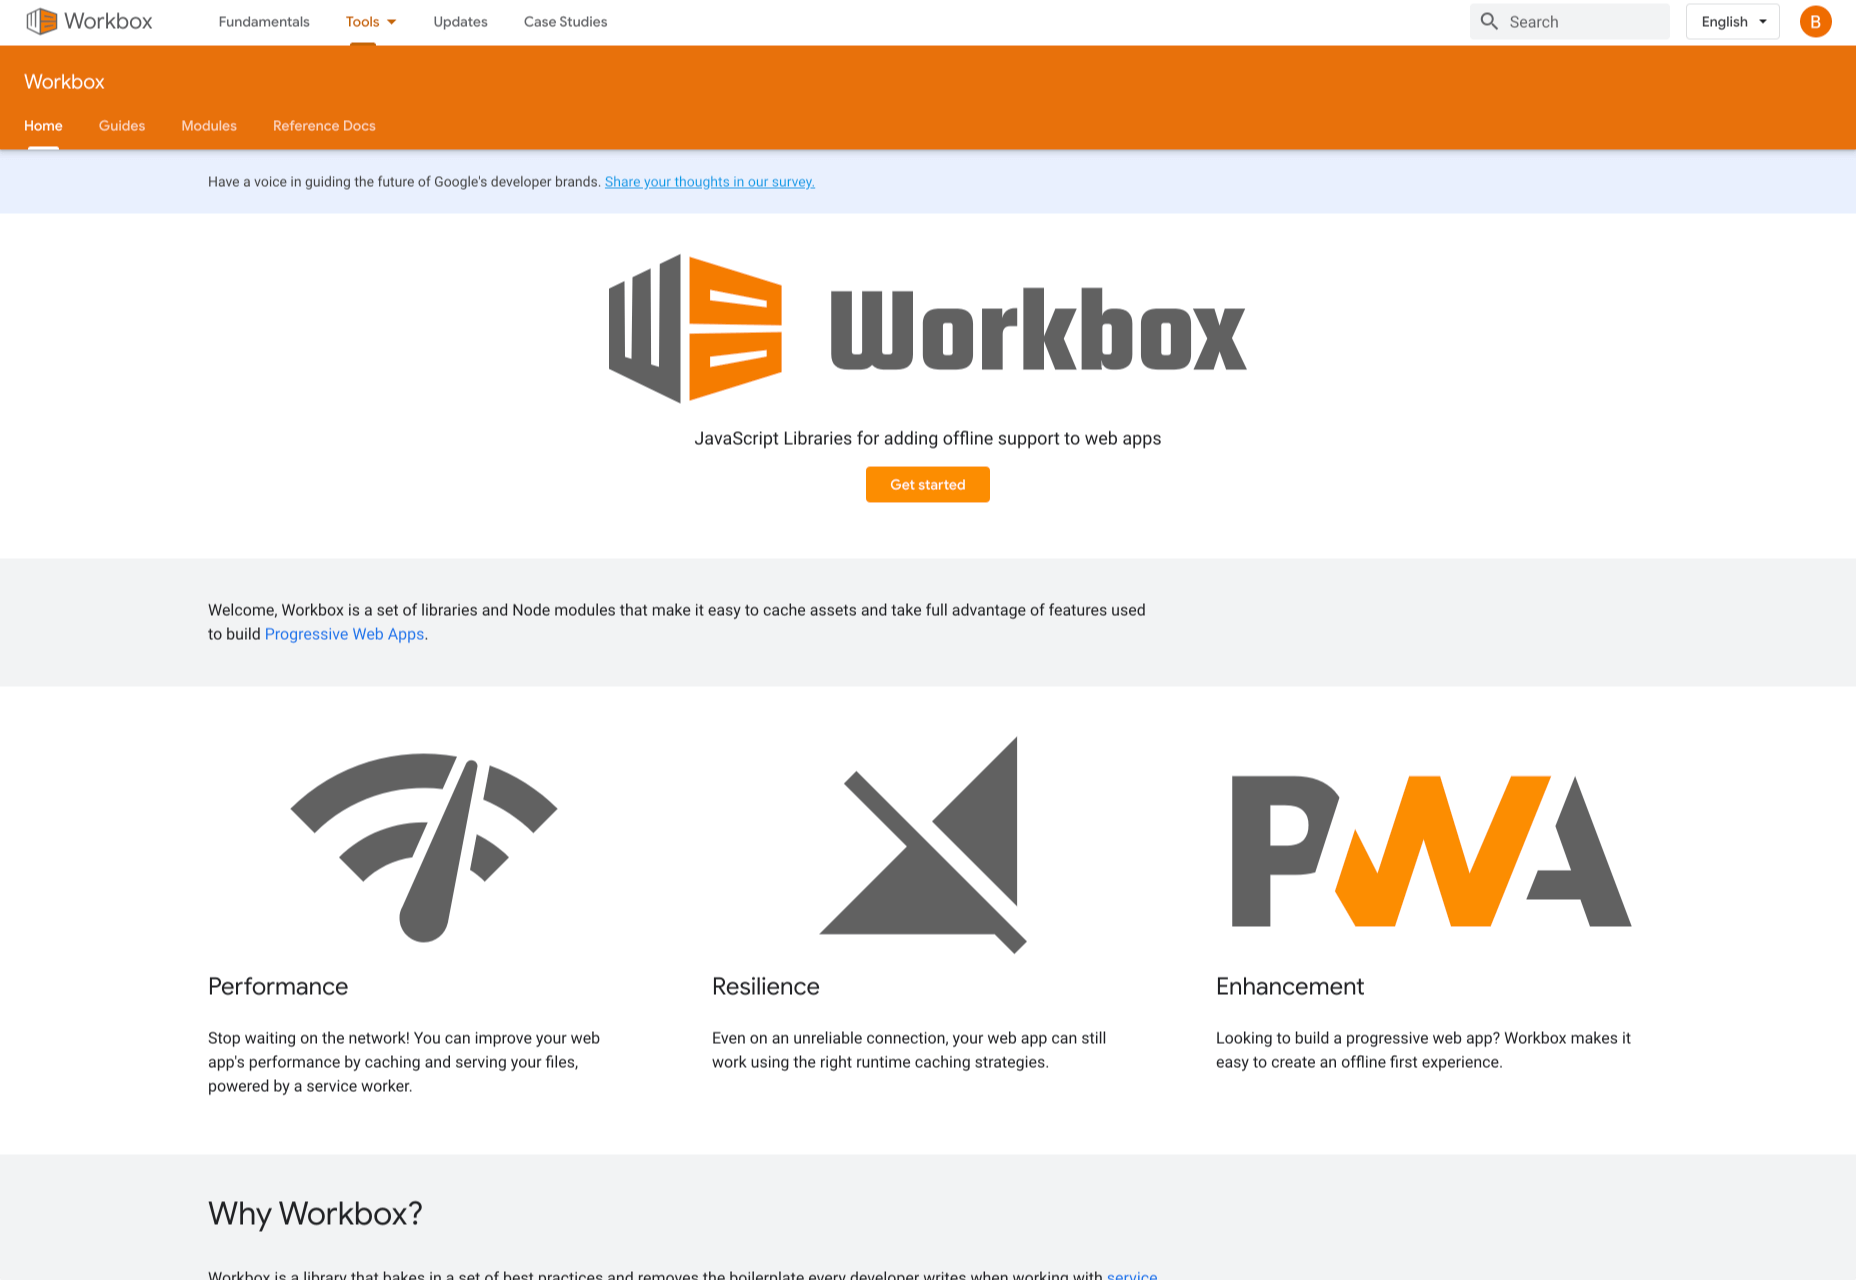
9. Workbox

Workbox is a set of JavaScript libraries and Node modules. The JavaScript libraries make it easy to add offline support to web apps. The Node modules make it easy to cache assets and offer other features to help users build Progressive Web Apps. Some of these features include pre-caching, runtime caching, request routing, background sync, debugging, and greater flexibility than sw-precache and sw-toolbox. 

With Workbox, you can add a quick rule that enables you to cache Google fonts, images, JavaScript, and CSS files. Caching these files will make your web page to run faster and also consume less storage. You can also pre-cache your files in your web app using their CLI, Node module, or webpack plugin. 

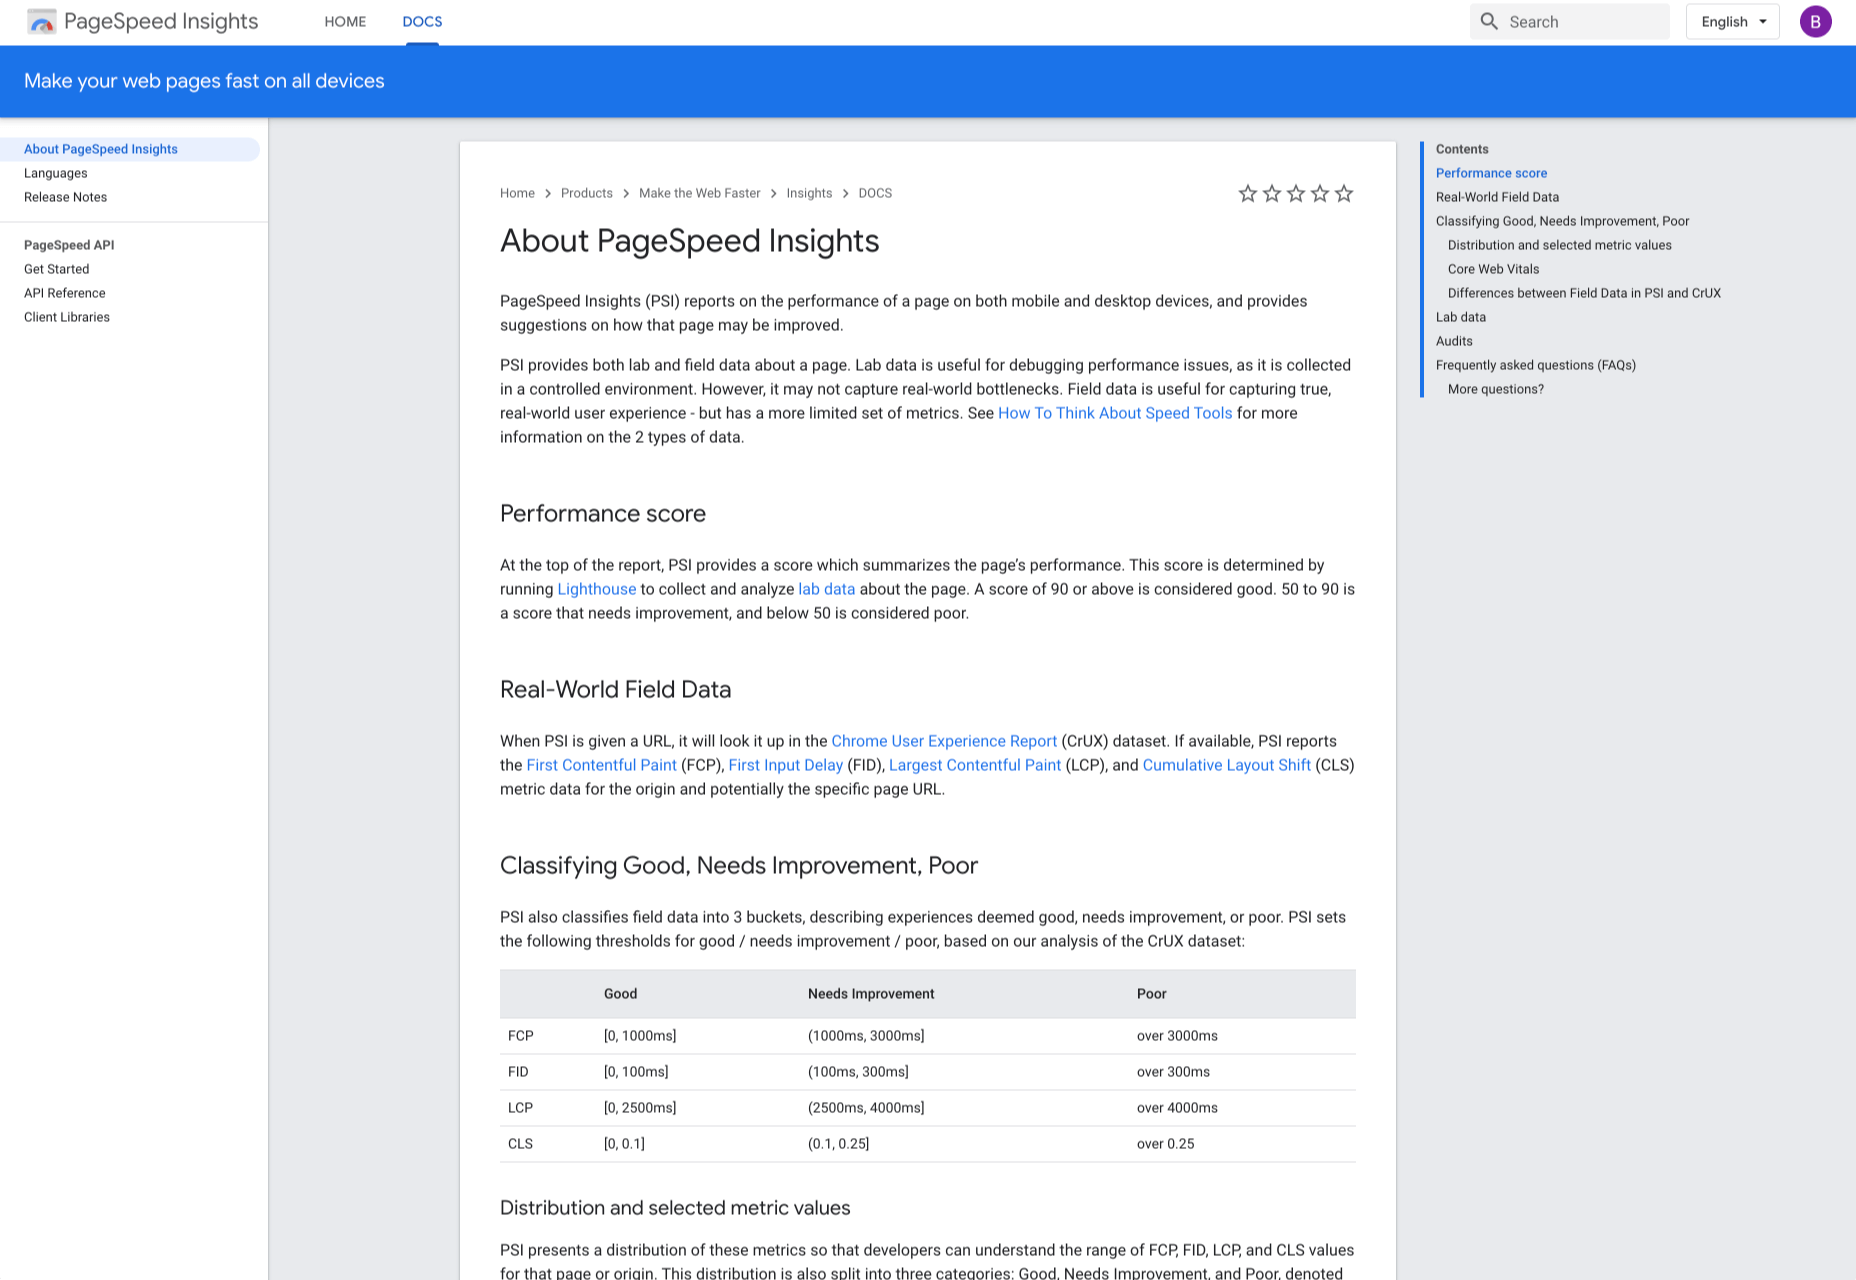
10. PageSpeed Insights

PageSpeed Insights is a handy tool from Google Developers that analyzes the content of a web page, then generates suggestions on how to make the page faster. It gives reports on the performance of a web page on both desktop and mobile devices. At the top of the report, PageSpeed Insights provides a score that summarizes the page’s performance. 

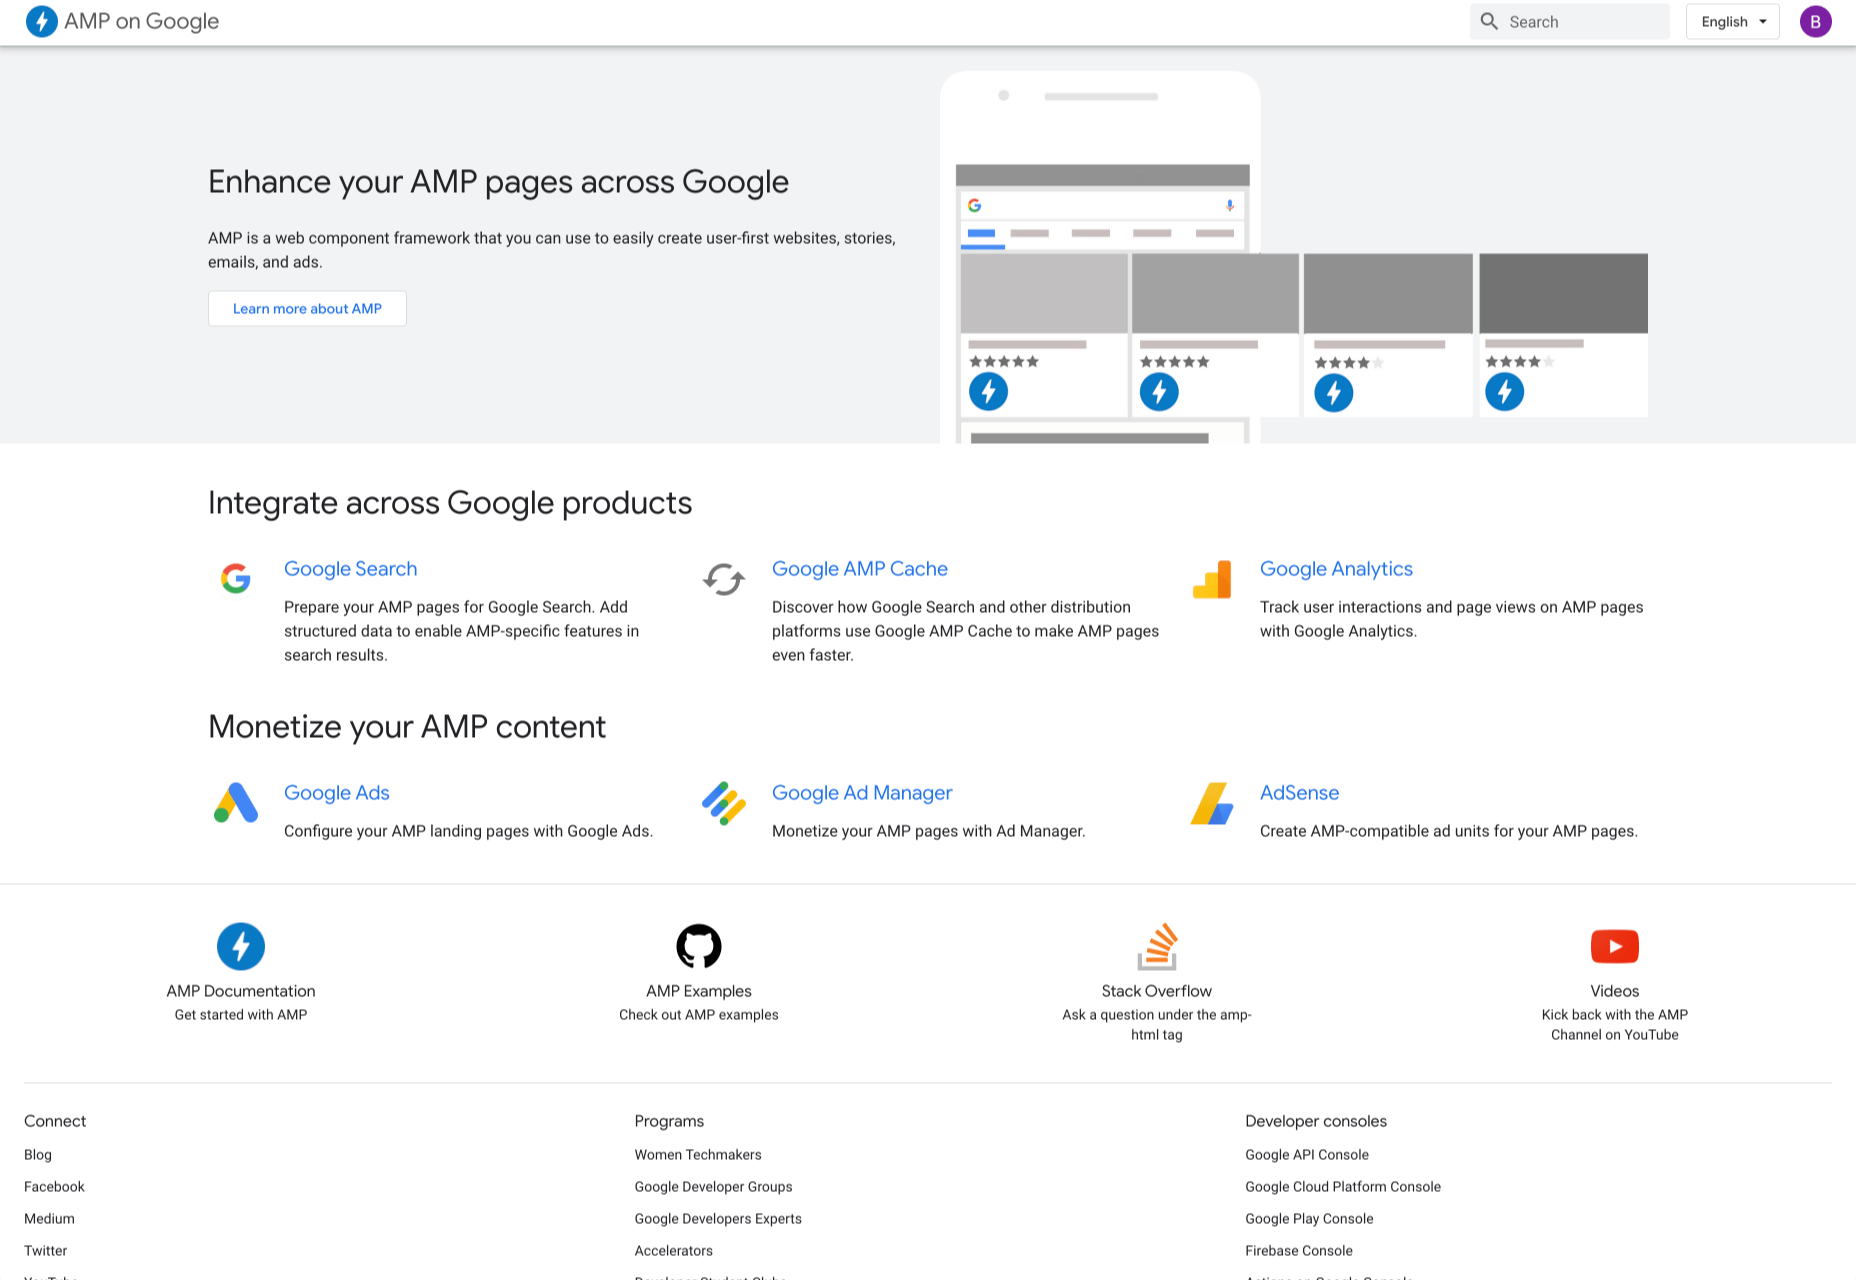
11. AMP on Google

AMP pages load faster and also look better than standard HTML pages on mobile devices. AMP on Google allows you to enhance your AMP pages across Google. It is a web component framework that allows you to create user-first websites, ads, emails, and stories. One benefit of AMP is that it allows your web pages to load almost instantly across all devices and platforms hence improving the user’s experience. 

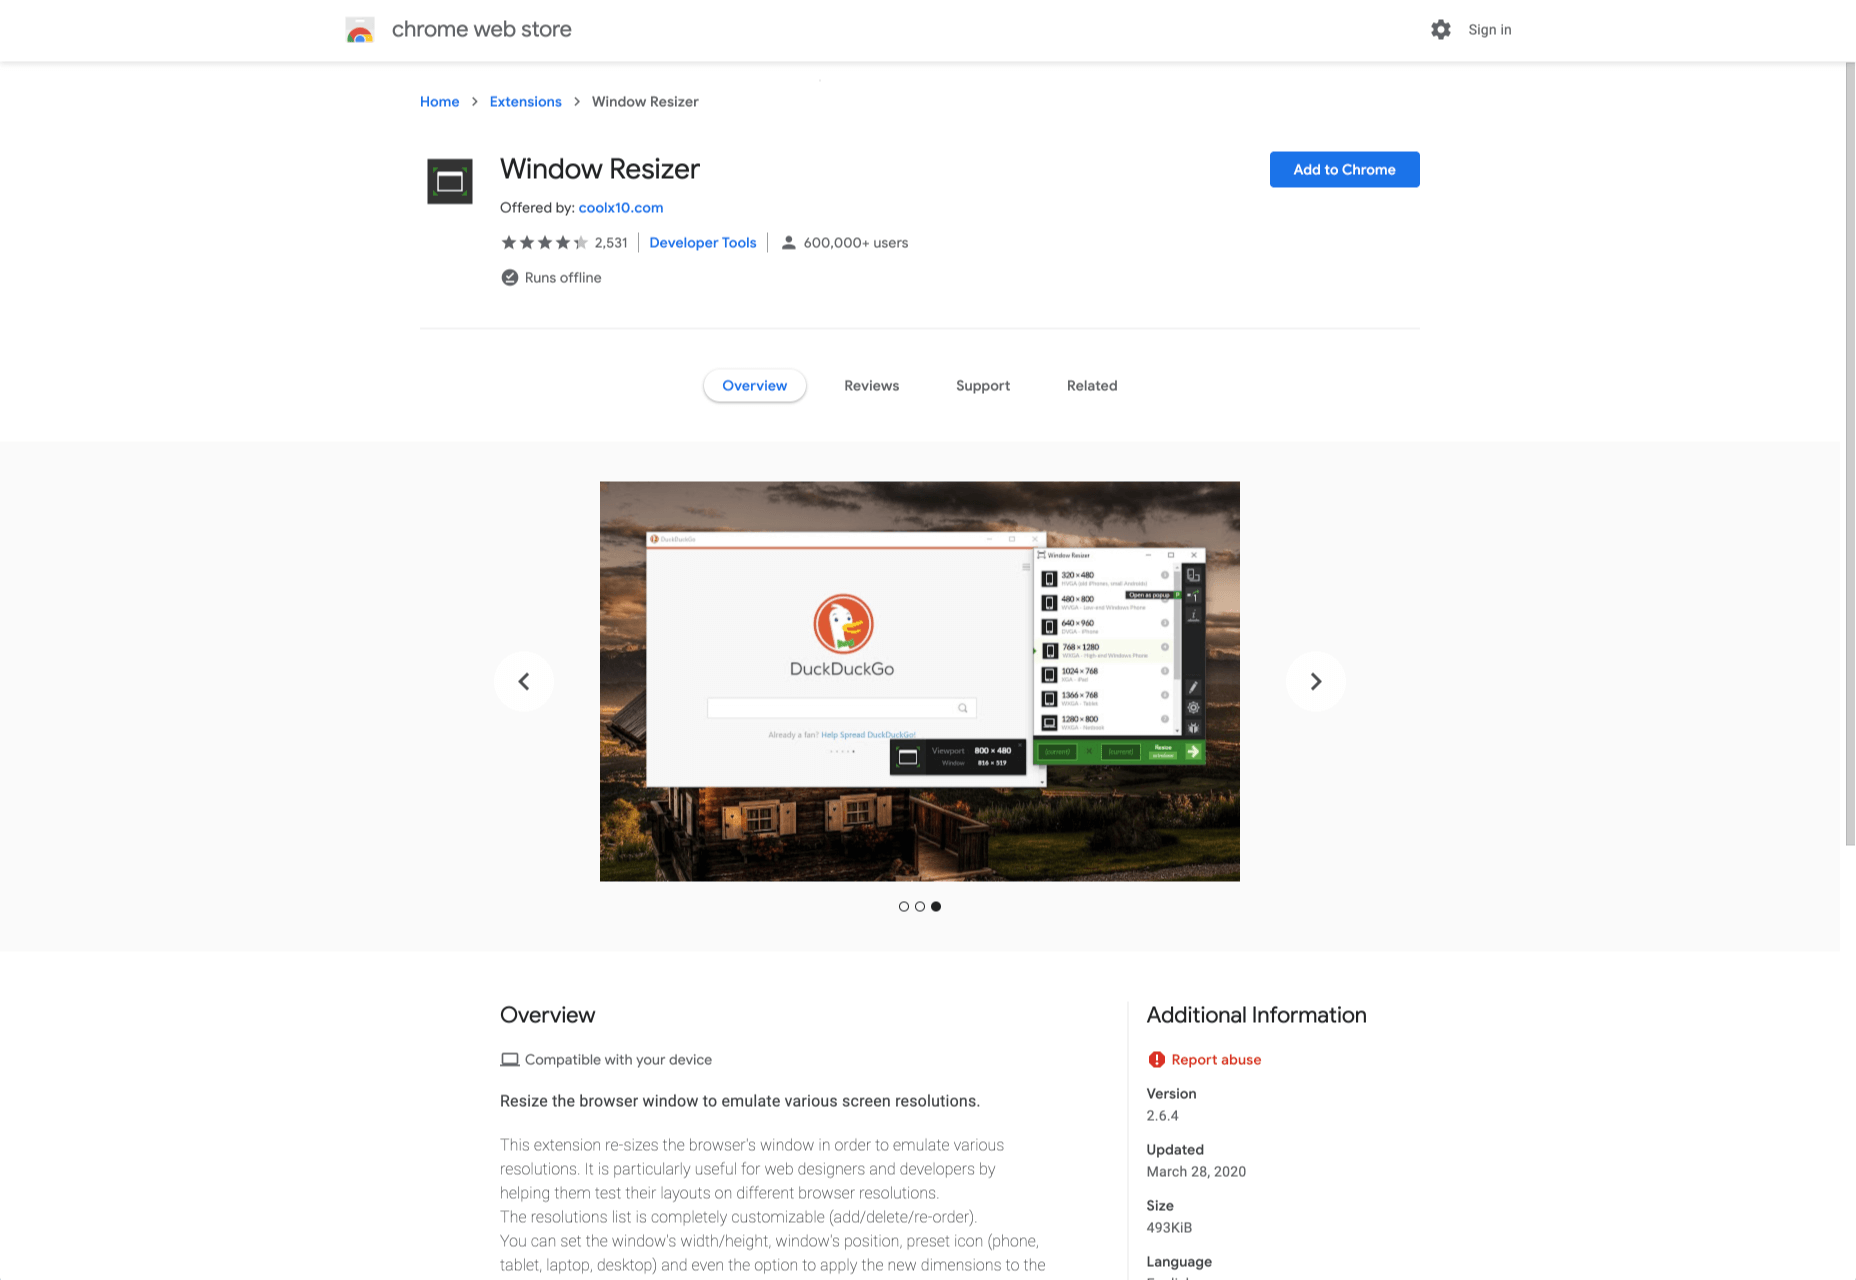
12. Window Resizer

When creating websites, it is important that developers test them for responsive design – this is where Window Resizer comes in. Window Resizer is a Chrome extension that resizes the browser window so that you can test your responsive design on different screen resolutions. The common screen sizes offered are desktop, laptop, and mobile, but you can also add custom screen sizes. 


Featured image via Unsplash.

Source


Source de l’article sur Webdesignerdepot

It’s no secret that having a custom domain name is an essential piece of any company’s branding strategy. While there are a myriad of hosting plans available that offer domains like your company.webhost.com, making the shift from one of those to simply yourcompany.com is an important step.
However, your domain branding strategy need not end there. Domain mapping offers an opportunity for web developers and online business owners the ability to improve their marketing campaigns, protect their brands from competitors, cut down on costs, and develop a more efficient workflow.

What is Domain Mapping?

Domain mapping refers to how visitors to your website are directed to different domains and subdomains and what URLs will be displayed in the visitors’ browsers.

When you first set up your online business, one of the very first things that you do is register a domain name for your company website. But depending on the business, it could be wiser to actually register multiple domain names at once. This is because you will want to lease the primary domain name you plan on using in addition to all related TLDs. This way, cybersquatters will not be able to hold your domain name hostage, especially once you have grown into a more established brand.

For example, if you register the name yourcompany.com, you might also want to register yourcompany.net and yourcompany.org. Then you might set up a URL redirect so that visitors to the latter two sites will be redirected to yourcompany.com. However, with a domain redirect, visitors to yourcompany.net and yourcompany.org will be redirected to yourcompany.com, meaning the URL in their browser will appear as yourcompany.com no matter what they typed.

With domain mapping, this isn’t the case. A visitor to yourcompany.net will still see that URL in their browser even if the content is actually being hosted on yourcompany.com.

Benefits of Domain Mapping

Although domain mapping may seem a bit esoteric and complex at first, it serves several purposes and offers many benefits:

1. Make Web Addresses Easier to Remember

Imagine that your restaurant chain, Larry’s Lunches, just opened a new chain on 116th Street in New York City. Your first instinct may be to direct customers to larryslunches.com/116thstnyc, but that domain is a bit long and hard to remember. Instead, you might want to register the domain larrys116th.com for customers for that specific store.

With domain mapping, you can serve up the content from your main domain, larryslunches.com, while still having your visitors see larrys116th.com. This makes it easier to brand your sites without having to manage several different sites.

2. Boost Your Web Development Career

If you are a web developer yourself but are not admittedly well-acquainted with domain mapping already, you would do well to change that.

One of the easiest ways would be to look at online web development programs that one can take to read through documentation to get caught up to speed on how domain mapping can help their efforts and how to implement it. These kinds of programs can be more comprehensive than university courses and offer an impressive 88% job success rate for those who successfully complete the programs.

3. Shield Your Brand from Competitors

Remember, it’s a good idea to purchase several different related domains in anticipation of competitors snatching them up from you. Choosing the right domain names is essential to protecting your brand.

For example, Larry’s Lunches might want to snag larrysnyclunches.com and larrysfamouslunches.com as well. However, simply leaving those domains parked can be a bit of a waste, and managing multiple domains can be a pain in and of itself.

But with domain mapping, you can manage those domains just as easily as if they were your primary site, so you no longer need to leave them empty.

4. Save Time and Lower Development Expenses

Development isn’t cheap, and time is money. While the maintenance costs for a website are already high enough, adding in separate domains can sometimes break the bank due to the increased complexity of managing so many different moving pieces.

Domain mapping can lower expenses and save time by keeping everything tidy and in one place. By managing everything from a single WordPress installation, for example, you can push updates to all your subdomains at once, saving you from the tedium of going through each domain and making the same updates.

5. Manage Client Sites from One Place

If you’re a freelance developer or run an agency, using domain mapping for some of your clients’ sites can save you time as well. For example, if several clients want blogs, and you use the same infrastructure for them, you can easily push updates and changes to all of them at the same time. In short, domain mapping can make maintaining sites much easier and quicker.

How to Implement Domain Mapping

If you’re sold on the benefits of domain mapping, here’s a quick primer on the steps you’ll need to take to get started:

  1. Choose a domain registrar: The ideal registrar you choose should come with a number of important features including adequate hosting for keeping your website visitor friendly, SSL certification to ensure security, 24/7 customer support, comprehensive packages that make it easy to operate your online business.
  2. Register the domains you’re interested in: These can either be domain misspells (otherwise known as typosquatting), like youcompany.com, yourcmpany.com, etc, or related domains like yournewproduct.com, yournewlocation.com, etc. Whatever you decide to go with, you’ll need to have it registered before you can get started.
  3. Install WordPress Multisite: WordPress is one of the easiest ways to develop websites, and that holds true for domain mapped sites as well. Plus, considering WordPress sites account for over a third of the entire internet, you can’t go wrong with the famed CMS. All you need to do is install WordPress and, once that’s installed, open wp-config.php and add define(‘WP_ALLOW_MULTISITE’, true) above the /*.
  4. Configure your DNS settings: Next, you’ll need to point all your name servers to your hosting account. These changes can take up to 72 hours to go into effect.
  5. Add domains to your hosting plan: From your hosting platform, you’ll need to link your custom domains. You can usually do this from your cPanel.
  6. Map subsites to your custom domains: Once you have your domains set up, you’ll need to link them through WordPress. To do so, simply login and navigate to Sites -> Add New. After you assign them a subdomain or subdirectory name, you can click Edit and add your custom domain. Then just hit Save Changes, and you’re good to go.

Take note that domain mapping is not necessary for transferring a domain name. When you map a domain, you’re simply telling your domain where it can find your website on the internet through having your name servers updated. When you change your name, it only affects where the domain has been resolved.

The Bottom Line

While domain mapping isn’t necessary for all websites, it can still be a major timesaver. By utilizing it properly, you can greatly improve the standing of your online business by saving time and money, making website management easier, and improving the branding of your sites.


Featured image via Unsplash.

Source


Source de l’article sur Webdesignerdepot

Contentful; Webster’s Dictionary defines “contentful” as… not found. Clearly someone made up this word, but that is not necessarily a bad thing.
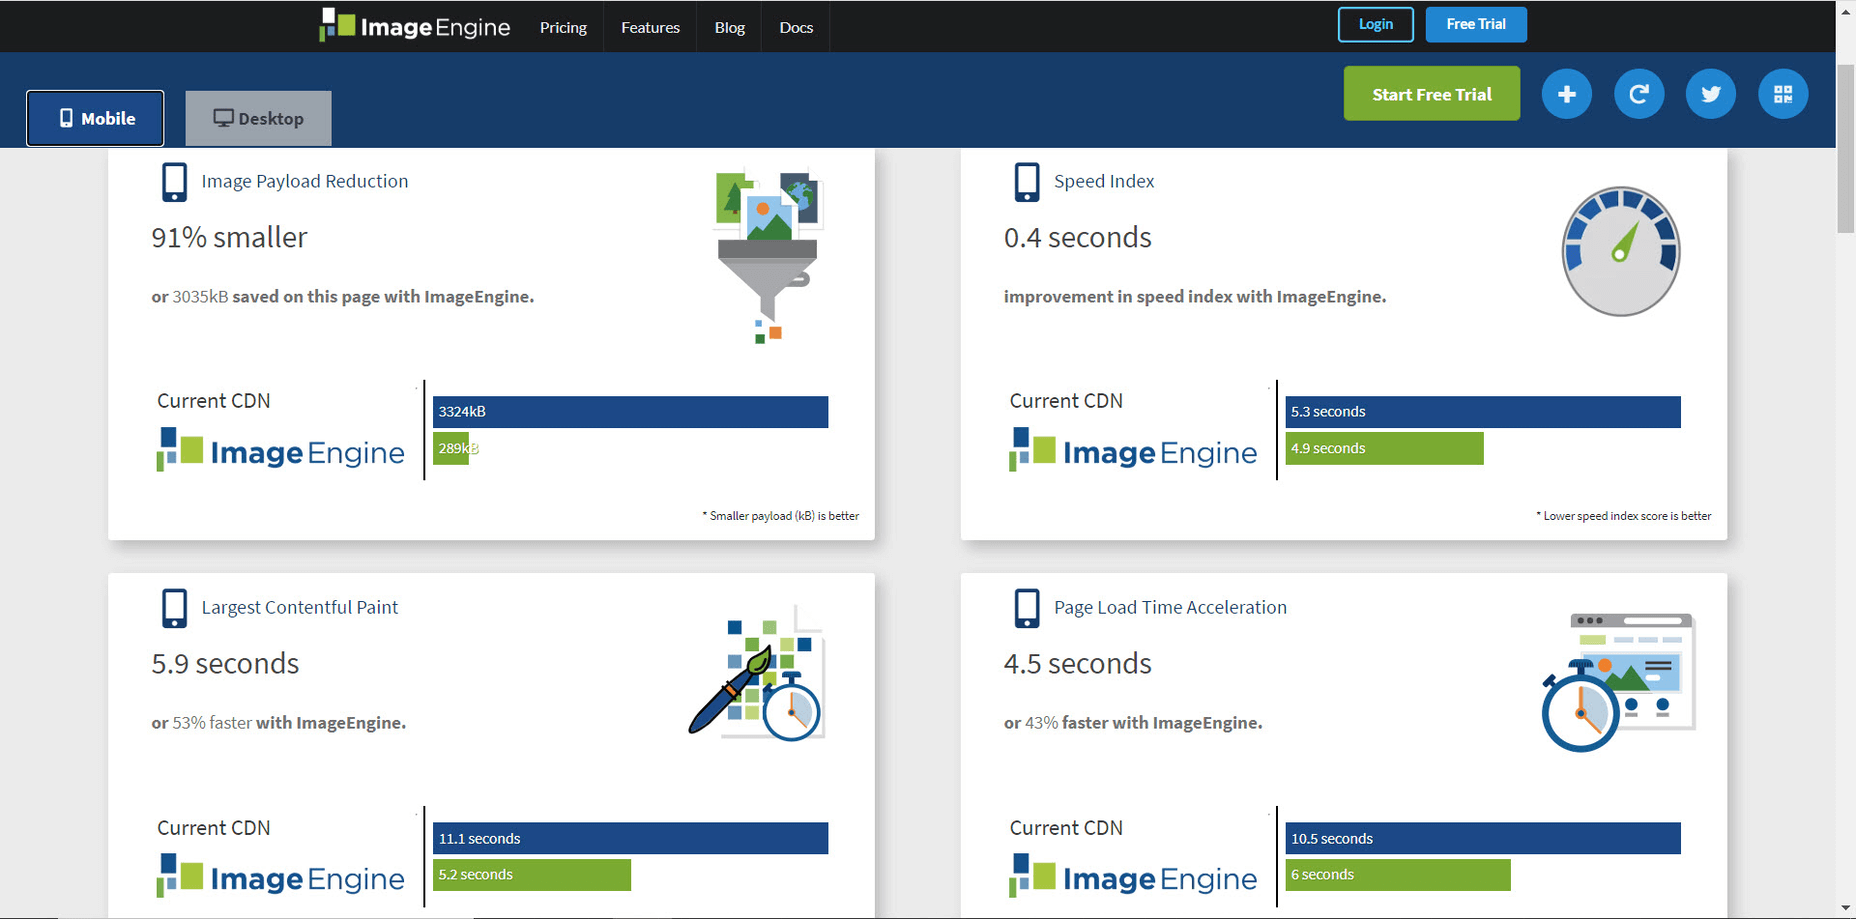
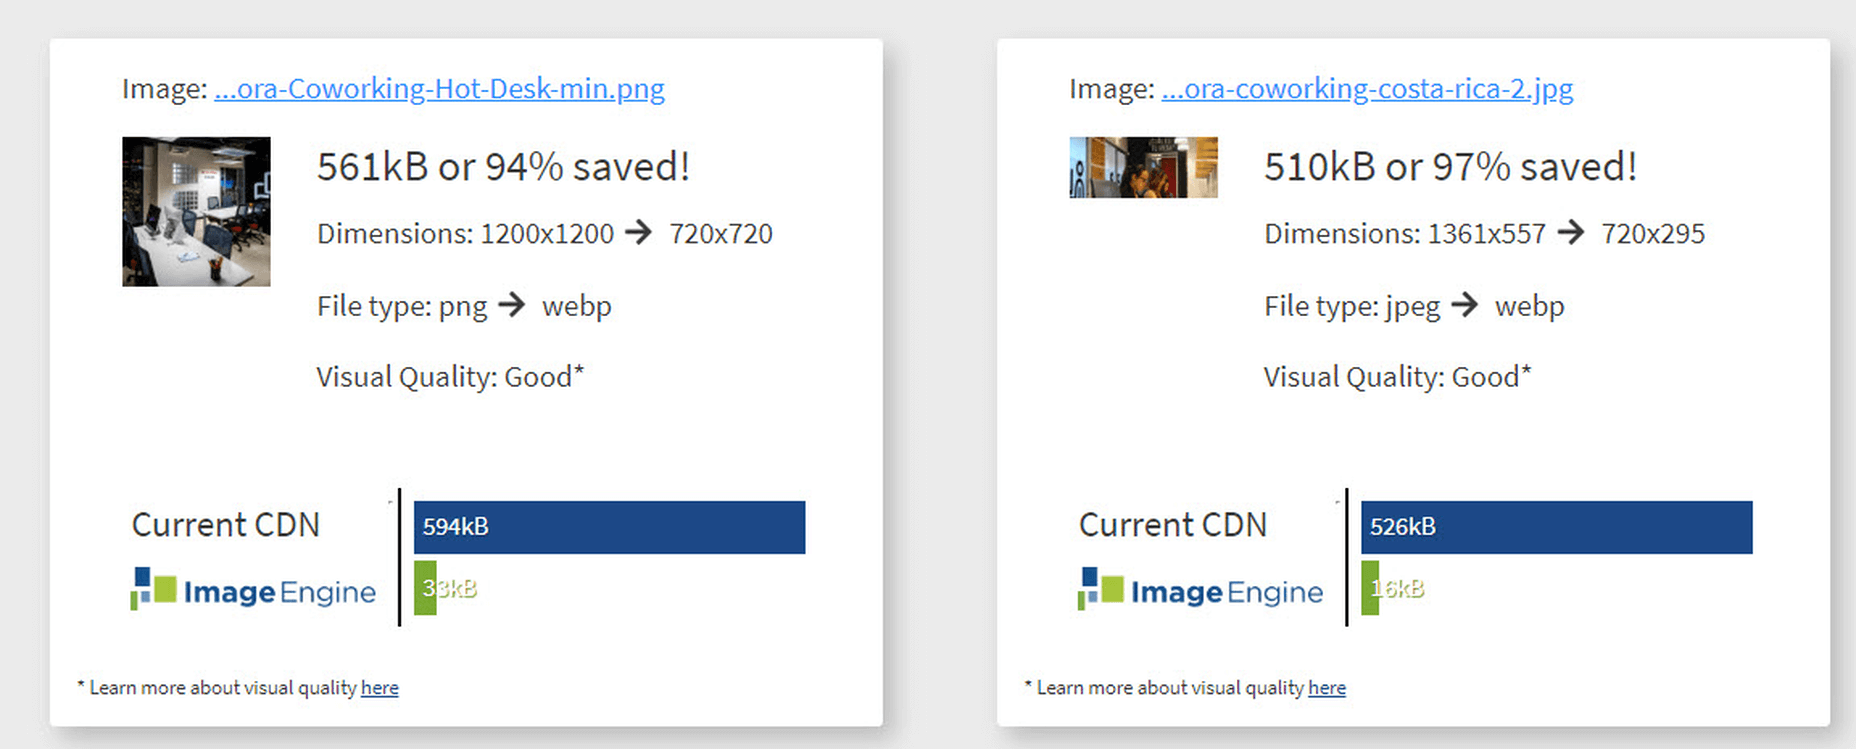
The world of user experience metrics is moving quickly, so new terminology is needed. Largest Contentful Paint (LCP) is one of a number of metrics measuring the render time of content on a web page.

What is Largest Contentful Paint?

Google defines LCP as “the render time of the largest content element visible within the viewport.” For what we are talking about in this blog, we will consider “content” to be an image, typically a JPEG or PNG file. In most cases, “largest” points to a hero image that is “above the fold” and is one of the first images people will notice when loading the page. Applying optimization to this largest content is critical to improving LCP.

It is probably more instructive to view LCP relative to other metrics. For example, First Contentful Paint (FCP) and Visually Complete book end LCP.

Each metric has its pros and cons, but LCP is a happy medium. LCP marks when web page loading starts to have a substantial impact on user experience.

In Google’s opinion, to provide a good user experience, LCP should occur within 2.5 seconds of when the page first starts loading. Poor values are anything greater than 4 seconds.

How Does Largest Contentful Paint Impact Lighthouse Scores and SEO?

LCP is now part of several “Core Web Vitals” scores that Google will measure in its ranking algorithm. Each of the Core Web Vitals represents a distinct facet of the user experience, is measurable in the field, and reflects the real-world experience of a critical user-centric outcome.

In the case of the overall Google Lighthouse score, LCP represents 25% weighting on the performance score of Lighthouse version 6.0. This makes LCP the most important Core Web Vitals metric in determining the performance score.

While Google has indicated that content is still the most important factor in SEO ranking, a better user experience (as measured by Core Web Vitals) will generate higher rankings in a crowded field. If there are many websites competing for the top search engine spots, then Largest Contentful Paint will play a critical factor in rankings.

How to Improve Largest Contentful Paint

Now that you know that LCP is important, what can you do to improve it by making content load faster? Google provides a number of suggestions, but the most effective technique is to optimize content for the device requesting it.

For example, a website includes an 800kb JPEG image that is intended for high resolution desktops. On a smartphone, that would be optimized down to less than 100kb, with no perceptible impact on quality. LCP can improve by more than 60% — or several seconds — through this single optimization.

Find Savings in Largest Contentful Paint by using Image Speed Test

Image Speed Test is a great tool offered by ImageEngine.io that provides an analysis of LCP improvement opportunities. Just paste in the URL of the web page you are interested in optimizing, and the test will show you:

  • Image Payload Reduction
  • Speed Index
  • Largest Contentful Paint
  • Page Load Time (Visually Complete)

It also provides a video of the web page loading with and without optimizations. Finally, it analyses each image to provide an estimate of payload savings. In this case, the “largest content” on the page is this image. With optimizations, the image payload is reduced by 94%. That delivers a huge improvement in LCP.

How Does ImageEngine Improve LCP

ImageEngine is an image content delivery network (CDN) service that makes image optimization simple. Basically, for each image on the page, the image CDN will:

  1. Detect the device model requesting the web page;
  2. Optimize the image in terms of size, compression, image format;
  3. Deliver via a CDN edge server that is geographically closest to the user.

ImageEngine improves web performance for every image on the page, including the largest. You can learn more about ImageEngine here, and also sign up for a free trial.

Best Practices: Preconnect

In addition to using an image CDN like ImageEngine, a few other best practices can improve LCP. Using the resource hints to provide a preconnect for your content can streamline the download process.

For example, putting the following link statement in the HTML will accelerate the download process. The link statement will make the browser connect to the third party as early as possible so that download can start sooner. ImageEngine’s optimizations make each image download smaller and faster, but preconnect save time in the connection phase.

Best Practices: Minimize Blocking JavaScript and CSS

When JavaScript or CSS is “blocking” it means that the browser needs to parse and execute CSS and JavaScript in order to paint the final state of the page in the viewport.

Any website today relies heavily on both JavaScript and CSS, which means that it is almost impossible to avoid some render blocking resources. On a general note: be careful with what kind of CSS and JavaScript is referenced inside the <head> element. Make sure that only the strictly necessary resources are loaded in <head>. The rest can be deferred or loaded asynchronously.

When looking to improve the LCP specifically, there are some practices worth looking into more deeply.

Inline Critical CSS

It is not an easy task, but if the browser can avoid making a request to get the CSS needed to render the critical part of the page – usually the “above the fold” part – the LCP is likely to occur earlier. Also you will avoid content shifting around and maybe even a Flash of Unstyled Content (FOUC).

The critical CSS — the CSS needed by the browser to set up the structure and important styles of the part of the page shown above the fold — should in-inlined. This inlined CSS may also refer to background images, which of course should also be served by an Image CDN.

Do Not Use JavaScript to (lazy) Load Images

Many modern browsers natively support lazy loading, without the use of JavaScript. Because images usually are heavily involved in the performance of LCP, it is best practice to leave image loading to the browser and avoid adding JavaScript in order to lazy load images.

Lazy loading driven by JavaScript will add additional latency if the browser first has to load and parse JavaScript, then wait for it to execute, and then render images. This practice will also break the pre-parser in the browser.

If an image CDN is used to optimize images, then the benefits of lazy loading become much smaller. Especially large hero images that are above the fold have a large impact on LCP and will not benefit from being lazy loaded with JavaScript. It is best not to make JavaScript a blocking issue for rendering images, but rather rely on the browser’s own ability to select which images should be lazy loaded.


[– This is a sponsored post on behalf of ImageEngine –]

Source


Source de l’article sur Webdesignerdepot