Articles

The dog days of summer are here. From vacations to pool time, you might not be thinking about work that much. But there are still plenty of new tools and resources popping up to help you become a better or more efficient designer.

Here’s what new for designers this month.

Haikei

Haikei is a web app that you can use to generate SVG shapes, backgrounds, and patterns in a web-based editor that you can use with any design tool or workflow process. Everything is customizable and it is free with access to 15 generator functions. (Additional templates and generators will be available when the pro plan is released later.)

Pixelhunter

Pixelhunter is a smart image resizer for social media platforms. It recognizes objects and crops pictures automatically. It supports 102 sizes and is free to use.

Compo

Compo is an Apple app that allows you to play with shapes and colors and create compositions on your own. You can see shapes and colors like the Bauhaus masters, creating from a blank canvas or shuffling in more creative ways. You can move, rotate, copy, overlap, and adjust shapes and colors to suit your style. Available for iPad and iPhone.

Backlight

Backlight is an all-in-one design system platform that allows you to build code and reference sites in a space where designers and developers can work together. It has a series of “starter kits” to help you with the technology you use from React to Chakra to Tailwindcss. It’s designed to be collaborative with everything in one place and integrates into your workflows. The tool is just launching and you can request early access to learn more.

Multi Color Text With CSS

Multi Color Text With CSS is pure fun. Check out the pen by Shireen Taj.

Mega Creator

Mega Creator is an online graphic design tool that helps you create images, icons, illustrations, backgrounds, and more for a number of uses. It has templates that are sized for common uses such as social media. You can upload your own elements to work with (free) or use including graphic assets for a fee.

Noloco

Noloco is a no-code solution for designers to build web apps. You can start building for free and design almost anything you can dream up from a set of drag-and-drop ready-made blocks. (And it will work across all screen sizes.)

Tinter

Tinter is a tiny web tool to generate color variations of images. The tool also generates monochrome colors of images with multiple variants, without hampering the quality of the image.

Radix Colors

Radix Colors is an accessible, open-source color system for designing gorgeous websites and apps. It includes 28 color scales with 12 steps each and includes support for dark mode as well as matching transparencies.

WP Cost Calculator

WP Cost Calculator is a smart, simple tool that allows you to easily create price estimation forms. It’s perfect for a number of industries that use online pricing.

TraveledMap

TraveledMap allows you to create customizable maps thanks to the use of markers, routes, and photos, which you can share or add to your website or blog. This tool is made for travelers and tourism pros.

Glyph Neue Icons

Glyph Neue Icons is a collection of 1,500 icons in SVG and PNG format. (They are free with a link.) Icons come in plenty of categories and styles for all types of use.

Streamline Icons

Streamline Icons is a set of thousands of icons in 12 different styles and themes that you can use for projects. They work through the Streamline app or a plugin for Figma, Sketch, or Adobe XD.

Health Icons

Health Icons is a set of free, open-source health icons for personal or commercial projects. They include filled and outline styles that are editable. There are more than 800 icons in the collection.

OMG, SVG Favicons FTW!

OMG, SVG Favicons FTW! Is a look at the benefits of using SVG favicons in web projects. It also examines some of the challenges – such as browsers support – with code snippets to help you get started.

Aspect Ratio in CSS

Aspect Ratio in CSS explores a design concept we talk about a lot in other places, but not so much with CSS. This piece by Ahmad Shadeed takes a look at how you can go beyond the “padding hack” and use native aspect ratio support in CSS to maintain image height and width ratios in responsive design.

Fight Kick

Fight Kick is a bold font with a lot of personality. The free demo version has 249 characters and is for personal use only.

Glow Better

Glow Better is a beautiful premium typeface with a pair of options – a serif and script. Both contain letterforms with swashes and tails that are delightful.

Huggable Hedgehogs

Huggable Hedgehogs is a playful font that’s perfect for children’s projects. Everything has a mono-height in the all uppercase typeface.

Monice

Monice is a rounded sans serif with thick lines and high readability. It includes bold, regular, and italic styles with free (demo, personal) and commercial options.

Rustica

Rustica is a robust premium typeface with 20 styles and family options. It has slim curves and an easy-to-read character set that would work for almost any use. It also supports 219 languages.

Source

The post Exciting New Tools for Designers, July 2021 first appeared on Webdesigner Depot.


Source de l’article sur Webdesignerdepot


Motivation

I had a customer inquiring about whether CockroachDB is capable of working with multi-level JSON. Considering their JSON would have up to 3 levels of hierarchy, they wanted to know whether CockroachDB is able to use native capability to access data multiple levels down. This prompted my interest and led to this tutorial. Surprisingly, CockroachDB does not inhibit any limitations to the number of levels in hiearchy and performance can be improved using various optimizations also discussed below.

Start a Single Node Instance With Max SQL Memory Flag and Connect to It

Java


cockroach start-single-node --max-sql-memory=.25 --insecure --background
cockroach sql --insecure --host=localhost

Source de l’article sur DZONE

A press release is one of the most valuable tools in a marketing team’s arsenal. Though press releases have been around for decades, they remain one of the best ways to reach new customers, improve your brand reputation, and generate awareness. 

Press releases are also wonderfully cost-effective. Unless you’re using paid distribution channels, all you have to spend is your time to create your press release.

So, how do you get started?

What is a Press Release?

A Press Release is a short, simple, and compelling news story designed to promote the goods and services of a business. You’ll usually see these pieces of content published on industry websites, news channels, social media platforms, and even on the company’s blogs looking for awareness. 

The idea behind a press release is you provide a publication or group with all of the most valuable facts and insights into your latest newsworthy story. You might use a press release to announce a new product or to tell people about your recent partnership, for instance. 

A press release post then delivers this information to a wider potential audience by distributing the content in a range of different places. 

Why Should My Business Send Press Releases?

Why not simply tell people about your latest products and sales on social media, and leave it at that? The simple answer is Press Releases help you to gain the attention you might not get from your own media channels alone. With a press release, you can:

  • Set the record straight: In the middle of a PR disaster, a Press Release can give people the information they need to make their own decision about who’s right.
  • To improve your brand reputation: Launching press releases through well-known publications immediately boosts your credibility. The right publication shows you’re well-connected and professional. 
  • To gain media coverage: When launching a new product or service, a press release helps attract potential customers to your business and gives you more opportunities for sales.
  • To improve SEO: In the digital world, a press release allows you to earn backlinks from high-authority websites, improving your ranking.
  • To find new customers: Press publications and websites will reach a wider audience than you can find on your own. In addition, publishing press releases gives you new eyes on your business for minimal cost. 

You can send a press release for various reasons, including announcing breaking news, talking about newly launched products, discussing upcoming events, confirming partnerships, and more. It’s also worth creating a press release when new people join your executive team when you receive an award, or even if something bad happens (for crisis management)

What’s Included in a Press Release?

A press release will include different information depending on what you’re trying to accomplish. In general, PR posts feature:

  • A headline: This is where you share the most important info of your story
  • Contact details: How the media can get in touch with you
  • Location: Where you are and where the news event is taking place
  • Body copy: Information about the news event
  • Quotes: It’s common to see quotes in a press release from high-level staff
  • Boilerplate: Insights into what your organization is about

How to Write a Press Release (Step by Step)

Now you know what goes into a press release and why these tools are so valuable, it’s time to start planning your big announcement. 

Here are our top tips for creating an amazing press release.

1. Choose the Right Story

Press releases are focused on sharing valuable news with a specific audience. It would be best if you had something important and new to say, or you risk not getting your story published at all. You can’t just talk about a product or service that’s selling well (unless it’s breaking world, or brand records). 

Think about whether your PR topic is:

  • Timely: Is the event you’re talking about just about to happen, or has it happened recently? If something happened weeks or months ago, press groups aren’t going to be interested. Aside from ensuring your message is timely, make it topical too. Ensure this story is going to give something valuable to your audience. 
  • Relevant: Before you send a press release to anyone, make sure it will be relevant to the audience you’re targeting. Who does the story affect, and why is it important? What kind of benefits or opportunities will it deliver?
  • Unique: What’s unusual or unique about this story? You don’t want to comment on the same things that everyone in your industry is already talking about. 
  • Engaging: What about your story is going to make readers stand up and take notice? Is there any trouble or tension you’re going to overcome? Look at this press release from Target as an example. How can you frame your story in a way that makes people want to learn more about your business?

When asking yourself what your PR story should be about, consider whether you want to publish it if you were a publication leader. From an objective perspective, does this story have value?

2. Answer the Right Questions

A press release doesn’t just provide information. Written correctly, this content will also answer essential questions for your audience. For instance, let’s take a look at the questions you should answer, with an example. 

For this example, we’ll be looking at a social media marketing firm partnering with an SEO brand:

  • Who is doing this? What’s the name of the social media marketing firm and the SEO brand? Where do they come from? Which executives are involved?
  • Who is affected? This news would probably affect the stakeholders and shareholders for the business and the customers by providing access to new services.
  • What have the companies done? They’ve joined forces in a partnership, but which sectors and teams are actually going to be working together?
  • Where is this happening? Which area will these two companies now serve? Who will be able to access the service?
  • When did it happen? When is the partnership going to start when will customers see the first major changes?
  • Why has this happened? In this example, the why might be to offer customers more services and helpful products. 
  • Why does this matter? Why is it so important that this event is taking place for your target audience? How are they going to benefit?
  • How will you be implementing this change? For example, if you’re partnering with a new business, will you change your brand name and leadership team? Will you have a new headquarters?

3. Target the Right Sector

Like most pieces of great copy, a press release should generally be written with a specific audience in mind. The interesting thing about a press release is that you’re not just writing for the people who might be interested in your products and services. You’re also writing for a specific publication, journalist, broadcaster, or editor. 

When you’re writing your content, you’ll need to keep both audiences in mind to ensure that you get your message across. Focus on the kind of crucial messages which will appeal to your end-users and customers but address the preferences and needs of the editor too. Many publications will have guidelines to follow if you want a chance of getting your content on their site. 

If you’re sending your press release to multiple locations, you might need to look into doing several different versions of your press releases, each with slightly different wording and information, based on your target publication.

4. Get the Headline Right

There are few things more important in a press release than an amazing headline. 

A good headline will immediately attract the attention of your publication, as well as anyone who might end up reading your article. The media uses headlines to determine whether stories are worth reading or publishing. This means that you need to get attention quickly. 

Most press release headlines don’t try to be clever. There isn’t a lot of fancy language to worry about. Instead, your focus should be on sharing the main point of the press release fast.

For instance, if you’re announcing the arrival of new security measures in your business to protect hybrid workers, you might have a headline like:

  • [Company] implements end-to-end encryption for hybrid workers
  • [Company] uses new encryption techniques to support hybrid work
  • [Company] invests in encryption technology for hybrid employees

5. Use the Right Structure

Structuring a press release can be tough.

Some companies have specific requests on how your press release should look. For instance, you might have to place the date and time in a specific place. For instance, CNN always puts the date of the release before the headline:

If you don’t have to follow a specific format, you should stick with the inverted pyramid structure. This strategy involves placing the most critical information first and moving down the hierarchy to less important info – like contact details. 

When structuring your press release, make sure the headline immediately tells your customers and readers what the story is about and presents immediate value. The opening paragraph will then summarise the main factors and elements of the story, giving a fuller explanation of what the story is about. For instance, for the “[Company] implements end-to-end encryption for hybrid workers” example, the first paragraph might read:

[Company] recently announced an investment in the latest encryption tools for information at rest and transit for hybrid employees. This new security strategy is rolling out immediately to new and existing customers of [company], with access to extra features available for premium subscribers.

The second paragraph then follows up with contextual insight into why this story is important. For instance, in the example above, the second paragraph might say:

This new investment comes at a time when more employees are moving into the hybrid working model. [Company] believes that higher encryption is crucial for teams working in a cloud environment, even with access to VPNs and other security measures available. 

The third paragraph then presents details on the story, including information on who’s involved, how this story came about, and anything else that business leaders might need to know. If there is an additional paragraph, you might include some quotes from business leaders or industry authorities to add credibility or opinions. 

6. Perfect Your Writing

No matter how short or simple, any press release is an insight into your company and brand. Don’t rely on the publication company you choose to do all the editing for you. Make sure you proofread your content and ensure everything sounds fantastic. It’s also worth double-checking any details to ensure that stats and facts remain accurate. 

When boosting the writing of your press release, remember:

  • Address the topics that your readers will find most interesting: Choose relevant topics with obvious benefits and repercussions for your target audience. Don’t get bogged down in fluff, and don’t be overzealous with patting yourself on the back. It’s best to avoid too many adjectives like “world-leading” and “fantastic” when describing your brand.
  • Write in the third person: Third-person writing is common for press releases, even when you’re talking about yourself. For instance, you might say, “Dell’s marketing team recently shared information on a new computer series.” 
  • Keep it simple: Stick to one focus story per press release and try not to overwhelm your audience with too much information. Press releases are short, focused, and easy to read. If you have extra information to provide, you can make a note at the bottom of the release. The close of your PR is where you can provide contact details, links to products, and backlinks to further articles. 

Remember, a compelling, human quote can really make a difference to your press release too. This is a chance to allow the executive voices in your business to shine through. Make sure you highlight exactly why you’re so excited about the press release in the quote while using emotive language to connect with customers. For instance,

The company CEO said: “We’re proud to be offering our current and new customers access to this new security service. After working with the best encryption professionals in the industry, we’re confident we can reduce data breaches and security concerns for hybrid workers.”

7. Double-Check Your Press Release

Before you send your press releases to anyone, it’s best to do a quick check to ensure that everything sounds great and that you haven’t left any annoying errors unaddressed. Use this quick checklist to examine your content:

  • Is the release date and publishing date correct (make sure you’ve included information on any embargos)
  • Is the contact information correct and in the right-hand corner of the page? This includes the name of the company, phone number, and email address.
  • Does the formatting match the outline requested by the publication?
  • Is the boilerplate at the bottom of the template?
  • Is the headline eye-catching and meaningful?
  • Are all of the relevant details included throughout the press release in order?
  • Are names and information spelled correctly?
  • Is the press release free from any grammatical issues and complex jargon?

Make sure you include information on how to reach out to you if the publication notices anything wrong with your site’s performance. 

Where To Send Your Press Releases

Once you’ve worked through your press release (and double-checked it for quality and accuracy), you can think about where you’re going to send it. For example, you may send multiple versions of your press release to different companies and publications. Ideally, you’ll create an entire press kit, which might include pictures of your team, product, or service, as well as contact details and extra brand information. 

Some companies prefer to approach press relationships by pitching their story to a few carefully selected editors and publications. This is often a good idea if you’re trying to reach a particular audience or you want to improve your reputation by connecting with a certain brand. 

Alternatively, you can use PR wire services to send your information to multiple companies at once. There are various services online to help you get your press announcements to the right people. Options to look into include:

  • Industry publications for specific sectors (like technology or medicine)
  • Local newspapers and online news outlets
  • General news sites like Google News and Apple News
  • Blog sites that attract your target audience
  • Influencers and industry partners

Start small and gradually build a list of contacts to help you get your voice and business out there. Eventually, you’ll find it’s much easier to get publications to accept your press releases. You might even find that people start approaching you to find out if you have any upcoming news. 

Go and Get Published!

Now you’re equipped with everything you need to know to create a fantastic press release and attract new eyes to your business. The only thing to do next is to get out there and start sending your press releases to the right people. Remember, once your press release is published, make sure you promote it through your social channels, email, and website. 


Featured image via Pexels.

Source

The post How to Write a Press Release: The Complete Guide for 2021 first appeared on Webdesigner Depot.


Source de l’article sur Webdesignerdepot

There’s no shortcut to success when it comes to Google search results. That is unless you count pay-per-click advertising.

While pay-to-play will shoot your site to the top of the SERP immediately, it’s not a sustainable strategy for maintaining your position there. So, you’re going to have to get serious about SEO.

This guide will show you what to do to improve your SEO ranking and start seeing results this year:

  1. Use Google Analytics to track metrics
  2. Get an SSL certificate
  3. Improve mobile page speed
  4. Design a mobile-first UI
  5. Make your site accessible
  6. Optimize your images
  7. Create great content
  8. Structure your content for scannability and readability
  9. Create click-worthy title tags and meta descriptions
  10. Choose one focus keyword per page
  11. Improve your internal link strategy
  12. Use only trustworthy external links
  13. Get your site listed as a featured snippet
  14. Get high-quality backlinks
  15. Create a Google My Business page
  16. Refresh Your Content
  17. Regularly monitor Google Search Console

How to Increase Your Website’s SEO Ranking

If you can improve your SEO ranking — and get your pages closer to, if not on the highly coveted top SERP — you will:

  • Boost your site’s overall visibility as its authority in search grows;
  • Bring high-quality traffic to your pages;
  • Drive-up your conversion rate.

That said, search engine optimization is most effective when it’s an ongoing strategy as opposed to something you set up and forget about. So, some of the suggestions below will only need to be implemented once, while others you’ll have to return to every six months or so to make sure your site is on track.

Let’s get started.

1. Use Google Analytics to Track Metrics

If you haven’t yet begun tracking your website’s activity with Google Analytics, it’s the very first thing you need to do.

While Google Analytics alone can’t tell you how well or poorly your website ranks, there’s valuable data in there about what happens to the traffic that arrives from Google. Or any search engine your visitors use.

You can find this information under Acquisition > Source/Medium:

What you want to see here is that (1) you’re getting lots of visitors from organic search results (as opposed to paid) and (2) that they’re highly engaged. So, that means:

  • Longer times on site;
  • Multiple pages visited;
  • Lower bounce rates.

And if you configure Google Analytics to track different conversions on your site, you can see how well those organic visits convert.

Obviously, there’s a lot more you can track here. But you must understand if your SEO efforts are working in the first place, and that’s where you’ll get your confirmation.

2. Get an SSL Certificate

HTTPS has long been one of Google’s SEO ranking factors. Yet, of the two billion-plus websites that are online today, BuiltWith data shows that only 155 million have an SSL certificate installed:
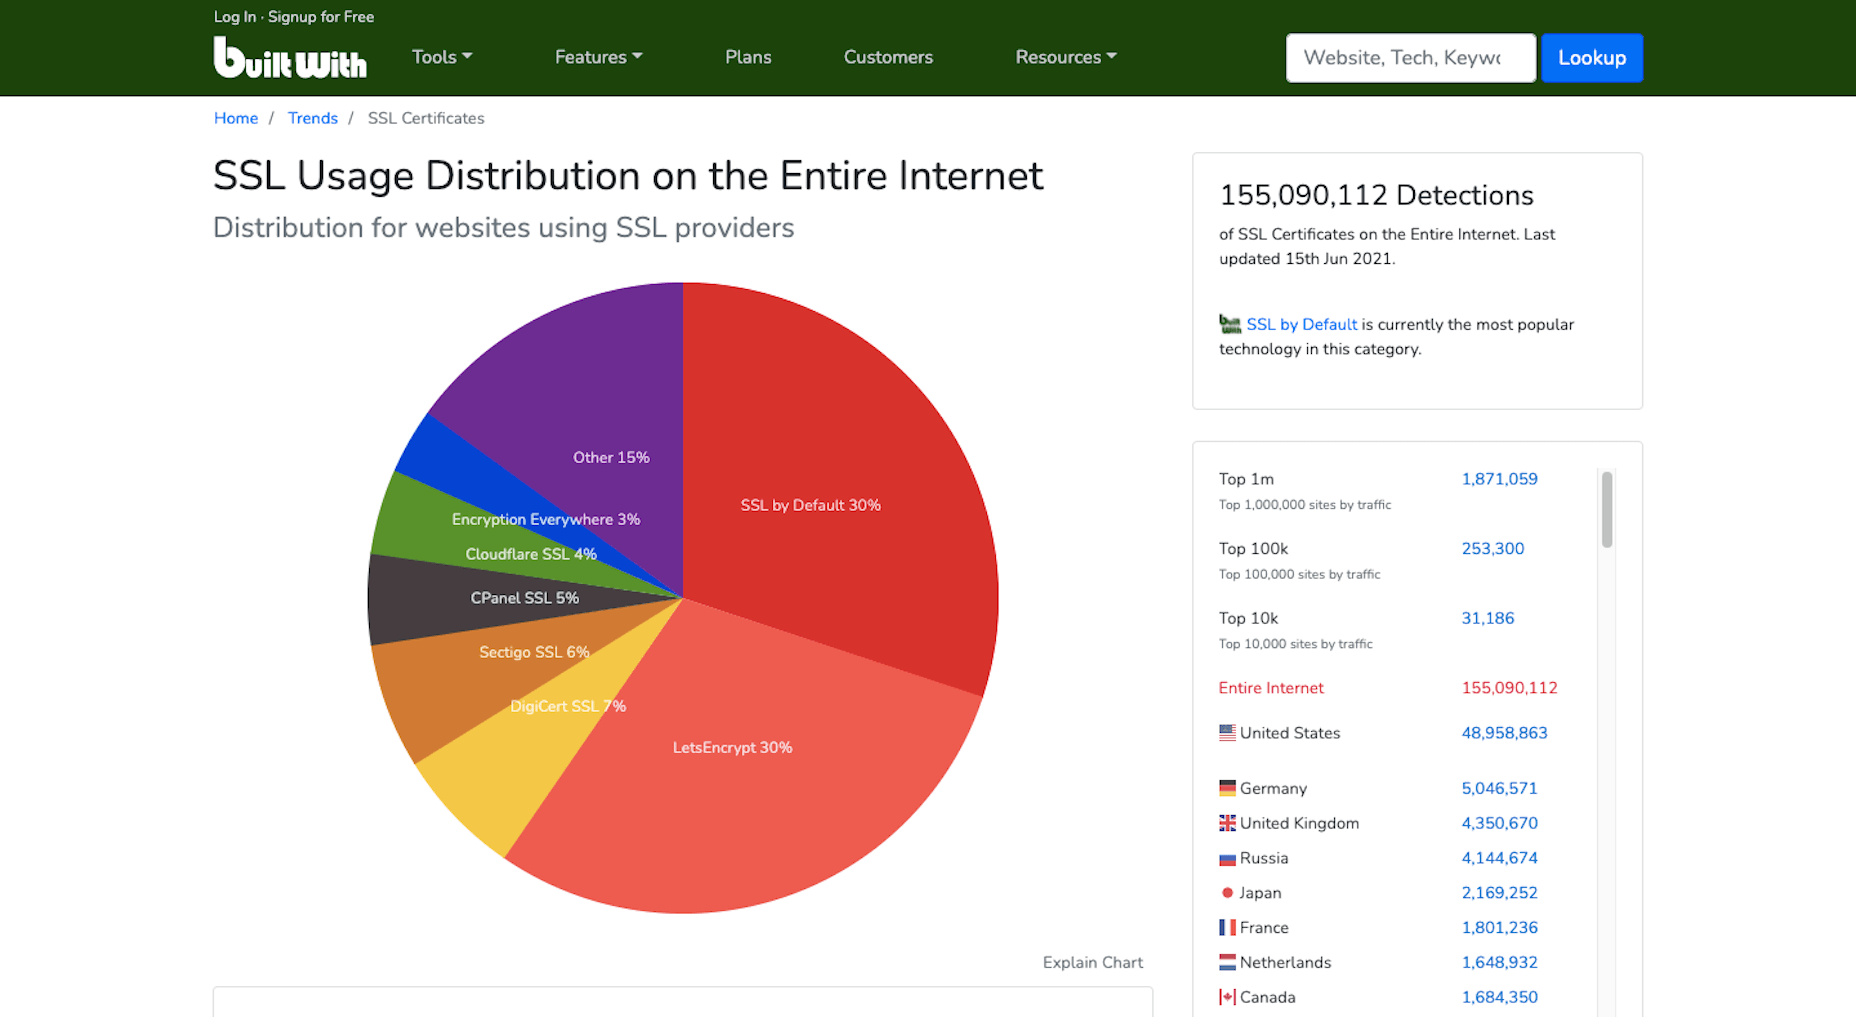
Security and privacy are major concerns for consumers. So if you want to increase their confidence in your website, installing an SSL certificate is an easy thing to do. And it’ll put you in Google’s good graces, too.

If you don’t have one already, get one for free from Zero SSL.

3. Improve Mobile Page Speeds

Mobile loading speeds became a Google ranking signal in July 2018.

It was something we saw coming ever since smartphones overtook the desktop as the primary device people used to access the Internet. Once it became a ranking factor, though, mobile page speed was something we could no longer treat as a “nice to have.” It became a must.

And with Google’s most recent Core Web Vitals algorithm update, there’s no ignoring how big of a role your site’s mobile loading speeds (i.e., performance) play in ranking it.

To ensure that your site meets Google’s expectations for speed, bookmark the Core Web Vitals tool. It’ll tell you how your site performs across all four of the major ranking categories.

You’ll find your speed-related issues at the bottom of the page, along with resources to help you resolve them.

Most of those tips will have to do with optimizing your code. However, there are other things you can do to make your site load quickly:

  • Use well-coded themes and plugins;
  • Remove unused themes, plugins, media, pages, comments, backups, and so on from your database and server;
  • Install a caching plugin that’ll minify, compress, and otherwise make your site lightweight and fast.

It’s also not a bad idea to review your web hosting plan. You might not have the right amount of server power or resources to keep up with your existing activity.

4. Design a Mobile-First UI

On a related note, a mobile-first design can also improve your site’s loading speeds. Rebekah Carter wrote a really helpful guide on how to do this last year.

In addition to speeding things up — since you won’t be trying to jam a bunch of desktop-first design and content into a smartphone screen — it’s going to help your site rank better.

Just be careful when you do this. A mobile-first design doesn’t mean creating a scaled-back version of the larger site for smartphone users.

In fact, Google explicitly tells us not to do that and why:

“If it’s your intention that the mobile page should have less content than the desktop page, you can expect some traffic loss when your site is enabled mobile-first indexing, since Google can’t get as much information from your page as before.”

And if your response is that the content on desktop-only doesn’t matter, then it really shouldn’t be there. Don’t waste your visitors’ time with useless or repetitive content, as it’ll only give them more reason to abandon your site.

5. Make Your Site Accessible

Accessibility has come to the forefront of the SEO discussion thanks to Core Web Vitals.

Now, running your site through the tool will tell you if there are any inaccessibility issues that Google will ping you for. But that doesn’t make your site completely accessible.

Considering the rise in website accessibility-related lawsuits, you’ll want to take this seriously.

Because a bad experience due to inaccessibility won’t just cost you visitors and a lower search ranking, it’ll cost you a lot of money, too.

Here are some things you can do to ensure that your site and all its content is accessible.

6. Optimize Your Images

Technically, image optimization falls under the page speed tip. However, that’s not the only way you should be optimizing your images, which is why I wanted to address this separately.

According to HTTP Archive, the average weight of a mobile web page these days is 1917.5 KB. Images take up a sizable chunk of that weight:

Because of this, bloated image sizes are often to blame for slow pages.

You can do several things to optimize your images for speed, like using lightweight formats, resizing them, and compressing them. You’ll find 6 other image optimization tips here.

While those tips will help you speed up your site and, consequently, improve your SEO ranking, there’s something else you need to do:

Add alt text to your most important images.

One reason to do this is to improve accessibility. Another is so your web page can rank in both the regular Google search results and image results as this search for “WordPress by the numbers” does:

If you can write alt text that perfectly describes your graphic and matches the image searchers’ intent, you can create another ranking opportunity for your page.

7. Create Great Content

There are many technical ranking factors you have to pay attention to if you want to create a good experience for your visitors and rank well as a result. However, none of that will matter if your content sucks.

So, how do you make great content? It really depends.

Think about the difference between a page describing your web design services and a product page for a blender.

Your web design services page would need to:

  • Explain why hiring a web designer is a must;
  • What your design services entail;
  • What they can expect in terms of results;
  • Include some proof in the form of testimonials or portfolio samples;
  • Have information on next steps or how to get in touch.

That would be a comprehensive and useful page. If business owners searched for “hire a web designer near me” or “should I hire a web designer?”, that page would sufficiently answer their query.

A product page, however, would need to:

  • Provide a brief summary of the blender;
  • Show photos of the blender, different angles of it, as well as different variations of the product;
  • Display the price;
  • Allow customers to Add to Cart or Save for later;
  • Include technical specs of the blender;
  • Recommend related products;
  • Display sortable customer testimonials and ratings.

The last thing a shopper would want is to be directed to a product page that reads like one of your services pages.

So, great content not only needs to be well-written and error-free, but it needs to match the searcher’s intent and expectations. If you can do that, your visitors will stay as long as they need to read through everything, which will help strengthen the page’s ranking.

8. Structure Your Content for Scannability and Readability

Including necessary details and in the right format is an important part of making a page’s content valuable to the visitor. The structure is going to help, too.

For starters, you want to make sure every page is human-readable. So, that involves:

  • Shorter sentences and paragraphs;
  • Linkable table of contents for longer pages;
  • Header tags every few hundred words;
  • Descriptive and supportive imagery throughout;
  • Text callouts like blockquotes and bolded phrases.

By making a page less intimidating to read and easier to scan for a quick summary of what it is, you’ll find that more visitors are willing to read it and follow your calls to action.

You can use a tool like Hemingway to improve your page’s readability. Quickly pop the text of each page into the editor and follow the recommended suggestions:

You’re also going to have to think about how well Google’s indexing bots can read your page. They’re smart enough to pick up on cues but not smart enough to sit down and read your article on the benefits of Vitamin D or how to install a new showerhead.

So, you’ll need to use HTML meta tags as well as hierarchical header tags to tell the bots what the page is about.

If you’re building a WordPress site, you can use the Yoast SEO plugin to analyze how scannable and readable each page of your site is (among other things):

9. Create Click-Worthy Title Tags and Meta Descriptions

To get eyeballs on your really great content, the brief preview users see of it in search results needs to be able to lure them in. Get more clicks to your site from search, and Google will take notice.

But they can’t just be superficial clicks. If Google notices that your page is getting a ton of traffic that almost immediately drops off once they see the content on the page, your page will not fare well in search results.

So, your goal is to stay away from clickbait-y title tags and meta descriptions and make them click-worthy.

The first thing to focus on is the length. Google only gives you a certain amount of space to make your pitch.

There are many tools you can use for this, but I prefer Mangools’s SERP Simulator:

It allows you to play around with your URL, title tag, and meta description and to watch in real-time as it fits the allotted space. You can also compare it to the pages that currently rank for the keyword you’re going after, which can be a really useful reference point. After all, if those sites have made it to the first SERP, then they’re doing something right.

Another thing to think about when writing click-worthy titles is how engaging they are.

The tool I recommend for this is CoSchedule’s Headline Studio:

I don’t find this useful so much for basic web pages. You don’t need to get creative with something like your About or Contact pages. But for content marketing? If you want to beat out competing articles for attention in Google, this tool will be very useful.

10. Choose One Focus Keyword Per Page

It’s not as though you can add a keyword tag to your page, and Google will automatically rank your site for it. That’s not what keyword optimization is.

Instead, what you do is select one unique keyword per page and write the content around it. So, it’s really more about creating a clear focus for yourself and then comprehensively unpacking the subject matter on the page.

Keep in mind, though, that if you want to improve your chances of ranking for the keyword, it needs to be relevant to your brand, useful for your audience, and your site needs to actually be able to compete for it.

You can use the Google Keyword Planner to find keywords that fit those criteria:

Ultimately, you should choose a keyword that:

  • Has a decent amount of monthly searches — over 1,000 is what I aim for;
  • Have “Low” to “Medium” amount of competition, but the lower, the better;
  • Matches the user intent. So take that keyword, put it into Google and see what you find. Then, look at the sites on that first page of search results. Do they match what your own page will address? If so, then you’ve found a keyword that aligns with your users’ search intent.

Now, if you’re writing great content that addresses your visitors’ questions and concerns, then optimizing for your focus keywords will happen naturally. The same goes for related keywords you might want to target. As you write the content for each page, the keywords will organically appear.

But remember how I said Google’s indexing bots need certain HTML and header tags to “read” the content on the page? This means you’ll need to include the focus keyword in some of those areas, so there is no question about what the page is about.

Here’s where your focus keyword should show up:

  • Title tag (H1);
  • Meta description;
  • Slug (hyperlink);
  • Within the intro;
  • The first H2 header tag;
  • Alt text for the most important image on the page;
  • Within the conclusion.

It should also appear throughout the page, along with variations of the keyword that people might search for.

You can use the Yoast SEO plugin to analyze this as well.

11. Improve Your Internal Link Strategy

Okay, so here’s where we start to get into SEO strategies that Google might not directly care about, but that can still drastically improve how well your site ranks.

Internal links, in particular, are valuable because they create an interconnected structure for your site. Here’s a basic example of why that’s important:

Let’s say these are the pages on your website. Each of them can be accessed from the home page and main navigation. This structure tells us that each page is related to the overall message and mission of the company, but they are not related to one another. And that doesn’t make sense, right?

When you’re educating visitors on your Web Design services, it’s naturally going to come up that you also happen to specialize in WordPress and eCommerce design. So, those internal links should appear on your Web Design page. And vice versa.

In addition, your Portfolio and Contact Us pages are likely going to be the most common CTAs on the site. Your prospective clients shouldn’t be forced to backtrack to the homepage or scroll up to the navigation to take action. By including these internal links or buttons within the content of the services pages, you’re giving them a quick and direct line to the next steps.

The more intuitive you make the user journey, the easier it will be for them to convert.

This is one reason why websites with a strong internal linking structure perform well in search results. Another reason is that internal links help Google’s bots find all of the content on your site and better understand how they relate to one another.

12. Use Only Trustworthy External Links

Link juice is one of the reasons why business owners are obsessed with getting backlinks. We’ll get to that shortly.

But it’s also something that comes into play when choosing external links to include on your site.

Link juice is the idea that one site can pass its authority to another through a dofollow link. So, by linking out to authoritative and trustworthy sources, your site may raise its own clout with the search engines because of that connection.

However, it works both ways. If you create external links to websites with misinformation that pose a security threat to visitors or are otherwise untrustworthy, that bad reputation can do your website harm.

So, make sure that every external link you use is necessary and reliable. If not, get rid of it.

13. Get Your Site Listed As a Featured Snippet

I said earlier in this post that pay-per-click advertising is the only way to shortcut the SEO process and get on the first page of Google. That’s not entirely true.

We’ve already seen how optimizing your images for Google Images search can shoot your site to the top of results. Another way to get ahead is by optimizing your page using structured data to land a spot as a featured snippet.

Like this page from Bankrate that answers the question “how do you get a loan”:

Remember that structured data alone won’t instantly move your web page into the featured snippet space. The content needs to be the best it can be, and the structured data needs to be well written.

Schema.org was created to help you pick the right category and write the structured data for it:

Use this to write up the relevant microdata for the pages to make the most sense to do so. For instance, an About page probably wouldn’t benefit from having structured data attached to it. However, a lengthy blog post that explains a step-by-step process would.

There are WordPress plugins (Yoast is one of them) that will help you insert this code into your pages if you prefer.

14. Get High-Quality Backlinks

Backlinks pointing to your website are a huge indicator to Google that your site is share-worthy and authoritative.

However, like everything else in SEO, you can’t cheat your way into a bunch of backlinks. They need to come from authoritative sources, and they need to be relevant. That’s why paying or bartering for backlinks isn’t usually effective. If your web page’s backlink doesn’t organically fit within the content on their site, visitors aren’t going to click on it.

There are lots of ways to go about building up a repository of backlinks that do generate authority for you and improve your SEO ranking in the process:

Get active on social media and become an authority there: The rule is generally that 80% of your posts need to be non-promotional. By sharing content from all kinds of sources that are relevant to your audience, you’re going to get more meaningful engagement. And this’ll eventually put the spotlight on your own content and get people to share it on social media, too.

This is something that Google will look at when ranking your site: What sort of social signals are coming from your brand?

Get featured as an expert: You don’t need to become an influencer for people to view you as an expert in your field. It’s all about your reputation.

By leveraging your reputation to get speaking gigs, you’ll grow your authority even more. Just make sure they’re relevant to what you do. So, look for podcasts, webinars, and conferences in your field that are looking for experts.

Become a guest blogger: If public speaking isn’t your forte, that’s okay. Turn your attention instead to lining up guest blogging gigs.

By writing high-quality content for authoritative websites (whether you get paid or not), you’ll bring more attention to your own brand. And Google will pass that authority onto your site.

15. Create a Google My Business Page

Any business can create a Google My Business page. There are a number of SEO-related benefits to doing this.

The first is that local businesses can literally put themselves on the map with Google My Business. Here’s what a Google search for “restaurants near me” looks like:

Even if your site doesn’t appear on the first SERP, the map that sits at the top of search results can give you a front seat anyway.

Another reason to create a My Business page is that you get to control your knowledge graph sidebar, like Ford’s Garage does here:

By including high-quality graphics, pertinent details about the business, and collecting positive customer reviews, this knowledge graph could do your brand’s reputation a lot of good in the eyes of Google and your prospects.

16. Refresh Your Content

This is useful for all of the content on your site, even your most high-performing pages.

If your site is starting to gain traction, take a close look at your Google Analytics data. You may find a few pages that no one seems to be paying attention to or, worse, that they always seem to bounce from.

In Google Analytics, go to Behavior > Site Content to figure out which pages are underperforming.

Then, ask yourself:

  1. Is this page even a necessary part of the user journey? If not, you can probably scrap it and have one less distraction on your site.
  2. If this page is necessary, what do you need to do to make it more valuable and relevant to your audience?

With the most popular pages on your site, it’s not unreasonable to expect that at least part of what you originally wrote will go stale or become irrelevant within a year or two. So, it’s a good idea to refresh these as well.

To do that, it’s simple. Do a search in Google for your focus keyword. Read through the top five results and see what sort of information your post is missing. Then update it accordingly.

Anything outdated or irrelevant should also be stripped out.

17. Regularly Monitor Google Search Console

Last but not least, you should keep your eyes on Google Search Console.

There’s a lot of valuable information in here that will tell you why your site might not be ranking as well as it could. You’ll find issues related to:

  • Indexing
  • Mobile usability
  • Security
  • Core Web Vitals

You’ll also find data on how well your site is ranking in general. You’ll find this under the Performance tab:

Use this to identify:

  • Which keywords you’re ranking for and are driving traffic to your site;
  • Which keywords you’re getting the most impressions from but not getting clicks from;
  • Which keywords you’re getting the most clicks from but not a lot of impressions;
  • Which keywords you rank low for and could stand to improve upon.

You can learn a lot about how strong your SEO strategy is. Just use the Clicks, Impressions, and Position tabs to sort your data so you can better understand what’s going on.

Then, prioritize fixing the pages that can and should be bringing your site highly qualified traffic but aren’t.

Wrap-Up

If you’re wondering how long it’ll take before you see an improvement in your SEO ranking, it depends. If your domain’s current authority is low, it can realistically take about six months to see major changes. That said, if you implement all of the suggestions above, you can certainly expedite that.

Just remember that there are no real shortcuts in SEO. You need to have an authoritative and trustworthy website and brand before anything else. So, take the time to build your credibility online so that these SEO tactics can really work.

Source

The post 17 Things You Can Do To Improve Your SEO Ranking In 2021 first appeared on Webdesigner Depot.


Source de l’article sur Webdesignerdepot

Ever since online stores first emerged they’ve faced one big challenge compared to their real world rivals; yes, it’s convenient to shop wherever, whenever you want, and delivery options permitting, buy from anyone anywhere in the world. But it’s a minimal experience compared to the fuller sensory experience of shopping in the real world.
Online stores can only access our sight and hearing, whereas physical shops can engage all our senses. How can a website compete with the experience created by walking into a physical space where lighting, layout, decor, and background audio are all carefully designed to create an appropriate atmosphere; where you can touch fabrics to check how they feel, try clothes or shoes on without having to buy them first? How do you sell scented products without allowing them to be smelled?

In this month’s round-up, we see a few different approaches to solving this dilemma, sites that focus the copy, visual, and auditory, to work on the imagination.

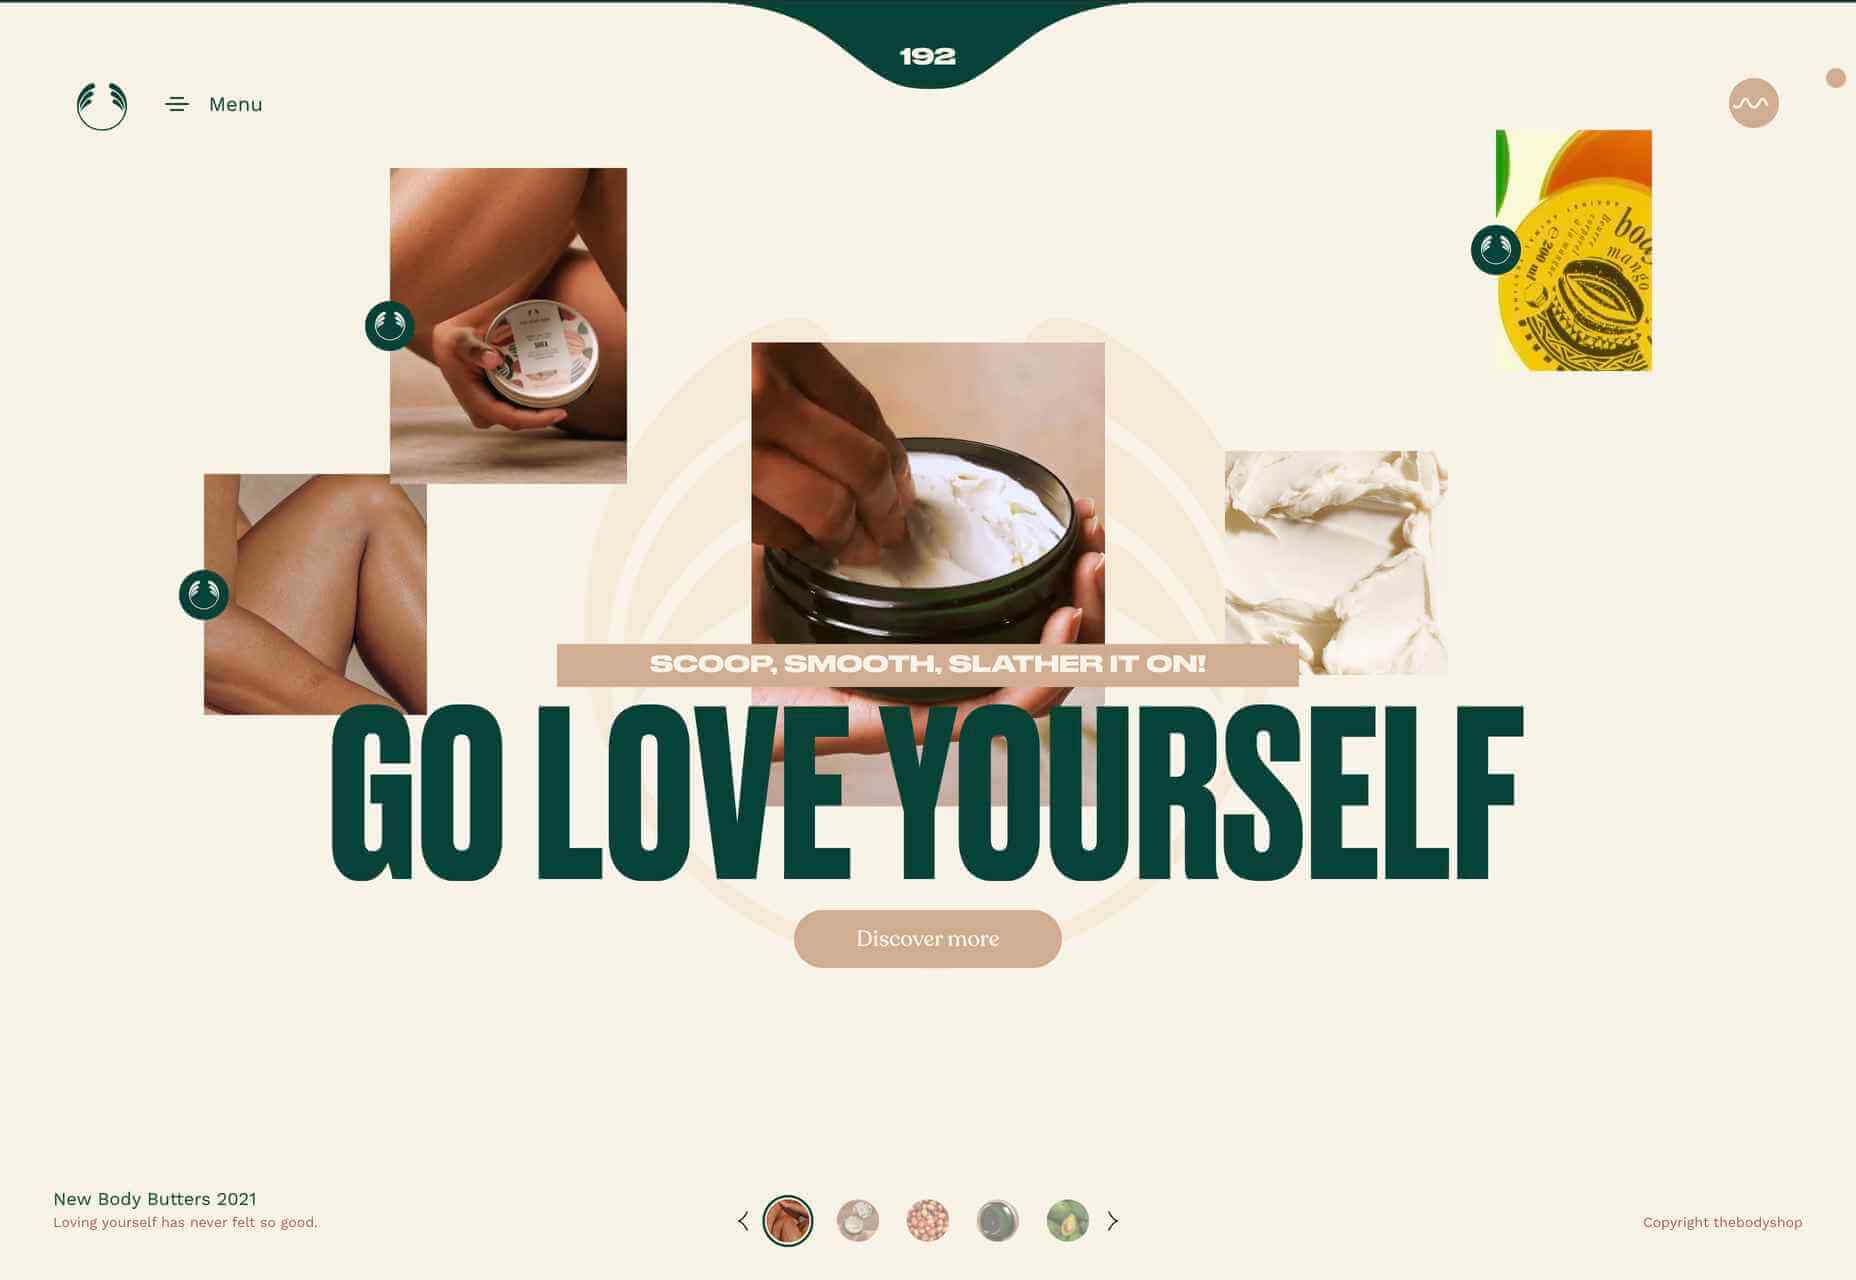
Go Love Yourself

This microsite to advertise The Body Shop body butters, uses sensuous imagery and video to create an atmosphere of indulgence while also offering comprehensive product information.

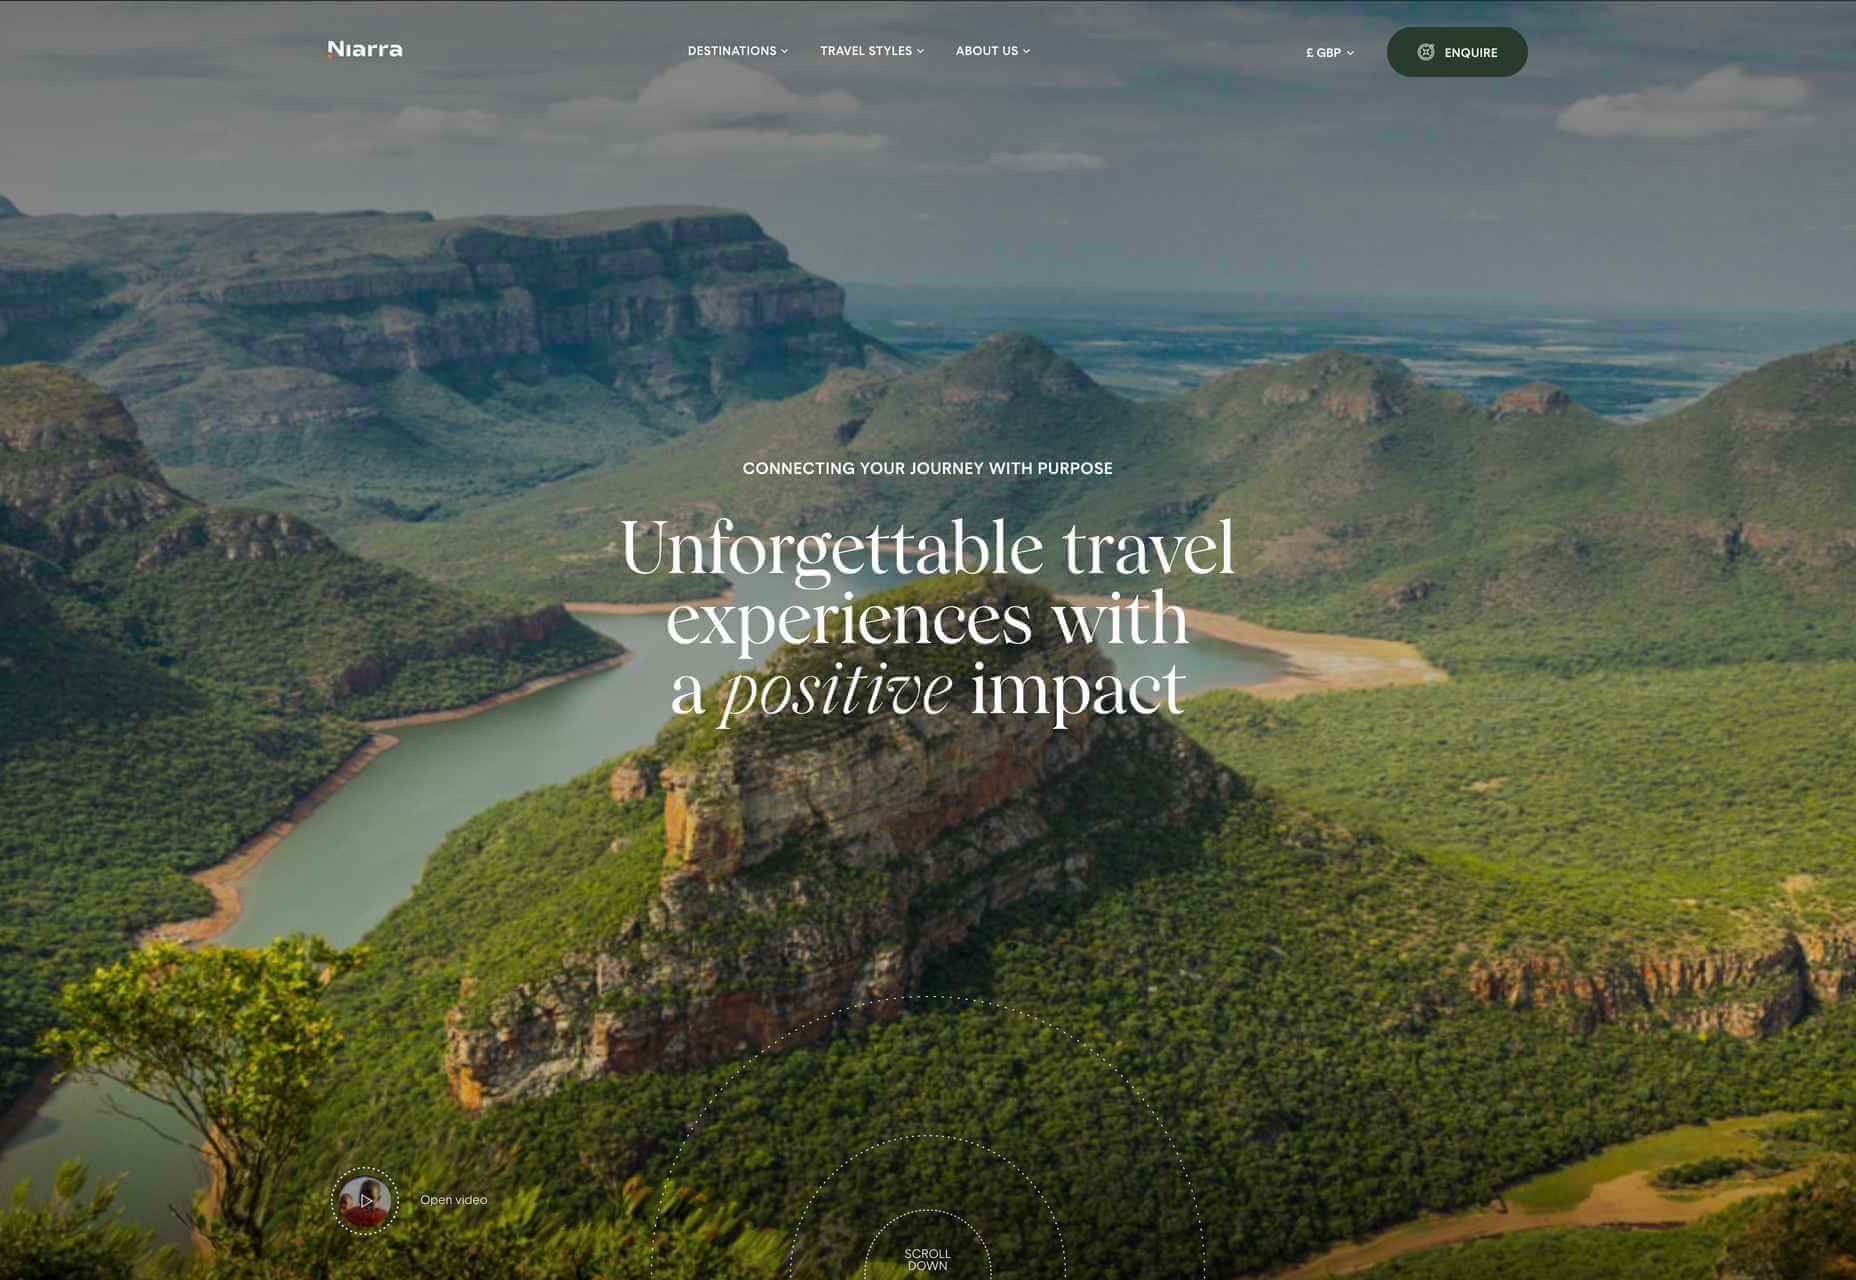
Niarra Travel

Sustainable, bespoke travel agency Niarra Travel makes good use of some beautiful photography. The background color scheme of earthy greens and neutrals fits both the luxury and eco-conscious aspects of the company.

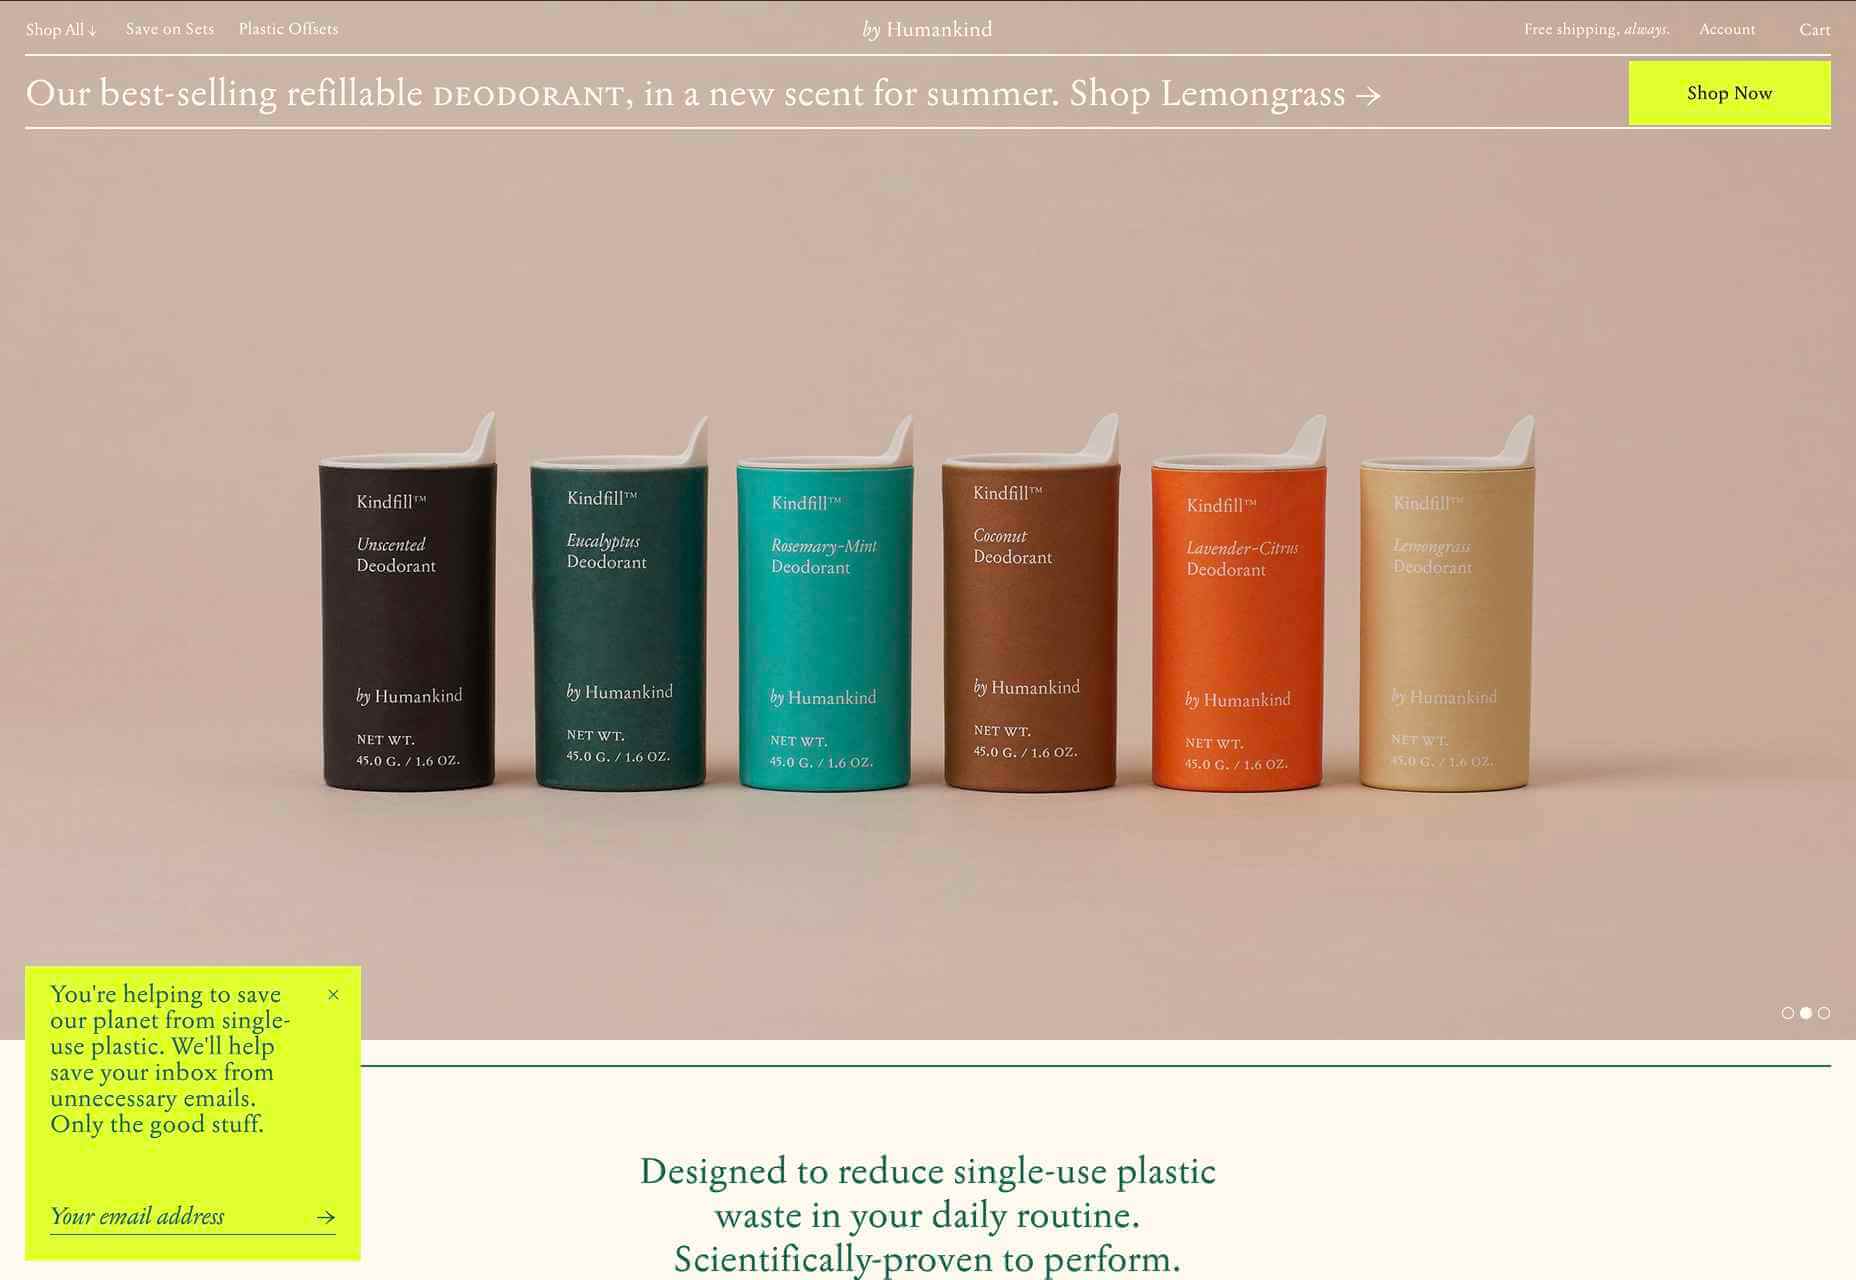
by Humankind

by Humankind is a personal care brand making toiletries from natural ingredients. The focus of their pitch is reducing plastic waste. The site is appropriately sparse, with simple product shots and mostly warm neutral colors.

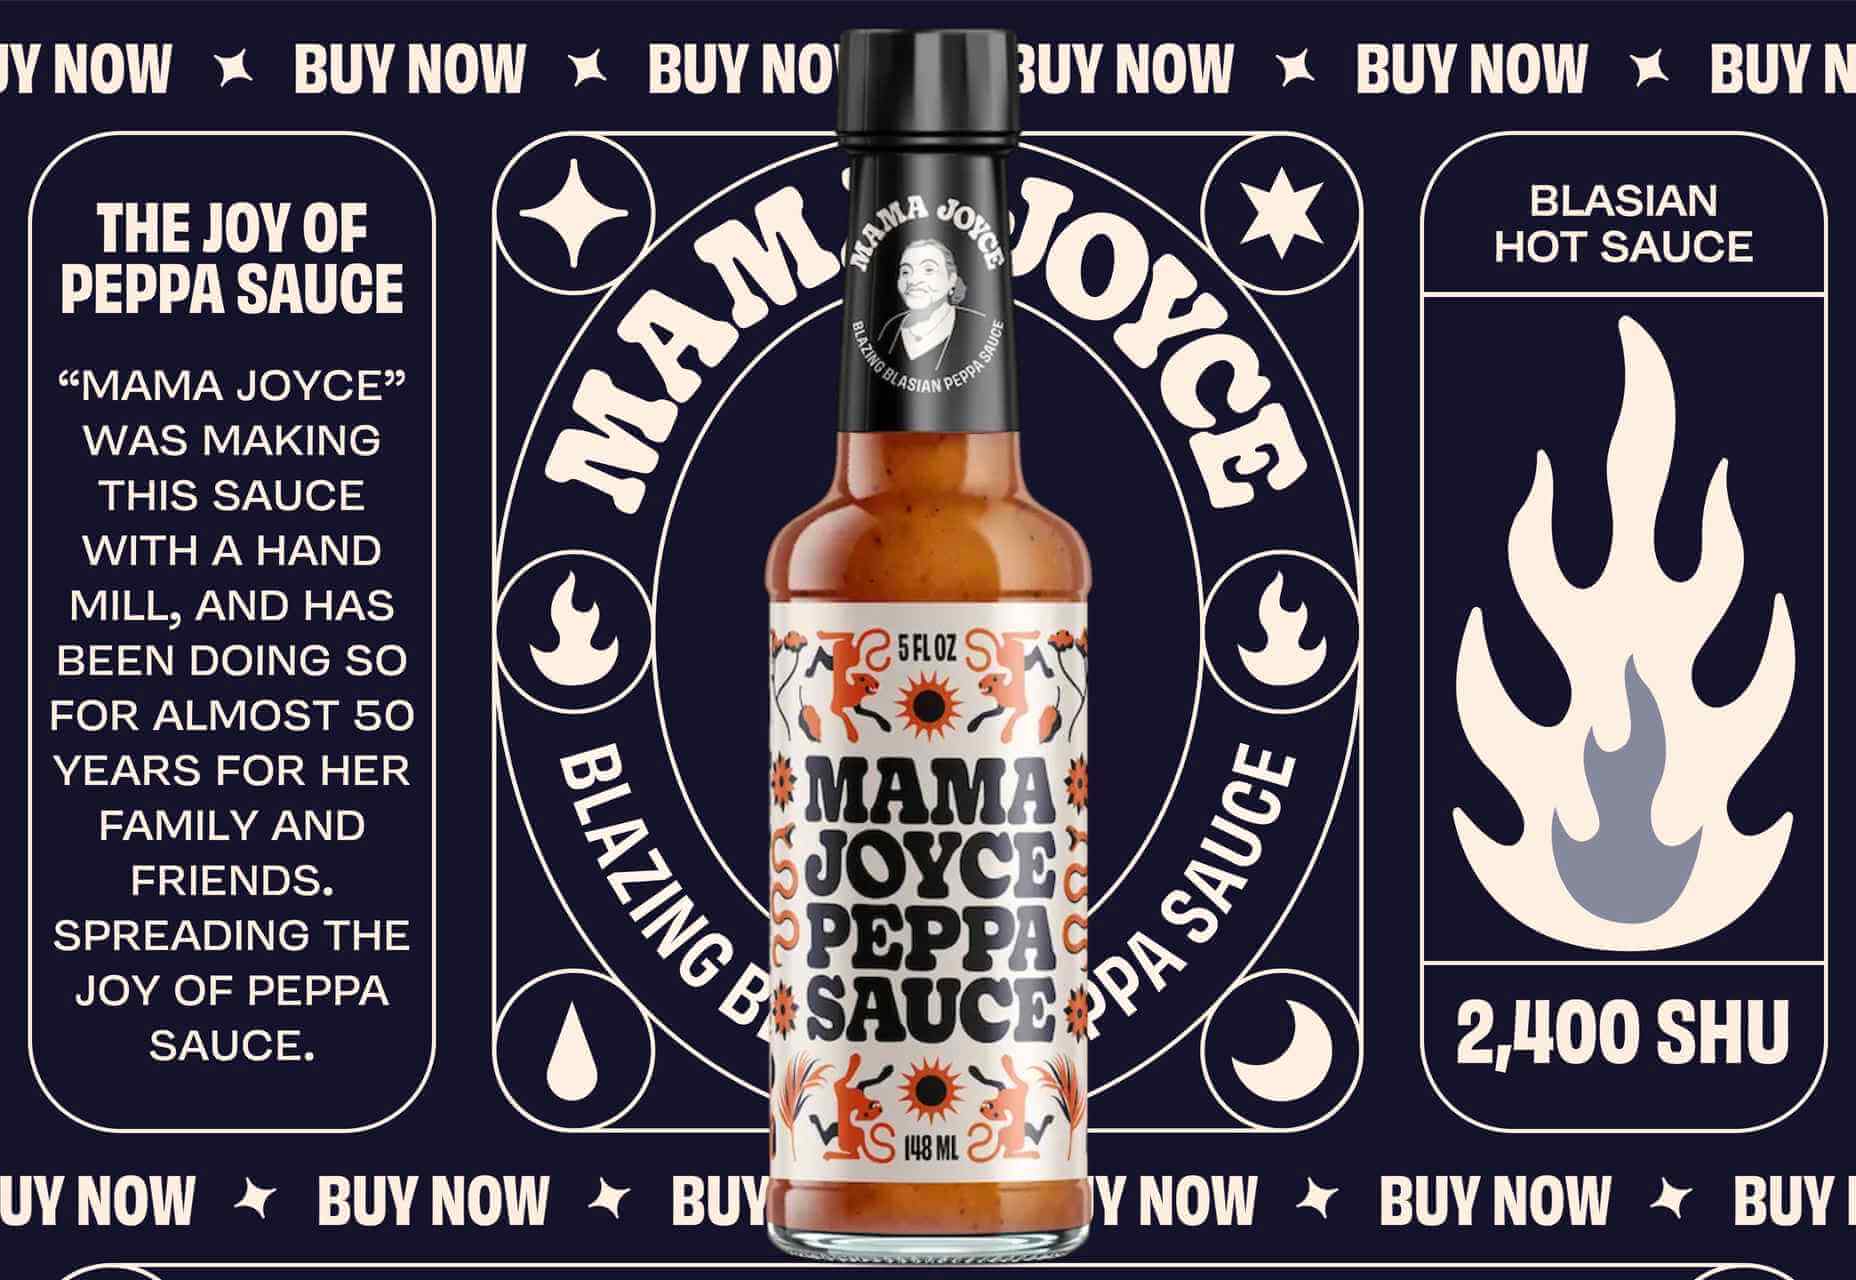
Mama Joyce Peppa Sauce

This one-page site for Mama Joyce Peppa Sauce is big and bold. Lots of scrolling type and vintage style illustration. You don’t need to look for a ‘buy now’ because the cursor itself is it. Click almost anywhere, and two bottles of sauce go into your cart.

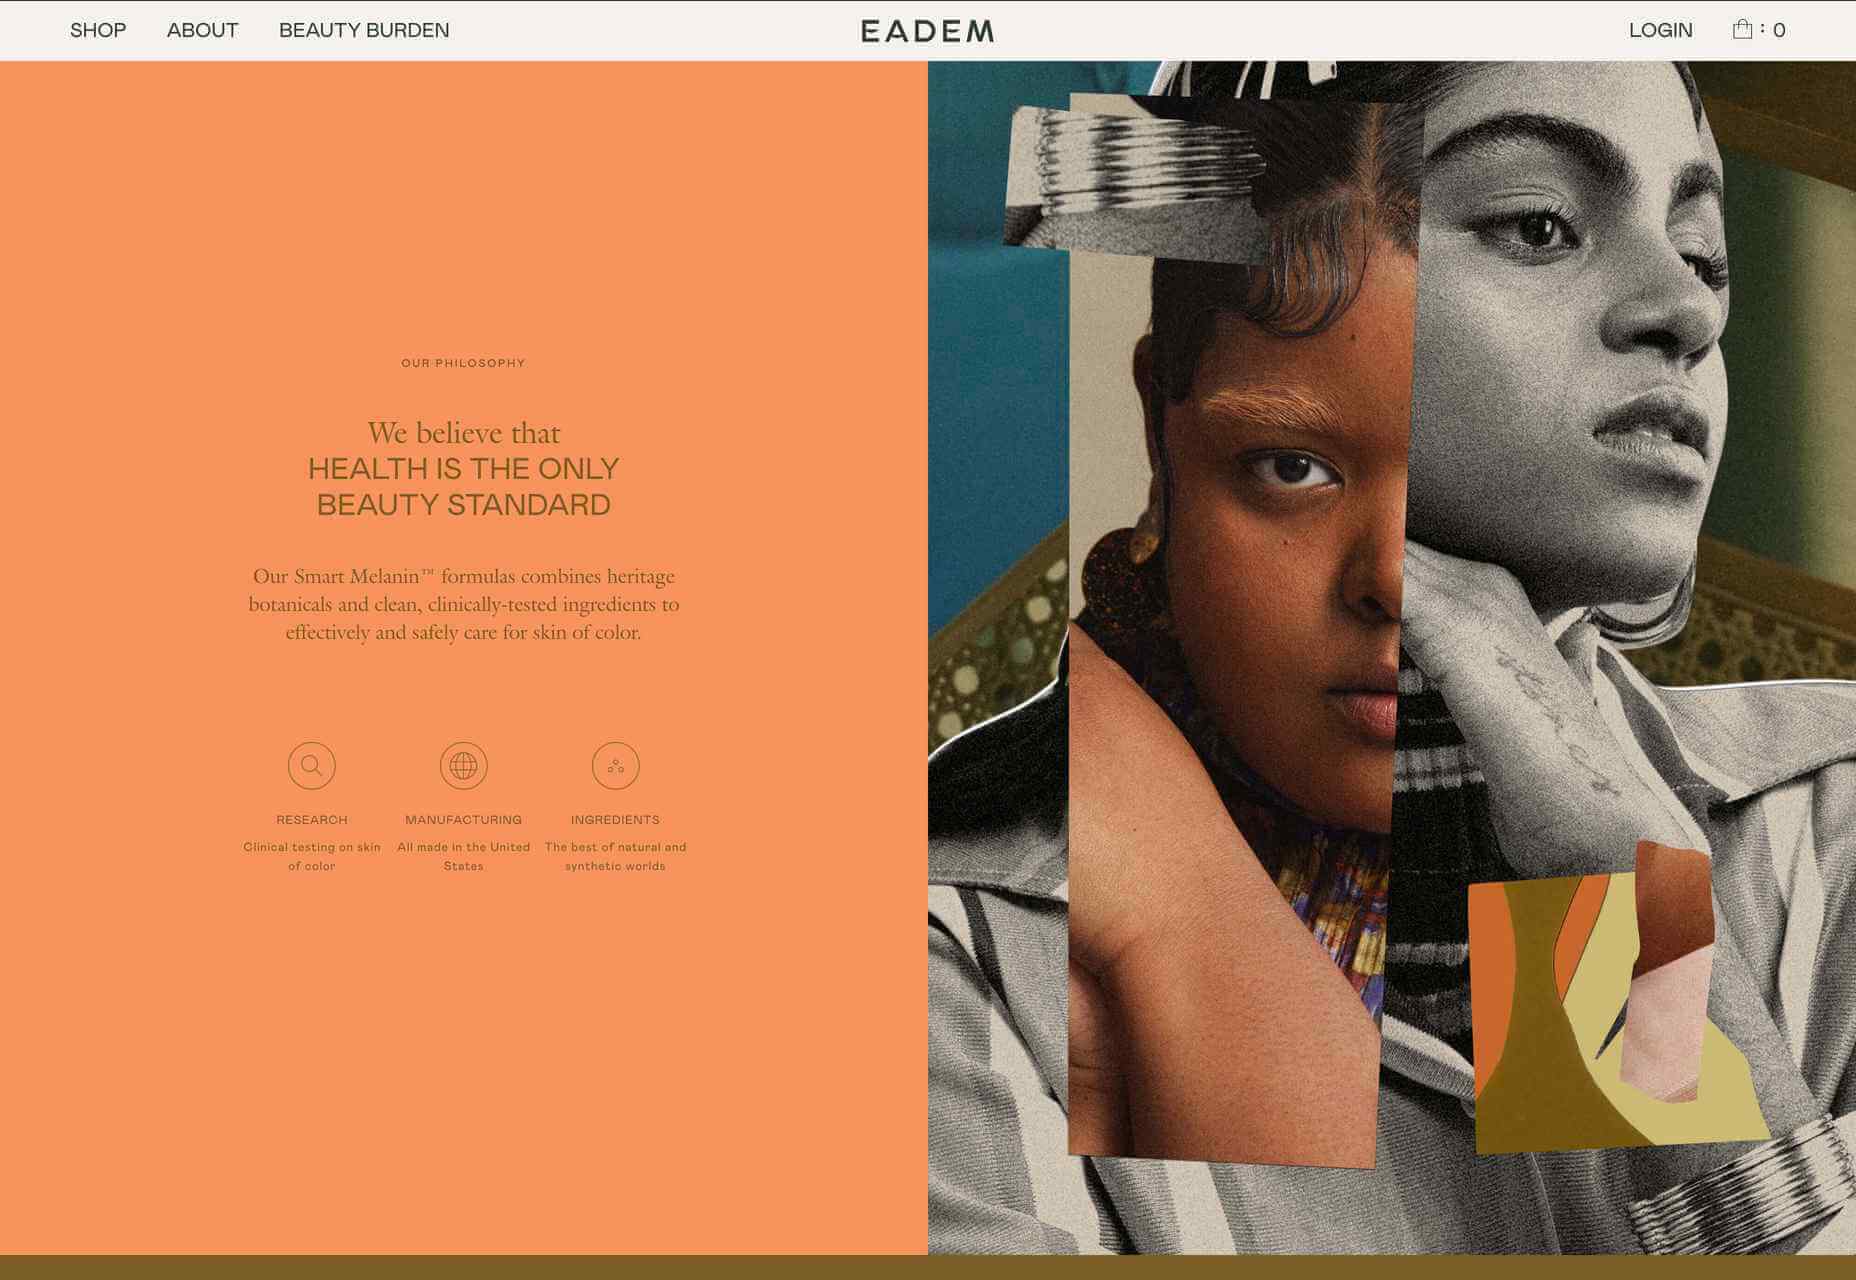
Eadem

Eadem is a beauty company for women of color — their flagship product is a serum that fades dark spots without bleaching. Pinks and dark golds contrasted with fresher oranges and pale greens create a color scheme that feels rich but not heavy.

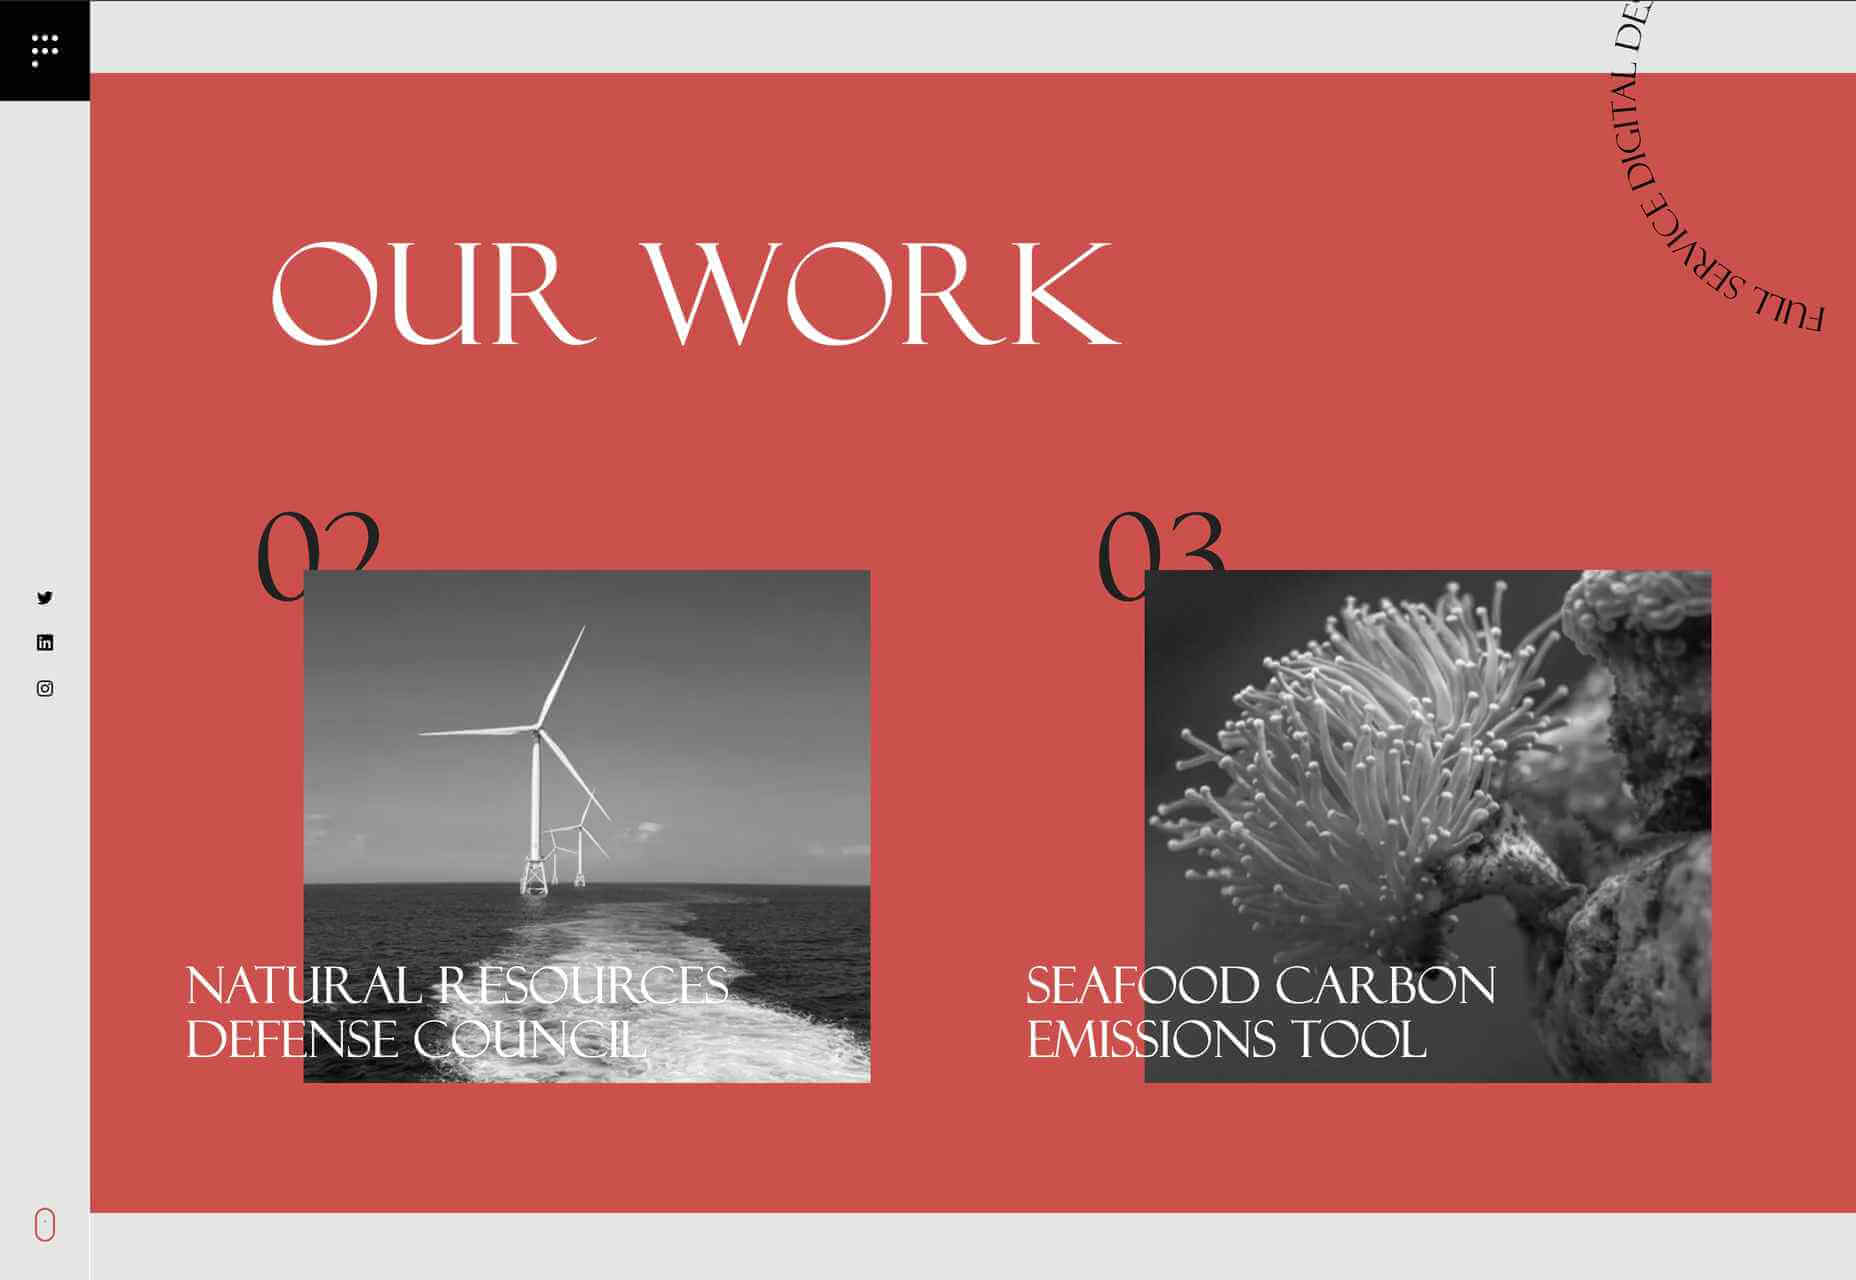
Pact Media

Pact Media is a full-service digital design agency whose work mainly focuses on agencies, businesses, and organizations involved in conservation. Large type and greyscale with red accents create a strong feel, while color on image rollover adds extra impact.

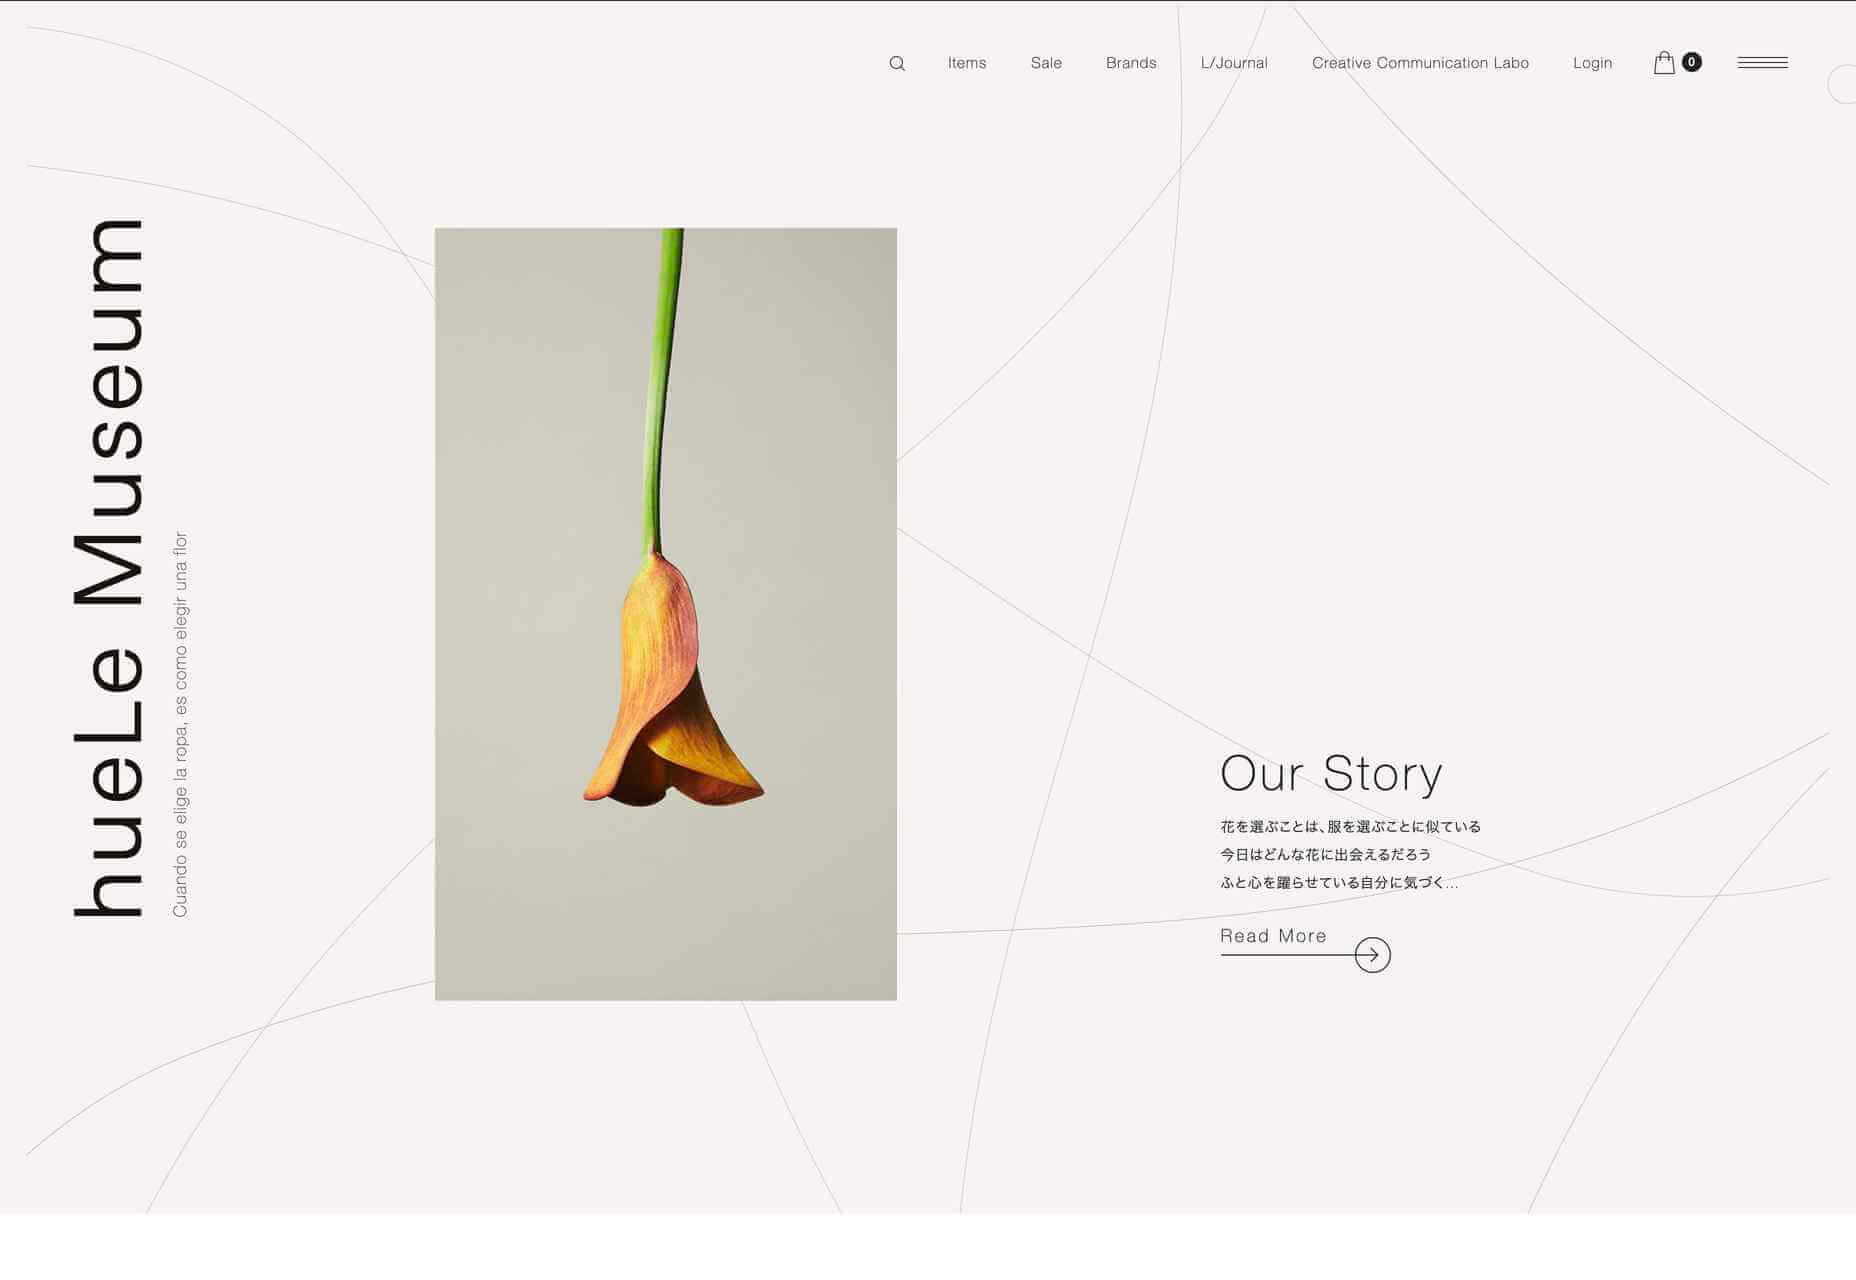
hueLe Museum

hueLe Museum is a collection of clothing brands. The philosophy behind it equates choosing clothes to choosing flowers, and there are some beautiful flower images. There is a sense of tranquility to the site, and it is even better on mobile.

Marnie Hawson

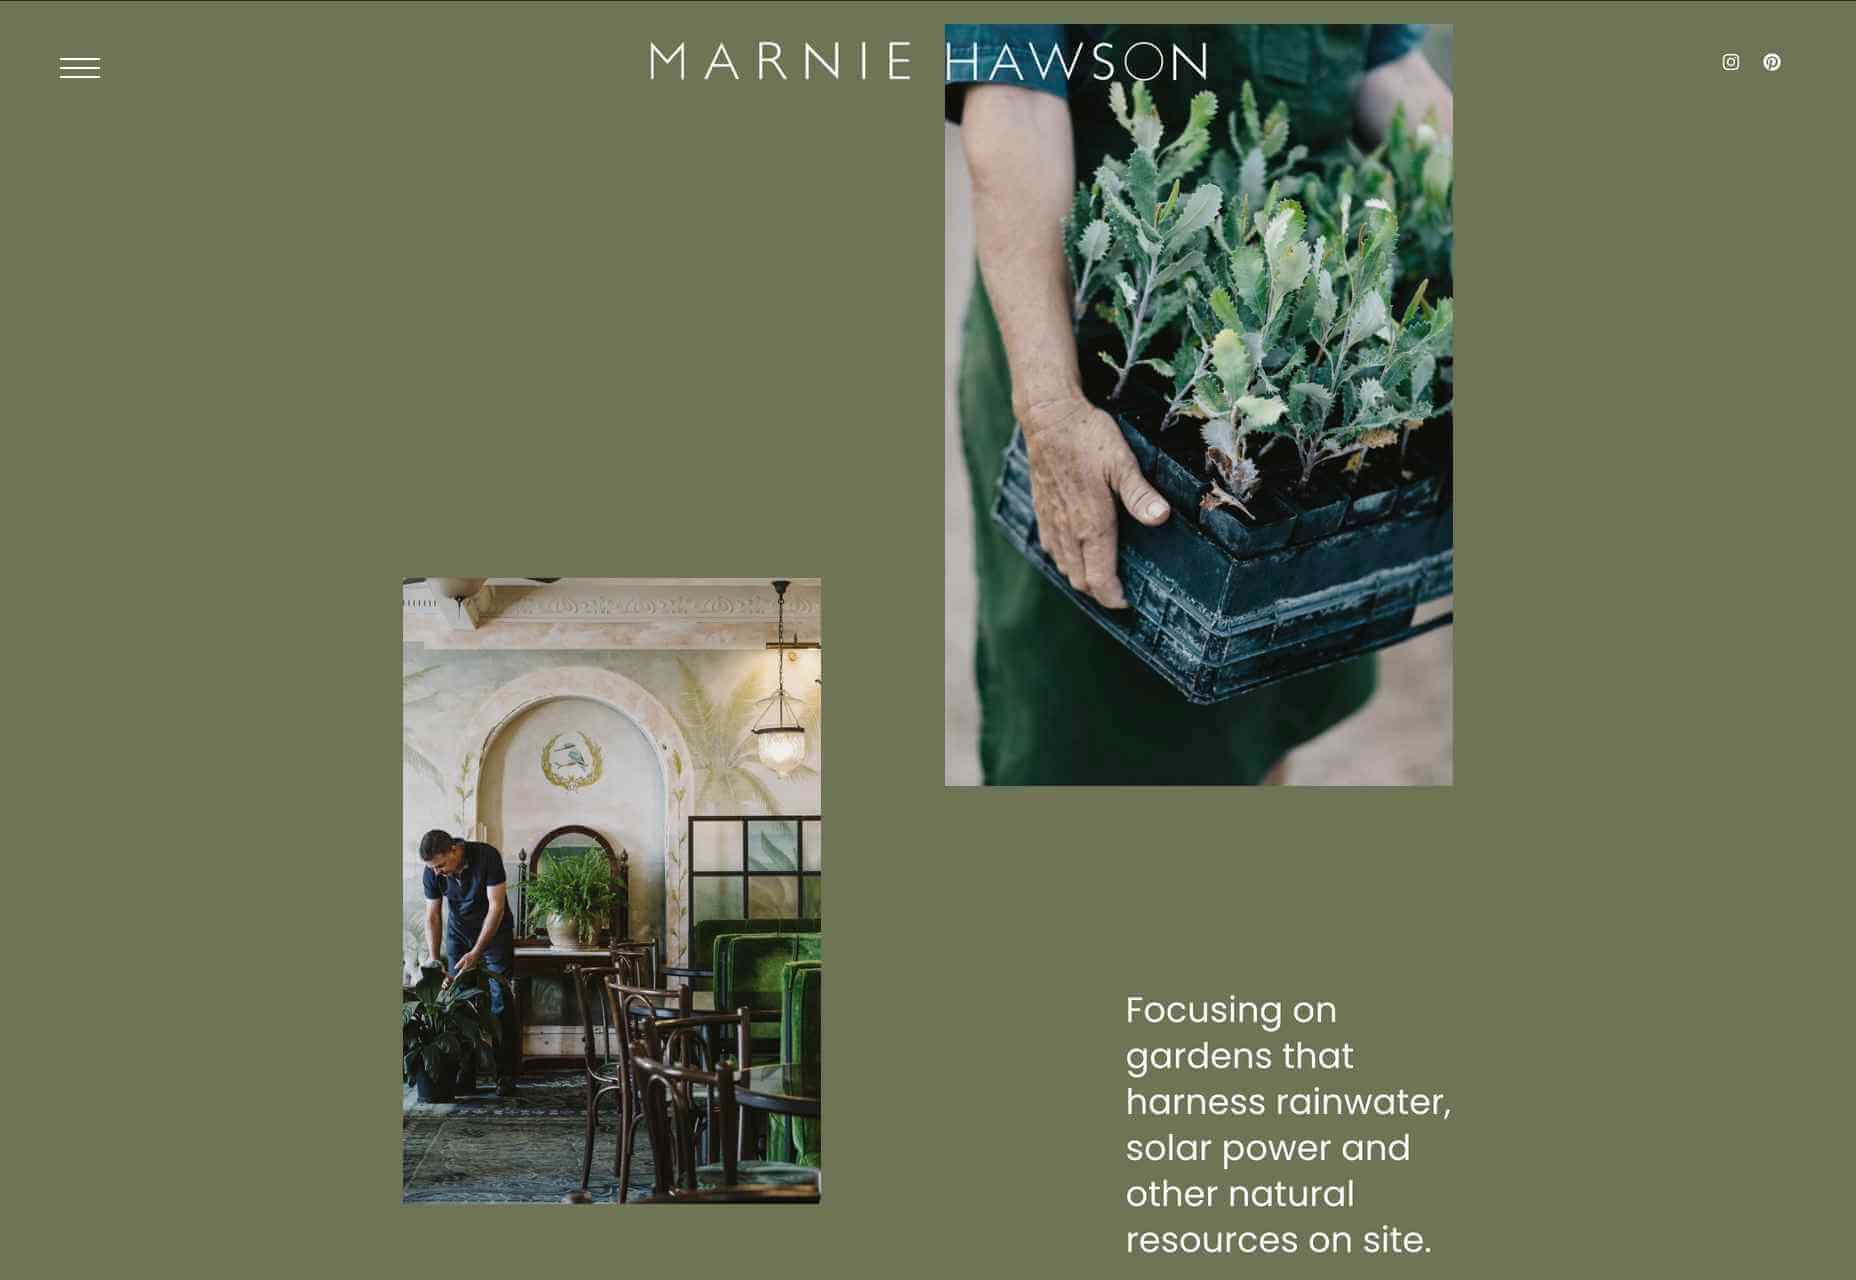
Photographer Marnie Hawson’s portfolio site is clean and simple, with a warm green (again) background and an engaging asymmetrical grid layout.

Kōpiko

Kōpiko is a micro-bakery that offers a sourdough delivery subscription service to its local area. It makes and sells only two products, and the single-page site is suitably simple. Putting the subscription form above the product and company information gets to the point without seeming pushy.

Banila Studio

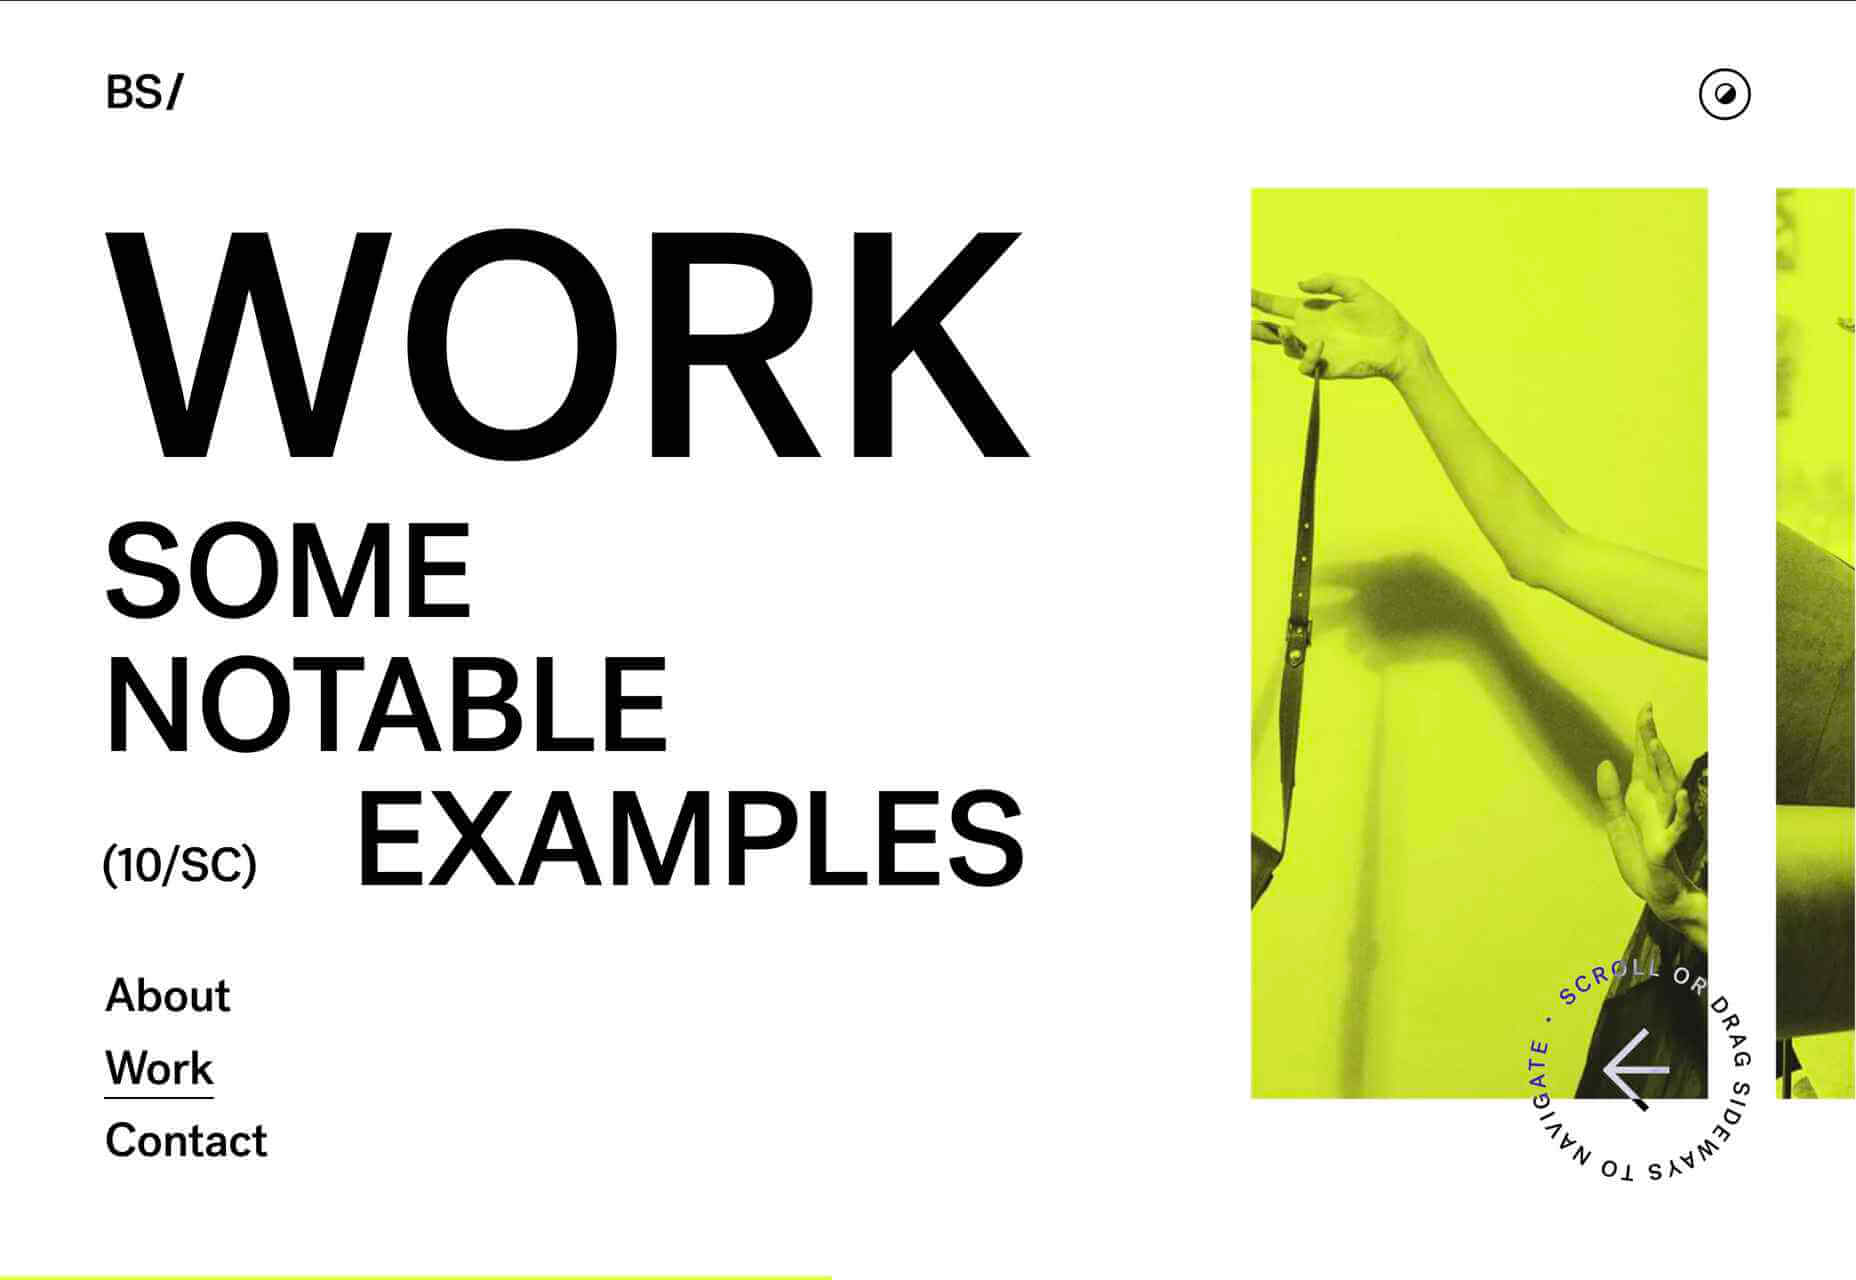
Banila Studio is a branding and design studio in Basque Country. This is a nice example of sideways scrolling, and the alternate color scheme option is a fun touch.

Big Green Egg

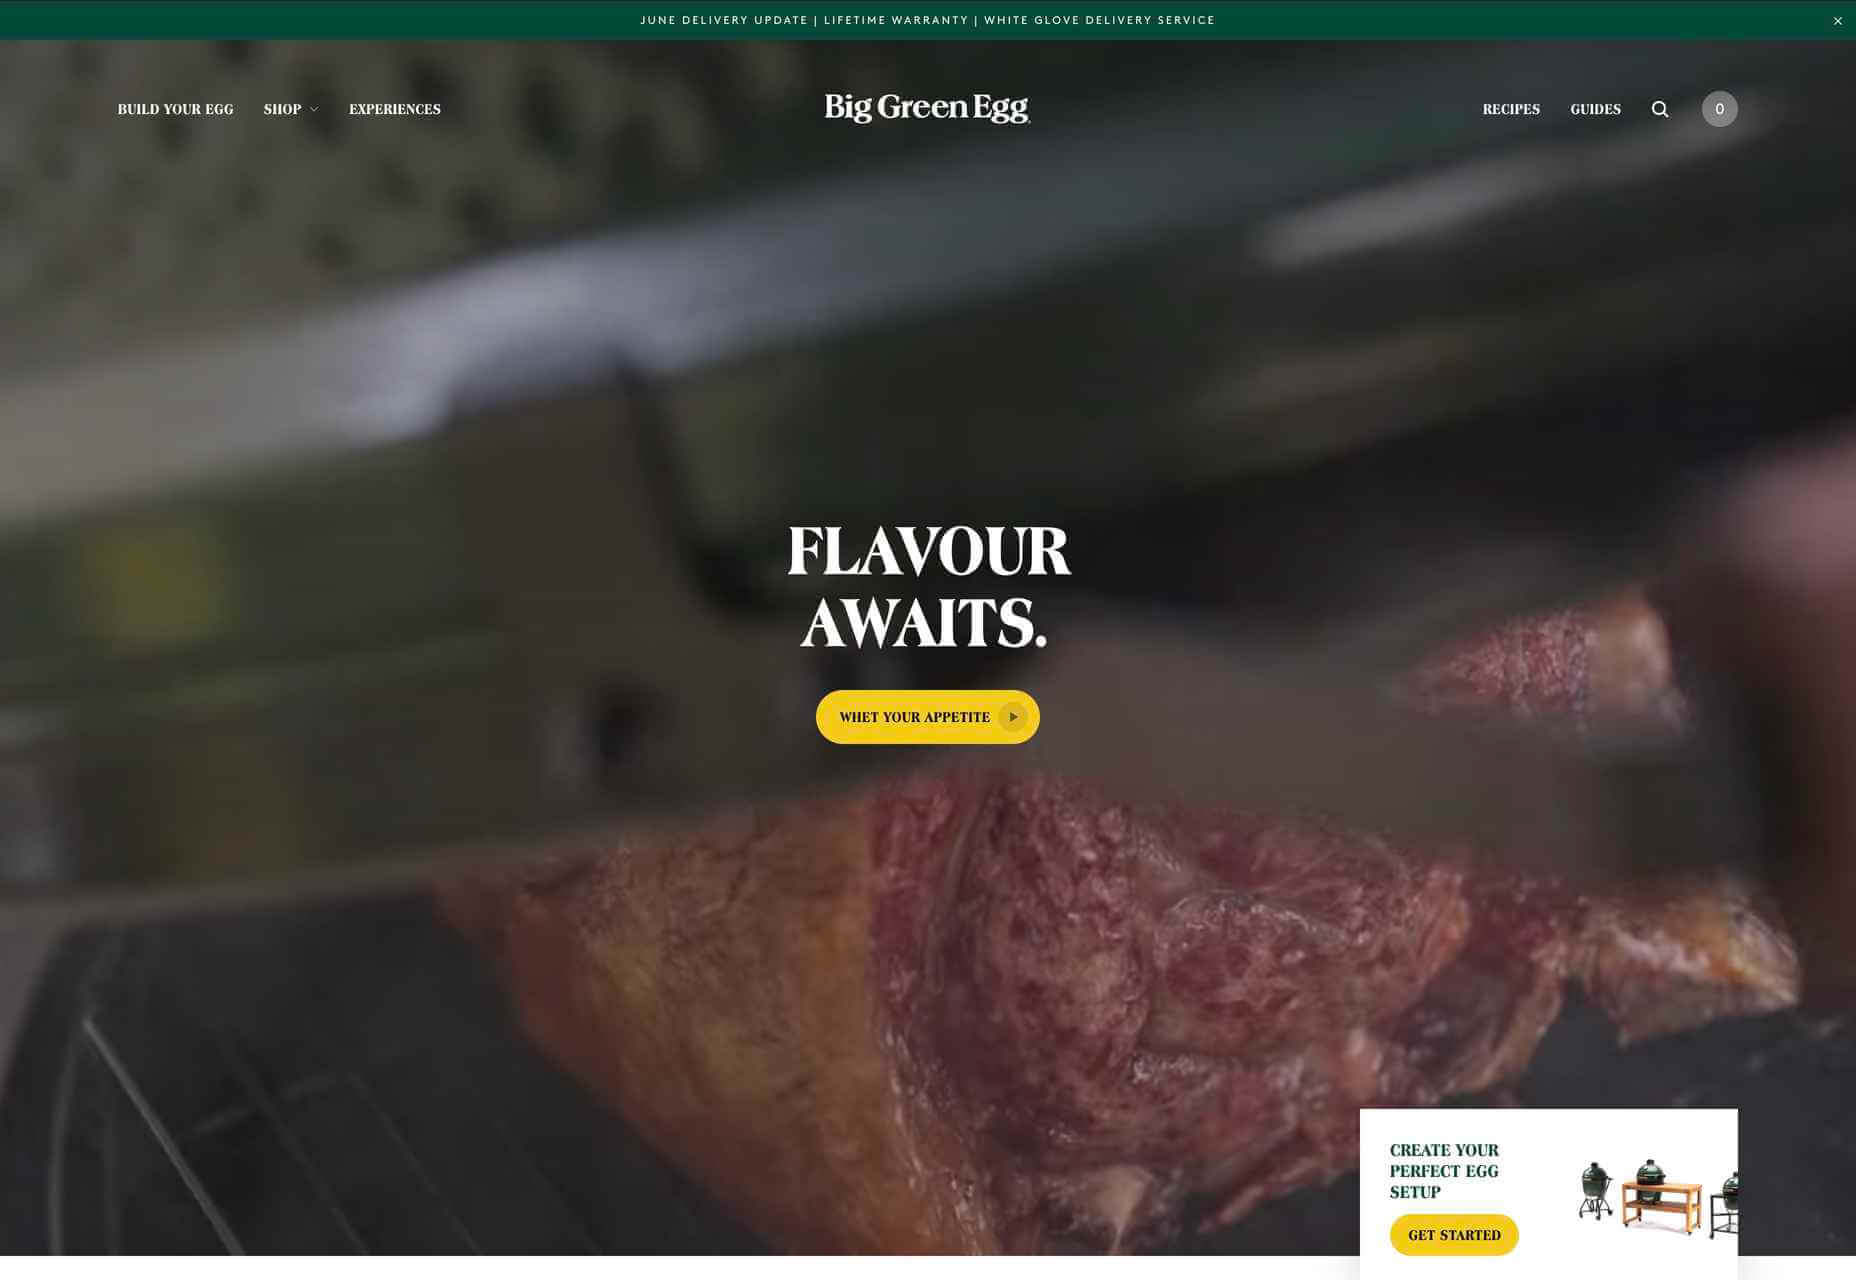
Big Green Eggs are high-end barbecue/outdoor ovens. Lots of high-quality food photography is the key here, along with a clear build-your-own setup process.

Pawzzles

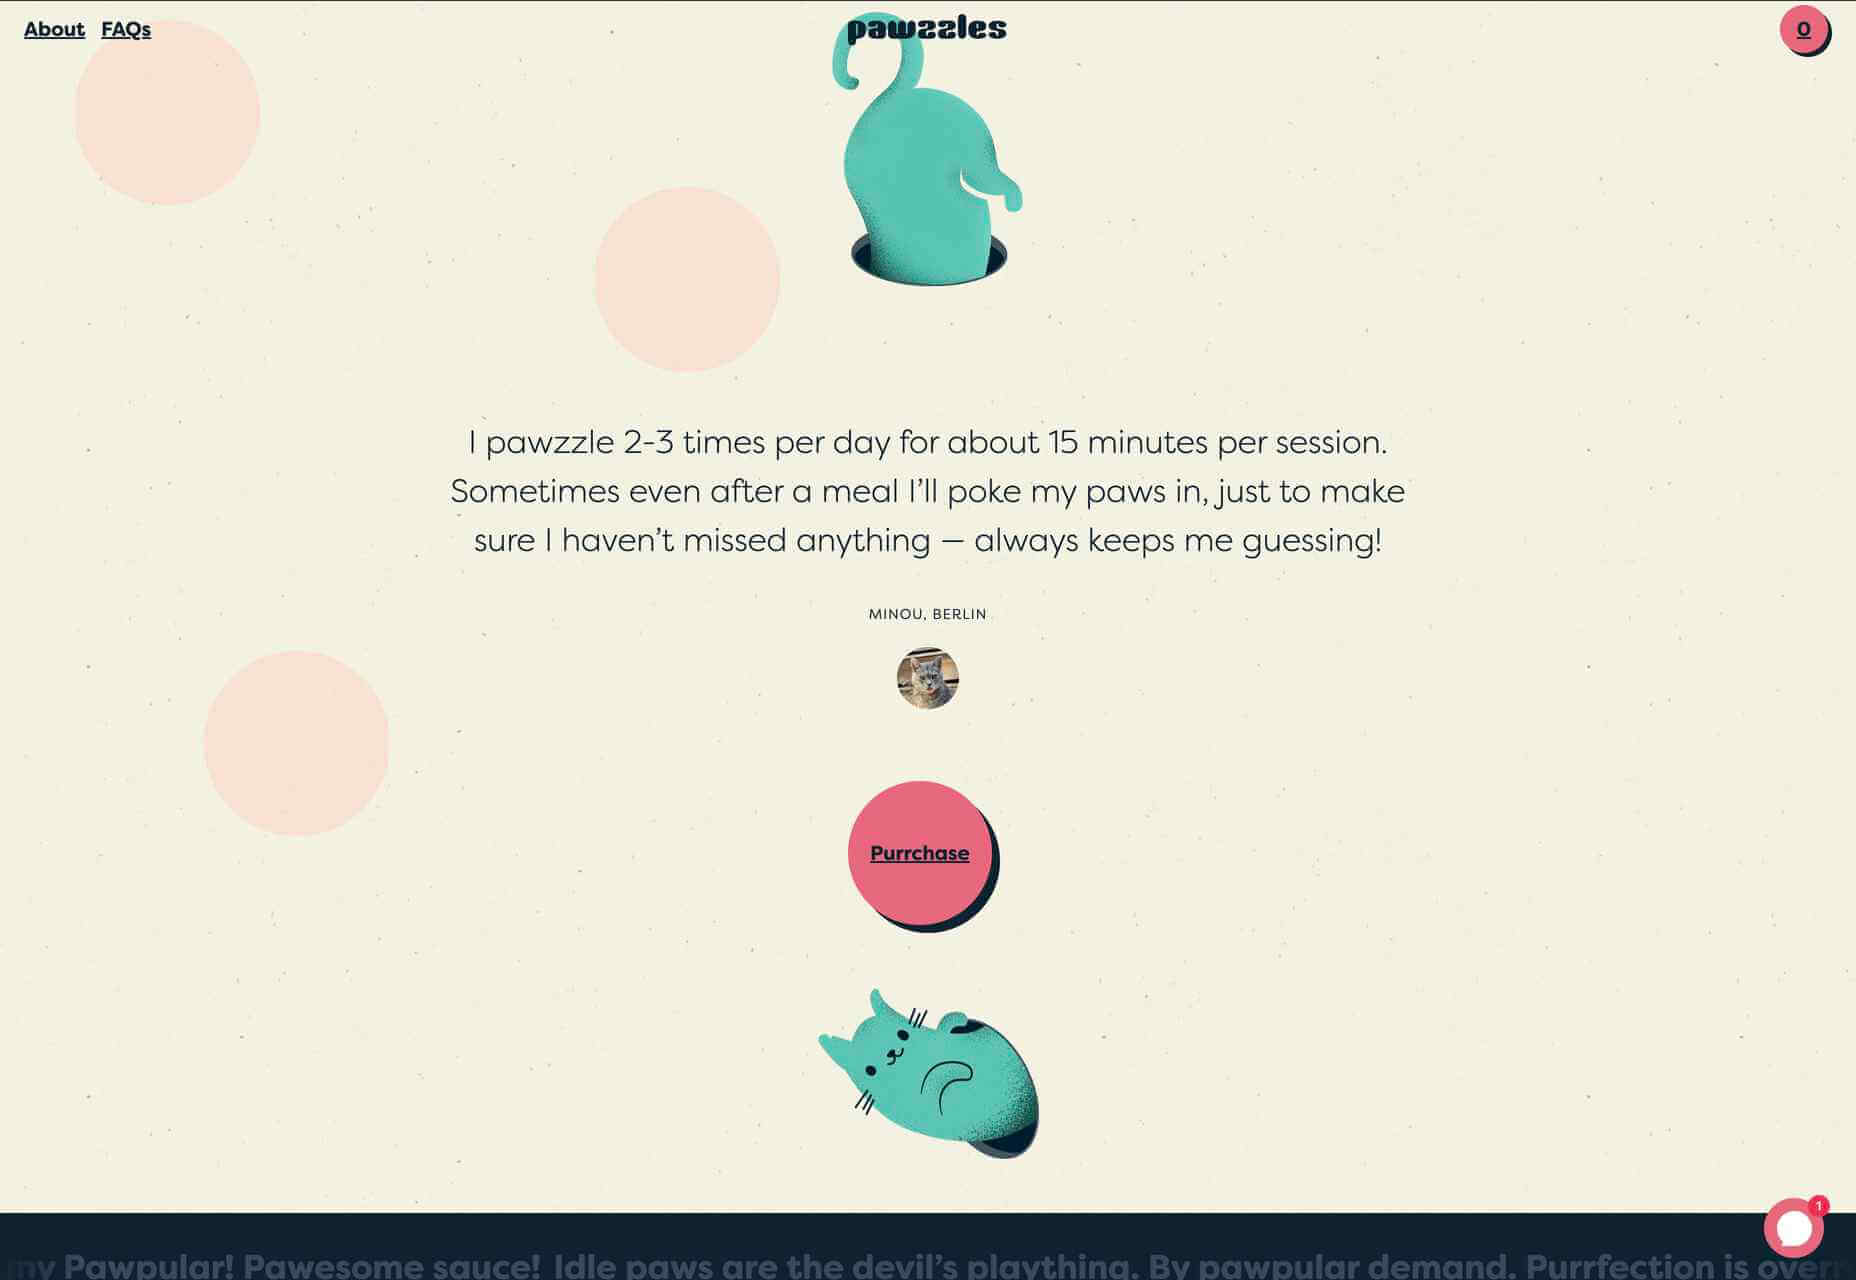
Pawzzles is a puzzle feeder toy for cats, and yes, there is a cat video. This has a fun feel, with some rather sweet illustrations and lots of silly puns. By cat lovers, for cat lovers.

Melopeion Organic Thyme Honey

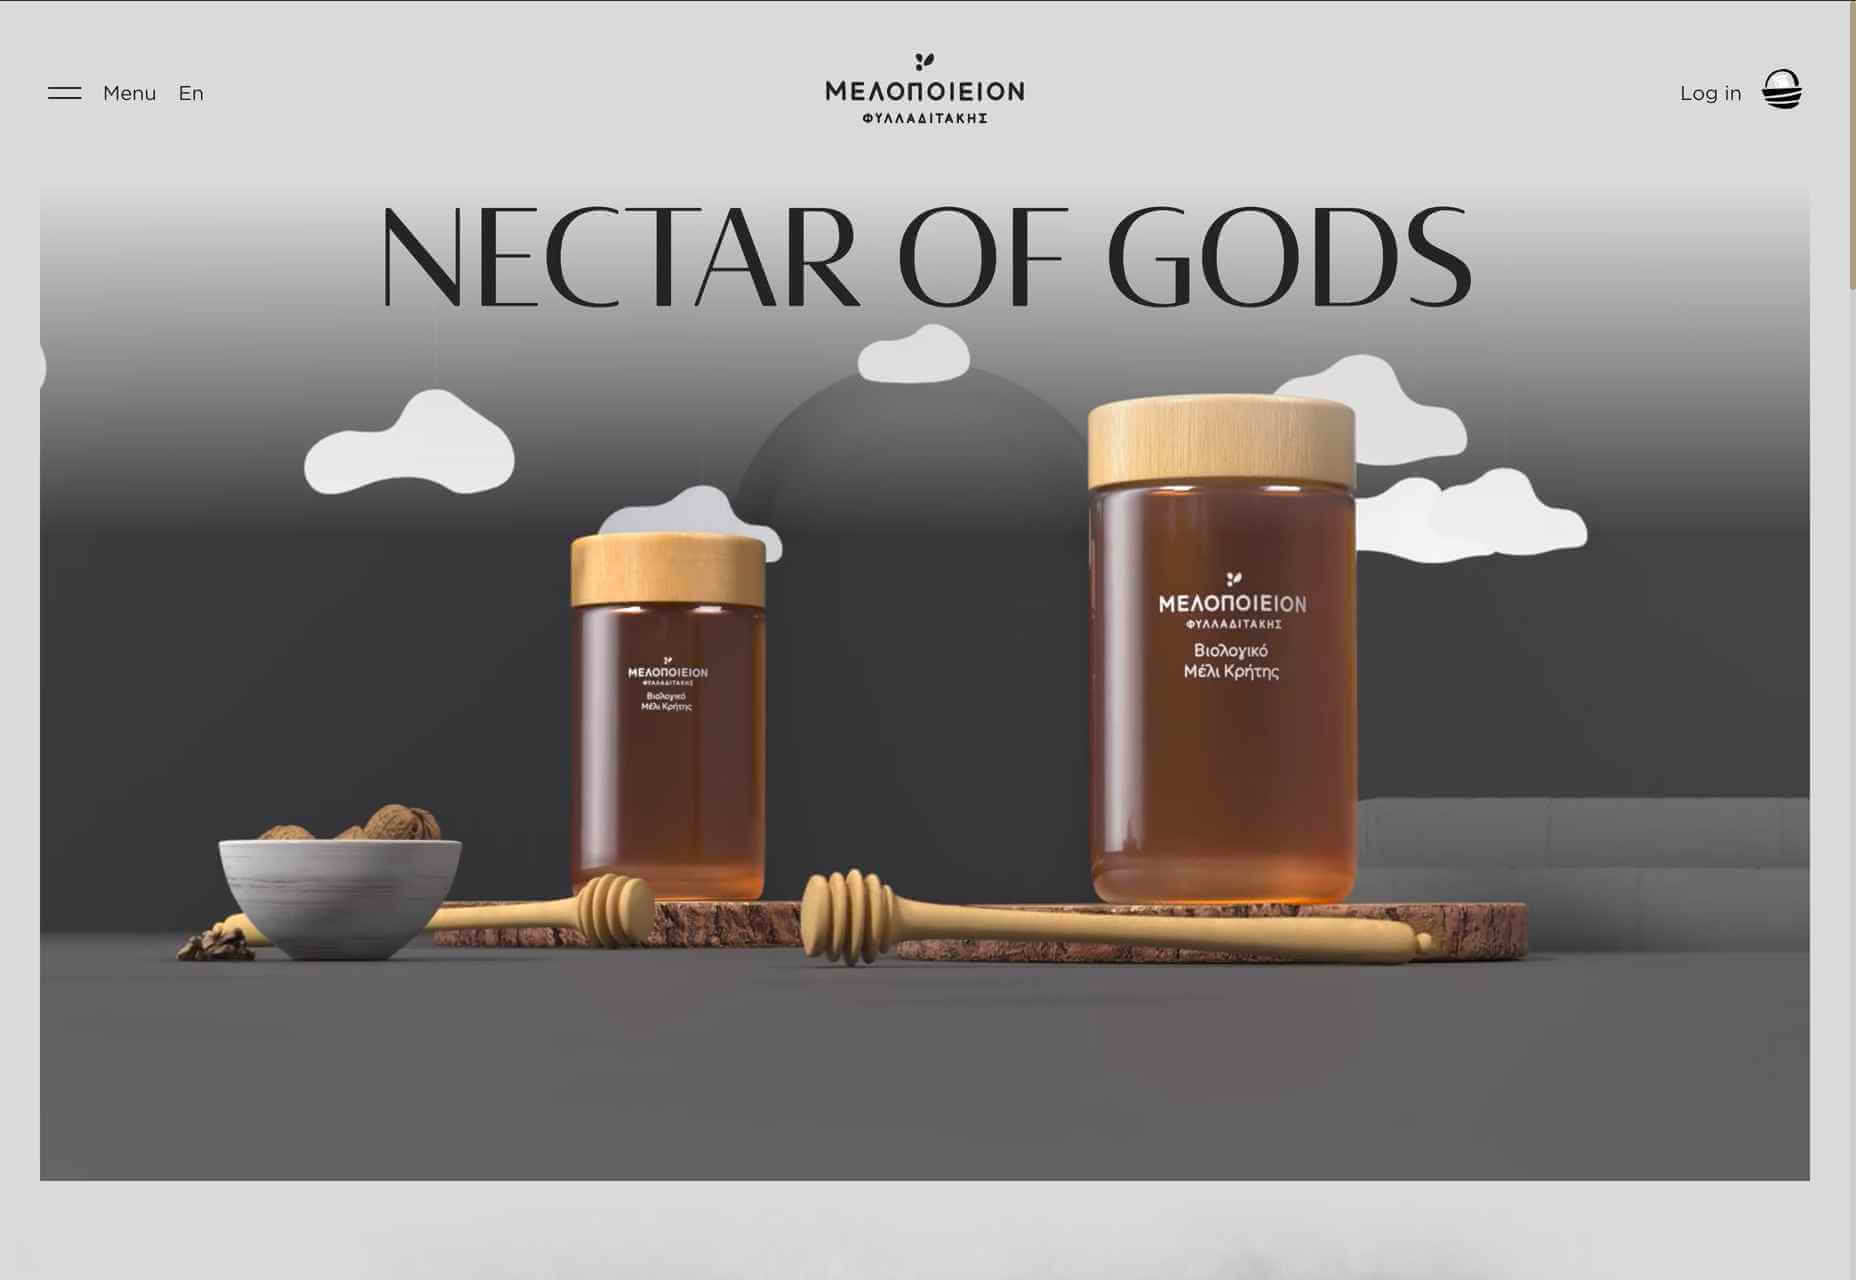
The choice of display type on this site — crucially one that works well for both the latin and greek alphabets — emphasizes the Cretan origin of Melopeion honey. The illustrations are appealing, and the shopping basket icon is an especially nice detail.

Brendel Wines

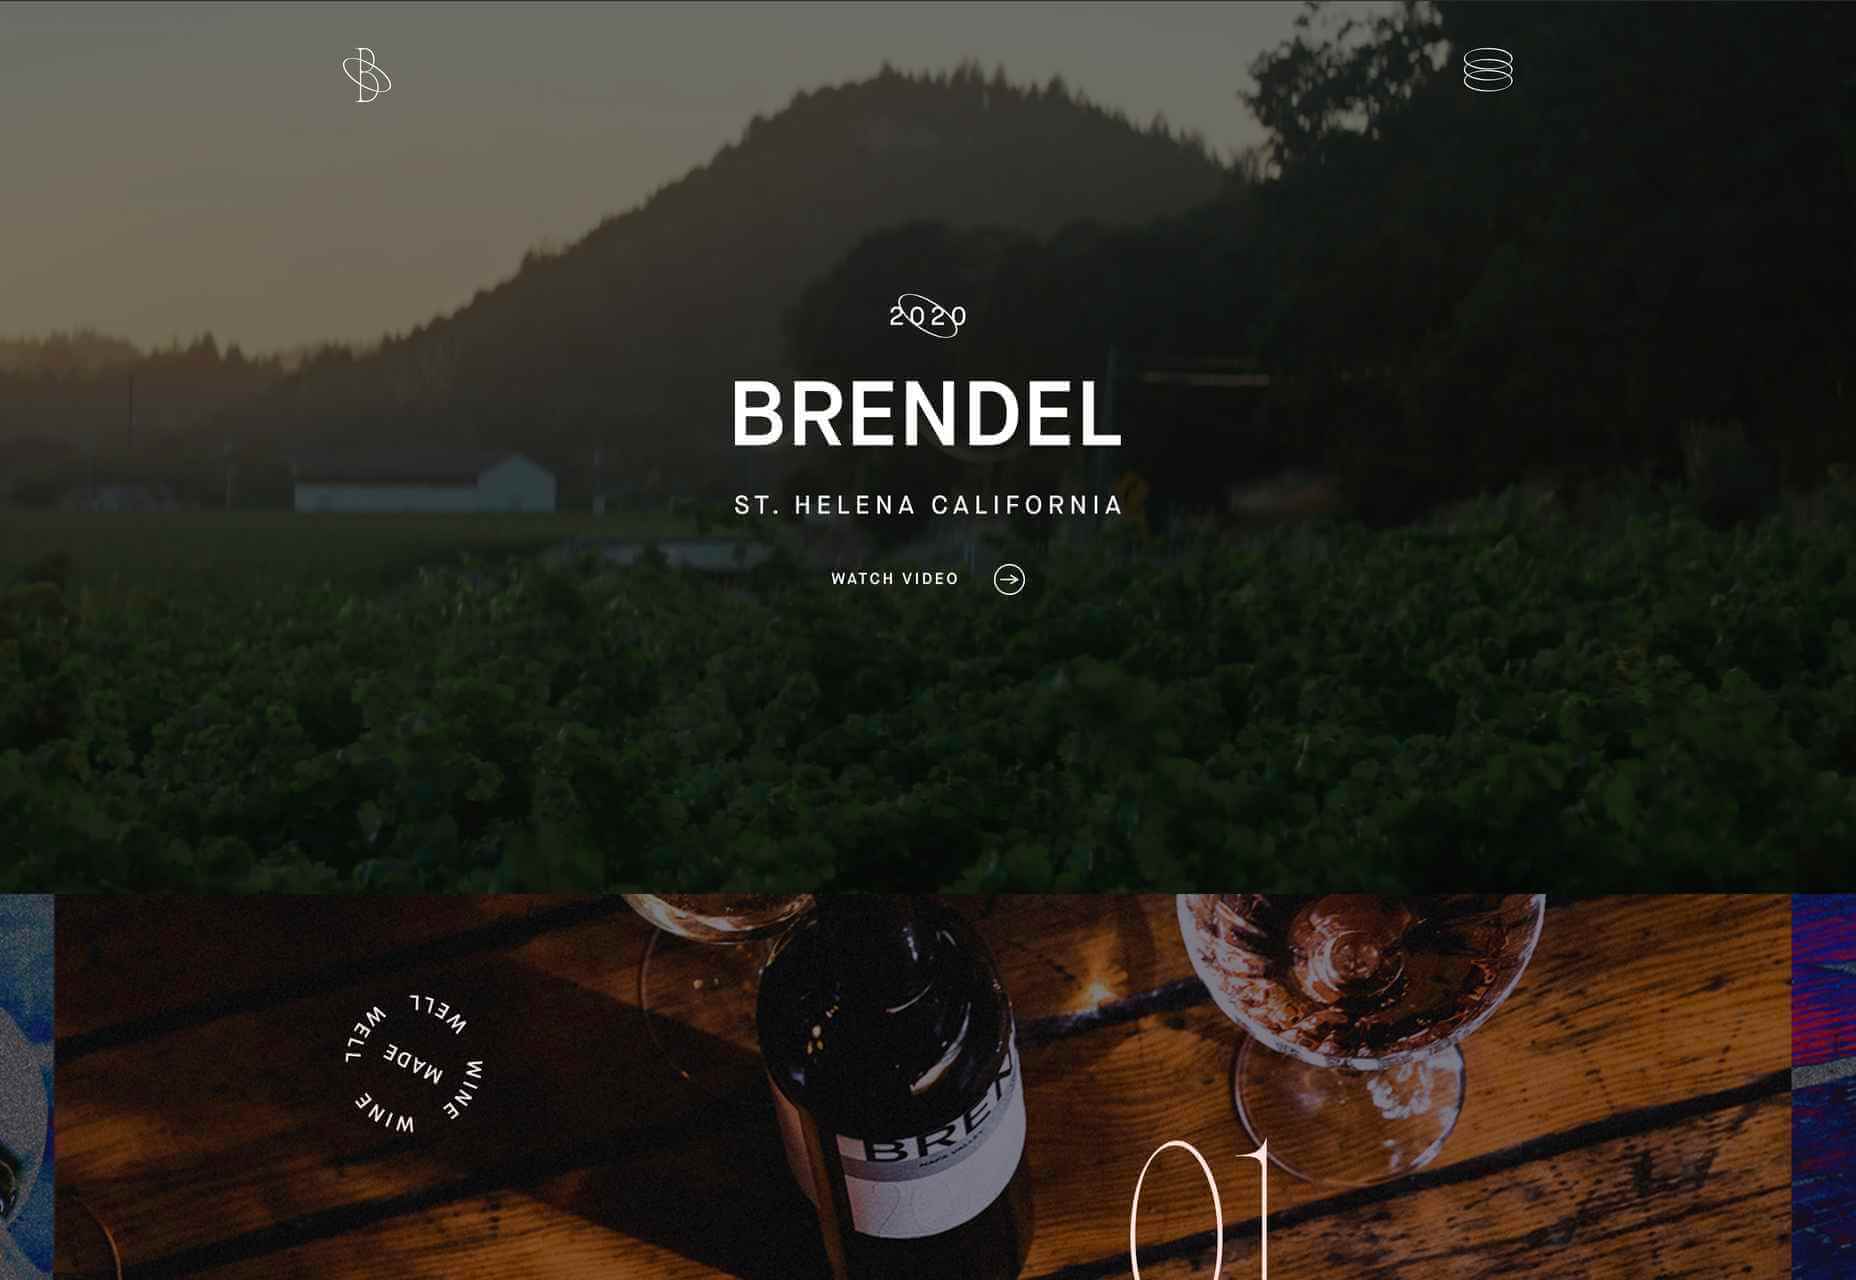
This site for Brendel Wines is all about photography, large background photographs, and video, as well as product shots. More specifically, the lighting in the images creates an atmosphere, a sense of warm summer evenings.

imNativ

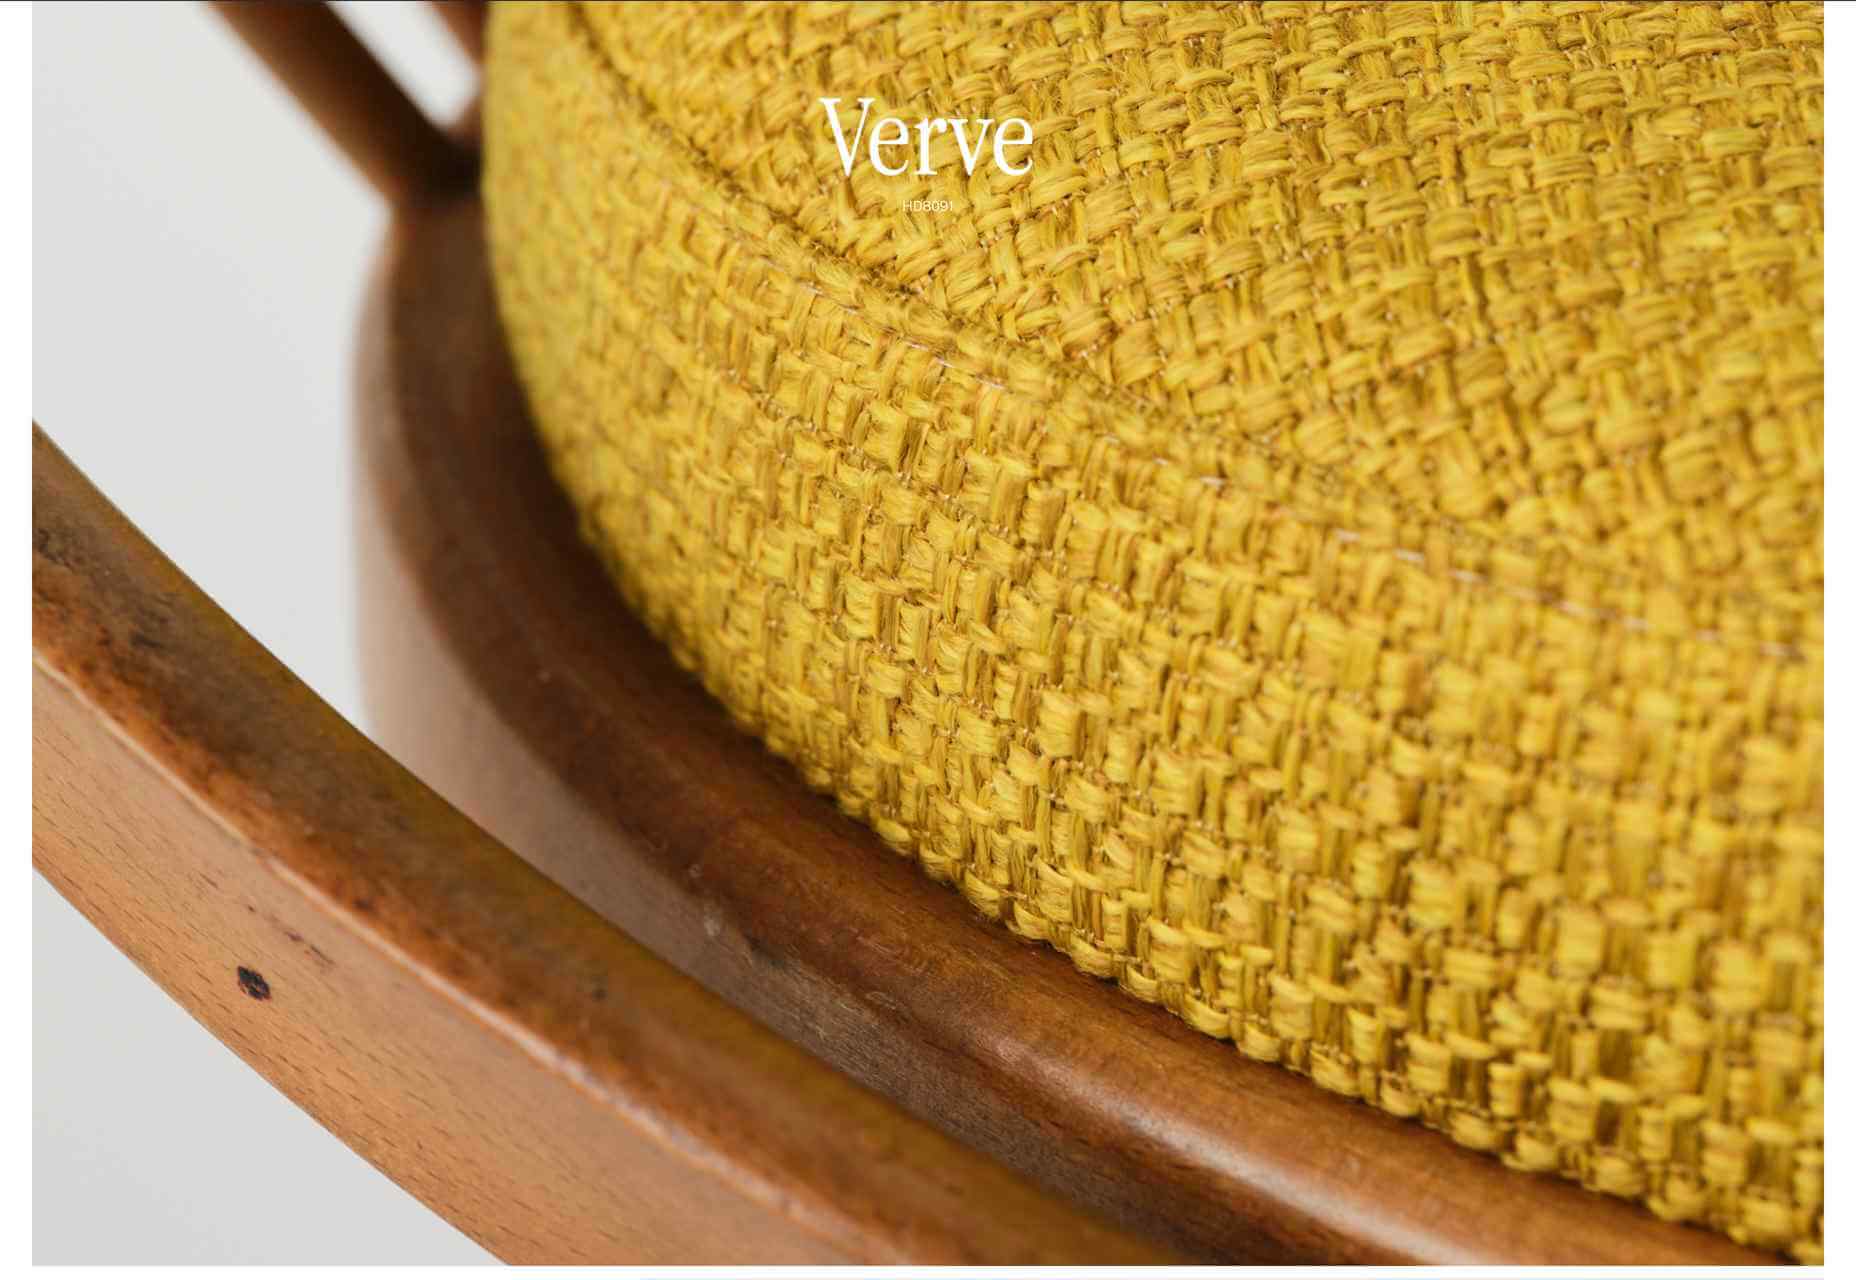
imNativ is an upholstery fabric: not the most exciting product to present enticingly. Some good, close-up photographs and well-styled images of the fabrics in use make them desirable.

Thursday Studio

Thursday design studio has produced a very pleasing, clean site for their own portfolio. The split-screen scrolling that changes to sideways scrolling on mobile is especially nice.

HALEYS Beauty

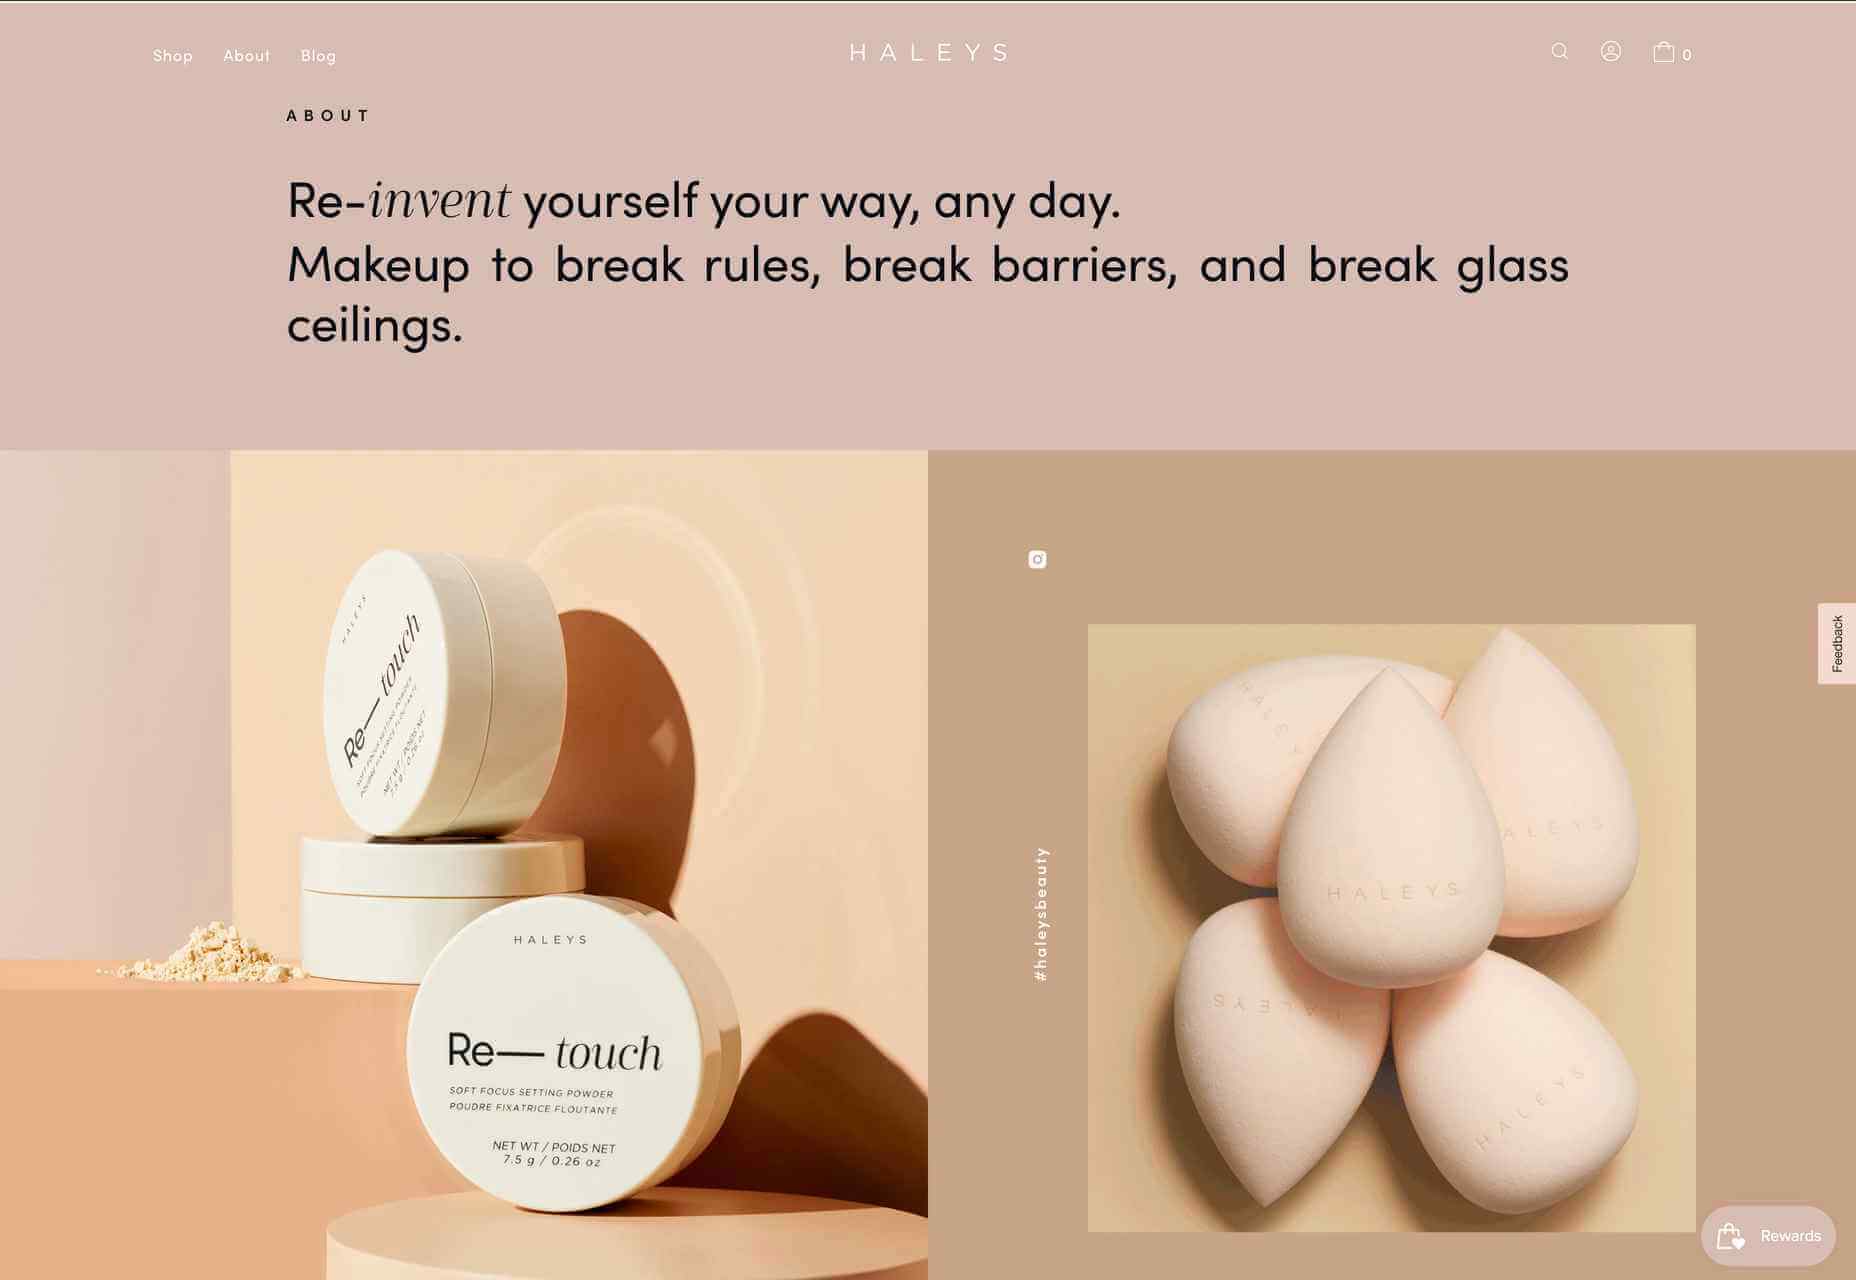
HALEYS Beauty uses a soft, powdery color palette and a clear, well-spaced grid, which gives it a modern, feminine feel.

Wookmama

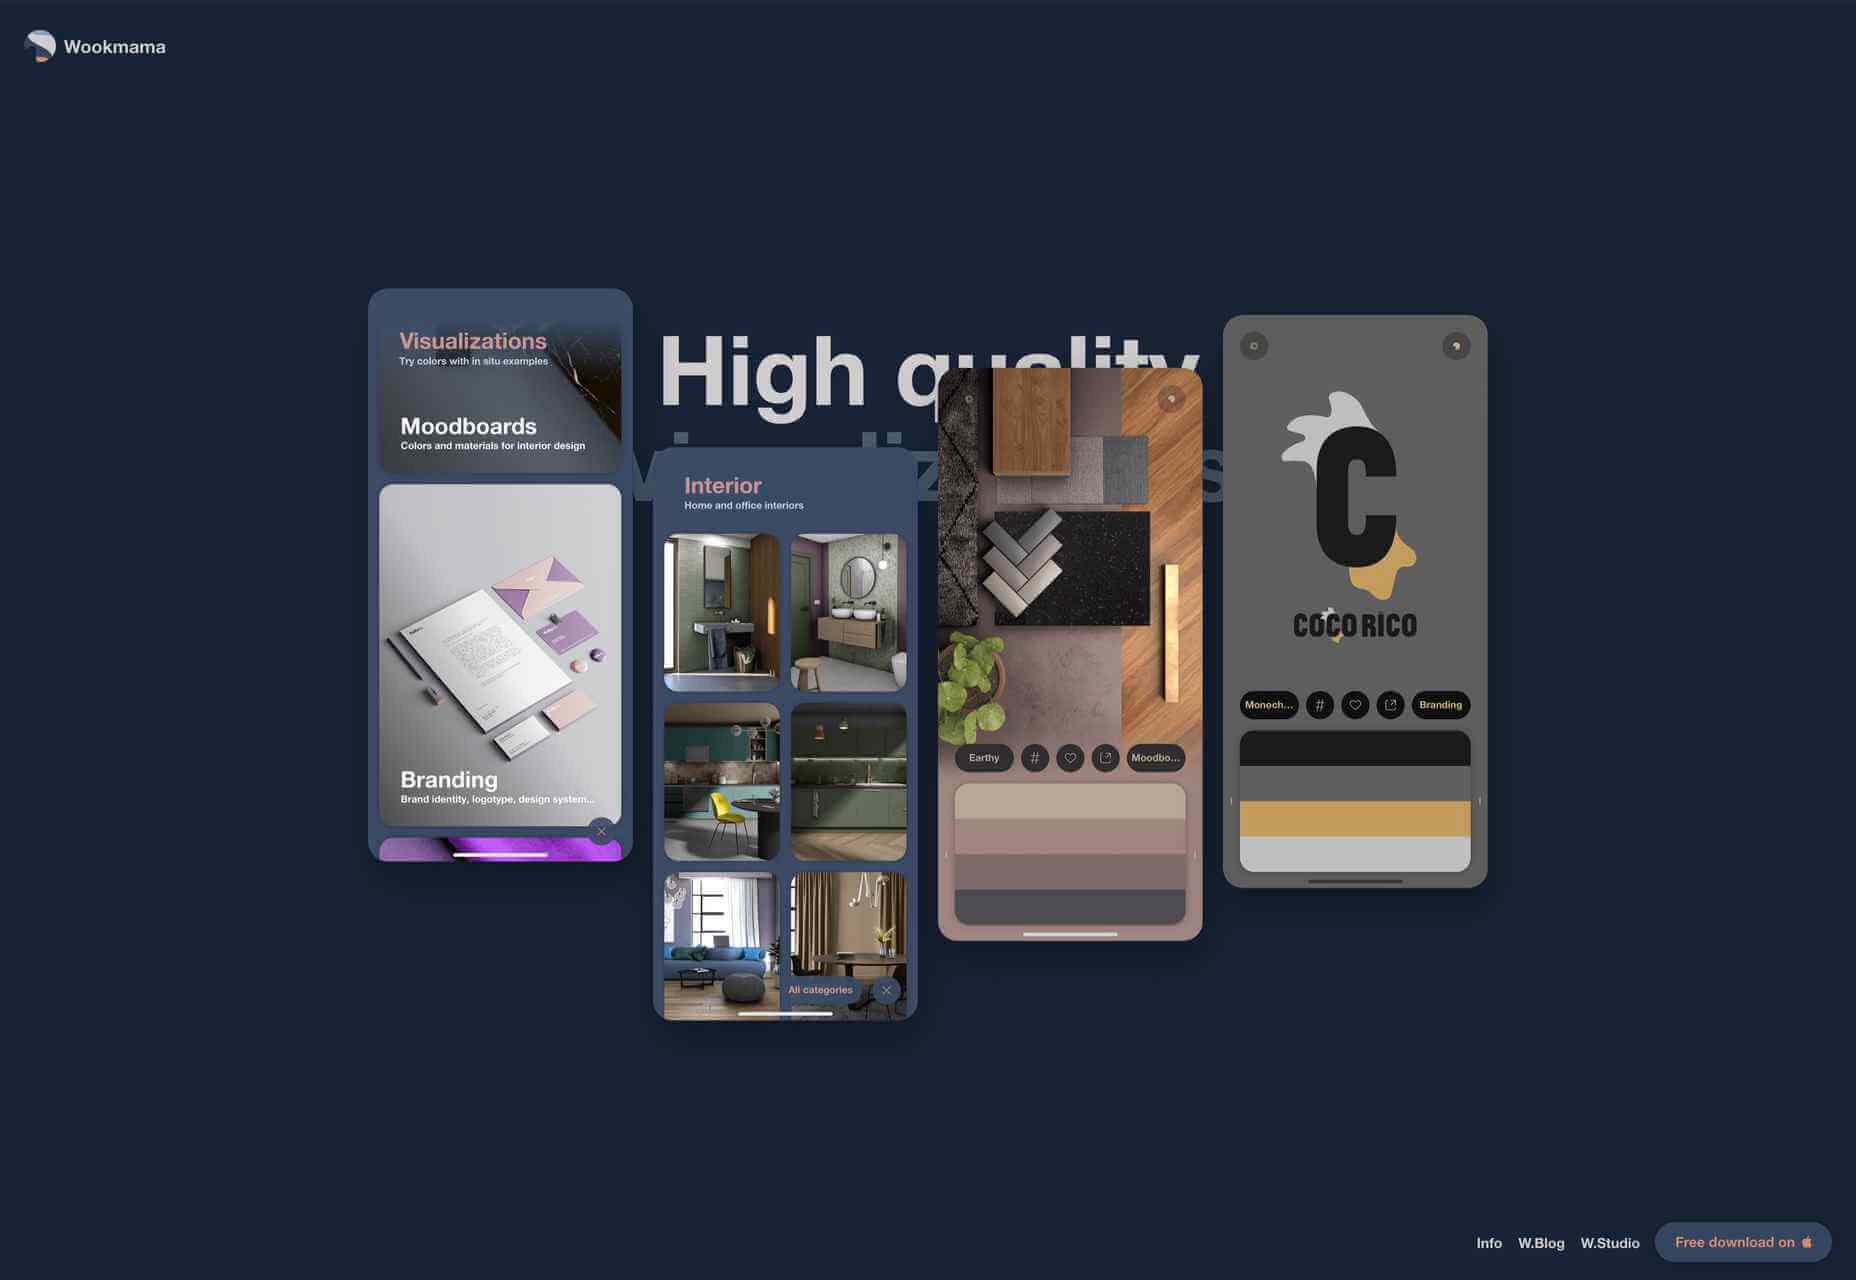
The Wookmama app is a color visualizer which displays palettes and applies those palettes to real-world images. Colour is, as one would hope, used well here, along with plenty of screen mock-ups.

Planet of Lana

Planet of Lana is the first game from Wishfully Studios, due for release in 2022. This teaser web page really allows the game illustrations to do the talking.

The Future of Office

The Future of Office is a sales site for office space to rent. It has a fresh, airy feel which reflects the open, minimal aesthetic of the spaces on offer.

Source

The post 20 Best New Sites, June 2021 first appeared on Webdesigner Depot.


Source de l’article sur Webdesignerdepot

The network model for security fails in the cloud. While the old on-prem model made sense in the earlier days of computing, the rapidly expanding suite of cloud providers, along with their infinite combinations of settings and services, now places an extraordinary burden on security teams to become cloud-centric. An enterprise that doesn’t fully understand its role in securing its data in the public cloud is taking unnecessary risks with its outdated security strategies.

In the traditional data center, the network provided a secure boundary for the organization. The network was carved up into zones and trusts were established within and between zones. Security architectures were established and tools deployed based on this strategy, which largely involved monitoring the traffic flows and enforcing controls where the zones met. But in the cloud, this approach is no longer relevant. Time and again, in breach after breach, headline after headline, the modern attack cycle, particularly in the cloud, starts with identity. Attackers seek access to the identity, then pivot between resources, discovering credentials and other identities that give them more and more access to get what they want.

Source de l’article sur DZONE

With the widespread acceptance of web standards, and the resulting deprecation of browser prefixes, there has been a noticeable change in the browser market. Where once browser manufacturers would try to lure users in with promises of feature support, now the focus is on privacy, speed, and developer tools.

When it comes to web development, you should really be testing on every browser and device you can lay your hands on; you’re probably already doing so using an app like LambdaTest, or BrowserStack.

When quality assurance testing, you probably work by market share: starting with Safari on mobile, Chrome on desktop, and working your way down to Opera and (if you’re a glutton for punishment) Yandax; naturally, when testing, it’s the largest number of users that concerns us the most.

But before you reach the QA stage, there are a number of browsers designed to assist development. Browsers that offer tools, especially for front-end developers, that assist with code and speed up development. Here are the best browsers for web development in 2021:

1. LT Browser

LT Browser is an app for web developers from LambdaTest. Like many of the apps in this class, it offers side-by-side comparisons of a site in different viewports. Additionally, LT Browser has a number of features that make it stand out.

As well as previewing web pages, LT Browser offers developer tools to rival Chrome, which is handy if you want to see how changes across different devices affect your Lighthouse scores. LT Browser also supports hot-reloading, which means when you make a change to your code, you don’t have to hit ‘refresh,’ the viewports simply reload — it’s surprising how much of a time-saver that simple addition is.

LT Browser requires a LambdaTest account, there is a free plan, and paid plans start at $15/month.

2. Firefox Developer

The best conventional browser for web development in 2021 is the developer edition of Mozilla’s Firefox.

The standard edition of Firefox is an excellent browser, packed with features, and privacy-focused. The developer edition adds to this with a suite of tools aimed at developers. The CSS and JavaScript debugging tools are superb, and the Grid tools are unparalleled for coding layouts with CSS Grid.

Firefox Developer is free to download.

3. Polypane

Polypane is one of the new generation of web browsers that are firmly intended as development aids rather than browsers. Polypane allows you to compare different viewports and platforms by placing them side by side. Interactions like scrolling are synced.

Polypane takes a step further than many browser apps in this class by showing social media previews. It even has a suite of accessibility tools, including some handy color blindness simulators.

Polypane has a 14-day free trial, and plans start at $8/month.

4. Blisk

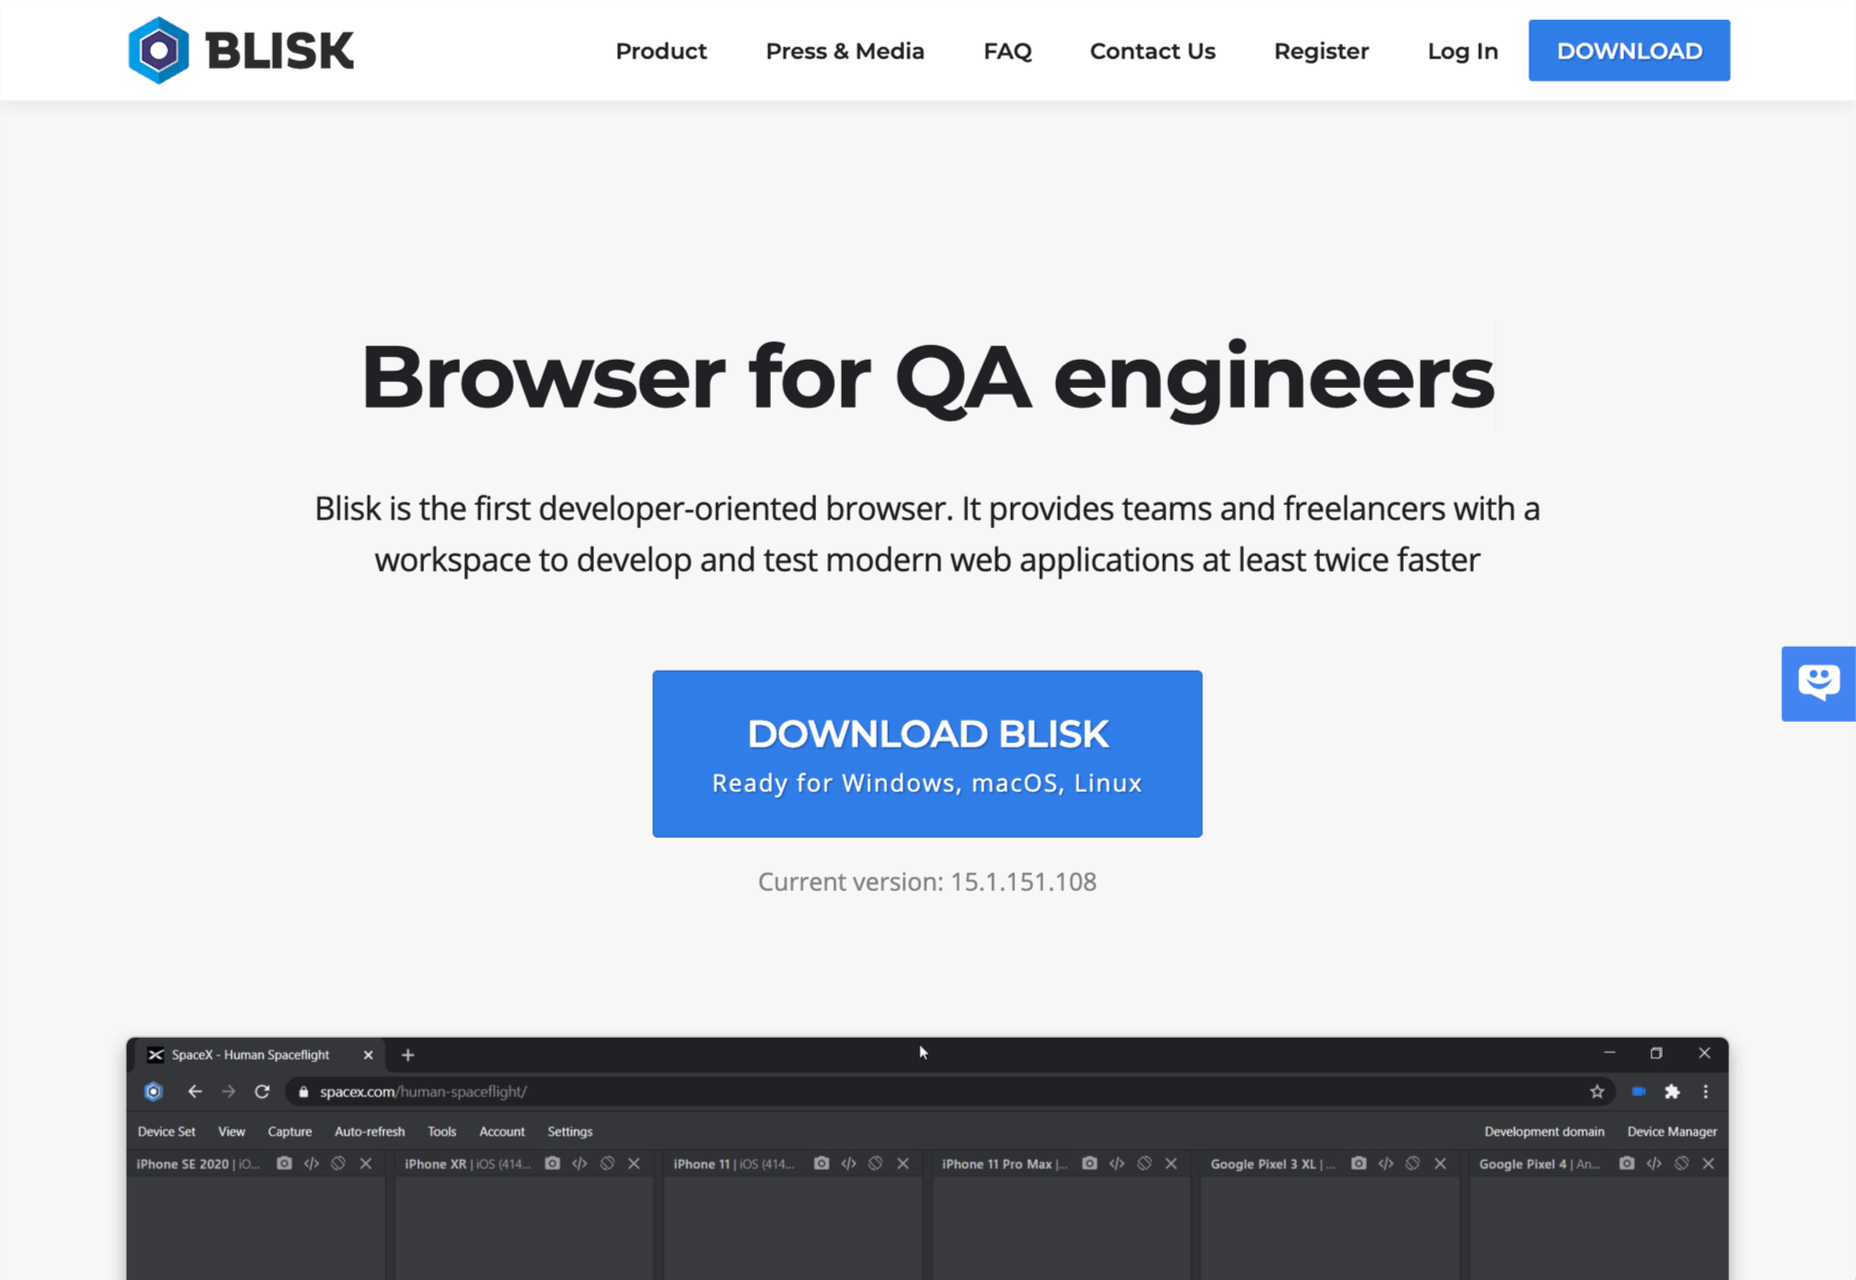
Blisk is another browser for developers that allows you to line up a collection of viewports in a single app. URL and scrolling are synced, making testing interactions and animations effortless.

Blisk is awesome fun to play with and delivers a great preview of a responsive design. But be warned, synced viewports can be addictive, and it’s easy to line up browsers and become hypnotized by the synchronized movement; you’ll need a very large screen to get the most out of Blisk.

Blisk plans start at $9.99/month.

5. Sizzy

Sizzy is another app that allows you to view multiple viewports at once. It also has synchronized interactions, and like many competing apps, Sizzy allows you to screenshot different views.

Sizzy also includes a very clever synchronized inspect tool, so you can focus on individual elements across different viewports. It’s an excellent option for debugging, particularly if you’re digging into someone else’s code.

Sizzy has a 14-day free trial, and paid plans start at $7.15/month.

6. Brave

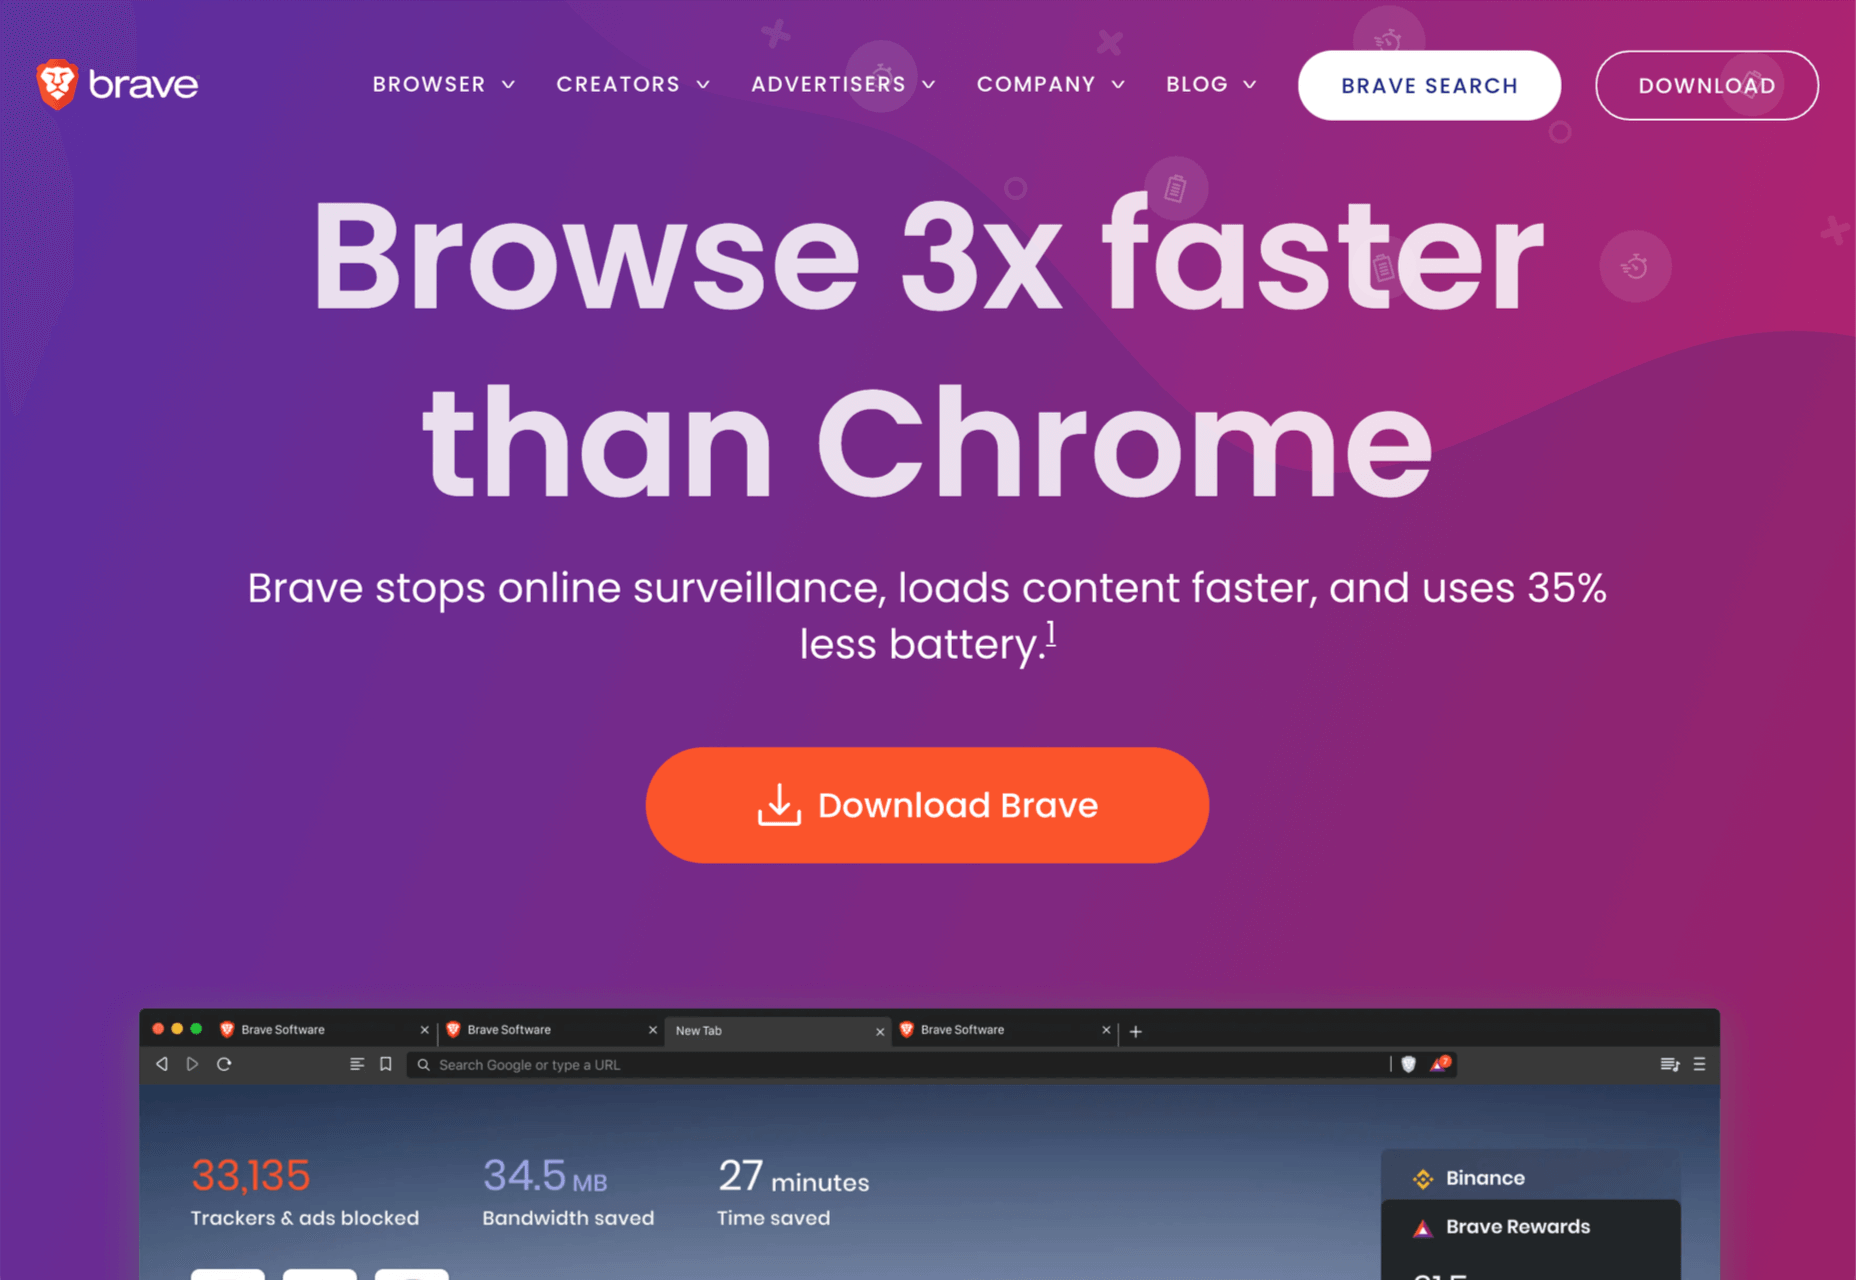
Brave is a privacy-focused browser that runs up to three times faster than Chrome. If you’re someone who balks at rendering speeds on most sites, Brave could be for you.

Brave’s main benefit for developers is that it supports Chrome extensions while maintaining privacy — it can even access the Web using Tor if simple privacy mode isn’t enough for you. There are hundreds of useful Chrome extensions, and if you avoid Chrome due to privacy concerns, then Brave solves your problem.

Brave is also pioneering a new system for monetizing site revenue, allowing viewers to tip sites, and soon, to control how advertising revenue is distributed.

Brave is free to download.

7. Chrome

Boring it may be, but Chrome is still the world’s most popular browser from the US to mainland China. Where once sites were “best viewed in IE,” Chrome is now the Web’s default.

No matter the site you’re designing, it has to work well in Chrome, and no simulator is as good as the real thing.

In addition to being the benchmark for page rendering, Chrome developer tools are the simplest way to access your Lighthouse scores, which helps you track down issues that may be holding you back in Google’s search results.

Chrome is free to download.

Source

The post 7 Best Browsers for Developers in 2021 first appeared on Webdesigner Depot.


Source de l’article sur Webdesignerdepot

Inclusive design is often mistaken for accessibility, or even used as an interchangeable term, which is a good indication that most designers don’t know what it means.

Accessibility is a process that seeks to mitigate issues in a design that is not sufficiently universal; inclusive design increases the universality of the design. In real-world terms, an accessible building may replace its front steps with a ramp; an inclusive building is constructed at the same level as the sidewalk.

Accessibility is concerned with objective, measurable improvements. It’s a UI concern. Inclusive design is subjective, more difficult to measure, and is a UX concern. By designing inclusively, we extend our designs to the widest possible user group and contribute to a better society. Here are three ways to get started.

1. You’re the Edge Case

When designing, it’s normal to assume that we are normal. After all, we are the center of our experience of the world. Everything from our preferences to our empathy stems from our individual place in time and space.

When we use the term “edge case,” what we’re referring to is a minority experience, a way of using our design that is uncommon or distinct from our own expectations.

But what would happen if we treat ourselves as the edge case? What if all of the experiences that we deem to be minority experiences are actually the core, common user experience of our design?

If we start from the position that we are the one out-of-step with the design, that most people will not think or act as we do, then we’re eliminating thousands of biased decisions about how our design should be.

Draw From Life

It has always surprised me that in Europe’s dark ages — ranging from the decline of the Roman empire to the Proto-Renaissance — it didn’t occur to anyone to draw from life. Artists drew things the way they thought they should look, which is why so many Byzantine icons of the infant Jesus look like a middle-aged blonde man that has been shrunk.

It’s important to draw from real life as much as possible. That means abandoning personas — which are by definition under-representative and frequently loaded with bias — and engaging with actual users. Most of all, it means taking a step back and opening your eyes.

2. Stop Making Inclusive Design Part of Your Practice

Inclusive design cannot be a part of your practice; it’s an all-encompassing attitude. Your design practice must be inclusive. At least, it should aspire to be…

As human beings, we are biased—all of us. The reason for that is that bias — be it racism, misogyny, nationalism, homophobia, or anything else — is cultural. And we all exist within society. We’re all bombarded with information that reinforces those biases every day.

Accept that you have biases and that your biases will pull your design work away from the inclusive solution you aspire to. But equally, accept that by acknowledging your biases you’re limiting the influence they have over your decision-making.

Do Not Require Users to Self-Identify

It’s divisive and abusive to partition users into groups, especially when the act of doing so perpetuates bias.

One of the most encouraging developments of the last decade has been the introduction of the answer “prefer not to say” in response to personal questions about race, gender, status, and so forth. But if “prefer not to say” is a valid option, in other words if you don’t actually need to know, then why ask at all?

Beware Occam’s Razor

Occam’s Razor is an often misquoted idea that (to paraphrase) states that when making a decision, the one with the least assumptions is the correct choice.

The problem is that Occam’s Razor implies that there is a ‘correct’ decision. But in fact, inclusive design benefits most from a flexible UI and a high tolerance for deviation.

If you can identify the assumptions in a design decision sufficiently to count them, then you’re best served by testing, not comparing, those assumptions.

3. Design Flexibility Into Everything

There is no such thing as a “natural normal,” but there is “perceived normal.” Much of our behavior is governed by the experiences we’ve had since we were very young. Despite existing somewhere on a scale of ability and preference, most of us have inched towards what we have been told is a “normal” range all our lives.

However, it is a physiological fact that every characteristic exists somewhere on a spectrum. There are no black and whites; it’s all grey.

When we design a site or app, we tend to silo certain characteristics into one. Someone who is visually impaired is treated to the same ‘solution’ as someone who is blind, even though visual impairment can range from screen reflections on a sunny day to someone who was born without optic nerves.

There are people who have lost their sight through degeneration or accident and will be able to make visual connections based on remembered visuals. Other people have never seen anything and their conscious mental process isn’t figurative at all.

To accommodate the full gamut of possible interactions with our design, we need to design to a scale, not with absolute values. This means thinking less about set colors and sizes and more in terms of contrast and scale.

Avoid Communicating in Color

Few areas are more indicative of a spectrum of experiences than color.

Color is instantly problematic for designers because quite apart from color blindness, color has deeply personal associations.

Over the last couple of decades, it’s been repeatedly proven that it is contrast, not hue, that increases engagement. Green does not always mean go; red does not always mean stop.

Color involves so many biases and assumptions that it’s simply better to work with contrast than select the ‘right’ hue.

Bigger Typography (Sometimes)

In the first draft of this article, I wrote that increasing the scale of your typography was always good.

My rationale was that some users will benefit from larger type, and zero users will be hindered by it. But that’s not true. Larger type means fewer lines per viewport, which means more scrolling; not a problem for some users, but potentially an issue for those with motor control issues.

That was one of my biases right there.

Congratulations, You’re Now An Inclusive Designer

Good design is self-aware in origin and unselfconscious in execution.

Inclusive design isn’t about enabling access for everyone; it’s about designing for a user experience that is welcoming and respectful. Every one of your users should feel not just enabled but validated.

Inclusive design isn’t a series of items on a checklist; it’s an ideal, like harmony or beauty, that we may struggle to achieve but that we should strive for nonetheless.


Image via Pexels.

Source

The post 3 Ways to Design More Inclusively first appeared on Webdesigner Depot.


Source de l’article sur Webdesignerdepot

This month’s new tools and resources collection is a mixed bag of elements for designers and developers. From fun little divots to tools that can speed up development, you are sure to find something usable here.

Here’s what new for designers this month:

June’s Top Picks

Codewell

Codewell is a service to help you learn, practice, and improve HTML and CSS skills with real templates. The benefit here is pretty obvious. When working with real templates, you can see the result of actions and changes. The tool includes free and premium options with new templates to work on weekly. Everything works in a responsive environment, and free plans have access to free challenges and a Slack community; a paid plan also includes source files and premium challenges. You need a Github login to get started.

LoomSKD

LoomSDK is an easy and reliable way to add video messaging to your product – and it’s free. The SDK enables your users to record, embed, and view with Loom videos directly within web apps – adding clarity and context to any workflow.

Pintr New Image

Pinter New Image turns photos into funky and fun line images. Upload an image with plenty of contrast, use the controls to set the look you want to achieve, and download. The new images are available as PNG or SVG. Maybe use it to create your next profile photos for social media or a nifty avatar.

Terms & Conditions Apply

Terms & Conditions Apply is a game that explains all those little pop-ups that you accept to enter and interact with websites. You are tasked with a mission to start the game: Do not accept terms and conditions, say no to notifications, and opt-out of cookies. Can you do it?

Khroma

Khroma uses artificial intelligence (via personalized algorithm) to learn what colors you love and create palettes for you to discover, search, and save for use in projects. The beta tool is easy to get started with, although you do have a little color-picking homework to get started.

6 WebTools

Mmm

Mmm is a different type of website builder. The tool, which is still in alpha, allows users to create drag and drop websites in a simple manner. It works almost like making a digital collage. Users can get a custom URL, and every page is responsive. The interface is designed so that you can even build yours on a phone. And here’s the other feature – they encourage messy designs.

LightGallery

LightGallery is a lightweight, modular, JavaScript image and video lightbox gallery plugin. It works with React.js, Vue.js, Angular, and TypeScript. It includes plenty of demos and documentation to help you make the most of this gallery tool.

Vandal

Vandal is a nifty browser extension for Firefox or Chrome that allows you to navigate back in time without changing tabs. The utility of Vandal is to allow quick and easy access to all the archived snapshots for a URL, and it supports navigation to a snapshot as well.

CSS Layout Generator

The CSS Layout Generator is a tool for creating the CSS for layout components. It is also a learning tool for teaching what is possible in CSS for positioning elements in the browser. Tweak specifications to see how it impacts the layout, CSS, and HTML.

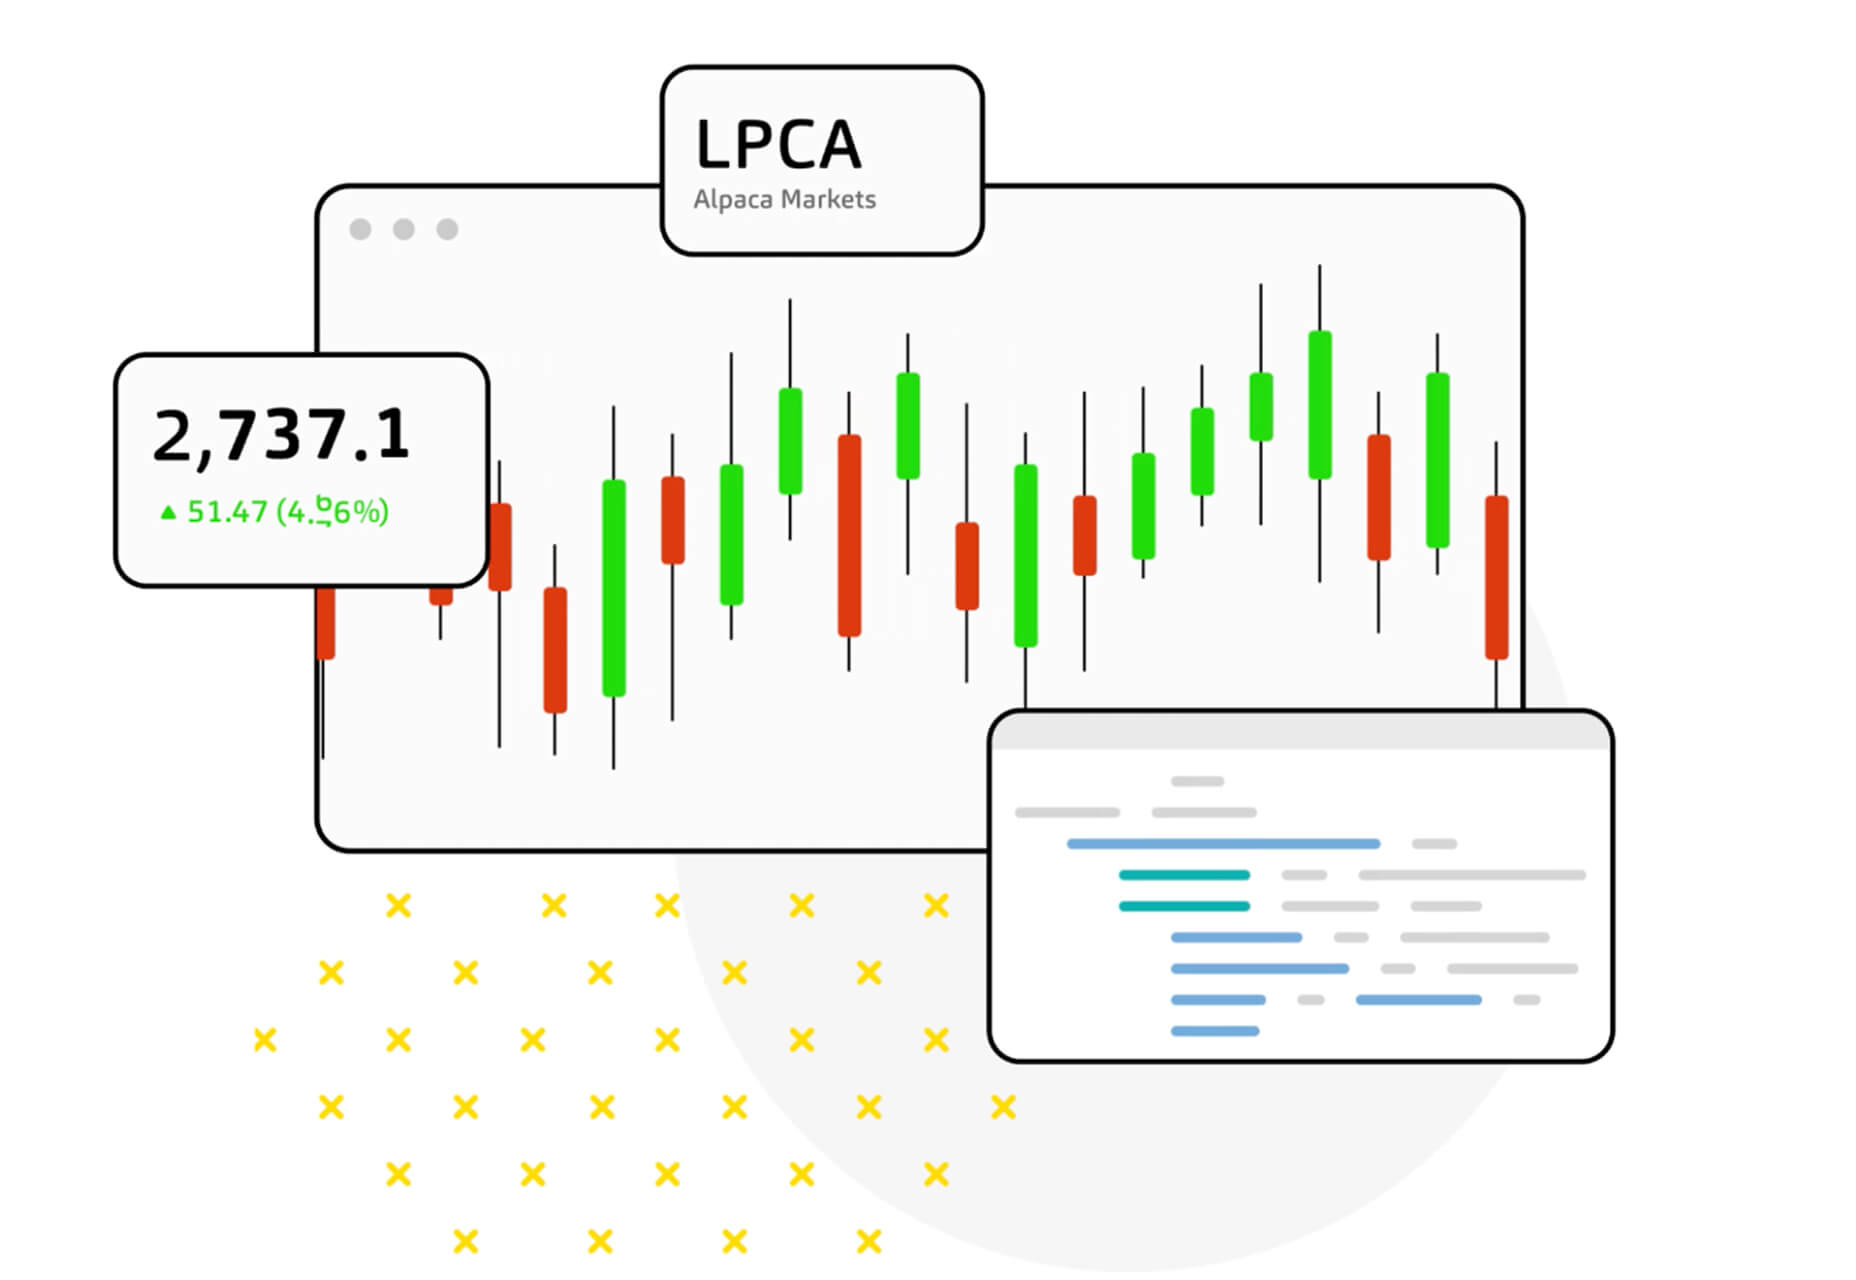
Alpaca Data API

Alpaca Data API is an easy-to-use feed that allows you to bring in stock market data for modeling and backtesting. (it includes free and premium options based on your needs.)

Mobile Palette Generator

Mobile Palette Generator is a color-picking tool that will help you select the best hues for mobile design projects. It then shows you all the specs for primary, secondary, and accent colors.

6 Icons and UI Kits

Iconoir

Iconoir is an open-source icon repository with more than 900 SVG icons. Search icons, browse by category or poke around for what you are looking for. Everything is ready to use without signups or forms to fill out.

Pmndrs Market

Pmndrs Market has a collection of more than 300 three-dimensional elements and drawings of things for use in projects. Model renders are in a rough style with a realistic feel.

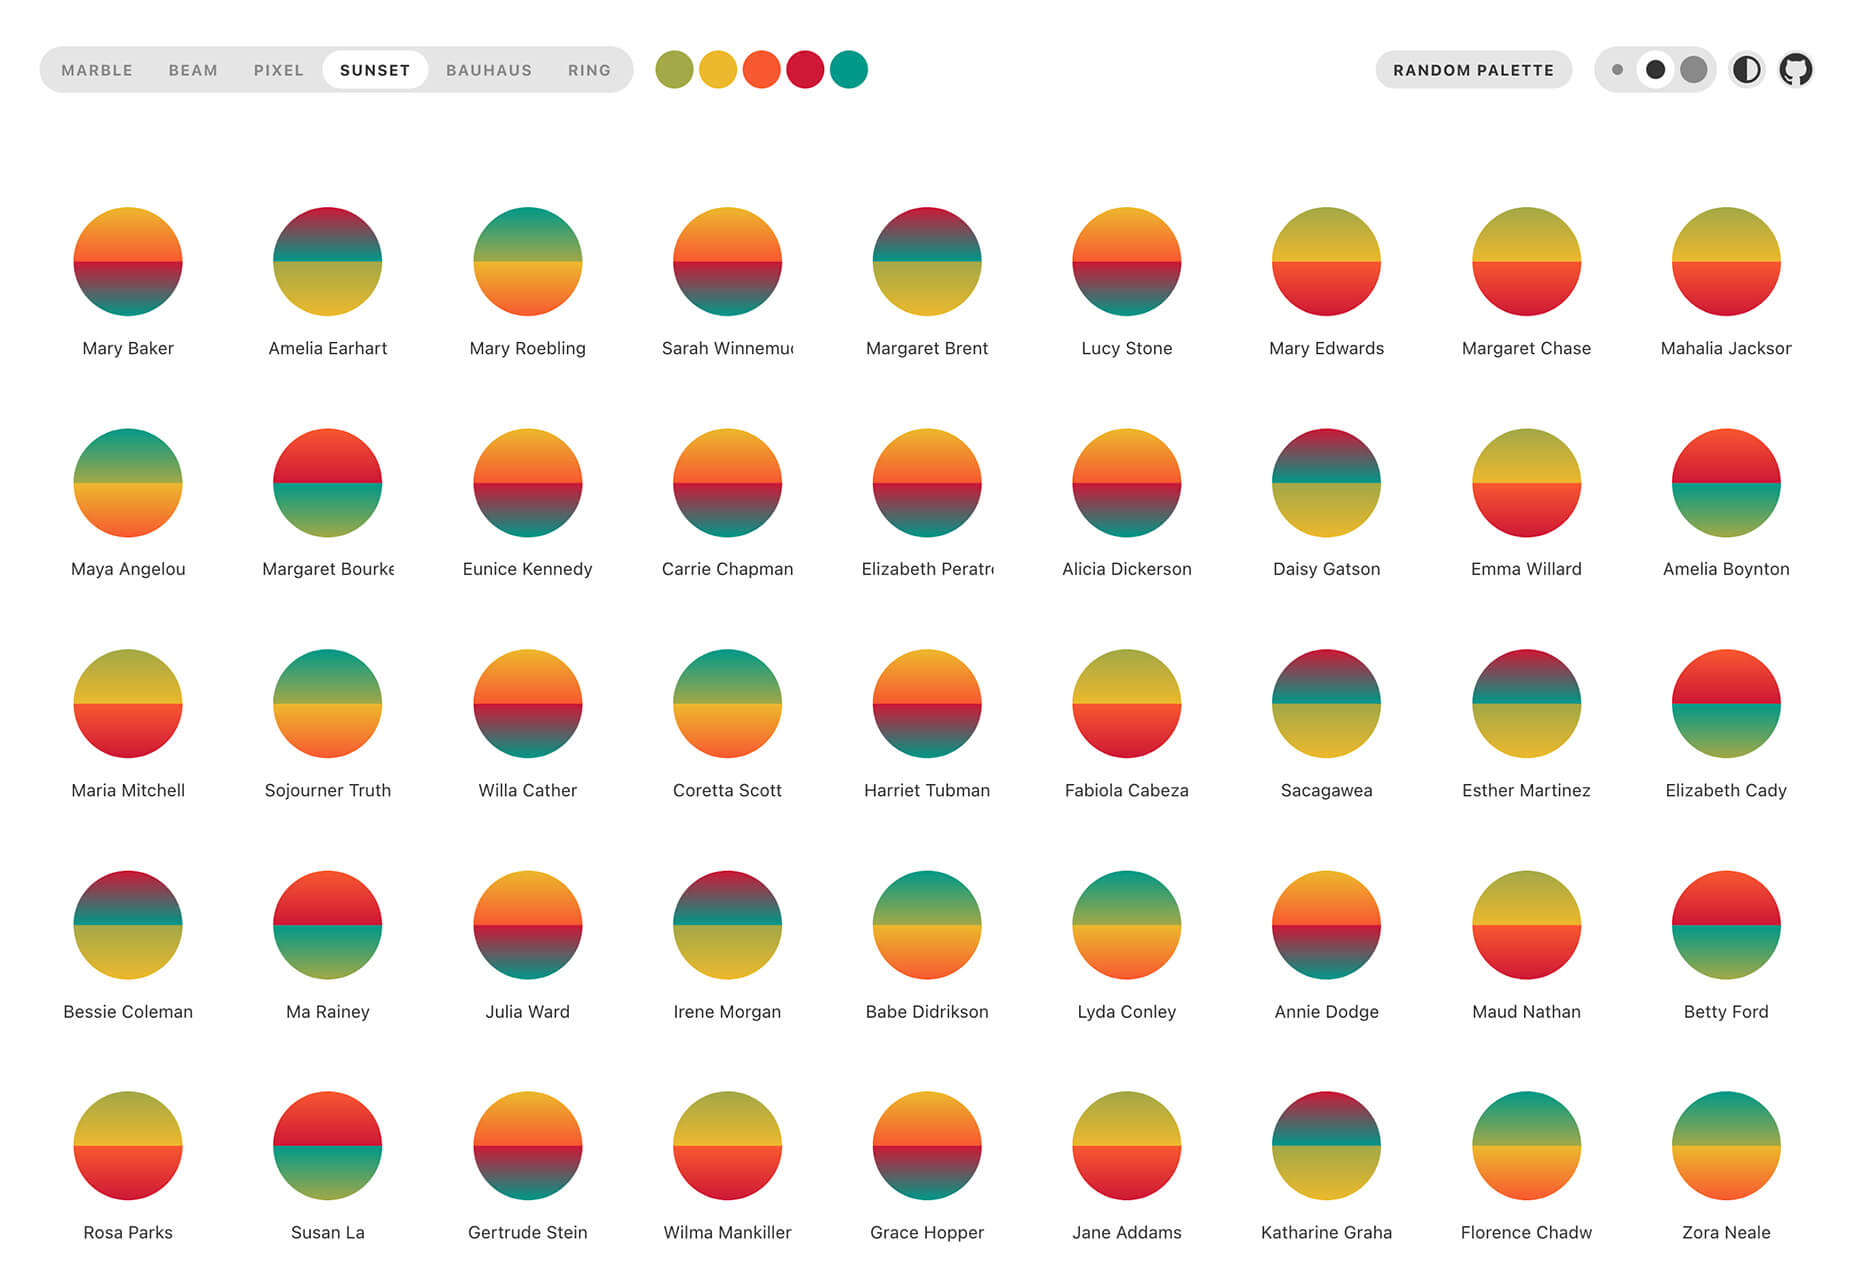
Boring Avatars

Boring Avatars is a fun collection of semi-customizable avatars without faces, hence the name. It’s a fun playground that puts a new twist on something that you might not expect to do differently.

Spark

Spark is a free download with three different website design starters. The hero images are ready to build from and are made for Figma.

Venus Design System

Venus Design System is a premium UI kit packed with more than 2,000 components and states that allow you to design fast. There’s also a demo version for you to test before you buy.

ReadyUI

ReadyUI contains more than 200 blocks and designs for agencies, developers, startups, and more. Everything is production-ready using Bootstrap and Figma files. Choose from light or dark themes and search for a design that works for your project.

5 Tutorials

Creating Generative SVG Characters

Creative Generative SVG Characters is a marriage of JavaScript and SVG that creates fun characters derived from drawings. Using shapes and a little code, you can see how to draw smooth lines, create polygons, and add other shapes for a fun feel. There’s a full demo on Codepen.

5 Steps to Faster Web Fonts

5 Steps to Faster Web Fonts helps you remove some of the bulk from popular typography options. Iain Bean explains a set of methods you can deploy to ensure that load times are quick with some applicable code snippets. Here’s a preview: Tip 1 is to use the most modern file formats (WOFF2).

The Perfect Link

The Perfect Link walks you through some accessibility checks from the A11Y Collective for linking best practices. Some of the things you think are the “right way” may be challenged here. The information goes through everything from design to semantics and is wonderfully thorough. It’s a must-read.

Readsom

Readsom is a curated collection of newsletters and emails that you can read online or sign up for. Its catchphrase is to “discover content you’ll want to read.” It is a good way to find newsletters that interest you, including plenty of design and development options that you might not otherwise know about.

Famous First Websites

Famous First Websites isn’t a tutorial per se, but it does provide a good place to do some visual learning. See what your favorite websites looked like when they launched and the evolution of the designs.

Source

The post 22 Exciting New Tools For Designers, June 2021 first appeared on Webdesigner Depot.


Source de l’article sur Webdesignerdepot

Every designer has their own preferred strategy for collecting resources. Some pluck brushes, fonts, and templates from different “stock photo sites” and public marketplaces. Others collect graphics from swipe files and forums around the web.
The never-ending desire for themes, visual content, and graphical components has prompted an influx of “design packages” to appear around the web. These all-in-one bundles, ranging from Envato Elements to Elegant Themes, promise a selection of valuable creative content in exchange for a single fee or monthly subscription. 

If you’ve been planning to seek out a few of these high-value subscriptions yourself, you’re in the right place! Today, we’re going to talk about some of the top designer resources available on the market. 

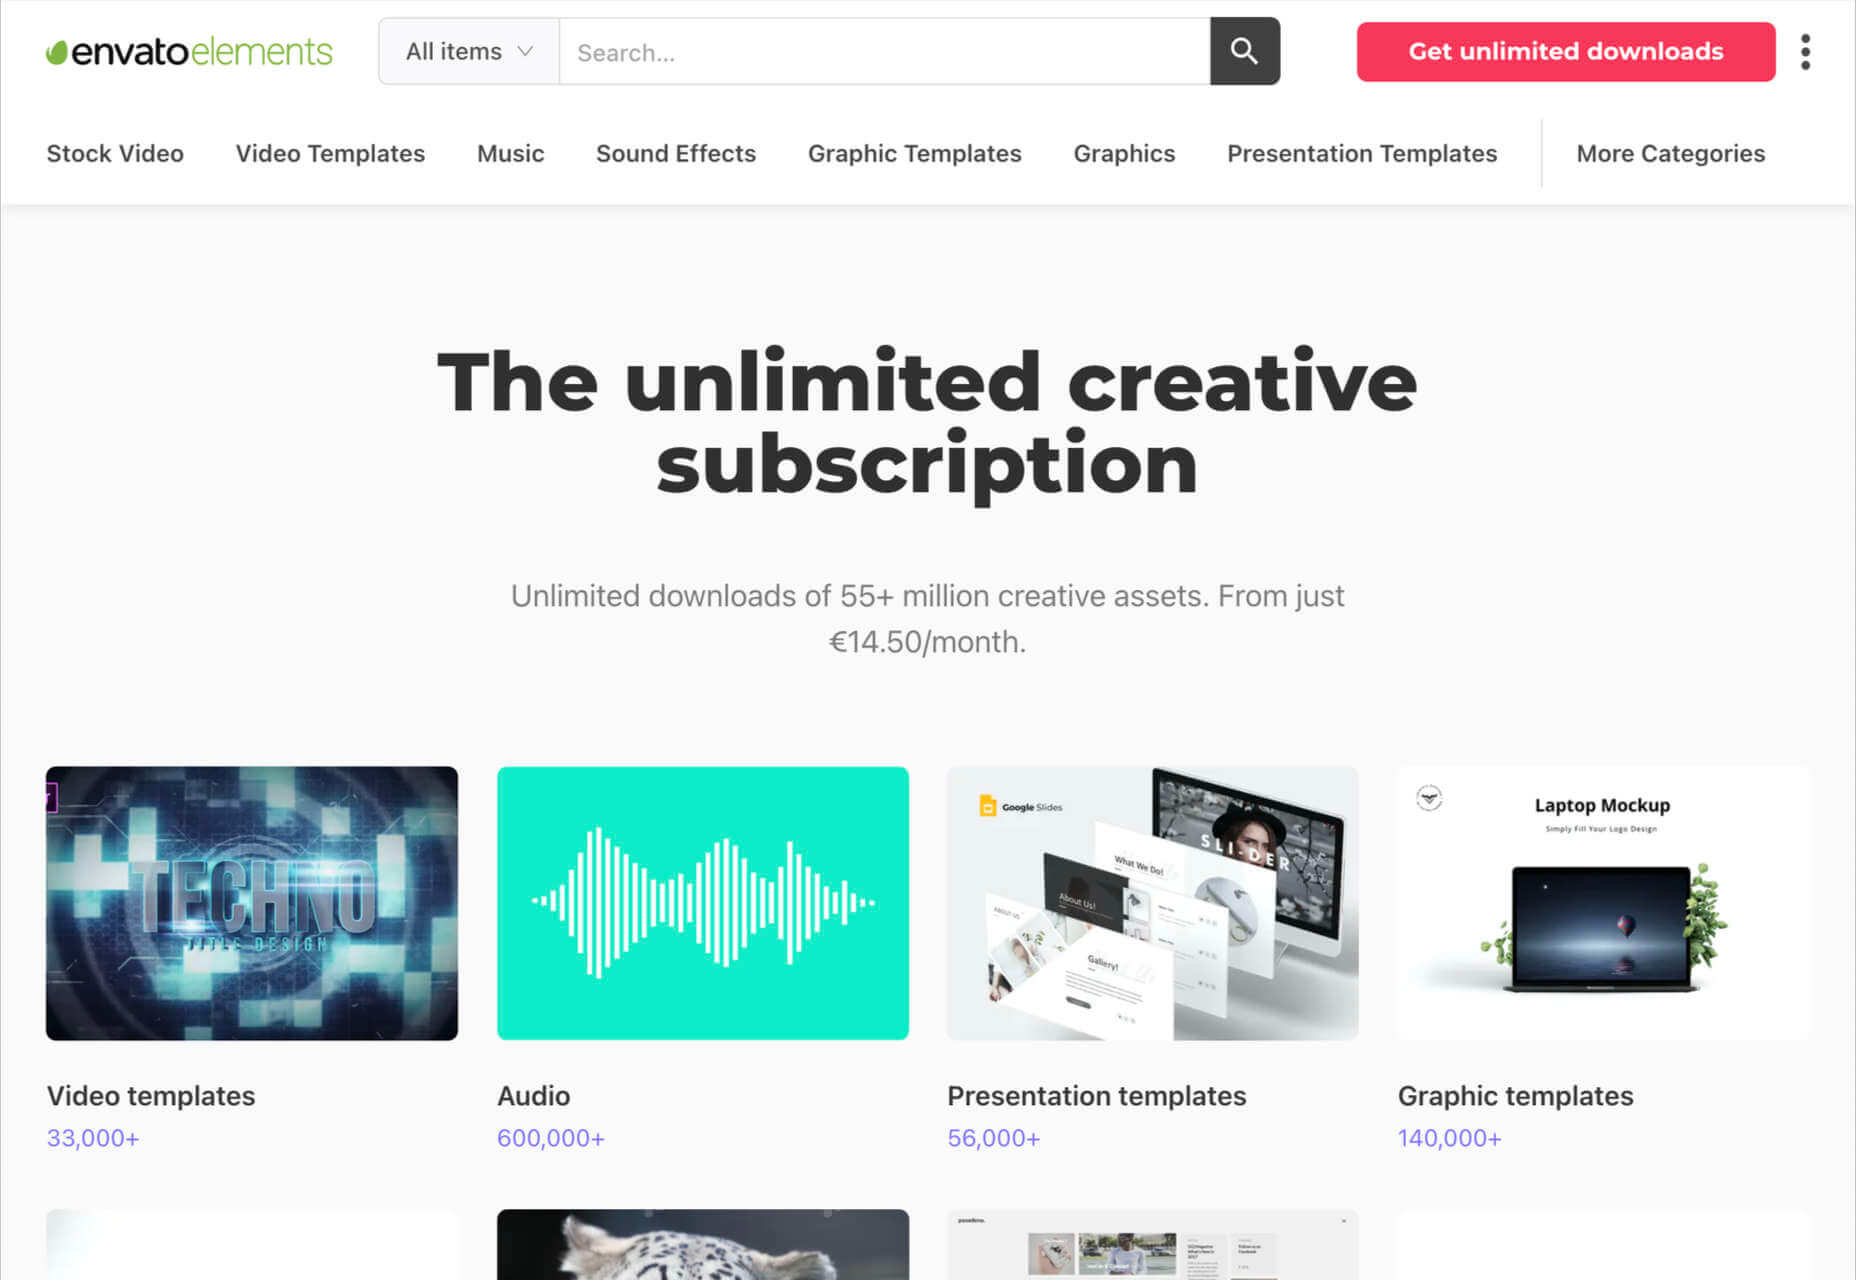
1. Envato Elements

Probably the best-known of all the designer resource marketplaces, Envato Elements advertises itself as the unlimited creative subscription. On this website, you’ll be able to access around 54 million creative assets through a single subscription. There are endless resources to unlock here, ranging from templates for your graphics to video templates, audio, and stock photos. 

Unlike most marketplaces, Envato gives you peace of mind by promising only the highest quality designs and graphics. Your content comes with quality assurance, and there are many PSD elements on the site, too, including stationery and web design templates, mock-ups, and more. Categories for your creative content include:

  • Stock photos
  • Video templates
  • Music
  • Sound effects
  • Graphic templates
  • Graphic designs
  • Presentation templates
  • Fonts
  • Photos
  • Web templates
  • Add-ons
  • CMS templates
  • WordPress resources
  • 3D content

Pricing: Pricing starts at only $16.50 per month, and this gives you unlimited access to everything on the site, including millions of digital assets and stock photos. You’ll also be able to use various courses and tutorials on the website too.

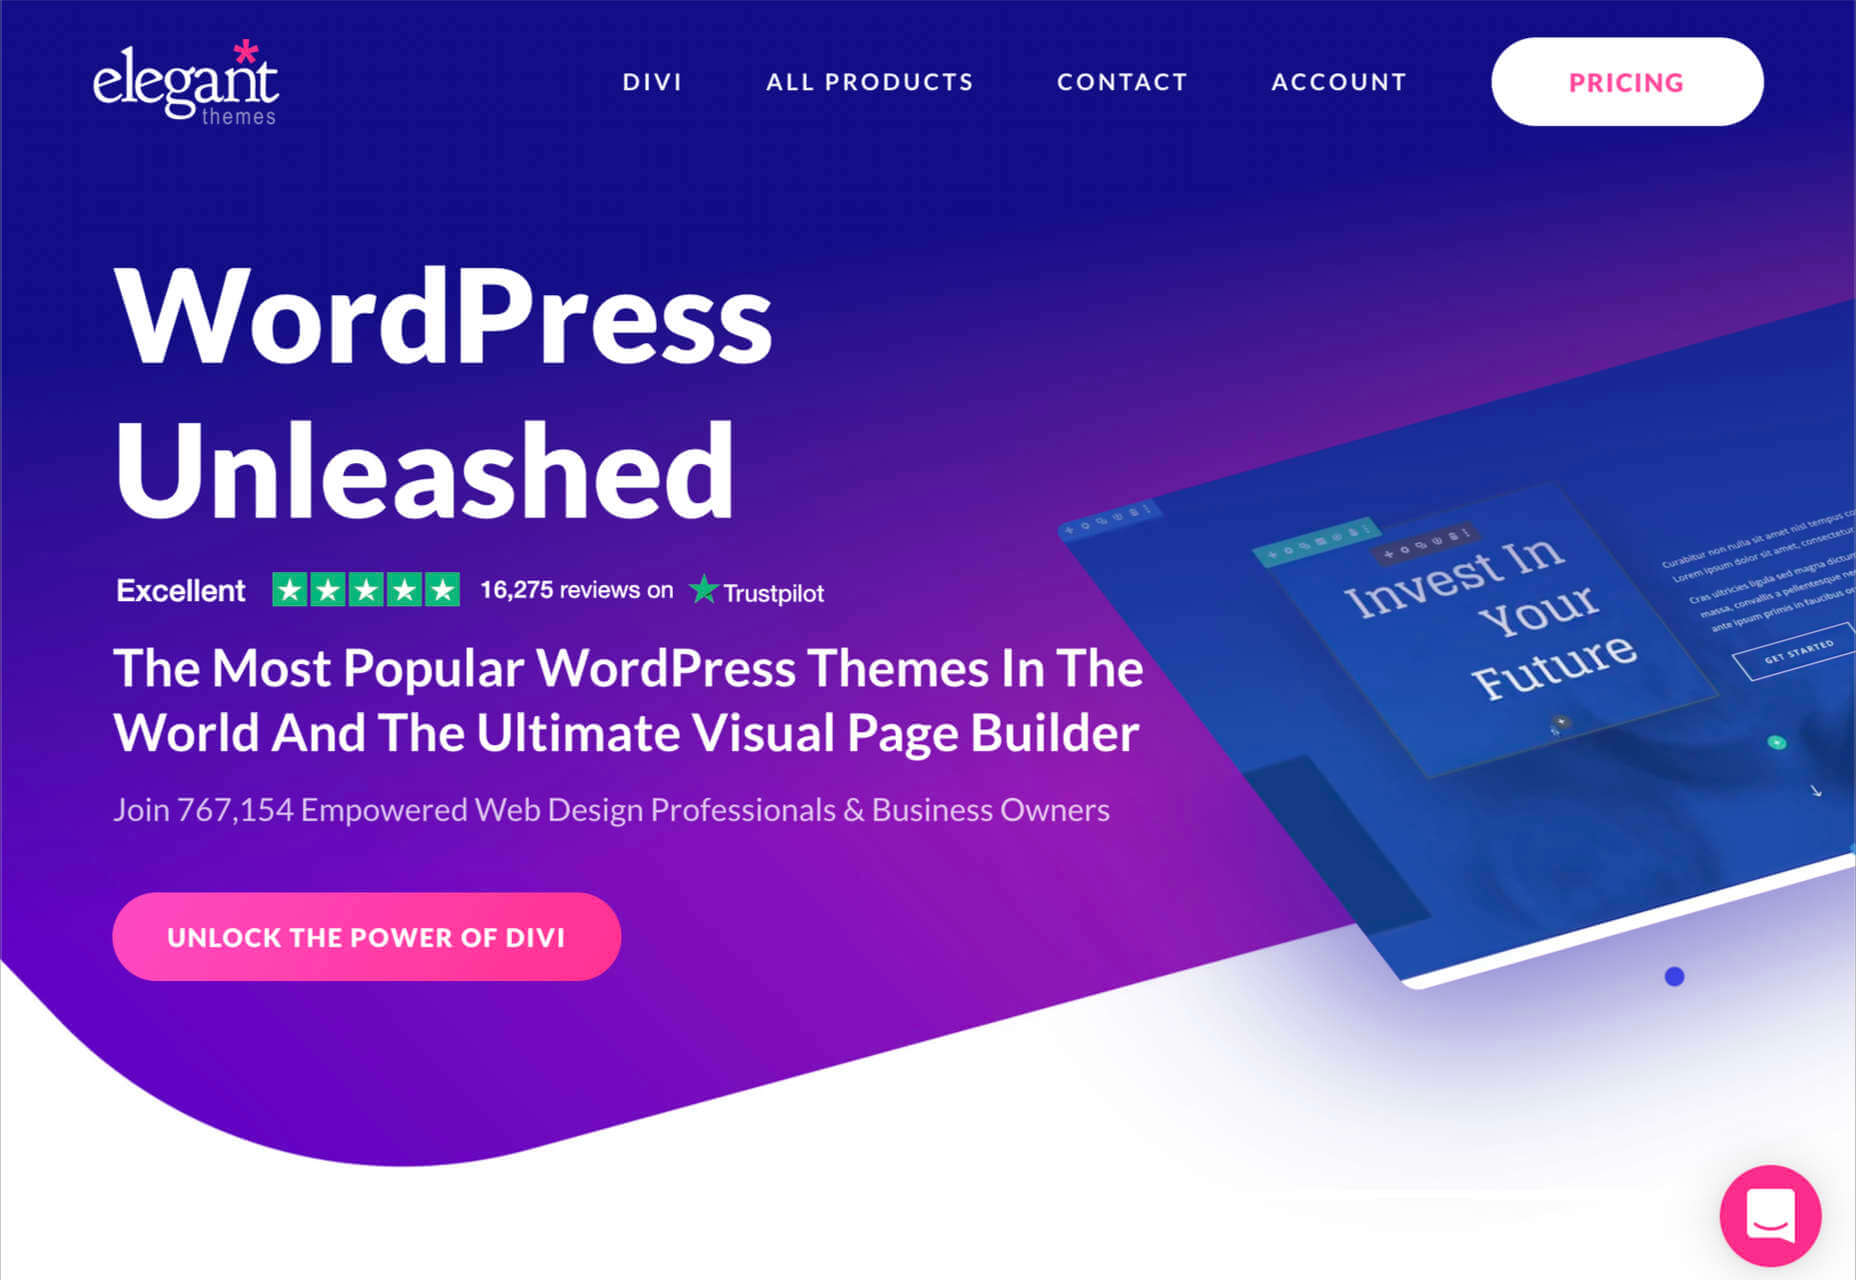
2. Elegant Themes

Elegant Themes is an all-in-one creative resource for website themes. The solution offers you access to some of the most popular WordPress themes worldwide. 

You’ll also get access to a visual page builder as part of the kit. When you sign up for the Elegant Themes subscription, you get access to all of the resources within, including the Divi page builder and WordPress theme, Extra, Monarch, Bloom, and more. If you’re a site builder or work on building pages for clients, this is a must-have subscription. 

Elegant themes are currently the go-to resource for more than 750,000 people. It’s also home to some of the highest-rated themes around. Features include:

  • Divi WordPress page builder
  • Endless WordPress themes
  • Page editing tools
  • Monarch, Bloom, and Extra 
  • Hundreds of website packs
  • Lifetime premium support
  • Unlimited website usage

You can either pay for yearly access with Elegant Themes or pay a one-off price for lifetime access. For most, the lifetime option is likely to be a pretty appealing one. You don’t have to worry about renewing your subscription this way.

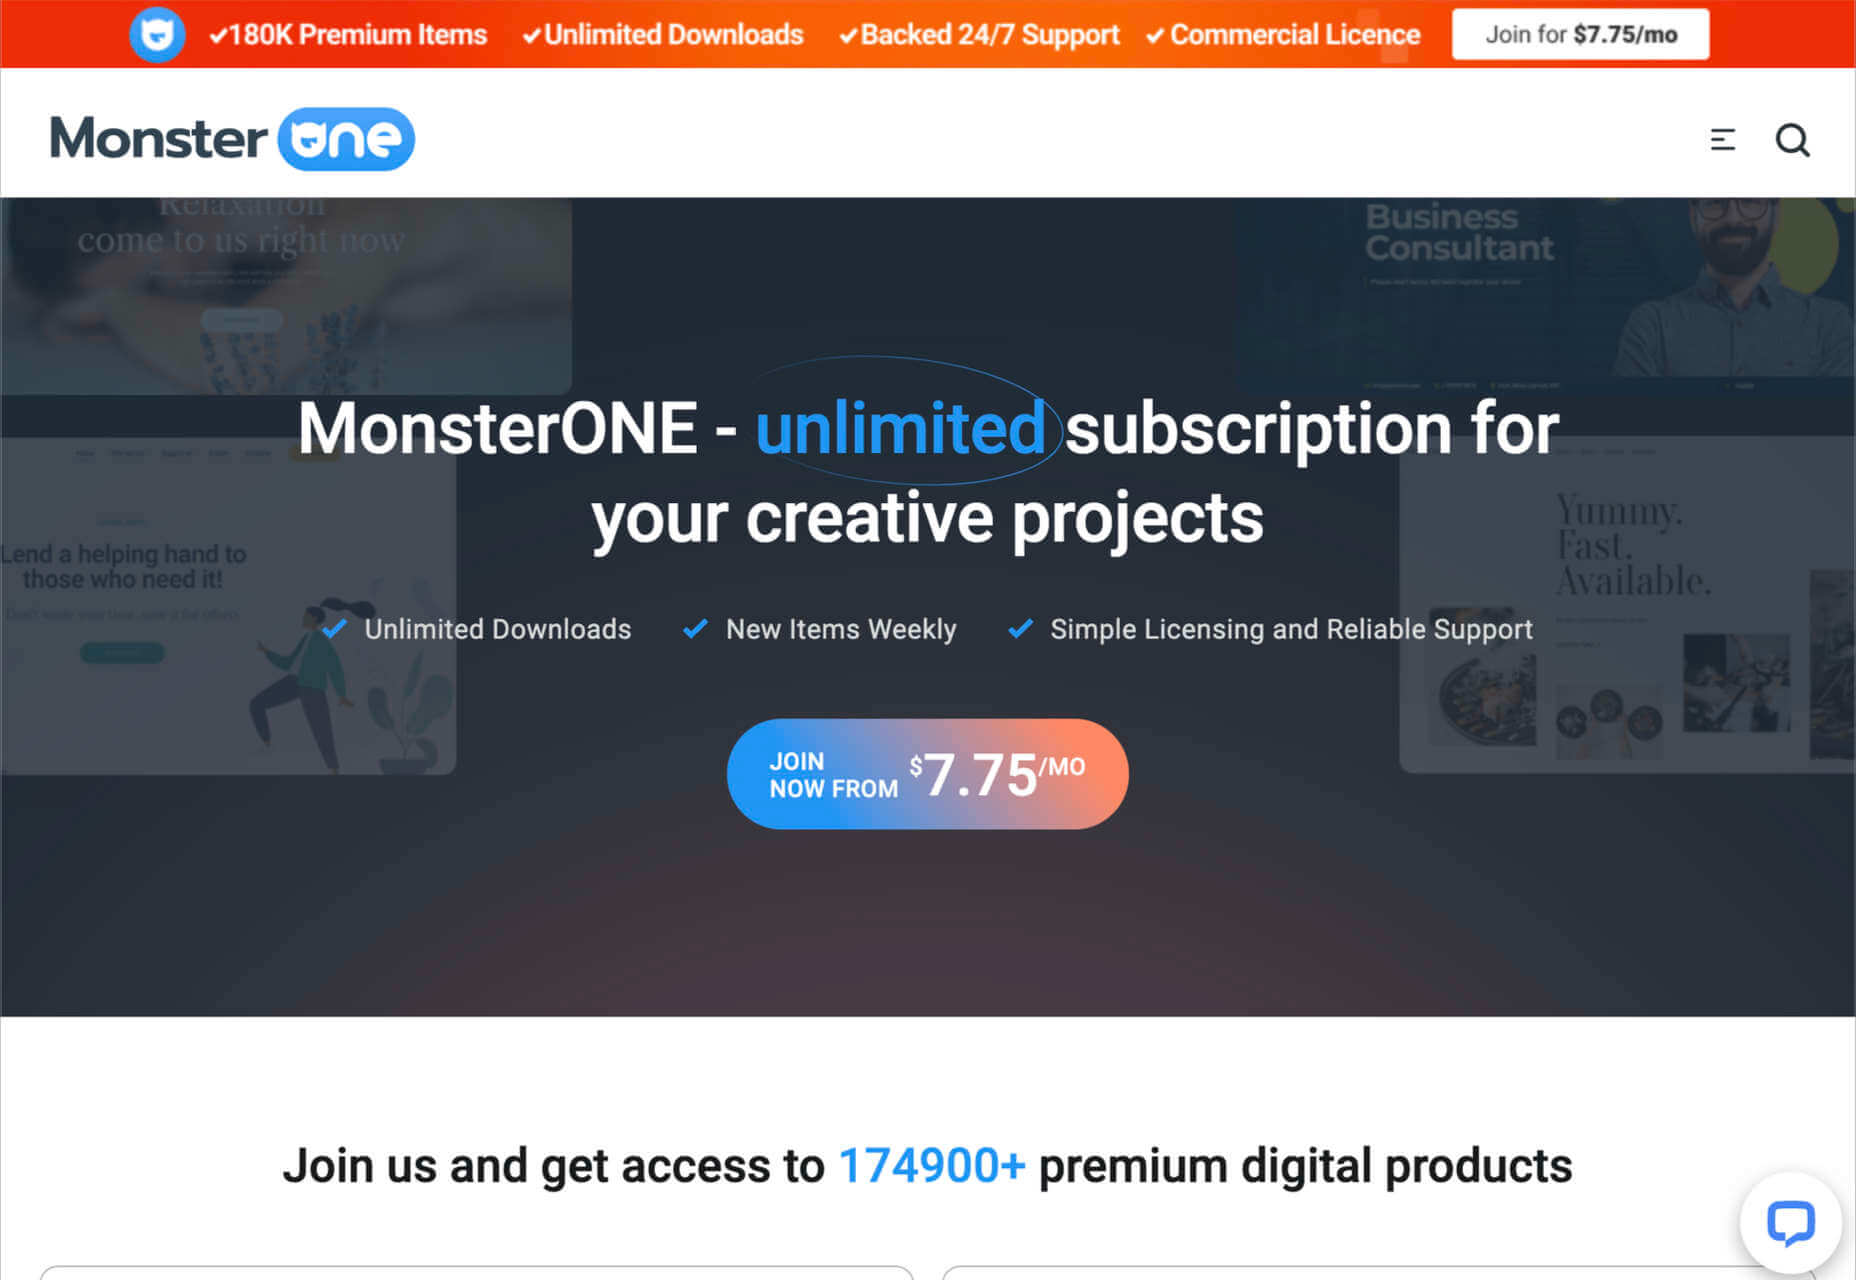
3. Template Monster

Template Monster offers the “ONE” web development membership, perfect for creative professionals. The MonsterONE offering is a complete unlimited subscription for all of your creative needs, with access to unlimited downloads, new weekly items, and simple licensing. You also get plenty of support from the Template Monster Team. 

A goldmine for anyone who needs to upgrade their selection of video and photo assets, graphic templates, HTML templates, or anything else, Template Monster is packed full of amazing resources for any project. You can also find new products from fresh contributors all the time, so the value of your membership is constantly increasing. 

Features include:

  • HTML templates
  • Presentation templates
  • CMS templates
  • Graphic templates
  • Video assets
  • 3D models
  • Audio assets
  • WordPress themes and plugins

Pricing starts at a tiny $6.90 per month, with a slight discount if you pay yearly. The lowest-cost package gives you access to all of your graphic and design assets, but you won’t get any eCommerce or WordPress themes. However, if you upgrade to the all-in-one package at $14.95 per month, you get a more extensive range of resources.

4. Creative Market

Creative Market is another one of those amazing all-in-one environments for creatives and designers. This marketplace is supplied by thousands of independent artists from around the globe, each offering a host of top-quality designs and resources. You’ll find photos, graphics, templates, fonts, web themes, and countless other tools on the Creative Market. 

If you’re looking for sheer size, it’s hard to find another company that competes with the Creative Market package. There are literally millions of ready-to-use products available, including Instagram templates, textures, and procreate brushes. 

You’ll have access to 3D content for your immersive website designs and a host of purchasing products. Although there’s no “subscription model” per-se for this marketplace, you can invest in a credit plan that allows you to set how much you spend on your assets each month. 

Features include:

  • Millions of creative products
  • Huge selection of independent designers
  • Brushes, textures, templates 
  • Fonts and web content available
  • Huge selection of stock photos
  • Convenient credit plan

The individual purchasing plan is likely to appeal more to people just beginning to test Creative Market for the first time. However, if you want a subscription experience, we’d recommend using the credit plan to estimate how many credits you’ll need each month.

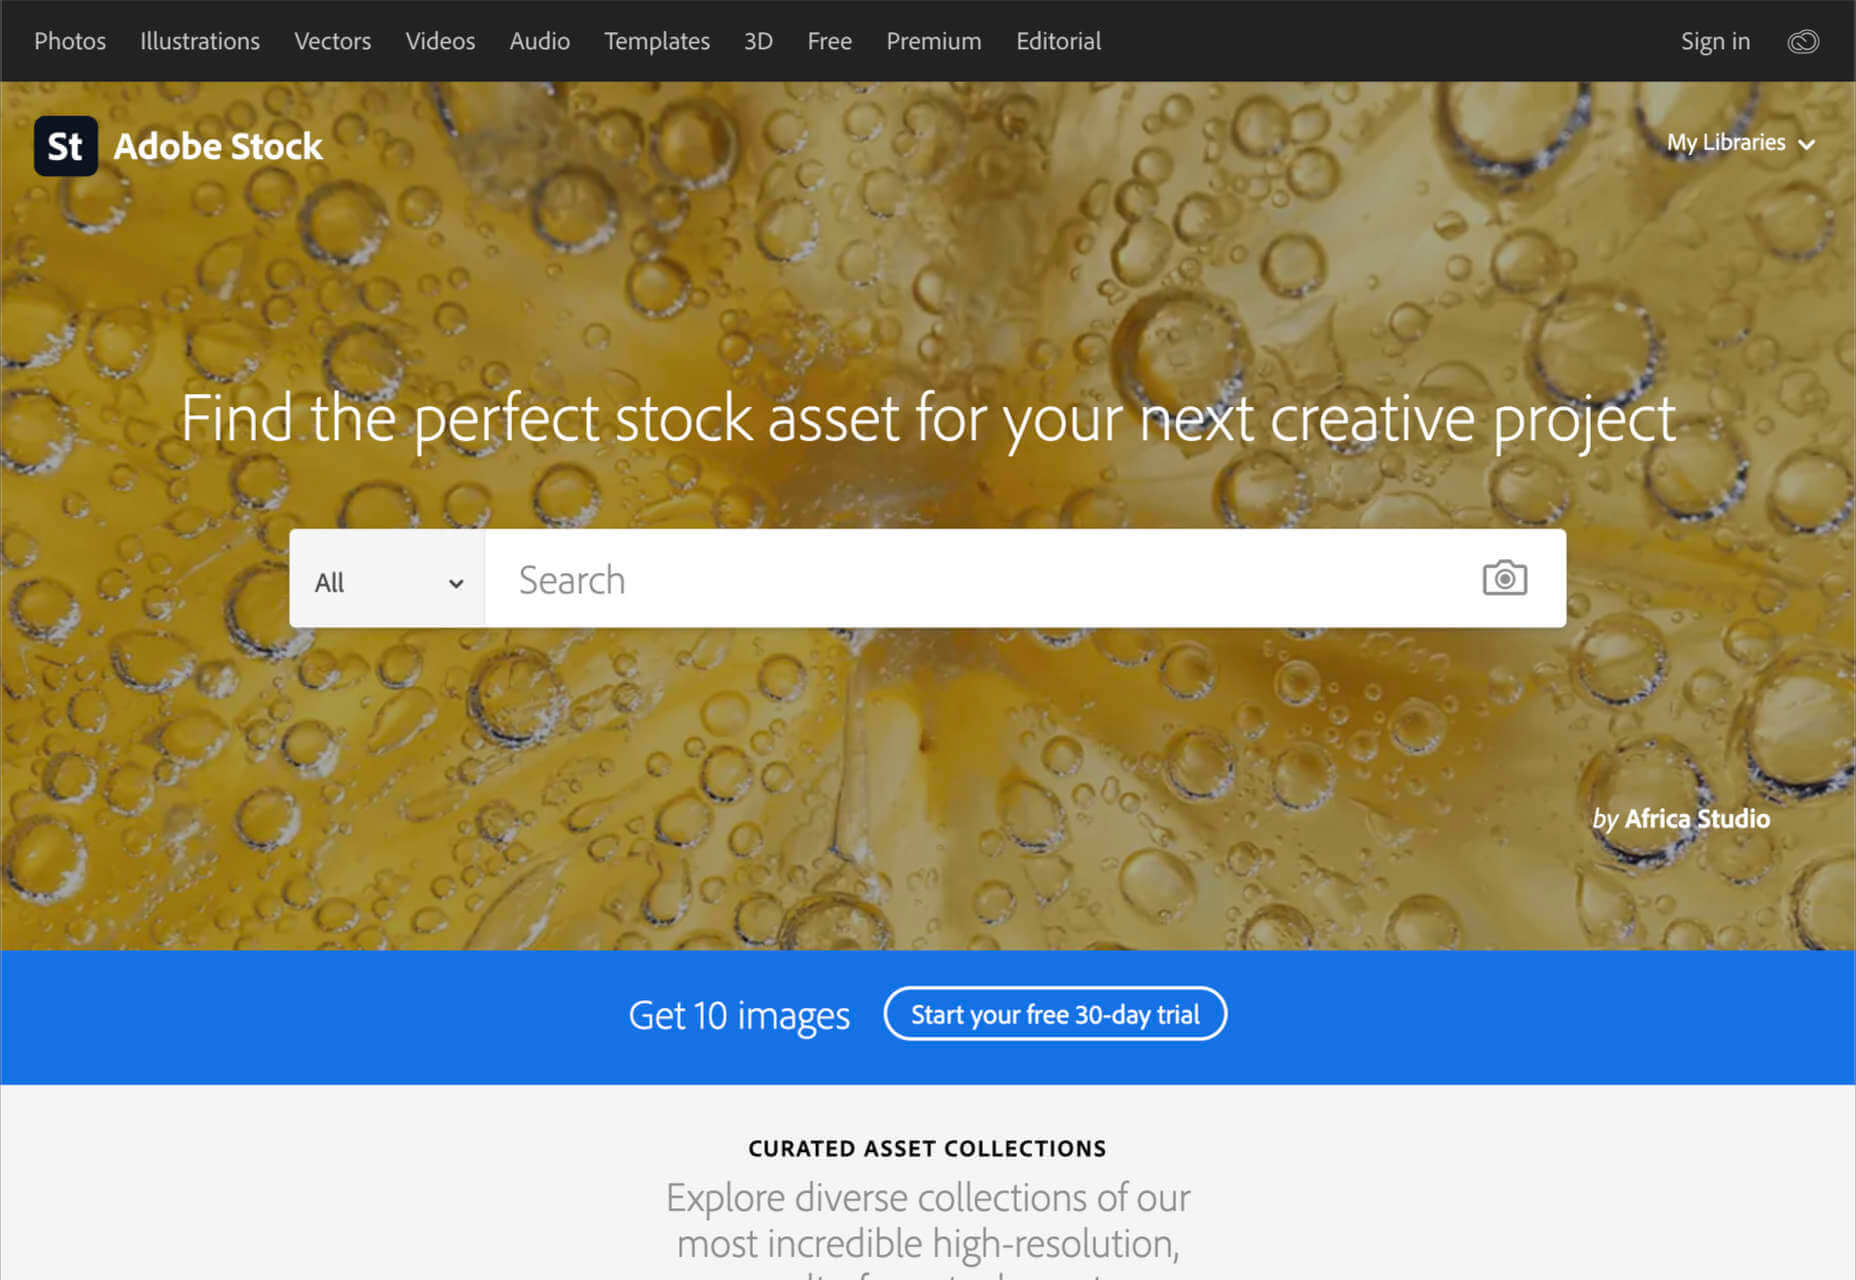
5. Adobe Stock

All web designers know Adobe. The chances are that no matter what kind of creative work you do, you’ve developed a few skills with an Adobe product, from Photoshop to Lightroom. Adobe Stock is also one of the leading platforms for images on any topic. 

Although Adobe Stock doesn’t compete with other marketplaces in terms of versatility, it still stands out as one of the main resources for designers. There are hundreds of millions of stock images, videos, editorial content, and vectors. You can also access a premium collection of custom content and 3D resources too. The great thing about Adobe stock is that you can easily create your own libraries and download content into your Adobe software. Resources include:

  • Stock photos
  • Premium images
  • 3D content
  • Vectors and brushes
  • Stock video footage
  • Royalty-free templates
  • Vector art and illustrations
  • Stock music and audio
  • Integration with Adobe software

Adobe Stock is a little pricier than some of the other marketplaces available today, but it’s still pretty impressive. You’ll pay around $29.99 per month for 10 assets per month, or you can access a full annual plan at $199.99 per month. The amount you pay will depend on the quality of the resources that you want to download.

6. Motion Elements

If Elegant Themes is the go-to resource for designers searching for WordPress themes and web design solutions, Motion Elements is the top choice for “motion” content. Here, you’ll find videos, SFX content, images, music, 3D solutions, and so much more. 

Though it’s located in Asia, Motion Elements is available worldwide. The marketplace offers a monthly subscription plan wherever you can download unlimited products to suit your needs. There are tons of resources to choose from here, including After Effects elements, tools for Lottie, Premiere Pro, FCPX motion, DaVinci Resolve, and more. 

Features include:

  • After Effects elements
  • Premier Pro resources
  • FCPX Motion
  • DaVinci Resolve
  • Video and audio content
  • Stock images
  • SFX resources
  • 3D content

Pricing starts at $16.50 per month for an unlimited annual plan. This means that you can download as much as you like without having to pay any more. There is a small discount if you pay for a full year of access in one go.

7. Creative Tim

Simple but effective, Creative Tim is an amazing resource for front-end and back-end content bundles. You get fully coded UI tools here that can help you create various mobile and web apps and a huge selection of dashboards and templates. If you’re the kind of designer who likes working on top of things like Bootstrap, React, Angular, Laravel, Node.js, and more, then Creative Tim has you covered. 

This is one of the more technical creative resource packages that we’ve looked at so far, but it has a lot of value to offer. That’s probably why there are already more than 1.5 million people using the service. You can search through administration dashboards, UI kits, premium templates, free content, and design systems. Of course, everything is easy to access too. Features include:

  • Frontend design technologies for endless platforms
  • Soft design, light design, paper design, and more
  • Bootstrap content 
  • Resources and third-party tools
  • Complete design and web kits
  • UI kits and templates
  • Admin and dashboard templates

There’s a free version of Creative Tim available for beginners if you want to keep your costs low, but it’s generally much better to sign up for the premium subscription. You can also purchase kits and templates on a one-off basis if you prefer to start small. However, the best prices generally come from buying the bundles from Creative Tim’s subscription side. 

8. Storyblocks

Similar in style to Motion Elements, Storyblocks is a creative design resource for any designer getting involved with the video world. This website is home to some of the best free-to-use videos around, with simple licensing available at a click. Aside from high-quality videos and templates, you also get audio and sound effects as part of your subscription and images or illustrations. 

The unlimited access pass gives you all the resources you might want, from 4K and HD footage to music and sound effects, After Effects templates, and photos, vectors, or illustrations. You can also export a host of your own video projects with access to the Maker video editor, which allows you to make various changes to your custom video content. Features include:

  • HD and 4K video footage
  • After Effects Templates
  • Sound Effects and Music
  • Photos, Illustrations, and Vectors
  • Unlimited video exports
  • Video editor access
  • Licensing support

The standard all-access plan from Storyblocks starts at a very affordable £39 per month for all of the content you might want. In addition, everything you get here is unlimited, so you don’t have to worry about running out of credits. There’s also an enterprise option available if you want to share access to resources with your team.

9. Motion Array

Motion Array is an all-in-one video creation platform for those with an eye for visual content. This fantastic resource center is packed full of valuable tools, from Da Vinci Resolve templates to Adobe Premier Pro Content. As part of your subscription payment, you’ll get endless presets, audio effects, plugins, video footage, tutorials, and more. 

Though a little more expensive than some of the other premier subscription services on the market, Motion Array does offer a lot of content that you can’t get anywhere else. There’s an unlimited marketplace constantly updating with access to royalty-free footage, stock photos, music, and sound effects. You also get plugins built for Premiere Pro. Features include:

  • Adobe Exchange elements
  • Final Cut Pro and DaVinci resolve templates
  • Royalty-free music and sound effects
  • Stock footage and video
  • Photos and images
  • Time-saving integrations with your favorite apps
  • Portfolio site builder
  • Stock media requests

There’s a free subscription option for Motion Array, which you won’t find from most alternatives. This only gives you access to some basic stock photos and assets, but it’s a nice way to start. When you are ready to upgrade, you can pay $29.99 per month for the full stock media library, as well as requests for custom media assets and exclusive plugins.

Start Stocking Up on Designer Resources

As a designer or creative professional, keeping a constant stack of resources available is crucial to your ongoing productivity. Fortunately, there are tons of premium marketplaces out there today, making it easier to access everything you need. 

Whether you’re looking for full UI kits and templates, or you want some free-to-use images and videos for the website content you’re creating, there’s something for everyone. With most monthly subscription services available at a highly affordable price, you could even sign up for multiple sites at once. 

Source

The post 9 Amazing Design-Resource Package Sites first appeared on Webdesigner Depot.


Source de l’article sur Webdesignerdepot