Articles

Every day design fans submit incredible industry stories to our sister-site, Webdesigner News. Our colleagues sift through it, selecting the very best stories from the design, UX, tech, and development worlds and posting them live on the site.

The best way to keep up with the most important stories for web professionals is to subscribe to Webdesigner News or check out the site regularly. However, in case you missed a day this week, here’s a handy compilation of the top curated stories from the last seven days. Enjoy!

Next.js and Drupal Go Together Like PB & Jelly

Couleur.io – Harmonizing Color Palettes for Your Web Projects

11 Open-Source Static Site Generators You Can Use to Build Your Website

Buttons Generator – 100+ Buttons You Can Use In Your Project

3 Essential Design Trends, September 2021

12 CSS Box Shadow Examples

The Fixed Background Attachment Hack

The Internet ‘Died’ Five Years Ago

Media Queries in Responsive Design: A Complete Guide (2021)

The 7 Core Design Principles

Source

The post Popular Design News of the Week: August 30 2021 – September 5, 2021 first appeared on Webdesigner Depot.


Source de l’article sur Webdesignerdepot

Every day design fans submit incredible industry stories to our sister-site, Webdesigner News. Our colleagues sift through it, selecting the very best stories from the design, UX, tech, and development worlds and posting them live on the site.

The best way to keep up with the most important stories for web professionals is to subscribe to Webdesigner News or check out the site regularly. However, in case you missed a day this week, here’s a handy compilation of the top curated stories from the last seven days. Enjoy!

Embarrassing Coca-Cola Design Fail

Find Inspiration With a Curated List of Simple Buttons

Pandoc Markdown CSS Theme

20 Best New Sites, June 2021

7 Website Navigation Examples That Will Inspire You

Glassmorphism CSS Generator

Bauhaus Movement: Design Principles, Ideas, and Inspiration

UX Strategy: Giving Your Product an Edge

15 CSS Paper Effects

Radix Colors – A Gorgeous, Accessible, Open-Source Color System

Source

The post Popular Design News of the Week: June 28 2021 – July 4, 2021 first appeared on Webdesigner Depot.


Source de l’article sur Webdesignerdepot

So, really, you’re in the business of designing websites for your clients’ audiences.

But how do you ensure you get it right? You could take what your client tells you at face value, but that’s only going to scrape the surface of who their audience is.

What you need to do is figure out how consumers think and why they respond to websites the way they do. A lot of this is already explained to us by psychology principles.

Once you memorize them, you’ll be able to design user journeys that get visitors to respond exactly as you and your client want them to.

15 Psychology Principles to Use in Web Design

We as humans think certain ways, and your design should cater to those underlying thought processes and natural responses.

Below are 15 psychology principles that’ll help you design better, more intuitive digital experiences for your end-users:

1. Aesthetics-Usability Effect

The Aesthetics-Usability Effect suggests that people equate more attractive interfaces with more usable ones. In other words, a good, modern, responsive design should always be your starting point.

2. Color Psychology

Color psychology tells us about color’s influence over how something is perceived. With color so strongly tied to emotion, you can do a lot to affect how visitors perceive a website and the brand behind it.

3. Psychology of Shapes

Just as a color has the ability to affect someone’s perception of a brand or the content they’re looking at, so too do individual shapes used within an interface. Each shape — circles, squares, triangles, hexagons, and polygons — has a unique psychological association.

4. Gestalt Principles

Gestalt Principles are a way for humans to make sense of chaotic data presented to them. So, rather than see a bunch of text, images, and space, the human brain recognizes patterns to simplify complexity.

About half a dozen principles are associated with this theory, and they’re related to factors like symmetry, similarity, and proximity.

5. Mere-Exposure Effect / Jakob’s Law

The Mere-Exposure Effect, or Familiarity Principle, suggests that people are more likely to prefer things that seem familiar.

Jakob’s Law applies this psychology specifically to the internet user experience. It suggests that users expect your website to work the same way as the other sites they spend their time on.

6. Von Restorff Effect

The Von Restorff Effect, or Isolation Effect, describes what happens when someone is exposed to identical stimuli, and then a unique element is introduced to the fold. It’s the outlier that will most effectively grab their attention.

7. Selective Disregard

Selective disregard is a type of “blindness” users develop to anything seemingly irrelevant to their main goal. This often occurs when a design or marketing trend grows stale — like websites that use the exact same cookie consent banner.

8. Hick’s Law

Hick’s Law states that the number of choices a person has to make will increase the amount of time it takes to make a decision.

This is a fundamental principle to pay attention to on ecommerce sites as you want to speed up the decision-making process, not slow it down.

9. Loss Aversion

Loss Aversion states that decision-making is more commonly driven by avoiding losses than acquiring gains.

If your website or the content within it gives visitors any reason not to trust it or feel confident in taking action, you’re more likely to see high abandonment rates than conversions.

10. Paradox of Choice

The Paradox of Choice is a response to the problem posited by Hick’s Law. It suggests that the reduction of choices makes consumers feel less anxious, which, in turn, increases confidence and satisfaction with purchases.

If your site suffers from high cart abandonment or product returns, the paradox of choice would be a useful principle to leverage.

11. Miller’s Law

Miller’s Law, also referred to as Cognitive Load Theory, has to do with memory capacity. On average, people can only have about seven items stored in their working memory at any given time.

This psychology principle encourages the reduction of options and the general reduction of content to improve focus and decision-making capabilities.

12. Feedback

Feedback is one of the principles of learning and plays a big part in interaction design.

Feedback is what designers use to tell people when they’ve made progress towards a goal or achieved it. You can also use it to teach visitors how a website will respond to their actions, which encourages faster and more confident engagements with your website.

13. Extrinsic Motivation

There are two types of motivation. Intrinsic motivation is an internal one, whereas extrinsic is external.

It’s Extrinsic Motivation that plays a role in getting users to complete more tasks online. As a designer, you have to make sure these kinds of “rewards” are obvious.

14. Social Proof

Not so much a psychological principle as it is a psychological phenomenon, Social Proof or Influence, suggests that people will copy the actions of the masses. It also refers to the assumption that the truth lies with the majority.

This is why customer reviews, client testimonials, and user-generated content have become so useful on websites.

15. Peak-End Rule

The Peak-End Rule states that people will judge an experience based on their very first and last impressions of it. This is somewhat related to the Serial Position Effect, whereby people will remember the first and last items in a group.

So, this is something to remember when you build out the top and bottom of each page as well as the start and expected end to the user journey.

Wrap-Up

Want to build better websites? Then, you need to design from the end users’ perspective.

The best place to start is with psychology principles, as they’ll tell you how most consumers think and what motivates them to respond. If you understand this inherent cause-and-effect relationship, you can design websites that elicit the right kind of response from your visitors.

Source

The post 15 Psychology Principles Every Designer Should Know first appeared on Webdesigner Depot.


Source de l’article sur Webdesignerdepot

There are many reasons you might be wanting to improve your design skills this year. Perhaps you have extra time on your hands and want to put it to good use. Or maybe you’re new to web design and finding that there’s a lot you still don’t know how to do. It could also be that you recognize that the web is changing, and your skills could use some refreshing to keep up.

Whatever the reason, there are many ways to level up your web design skills in 2021. Here are 12 ideas to get you started:

Tip 1: Niche Down If You Haven’t Already

Jack-of-all-trades designers might be able to say “yes” to everyone. However, they’re going to be stretched very thin as they attempt to strengthen every skill needed to keep up with demand.

It’s much easier to become a trusted designer and to improve your skills if you have a smaller and more specific skill set to develop.

Just keep in mind that niching down doesn’t necessarily mean focusing on a particular industry. For instance, you might choose to be a UX designer instead of a web designer. Or you might specialize in designing ecommerce websites instead of monetized blogs. Just find something that you’re passionate about and will be good at doing, and zero-in on the skills needed for it.

Tip 2: Play Around in the Sandbox

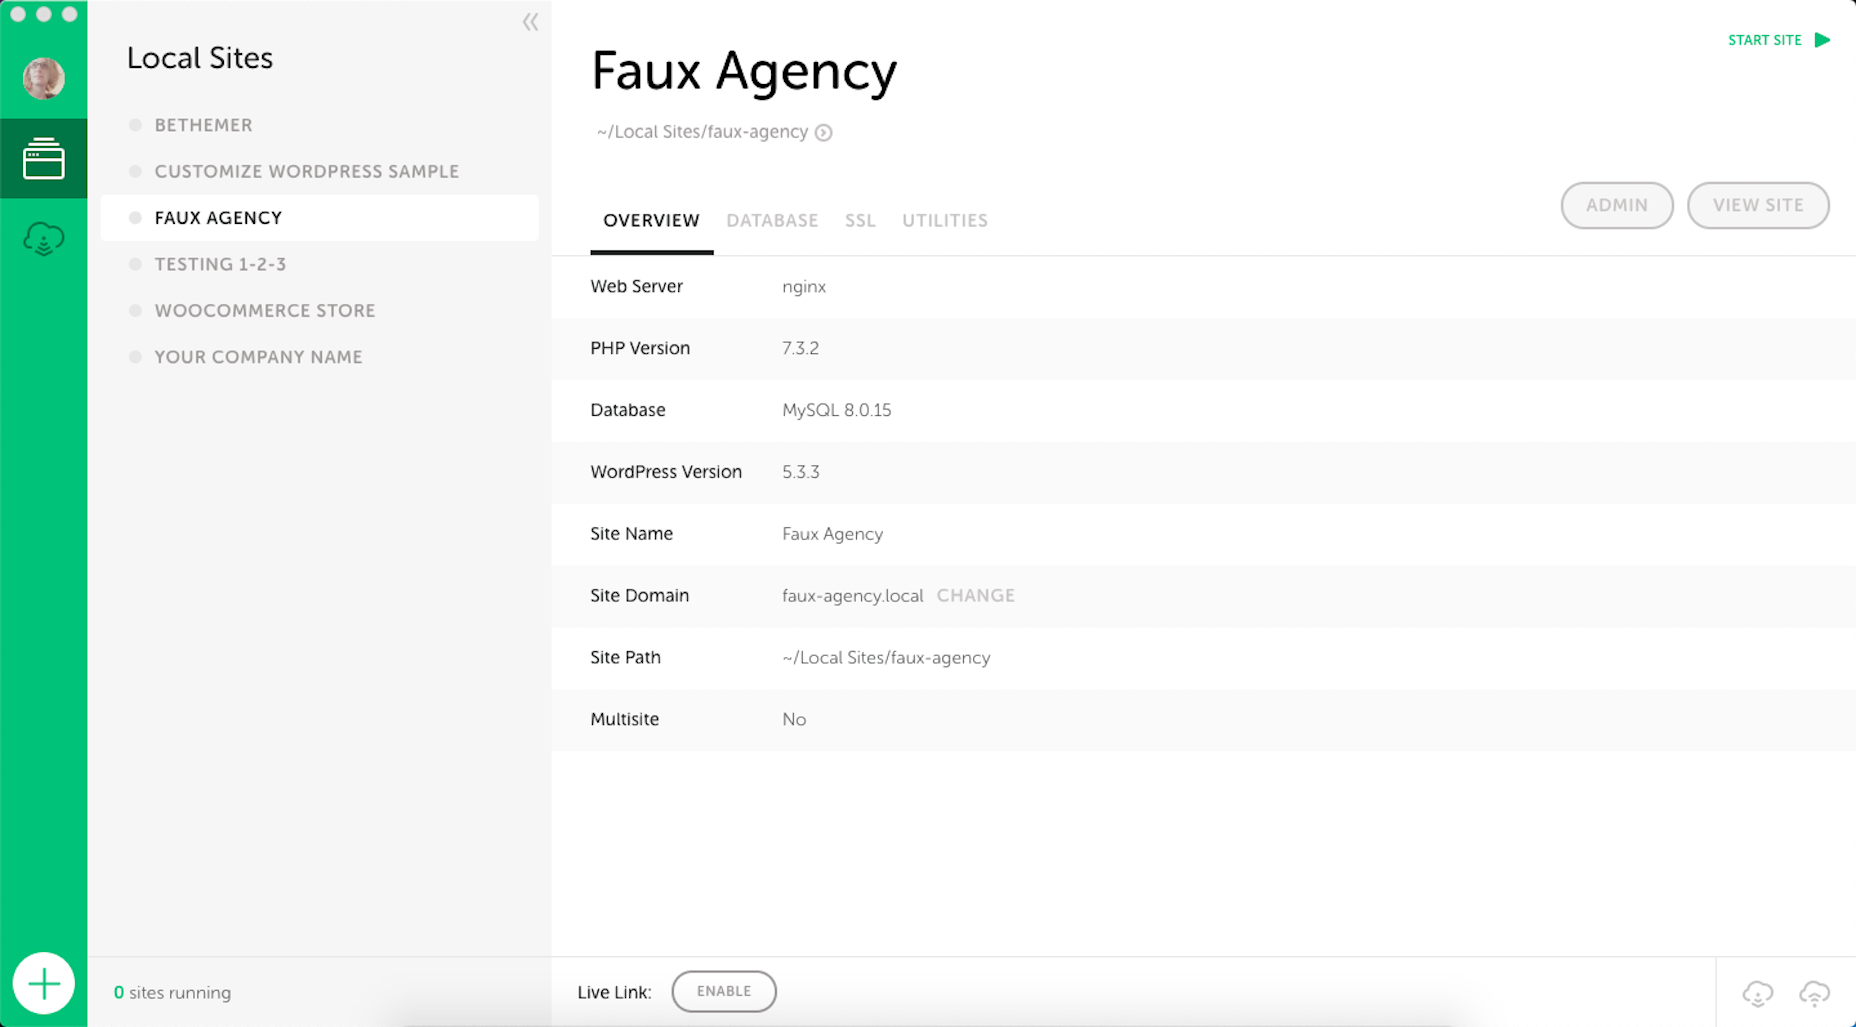
Local development environments are useful for staging websites, doing redesigns, and testing updates safely away from live sites. But you can also use them for experimenting with new design techniques, trends, templates, plugins, and more.

Local by Flywheel is the one I prefer to use:

Here’s a good exercise to start with:

Take a website you like — something you’ve looked at in awe and couldn’t imagine ever building on your own. Then, put yourself to the test. See if you can recreate it in your sandbox.

Don’t be hard on yourself if you don’t figure it out right away. Consult your resources and give yourself time to make sense of what’s going on and implement it with the available skills and tools.

Tip 3: Redesign One of Your First Projects

There’s always a clear evolution in a designer’s skill set, from the day they begin designing to the present day. And that’s a good thing. If your work doesn’t improve or change with time, then you’re going to have a lot of catching up to do when the stagnation begins to hurt your business.

Want to see how much progress you’ve made so far? Revisit one of your first projects and look at it with fresh eyes. I bet you’ll see a big change in how you design today from how you designed that site then.

Now, ask yourself what you would do differently. And then, go to your sandbox and do the redesign.

Tip 4: Work on a Passion Project

A friend of mine is taking a UX design course and needed some users to run through a prototype he created for the class. He could create anything he wanted, so he designed an app related to his other love: Music.

While he could’ve easily thrown together some carbon copy of Spotify or SoundCloud, he came up with a completely new concept. And it was really impressive, to the point where I urged him to put it into production and see if he could list it in the app stores.

I think it’s when we’re really passionate about something that we’re willing to push past our limits. So, carve out some time to tackle that passion project you’ve been toying around with and see where it takes you.

Tip 5: Share Your Designs on Dribbble and Ask for Feedback

One of the reasons UX designers do user testing is how valuable users’ raw input is. While it would be nice to think that design is a completely subjective matter, that isn’t really the case when usability becomes compromised due to design choices.

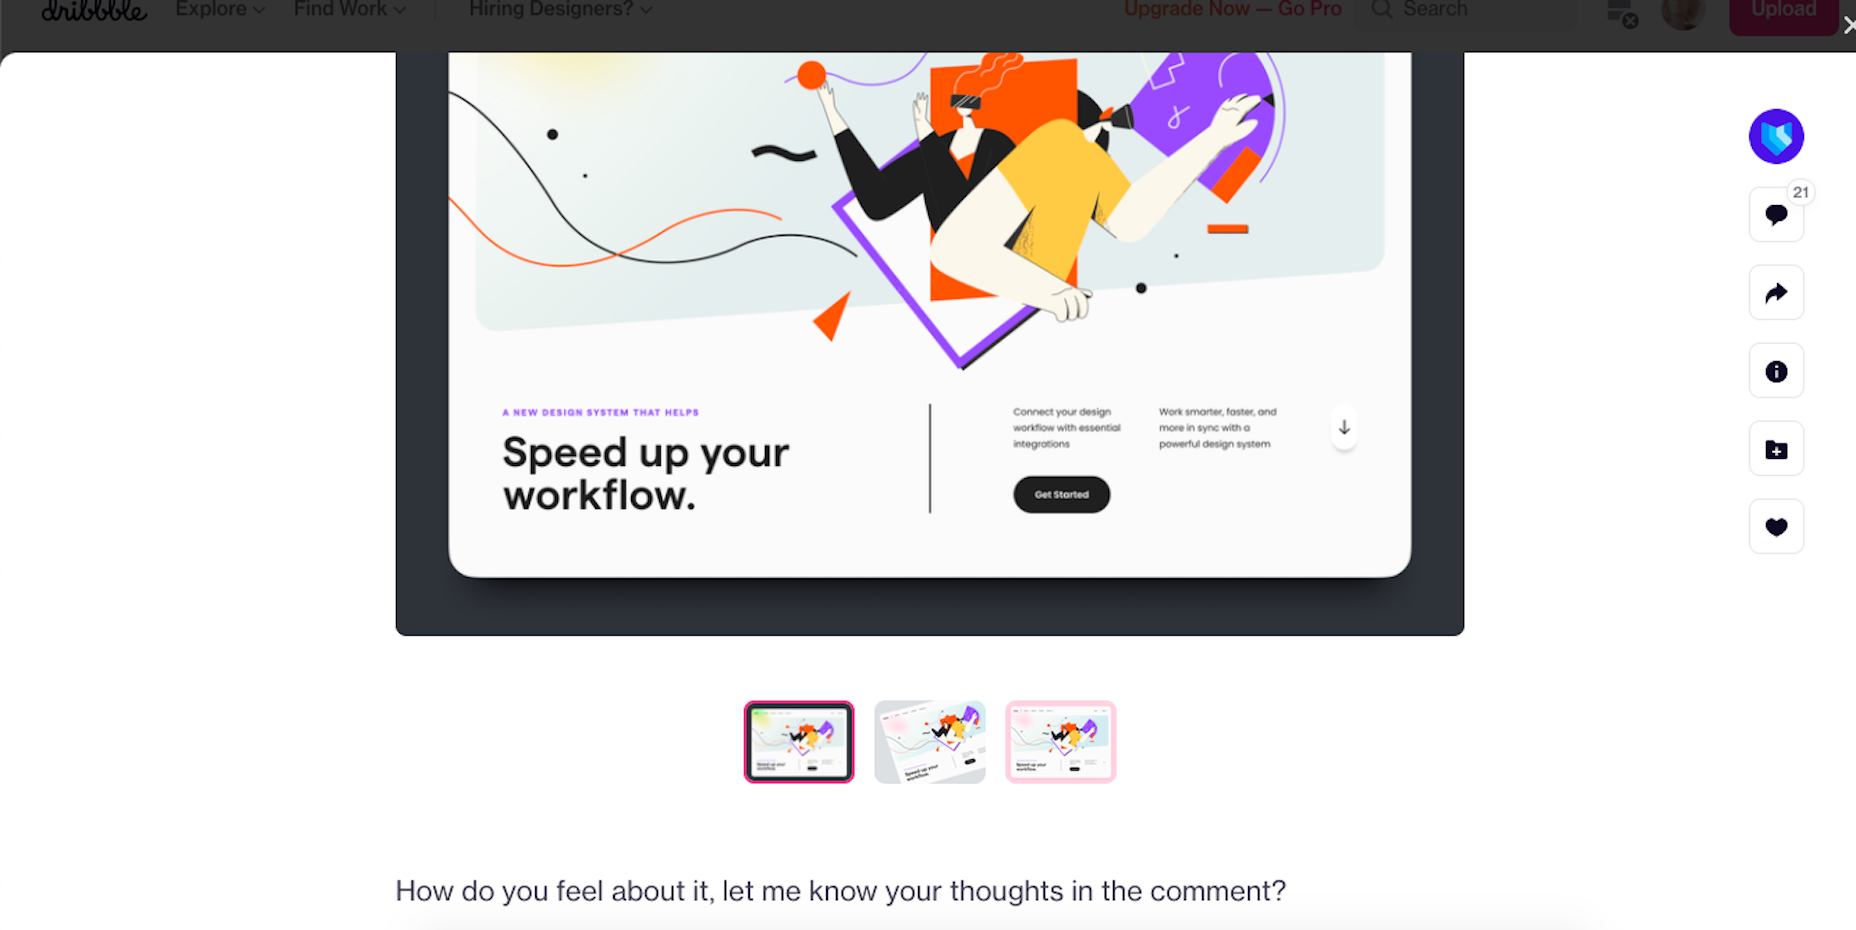
Understanding what users like and dislike is an important part of taking your design skills to the next level. And a good way to do that is to share your designs on Dribbble.

Here’s an example of UI8 asking for feedback:

Tip 6: Create a Design Toolbox

I’m a huge fan of automation and shortcuts powering things behind the scenes in business.

After all, one of the reasons you become a web designer is so you can design, right? When you’re bogged down with administrative and logistical tasks, that’s time spent away from doing what you enjoy.

One way in which you can streamline your backend processes is by putting together a design toolbox. Your preferred CMS. Flexible templates or apps you use from project to project. Website testing tools. And so on.

As you do this, it’ll force you to examine how you build websites. Are you really working as efficiently as possible? Are there newer apps or systems that’ll help you design better sites? And as you improve your design toolbox, you’ll improve your design skills.

Tip 7: Subscribe to Your Favorite Blogs

I have a hard time recommending this one, only because I’m reluctant to sign up for yet another newsletter. That said, I do see the value in subscribing to some blog newsletters as I don’t always remember to revisit their websites and check out the latest content.

What I’d suggest you do is pick one or two design blogs that have a good variety of content and publish regularly. And then pick one small business or freelance blog.

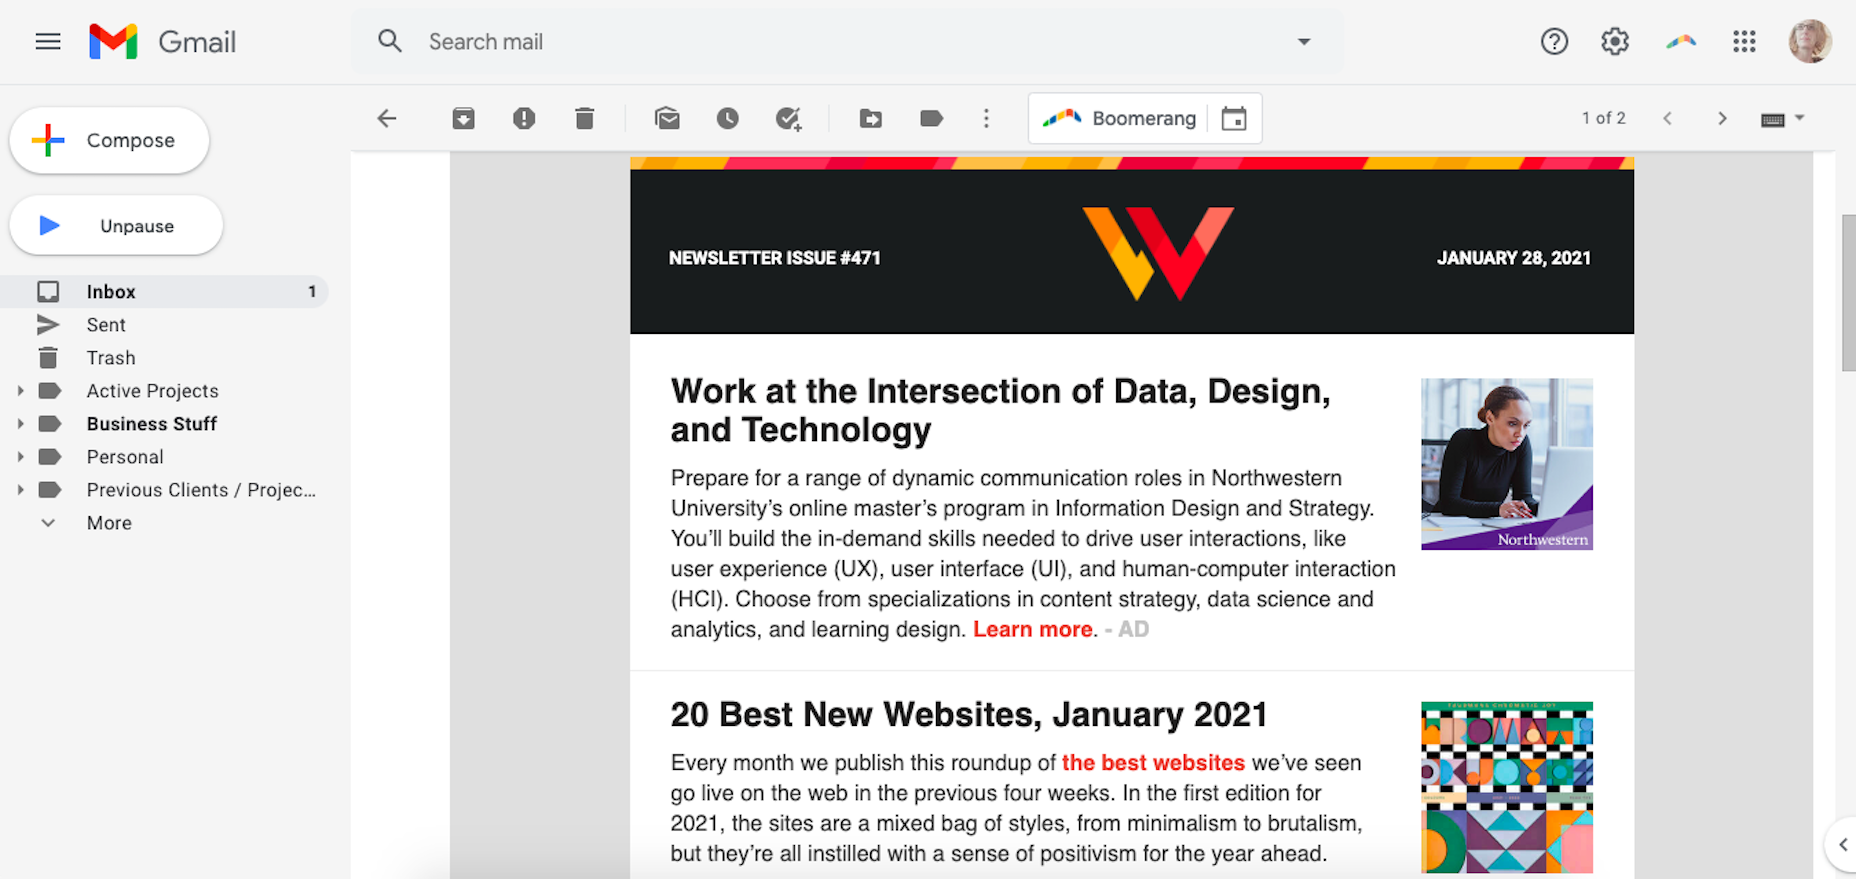
WebdesignerDepot, of course, is a good one to start with as it comes at a good frequency, recommends great reads from all around the web, and is fluff-free:

I’d also recommend signing up for one that’s focused on your niche as well as one for business.

As a freelancer, I’d vote for the Freelancers’ Union newsletter. There’s always something timely and useful in there.

Tip 8: Listen to a Podcast

I just adopted a second dog, so I’ve spent a lot more time on walks while house-training her. At first, I was stressed about it because it was time spent away from work. However, I started to fill that time with podcasts and found that it helped me work better for the rest of the day.

One reason is that I’ve been listening to work-related podcasts, which are always chock full of helpful tips. Another reason is that it gives my eyes a rest from looking at the screen so that when I come back 15 or so minutes later, I feel refreshed and ready to go.

Rebekah Carter has a good set of web design podcast recommendations to get you started.

Tip 9: Take a Free Online Design Course

There’s an overabundance of information online. If you want to brush up on CSS, there are hundreds of YouTube courses that cover it. If you want to learn how to use a new WordPress plugin, you’ll find dozens of great tutorials across various online course platforms, YouTube channels, and even people’s blogs.

There’s no need to go back to school to become a better designer. Here are five places where you’re bound to find free courses for web designers.

Tip 10: Read a Book on Design Principles or Theory

It’s easy to lose sight of design principles when your clients are clamoring for a website that will make them a lot of money, get them a lot of readers, and so on. Sure, you can design a UI and UX that works, but do you remember why the design choices you made are effective?

Choose a book — just one to start — that’ll help you reconnect with the roots of good web design. Not only will you get a good refresher on web design principles or design theory, but you might learn something brand new.

Here are some of my favorite books for web designers:

Tip 11: Find Your People

Now more than ever, finding a community of like-minded web designers, developers, or freelancers is important. It’s not just about having a group of people to vent to when clients drive you nuts (though that’s great, too).

It’s about finding a group that brings something new to the table and enriches your understanding of web design and what it means to be a web designer.

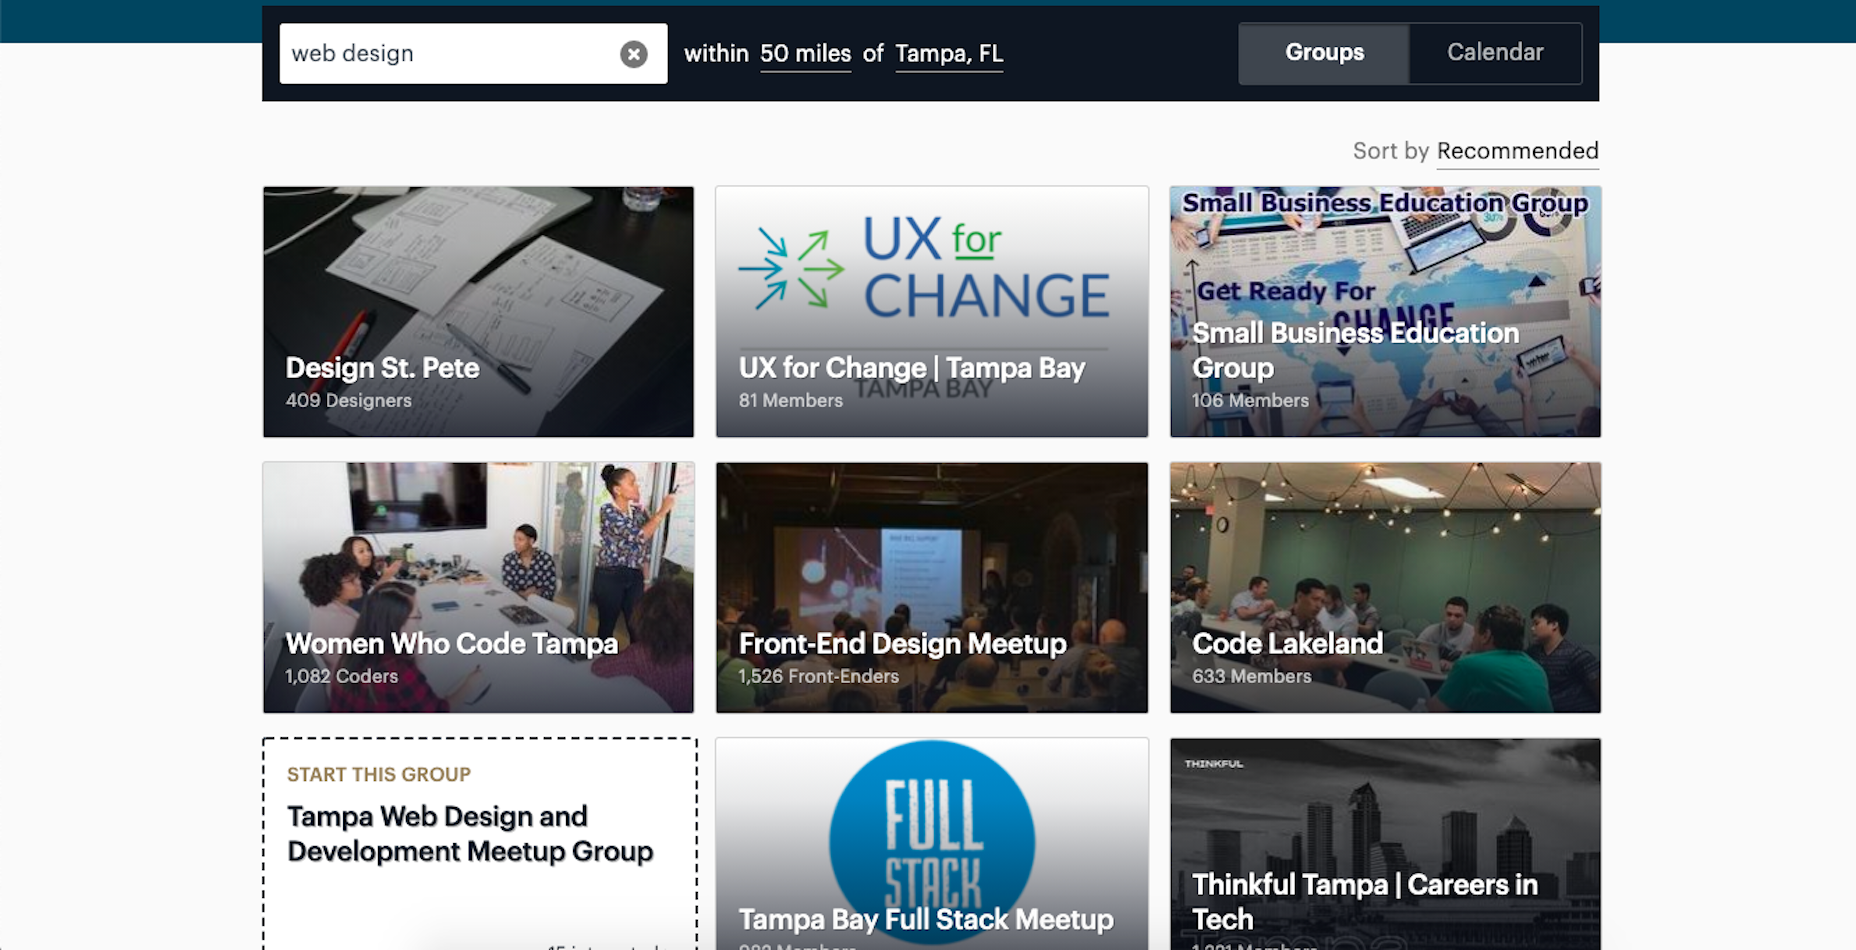
If you’re on Facebook or LinkedIn, start there. There are tons of web design and freelance groups that have productive discussions every day. If you prefer to meet up with local designers and developers, check out Meetup.

You may be surprised by how many groups there are and the kinds of meetups they have planned.

Tip 12: Attend a Virtual Conference

Did any of you attend a design conference last year? I did. I virtually attended Adobe MAX — from the comfort of my home, in my pajamas, for three days.

I scheduled my assignments around the sessions I wanted to attend and didn’t have to pick one over the other (i.e., “Do I make money or do I learn something new?”).

Some of the sessions showed us how to do more with Adobe’s tools, while some of them featured design and business leaders who shared personal insights on how to work more effectively. It was a great way to shake up my normal routine and to get a ton of information about the future of web design in a short period of time.

Which of These Tips Will You Use to Improve Your Design Skills?

Like I said before, there’s a lot you can do to improve your design skills. Just be careful not to overdo it.

Pick one or two things on this list to start with. If you have more time in your schedule and you’re excited about what you’ve learned so far, add a couple more.

Just take it slowly. Your brain will only be able to absorb so much at once. Plus, the last thing you want is to burn yourself out on skills training and not have the energy to complete your work.


Featured image via Unsplash.

Source

The post 12 Tips to Improve Your Web Design Skills in 2021 first appeared on Webdesigner Depot.


Source de l’article sur Webdesignerdepot

How can your customer reach you? If a client arrives on your website after searching on Google, what can they do to take the next step in a relationship with your brand, without buying anything?

One of the primary aims of any website is to drive conversions. However, it usually takes between 5 and 8 touchpoints to generate a viable sales lead. People don’t want to convert straight away.

Since building a relationship with customers is crucial to success, it makes sense that the contact page would be an essential part of driving results. Unfortunately, a lot of website owners pay virtually no attention to that page. They ask their designer to create a page with their address and phone number on – and that’s it.

What many business owners don’t realize, is that the contact page is the door to deeper, more lucrative relationships with potential prospects. The design of this essential website element needs to be fantastic to drive results.

So, where do you start?

Defining a Well-Designed Contact Page

Let’s start with the basics, what makes a great contact page?

The complete answer to that question depends on the target audience. Some customers will want to see fun and friendly contact pages, complete with social media sharing buttons. Others will want to see a map that shows them exactly how to reach an office or business.

There are a few golden rules to keep in mind, of course. Contact pages should be:

  • Easy to find: Don’t hide the link to the contact page on the website footer. Make it easy for customers to find out how they can get in touch.
  • Simple: Don’t put too much content on this page or it will overwhelm your audience. Just let them know where they can go to get answers to various questions.
  • Professional: Even if you have a friendly brand personality, your contact form still needs to be grammatically correct and well-designed to show a professional edge.
  • Convenient: Make your phone number clickable so customers can use it on Skype. The same can apply for your email address. Provide easy access to social media profiles, and if you have a contact form – keep it short and sweet.
  • Informative: Include all of your contact information in the same place. This may include your address, a map to your location, social media pages, email addresses, and even forums.
  • Accurate: Ensure that the information on your contact page matches the information listed elsewhere. Check directories and Google my Business listings to be sure.
  • Attractive: Yes, a contact page needs to look good too. Plenty of white space will make essential information stand out. A good layout will guide the eye through the page.
  • Consistent: Make sure the contact form on your website matches the brand personality that appears on all of your other pages.

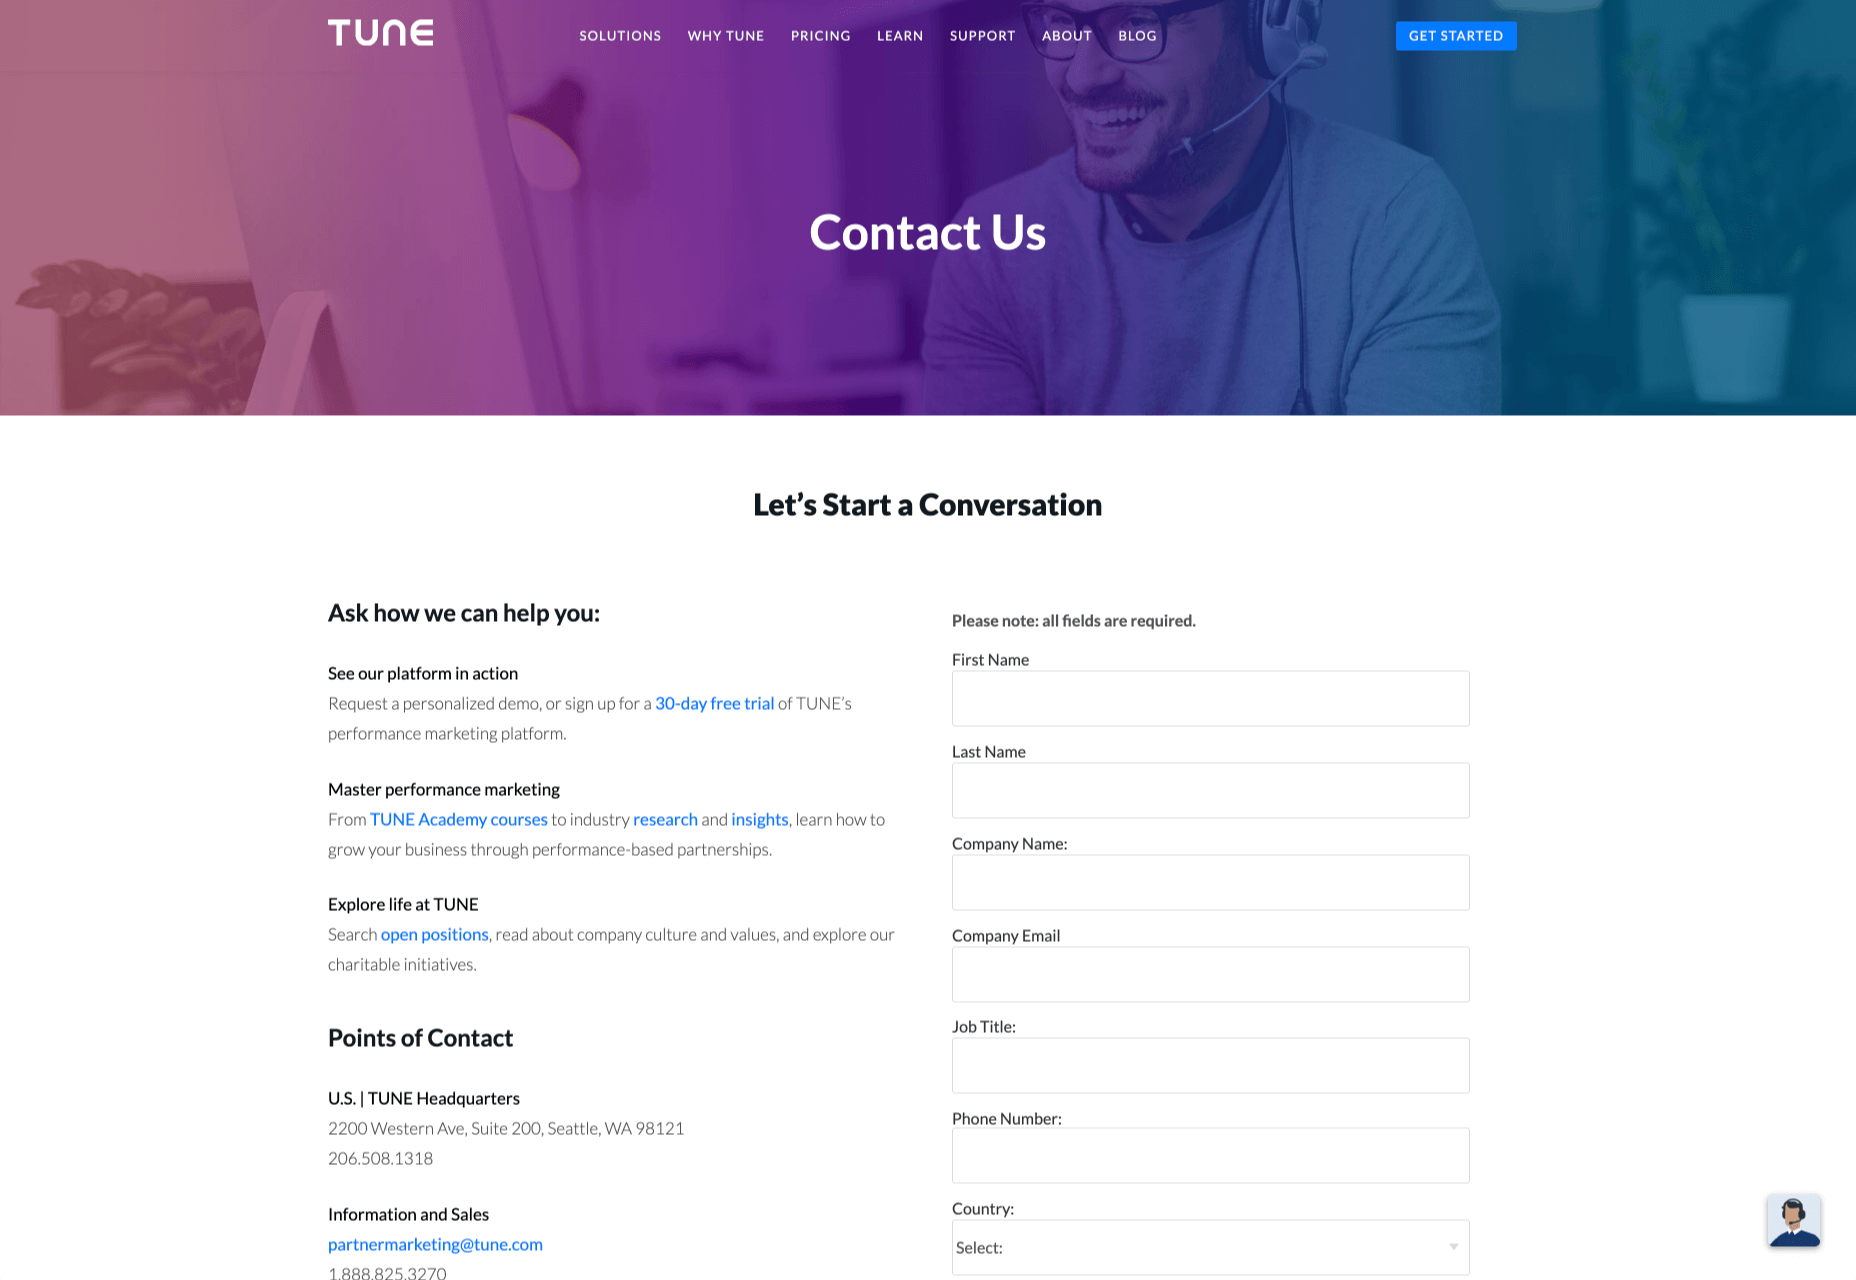
Take a look at the Tune Contact page:

It’s beautifully laid out, with clear information that’s easy to read. The company shows exactly why customers might want to get in touch and how they can reach out. As you scroll through the page, you’ll find additional office locations, email addresses for different teams (sales and support), and links to social media accounts too.

How to Drive Engagement on a Contact Us Page

A good contact page needs to look fantastic, showcase the company’s personality, and capture audience attention. However, there’s a big difference between a contact page that gets the job done, and one that convinces your audience they have to connect with you.

Here are some excellent ways to make your contact us page stand out.

Step 1: Using Color Correctly

Color and color psychology have a massive impact on user experience.

Studies constantly demonstrate the conversion powers of having the right shades on certain pages throughout your website. For instance, changing a CTA button from red to green can increase click-through rates by 27%.

However, every audience is different. The colors that drive engagement on a contact page for your company will depend on your target customer. A/B testing color palettes that match your brand personality is a good way to get started.

One interesting example of colors that make the right impact on a Contact Us page comes from Hubspot. Here, the brand maintains it’s brand color (orange), but it also introduces some new shades that convey trustworthiness and professionalism.

Blue is the most calming and credible color for any brand, The gradient that Hubspot uses here blends perfectly with its brand identity, allowing for a stunning contact page, with CTA buttons that still stand out.

Experiment with colors that can generate the right emotional response from your audience, but don’t ignore the golden rules of color in web design. You still need to showcase your brand identity, and you still need a way of making crucial information stand out.

Step 2: Humanizing the Customer Service Team

Some of the customers that arrive at a contact page are interested in your product or inspired by the potential of your service. Other customers will be looking for assistance because they’re frustrated with something or stressed out.

If you’ve ever had a problem with a product and wanted to reach out to the brand about it, you’ve probably noticed how annoying it is to find a blank contact page with nothing but an email address. The lack of effort and humanity in the contact page is enough to convince you that you probably won’t get a response.

But what if you add some happy smiling faces to the page?

Research indicates that brains are fine-tuned to recognize and appreciate human faces. Having a picture of your customer service team, or just any human being on your contact page makes you instantly more approachable. Your customers start to feel like they’re reaching out to a person – not an empty website.

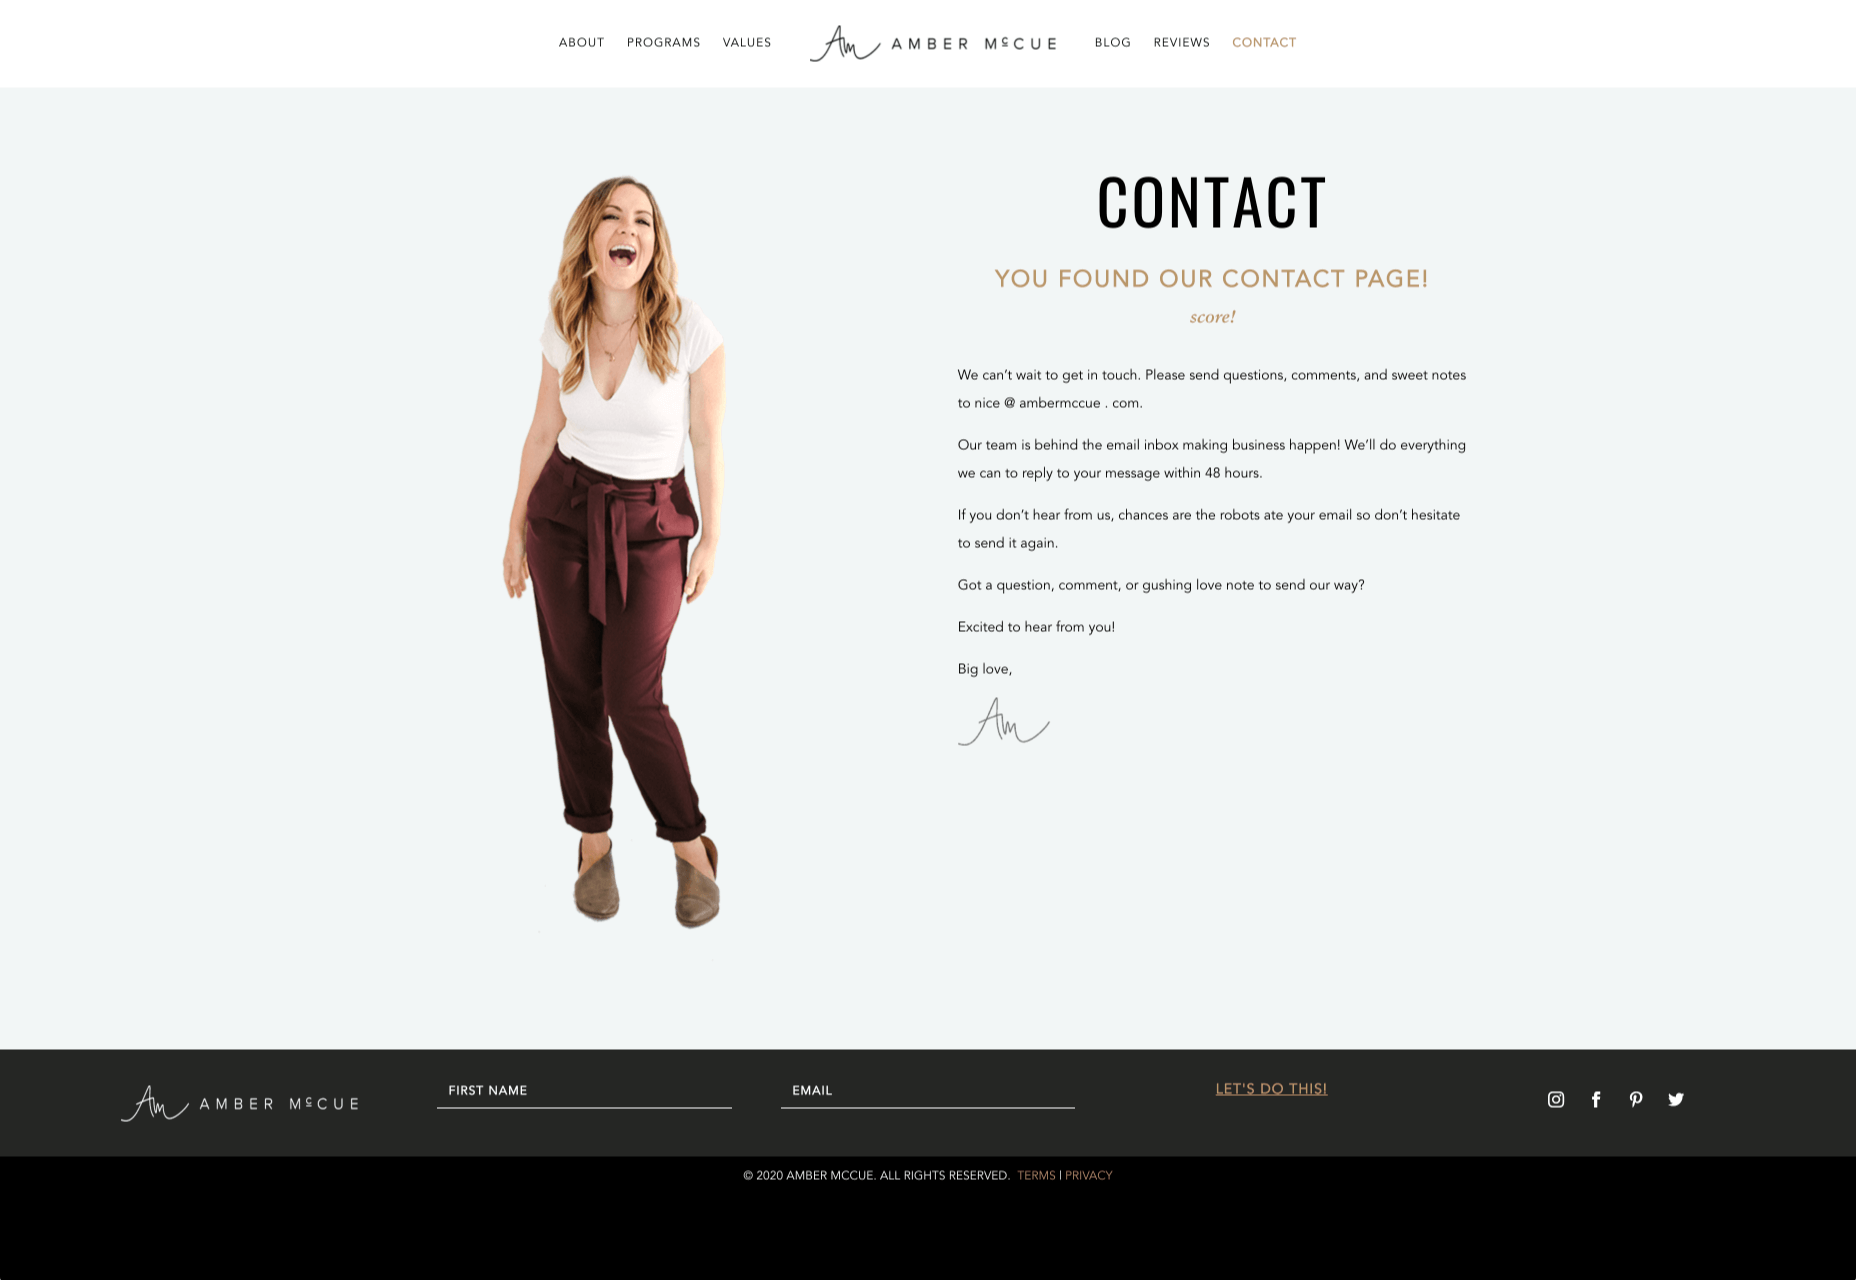
Look at how engaging and personalized this contact page from Amber McCue looks:

Although you can show any human face on your contact page and potentially get results, showing your actual agents will be more likely to drive positive results. It’s a great way to showcase the authenticity and humanity of your team.

Step 3: Making it Easy to Find

A surprisingly large amount of the time, companies shove their contact information into the footer of their website, forcing customers to spend forever looking for them. However, your audience might not want to spend an age searching for your details if they’re in a hurry to get answers.

Stowing a contact page in a footer is also a problem for those visiting your website via mobile, as they might not be able to see all your footer details and links as well.

A Contact Us page doesn’t have to be a massive part of your website navigation if you don’t want it to be. However, it should be one of the first things your audience can see. Putting the information on the header of your website, or even sticking it to the top of the page as your users scroll is very helpful.

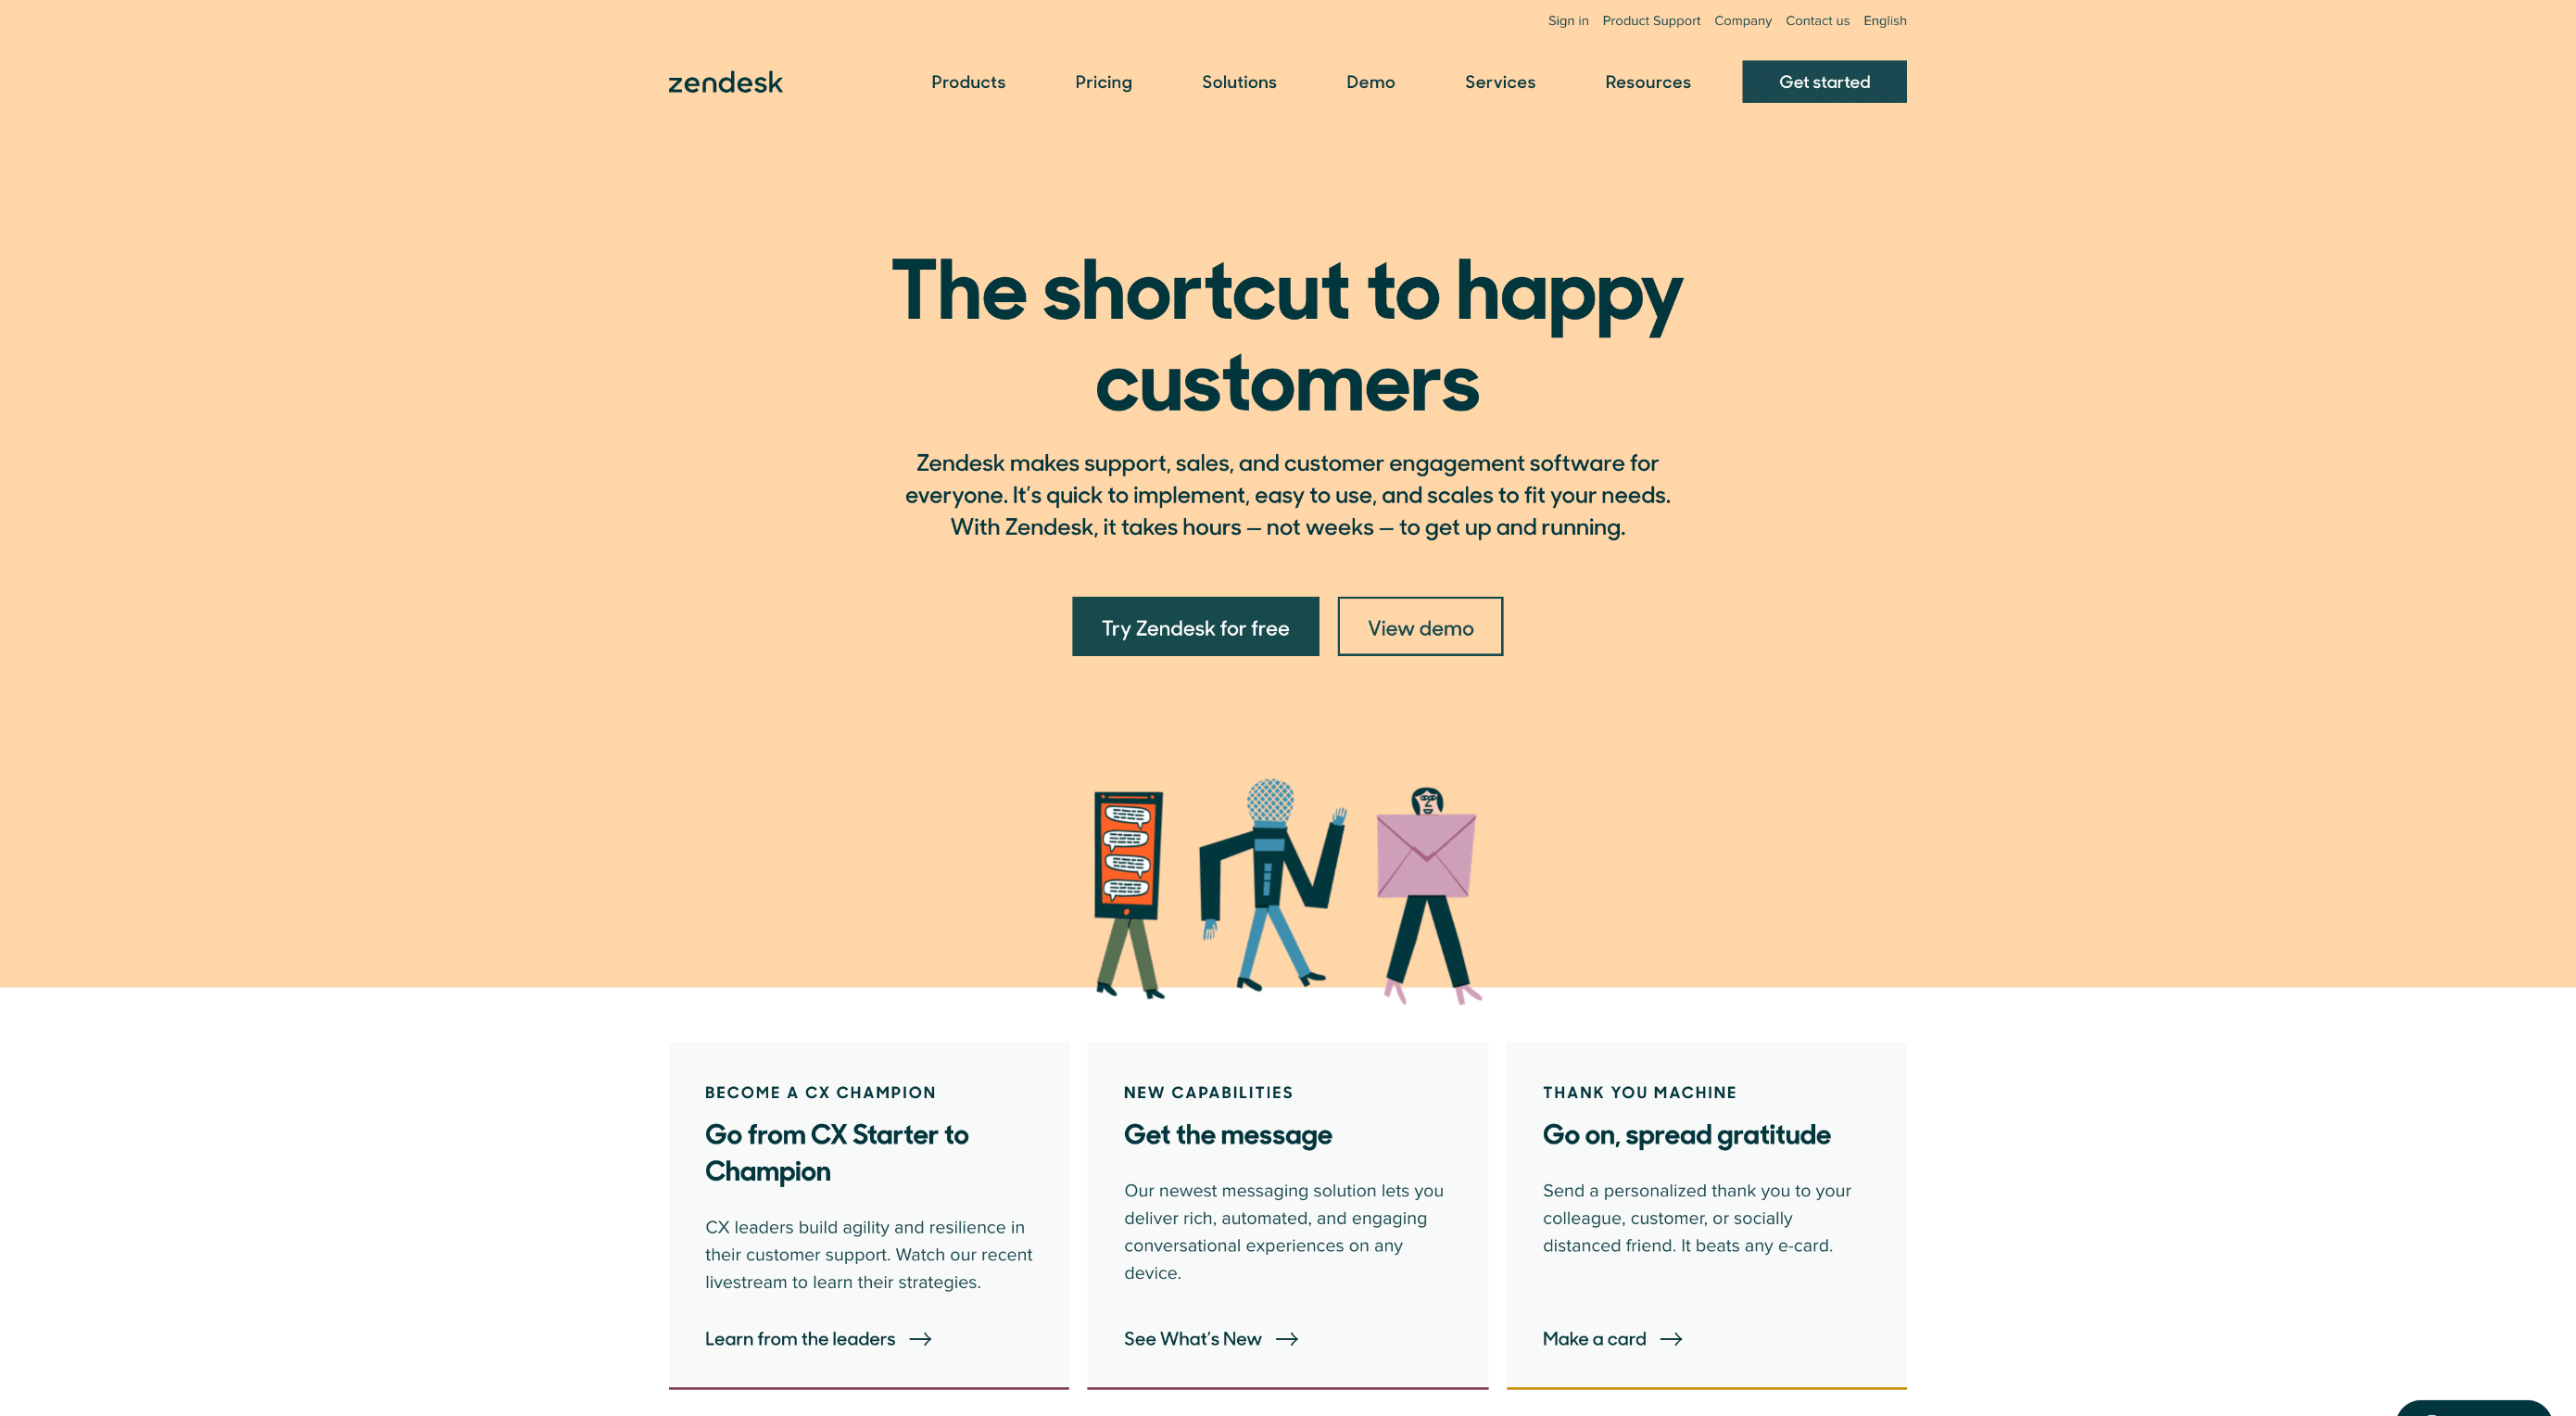
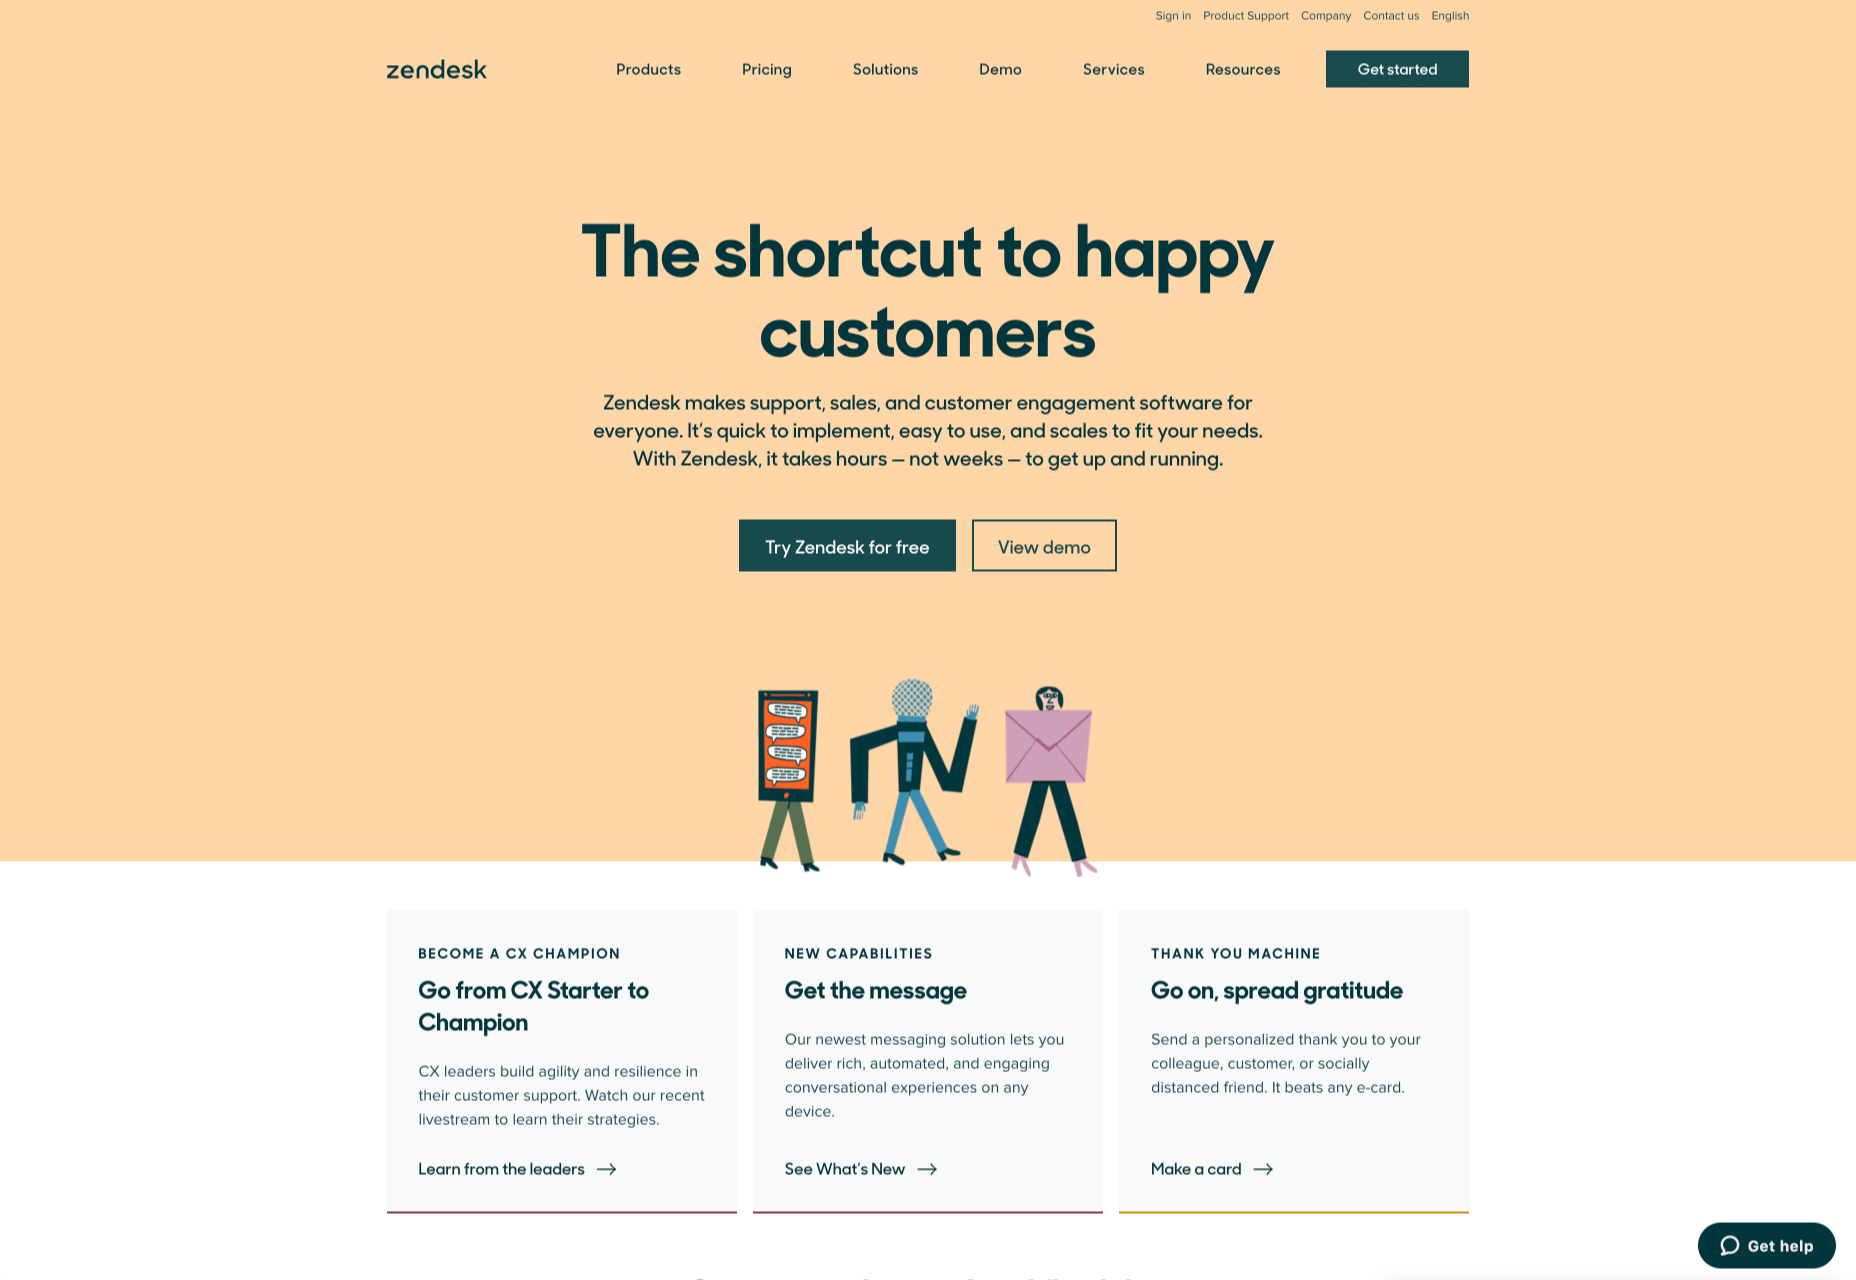
Zendesk makes it easy for customers to get in touch in multiple ways. First, the Contact section of the website is clear at the top of the page. Secondly, if you start scrolling through the Zendesk website, a “Get Help” button pops up, so you don’t have to scroll back to find assistance:

Remember, aside from making sure that your contact page appears in the right part of your website, it’s also worth ensuring that it’s easy to understand. Don’t use unusual terms like “Chat”, or “Chill with us”. Stick to tried-and-true options like Help, Contact, or Support.

Step 4: Making the Experience Relevant

There’s a reason why it’s practically impossible to find a one-size-fits-all contact page.

It’s because different customers need different things from your brand.

Some customers will be looking for the answer to a question; others will want to discuss something with your sales team. That’s why many companies are using adaptive contact pages that can change to suit the situation.

For instance, you may start by asking customers what they need help with. Zapier takes this approach with its Contact page:

By asking the client what they need straight away, Zapier can make sure that the visitor finds the right information, and the right number or email address for the appropriate agent. You can even scroll down the help page and look for something in the available help centre, using the search bar. Or you can click on View our experts to hire a Zapier pro.

Creating a dynamic and customized experience like this does a few things. First, it ensures that the customer will reach the right person to help them first-time around. This reduces the number of inappropriate calls your employees have to deal with, and the number of transfers.

Secondly, you deliver a better experience overall for your client, because they don’t have to repeat their issue to multiple people or start a massive email thread. They get the support they need immediately.

Dynamic contact pages can even save you some money and time. If clients decide to solve an issue themselves, using your resources, that’s great for your busy agents.

Step 5: Direct People to the Right Place

The central focus of your contact us page needs to be the available contact options. Centralizing the contact options on a page is an excellent way to make sure that they get the right amount of attention. Centralizing also means that your customers can spend less time searching for the contact details that they need, which is great for usability.

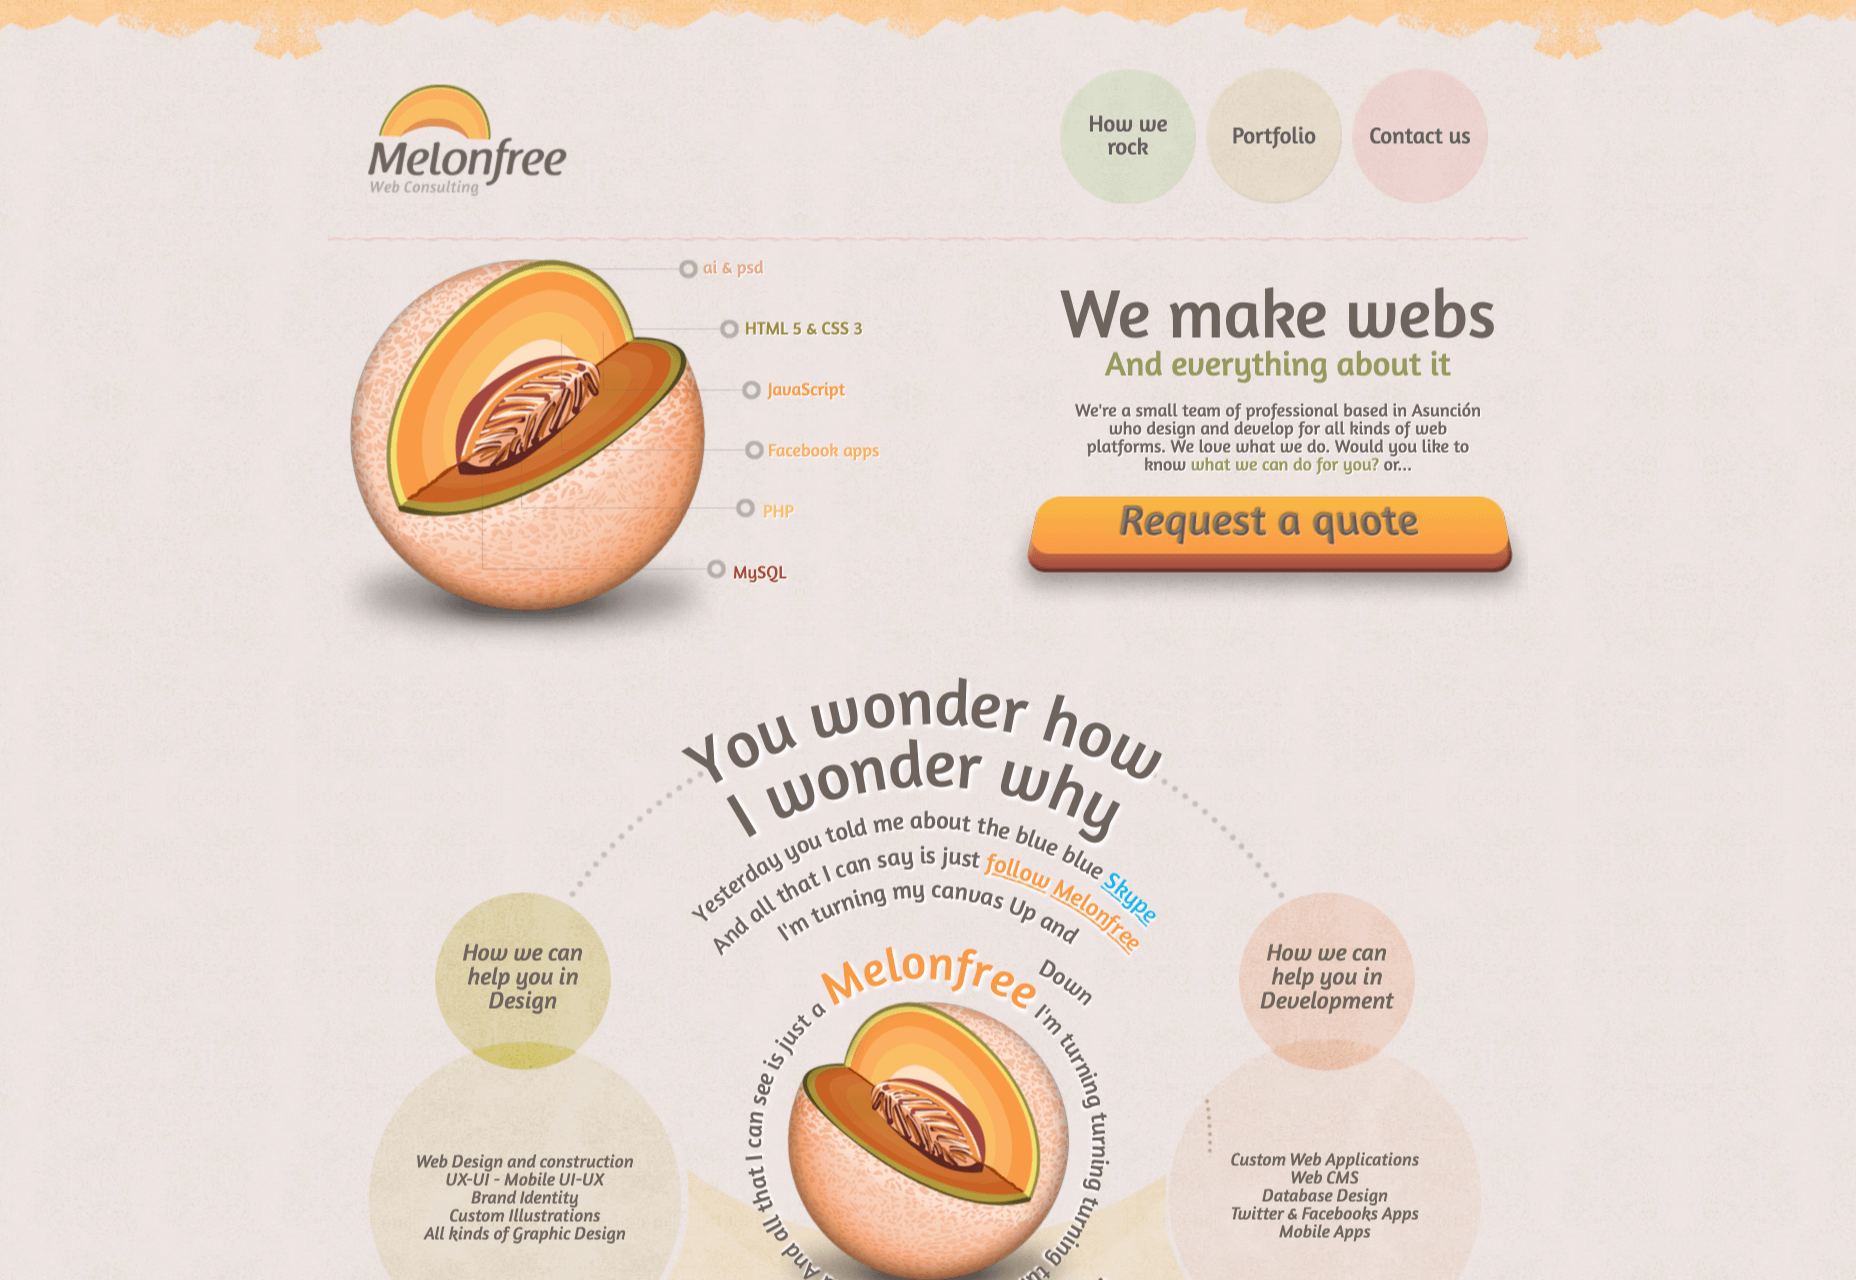
The Melonfree.com website uses a contact us form that’s centralized to immediately pull attention to the customer’s options for getting help.

Centralization isn’t the only way of using design principles to guide visitors on a contact page. According to Ray Hyman and Edmund Hick, increasing the number of choices on a page often increases the time it takes for people to make a decision.

When it comes to connecting with a brand, the right option for each customer will depend on the person and the situation they’re trying to overcome. For instance, a customer that needs to reset their password will probably be able to get the solution they need from an FAQ page.

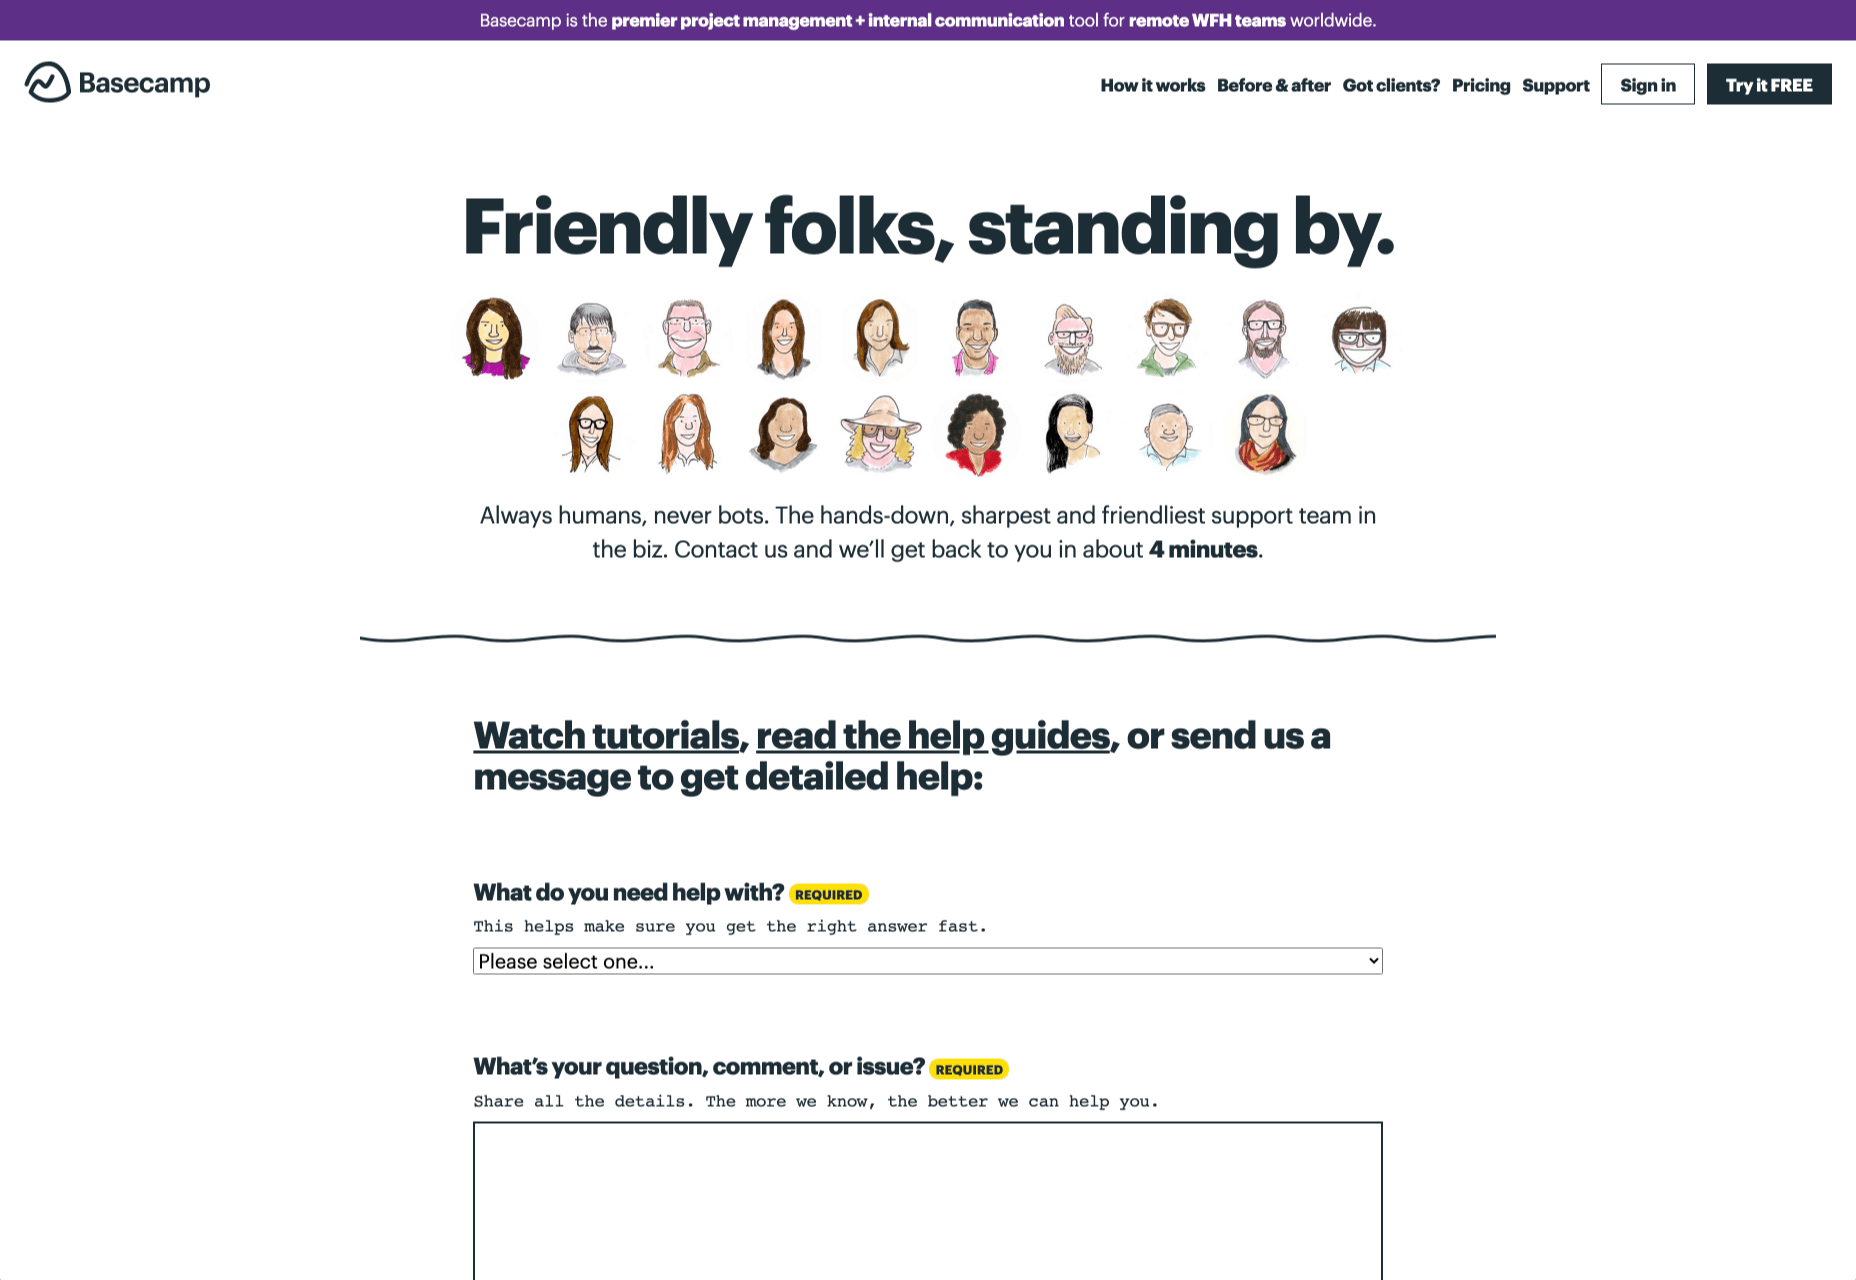
On the other hand, someone who needs help using a new feature might need the guidance of a professional. To help guide customers to the right solution, Basecamp gives customers a variety of steps to follow to get the right solution fast.

The main purpose of the contact page is to help customers get the right answer with an informative form. However, there are unobtrusive alternative options available too. If all you’re looking for is a way to help yourself fix a problem, you can click on the help guides link before you ever scroll down to the form.

Step 6: Support the Contact Team Too

The best contact us pages aren’t just a great way to improve customer experience. Well-designed solutions also help the customer service team to save time and stay productive.

One of the primary metrics that companies consider when evaluating the success of a service team, is the number of replies required before an issue is resolved. However, if the initial question from a customer doesn’t contain enough information, this number often increases.

Using the design of the contact form to access the right information helps with:

  • Automatically routing people to the right team member: Companies can set up segmentation rules that automatically send certain emails to different employees based on keywords. You might have questions that go to the sales team, and separate queries that you direct straight to the customer service team.
  • Show appropriate support options and FAQs: Remember to give the audience a chance to help themselves before they reach out for extra support. Links to an FAQ page or self-service options can really reduce the pressure on a team. Some companies even add automated chatbots to the mix to help with self-service.
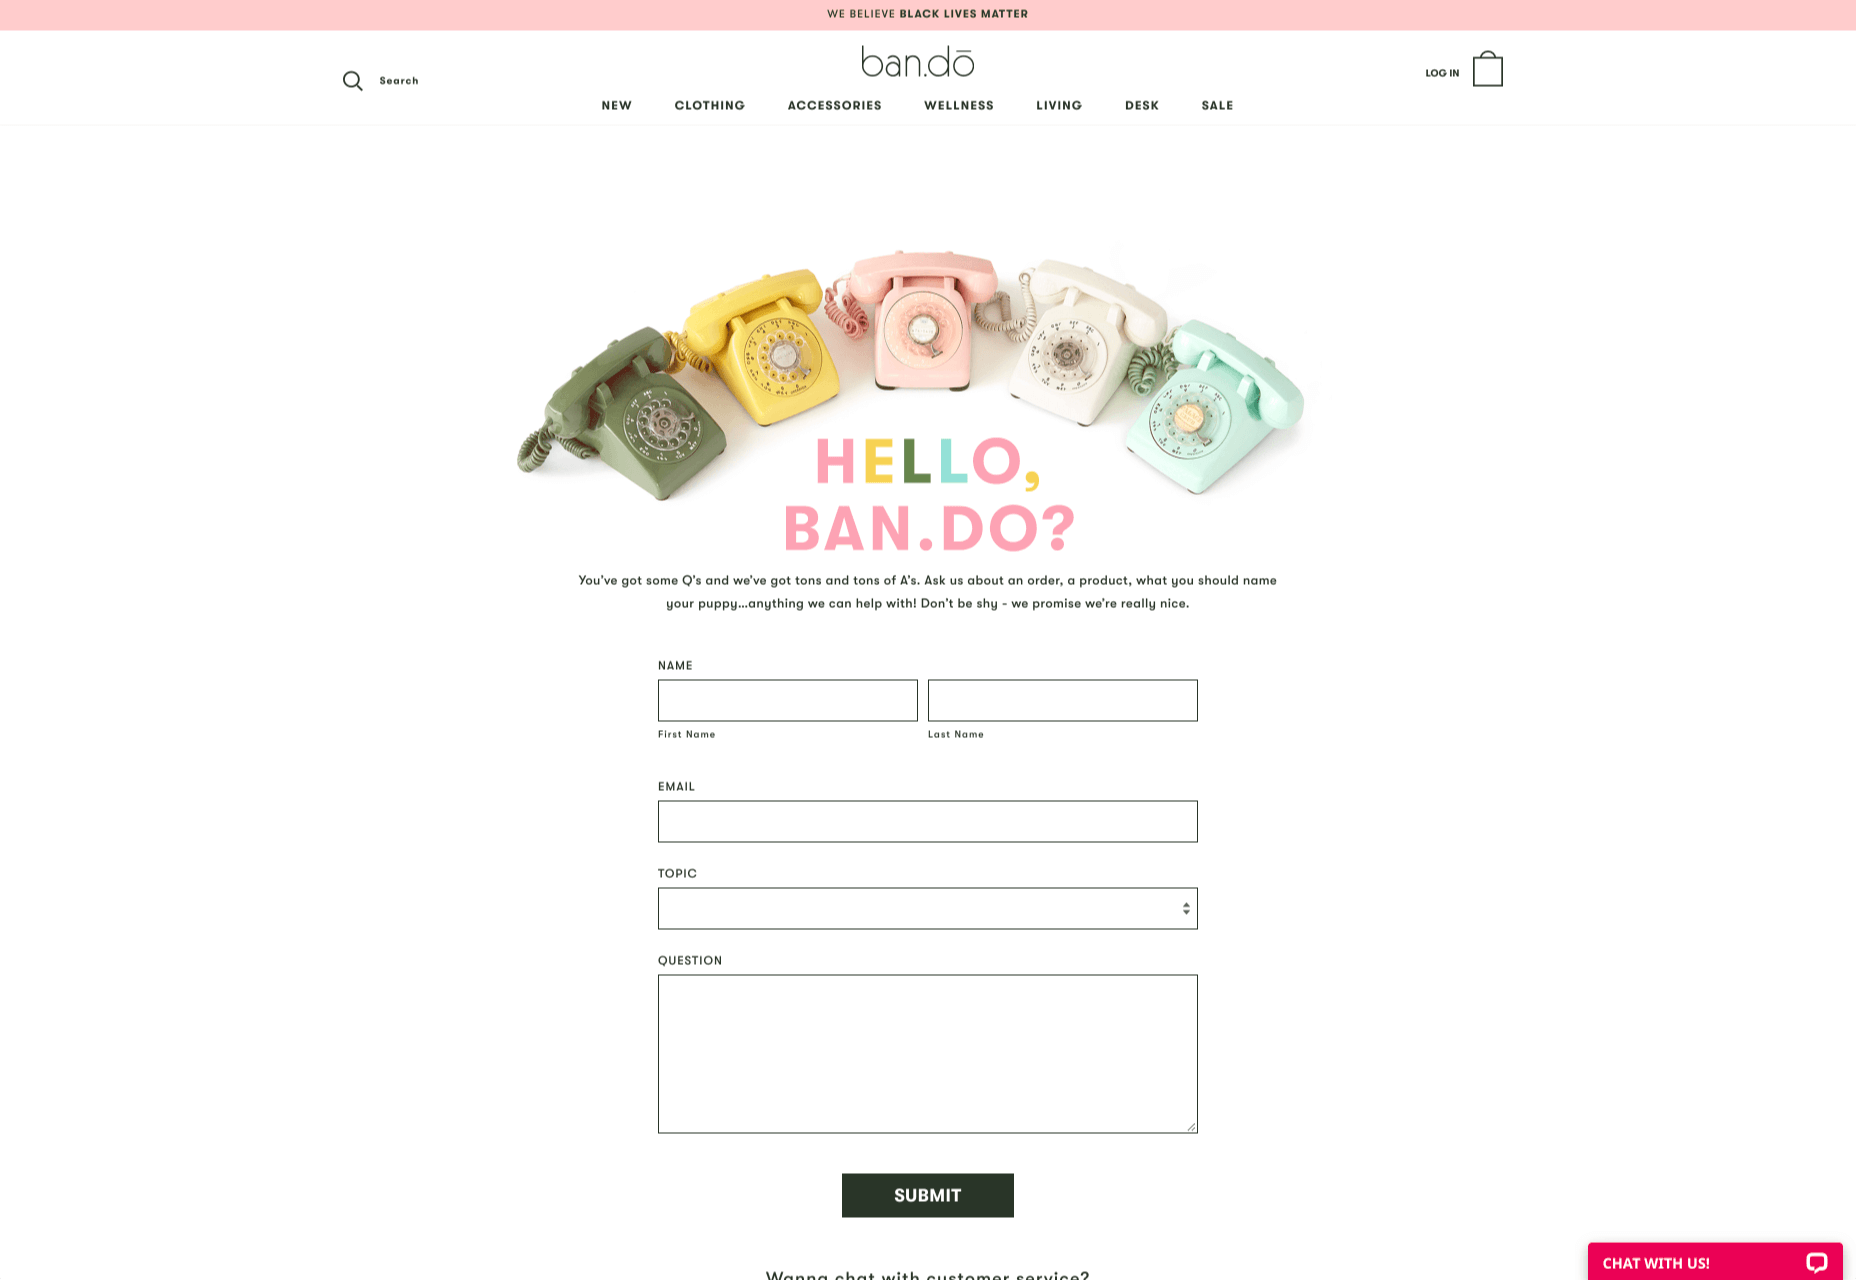
  • Prompt for extra context: Although not every customer will take advantage of an opportunity to add extra information to a form, some will. Adding a box to your contact form for “anything we need to know?” is a great way to generate more information. Ban.do includes a simple “question” box where customers can add as much detail as they like. An option to add screen shots or documents might be a nice touch too.

Building Your Own Contact Us Page

Every customer has their own specific set of needs. The right contact page for another business might not be the right one for you. That’s why it’s so important to take some time getting to know your customers and speaking to your support team.

When you’re planning your contact page, it helps to ask yourself some basic questions about what you want to achieve. For instance:

  • What kind of channels will our customers want to use to connect with us? Look at things like social media messaging, email, or phone calls. If you’ve got a relatively tech-savvy audience, then they might want to use things like instant messaging with chat bots too.
  • How can we direct clients to the appropriate channels in as little time as possible? Having a system in place to automatically route your customers to the right agent will reduce the time to resolution for your customers. The faster you solve problems, the better your reputation becomes.
  • What can we do to set customer expectations and build confidence before they speak to us? Designing a professional-looking contact page will increase customer confidence, while an FAQ section shows that you’re ready to answer common questions.
  • How can we showcase a unique brand personality without making the page complicated? Everything from using distinct brand colors on a contact page, to adding images and illustrations reminds customers that they’re in the right place.
  • What can we do to reduce the friction points in a customer’s path to contact? Avoid adding too many input options to a contact form and ensure that it’s easy to reach out when your clients have a problem.

Understanding exactly what your audience needs from you, and what they’re looking for when they come to your team for help reduces the effort involved for your client when they reach out for help. Remember, today’s digitally-savvy customers expect their interactions with companies to be as streamlined and simple as possible.

Make the Most of Your Contact Page

Contact pages are frequently an afterthought in the website design process. However, they’re one of the most valuable tools your company has. With a good contact page, you ensure that your customers can always reach you when they have problems. What’s more, you boost your chances of people wanting to reach out to the sales team too!

Good luck creating a contact page that encourages engagement from your target audience. Don’t forget to track your results from each design, and A/B test for optimization.

Source


Source de l’article sur Webdesignerdepot

Every week users submit a lot of interesting stuff on our sister site Webdesigner News, highlighting great content from around the web that can be of interest to web designers.

The best way to keep track of all the great stories and news being posted is simply to check out the Webdesigner News site, however, in case you missed some here’s a quick and useful compilation of the most popular designer news that we curated from the past week.

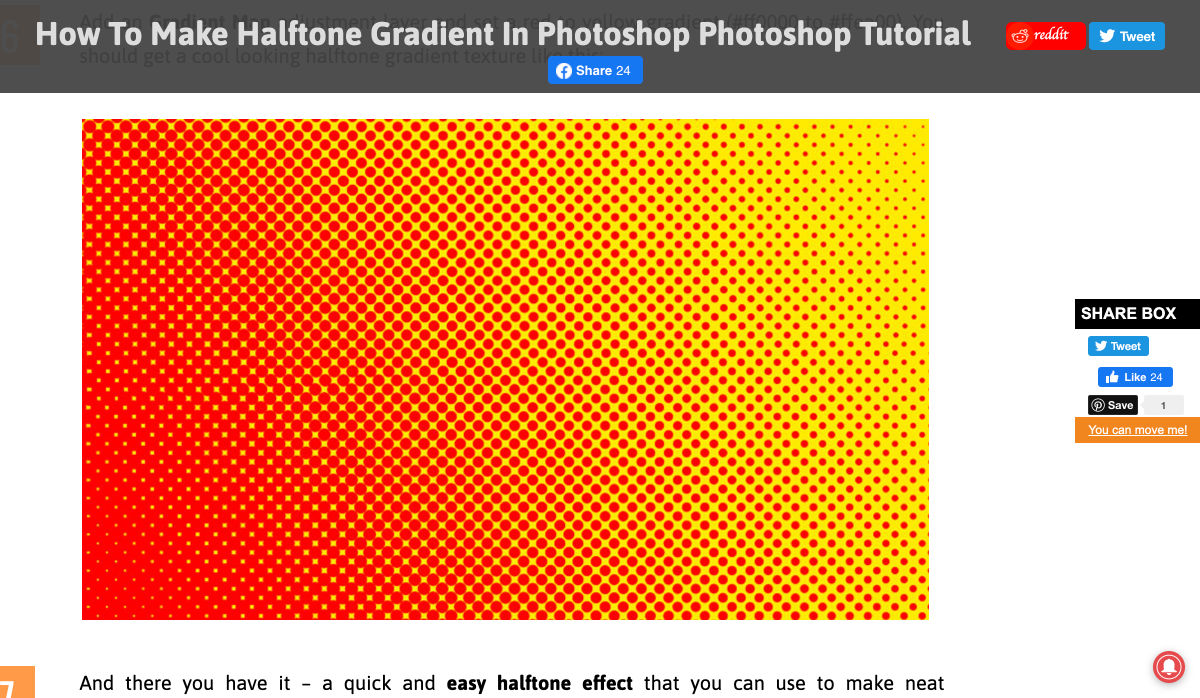
How to Make Halftone Gradient in Photoshop


Drawing Simple Line Patterns Using HTML5 Canvas


10 Online Design Tools You Never Knew You Needed


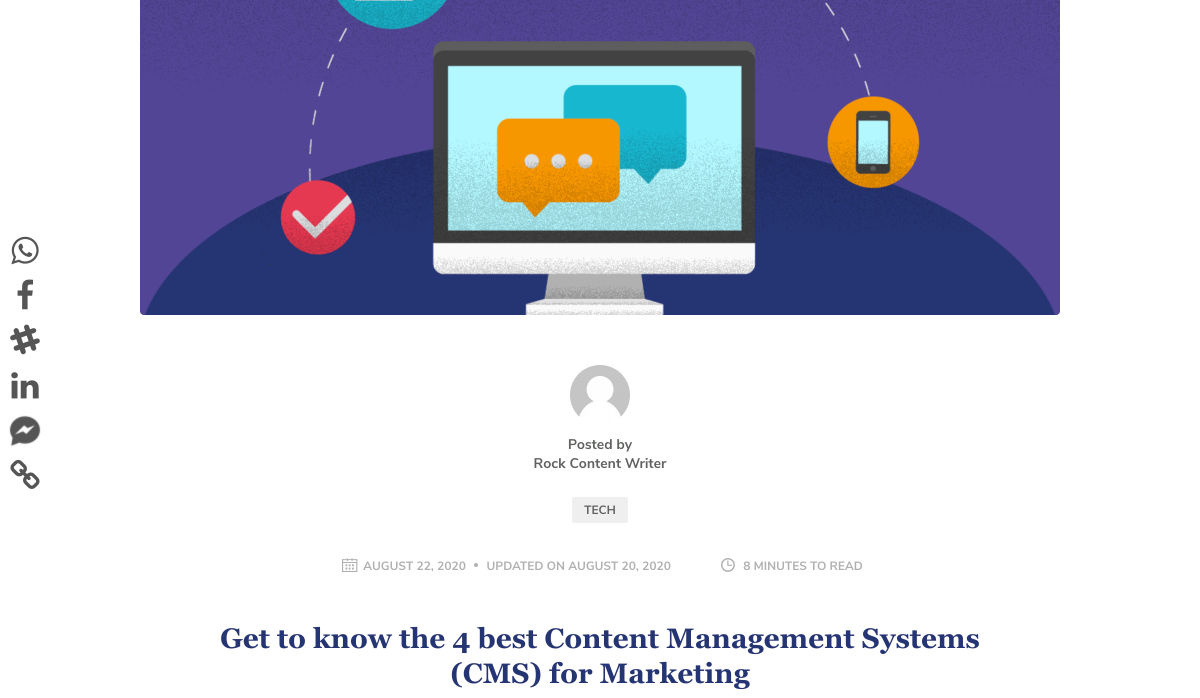
4 Best Content Management Systems (CMS) for Marketing


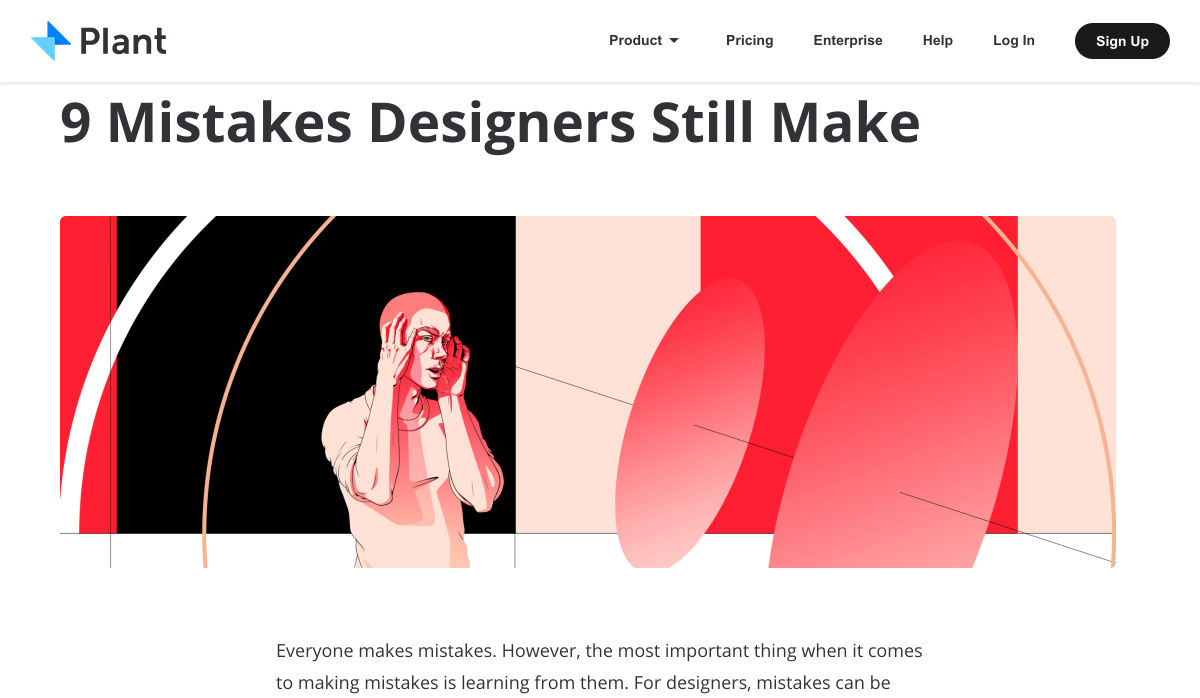
9 Mistakes Designers Still Make


6 Visual Design Principles that UX Designers Should Be Aware of


Best Way to Lazy Load Images for Maximum Performance


17 Stunning Examples of Sites with Horizontal Scrolling


Less is a Bore. Why Tech is Finally Embracing Maximalism


What Does it Mean to Have a High-Quality Website in 2020?


8 Project Management Tips for your Next Web Development Project


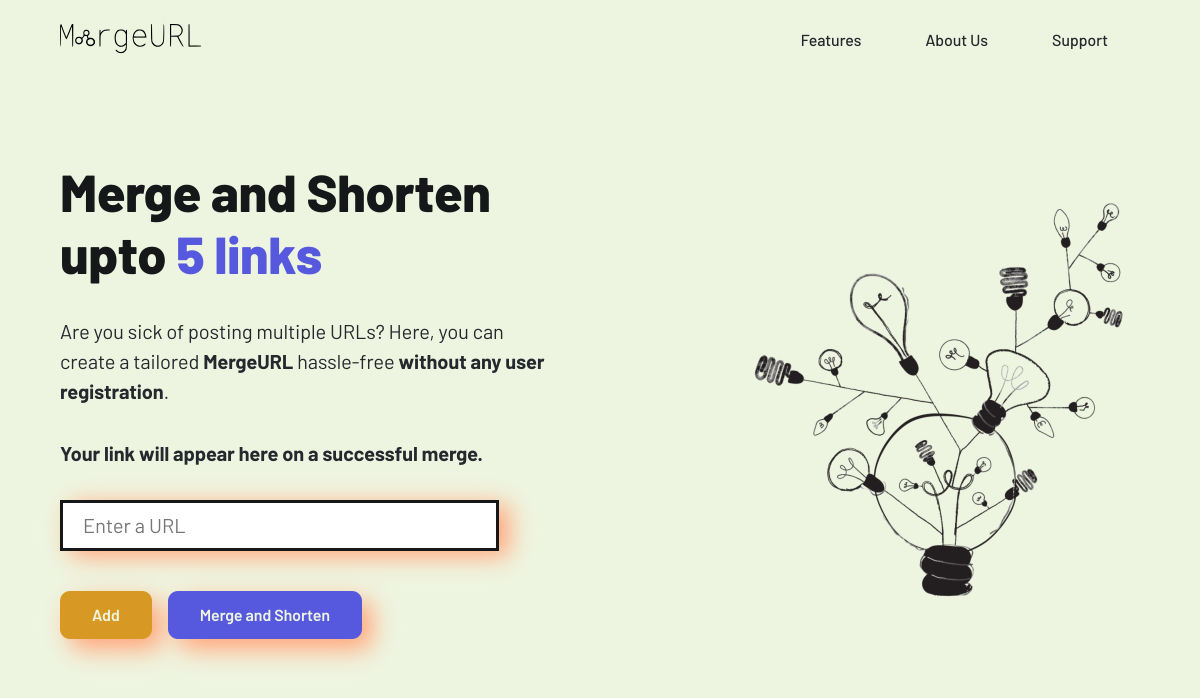
MergeURL – Shorten Urls for Free Without User Registration


13 Design Challenges to Improve and Showcase your Skills


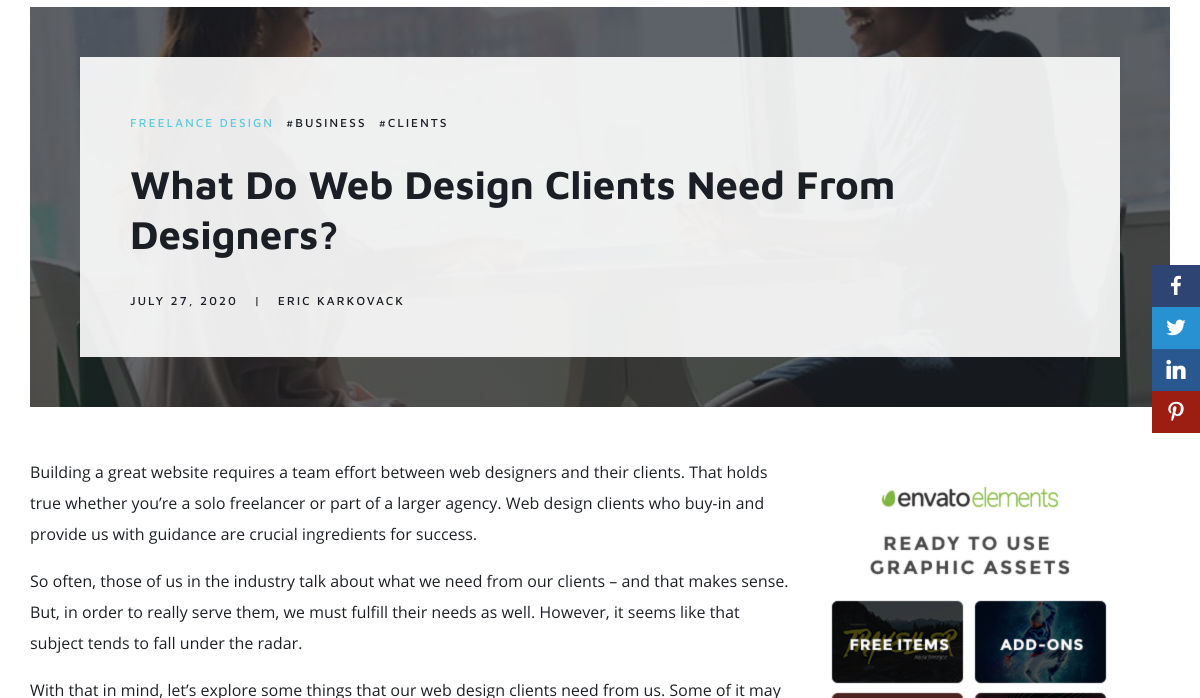
How to Find Web Design Clients


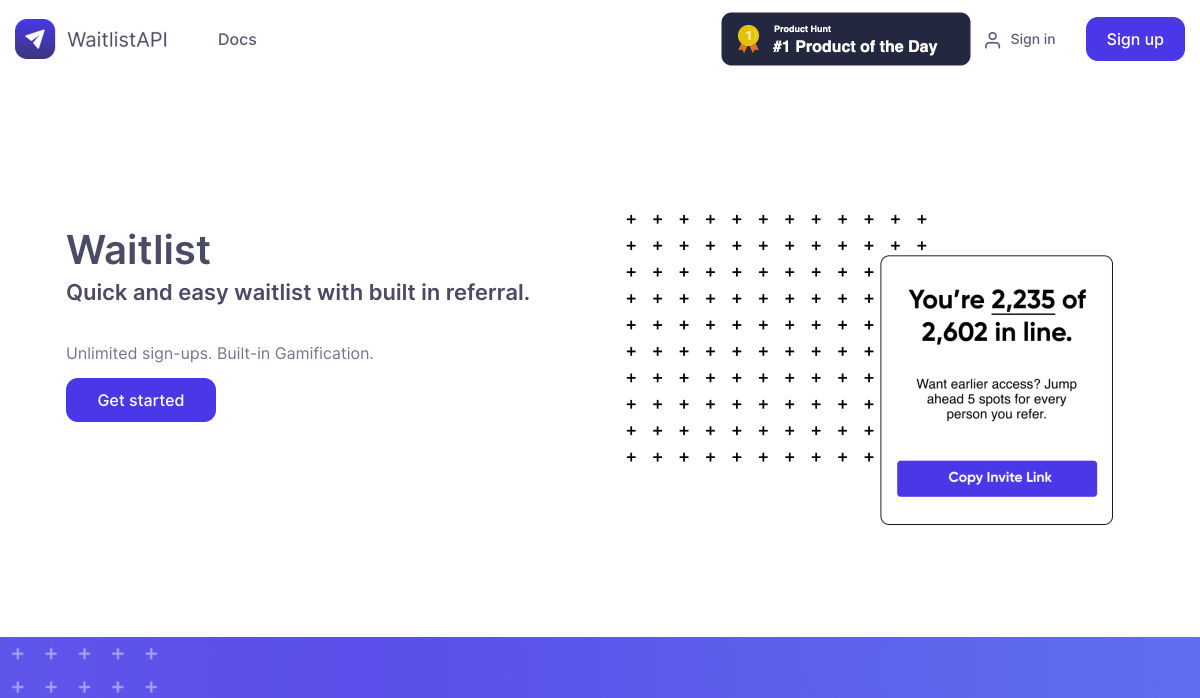
Waitlist API – Quick and Easy Waitlist with Built in Referral


What is the Small Web?


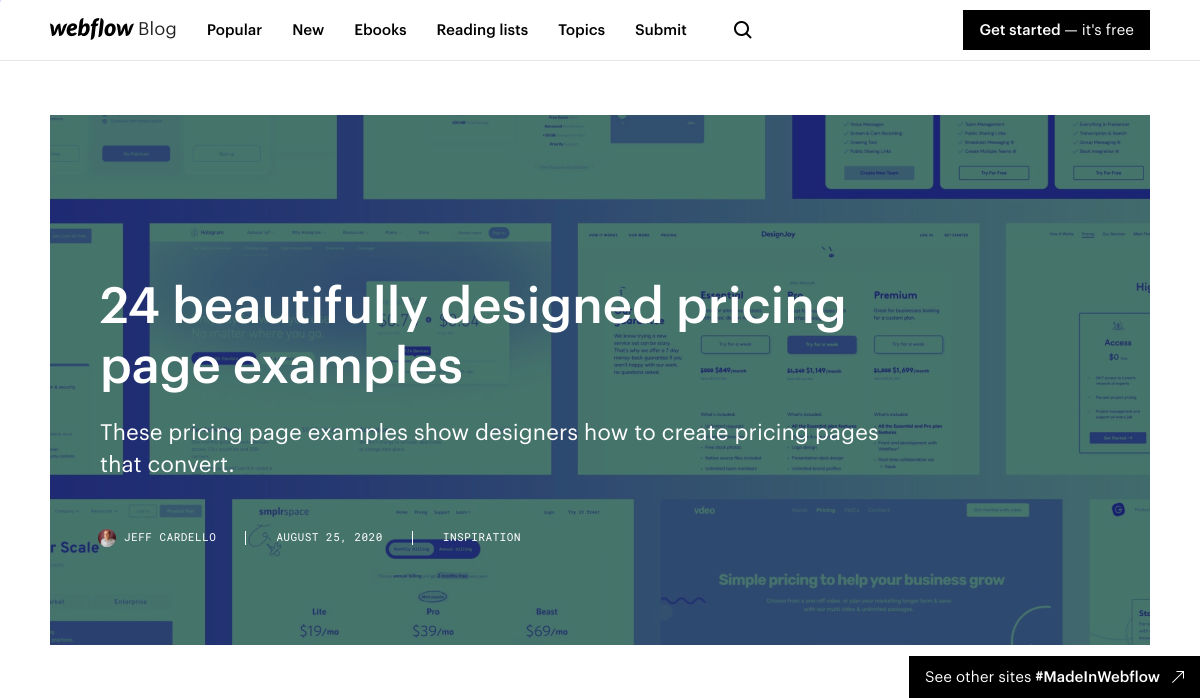
24 Beautifully Designed Pricing Page Examples


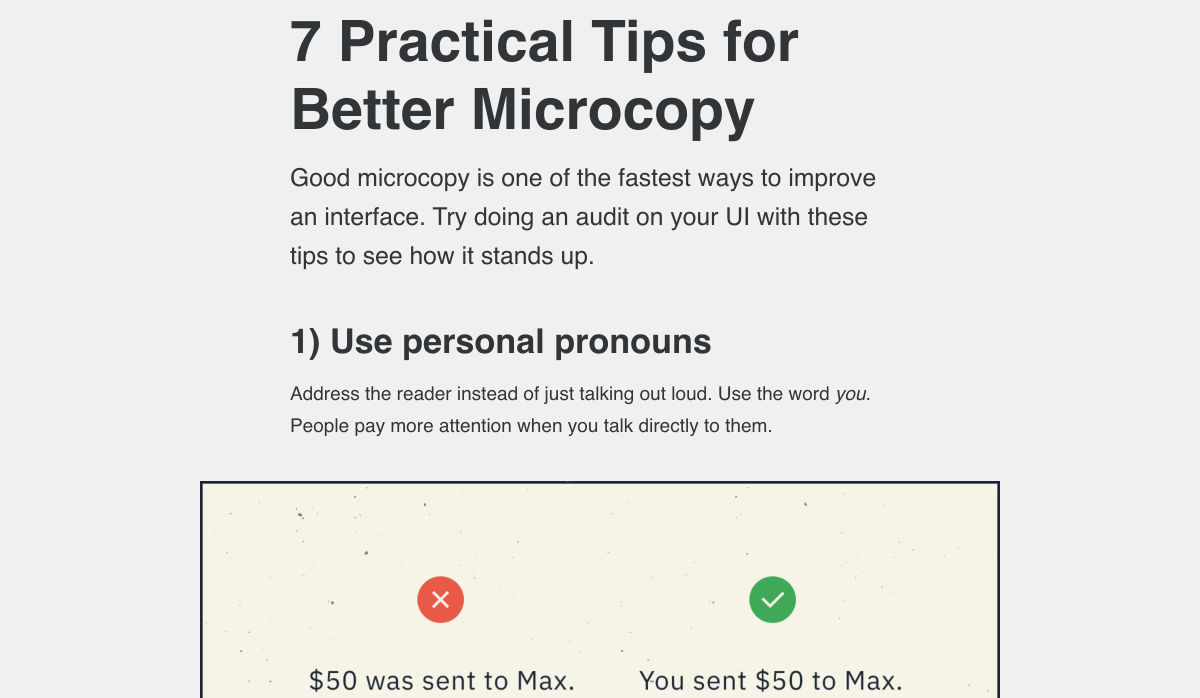
7 Practical Tips for Better Microcopy


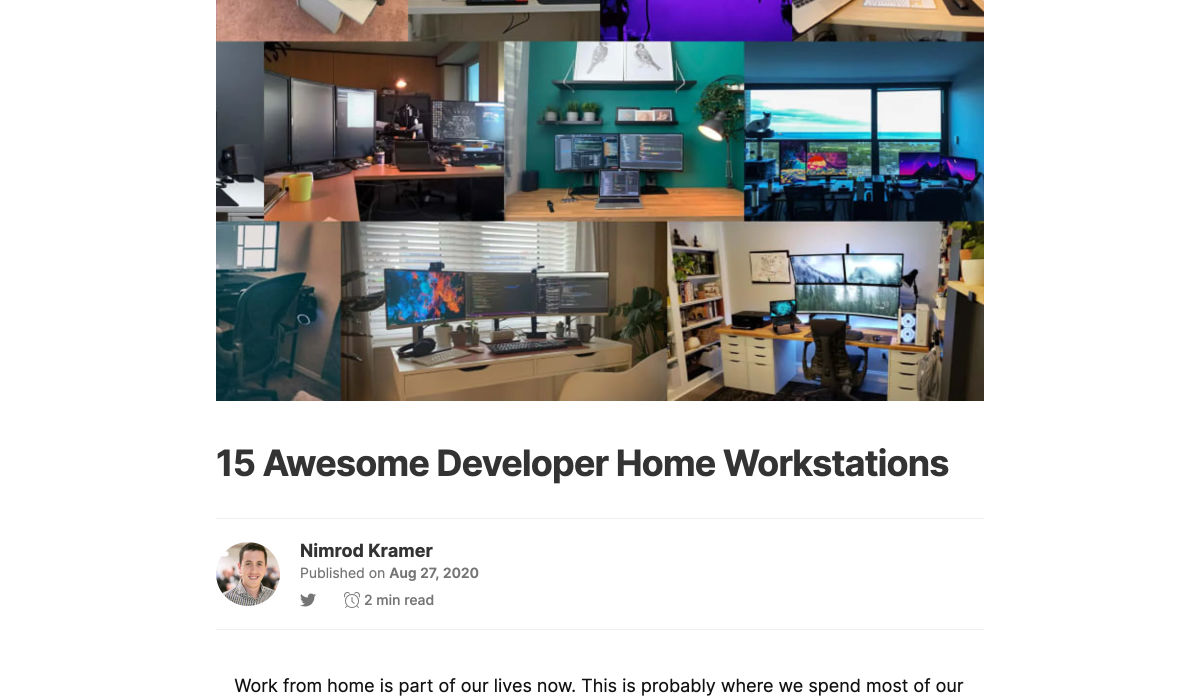
15 Awesome Developer Home Workstations


Pentagram Designs “edgier” Visual Identity for Rolls-Royce


Gorgeous Gradients: A Curated Collection of Dreamy Color Transitions


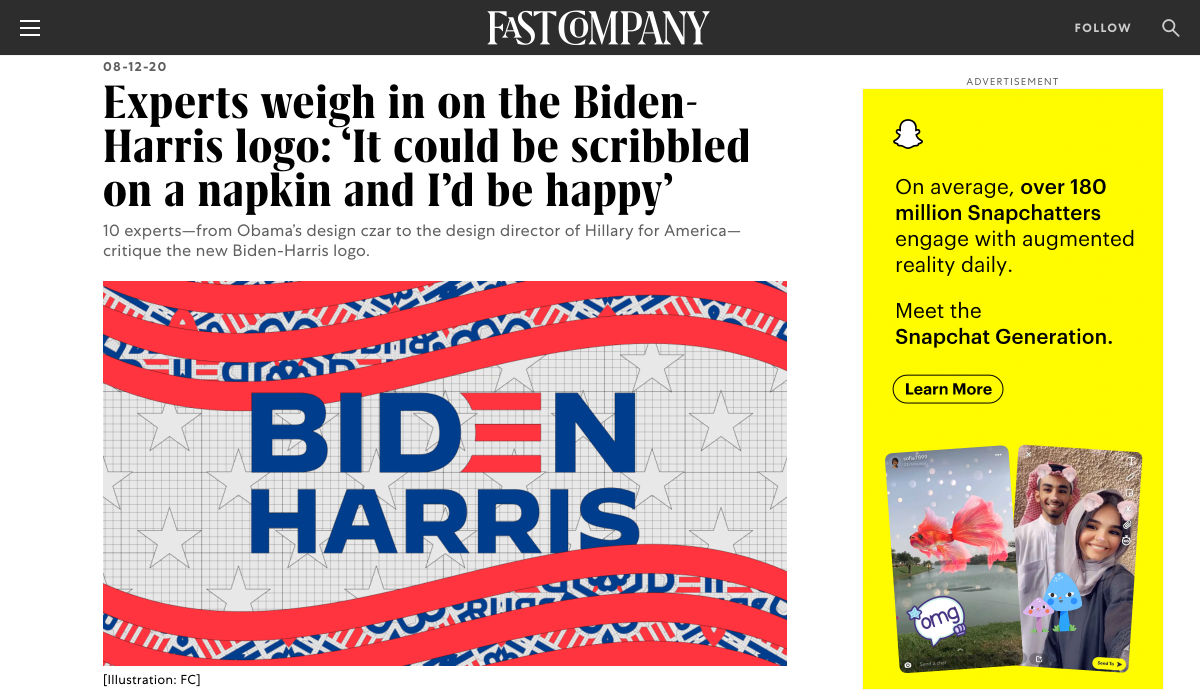
Experts Weigh in on the Biden-Harris Logo


50+ Modern Fonts to Use on your WordPress Website in 2020


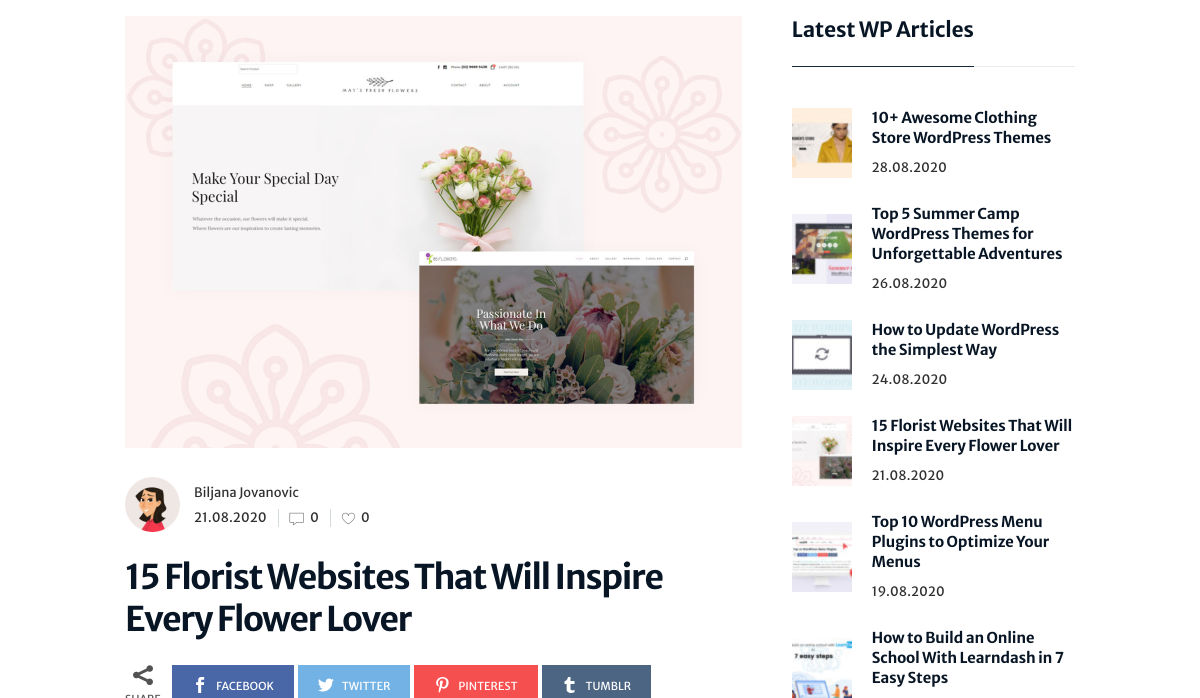
15 Florist Websites that will Inspire Every Flower Lover


Create your First React Native Android App


Want more? No problem! Keep track of top design news from around the web with Webdesigner News.

Source


Source de l’article sur Webdesignerdepot

When it comes to increasing sales for your ecommerce store, there are 3 levers you can pull: You can increase your average order value; You can increase the amount of traffic to your site; You can increase your conversion rate.

While all of the above are important, the cheapest, most effective way to grow your sales is by improving your conversion rate.

For most online stores, low conversion rates are typically the result of a poor design or a bad user experience. Your visitors may not resonate with the look and feel of your website or they may have problems finding the information they need in order to make a purchase.

In this post, I will walk you through the exact steps I took to increase my desktop conversion rate by 46% and my mobile conversion rate by 39% with my last site redesign. I will also show you how you can apply these same design principles to optimize the conversion rate for your own online store.

Even if your ecommerce business is already performing well, this post will help you achieve even better results.

What Is Considered A Good Ecommerce Conversion Rate? 

Monitoring your conversion rate is crucial to building a profitable ecommerce business. And most analytics tools can help you measure this data out of the box.

Your conversion rate is calculated by simply dividing the number of desired actions by the number of website visitors in a given period. For example, if your website is getting 50 conversions for every 5,000 visitors, your conversion rate is 1%.

Depending on the specific type of online business you run, your conversions may include online sales, email signups, add to carts, or any other KPI you wish to measure. But in the case of an ecommerce store, your primary focus should be your purchase conversion rate.

On average, ecommerce stores have a purchase conversion rate of 1% – 2%. What’s more, experts say a good conversion rate is anywhere from 2% to 5%. This should be your baseline as you measure your online store’s success.

The Conversion Results of My Last Site Redesign

Before we dive into the nitty gritty details of how I improved my conversion rate, here are my overall results and exactly how I conducted my experiment.

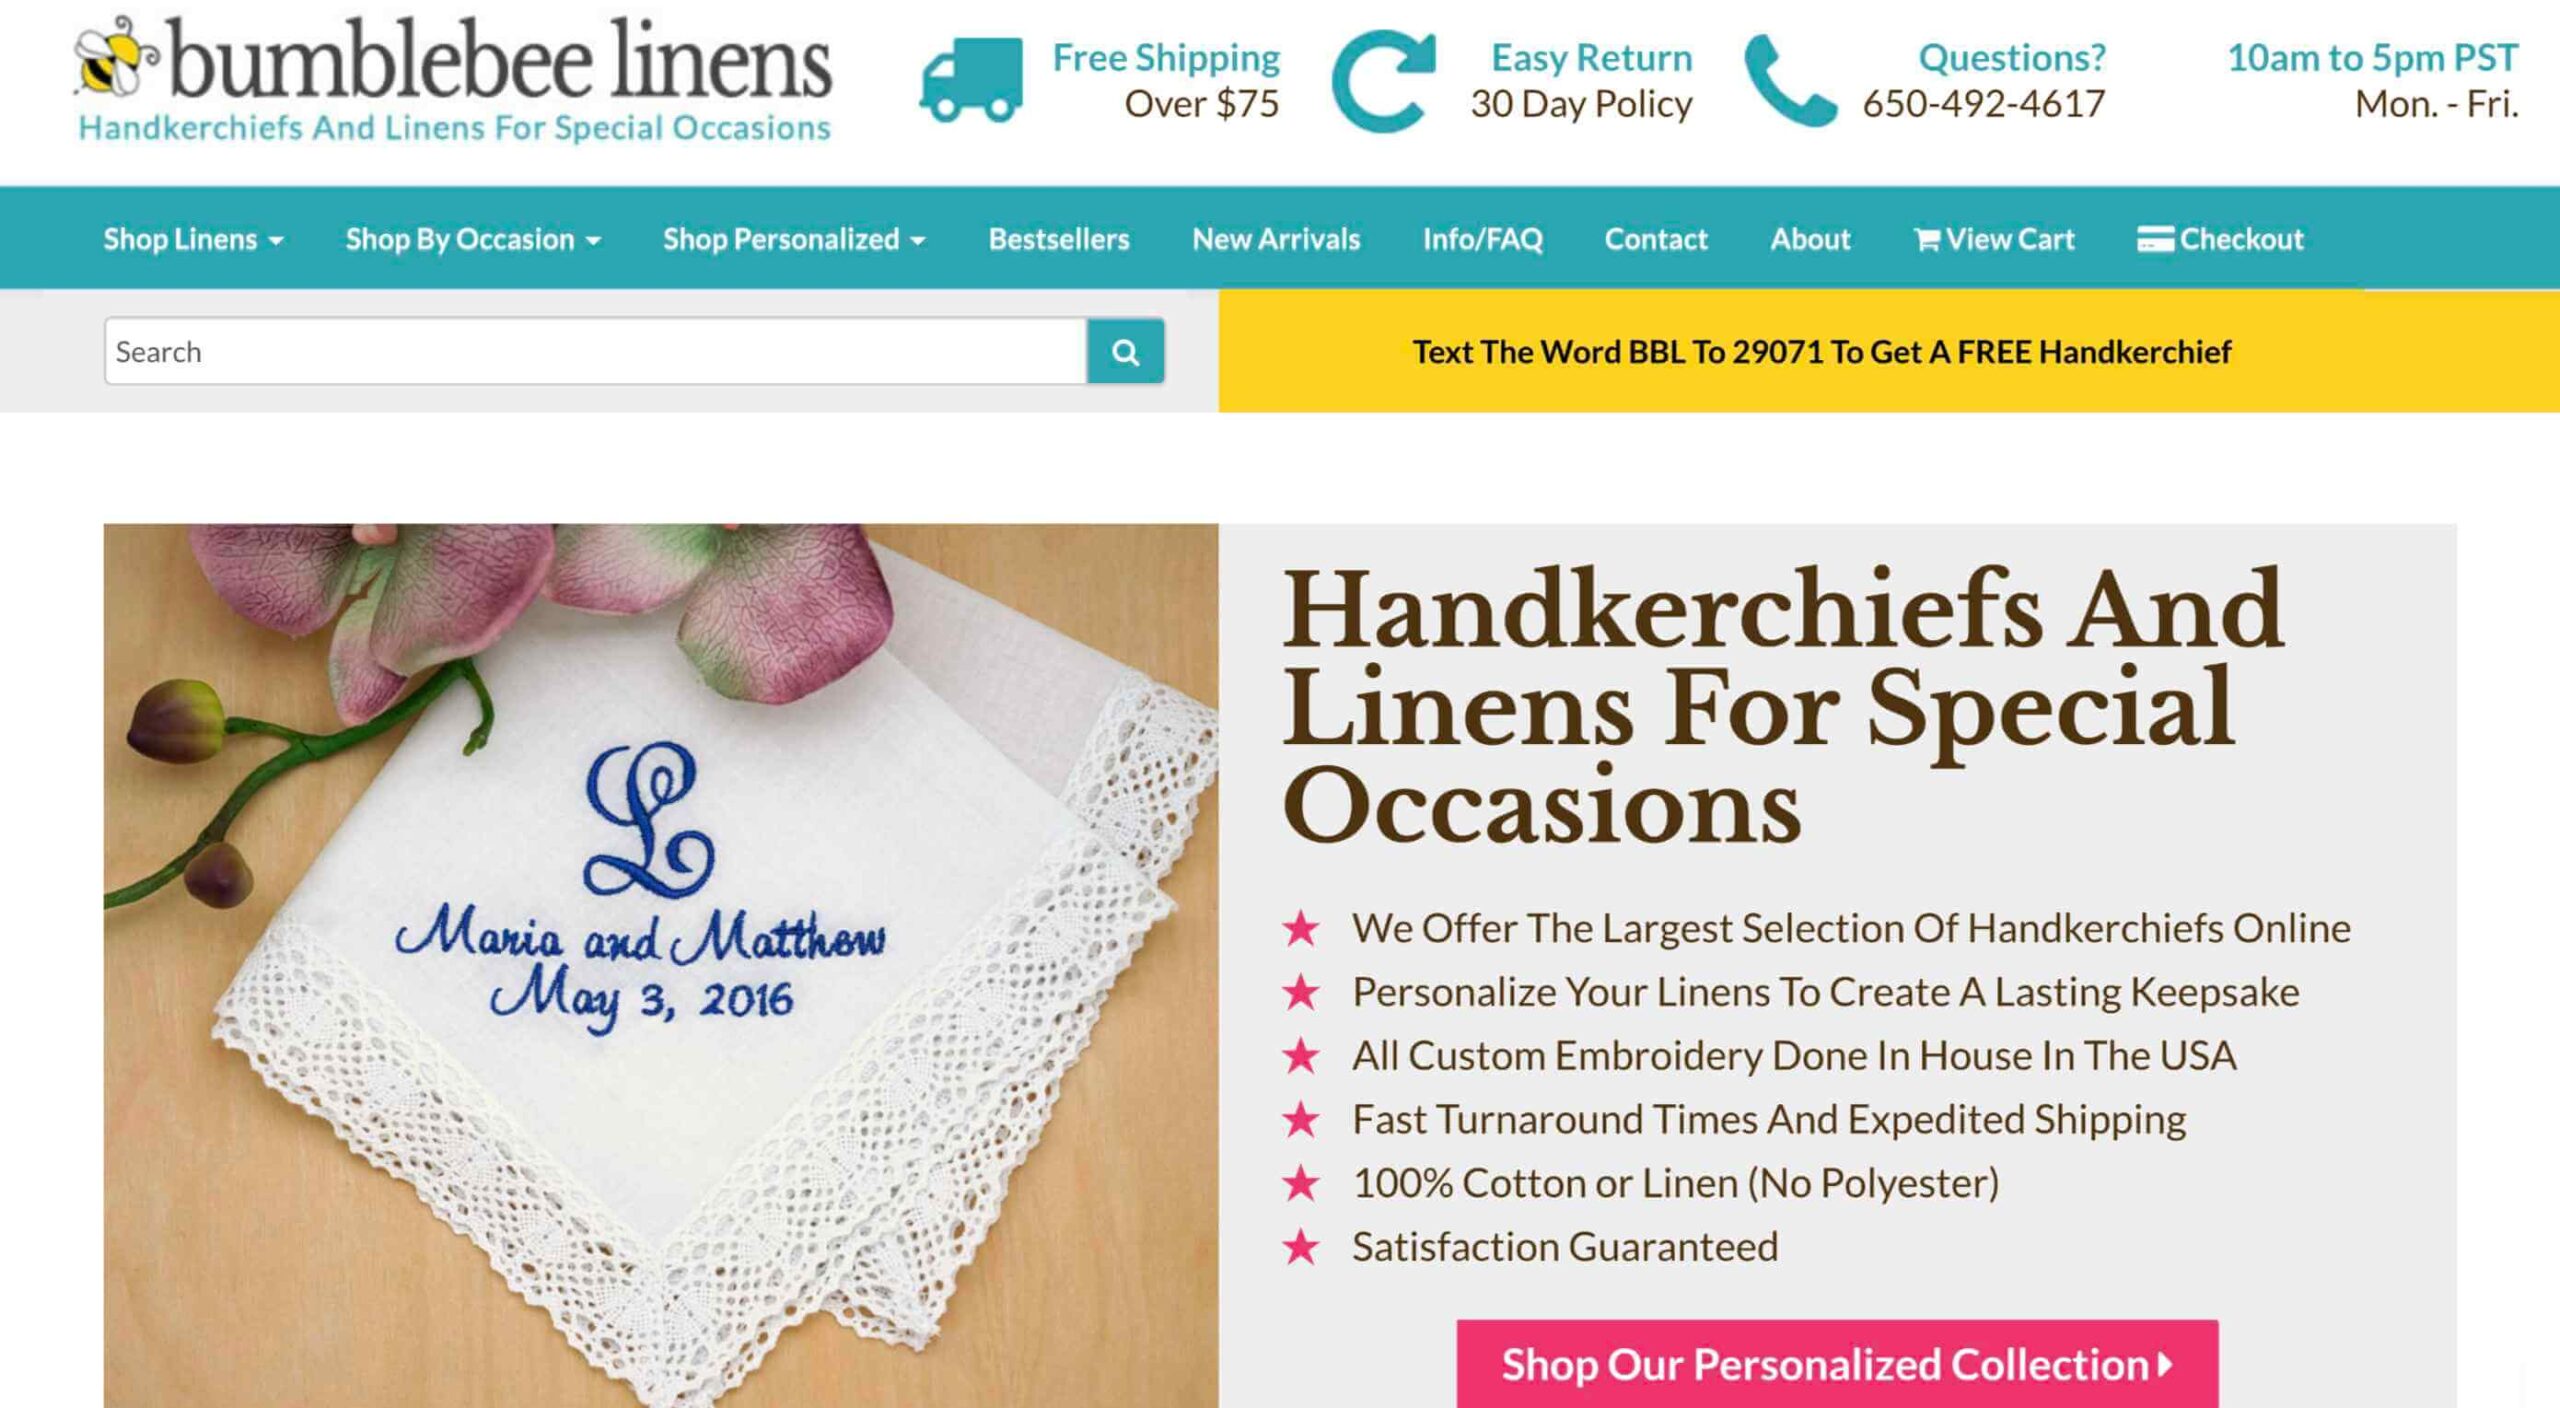
First off, I run Bumblebee Linens, an ecommerce store that sells handkerchiefs online.

Because my site gets a ton of traffic from content pages that do not directly convert to sales, I measured my conversion rate based on my most predictable traffic sources.

As a result, all of my conversion data was taken from targeted PPC ad traffic sources like Google Shopping and Google Adwords. After all, my Google ads traffic is very steady and always converts at a consistent percentage.

Before I redesigned my site, the conversion rate for my ecommerce store hovered at around 3% which is above average. But the look and feel of the site was dated and desperately needed a refresh. Overall, the entire redesign took approximately 7 weeks and cost me roughly $1840.

Here are the conversion results from my updated design compared to the original:

  • Desktop conversion rates increased by 46%
  • Mobile conversion rates increased by 26% 
  • Tablet conversion rates increased by 32% 

The remainder of this post will highlight the specific elements of the redesign that contributed to these increases. (Note: I made all of my redesign changes live simultaneously so it’s difficult to determine which specific optimization contributed the most gains.)

8 Ecommerce Design Tips To Optimize Your Conversion Rate

If your ecommerce store is not performing as well as it should, there are many aspects of the user experience that could be negatively impacting sales. Even a seemingly innocuous design choice like your font size or the color of your buttons can have a significant impact on your overall conversion rate.

If you want to systematically improve the conversion rate for your ecommerce store, you should follow these 8 design steps.

1. Use A Consistent and Complementary Color Scheme 
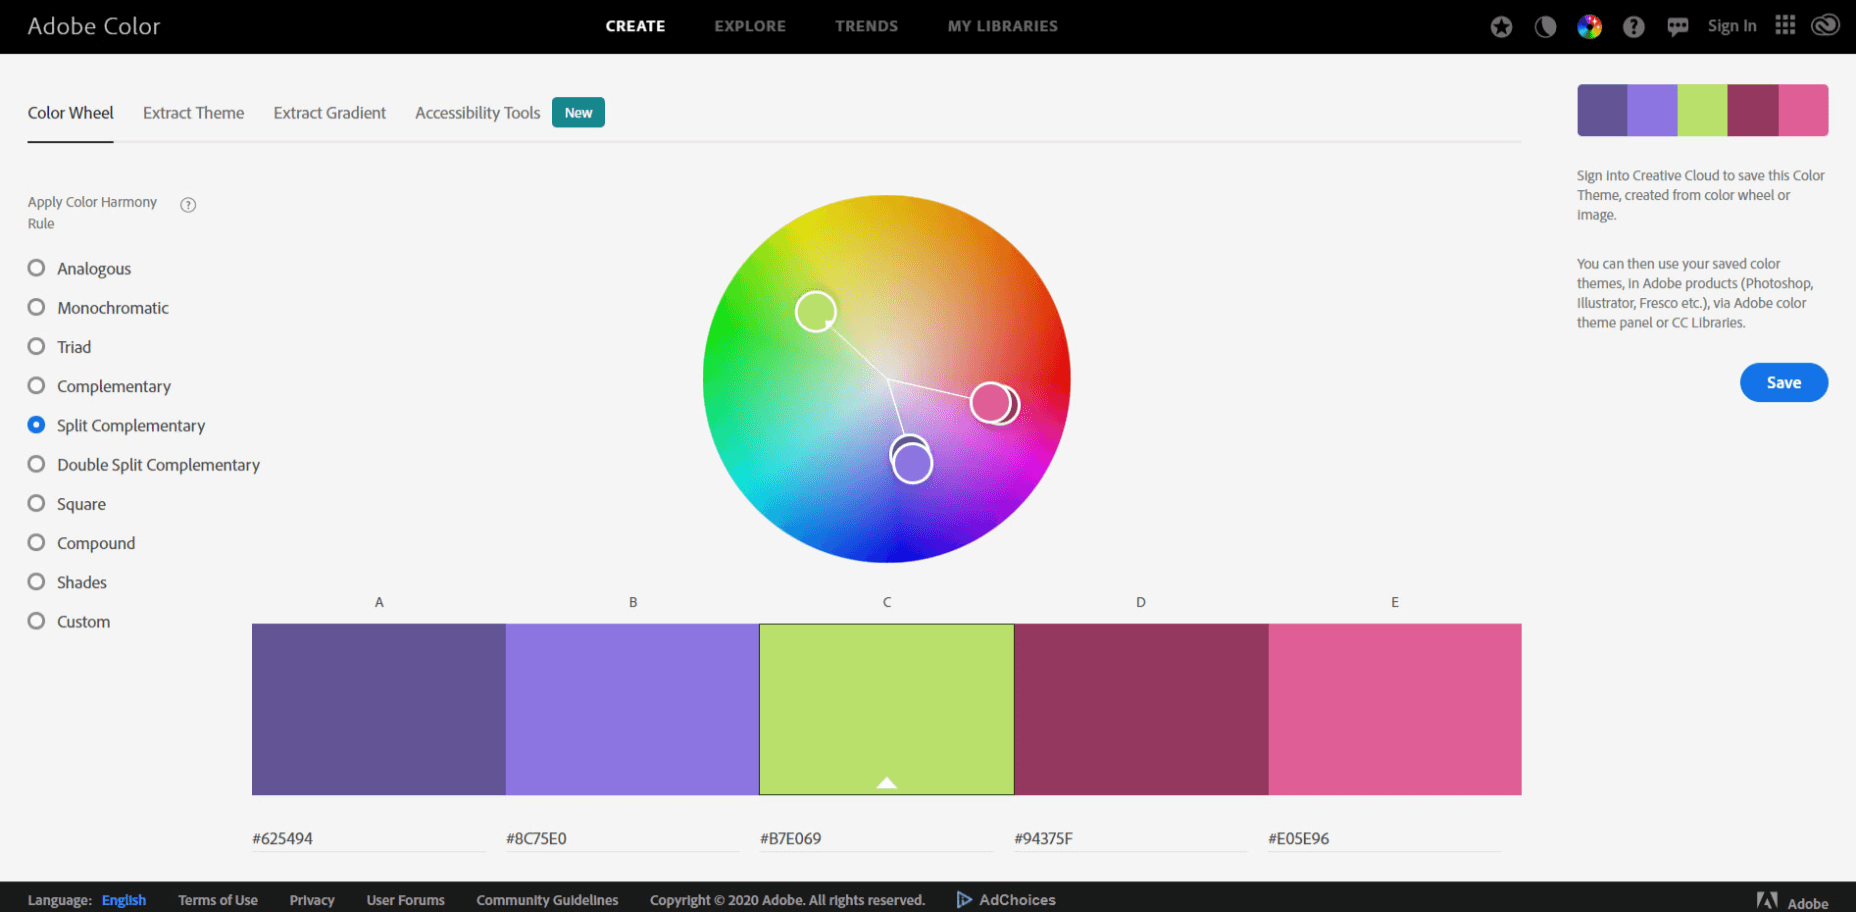
Use color.adobe.com to choose complementary colors when redesigning your website.

A well chosen color scheme can instantly attract a customer’s attention, evoke emotion, and drive users to take action. After all, how a customer feels about your website can be the deciding factor between completing checkout or bouncing from your shop.

A well designed ecommerce store should utilize at least 3 complementary colors that are consistently applied across every page of your website.

If you don’t have a good eye for color, you can use a free tool like color.adobe.com which will help you mix and match different colors that go well together.

For my site redesign, I wanted a modern feel so I chose teal, hot pink, and yellow for my color palette.

I also assigned each color a specific purpose on my site:

  • Teal was applied to give the site a bright, overall color for a young and hip feel;
  • Yellow was used to draw attention to marketing elements like free shipping and special offers;
  • Hot Pink was used for all action buttons on the site.
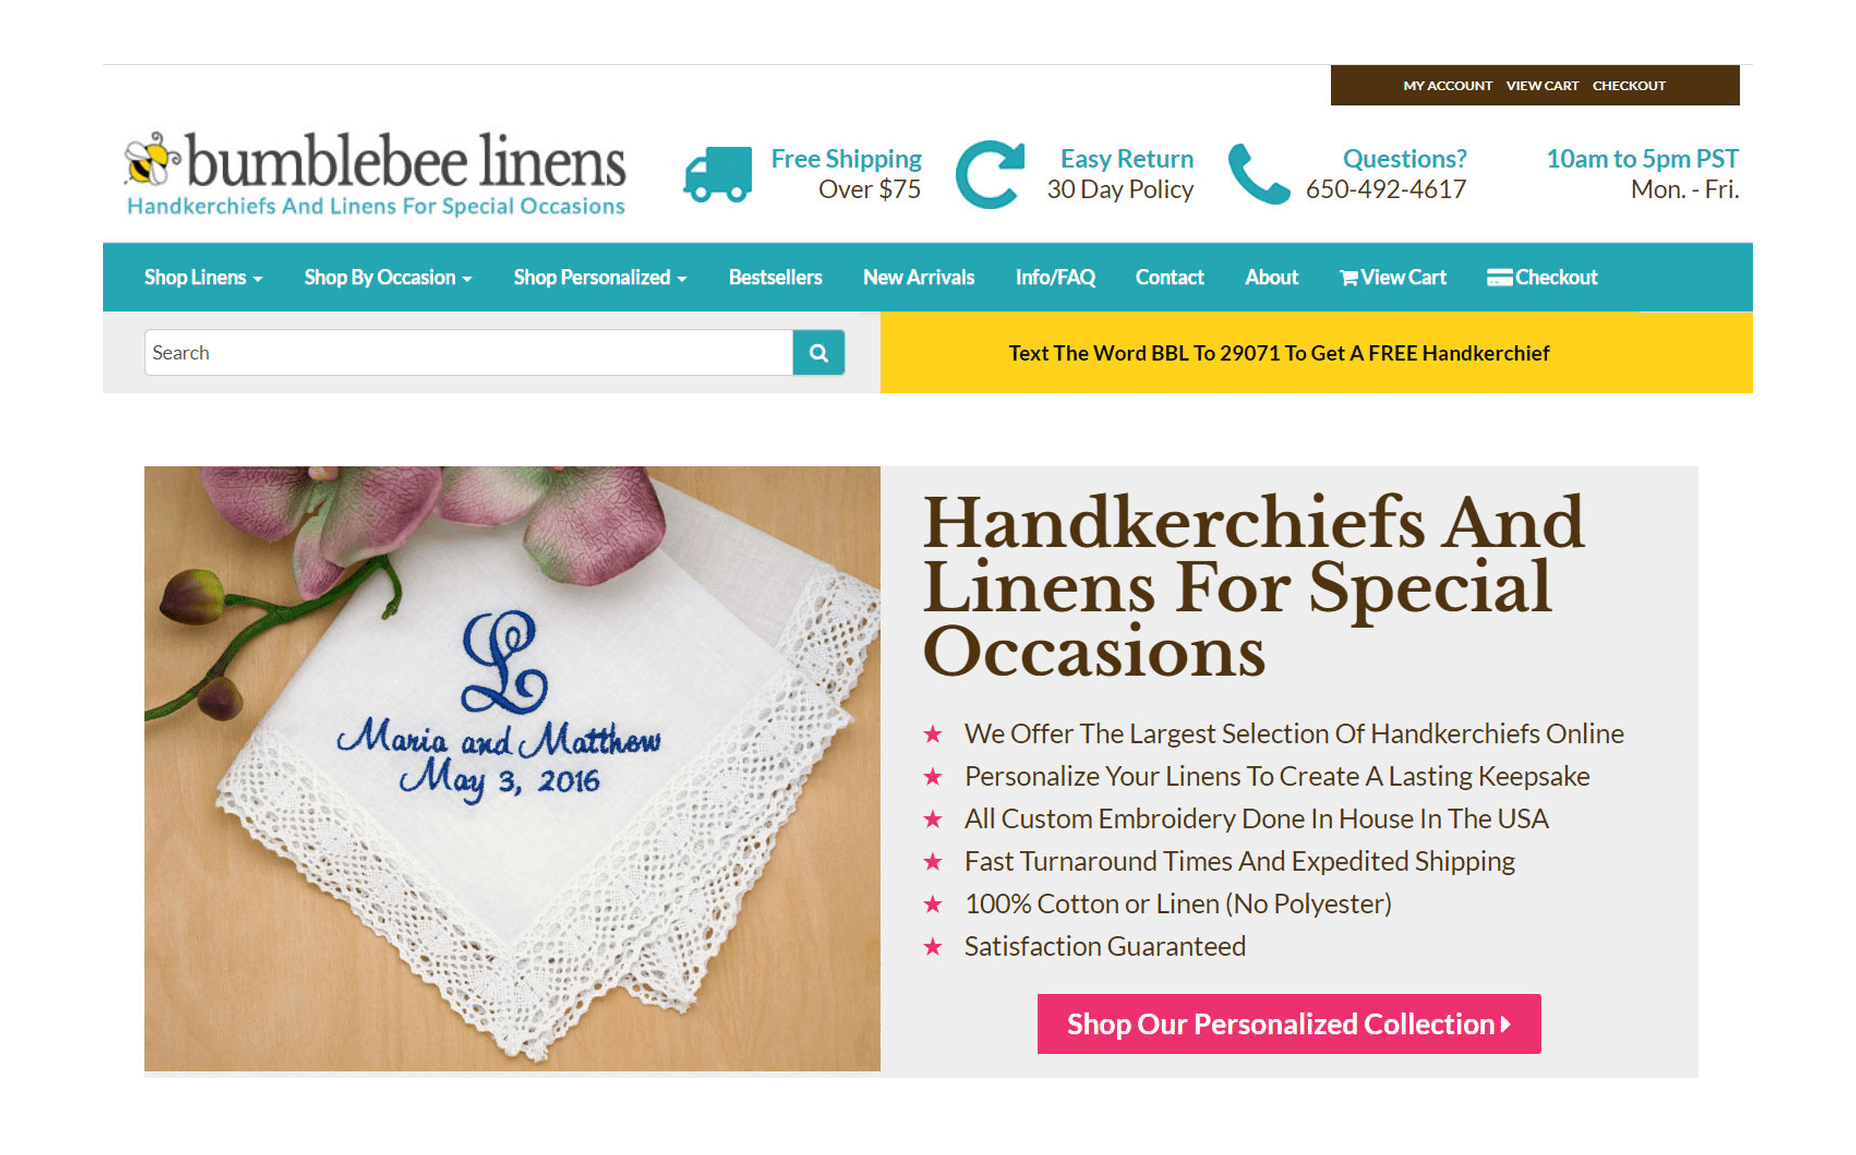
Overall, every single page of your ecommerce store should have 1 main call to action (using a bright color like hot pink) that guides a customer closer towards checkout.

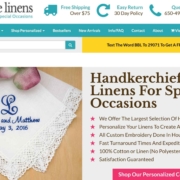
For example on my front page, the hot pink button “Shop Our Personalized Collection” pops out of the page and catches a user’s attention right away. We want visitors to shop our personalized collection because our personalized products are the highest margin products in our store.

2. Simplify Your Navigation 

Is your menu too complicated? Is your navbar taking up too much screen real estate?

A good rule of thumb for an ecommerce store is to minimize the number of clicks for a customer to add to cart. As a result, you should avoid nesting your product categories in more than 1 level of hierarchy.

If you have too many categories in your shop to display all at once, choose your best selling categories for your main menu and lump your less trafficked categories in a separate tab.

For my store, I decided to use a top-level, hover style drop-down menu as shown in the photo below.
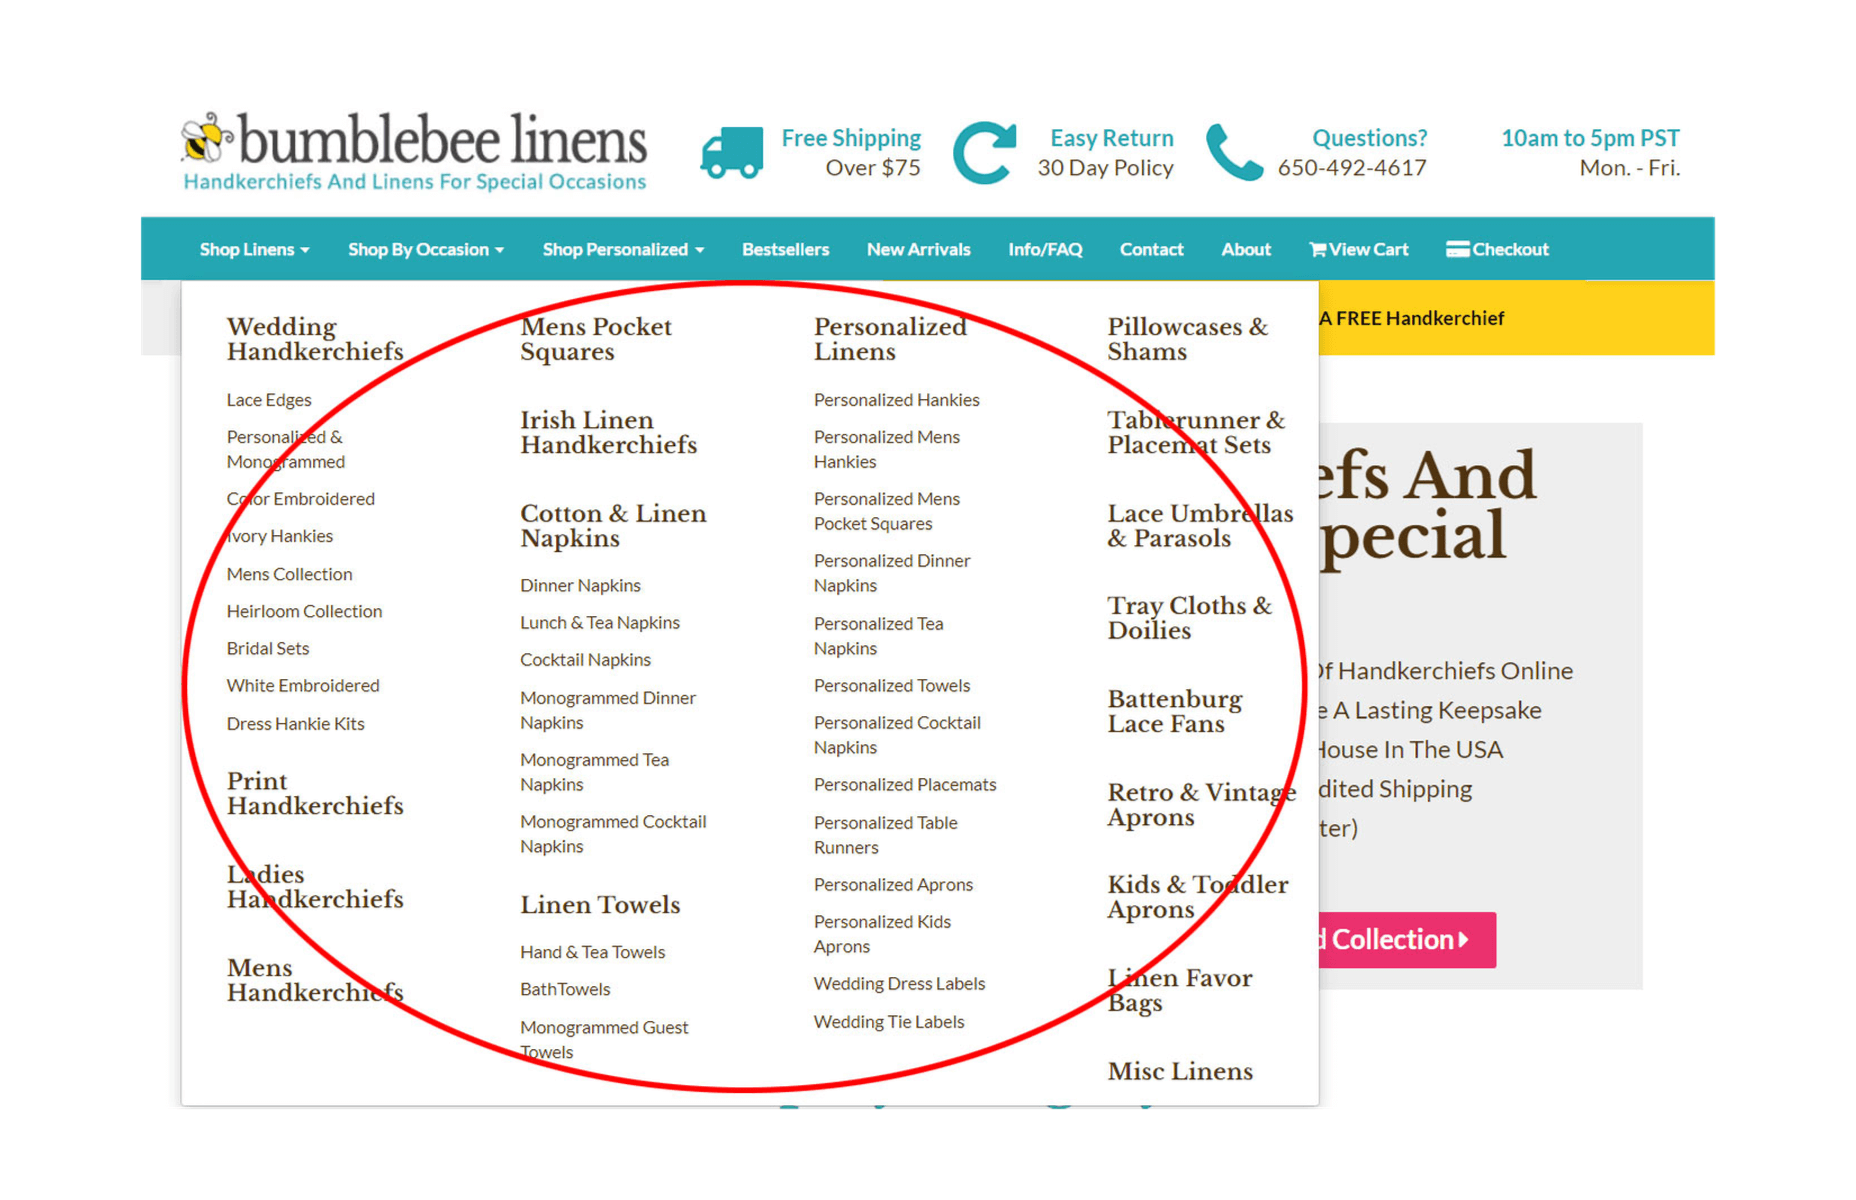
Top-level navigation is one way to organize and display your product categories.

My old design utilized left hand style navigation which took up too much screen real estate. And freeing up the extra space allowed me to blow up my category and product images by 300%. With my new navigation menu, every visitor can add to cart in just three clicks: One click to find a product category; One click to view the product description; One click to add to cart.

Once you’ve designed your menu, pretend that you are a customer and try to shop on your site. Is the content easy to read? Do the important elements pop out? Can you find the information you need right away? Analyzing your site from a customer’s perspective will help you improve your users’ shopping experience.

3. Display Trust Factors On Every Page 

Free shipping, easy returns, and trust are crucial to driving conversions. 

Trust is the most important value you must establish with your customer.

Unless you’re Amazon or a big box store, people have likely never heard of your brand and you have to reassure them that it’s safe to buy from your store.

Due to Amazon’s influence in the ecommerce space, most customers look for 3 things when shopping at an online boutique for the first time:

  • Fast and free shipping;
  • Easy returns;
  • A way to reach customer support.

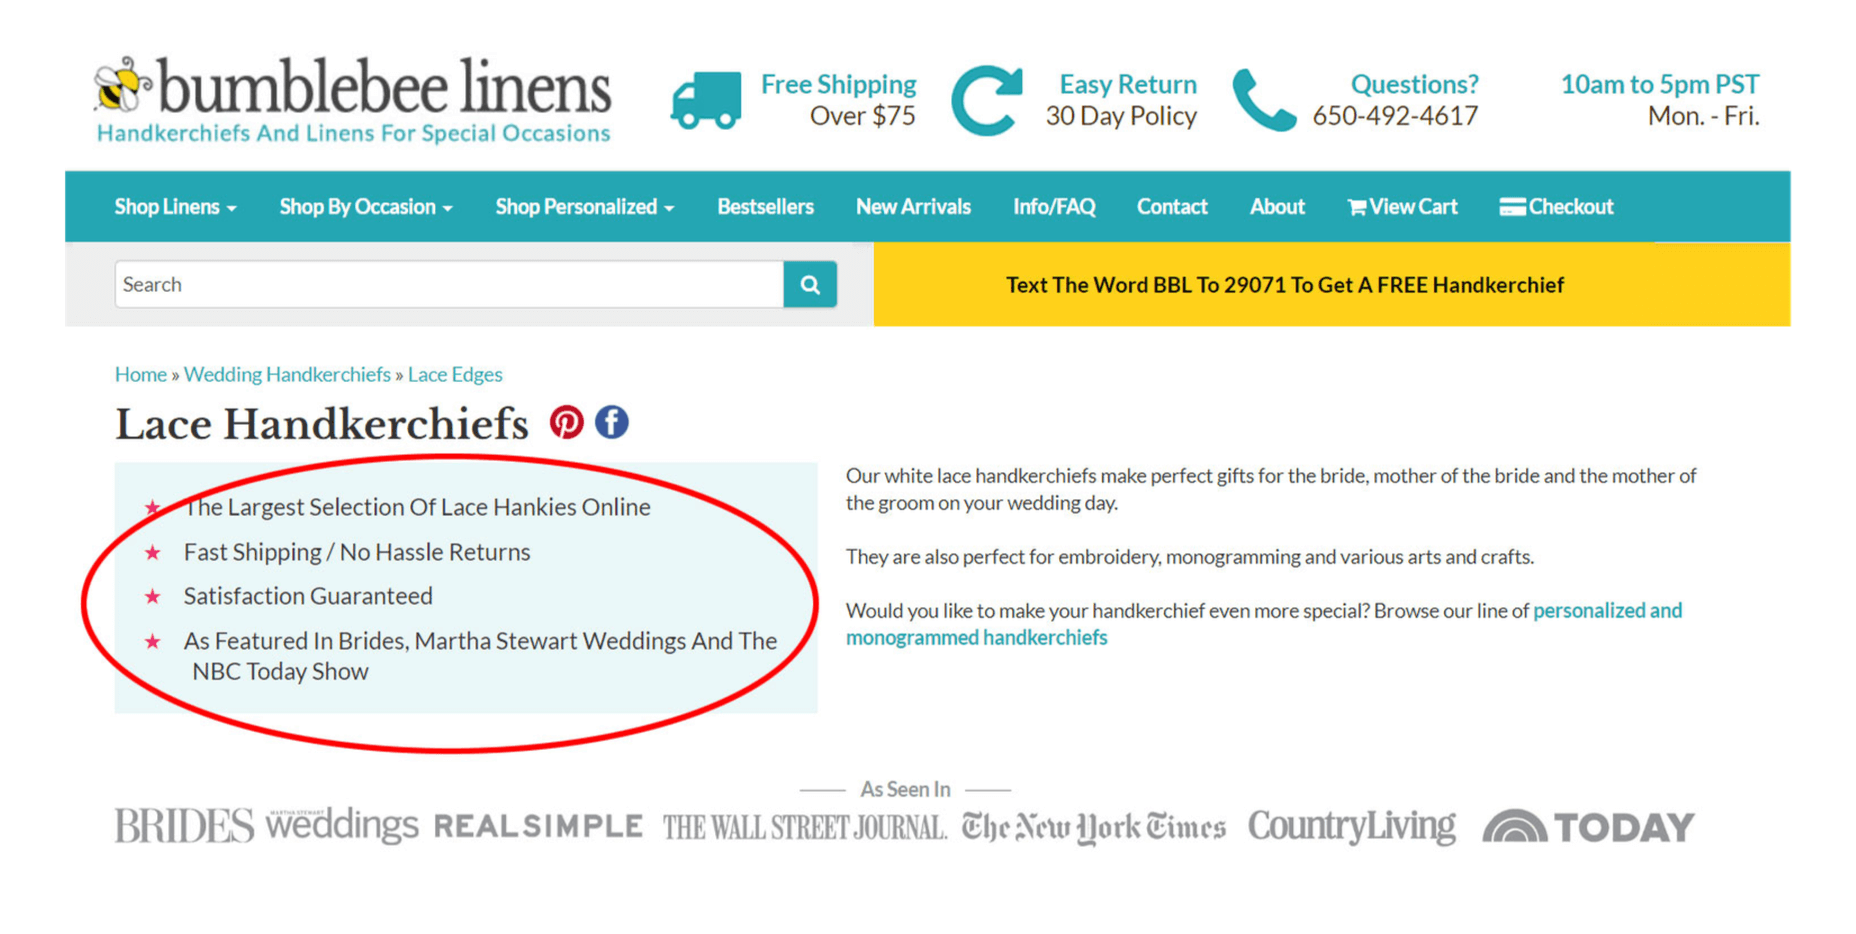
Displaying your phone number and email address is very important! Adding your store hours also helps to make your site look legit to new visitors. If you don’t have a recognizable brand, customers will want to know that they can reach a real human in case of problems or questions.

In the above image, you’ll notice that I placed my trust factors in the header, so they can be seen above the fold on every single page. We’ve also been featured on the Today show and a bunch of magazines. So I made sure to display this social proof on the bottom of every page.

Don’t hesitate to flaunt your achievements to reinforce trust. 

In addition, customer testimonials provide social proof and credibility to your website. As a result, it’s important to regularly reach out to happy customers for testimonials and endorsements. On our redesigned site, you’ll find the testimonials section right below our press mentions.
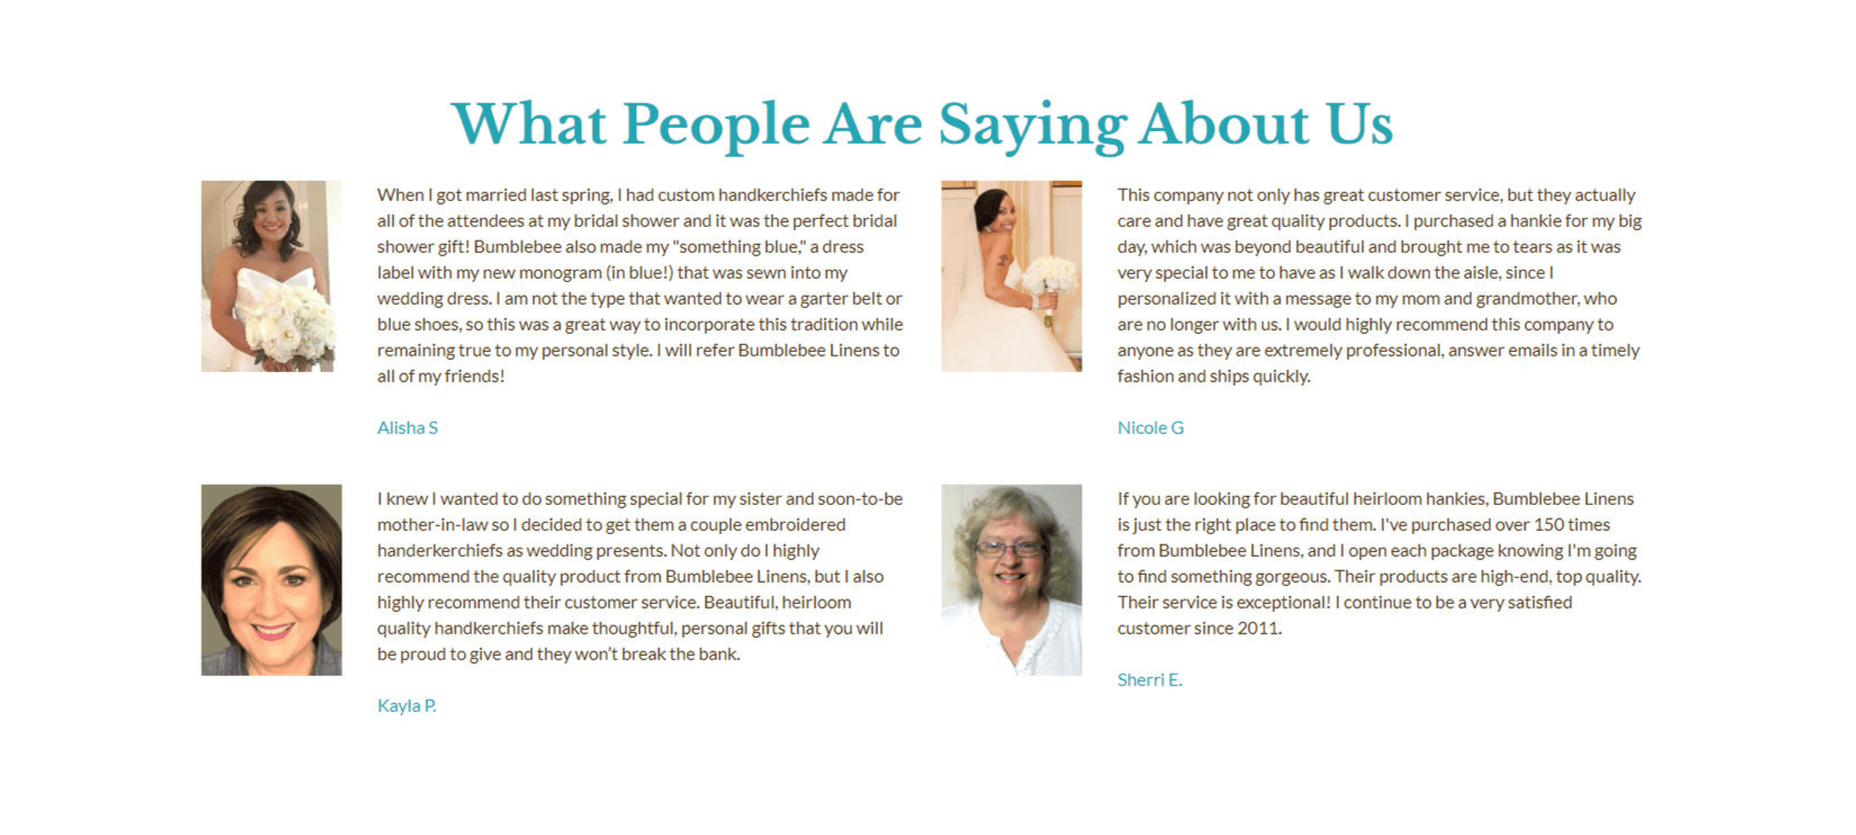
Testimonials lend social proof and credibility to your website.

Remember, to generate conversions as an unknown store or brand, you first have to gain your customers’ trust. Make it easy for them to contact you or get a full refund if anything goes wrong with their purchase. By showing a genuine concern for customer satisfaction, you’ll be able to build a solid reputation over time.

4. Emphasize Your Unique Value Proposition

Users spend an average of 5.59 seconds looking at your website’s written content. And in those 5.59 seconds, you must capture their interest or else they’ll bounce from your page. Right off the bat, you must convey to a user exactly what you sell and why they should buy from your store over a competitor.

What’s more, every single page on your site should communicate your unique value proposition. A unique value proposition is a concise statement that describes what makes your business special and outlines what your store does better than anyone else. The best way to show off your unique value proposition is to use an eye-catching image alongside compelling copy.

For example, here’s the first thing a user sees on my home page above the fold:
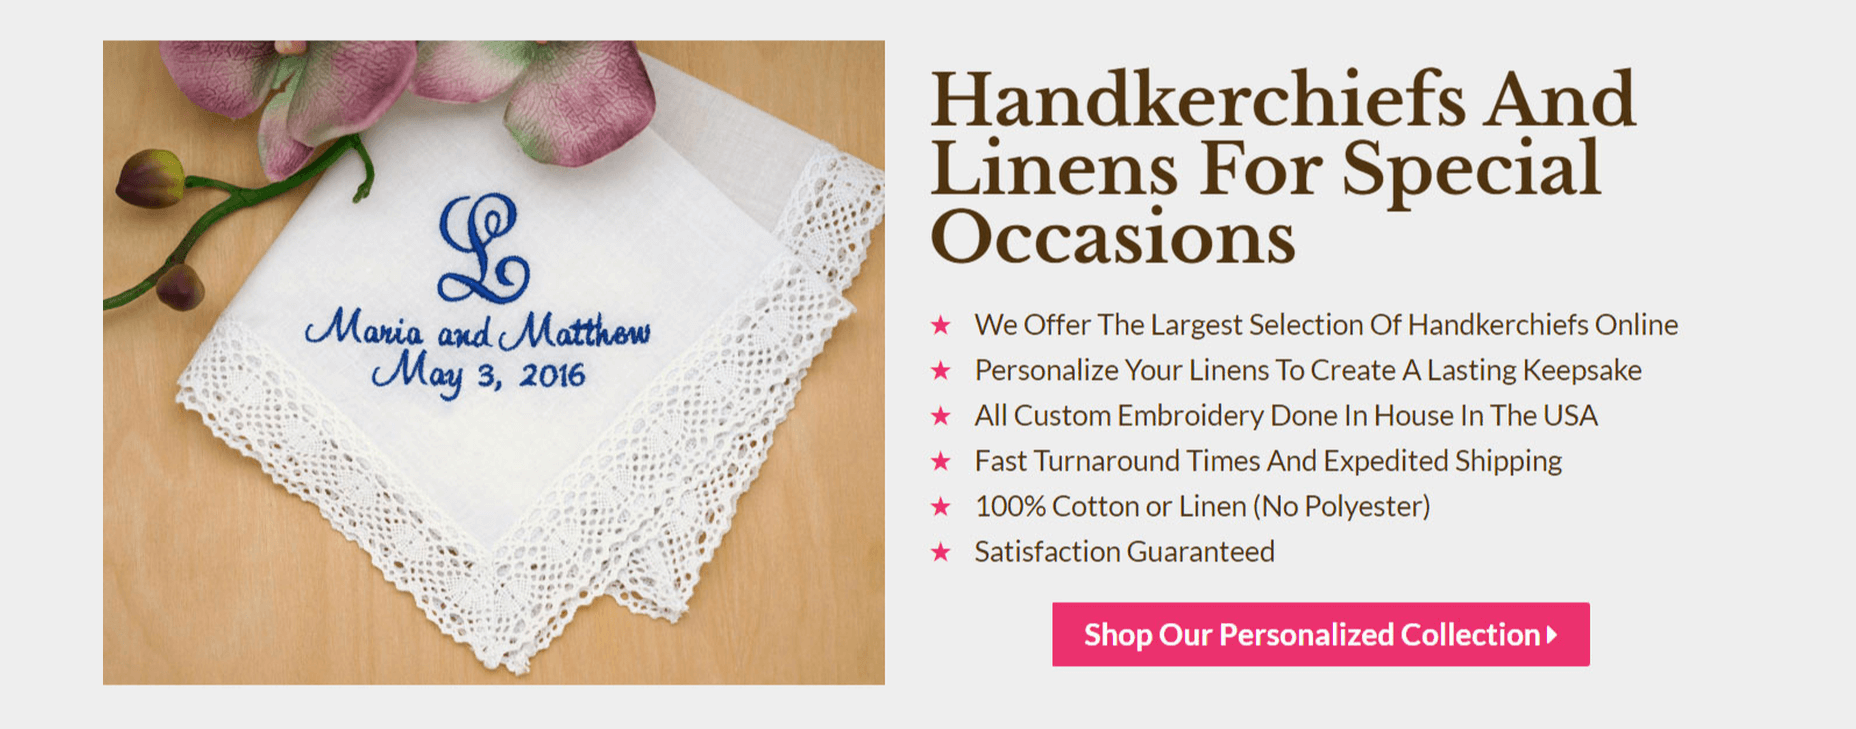
Right away, a user is shown a large image of one of our best selling personalized handkerchiefs. And right beside that image is a clear and concise value proposition, followed by a call to action to shop in our store.

Displaying your value proposition should not be limited to your home page. We also include our unique value proposition on every category page as well. Overall, you should include your value proposition on every landing page on your website.
5. Optimize The Visual Hierarchy Of Your Product Pages 

Every page on your site should have a single objective. And for your product pages, your goal is to get a customer to add to cart.

When designing a product page, you must apply a logical visual hierarchy to your design. A visual hierarchy is the order in which a user processes information on a page and in the case of a product page, there must be a clear path to your add to cart button with as few distractions as possible.

Here’s a screenshot of my old product page:
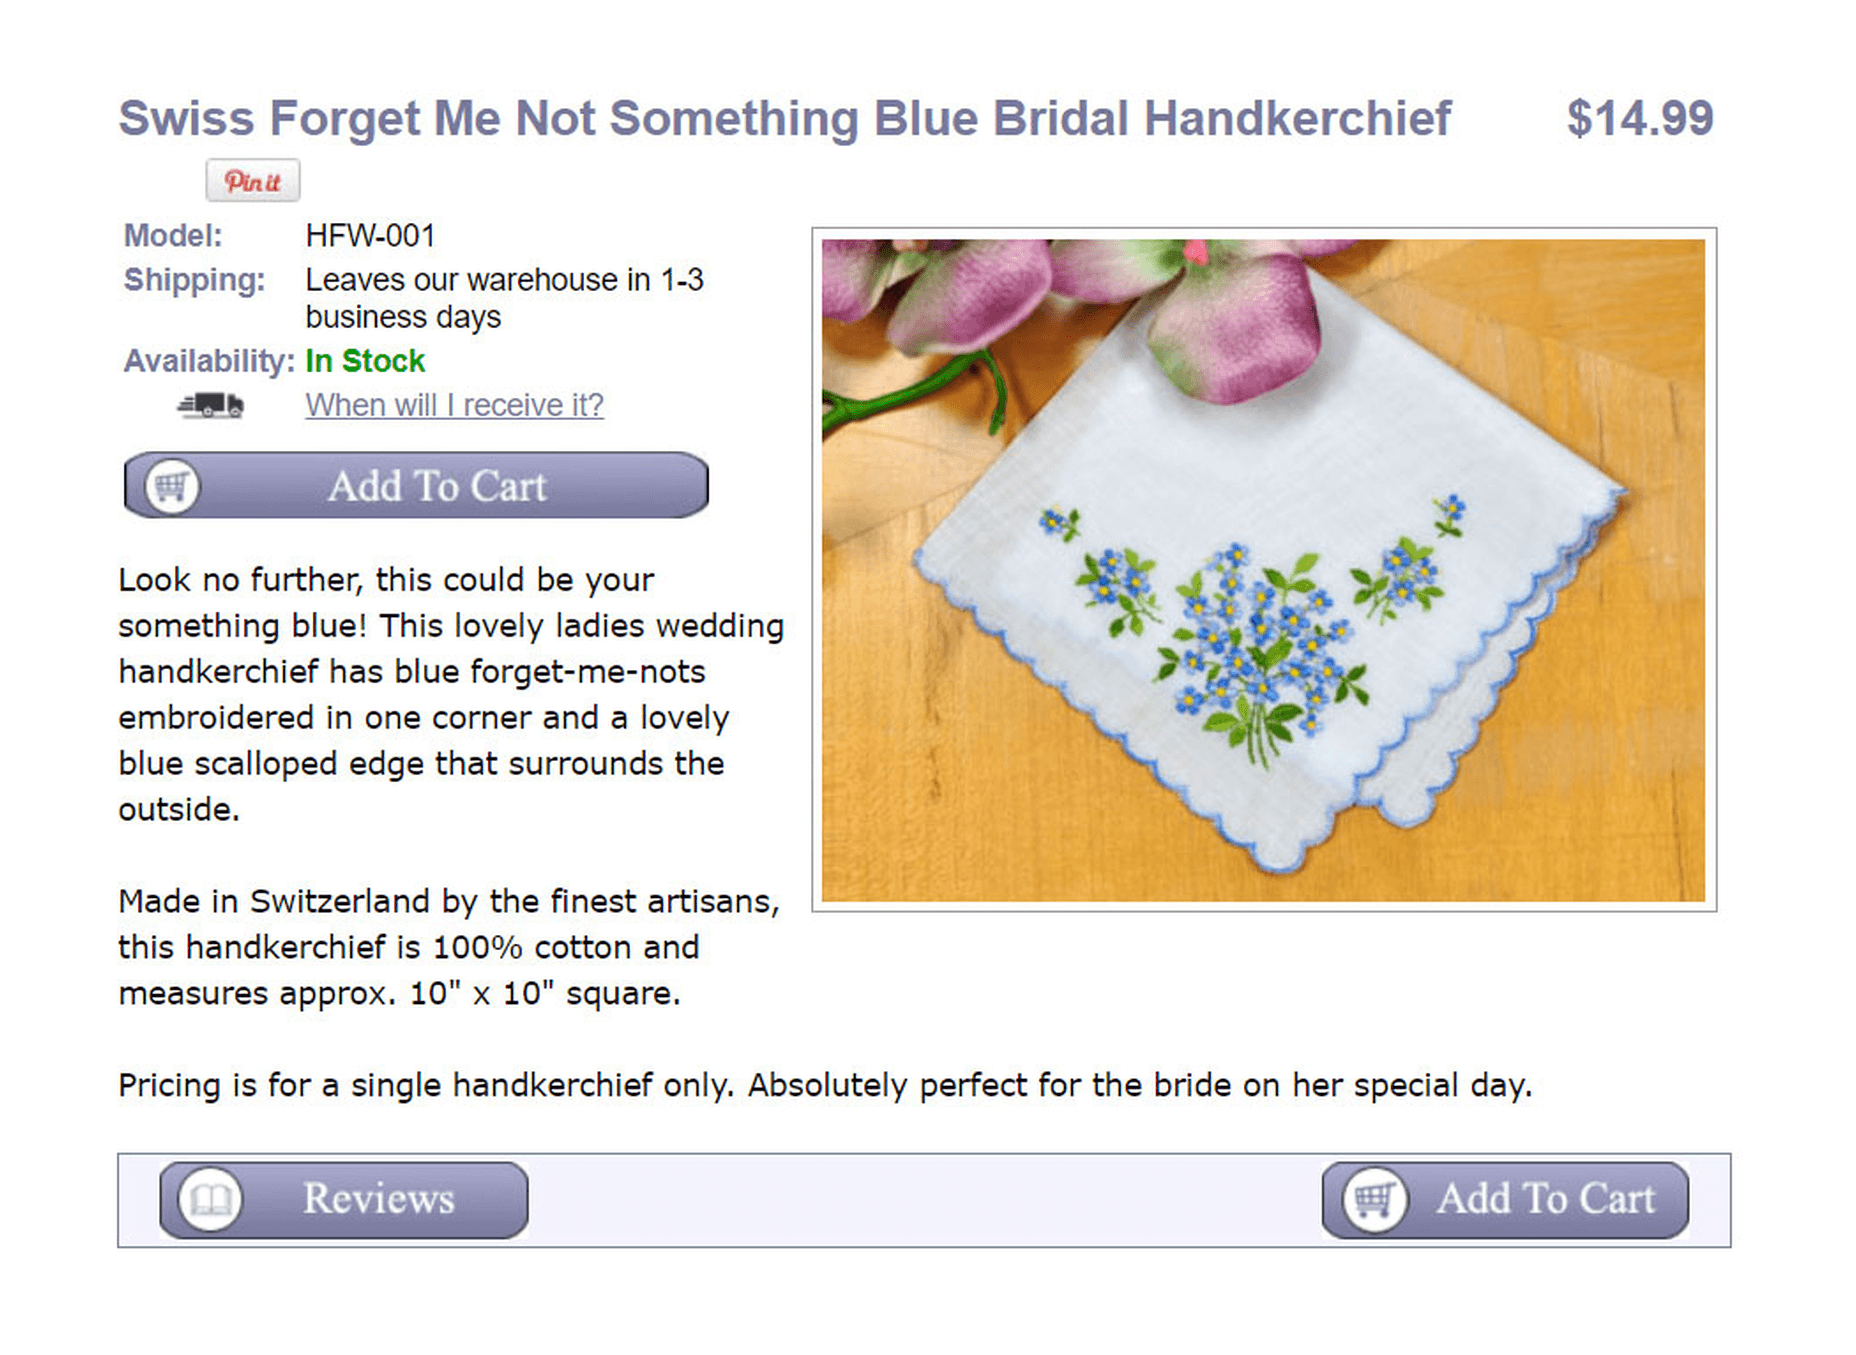
As you can see, my old product page is overwhelming. All of the design elements try to grab your attention at the same time and there are many different calls to action that blend together. To improve my product descriptions, I freshened up the color scheme and enlarged my product image by 266%. I also changed the placement of the buttons in a more logical flow.

Here’s what the redesigned product page looks like today:
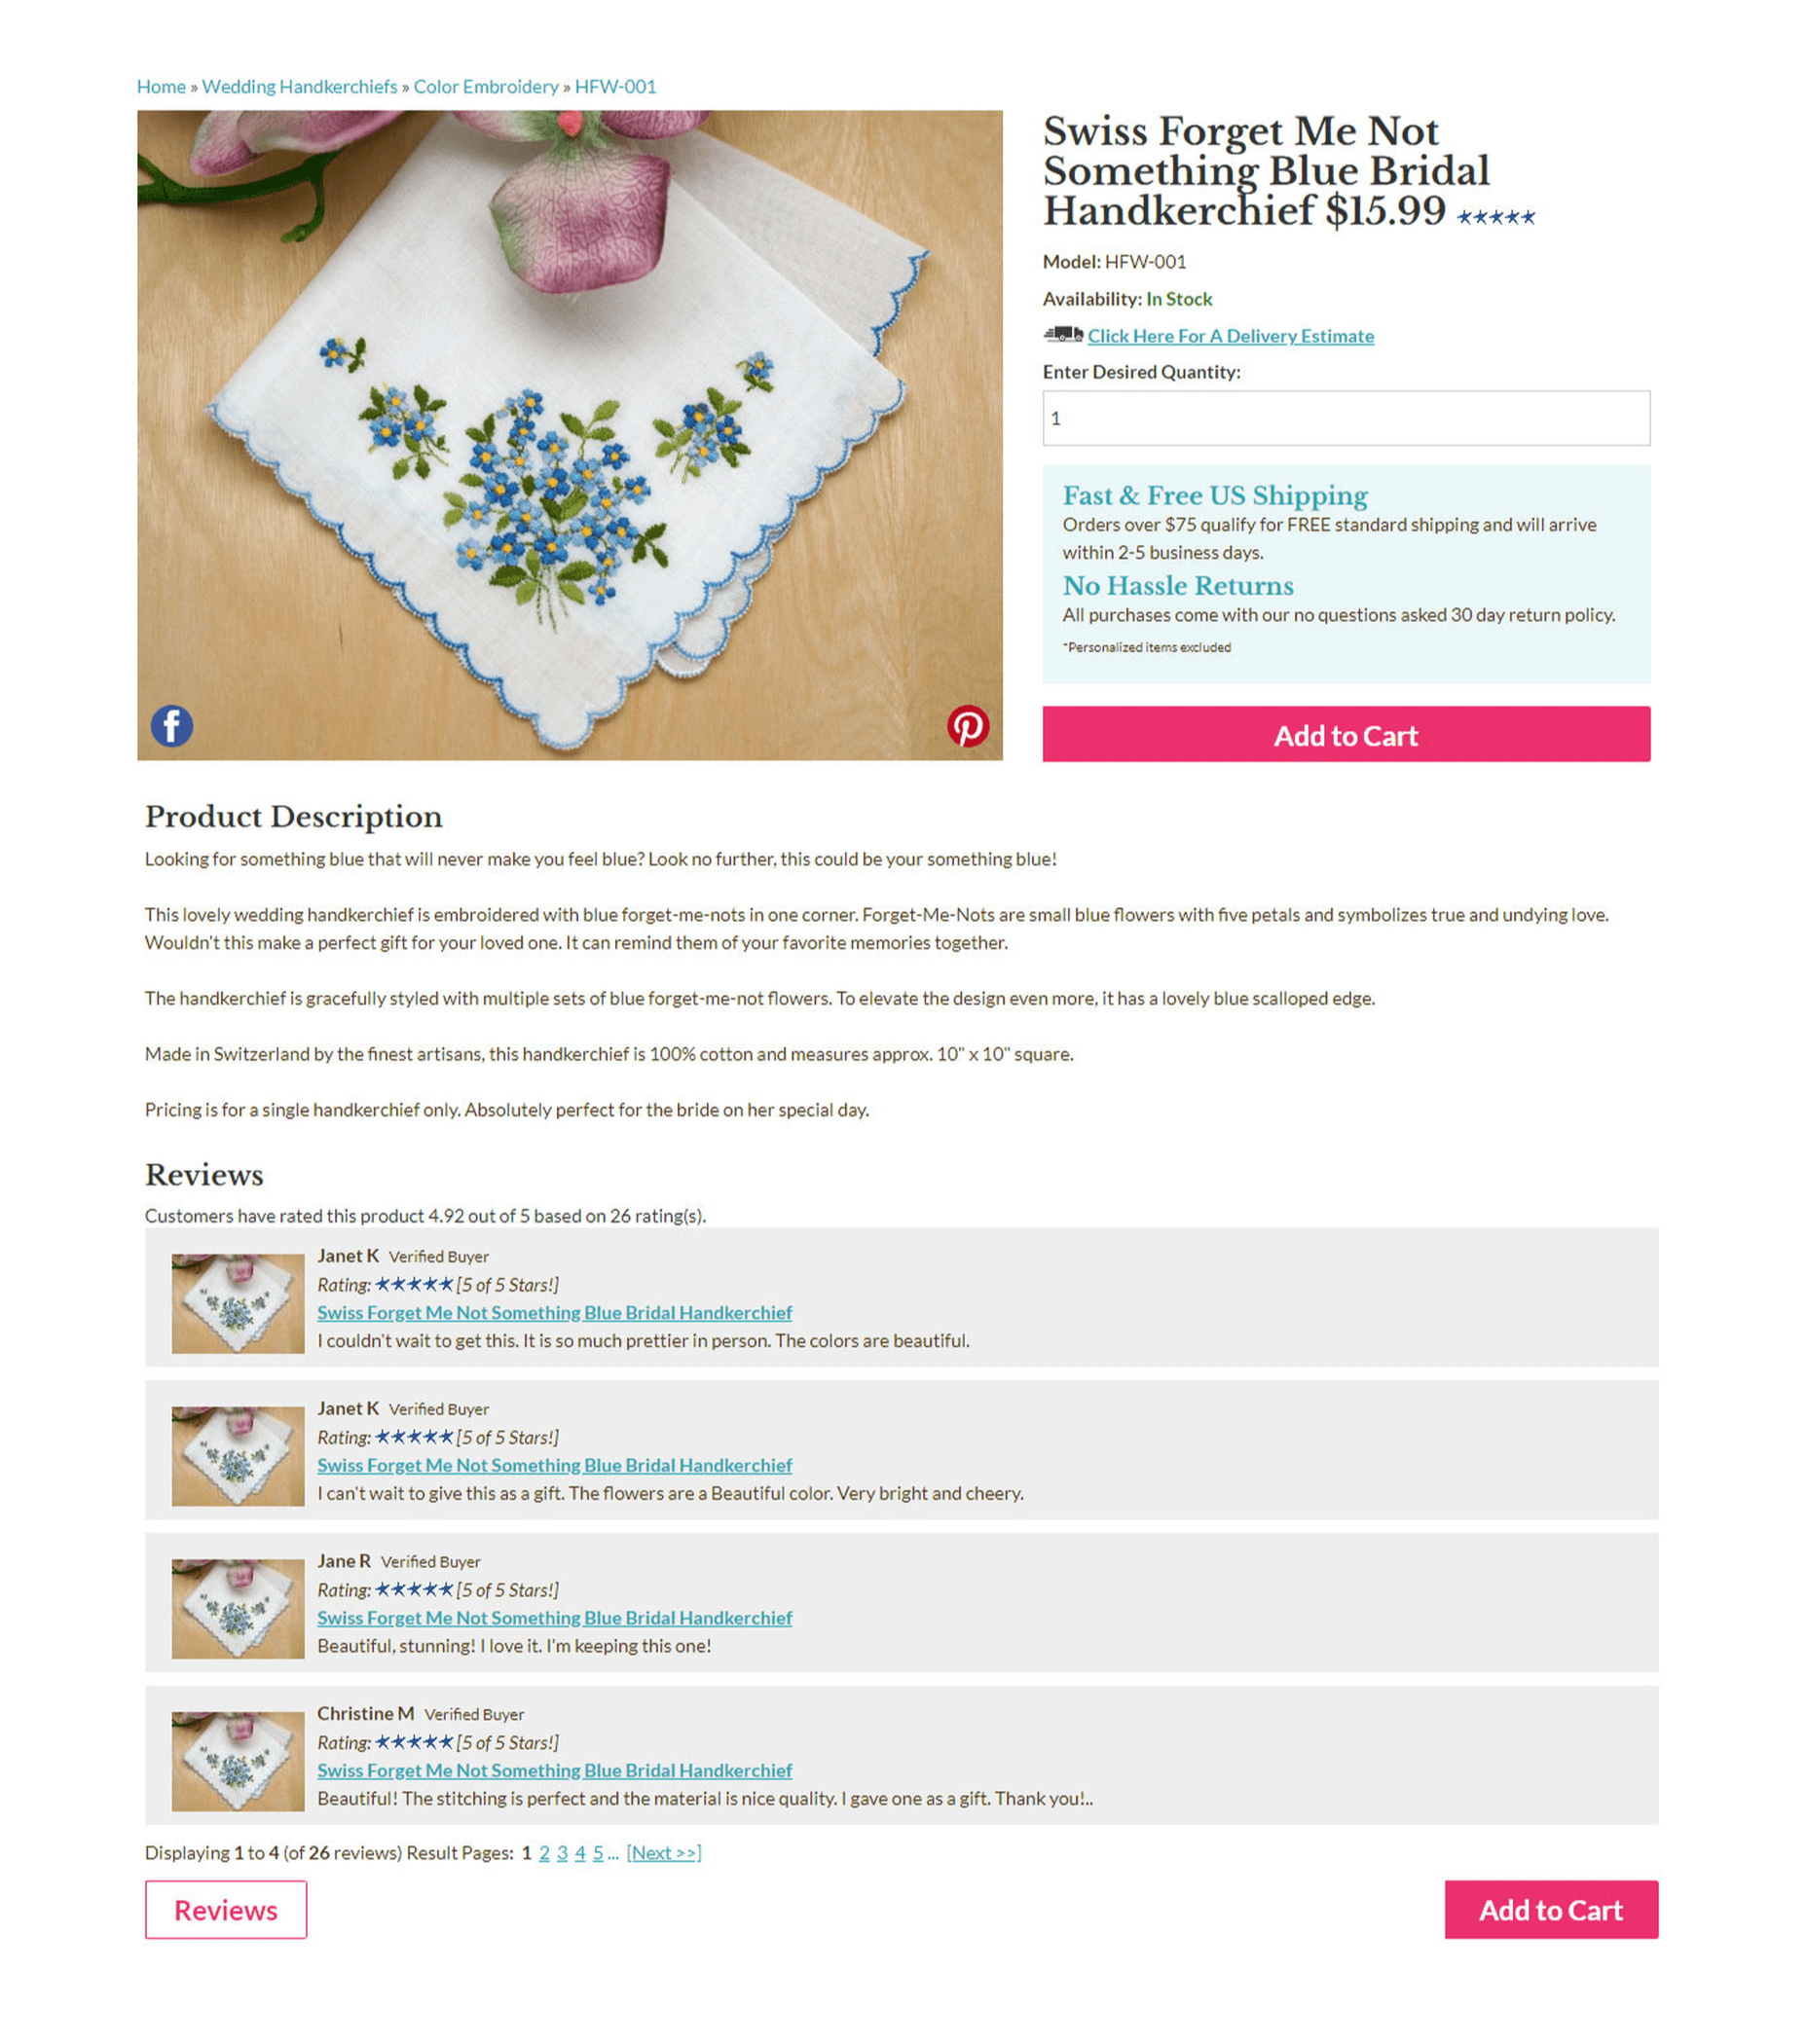
By adjusting the size, color, contrast, and alignment of the page elements, I now force the customer to process my product information in a set path that leads directly to my primary call to action. For example, the hot pink color draws attention to the “Add to Cart” button over the “Reviews” button. Also, by applying a blue text color and teal background, I reassure customers that shopping with us is safe and risk free.

Overall, rearranging the design elements this way nearly doubled my add to cart percentage.

6. Simplify Your Checkout Process 

With our old site design, we would regularly receive feedback from confused customers who weren’t sure if they needed an account to purchase our products.

Here’s what our old checkout page looked like:
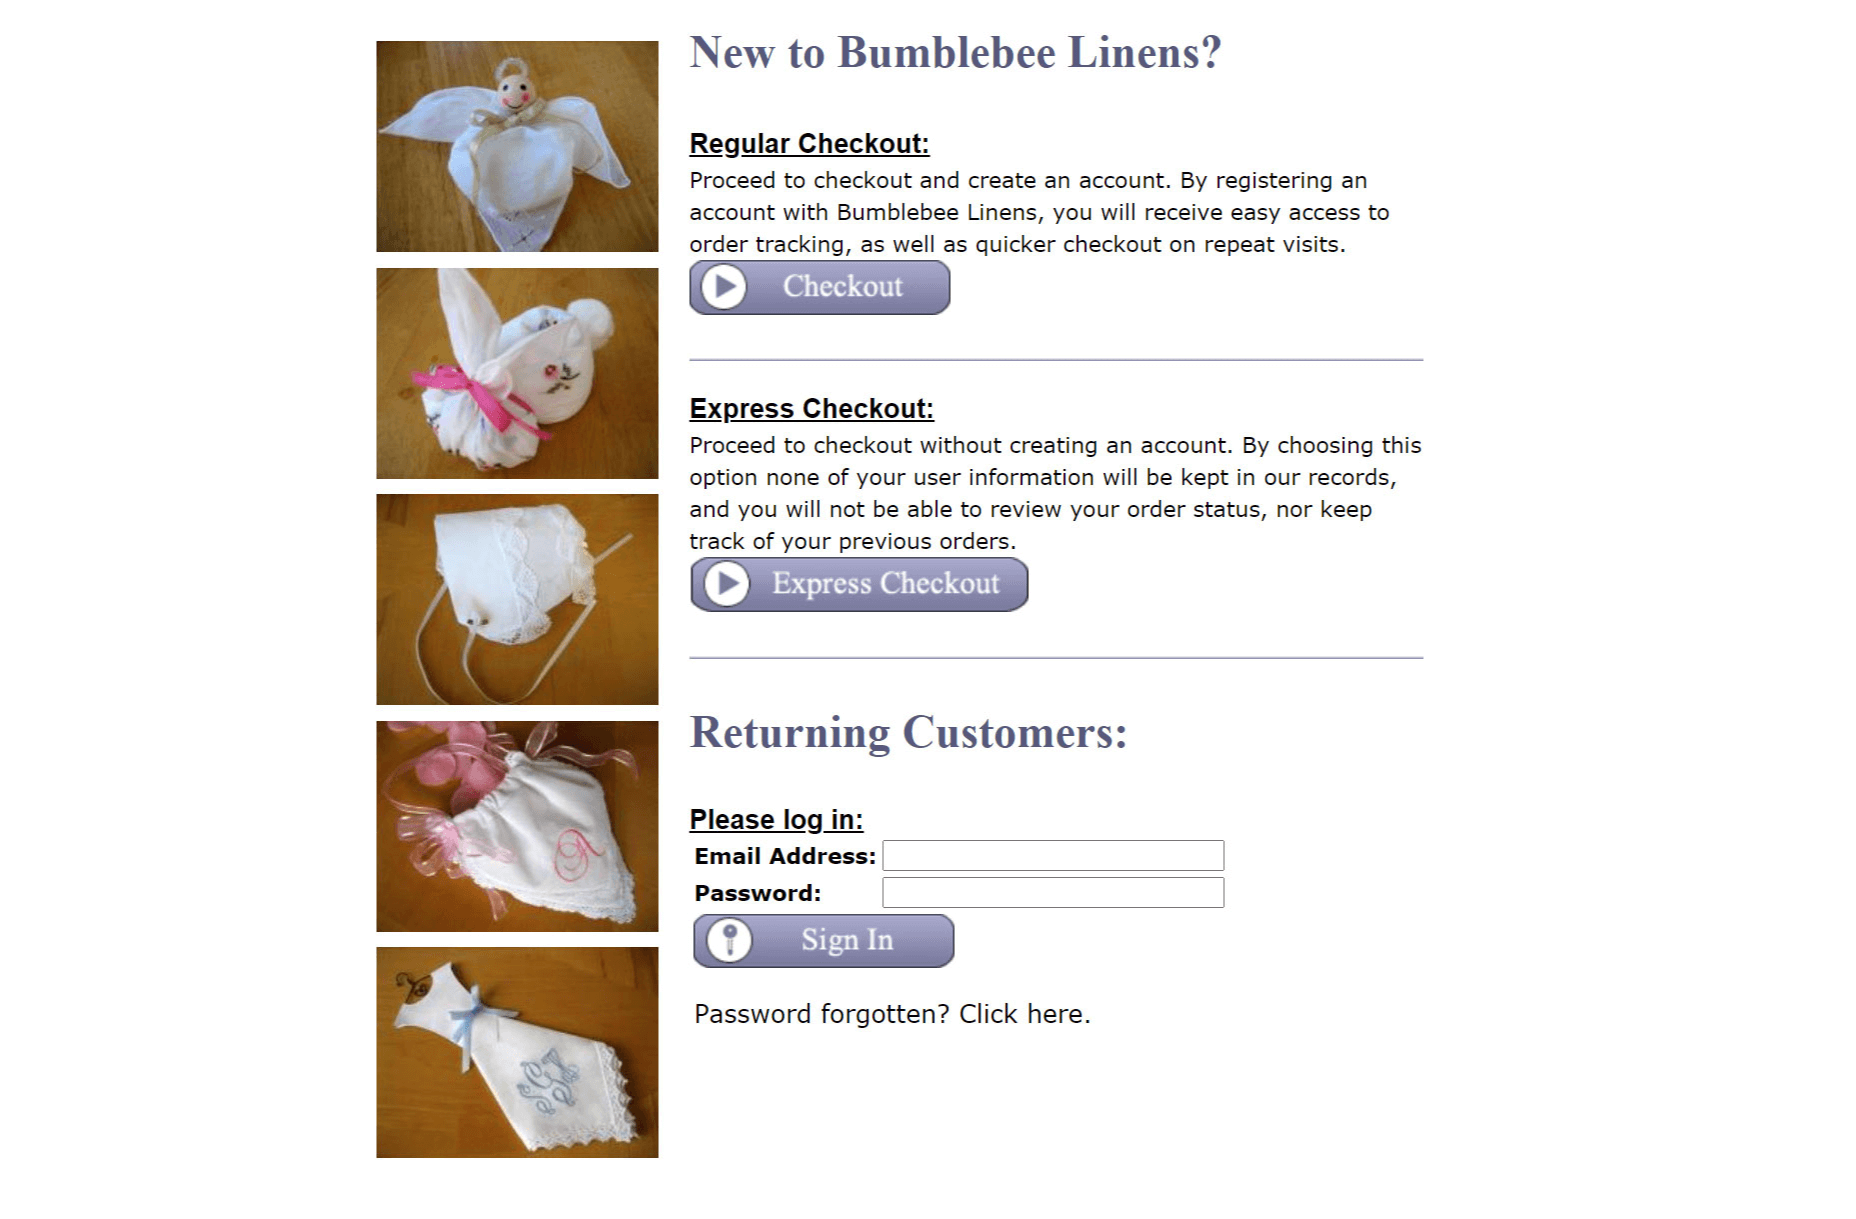
As you can see, there are too many choices. After all, a customer doesn’t need 3 ways to checkout and the choices are a little overwhelming.

Here’s what the checkout page looks like now:
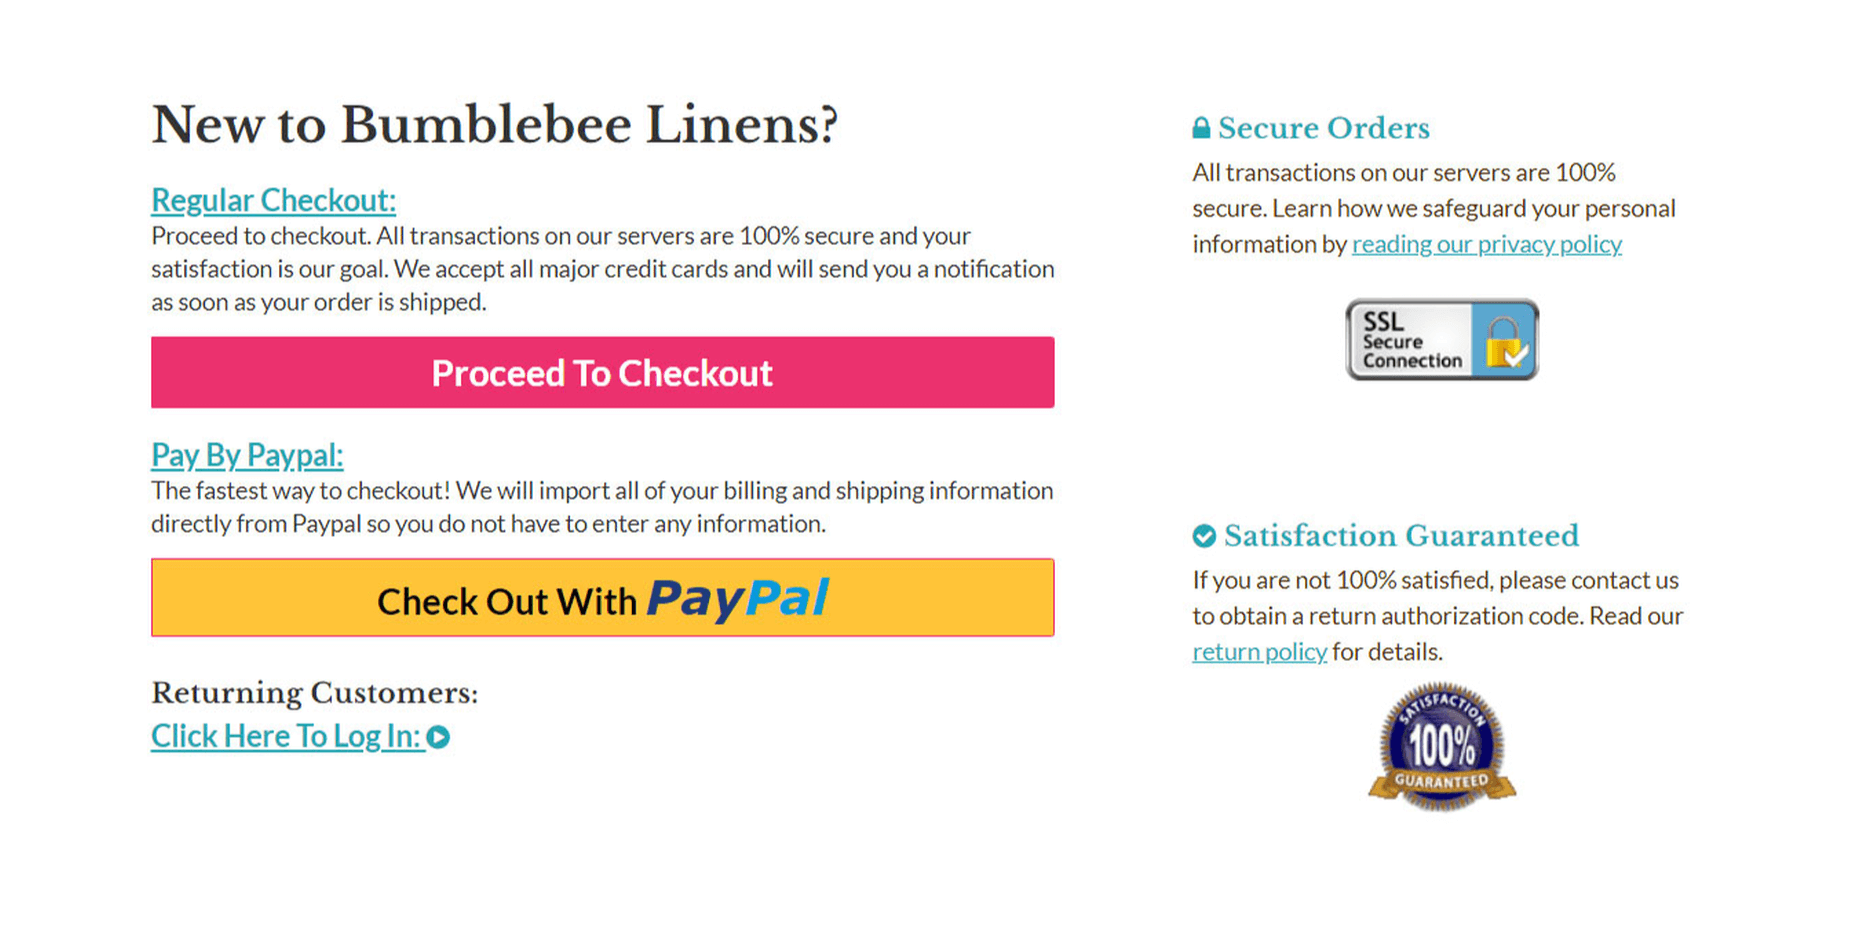
Instead of offering 3 separate options for checkout, I consolidated them all into one and added a separate Paypal option (more on this later). First off, less than 6% of customers create an account so there was no reason to offer account creation as a separate option. Furthermore, displaying a login form was causing more headaches than it was worth because the majority of customers don’t even have an account. As a result, I decided to hide the form altogether by default.

Overall, when you are designing your checkout process, keep these optimization principles in mind.

Principle #1: Remove all unnecessary elements from the page. Don’t make the customer think and hide all elements that are not frequently used.

Principle #2: Display trust logos to assure customers of a secure checkout. In the image above, you’ll find trust logos on the right-hand side of the checkout page.

7. Optimize The Checkout Process For Mobile Users

4 out of 10 mobile users abandon their carts if they have a hard time entering their personal information. People don’t like entering their contact and credit card information using a tiny keyboard. What’s more, small buttons and too many form fields drive away mobile users. 79% of smartphone users shop online with their mobile devices, which is why you should optimize for mobile.

These days, a responsive design is par for the course but you can still screw things up if you are not careful. Here’s what my checkout process looks like on a desktop:
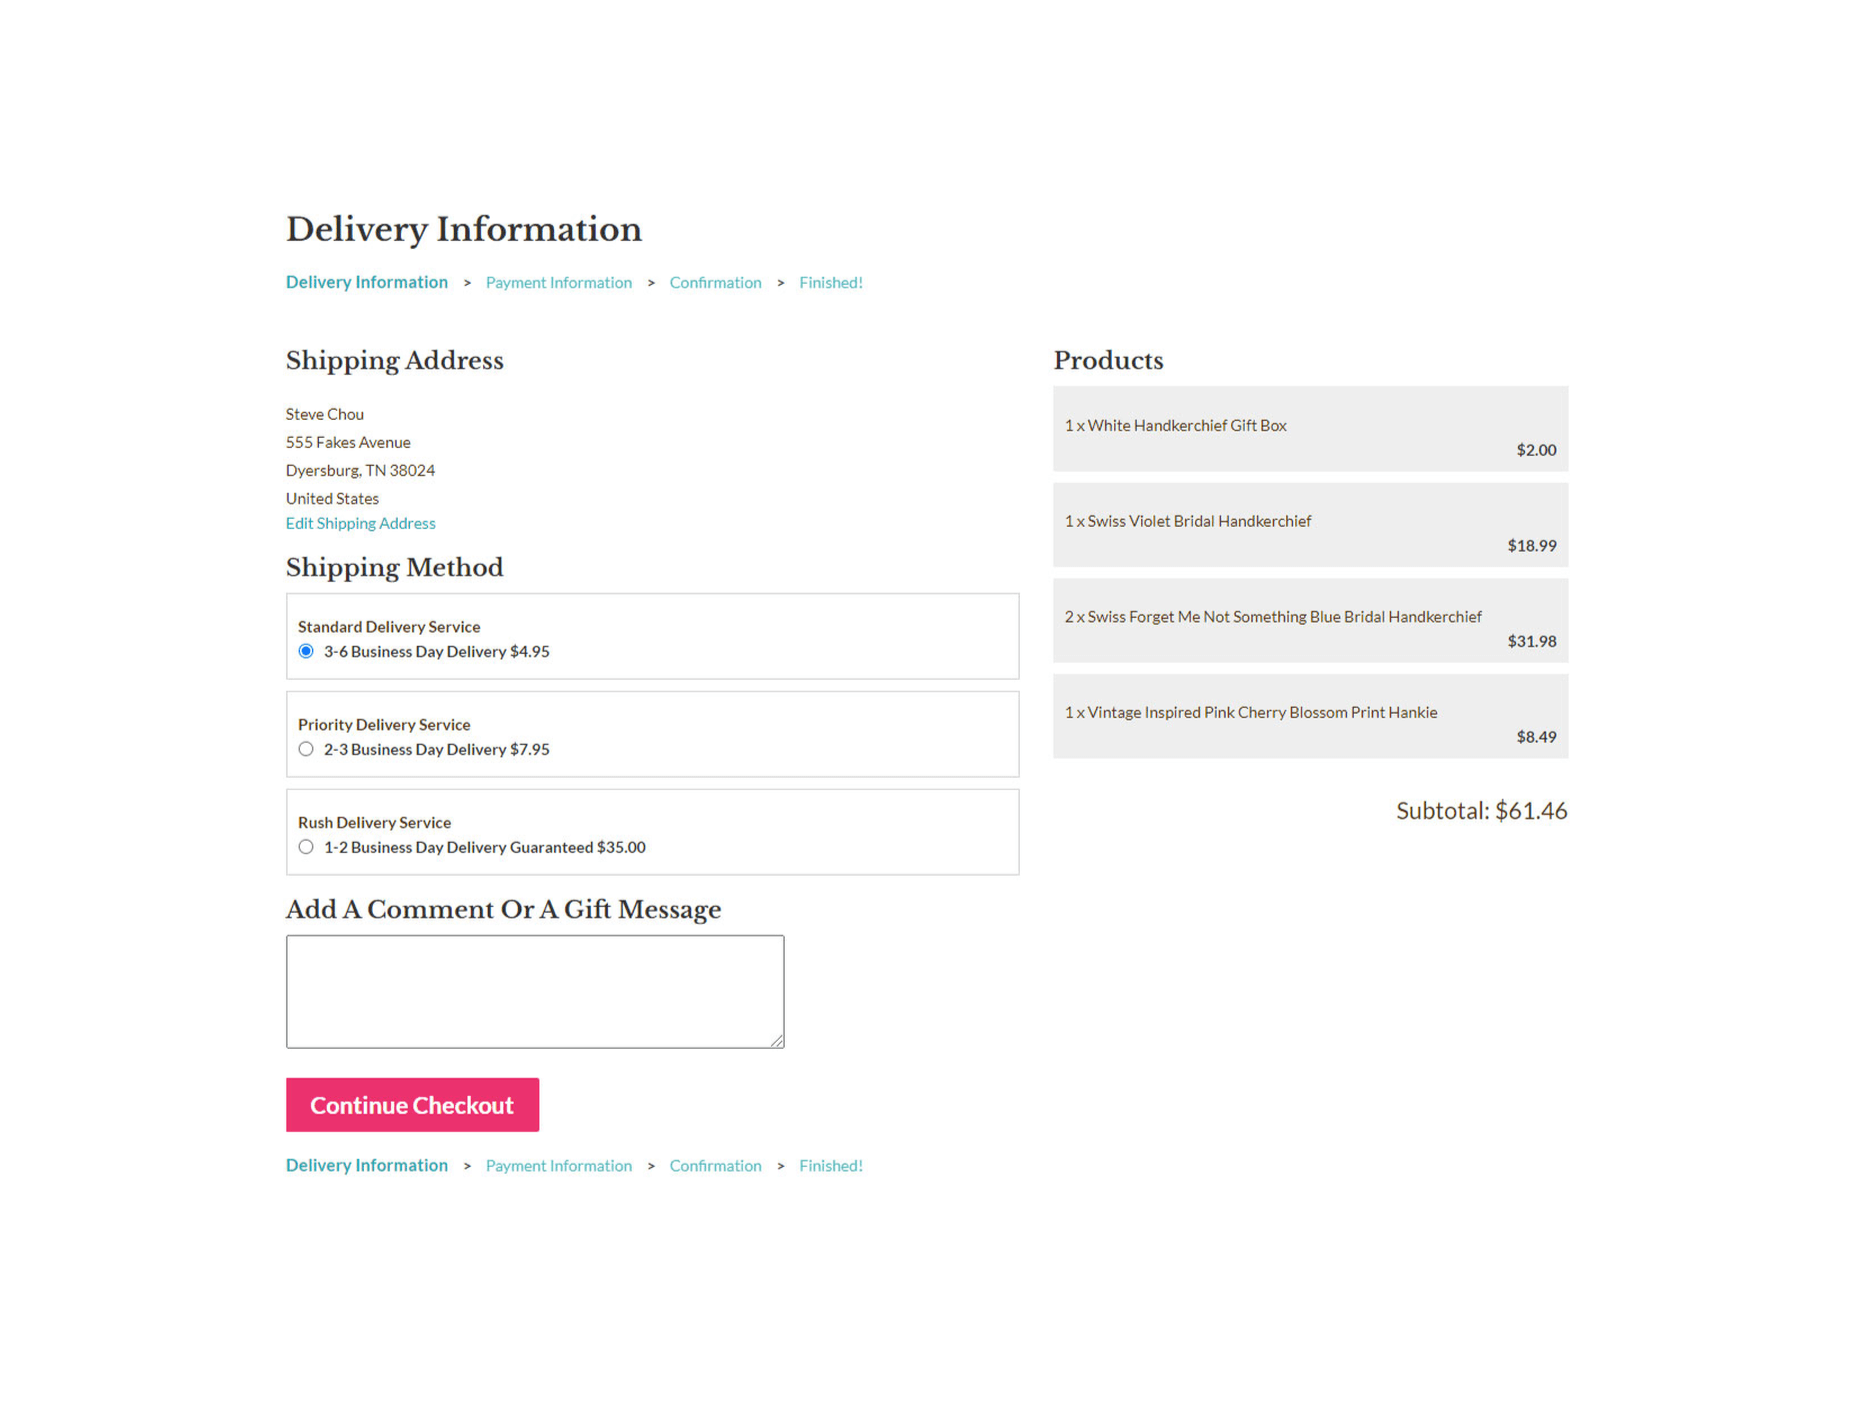
And here’s how the checkout page looks on a mobile device:
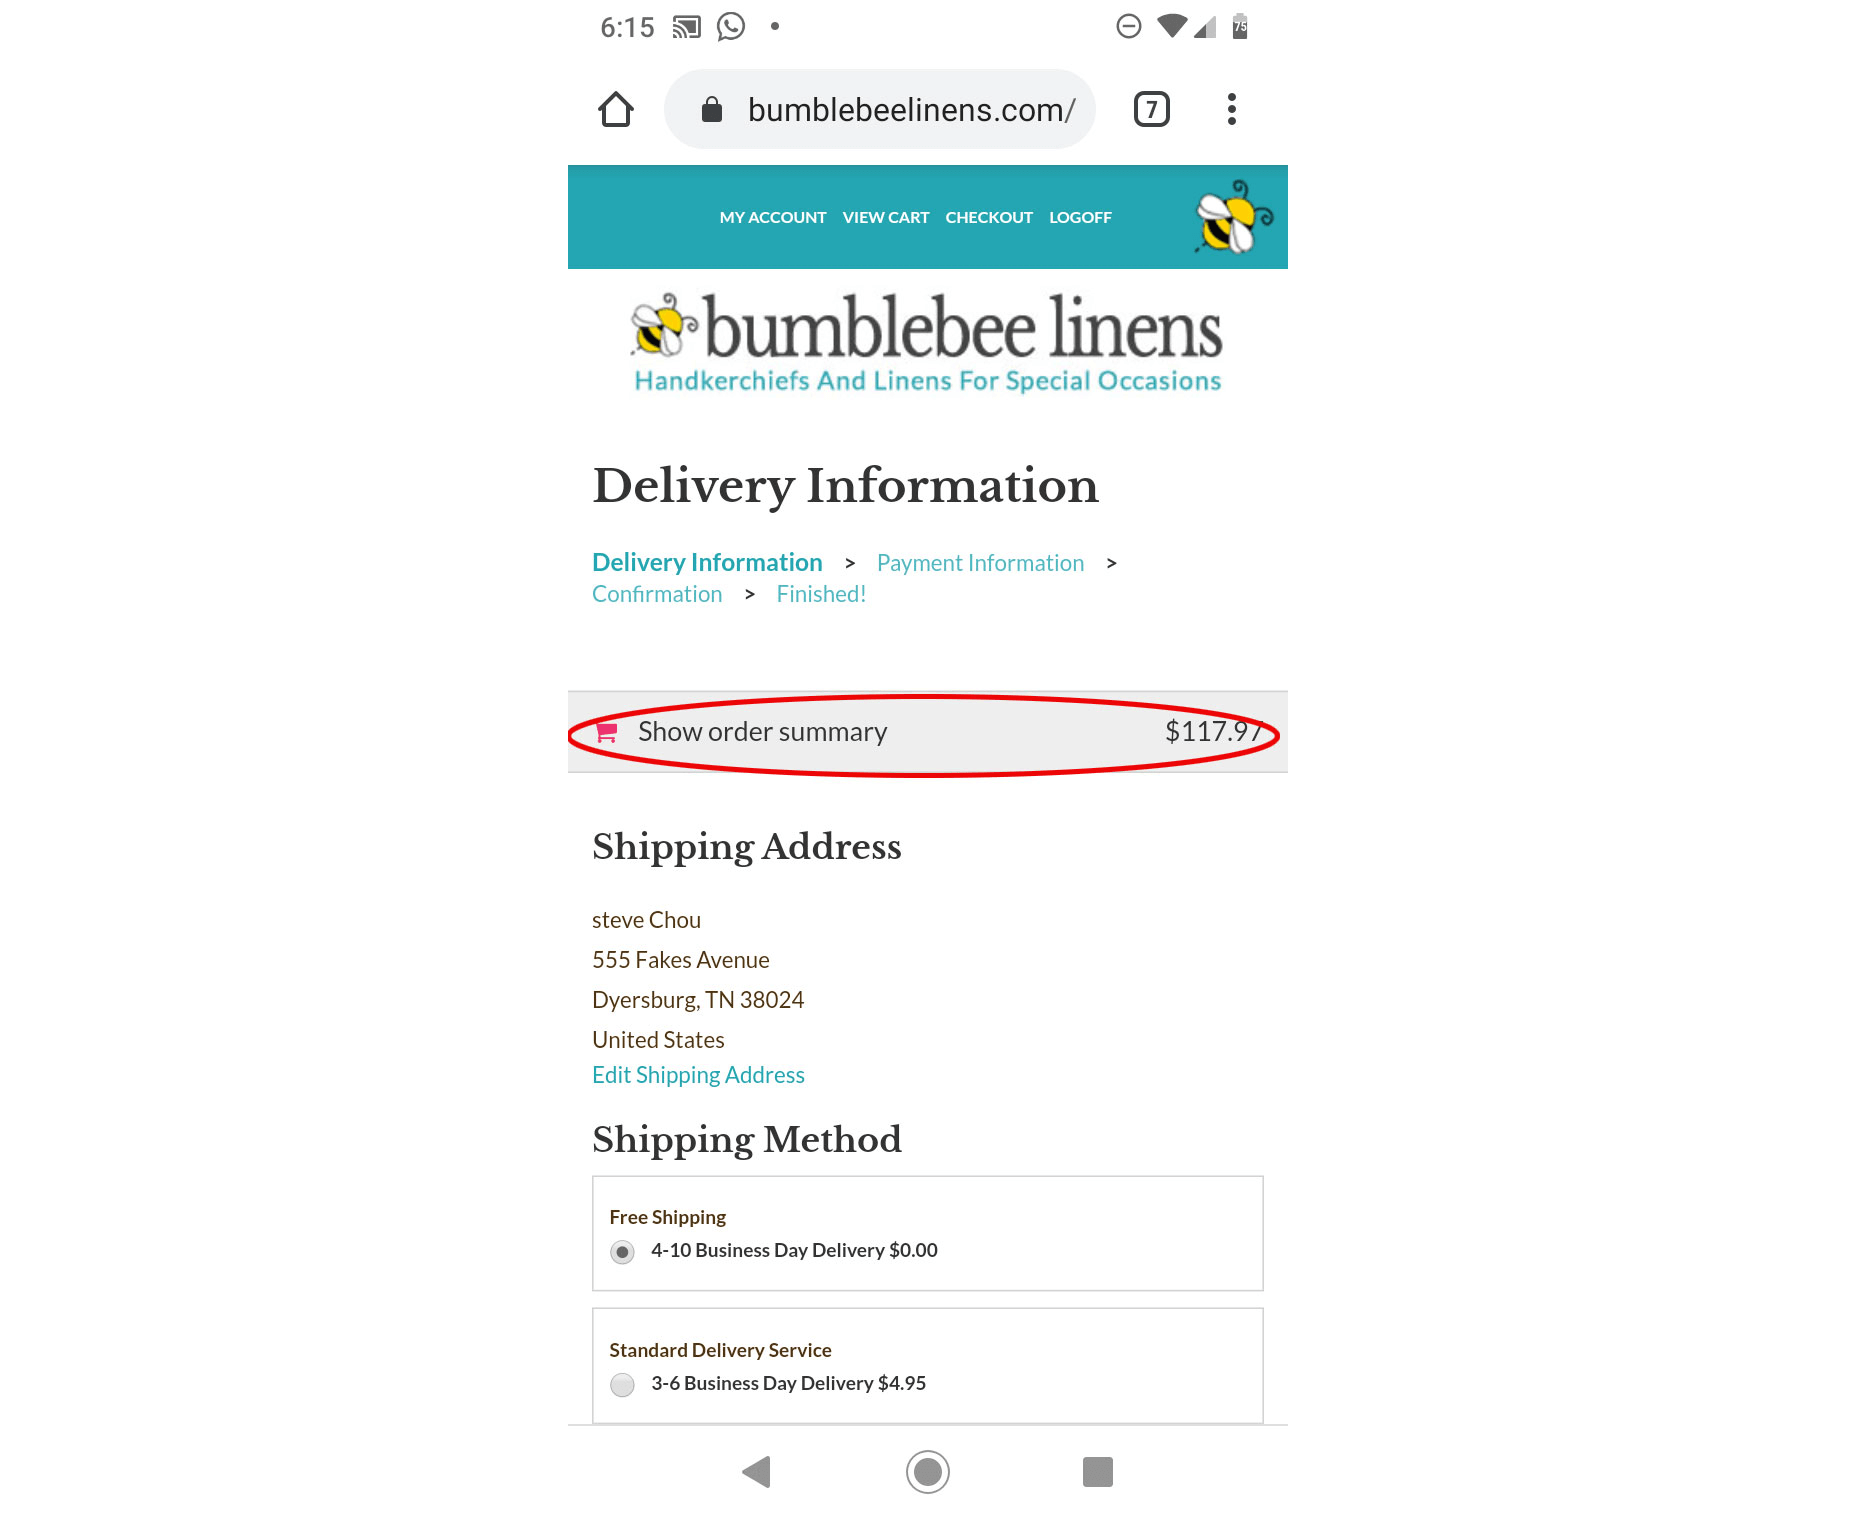
On mobile, the user’s cart contents are collapsed so it doesn’t occupy the entire screen. Overall, here were the mobile optimizations I made to checkout:

Optimization #1: Keep Your Checkout Form Short And Sweet

A mobile user should be able to tap buttons on your checkout page without accidentally hitting another option. Also, the buttons should be large enough to tap on a mobile device.

Given the smaller screen size of a mobile phone, keep your checkout form short and sweet with no extraneous options. Also, make sure you turn off autocorrect for your form fields. Otherwise, your phone’s autocorrect feature may frustrate users when they try to enter their address. In fact, we once had a customer get so frustrated trying to type in their city on their iPhone that they called us up and complained in frustration.
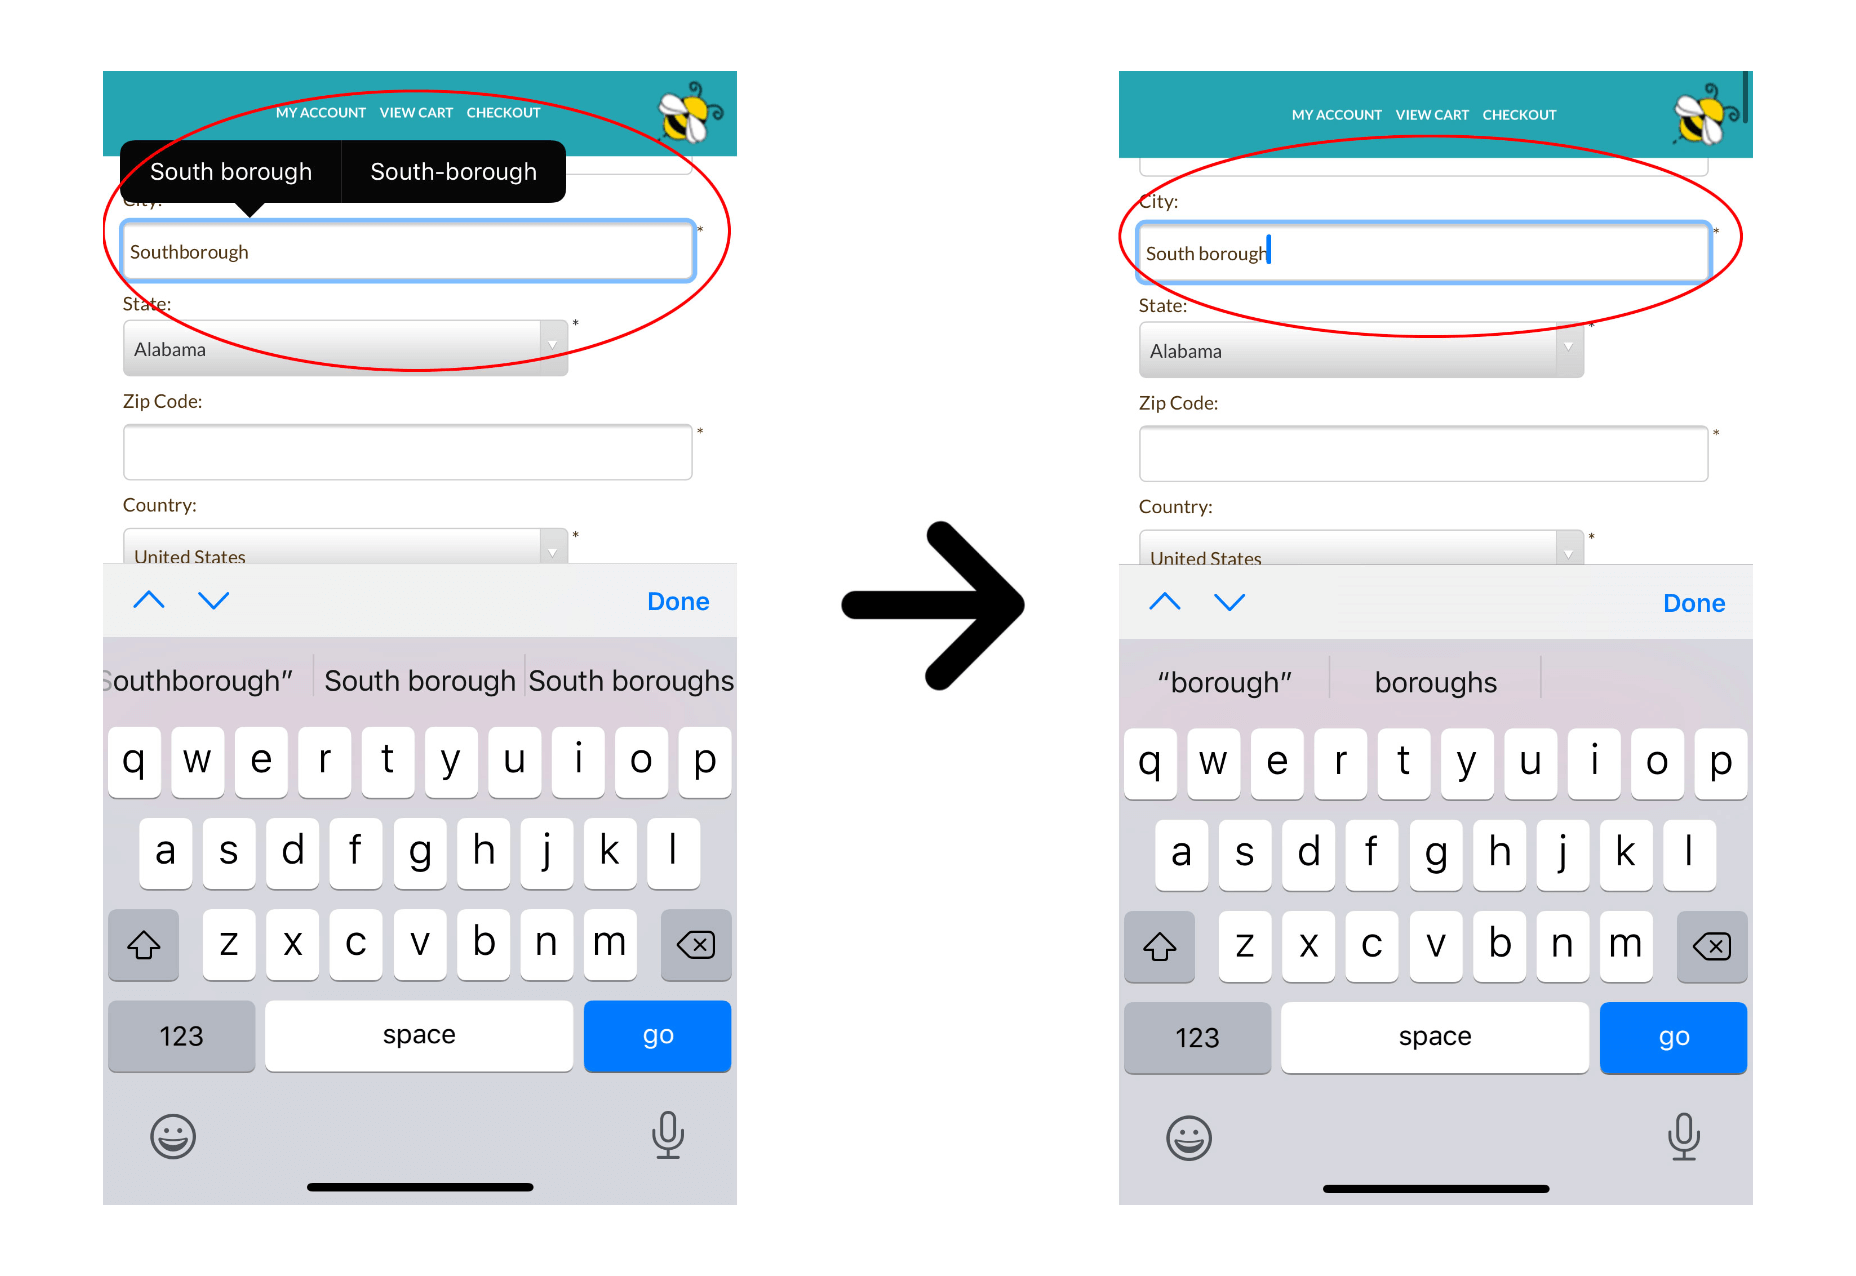
To fix this, you simply need to add the following tag to all of your text input fields.

<input type="text" name="name" autocorrect="off">

And to reduce frustration, you should also turn off auto-capitalization and auto-complete by adding auto-capitalization=”off” and auto-complete=”off” to all of your forms as well:

<input type="text" name="name" autocorrect="off" auto-capitalization="off" auto-complete="off">

In addition, for phone number entry, you should always display a numeric keypad as opposed to a regular keyboard:
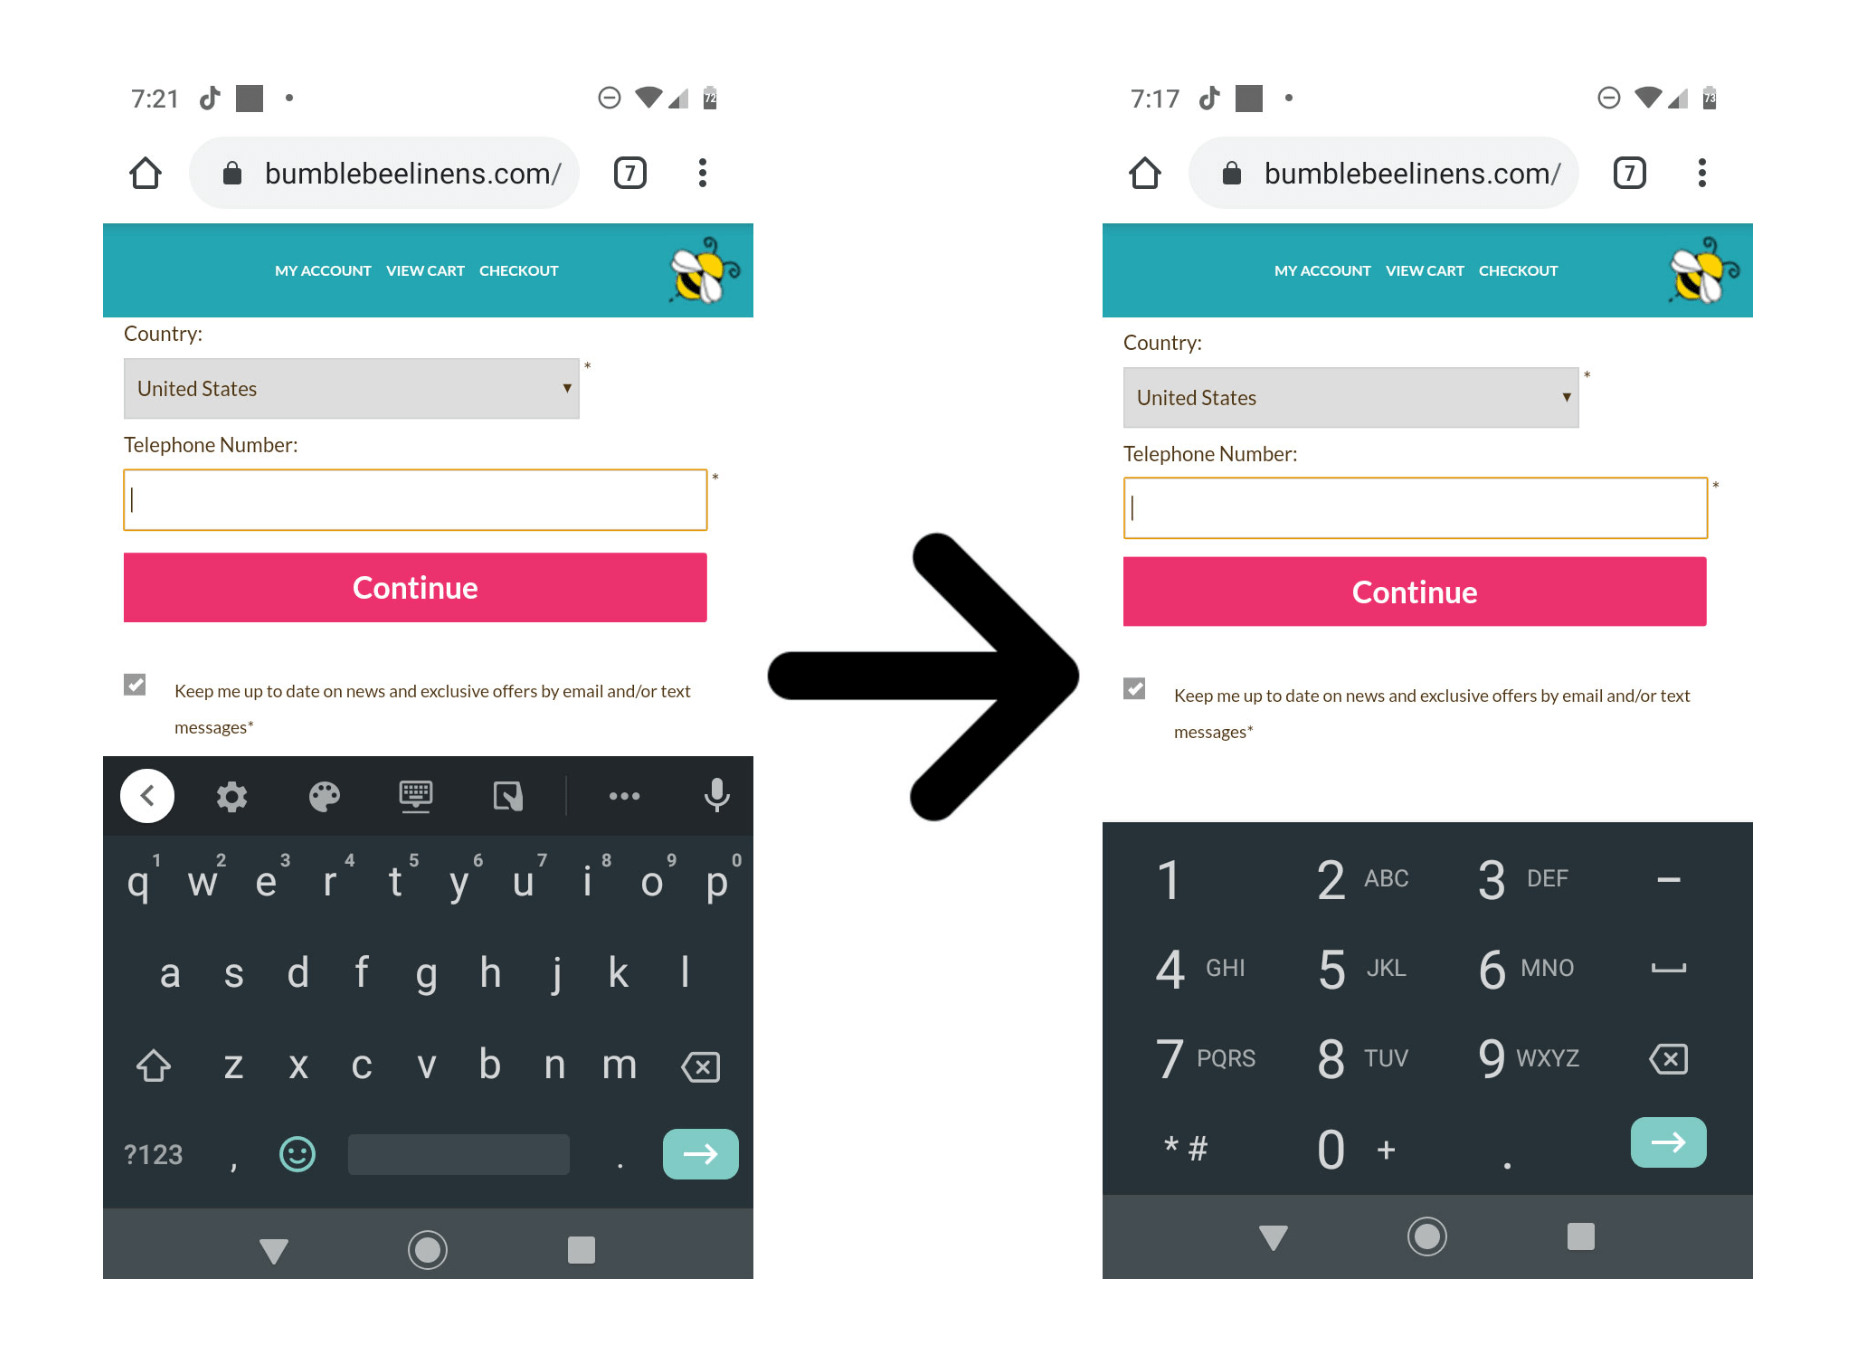
Optimization #2: Automatically Import Your Customer Data If Possible

The less information mobile users have to enter in, the better. Payment options like Paypal Express and Amazon Payments can simplify the checkout process. These third-party payment processors automatically fill out a customer’s billing and shipping information which reduces typing and increases conversion rates.

To offer a more convenient checkout, I implemented PayPal One Touch, which alone increased my mobile conversion rates by 31%.

Here’s a quick tip when implementing Paypal: Make sure you display the Paypal button early in the checkout process before a user has entered in their information. Otherwise, it defeats the purpose of importing their information! In the first step of my checkout process, I explain each payment option in depth.

These simple changes made a huge difference in my conversion rate. And the number of PayPal users on my site nearly doubled from 13% to 23%!

8. Add A Sense Of Urgency

Most customers like to window shop and the best way to get a visitor to take action is to create a sense of urgency.

Whenever I run a sale, a big yellow countdown timer is displayed on every page of the website.

Note: It’s important to note that we only utilize this timer when there is actually a sale going on. Otherwise, you risk desensitizing your customers or losing trust.
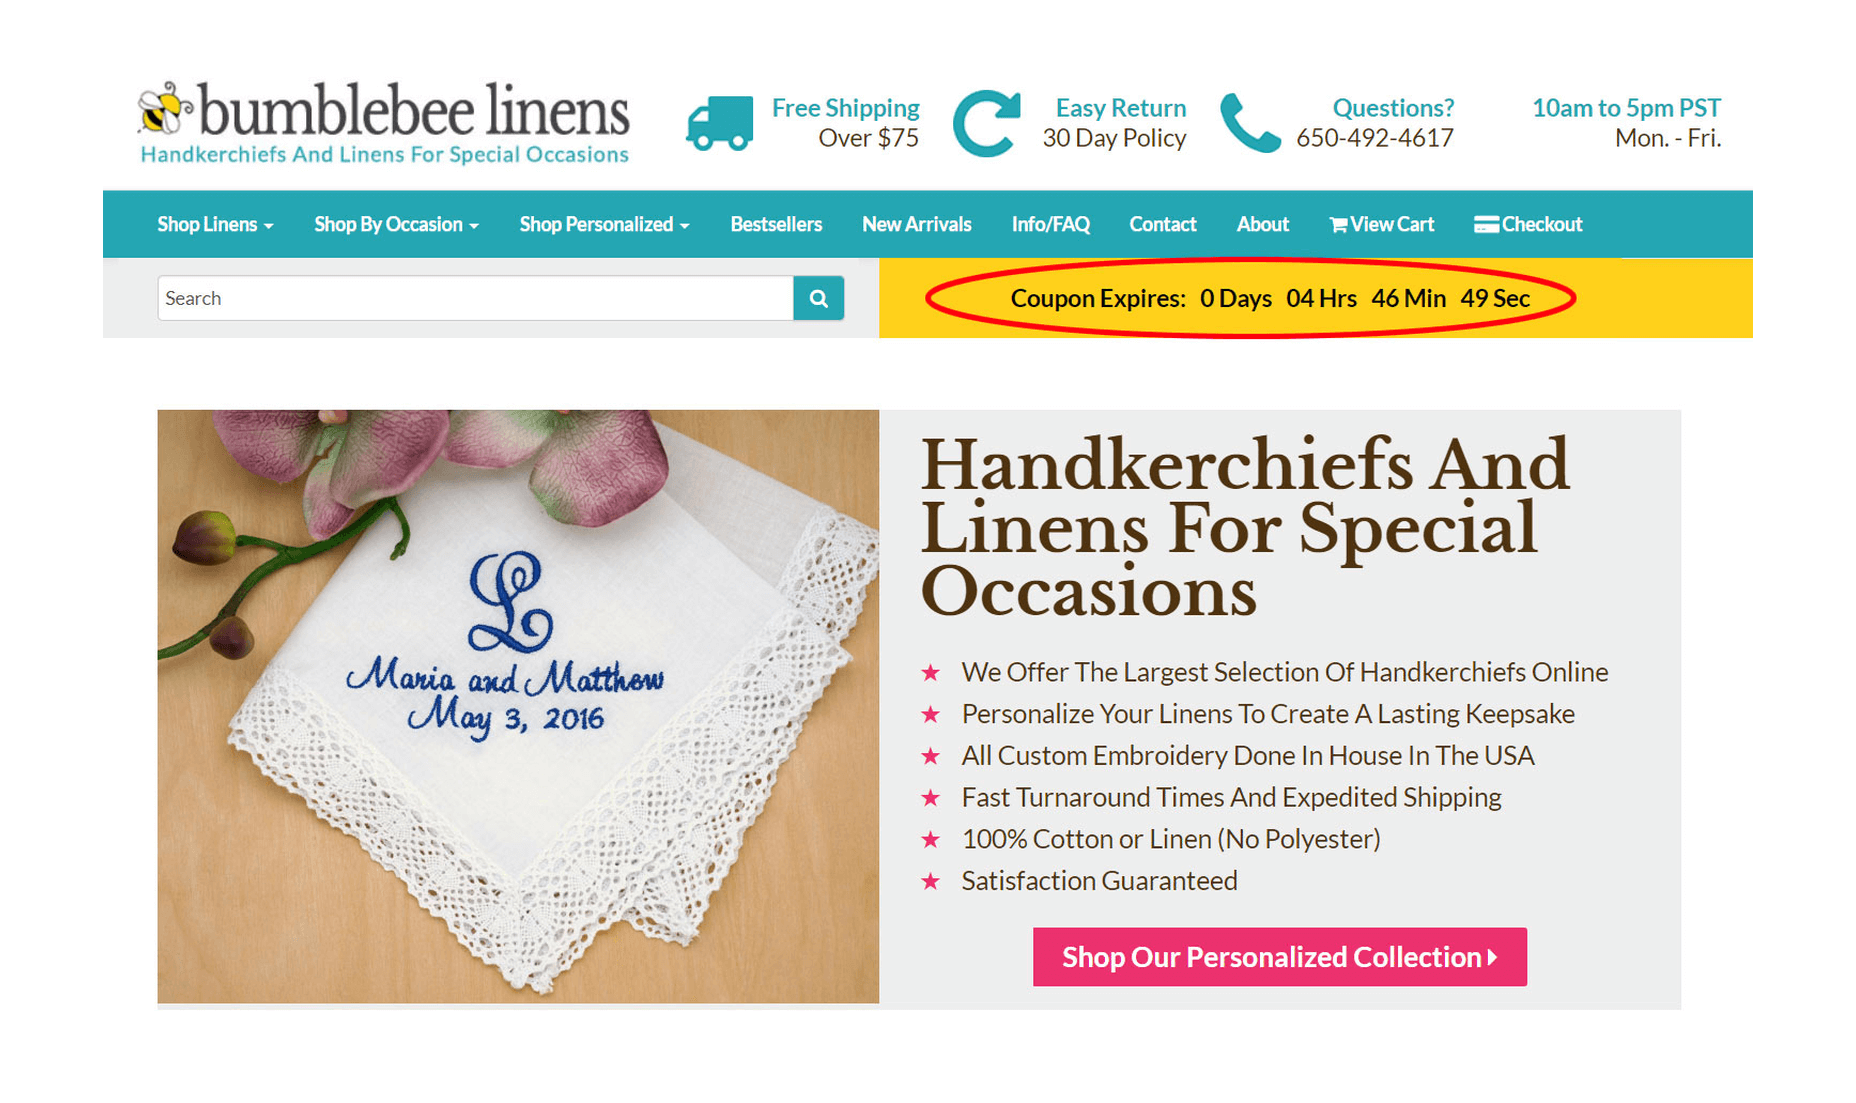
In addition, I also display a countdown timer on the checkout page to create a sense of urgency to complete the payment process:
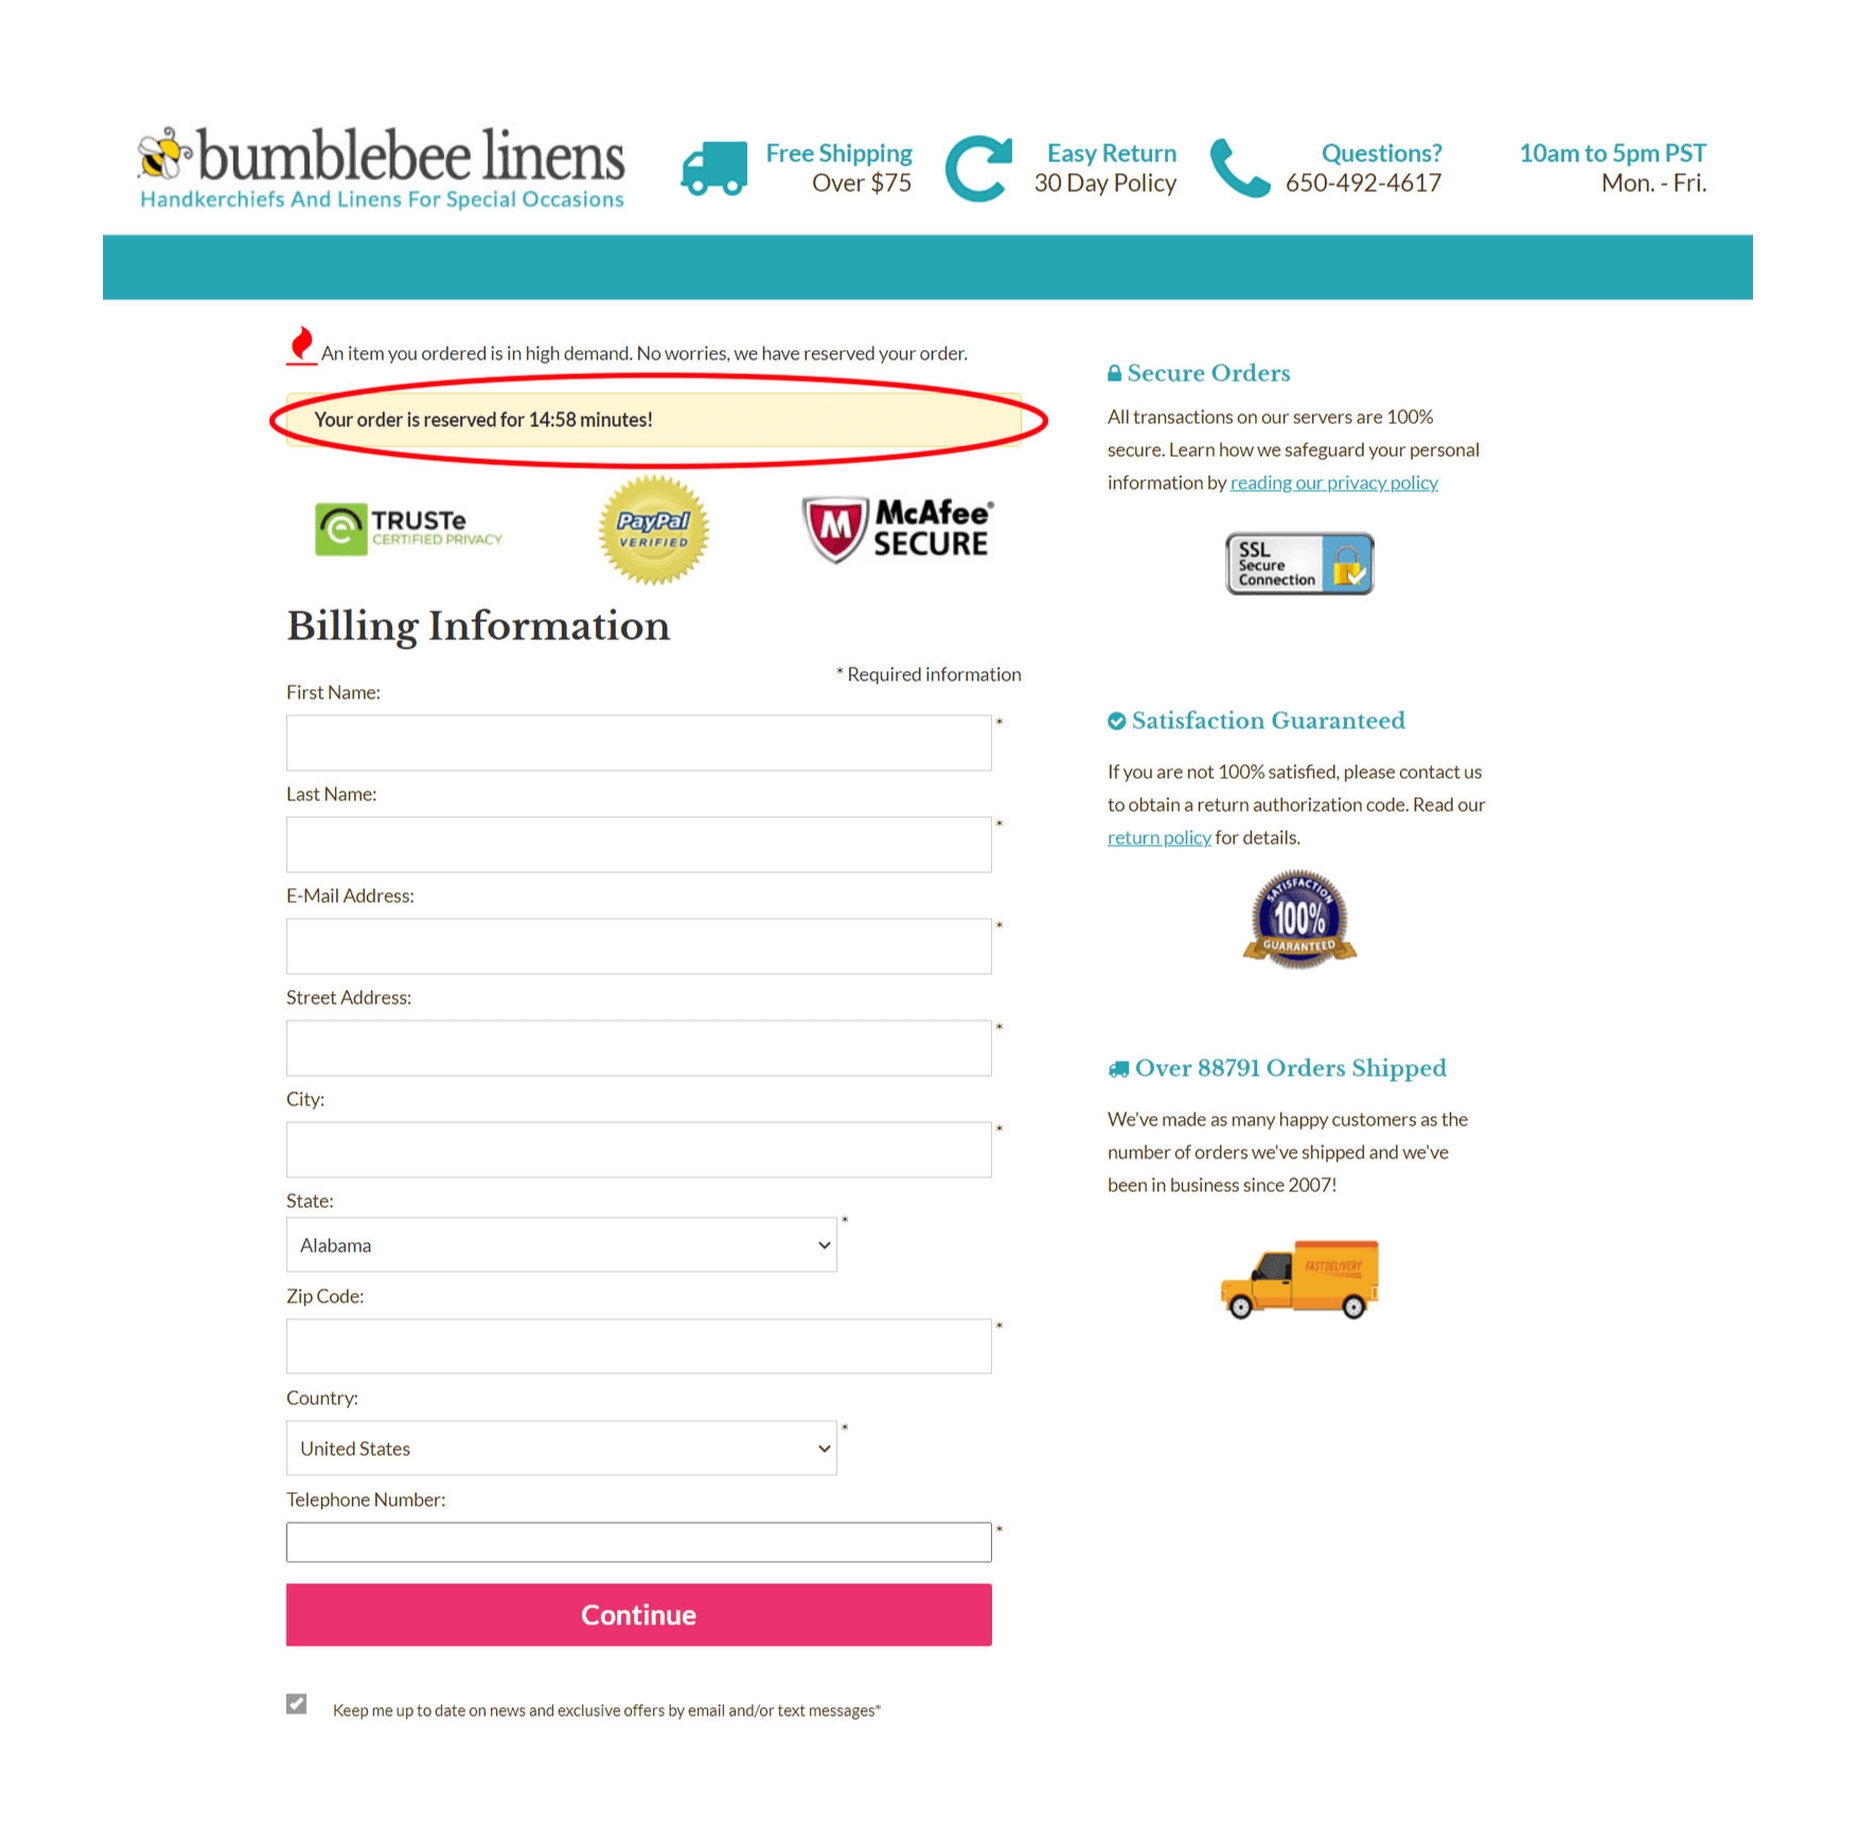
These extra design elements force a customer to take action sooner rather than later.

Final thoughts

Optimizing your conversion rate is an ongoing process. And testing your results is the only way to track your improvement.

Never go with your gut and always listen to the data. After all, sometimes an ugly site can out-convert a beautiful one.

Regardless, the design tips I demonstrated above will give you a solid foundation to start with. From there, you can further improve your website and optimize your conversion rate through repeated testing and tweaks. Good luck!

Source


Source de l’article sur Webdesignerdepot


As promised, the just-released Java, JavaFX theme in JMetro version 4.6 brings a new style for the Progress Bar.

The Progress Bar has two possible states: determinate and indeterminate, and the new JMetro version has different styles for these two. In this post, I’ll go into greater detail about some API design principles I abide by in JMetro.

Source de l’article sur DZONE

When your heroes start acting weird, you reexamine their influence on your life. I’ve long been learning, demonstrating and teaching clean code through TDD, patterns, and so on. But when I look back, I am now worried that the ideas negatively influence my life and my work and that of others.

Many who know me consider me an exceptionally skilled programmer. I got that way because I have often spent my evenings practicing programming techniques and technologies. I often leave the office 1-2 hours later than my co-workers after polishing some piece of ultimately meaningless code. This is time I don’t spend with my family. Because I’ve learned to care about Clean Code.

Source de l’article sur DZone