Articles

When you hear the word “leadership,” do you think of a particular person?

If you’d been asked that question anytime before the 1900s, chances are you’d think of an accomplished politician or a battle-tested general. These were the people leading society for most of recorded history. Today, you might have someone else in mind.

Since the industrial era, the US has birthed a pantheon of founders who’ve arguably led our society as much as any statesman or president. We put Rockefeller and Ford right next to Lincoln and Jefferson. Think about it; these guys haven’t just changed the US; they’ve changed how the entire world lives and does business.

Founders of successful companies today command even larger amounts of capital and power than JD and Henry. With the rise of social media, they are often thrust to the forefront of their brands and the public, whether they like it or not. Some manage the responsibility better than others.

In my opinion, the best businesses use all that capital, manpower, and name recognition to do more than simply make a profit. By leading with authenticity, inspiring positive action, and influencing their brand’s vision for innovation – they try to make a change.

I wanted to take a minute to reflect on some modern founder-led brands I think are doing a killer job of creating unique, world-changing businesses and company cultures. I also want to discuss the lessons I have learned from them.

Elon Musk – Tesla

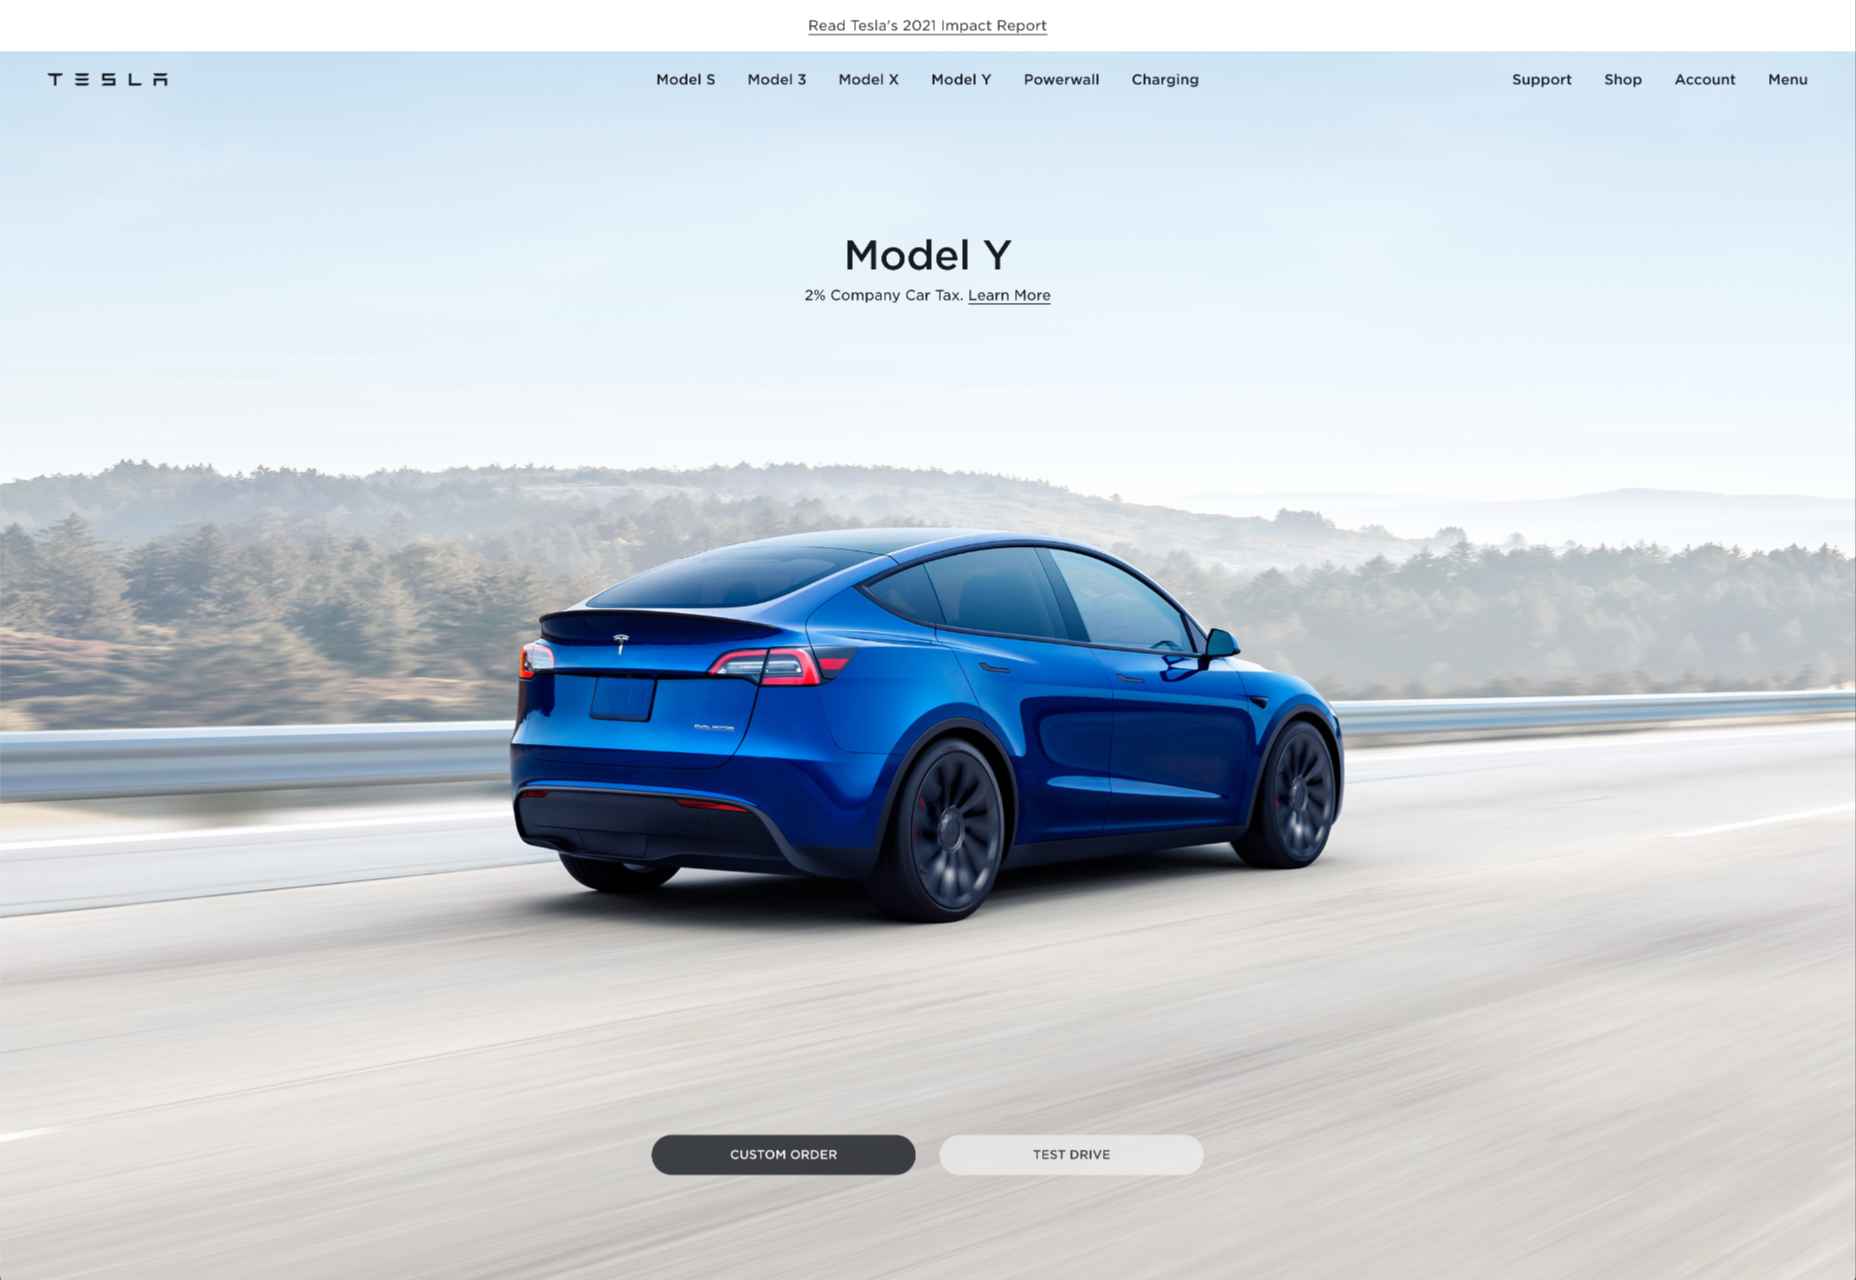
When talking about founder-led brands of the 21st century, it’s hard to pass over electric vehicle manufacturer Tesla and its outspoken CEO, Elon Musk. Love him or loathe him, he belongs in any conversation on influential founders.

While Musk isn’t technically the founder of Tesla, he is one hundred percent responsible for the company’s direction over the past decade. I think two of the strongest leadership points for Musk are his focus on branding and innovation.

Tesla created showrooms and charging stations long before his business had the sales to justify the expense. People saw the name Tesla everywhere, got curious about it, and now that’s paying off big time. Tesla today is at the forefront of the EV industry while all the other car companies play catch-up.

Behind the scenes, Tesla was also early to create a vertically-integrated supply chain – giving it almost complete control over its product and logistics. That’s another feature with a hefty upfront price tag but paid off when the pandemic hit. Now the biggest automakers in the world are rushing to copy that model.

Musk arguably even convinced China to deregulate foreign ownership of automotive companies. That’s hard to prove. However, China changed its rules around foreign ownership of EV companies shortly after he refused to enter the country.

Arguably, Tesla today is one of the frontrunners in redefining how traditional companies run. Musk is known to hate bureaucracy and traditional hierarchies. He hires other people to take care of bureaucratic processes for him.

Musk is also known for hiring relatively young, hard-working employees into high-power management positions in the company and letting them prove themselves. That inspires extreme loyalty from his employees from an early age. Musk’s focus on efficiency and rejection of traditional hierarchies has sparked a small revolution in tech companies.

Finally, I respect Musk because he has goals beyond showing year-over-year growth to shareholders. That’s hard to do day in and day out.

Sara Blakely – Spanx

Sara Blakely is an example of a founder with her hands in every part of her business, from product creation to sales. Most importantly, she created an authentic company culture with values she felt the business world lacked.

For those who know her story, Spanx very nearly didn’t happen. Blakely pitched her slimming undergarment to multiple women’s brands run by men. Most told her it would never work.

It might seem silly now, but men used to think they knew women’s fashion better than women. It wasn’t until one executive gave Blakely’s product to his daughters to try out that he agreed to start stocking Spanx. It’s a great example of how businesses can make a lot of money by listening to their customers.

Besides founding a women’s clothing company that sells products women want, Blakely strived to bring “feminine energy” into the workplace. I saw this poignant quote from her in an article:

“Twenty-one years ago when I started Spanx, I ended up in the paper in Atlanta, and I was at a cocktail party and a couple of guys came up to me and they said, ‘Sara, we read about you. Congratulations! We heard you invented something.’ And I said, ‘Yes I did, I’m so excited.’ They said, ‘Business is war,’ and then they pat me on the shoulder and they kind of laughed at each other. I went back home to my apartment that night. I was 29 and I just thought, I’m not going to war. I’m going to do this very differently. I’m going to honor a lot of feminine principles — intuition, empathy, kindness. Just allowing myself to be vulnerable through this process. And of course, a lot of the masculine energy has helped me also — it was a balance. But I wasn’t going to do it by squashing the feminine.”

Blakely worked hard to create a sales-oriented company culture that was purposely welcoming from that point forward. She regularly scheduled “oops meetings” where employees could stand up and say how they messed up and turn it into a funny story. At Spanx, it was okay to make mistakes and learn from them.

Blakely wanted everything about her product to be fun, including the way it was sold. She created a mandatory boot camp for salespeople, which, among other things, requires employees to perform standup comedy. Little things like that resonated with people and made Spanx synonymous with “fun.” Even famous actresses were flashing their Spanx on the red carpet.

The lesson we can all learn from Spanx and Blakely is that fun and positive energy are great marketing tools for any business. Many companies try to push a fun culture publicly without any authentic leadership that genuinely exemplifies that narrative, they won’t have the same effect. Blakely’s story of Spanx is not just a story of the brand but a story of her life and the experiences that shaped her vision and goals.

Jack Dorsey – Block (FKA Square)

While better known for founding Twitter, Jack Dorsey has recently been in the news for his move to solely running payment processing business Block. I admire Dorsey because he radically encourages his teams to think differently about how they work.

Dorsey is known for optimizing ways to stay productive and focused throughout the day. He manages through unconventional tactics like communicating only through voice memos on his phone that he runs through transcription apps. He says this prevents him from being sidetracked by distractions on his computer. I think that kind of mindfulness is necessary now more than ever.

Dorsey tries to bring this level of focus to his interactions with his employees too. I saw a great quote from him in this article discussing computer-less meetings at Block.

“When phones are down and laptops are closed, the team can discuss any issue at hand without distraction. We can actually focus and not just spend an hour together but make that time meaningful — and if that time is 15 minutes, then it’s 15 minutes and then we move on with our lives.”

Besides limiting distractions, Dorsey is known to walk five miles to work daily, theme each day, and create detailed agendas and goals for each team meeting. In his former company, Twitter, the culture was frequently described as a space where employees could speak freely to management about things they wanted to change.

On that subject, Dorsey has been known to push hard for employee control in his companies. Perhaps ironically, he was also quoted saying he wants Twitter to break away from its co-founders’- vision and control, calling founder-led companies “severely limiting.” However, it still seems he has some sort of vision for the world that he wants to bring around via Block.

His business goals are visionary, pushing the boundaries of innovation in the financial world.

Dorsey is a known cryptocurrency enthusiast but had pushback from the Twitter team, including his CFO, about making a crypto-centric product. His move to payments processor, Block, seems to be a bid to follow his passion and exert his vision on the world.

Block has since made headlines for being extremely bullish on cryptocurrencies, while many have expressed doubts. Dorsey even changed the business’s name to Block to better reflect its focus on blockchain and famously purchased $50 million worth of Bitcoin in 2020. All the while, Dorsey has been quietly creating arms of his business in the hopes of improving BTC’s usefulness. That may pay off down the line.

Melanie Perkins – Canva

I identify strongly with Melanie Perkins, co-founder of graphic design SaaS, Canva. Besides being roughly the same age, we both came from nondescript beginnings with no background in entrepreneurship or tech.

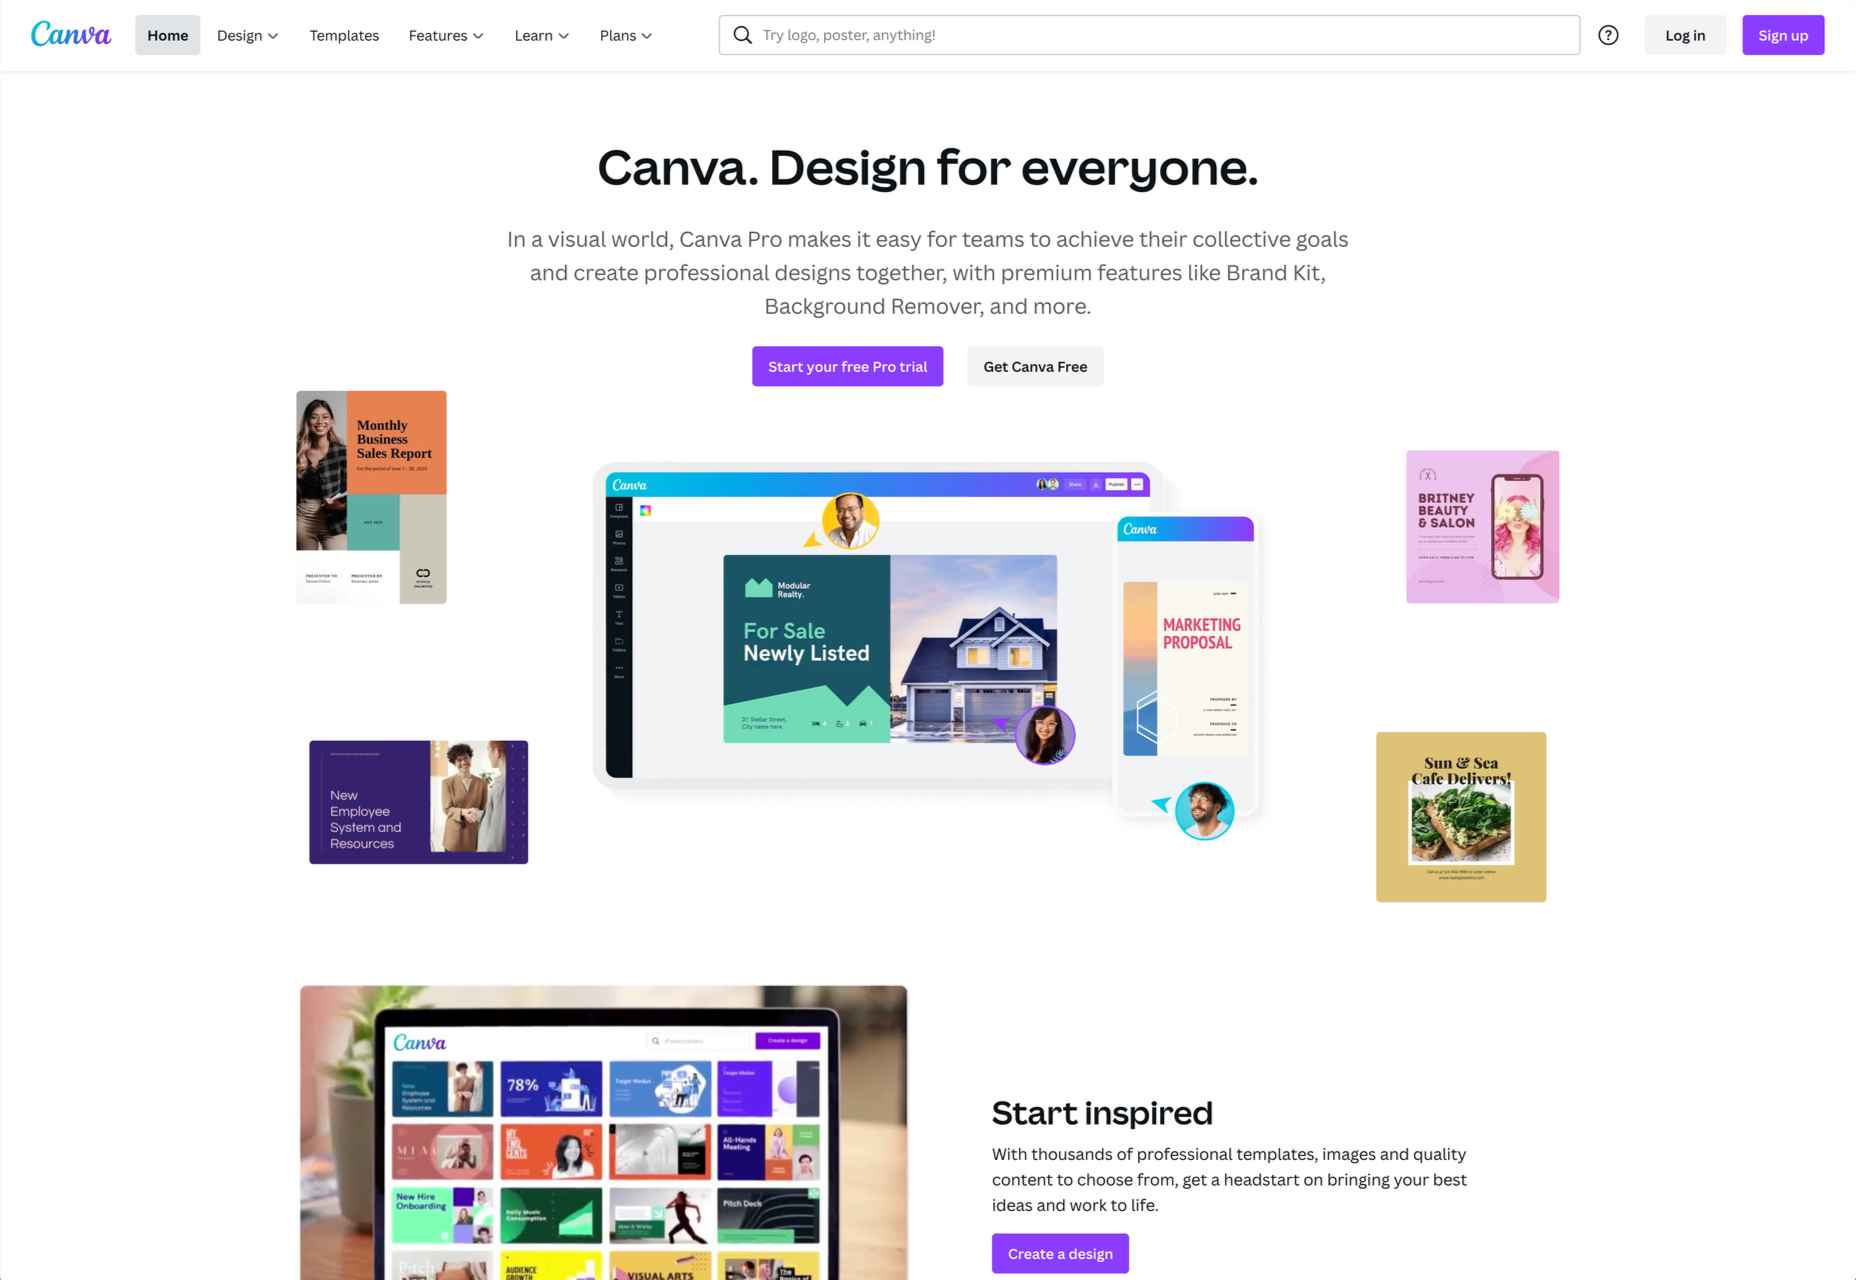
Canva is an excellent example of a business created by becoming intimately familiar with a customer problem and executing. Perkins spent years teaching people how to use design platforms like Adobe Creative Suite because they were so complicated. Taking that knowledge, she started a simple product to help customers create high school yearbooks. That expanded into a super app covering every aspect of design.

This super-app has unlocked a way for millions to learn design and produce high-quality content at any skill level. The cost to use Canva is many times lower than anything else on the market.

While Canva is an amazing product, what I like most about Perkins is that she believes business serves a higher purpose than maximizing profits.

When she was suddenly thrust into the limelight with a $40 billion valuation, people were even more impressed by Perkins’ philanthropic goals. She vowed to donate a 30 percent stake in Canva to a charity dedicated to eliminating poverty (about $12 billion). She is also known to regularly fundraise for 25,000 different nonprofits through her app. She doesn’t just inspire people with words, but by actions, she’s actually taking.

Canva is very public about its ethos. I like their values because they are general yet avoid the jargon many companies fall into. They are:

  • To be a force for good and empower others;
  • Pursue excellence;
  • Be a good human;
  • Make complex things simple;
  • Set crazy big goals and make them happen.

Besides revolutionizing how modern businesses design and harness goodwill marketing, Canva was also one of the forerunners of the remote work trend.

Most of Canva’s “Canvanauts” worked from homes worldwide even before the pandemic. Canva showed a lot of tired old businesses that you could still run a successful company without having employees in the office 24/7.

How I Try to Learn From the Best

Finally, I want to talk about what I am trying to contribute to my team and society with my current business, startup acquisition marketplace, MicroAcquire.

As I’ve mentioned, I think it is very much on myself as a founder to set the tone of my business – and that starts with who I hire. When I’m searching for new employees to join the “#Micromafia” I not only look for productive workers, I look for people I genuinely enjoy spending time with. It’s the best feeling in the world to go to meetings where you leave thinking, “That was really fun.”

Besides creating a great team, I’ve tried to address another problem I see again and again at major tech companies: employee burnout. There’s a reason the average tenure of a tech employee is three years.

I love working on startups. It’s like playing a video game for me, and it’s probably why I’m a founder. That said, I know my employees don’t always feel the same way. As CEO, I make sure my team knows I want them to live their lives outside of MicroAcquire.

On the business side of things, I take cues from the best. Like Musk and Dorsey, I want to preemptively create features that I know our customers will love. I knew people wanted an easy way to sell their startups because I wished I’d had one back when I was doing it.

Like Spanx and Tesla, I also strongly believe in the power of innovative branding – and I make sure we spend in areas that will give us significant returns down the line.

For example, we’ve made it easy to get MicroAcquire merchandise online completely free. The extra exposure we get from tech people rocking MicroAcquire t-shirts is more than worth the cost. We also created our own media publication Bootstrappers.com to tell the founder stories we thought major publications had missed. That’s been a huge hit with our customers, who also happen to be founders. These people traditionally have had to spam inboxes and pay for press because they didn’t raise billions in funding.

Finally, like Blakely and Perkins, I also want to actively listen to customer feedback and make sure we create a necessary and desired product. That’s why I make sure we’re constantly engaging with our community both on our website and social media. Many of the features we’ve added are just things we’ve heard mentioned multiple times from customers.

So far, I love the community we’ve created online and in the office. I don’t claim to have the winning formula, but I feel we are making a real difference out there. We’re lucky to live in a world with so many smart people getting their ideas out and making a positive change in the world.


Featured image via Unsplash.

Source

The post 4 Founder-Led Brands That Are Done Right first appeared on Webdesigner Depot.

Source de l’article sur Webdesignerdepot

Are you a creative person looking for the perfect career path to take? If so, there are not many more creative professions than that of a web designer.

However, becoming a web designer can be challenging, especially if you do not know where to start. For example, do you need to attend college to become a web designer? And what kind of computer and software do you need to own to be successful as a web designer?

This guide aims to answer all these questions and show you the steps you need to follow to build a career in web design.

Web Designer: Main Skills and Responsibilities

Generally speaking, a web designer is a professional who creates, manages, and maintains content for the web. Nothing is left out from designing pages and visual elements via programming languages and creating user-friendly websites.

Web Designer (Hard and Soft) Skills:

  • UX, UI, and visual design knowledge (web fonts, colors, etc.)
  • Management of design software (e.g., Adobe Photoshop)
  • Coding knowledge (HTML, CSS, JavaScript, etc.)
  • Time management
  • Communication skills
  • Problem-solving and teamwork skills
  • Research skills

Web Designer Responsibilities:

  • Plan and create web pages
  • Design appealing layouts
  • Use codes to create user-friendly pages
  • Ability to meet deadlines
  • Listen and advise clients
  • Able to work as part of a team and effectively solve occurring problems
  • Analyze the client’s niche, explore new web design opportunities/ innovative digital marketing approaches

If you feel overwhelmed reading this table, don’t be! You do not have to master all of the above skills. No one expects you to either. Becoming a top-notch web designer takes some dedication, but ultimately it’s nothing more than a series of steps. Let’s dive deeper into them.

Becoming a Web Designer: 7 Essential Steps

1. Gaining the Knowledge Needed: Theory and Certifications

Let’s start with the most common question, “Do I need to go to college to become a web designer?” Research shows that more than 65% of web designers are self-taught (fully or partially). Of course, that does not mean you can jump into design from the start.

Instead, we recommend that you learn some essential web design elements and how to use them in your future projects. This includes UX (user experience), UI (user interface), protocols, and patterns. The same goes for technical knowledge like programming languages, frameworks, and design software.

2. Developing Certain Skills

So, there are numerous aspects you can explore regarding technical skills. To be specific, your first steps in web design include developing the following skills: 

  1. Theory and certifications: Learning the theory to understand how the web and the market work
  2. Web design tools: Finding the web design tools you need to start designing (.e.g Webflow, Sketch, Figma). This will allow you to learn how to prototype web design mock-ups.
  3. Graphic design tools: Becoming familiar with software like Photoshop, Illustrator, etc.
  4. Programming languages: Especially if you think of becoming a freelance web designer, you should at least learn how to use fundamental languages (HTML, JavaScript, CSS).
  5. SEO (Search Engine Optimization): Learning how to optimize your web pages to rank on search engines is crucial.  

3. Mastering Web Design Software 

What software do you need as a beginner to start creating web designs? There are numerous apps that will help you gradually enter the fascinating world of web design. 

When it comes to CMS platforms, WordPress is by far the most popular in the market. The good thing about WordPress is that it is very beginner-friendly and comes with thousands of pre-built themes and plugins that you can use when creating a website.

But the same is true for InVision Studio. Unlike WordPress, InVision Studio is specifically designed to help web designers prototype and design a website. Finally, when it comes to graphic design software, we recommend you start with Photoshop (for creating visual samples and prints) and Sketch (for UI designs). 

4. Learning How Much Computing Power you Need

Although online CMS platforms like WordPress do not require special hardware, that’s not true for web design and graphic design software. To be precise, both InVision Studio and Photoshop have quite demanding system requirements. 

Still, a mid-range desktop or an entry-level gaming laptop can easily handle such applications. You need a reliable CPU, 8 GB RAM, and a dedicated graphics card.

I find working with two screens perfect when it comes to prototyping. You do not need to spend thousands of dollars to buy a laptop or desktop for web design.

5. Practice, Practice, and Practice

As with any other profession, practice makes perfect in web design. Therefore, the good idea is to get involved with personal web design projects before you start seeking clients or applying for job offers. This way, you can gradually acquire the technical skills you need.

Also, by working on some personal projects first, you can build a professional portfolio.

6. Creating a Professional Portfolio

If you want to draw attention to your talent, you should have a comprehensive portfolio as a web designer. This way, potential customers to trust you by having a look at your work and previous experience.

When creating a portfolio, make sure to showcase all aspects of your work and make it user-friendly. In other words, think of your online portfolio representing your talent and treat it accordingly.

7. Choosing the Web Designer Type That Best Suits Your Needs and Preferences

Last but not least, before working as a web designer, you should know that there are three main types of web designers: Freelance web designers, Agency web designers, and In-house web designers.

If you prefer to be self-employed and believe that you have the required soft skills, freelancing is probably the best path.

On the other hand, working for an agency or a company is usually easier (especially for beginners) and will provide you with a stable income. But, in the end, it all depends on your needs and preferences.

Wrap Up

Being a web designer can be an exciting career. As long as you have the necessary dedication and willingness, nothing will stand in your way.

Learning different aspects of the profession and mastering specific software will only make you better. All you need to do is respond positively to (and ask for) incoming feedback and practice!


Featured image via Pexels.

Source

The post How To Take Your First Steps in Web Design first appeared on Webdesigner Depot.

Source de l’article sur Webdesignerdepot

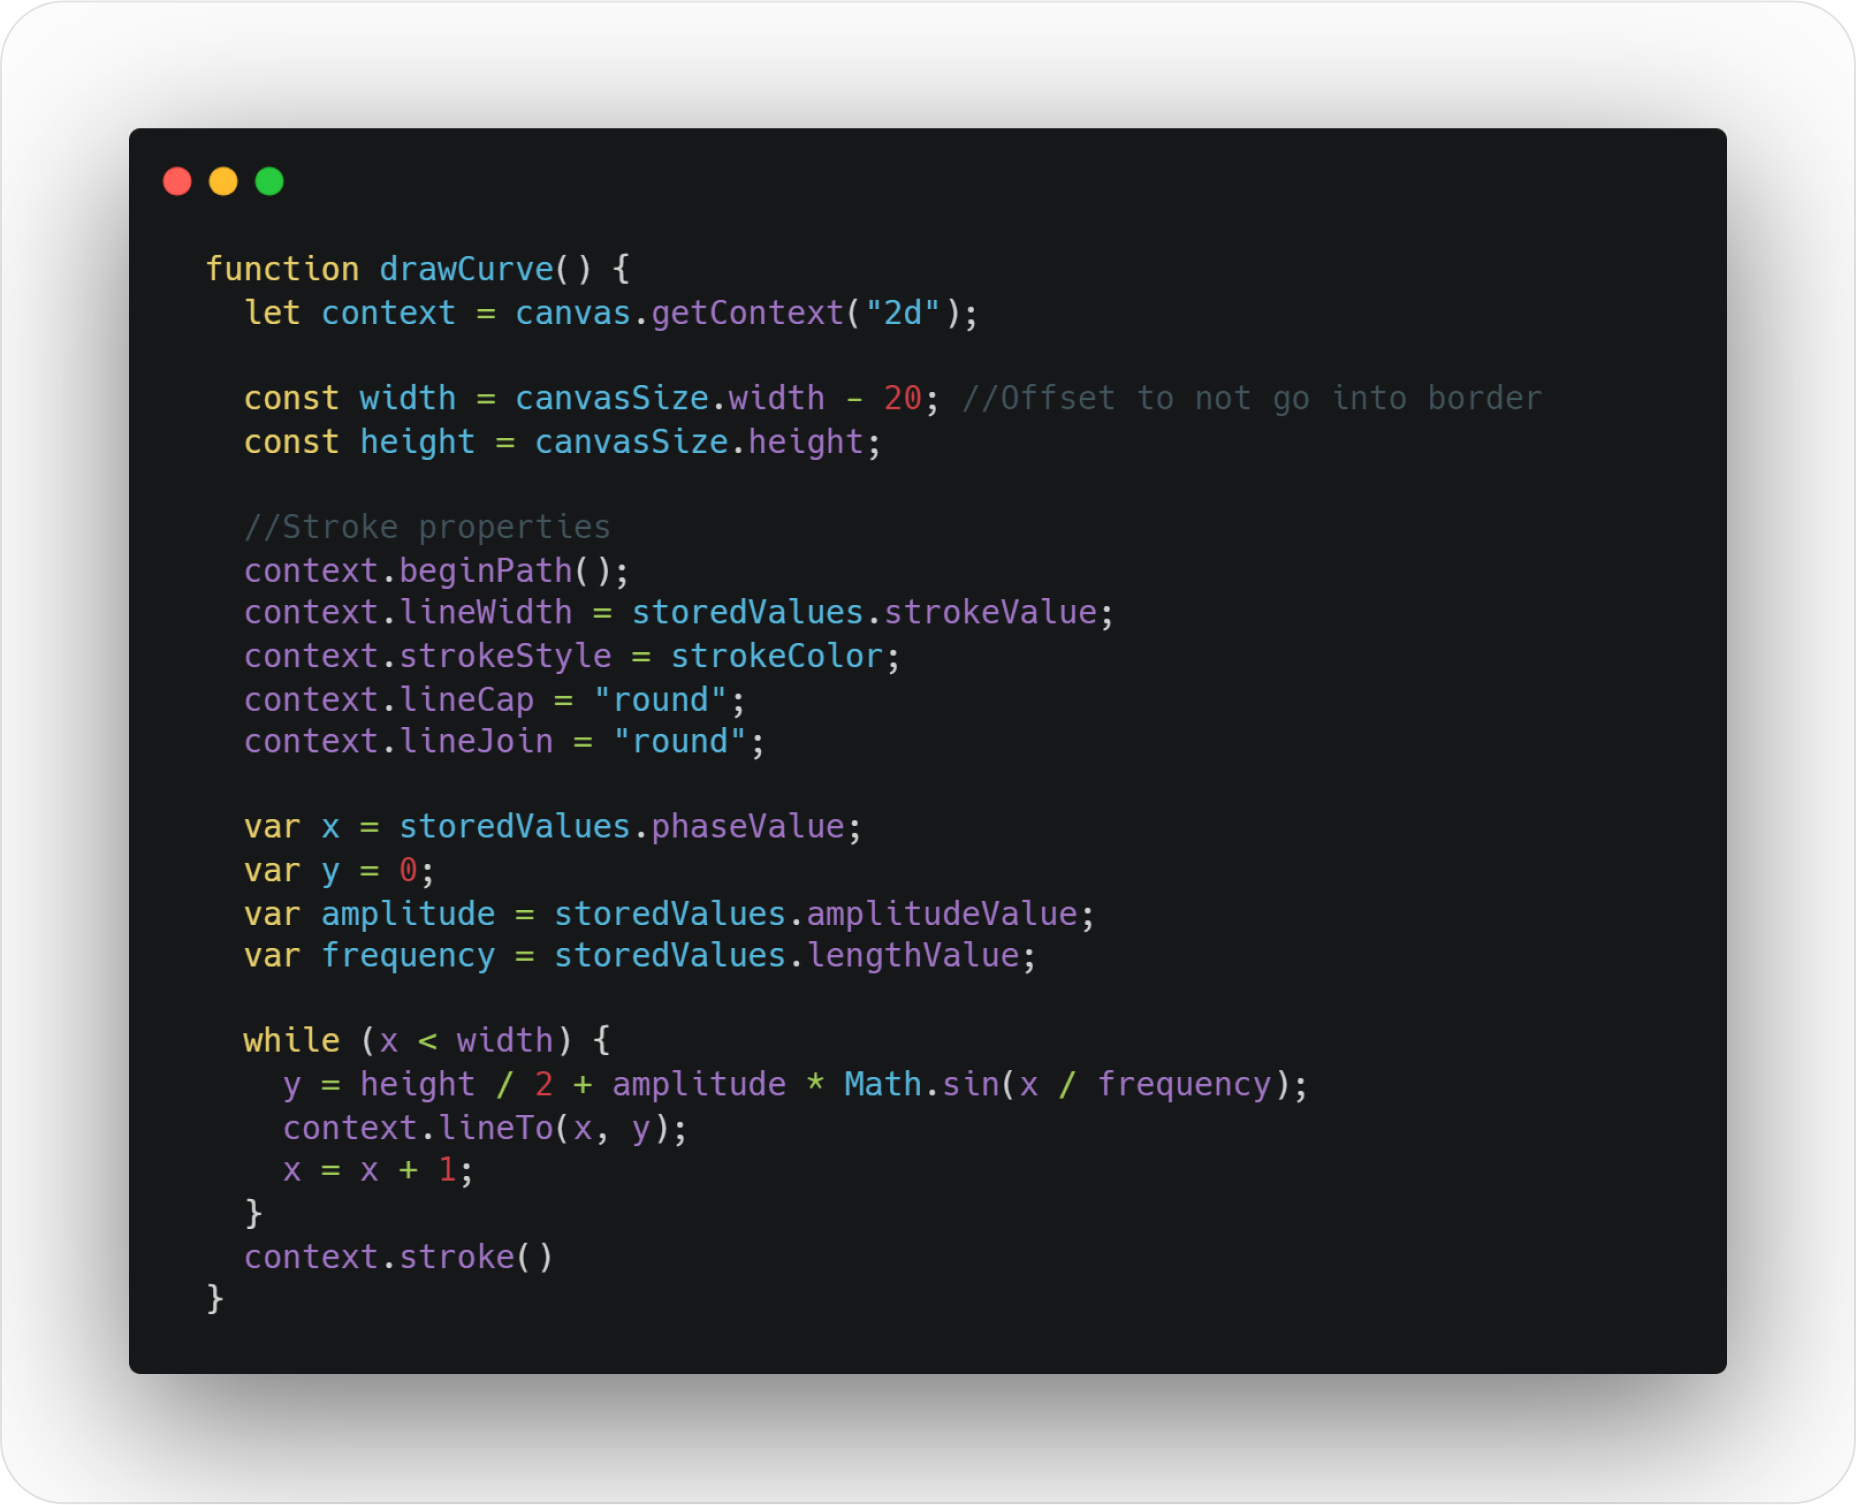
A breakdown of a simple app, from UI design to deployment, that shows off why coding is a magic tool for designers.

Figma, Adobe XD, Photoshop, Wacom Tablet, sketchbook… all tools for interfaces and web designers, yes? Take 2 minutes, and try to remember why you want to become a designer and why you enjoy designing stuff.

Chances are it’s because you like to create; you’re a creative person. Maybe you started with artistic experiences as a child, then turned that creative energy into problem-solving while continuing to express it visually: You became a designer, a creative problem solver.

Today, I’ll try to show you how coding is an underrated tool to express your creative problem-solving mindset by building a real SVG generator from scratch. So let’s get into it!

Step 1: Don’t get an idea; solve a problem

We didn’t go into deep business considerations here, but seeing problems you face and deciding to solve them yourself is a great way to start.

During client work, I needed some SVG waves for illustrations. So I looked for a wave generator: There were a ton of wavy colorful wave generators with parametric inputs but no simple, perfect sine waves generator. I decided to draw it on my math tool GeoGebra and then export it to SVG.

Okay, but not fast. And we like to get our jobs done quickly. But wait… Why don’t we create a perfect sine waves generator? Without equations & boring math software to open, just a curve and an export button. You got it, now let’s design it.

Quick tips: If you are looking for a problem, look for memes in your field. They always show a deep, painful, well-known problem.

Step 2: Design the solution simple as possible

Two main rules: First rule, think about who will use it; the second rule, predict what they expect from how it works. So who? Front-end developers. What are they waiting for? A curve that can be edited with direct feedback and an export button.

Wireframe design

High-Fi design

A quick tip: You can grab the Figma design of the app for more technical tips on the design.

Step 3: Build it for real

As a designer, stopping at step two is perfectly fine. But imagine if you could build what you design! You already know you can create everything you want.

You can see coding as a way to translate your UI that will surely end with a .com application that is usable by everyone. This is why “best languages” don’t matter; coding is just a tool to express your creativity and build stuff for others. And as a designer, a creative person, this might sound…interesting.

UI to functionnal app

UI to functional app

Every web app interface can be translated from UI design to code with HTML/CSS/JS. There is how we can see the role of each of those 3 “languages”:

HTML: I want a button.

CSS: I want my button to look rounded.

JS: I want something to happen when I click on my button.

To build our app, I’ll use Svelte. Svelte is a JavaScript compiler that allows us to use all those three “languages” in one place. So, let’s see how code can translate our UI to functional things.

HTML button code

“Hey web browser, I want a button named “exportButton” and everything in a function named “downloadSVGpath” to be carried out when someone clicks on the button :) Thanks”

CSS style button code

“Hey web browser, I want you to apply these style rules to my basic HTML button: I want a beautiful rounded corner at 16px, a mouse pointer when we hover it, I don’t want any borders, but I want a cool color gradient as a background color. Then, I want the font inside the button to have its color set to #fcfcfc and use the Inter typeface (bold, please). Like my Figma design, I also want to center stuff in the button and add padding. Oh, and add a subtle shadow :) Thanks.”

Drawing SVG curve function

“Hey, web browser, each time our slider moves, I want to run this function: I want you to draw a curve inside a frame that I have defined inside my HTML code. I also want my curve stroke to look rounded at each cap and have a color and width I’ve defined inside variables. You will take the sine function parameters from the stored values of the sliders. Finally, while your x variable hasn’t reached the total width in the x-axis of our frame, you will solve the y-axis point position of the sine equation and draw the curve :) Thanks.”

Quick tips: You can grab the source code files of the app to explore them.

Summary

  • Coding is just a tool that allows us to translate our very visual metaphors into something that everybody can use. How cool is that?!
  • Coding helps us to envision our design goals and forces us to see beyond the visual range: how is my button will be supposed to work? How does it look when hovering? How my popup modal can be designed for mobile devices?
  • Coding allows us to create the weird idea we designed “just for fun” instead of pushing the design case study into our portfolio under the “personal project” tag.
  • Coding shows us how much work is required to achieve what we designed. So we can better understand our design clients’ needs, challenges, and resource management.
  • Coding is flexible. You can replicate the Netflix website pixel perfect with pure HTML/CSS, the Vue Framework, or any other Web framework.

Source

The post Designers Should Code: Build an App From Scratch first appeared on Webdesigner Depot.

Source de l’article sur Webdesignerdepot

Do you find yourself stuck when finding new web design clients? Whether you own a web design company or work as a freelancer, expanding your audience and attracting clients can be challenging.

Talking from experience: there are times when I can not find people interested in my work. If that’s the case for you right now, let me tell you not to worry.

This guide will analyze the best practices I use to attract new web design clients and how you can easily customize them to fit your needs and preferences. First, we will explore why it’s essential to use more than one way to acquire clients in 2022.

Why Should You Seek Innovative Ways to Attract Clients?

Let’s start with a personal conviction: There are enough customers to cover our niche’s supply. A common mistake most web designers make is looking in the wrong place.

Do not get me wrong, the quality of your work is always the most important thing. The better your services are, the more clients you will eventually get. But if you want to prove your talent online, you need to expand your audience.

Remember that the market is highly competitive. And so you need to follow certain steps and choose the best platforms. 

7 Best Ways To Attract Web Design Clients in 2022

Although there are many ways to attract web design clients online, some prove to be more effective than others. Let us explore them one by one:

1. Use Marketplaces for Freelancers Such as Upwork, Indeed

Whether you own your web studio or are just getting acquainted with being a freelance web designer, marketplaces for freelancers are a great way to attract new clients. The same goes for well-known web design job boards like Dribbble, Twine, and WordPress Jobs

But in general, marketplaces for freelancers are more effective as these platforms attract thousands of buyers/clients every day. The best way to attract clients is to create and polish your profile and respond to relevant job offers.

However, it is equally important to choose a platform that is not exploitative but also has numerous clients in the web design niche. Although Upwork and Indeed are the two most popular, several other platforms meet these requirements, including Freelancer, 99 Designs, Guru, Upstack, TopTal, and PeoplePerHour.

2. Search on LinkedIn

Many would argue that social media platforms are the best way to attract web design clients these days. While this is true to a certain extent, not all social networks have the same impact on professionals. I have found that LinkedIn is the number one platform that a web designer should invest time and effort into.

The reason is simple; the platform’s goal is to bring professionals together. So, if you create a top-notch LinkedIn profile, you can quickly expand your audience and find people interested in buying services. The process is quite simple because all you need to do is:

  1. Create a professional bio: Mention what you do and who are the people you can help via your services.
  2. Optimize your profile’s About (personal info, website and portfolio info, etc.) and Experience (previous projects) sections.
  3. Use the LinkedIn filters to connect with individuals and companies. 
  4. Personalize your invitations and respond via DMs to people inviting you.

This may sound like a lot of work, and believe me, it is. Still, if you want to attract more clients via social media platforms, LinkedIn is the best way to go. 

3. Pay Attention to your Portfolio and Website

Regardless of how many connections you have on LinkedIn, clients need to trust that you are the best person for a project before hiring you. And there’s no better way to do that than to have a comprehensive portfolio and website.

Websites like Dribble and WordPress allow you to create portfolio websites quickly and efficiently. As a web designer, you can treat your website like a personal project and use your UI and UX knowledge to outshine your competitors.

4. Create Social Proof

In a few words, social proof is a way to prove to new clients that they should mimic the behavior of your existing clients by hiring you for their project.

To do this, you can create a page with Google reviews, collect testimonials/references, take screenshots of your conversations with clients and capture their feedback. Then all you need to do is present them on your portfolio website, in your social media posts/stories, etc.

5. Use Word of Mouth

Apart from asking your existing clients for referrals, you should try to build a deep professional relationship with them. This will automatically help them to recommend your services through word of mouth.

In many cases, word of mouth has proven to be much more reliable than traditional advertising methods (email marketing, SEO tactics).

6. Speak at Events and Podcasts

Say you are an experienced web designer, and all you need is to expand your target audience. In this case, speaking at events is a fantastic way to build authority. Of course, becoming a public speaker is not easy, especially if you’re a beginner.

This is where podcasts come in handy. By appearing as a guest on podcasts (or webinars), you can easily get your name out there, connect with people interested in web design, and eventually attract new clients.

Start by finding communities (e.g., Facebook groups for web design) and communicate with active (or just interested) people in the web design niche.

7. Offer Free Advice to your Audience

Don’t get me wrong, I know that offering something for free is not the best thing. Still, by creating free content and offering free advice, you can make people take notice of your talent.

Likewise, answering questions on social media platforms and creating valuable content is a great way to convert your website/social media visitors into customers.

Wrap Up

Remember that the most important thing in attracting new clients is the quality of your work. This may sound obvious, but believe me, it’s more than just a rookie mistake.

Let’s close with this; the tips listed above will allow you to work harder but smarter. After all, that’s all you need to build authority as a web designer and attract new clients.


Featured image via Pexels.

Source

The post How to Find Web Design Clients in 2022 first appeared on Webdesigner Depot.

Source de l’article sur Webdesignerdepot

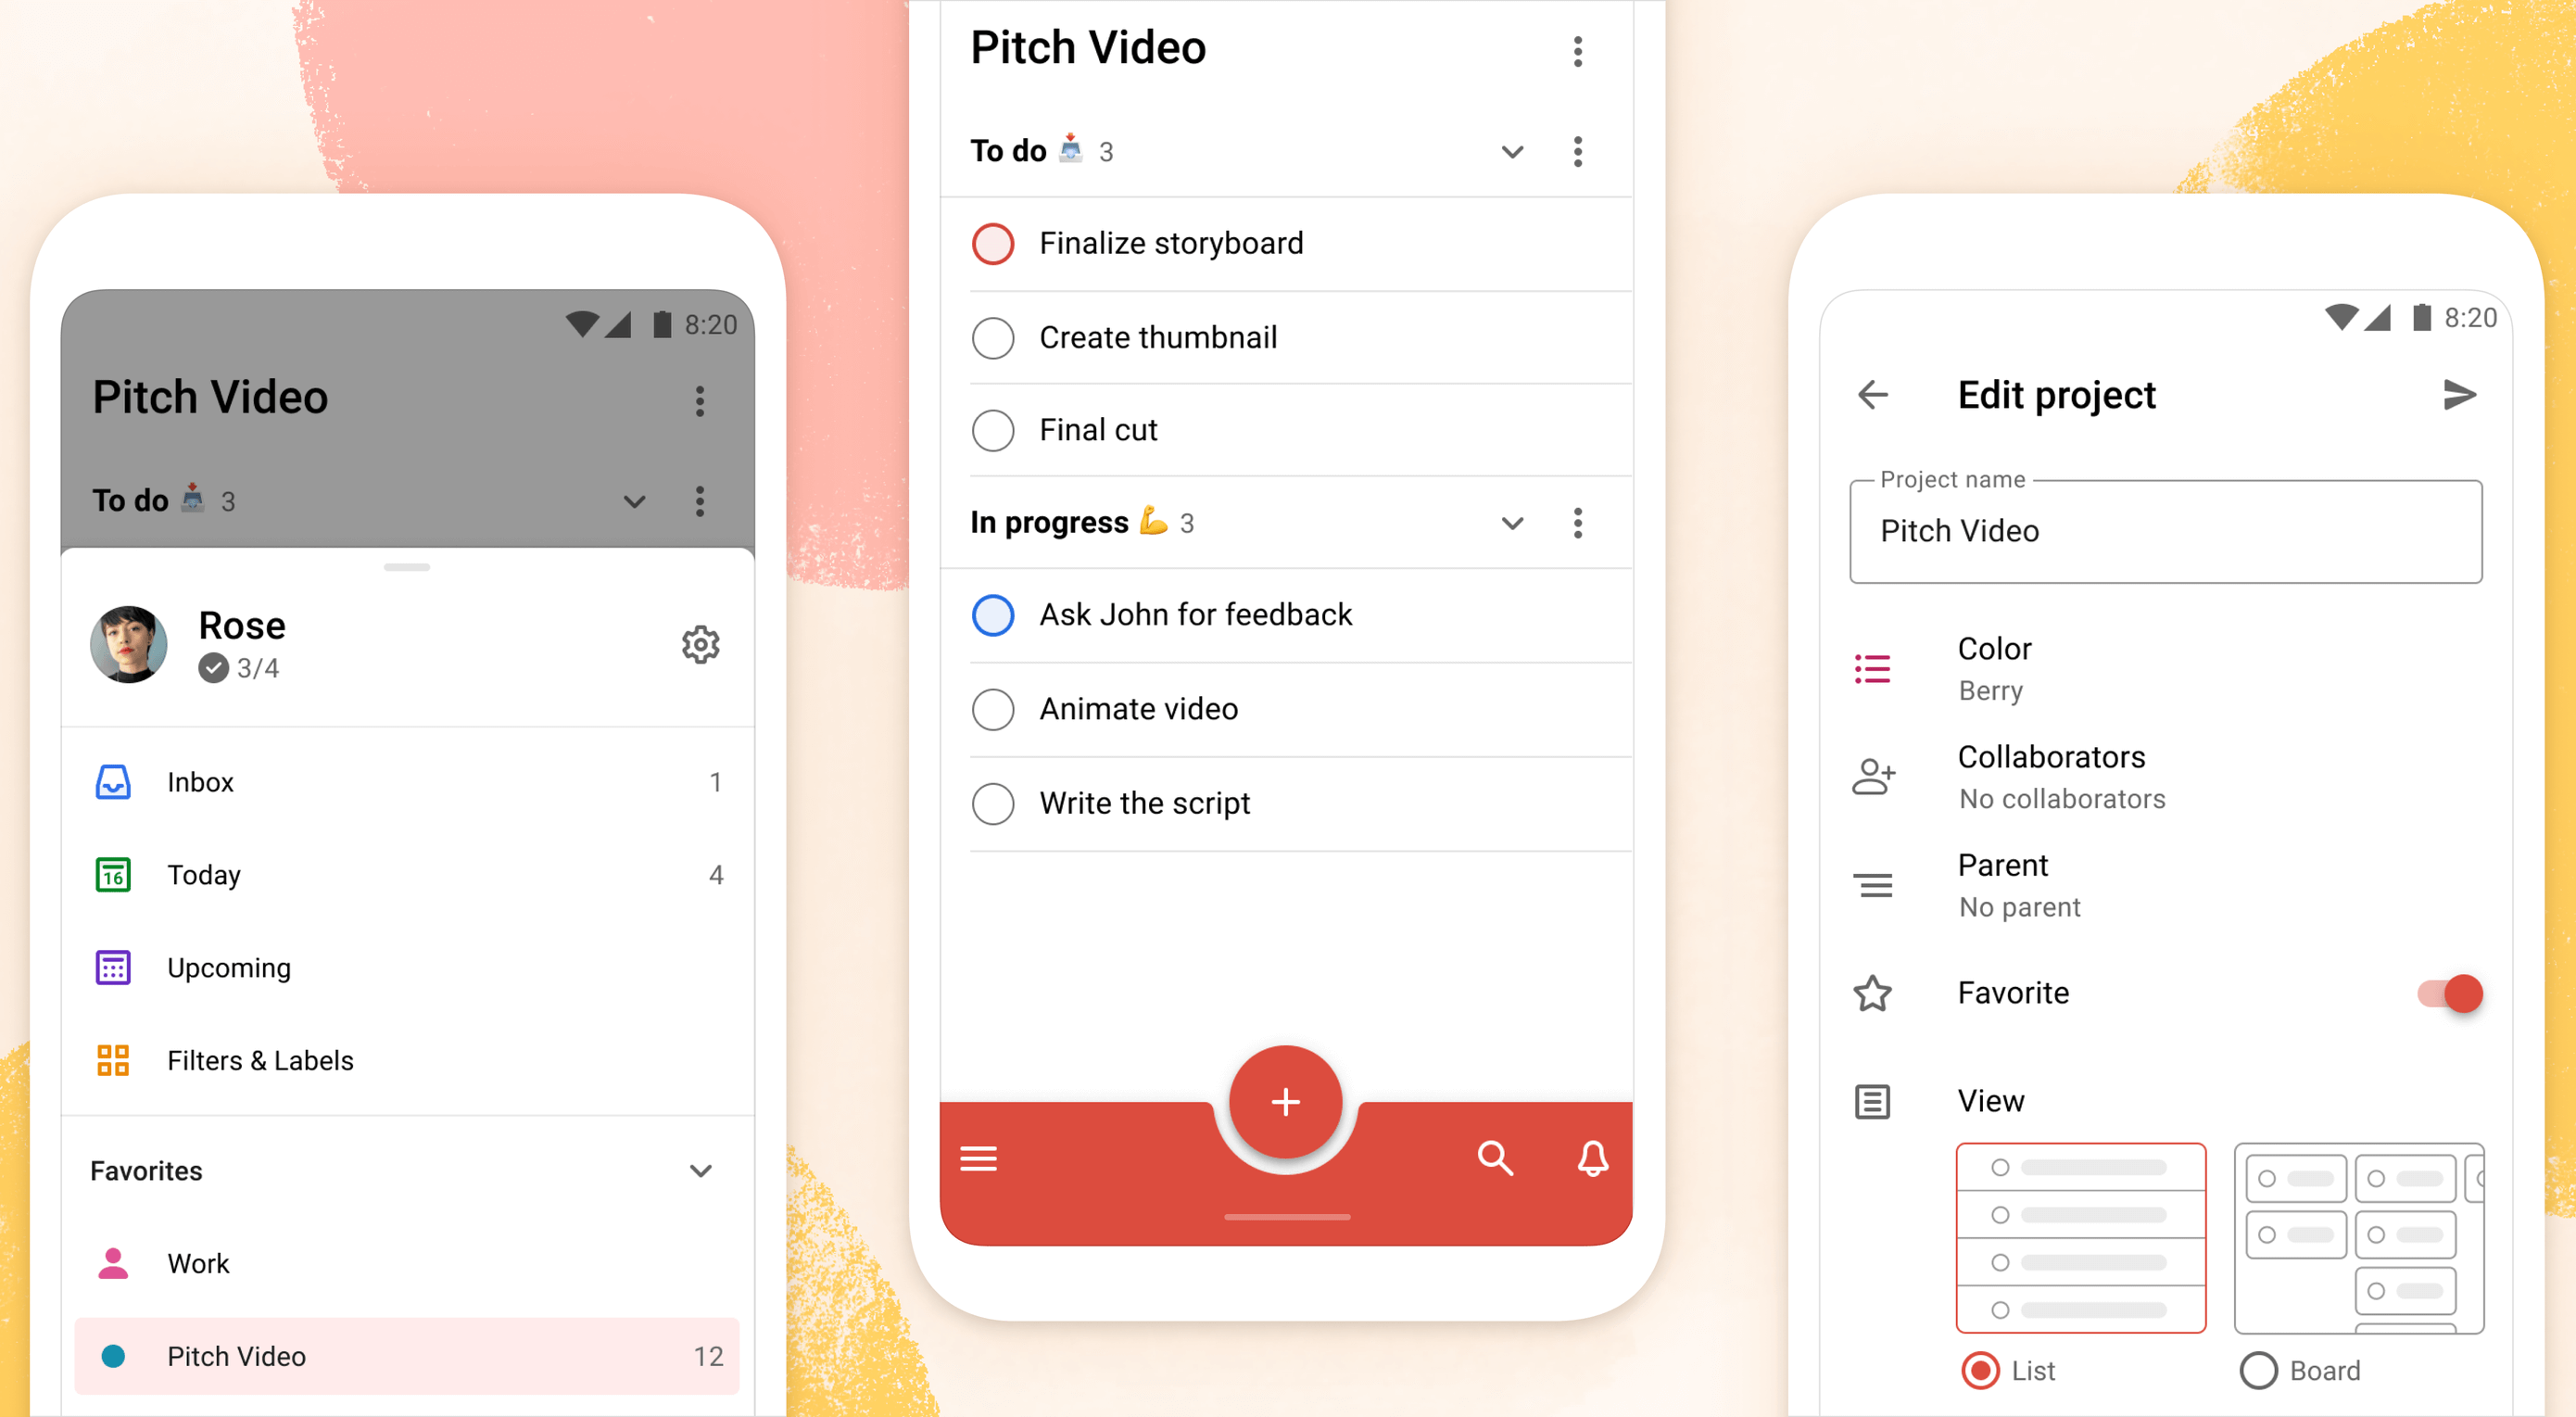
Todoist is a to-do list app that 25 million people rely on every day to keep their lives organized. As part of the Doist design team’s goals for 2021, we aimed to redesign the Todoist Android app to take advantage of the latest Google Material Design guidelines.

In this post, we cover the design decisions and processes behind redesigning the Todoist Android app for Material Design. We explore the Design and Android team’s collaboration practices that brought the app update to life, which resulted in winning the Material Design Award 2021 in the large screen category. Let’s get started!

Opportunity

When we started the project, our design implementation on Android was ready for a major overhaul. The last milestone redesign on Android was initiated after the release of the first Material Design guidelines in 2016. Since then the team successfully worked on continuous improvements to the Android app, but we saw the opportunity to improve Todoist on Android on a more holistic level.

We set out to clean up instances of older UI components, colors, and text styles and update them with the latest Material Design components. We observed that some interactions and navigational patterns had become inconsistent with what users were expecting on newer Android devices and were eager to modernize this experience. With new hardware and software changes in mind, we set out to make the experience on larger phones and tablets even better, so Todoist could take full advantage of the latest generation of devices. Material 2 and 3 provided an incredible new framework to rethink the current app experience. With this in mind, we set out to challenge what a modern Android app should look like and innovate on top of the default user experience.

Solution

The team set itself the goal of redesigning our Todoist Android app and aspiring to make it the best-designed productivity app on Android. The project was ambitious and scheduled to take several months to complete. We set ourselves the following targets while working on the project:

  • Review the current implementation and older design specs.
  • Study the latest Material Design Guidelines and assess what is relevant for our project.
  • Research great Material Design apps and case studies and learn from their execution.
  • Define the new Todoist Android app design language and document the changes.
  • Design and development work together to assess the proposed solution and implementation.
  • Test an early version of the new app internally to gather feedback and make adjustments.
  • Invite beta testers to the new app to gather feedback and make adjustments.
  • Refine the app and address core issues before launching to the public.

Review

The project was kicked off by reviewing the current Todoist Android app implementation, noting down what areas needed to be fixed and what was up to date. While reviewing, we took screenshots of the app implementation for reference. This way we could easily see the current state of the app and compare it to the new design proposals that would be created. Once the review process was finalized, we had a comprehensive overview of the current state of the app and the layout, component, and styling changes we wanted to make.

Study

We continued the project by studying the latest Material Design Guidelines, assessing the components and practices that were most relevant to Todoist.

When the project kicked off in February 2021, Material 2 was the most recent version of their design system. Since Material 2 had already been released for quite some time, we anticipated that design changes to Material would be announced soon at the Google I/O event in May 2021. Rather than wait, because we expected the changes to be iterative, we pushed ahead with our work.

We identified 25 components and UI patterns that we wanted to change across the app. The changes included buttons, forms, menus, sheets, navigation drawer, app bar, system bars, text and color styles, and more. We started by creating a table view in a Dropbox Paper document with the component changes and references links to Google’s Material Design Guidelines.

This components list was a starting point for discussion to plan the scope and complexity of the changes. Close async discussions between the design and development team in Twist and Dropbox Paper comments helped us make decisions about scope and complexity early on and set a solid foundation for the project.

Research

In the initial Material Design study, we also researched inspiring Material Design apps, Material studies, Play Store apps, and Google Workspace apps to learn from their execution.

We started out by studying the Material Design Award Winners 2020 and tested out the products that were showcased. The showcased winners struck a good balance between implementing the Material Design Guidelines while maintaining their own product’s brand within the system. This balance between Google’s guidelines and the Todoist brand was also key for us to get right and so we strived to find this mix across the work we created and implemented in the project.

Along with the MDA winners, we researched the Material Studies that Google produced to showcase what apps could look like with branding and Material Design guidelines applied. It was a great reference to see how far components could be customized while maintaining the core platform principles. The Reply case study in particular offered valuable insight to us as its content type and layout came closest to Todoist. It showcased how components like the app bar, navigation drawer, and large screen layouts worked while being customized.

We continued our research by searching the Google Play store for inspiring app examples. Google Tasks, Press, Periodic Table, and Kayak stood out to us as the level of polish and quality of the apps were on par with the experience we were aspiring to create.

Sometime later in the project when Material You was released (more on that later), we stumbled upon the Google Workspace apps blog post which previewed Material 3 changes that Google was introducing to their own products. It offered a great glimpse at what was to come before the Material 3 Design Guidelines were officially released. This post sparked new internal discussions and further design explorations that we considered for future Todoist Android updates.

Design Spec

As we started to define the new Todoist Android app design language and document the changes, we opted to create a design framework, focusing on creating components rather than designing every screen in the app. This allowed us to consistently apply the design system in the app. We did so by using the previously defined component list that we created during the review and study process.

Core screens from different areas of the app were chosen to demonstrate how the components could be applied. We chose to mock up the Todoist project view, navigation drawer menu, project view edit screen, settings, and project detail view, among others. These screens gave us a good overview of how buttons, forms, drawers, lists, and other components would work together and in different states; selected, pressed, disabled, etc.

During the project, we were transitioning our Doist design system to Figma and started creating our first components in the new Doist Product Android Library. We started by using some components from the Material Design UI kit – Components library from the official Google Figma resource file and added them to our Doist design system. We then continued to build up the Product Android Library file with our Todoist-specific components such as task list & board views, detail views, sheets, colors, typography, etc.

We continued by documenting color and typography changes that were based on the Material Design guidelines. The design team opted to implement a new Design Token framework that would share the same values between our design system and the development implementation. The development team would output the values they had in the current implementation and the design team would analyze which values were needed and which could be merged, changed, or deleted. This informed the new Design Token color and typography system which we then documented and discussed with the team to implement. Later in the project, we were happy to see a similar token system introduced by Material 3 in the latest guidelines which validated our thinking and principles behind the new design system.

The design documentation expanded to hold other edge-case mockups that could sit alongside the design system. We documented different responsive screen experiences between phones and tablets against the previous implementation. Additional sections were created to document the motion that should be used for certain components and screens by referencing existing Material Design guidelines examples or prototyping custom motion in Principle and After Effects. The design spec also touched on haptic feedback that should appear on touch targets, how dark mode should work across the new components, documenting Todoist themes within the new design language, and more.

Design Implementation

At Doist, the benefit of the squad is that cross-team collaboration is built into the make-up of the team. Designers, developers, support, and product managers work together in a squad to deliver the project. This close collaboration from the start is key to bridging the gap between scope, estimations, design, development, and delivery. The squad discussed their findings on a daily basis and came up with the best plan of action together.

Designers started by creating components in Figma and shared them with developers in Dropbox Paper. We used screenshots to document the current implementation next to the new designs and linked to the default Google Material Design components. This allowed the team to compare all references in one place. Developers shared their feedback, adjustments would be brainstormed together as the designs were iterated.

Designers on the project would share their work in progress on a weekly basis with the rest of the design team in a design review Twist thread. Here details about the designs were discussed, alternatives mocked up and bigger picture plans made. Design reviews brought up topics like FAB (Floating Action Button) placement, theme options, accent color usage on components, consistency with other platforms, navigation options, and shadow elevation. After thorough discussions and alternative mockups were presented, the design team aimed to find the right balance between Material Design and Todoist brand guidelines. The development team, also part of the design reviews, gave their feedback on the solution and raised technical complexities early on.

Eventually, the design was stabilized and consistencies updated across components and mockups. The design spec was kept up to date so the development team could always review the latest designs in Figma.

Testing

As soon as the development process started, the Android team provided early screenshots and videos in Twist threads while they were implementing the design spec. This practice allowed us to review the app implementation early and often. Designers could review the development work and share feedback in Twist, which resulted in getting the implementation to a high quality. Alongside Twist discussions, the team set up a Todoist project to track ongoing issues and fix bugs. Designers logged new issues, developers would solve them and share the new implementation for designers to review.

When the team had the first stable version of the Android app, we shared it internally at Doist to get more insight and feedback. Other Doisters could access the redesign via a feature flag that could be turned on in the app settings and test the new version for however long they wanted. The feature flag system allowed people to give us early feedback on the design decisions we made and report bugs. Feedback was submitted by the wider team through a dedicated Twist thread and designers and developers could discuss how best to address the feedback during the active project implementation.

After we refined the app implementation further and addressed early feedback we opened up the app update to our beta users. Here users had access to the new Android redesign and were able to give us feedback. Our support team gathered feedback and shared it with us in a dedicated Twist thread. The squad aimed to analyze every comment and looked for patterns where we could make tweaks and improvements to the user experience.

As part of these tweaks, we made changes to how the bottom bar and navigation drawer worked. Some users reported frustrations with the way the new bottom navigation and menu drawer worked. In its first implementation, the drawer was half raised when opened and had to be swiped up to be raised again to see the full content list. This was an issue for some users as it was slower to get to the content below the list. So we decided to fully raise the drawer by default when opening. We also made it easier to open the navigation drawer by sliding up from the bottom app bar. This was a small shortcut but it enabled users to get to their content faster.

Material You

While we were in the testing phase and about to wrap up the project, Google unveiled Material You, and sometime later the Material 3 Guidelines were published. With the newly announced resources, we went back to study the latest guidelines and references we could find to see where the Todoist Android app redesign fits in and which adjustments we might need to make now or in the future.

Dynamic Color was a big new feature that was announced as part of the Material You update. As Todoist supports many different themes the Material You Dynamic Color feature seemed like a good fit for our product. We decided to prioritize this feature and implement Dynamic Color light and dark themes as part of our Todoist theme settings options.

To implement Dynamic Color, the development team started off by creating a demo prototype that utilized the Dynamic Color system and showcased how we could select from a range of color choices that the system defined based on the wallpaper choice. From there, we tried to incorporate system behavior in our design mockups. We designed a range of different color mockups and components to see which ones could fit with which components. We then came up with a color system that worked for the Todoist app and the new themes. These new Dynamic Color themes would sit alongside our current theme options in the Todoist app settings. From here users could choose between Dynamic Color Light and Dark themes.

Along with Dynamic Color, the team also created a customizable bottom app bar, allowing users to set up the app in a way that’s most convenient to their workflow. The location of the Dynamic Add Button can be changed to the center, left, or right corner of the screen. The order of the Menu, Search, and Notification buttons can be rearranged to best fit the ergonomics of the user’s dominant (left or right) hand and optimize their navigation patterns.

Launch

As critical beta feedback was addressed and stability tweaks were made, the squad felt ready to release the new Todoist Android app to the public. The team logged the issues that could not immediately be addressed for future reviews and updates.

The design and marketing team readied the launch by creating What’s New banner artwork and copy that are displayed within the app when launching the update. The Doist marketing team also created release notes and shared the app update announcements on our social channels. The brand and product design team worked together to create custom image assets and copy that summarised the project work in a simple and beautiful way.

What’s Next: Material 3

After a successful launch of the redesigned Todoist for Android app, Google contacted Doist to announce that Todoist was selected as the Material Design Award 2021 winner in the Large Screen category. The team was excited to be recognized for their hard work and it felt like we achieved the goal we had set out to accomplish.

Internally, designers and developers continued to study and discuss the Material 3 updates. The design team started exploring mockups and design changes inspired by Material 3 and Google’s Workspace app updates. Some of our current Todoist explorations include changing the FAB styling, updating the app bar, further removing elevation shadows, and more. Here is a preview of what a future Todoist update could look like.

We hope these insights into Doist’s design process and collaboration practices have sparked your interest. Thank you for reading and stay tuned for future design updates!

Takeaways

  • Study the Material guidelines, Material Design winners, Material studies, and Google Workspace apps to make informed design decisions when designing your next product or app update.
  • Evaluate which Material Design components and practices are right for you and implement them into your product.
  • Carefully balance the Material Design guidelines with your brand guidelines to create a unique and consistent experience between your product and the platform it lives on.
  • Collaborate with your Android developers early and often to ship app updates efficiently and increase the design implementation quality.
  • Use design components and build a design system along with practical mockups to create an efficient design spec.
  • Consider how the latest Android features fit into your product and which have the most impact on your users before deciding to implement them.
  • Test and review builds with your internal team and external beta users to get valuable feedback and make adjustments before releasing them to the public.
  • Create announcement artwork to showcase your latest app or feature update along with a clear description to share in-app and on social media.

Source

The post Case Study: Redesigning Todoist for Android first appeared on Webdesigner Depot.

Source de l’article sur Webdesignerdepot

Most of us are concerned about our public image, right? It matters a lot how people see and think of us. Export the same sentiment to a brand instead of a person. That’s what brand reputation is all about!  

Yes, it’s that simple – the public’s perception of a brand constitutes its brand reputation. And since the internet plays a significant role in public perception nowadays, a brand’s online reputation essentially drives brand perception.

If we come at it from a slightly different angle, it’s the sum of all ideas and emotions a customer or client associates with a brand while interacting with it at any stage. It includes everything, from what kind of customer services they get when purchasing goods or services to after-sales services the company provides. Reputation management is usually done via social media, emails, and online chats.

(Remember, you shouldn’t confine brand reputation only to a brand’s customers or end-users. It includes all stakeholders’ opinions of a brand. It can be anyone from customers to retailers and shippers to manufacturers.)

In short, brand reputation is the most vital intangible asset for any organization striving to make it big in today’s cutthroat market.

What’s The Importance Of A Strong Brand Reputation For Today’s Businesses?

It wouldn’t be wrong to say that nothing affects every stage of the marketing and sales funnel, like a brand’s reputation. Whether it’s awareness, interest, evaluation, commitment, sales, or reputation, a strong brand reputation will only supplement it.

Recent research reveals that about 94% of consumers say that their likelihood of frequenting a business increases if it has positive reviews. Conversely, 92% say that their chance of patronizing a business decreases if it has negative reviews.

Now, let’s look at various factors that make working on your brand reputation important.

Market Trust

Strengthening brand reputation earns your business the trust factor, making your brand a more viable choice for existing and prospective customers. It helps them place their faith in you, believing that your brand is here to thrive and fulfill any promises it makes.

Moreover, it’s a fact that people prefer buying goods and services from a brand that enjoys a solid reputation, especially if people in their social circle use its products.  

Higher Sales

You can’t be far from the truth if you believe brand reputation only yields intangible business gains. It lends you tangible improvements as well, most importantly, in the form of higher sales volume, which translates as higher profits.

All this can’t be achieved without the push from a strong brand reputation, helping the brand carve a niche for itself amongst tough competition.

Customer Loyalty

When a brand succeeds in earning a higher trust level and a positive reputation, the customers are more likely to remain loyal. And, will continue to buy products and services from it, refuting various incentives by the competition, such as discount packages & low prices.

Customer loyalty also leads a brand to a host of other fringe benefits, i.e., demanding a premium price after some time.

Competitive Edge

One thing is for sure, the level of competition in the market is always going to soar higher and higher. And it’s almost impossible for a business to make its way through it without a competitive edge. That’s where a positive brand reputation can make a business’s life easier.

Having the edge over the competition means your potential for catching new customers increases exponentially, helping your brand claim more of the market share.

Word of Mouth

Happy customers remain one of the most significant assets of a brand, especially in this digital era. They serve as brand ambassadors, and if they’re happy and satisfied, they’ll pass the word on, advocating for the brand for free.

It not only leads to increased brand awareness in the market, but it also paves the way for a business to improve its sales and profit margins over time.

What Are The Best Strategies For Managing Your Brand’s Reputation Online?

We’ll keep our focus on the ones proven to be the most effective, starting with:

Staying Ahead of The Curve

Being proactive is among the primary requisites for today’s brand managers. They should be thinking ahead of their competitors and the target audience. While branding online, the margin of error is relatively low, and any slipup can lead to a ripple effect in nullifying the brand’s positive image.

The best way to cope with such a situation is to embrace the mistake quickly and be upbeat enough to resolve the issue immediately rather than have a wait-and-see attitude.

Be Specific About The Deliverables

Social media has played a phenomenal role in educating today’s customers, making them very intelligent and demanding at the same time. It has opened up infinite mediums and channels to get alternatives for almost everything.

That’s why brands need to be very specific in delivery time and after-sales services to avoid earning themselves a bad name in the market. Most experts recommend the “under promise and over deliver” approach to avoid disappointing your customers.

Establish Yourself as An Authority

If you have complete faith in your offerings as a business, knowing that you’re the best in the market, you better be loud and clear about it. It will help you catch immediate attention from your target audience, increasing your brand awareness and your potential to bag more sales and revenue.

Let’s talk about the quality of the product as an example. If you believe that the quality of your product is the unique selling prospect, you must let people know about it. Flaunt this factor with full force, vigor, and authority.

It will help you establish your brand in the market as an authority, and your target market will start looking up to you for the best and the latest on it.

Be Consistent and Assertive

As they say, consistency is the key. If you do it right, your brand reputation will go beyond the lifespan of your brand. People will relate to your brand positively even after your business shuts down.

However, this demands the next level of consistency from your business. You have to make sure you deliver your best in all aspects of branding your business, from the quality of the products and services to the level of customer service you offer.

It doesn’t work well if you outperform your competition by miles for the first time and then step back from delivering those high service standards. You roll your sleeves up and get to compete yourself if you believe you’re outdoing your competition so well.

Deliver on Your Promises

You cannot overstate the significance of delivering on your promises if you want to make the most of your brand reputation. Nothing brands your business better than a bunch of happy and satisfied customers.

And, delivering on your promises consistently is the least of what you need to do to win over your customers to the level they turn into your unofficial brand ambassadors.

Value Feedback

It would be best if you realign your thinking this way. 

Who are you producing your products/services for? Your clients/customers, of course!

What if it’s not working well for them?

Redo your product/service to the requirements and likings of your customers. Otherwise, your business will earn you nothing but a bad name in the market.

You have to realize the importance of listening to your customers, gathering customers’ opinions about what’s not working for them and what areas they would like to see improved. 

Learn to accept and respect your customers’ grievances, praises, issues, tips, or any feedback they give you about your product or service.

You’ll upscale your brand’s reputation considerably if you start doing this.

How Can Influencer Marketing Help You Grow Your Brand’s Reach

Influencer marketing is the concept of branding your business through influential people and opinion leaders in the industry rather than engaging your business directly in doing so. They also brand indirectly, setting a practical example rather than advocating verbally for it.

Research reveals that 94% of marketers using influencer marketing find it highly effective, potentially increasing the ROI 11% times higher than conventional marketing.

Brands that indulge in influencer marketing associate themselves with influential personalities resonating with their message, driving it across their target market in a manner that a large number of people develop an affiliation toward it.

Influencer campaigns help brands tap into an existing community comprising their influencer’s dedicated followers, compelling them to tilt toward a brand they use. Most of us have observed how renowned YouTubers, Tiktokers, and bloggers proactively advertise different brands to their followers.

The increased penetration of a rapidly growing number of social media platforms also helps the influencers garner a solid following and significantly impact the communities that follow them.

They are like a part of the family for their followers, who value their opinion and try to imitate them in what they do and how they do it.

Conclusion

With the competition getting steeper every passing day, earning the trust and business of your target market is becoming a challenging task for most companies. It makes branding even more imperative.

Make a great customer experience your top priority, also keeping a focus on the customer and employee retention and customer feedback to establish yourself as a customer-centric brand. 

Though it might take some time, it will surely help you grab your target market’s attention and respect in the long run. Once you achieve that, you’ll see sales and profits soaring accordingly.


Featured image via Pexels.

Source

The post How to Build a Strong Brand Reputation first appeared on Webdesigner Depot.

Source de l’article sur Webdesignerdepot

Whether you’re new to the job or are an experienced designer, the anxiety of a new project can sometimes – often unexpectedly – cause us to freeze in our tracks. This creative paralysis sees us staring at a blank page, unable to come up with ideas, and the knowledge that time is slowly ticking away.

We’ve all been there. So we thought it would be helpful to share our tips and tricks for overcoming the tyranny of the blank page and help you get back to doing great work.

The first thing to know is that you are not alone; blank page syndrome has a basis in science, with a clearly identifiable set of symptoms that consistently occur together. 

The first thing to know is that you are not alone; blank page syndrome has a basis in science

It starts when you become stressed. Stress causes your brain to produce hormones that slow down neural functions, which only serves to increase the feelings of inadequacy over a lack of creative spark – and fuel anxiety. Understandably, this causes a spiral as your mind seems to get emptier and the blank page more threatening.

But don’t fear! Because there are ways to move past blank page paralysis and get back to productivity. 

Just Relax

Once you’re in a negative spiral, it’s notoriously difficult to get out of. The best solution is to avoid the spiral entirely – by starting in the right frame of mind. This means setting up a calm work environment before you even sit down. 

Do your best to avoid major distractions – such as young children who need your attention or colleagues who like to play music that vexes your soul. We’re not saying that you need a sound-proofed home office – the kitchen table might be fine – but schedule your work time for when the kids are at school or with a minder, or work from home if the office is likely to be noisy. A pair of noise-canceling headphones can be handy, too.

Avoid Distractions

Seemingly small things can also get in the way of your work. Chat and email notifications are the digital equivalents of a person calling your name from across a room. Try to avoid or silence anything that stops you getting into the creative mindset, even if you just mute things for a few hours. It’ll help you mentally separate your creative workspace from everything else.

all of those notifications will still be there when you resurface

Ultimately, you need to create a mood that you subconsciously associate with being productive. But even when the space around you is perfect, it can still take a while to get into the zone. Brains don’t just flip into creativity at the flick of a switch, so be kind to yourself. And remember – all of those notifications will still be there when you resurface later in the day. 

Do a Warm-Up

Studies have shown that a blank page is particularly stressful because it makes the task in front of you feel bigger than it really is. Gazing at an empty page is like seeing the whole project stretching out before you. The stress comes from the feeling of having to fill the whole journey, all the way from A to Z.

So don’t start with A! Instead, begin with a warm-up. Just as dancers always start with a series of exercises to warm up their muscles, creative designers can benefit from something similar. You could start by talking things through with colleagues or sketch some ideas using pen and paper, before opening your design app. 

Alternatively, you could start by planning your content hierarchy. You don’t need all the final words – but it can be helpful to work out how many headings you’re going to have, where images will sit, and whether your copy will be in paragraphs or lists. 

By doing this, you’ll have elements to place and a rough idea of their relative importance. It’s easy to get overawed by the importance of actual content – so start by getting a grip on the type, density, and length of content. 

Take Inspiration

The world around us is filled with inspiration and according to an icon designer Yannick Lung:

It helps to observe things in the real world and play around with them.

It can also help to borrow an idea. Obviously, we never condone copying someone’s work, but using existing work as a reference or jumping-off-point can help. Think of it as putting your own twist on an existing idea.

“I sometimes find it useful to reverse engineer a good example of the sort of thing I’m trying to write (and this works for design too). I usually break down a successful example into its constituent parts and swap them out for things more relevant to the project at hand, then refine from there,” says Harvey, one of Sketch’s brand storytellers.

Let Templates Take the Strain

Instead of putting pressure on yourself to instantly start designing, begin by creating templates or wireframes. This isn’t an avoidance tactic. Spending time creating an outline template saves time in the long run – plus, doing practical work that doesn’t need lots of detail will act as a warm-up. It might even help you catch potential issues in your designs earlier. 

Be Collaborative and Welcome Early Feedback

In general, people don’t work well in isolation – so collaborating with colleagues is a great way to get design ideas flowing. At the start of a project, reach out to your colleagues to let them know what you’re going to be working on and set up a session to collaborate on ideas and ask for direct input.

Never wait until the end of a project to ask for feedback. Involving your colleagues in the process early helps counter blank page paralysis and involving stakeholders can help you manage expectations. Aim to get regular and consistent feedback rather than waiting for it – which could cause a delay in your project. 

And of course, you should always choose a design software that enables real-time collaboration so that everyone working on a project can avoid version conflicts.

Avoid Burnout

When work isn’t physical, it can be hard to judge how much it takes out of us

When work isn’t physical, it can be hard to judge how much it takes out of us. If you’re suffering from blank page paralysis, it’s probably a sign that you’re starting to get burnt out. Try setting an alarm on the other side of the room so you have to get up to turn it off regularly – or just scheduling some time into your day to take a break, stretch, or even take a walk. Stepping away from your screen is good for your brain and your body.

In the end, the most important thing to remember when it comes to blank page syndrome is that you have to be kind to yourself. Nobody can be productive 100% of the time – we’re only human, after all. What matters is that you do whatever you need to get your creativity flowing.


Featured image via Pexels.

Source

The post Overcoming Blank Page Paralysis first appeared on Webdesigner Depot.

Source de l’article sur Webdesignerdepot

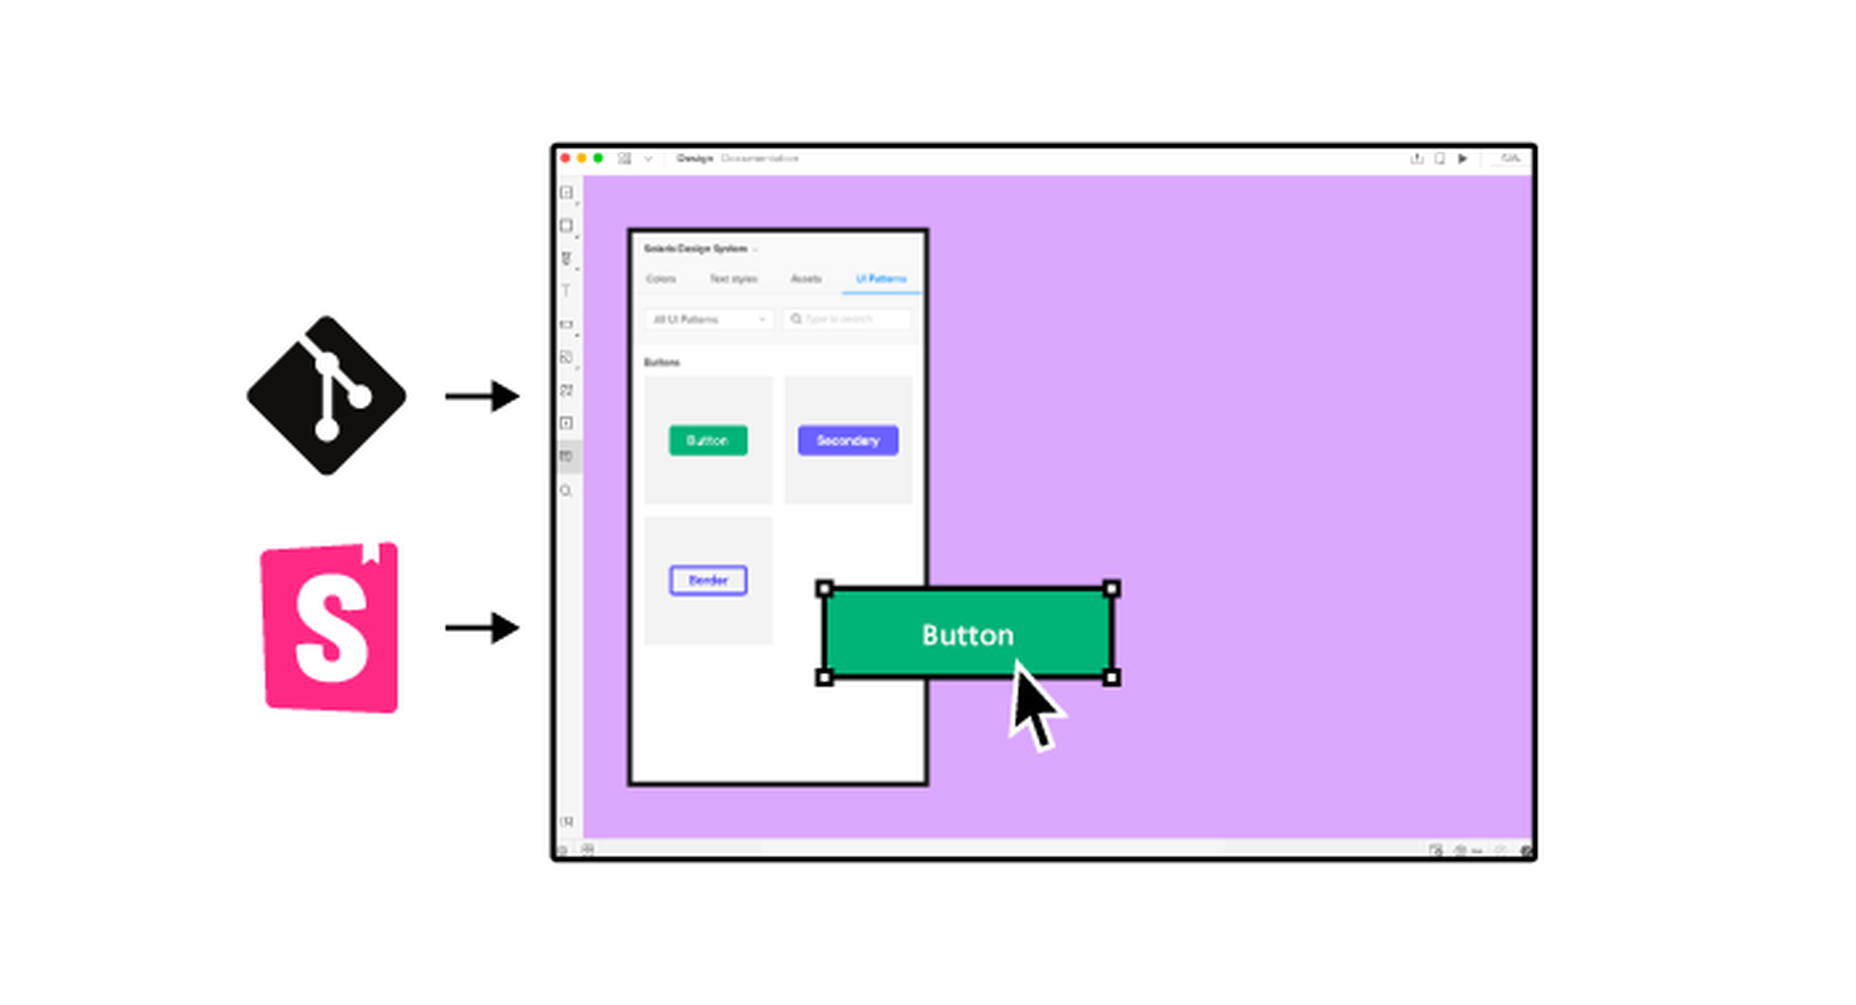
It’s something every design team dreams about – a better design process and handoff procedure. Your design team is not alone if you are looking for a better solution.

Imagine what your workflow would look like if you could forgo the struggles of image-based technology, design and handoff with accurate components that have interactive features. Projects in the design phase will look more like final products and, most importantly, interact like final products. 

Let’s imagine a new design process together.

Challenges of an Image-Based Design Process

Here’s what we all know – image-based design tools provide pictures of components in the visual form but lack the interactivity and conditions that exist in the end-product. There’s not a high level of functional fidelity there, and it can cause confusion among design teams and rework.

These tools require you to redraw the fundamental components and design with boxes and rectangles, which takes too much time and can create a disconnect between the design and development teams. 

Further, you don’t fully maximize the potential of a design system because of inconsistencies between code-powered systems that developers use and these image-based systems for designers. There’s an innate gap between maintaining the environments and creating consistency in components. 

The final and maybe most difficult challenge with an image-based design process is in usability testing. You just can’t test an image the way you can working components. If the prototype is not interactive enough, you lose valuable feedback in the testing process. Functional fidelity is a must-have design and development tool in 2022. 

Iress, market-leading financial software, had many of these same problems in its design system process. You can probably relate to its story, which includes a designer and engineer who aren’t entirely on the same page, hit the deadline and have to deliver, and then get customer feedback. The result was a lot of extra headaches and work. 

But there is a better way: Import all user interface components into a code-powered design system in sync with a design tool so that your team can work in harmony to build, scale, and handoff projects with ease. 

Scale Design With Accurate Components

Here’s what most design and development teams want en route to building products: Accurate components with built-in interactivity, states, and conditions. No redrawing boxes and rectangles; no trying to figure out what states and interaction should be.

And if you can do it with ten times the speed and agility? Now you’re really in business. 

“It used to take us two to three months just to do the design. Now, with UXPin Merge, teams can design, test, and deliver products in the same timeframe,” said Erica Rider, Senior Manager for UX at PayPal. “Faster time to market is one of the most significant changes we’ve experienced using Merge.”

The time and workflow savings come from the ability to maintain only one environment as a product team. Rather than image-based tools, a code-powered design system that will push updates to components as the design evolves is the modern way to work. This workflow can also eliminate duplicate documentation so that your team has a single source of truth for whole product teams. 

Now you can be more agile in the design process and scale. And as Rider hinted at, there is a solution already available in UXPin Merge. 

Scalability with accurate design components has other benefits as well. 

Teams can onboard people faster because the design system is in the design tool. There’s less searching for answers with drag and drop-ready building blocks. New team members will find more success and be more valuable to the team quicker due to fewer inconsistencies and errors. 

Testing also gets a boost as you scale with a single source of truth. You can actually create better usability tests with a high-fidelity, functional version of the prototype, allowing users to leave more valuable and detailed feedback that can improve your product in the early stages. 

Better Handoffs Start Here

As you imagine a better design process, take it one step further. Better handoffs are a goal for most teams. 

An interactive component-based design tool can eliminate the need for multiple iterations of the same meeting to explain how a prototype works. Everyone can see and interact with it for themselves with accurate, true components that ensure the prototype works the same as the product. 

Designers will feel more like their vision is making it into the final product, and developers have a better idea of how to work. Everyone has the exact same components written in code. Thanks to the single source of truth, devs can speed up as they build the product because they start with components that include production-ready code.

A typical design to developer handoff might have multiple steps: Create vector design elements, create a model for interactions, and then send the prototype with documentation. Not to mention the meetings that are required to make sure everyone is on the same page.

In a model with interactive component elements, the developer handoff is fast and easy; they create a prototype with true components and all the built-in properties. The developer copies the JSX code and pastes it into his tool to build the final product. All the component properties and their coded interactions already exist in the source code. This is possible because the source of truth is the code itself, the source code.

Quick Tool Solution and Technical Use

This solution to this common challenge is not somewhere in the future; it’s already here.

UXPin, a code-based design tool, has Merge technology, which allows you to bring all interactive components into UXPin. Then you can use your own, or the open-source library with the ready-made building blocks to get products ready faster.

Here are just a few of the things you can do with Merge by UXPin:

  • Integrate your developer’s storybook to use it as a single source of truth (works for all frameworks)
  • Import design system components from a dev’s Git repository, such as GitHub, Bitbucket, GitLab, or others (works with React)
  • Work with the built-in MUI library
  • Add the npm component package to UXPin on your own (no developer required)
  • Design with the confidence that your work can be ideally reflected by developers
  • Create and share a library of interactive components

Summary 

Say bye-bye to redrawing rectangles – build more accurate prototypes easier and end-products faster with Merge by UXPin.

Now is the time to solve one of your biggest design challenges while upgrading and scaling the design process and improving handoffs. 

Merge by UXPin is user-friendly and made for scalable projects of almost any size. The line between design and development blurs with quicker product release and a fully-interactive solution. Request access today.


[– This is a sponsored post on behalf of UXPin –]

Source

The post How to Scale Your Design Process and Improve Handoff first appeared on Webdesigner Depot.

Source de l’article sur Webdesignerdepot

Micro-interactions effectively communicate brand identity and ethos while strengthening ties with the customer. These habit-forming tools make for a fun and seamless user experience. Facebook’s ‘likes’ and Tinder’s ‘swipes’ are two classic examples. 

Micro-interactions originated with the need to guide customers who had hit a snag while using a service or a product. The goal was to ease customers into being more product-savvy via subtle reassurance and feedback. Micro-interactions are now employed by everything from washing machines, to coffee makers.

Along with feedback, prompts, and recommendations, they can also present customers with an appealing visual reward upon finishing a task. When used optimally, micro-interactions drastically enhance the navigation and simplify how users interact with sites and apps.

How Micro-Interactions Work

Here are the four structural elements to a simple micro-interaction: triggers, rules, feedback, and loops. Every micro-interaction has a significant component to organize the operational cycle. It lets you control feedback and runs, so the users understand the consequences of their performance and feel motivated to follow through.

Triggers

This feature begins micro-interactions of both the user-initiated (prompted by user) and system-initiated (driven by the system) kind. For example, a click, scroll, swipe, tap, and pull are common triggers that users carry out. So making a payment, booking a cab, and clicking or tapping on the hamburger menu all fall under this category. On the flip side, the user’s alert prompt upon entering a wrong password is a classic system-generated trigger. 

Rules

This element determines what happens after the user sets a prompt into motion via tapping, clicking, scrolling, or swiping. Rules refer to the fact that apps decide the triggers that users employ — Tinder’s ‘swipe’ feature illustrates this point. These rules gradually become a habit-forming action that users get accustomed to while regularly engaging with an app.

Feedback

During this process stage, the system informs the user via auditory, visual, or haptic cues. It engages the users and encourages them to proceed further in their process. For example, the progress bar of a download, the visual representation of steps cleared in a circle, or the visual, aural, and tactile indication upon the success or failure of payment are all a part of the feedback mechanism.

Loop/Modes

This final stage entails tiny meta-rules of the process and determines the frequency and duration. A classic example from an ecommerce app is the ‘Buy Now’ transformed to ‘Buy Another’ Before the user loses interest in the app, the app typically uses such a loop to get them to re-engage with the app. 

How to Use Micro-Interactions

We’ve established that micro-interactions are fabulous, but not every UX interaction on your app or site needs one throughout the wireframe. Overusing this tool could saturate the overall creative experience your design may want to offer. Worse, it might even end up confusing the information hierarchy. It undermines the design and unbalances the user experience of discomfort and irritability. So it’s crucial to know when exactly to use them.

Let’s find out how few quick tips on micro-interactions can elevate and humanize your mobile user experience:

  • Swipe right or left: A signature move made entirely on swiping micro-interaction featured in the famous Tinder app. Swiping is an easier action than clicking or tapping.
  • Call-to-action:  As part of the last step during payment or order, place a ‘Confirm Order’ or ‘Book Now’ prompt, which gives the task a sense of urgency. As a result, having acted on it feels like a minor achievement. 
  • System status: Your app user wants to know what’s happening. System status lets them know they are moving in the right direction and helps avoid confusion. Sometimes, users even run out of patience while uploading a picture, downloading a file, or filling up the registration form.
  • Classic notifications: Users need a quick reminder of products selected/wishlist in their abandoned cart with a reduced attention span. A simple notification can nudge them toward finalizing the purchase. 
  • Button animation: Animated buttons are not only cute, but they also help users navigate the mobile app swiftly. Try out attractive colors, fonts, sizes, shapes, and clipart elements corresponding to the animation and create that cool button to pop up when tapped or hovered on. 
  • Animated text inputs:  A simple process of a likable element like zooming in while entering data into a form or filling up card details for payment can enhance the user experience.
  • Reward an achievement:  Especially true for educational and health apps, micro-interactions celebrating big and small milestones with a badge or a compliment of encouragement can strengthen a user’s engagement with the app. 

Benefits of Micro-Interactions

  • Brand communication: A successful brand ensures that the transmission to the buyer is engaging, positive, and hassle-free. When micro-interactions show a process status clearly, it creates and reinforces a positive image for your brand.
  • Higher user engagement: Experts say micro-interactions engage users better. These tiny elements subconsciously create the urge to keep interacting with your app. For example, each push or nudge notification acts toward redirecting your customers back to your app.
  • Enhanced user experience: From shopping to banking to traveling to learning to staying healthy, there’s an app for everything. A wide range of activities elevates the overall user experience and stays ahead in the game. Micro-interactions can work that magic for your brand. 
  • Prompt feedback: It’s frustrating not to know what’s happening behind the blank screen, especially during a purchase. Instant feedback via visual, sound, or vibrating notifications makes for a pleasant user experience. 
  • Visual harmony: Micro-interactions initiated even with a tap, swipe, typing, or scrolling are all a part of the UX design’s overall appeal. The trick is to keep all the interface elements in perfect sync with the app’s visual features.

Micro-Interaction Best Practices

Here are a few basic principles you should follow when you introduce a micro-interaction to the user experience.

1. Keep it simple, stupid (KISS)

KISS is a famous design principle that becomes even more important in the case of micro-interactions. The goal is to make the user journey delightful and not be a distraction.

2. Keep it Short

It has ‘micro’ in the name itself. But, again, micro-interactions aren’t supposed to be show stars, and a lengthy micro-interaction only distracts the user. 

3. Pick the Right Place

You should always consider the options carefully before choosing the spot for any micro-interaction. The widely used user-interaction designs are popular for a reason. Many people have already approved them, so you can safely continue with them. The use of micro-interaction should also sit well with your brand image. 

See also if the placement of a micro-interaction is reaching your ideal customer or not. And even consider whether you need a micro-interaction to begin with. 

And That’s a Wrap!

As UX designers, we can profoundly impact the overall design of sites and apps, the user’s journey, their interactions with our product/service, their connection with the brand, and the ease of doing a transaction.

We want customers to connect to our brand, love our products, and experience our exceptional customer service. But most of all, we want to earn their trust and loyalty.


Featured image via Pexels.

Source

The post Using Micro-Interactions to Drive UX first appeared on Webdesigner Depot.

Source de l’article sur Webdesignerdepot

“Minimum Viable Product,” or “MVP,” is a concept of agile development and business growth. With a minimum viable product, you focus on creating the simplest, most basic version of your product, web application, or code possible.

Minimum viable products include just enough features to attract early adopters and validate your idea in the early stages of the development lifecycle. Choosing an MVP workflow can be particularly valuable in the software environment because it helps teams receive, learn from, and respond to feedback as quickly as possible.

The question is, how exactly do you define the “minimum” in MVP? How do you know if your MVP creation is basic enough while still being “viable”?

Defining the Minimum Viable Product: An Introduction

The concept of “Minimum Viable Product” comes from the Lean Start-up Methodology, introduced by Eric Ries. The purpose of MVP is to help companies quickly create versions of a product while collecting validated insights from customers for each iteration. Companies may choose to develop and release minimum viable products because they want to:

  • Introduce new products into the market as quickly as possible;
  • Test an idea with real users before committing a large budget to product development;
  • Create a competitive product with the use of frequent upgrades;
  • Learn what resonates with the target market of the company;
  • Explore different versions of the same product.

Aside from allowing your company to validate an idea for a product without building the entire concept from scratch, an MVP can also reduce the demand on a company’s time and resources. This is why so many smaller start-ups with limited budgets use the MVP and lean production strategy to keep costs as low as possible.

Defining an MVP: What your Minimum Viable Product Isn’t

When you’re building a Minimum Viable Product, you’re concentrating on developing only the most “essential” features that need to be in that product. For instance, you might be building a shopping app for a website. For the app to be “viable,” it would need to allow customers to search through products and add them to a basket or shopping cart. The app would also need a checkout feature and security components.

However, additional functionality, like the ability to send questions about an item to a customer service team or features that allow clients to add products to a “wish list,” may not be necessary straight away. Part of defining a minimum viable product is understanding what it isn’t. For instance, an MVP is not:

  • A prototype: Prototypes are often mentioned alongside MVPs because they can help with early-stage product validation. However, prototypes are generally not intended for customers to use. The “minimum” version of a viable product still needs to be developed enough for clients and users to put it to the test and provide feedback.
  • A minimum marketable product: An MVP is a learning vehicle that allows companies to create various iterations of an item over time. However, a minimum marketable product is a complete item, ready to sell, with features or “selling points” the company can highlight to differentiate the item from the competition.
  • Proof of concept: This is another similar but distinct idea from MVP. Proof of concept items test an idea you have to determine whether it’s attainable. There usually aren’t any customers involved in this process. Instead, companies create small projects to assess business solutions’ technical capabilities and feasibility. You can sometimes use a proof of concept before moving on to an MVP.

Finding the Minimum in your MVP

When finding the “minimum” in a minimum viable product, the primary challenge is ensuring the right balance. Ideally, you need your MVP to be as essential, cost-effective, and straightforward as possible so that you can create several iterations in a short space of time. The simpler the product, the easier it is to adapt it, roll it out to your customers, and learn from their feedback.

However, developers and business leaders shouldn’t get so caught up focusing on the “Minimum” part of Minimum Viable Product that they forget the central segment: “Viable”; your product still needs to achieve a specific purpose.

So, how do you find the minimum in your MVP?

1. Decide on Your Goal or Purpose

First, you’ll need to determine what your product needs to do to be deemed viable. What goal or target do you hope to achieve with your new product? For instance, in the example we mentioned above, where you’re creating an ecommerce shopping app, the most basic thing the app needs to do is allow customers to shop for and purchase items on a smartphone.

Consider the overall selling point of your product or service and decide what the “nice to haves” are, compared to the essential features. For instance, your AR app needs to allow people to interact with augmented digital content on a smartphone, but it may not need to work with all versions of the latest AR smart glasses.

2. Make a List of Features

Once you know the goal or purpose of your product, the next step is to make a list of features or capabilities you can rank according to importance. You can base your knowledge of what’s “most important” for your customers by looking at things like:

  • Competitor analysis: What do your competitors already offer in this category, and where are the gaps in their service or product?
  • User research: Which features or functionalities are most important to your target audience? How can you make your solution stand out from the crowd?
  • Industry knowledge: As an expert in your industry, you should have some basic understanding of what it will take to make your product “usable.”

3. Create Your Iterations

Once you’ve defined your most important features, the next stage is simply building the simplest version of your product. Build the item according to what you consider to be its most essential features and ask yourself whether it’s serving its purpose.

If your solution seems to be “viable,” you can roll it out to your target audience or a small group of beta testers to get their feedback and validate the offering. Use focus groups and market interviews to collect as much information as possible about what people like or dislike.

Using your feedback, you can begin to implement changes to your “minimum” viable product to add more essential features or functionality.

Understanding the “Minimum Viable Product”

Minimum viable products are evident throughout multiple industries and markets today – particularly in the digitally transforming world. For instance, Amazon might be one of the world’s most popular online marketplaces today, but it didn’t start that way. Instead, Jeff Bezos began purchasing books from distributors and shipping them to customers every time his online store received an order to determine whether the book-selling landscape would work.

When Foursquare first began, it had only one feature. People could check-in at different locations and win badges. The gamification factor was what made people so excited about using the service. Other examples include:

  • Groupon: Groupon is a pretty huge discount and voucher platform today, operating in companies all around the world. However, it started life as a simple minimum viable product promoting the services of local businesses and offering exclusive deals for a short time. Now Groupon is constantly evolving and updating its offerings.
  • Airbnb: Beginning with the use of the founders’ own apartment, Airbnb became a unicorn company giving people the opportunity to list places for short-term rental worldwide. The founders rented out their own apartment to determine whether people would consider staying in someone else’s home before eventually expanding.
  • Facebook: Upon release, Facebook was a simple social media tool used for connecting with friends. Profiles were basic, and all members were students of Harvard University. The idea quickly grew and evolved into a global social network. Facebook continues to learn from the feedback of its users and implement new features today.

Creating Your Minimum Viable Product

Your definition of a “minimum viable product” may not be the same as the definition chosen by another developer or business leader. The key to success is finding the right balance between viability – and the purpose of your product, and simplicity – or minimizing your features.

Start by figuring out what your product simply can’t be without, and gradually add more features as you learn and gain feedback from your audience. While it can be challenging to produce something so “minimalistic” at first, you need to be willing to release those small and consistent iterations if you want to leverage all the benefits of an MVP.

Suppose you can successfully define the meaning of the words “Minimum” and “Viable” simultaneously with your new product creations. In that case, the result should be an agile business, lean workflows, and better development processes for your entire team.


Featured image via Pexels.

Source

The post What is the “Minimum” in Minimum Viable Product? first appeared on Webdesigner Depot.

Source de l’article sur Webdesignerdepot