Articles


Set Up Kubernetes Cluster

First, we need a Kubernetes cluster. You may use an existing one or set up a new one. For this tutorial, we chose to use GKE (Google Kubernetes Engine).

Just follow the quick start to create a cluster. To save your money, the default pool with only one node is sufficient for our testing. For node image type, use the default Container-Optimized OS; for machine type, please select one with at least 8G mem. After creating the cluster, go ahead to configure kubectl to connect to the cluster following this guide.

Source de l’article sur DZONE

You’ve named your business. You’ve sorted out the visual branding piece. Now, it’s time to get your business online so you can start making money.

In this post, we’re going to look at where your web design business needs to set up shop online and how to get it up and running quickly.

Step 1: Set Up Your Website

As a web designer or developer, having a website is non-negotiable.

Not only does a website provide prospective clients with all the information they need about you, it can help you automate many of those annoying tasks that get in the way of your actual paid work.

So, let’s start here:

Buy Your Domain Name

If you haven’t done so already, use the business name generator exercise to come up with a domain name. You then have a couple of options for buying it.

To Do:

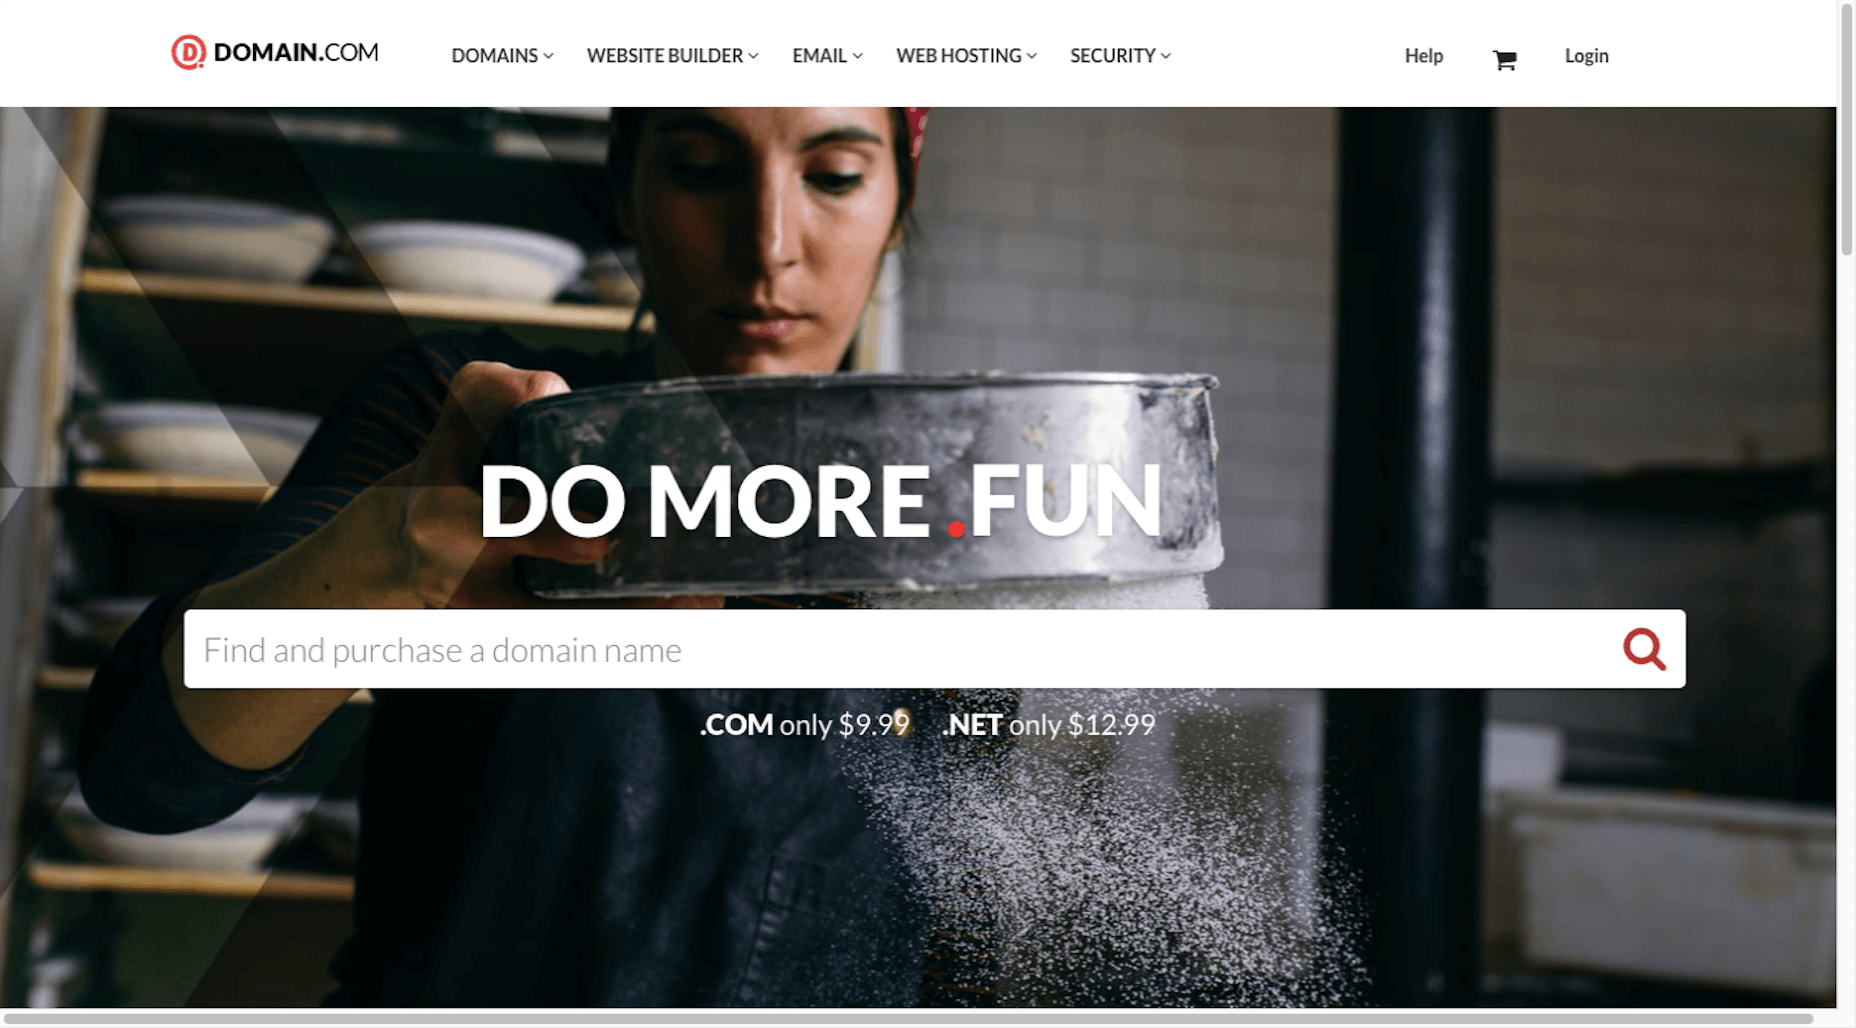
  • Buy it from a domain name provider like GoDaddy or Domain.com;
  • Or buy it from your web hosting company;
  • Check the next step to see which option makes the most sense for you.

Choose a CMS

Use the same CMS as the one you’ll use to build your clients’ sites. That way, clients don’t wonder why you’d use something like Squarespace for your site, but then recommend WordPress for theirs, for example.

To Do:

  • If you use a self-hosted CMS (like WordPress, Drupal, or Joomla), hold on this until you purchase your web hosting;
  • If you use a hosted CMS (like Wix, Squarespace, or Shopify), you won’t need to do the next step. Instead, just sign up for your website builder and buy your domain name now.

Buy Your Web Hosting

If you’re wondering what the difference is between the various types of web hosting, read this post.

Basically, this is what you’re looking for:

  • A hosting company with a good reputation that provides expert and timely support;
  • An affordable starter plan — either shared or cloud hosting;
  • Server locations near you (at the very least, in the same country as you);
  • Top-notch security features at the server level as well as the physical hosting facility;
  • Caching and other speed optimizations built into the server and on-site equipment;
  • Compatibility with your CMS (look for one-click install, too).

Also, look for add-ons like SSL certificates, CDNs, and, of course, a free domain name.

To Do:

  • Sign up for the hosting plan you want along with your domain name and SSL certificate (this is a must for SEO);
  • Install your CMS from the control panel once you’re ready to go.

Build Your Website

Ultimately, you have two goals here:

  1. To build a website that convinces prospective clients that you’re the real deal;
  2. To build a website that prospects would want for themselves.

So, there’s no need to go crazy with outlandish features or futuristic animations and design. Keep it simple. Keep it neat. And give prospects an honest portrayal of who you are, and what you can do for them.

Design It

The first thing to do is take all that work you did to create your visual branding and use it to design your website.

If you’re building a WordPress website, consider starting with one of these multipurpose themes.

Build Out the Pages You Need

A theme will automatically create the pages you need (most of them, anyway). If you’re not sure which ones to start with, these are the ones your prospects are going to be looking for:

You may also want to add separate pages for Testimonials and Case Studies once you’ve accumulated enough of them to show off. For now, you can include samples of your work in the Portfolio page and testimonials on the Home page.

Fill in the Content

Even if writing isn’t your strong suit, that’s okay. So long as the content you write for your site is free of spelling and grammar errors, your prospective clients are going to focus on what you’re telling them, not on how proficient a writer you are.

That said, if you’re nervous about this piece of your website, here are some tips to help you out:

1. Be concise, it’s not just minimal design that goes over well with modern audiences. Minimal copy does, too.

2. Be transparent. Tell prospects what exactly they can expect when they work with you and why your web design services are going to be different from the competition.

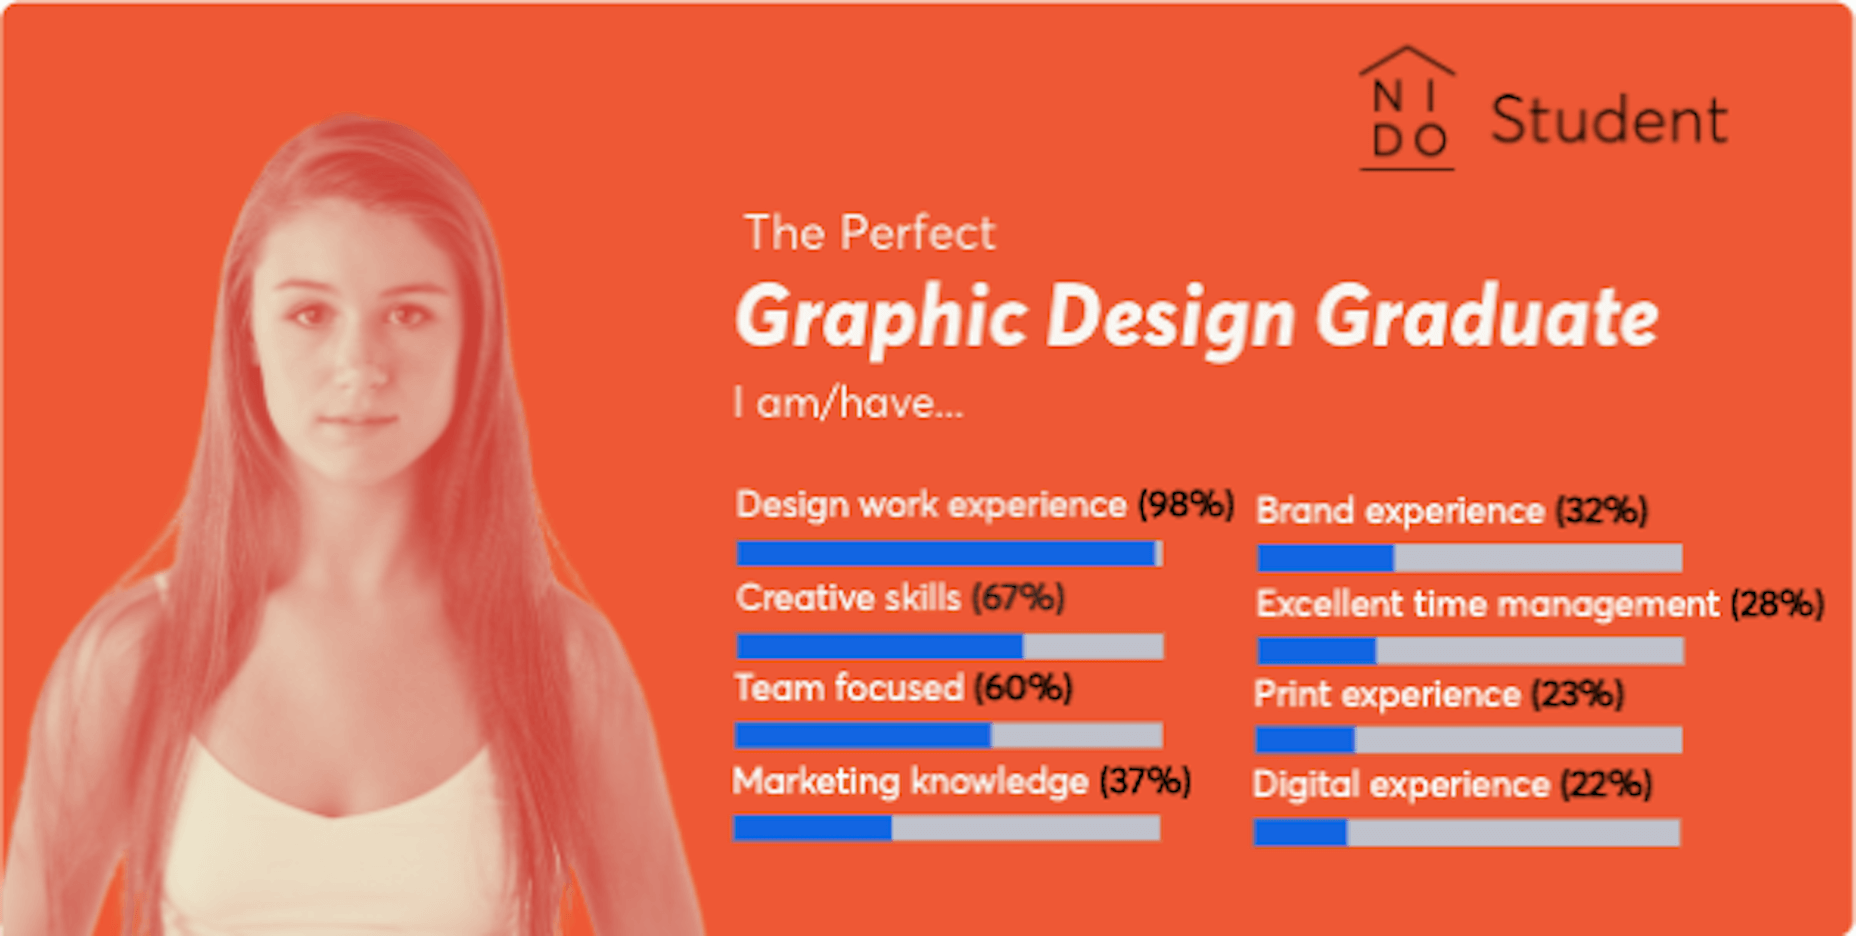
3. Consumers don’t trust companies that use meaningless buzzwords and make empty claims. Instead, focus on writing about the real and very competitive skills you have. According to research from NIDO Student, these are the skills employers look for when hiring a designer:

4. Let your images tell some of the story for you. Just make sure you use (or create) images that will impress your audience.

5. After you’ve written your content, take a step back and tackle the structure and formatting from a designer’s POV.

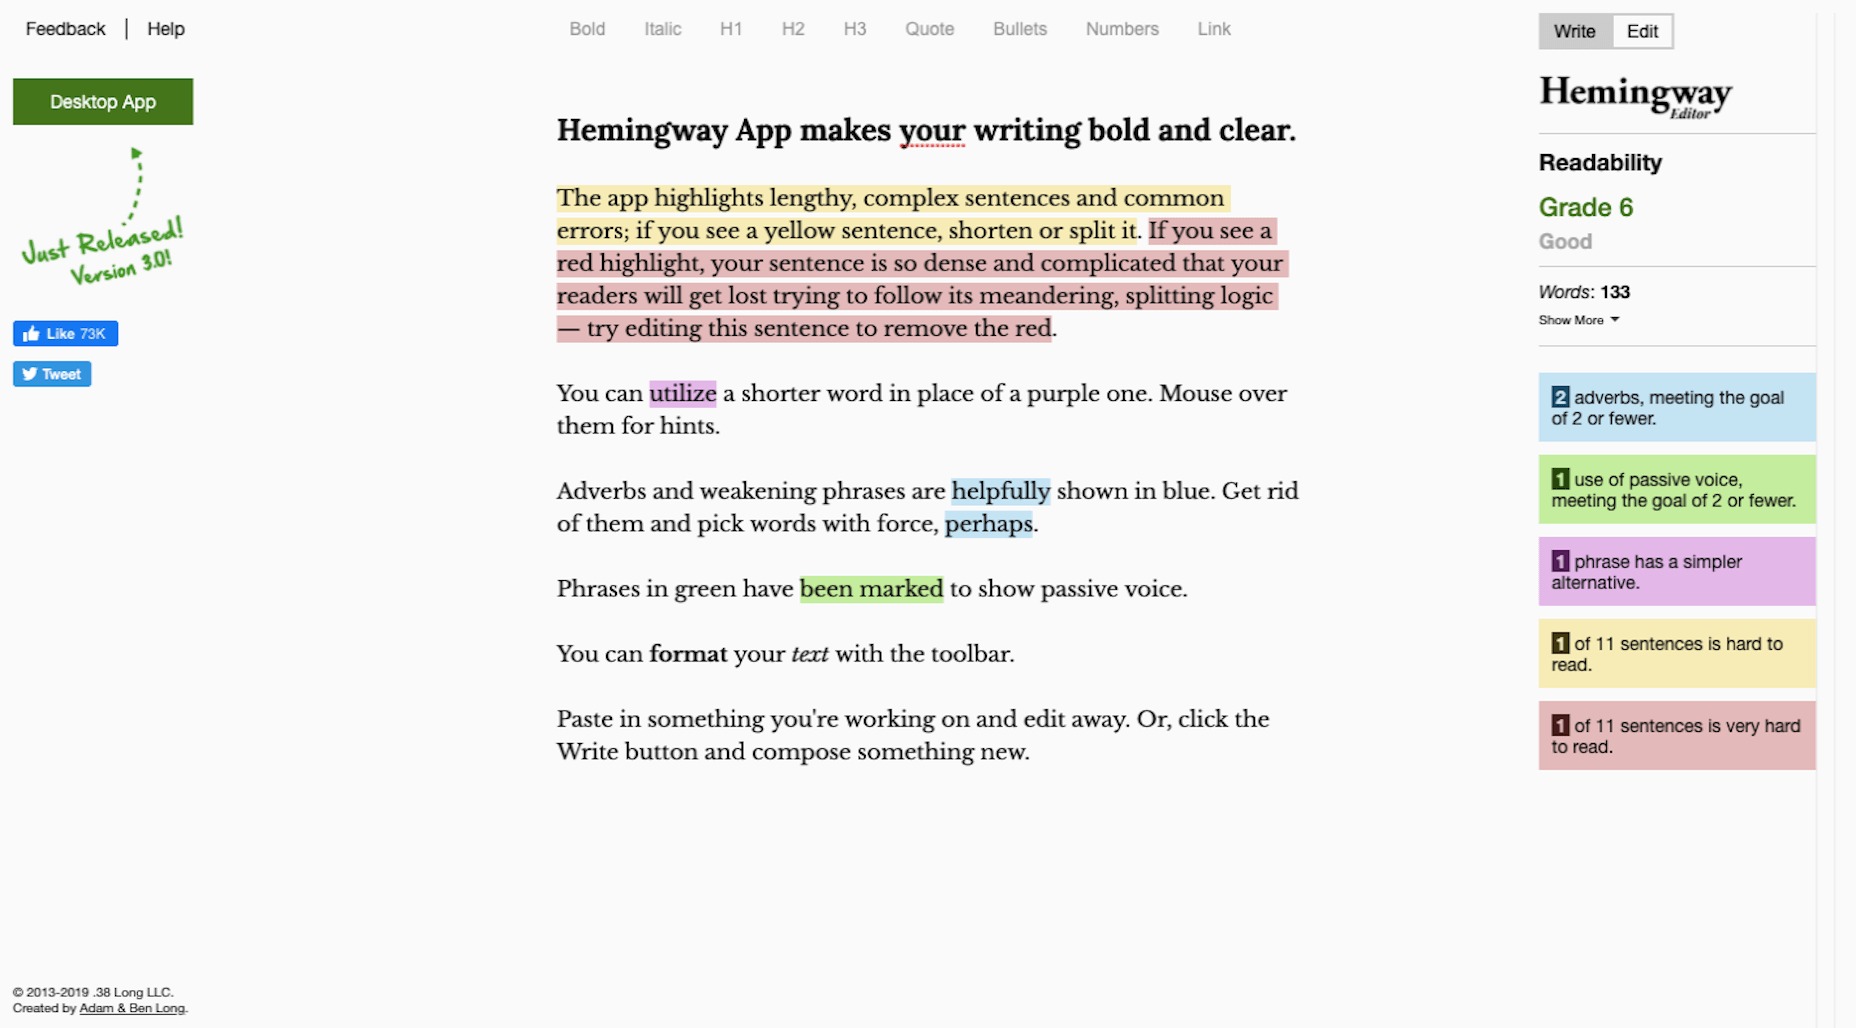
6. Before you hit the “Publish” button, run your copy through Hemingway Editor to ensure your content is error-free.

Add the Right Features

When I talk about features, I’m referring to anything outside the main design and content on your website. These are usually sales and marketing tools like:

  • Chatbot/live chat
  • Contact forms
  • Pop-ups or notification banners
  • Discovery call scheduler
  • Cookies consent notice

Only add the features you absolutely need. In other words, the features that will automate the marketing and sales tasks you’d otherwise have to manage on your own.

Step 2: Optimize Your Website for Search Engines

Search engine optimization (SEO) is a very important part of the work you do to get your business online. Here’s why:

After you launch your business and website, the next thing you’re going to focus on is getting clients. This can take a lot of work as you pore over the following resources for referrals and leads:

  • Your existing contact list (i.e. family, friends, old employers, colleagues, etc.);
  • Freelance job boards;
  • Industry-specific job boards;
  • Social media posts, pages, and groups;
  • Google search results for “we’re hiring”;
  • And so on…

And when you’re not busy cold-emailing prospective clients or talking to them on the phone, you’re probably going to be working on your business’ processes. Running a business is very time-consuming.

So, what happens when you finally start working on website projects? It’s not like the client search ends there. It’s an ongoing thing. Which is why your website needs to be optimized for search.

Once your site gets indexed by Google and starts to generate authority, your pages will rank better and the increased visibility will start generating leads without you having to actively make the first move.

SEO is a huge topic, so I’m not going to cover it here. However, the links below will do a good job of guiding you towards your next steps.

To Do:

Step 3: Get Active on Social Media

Your website is going to play a lot of roles:

  • Digital business card;
  • Authority builder;
  • Marketing vehicle;
  • Sales platform;
  • Content marketer.

But there’s one very critical thing it can’t do and that’s directly converse with your audience and grow your network. This is why you need to spend time building out your social media once your website is good to go.

As for which social media platforms to use (as there are way too many), here are my thoughts:

Become an authority on Twitter.

Twitter is a good place to share daily thoughts and interesting content you’ve found on the web.

Get discovered on LinkedIn.

LinkedIn is useful because it’s another place to get noticed by potential employers, so make sure your relevant work experience and portfolio are up-to-date.

Connect with other creatives on Facebook.

It’s really hard to get noticed on Facebook unless you pay to play. Instead, use it to find groups that you can turn to for support, referrals, and brainstorming.

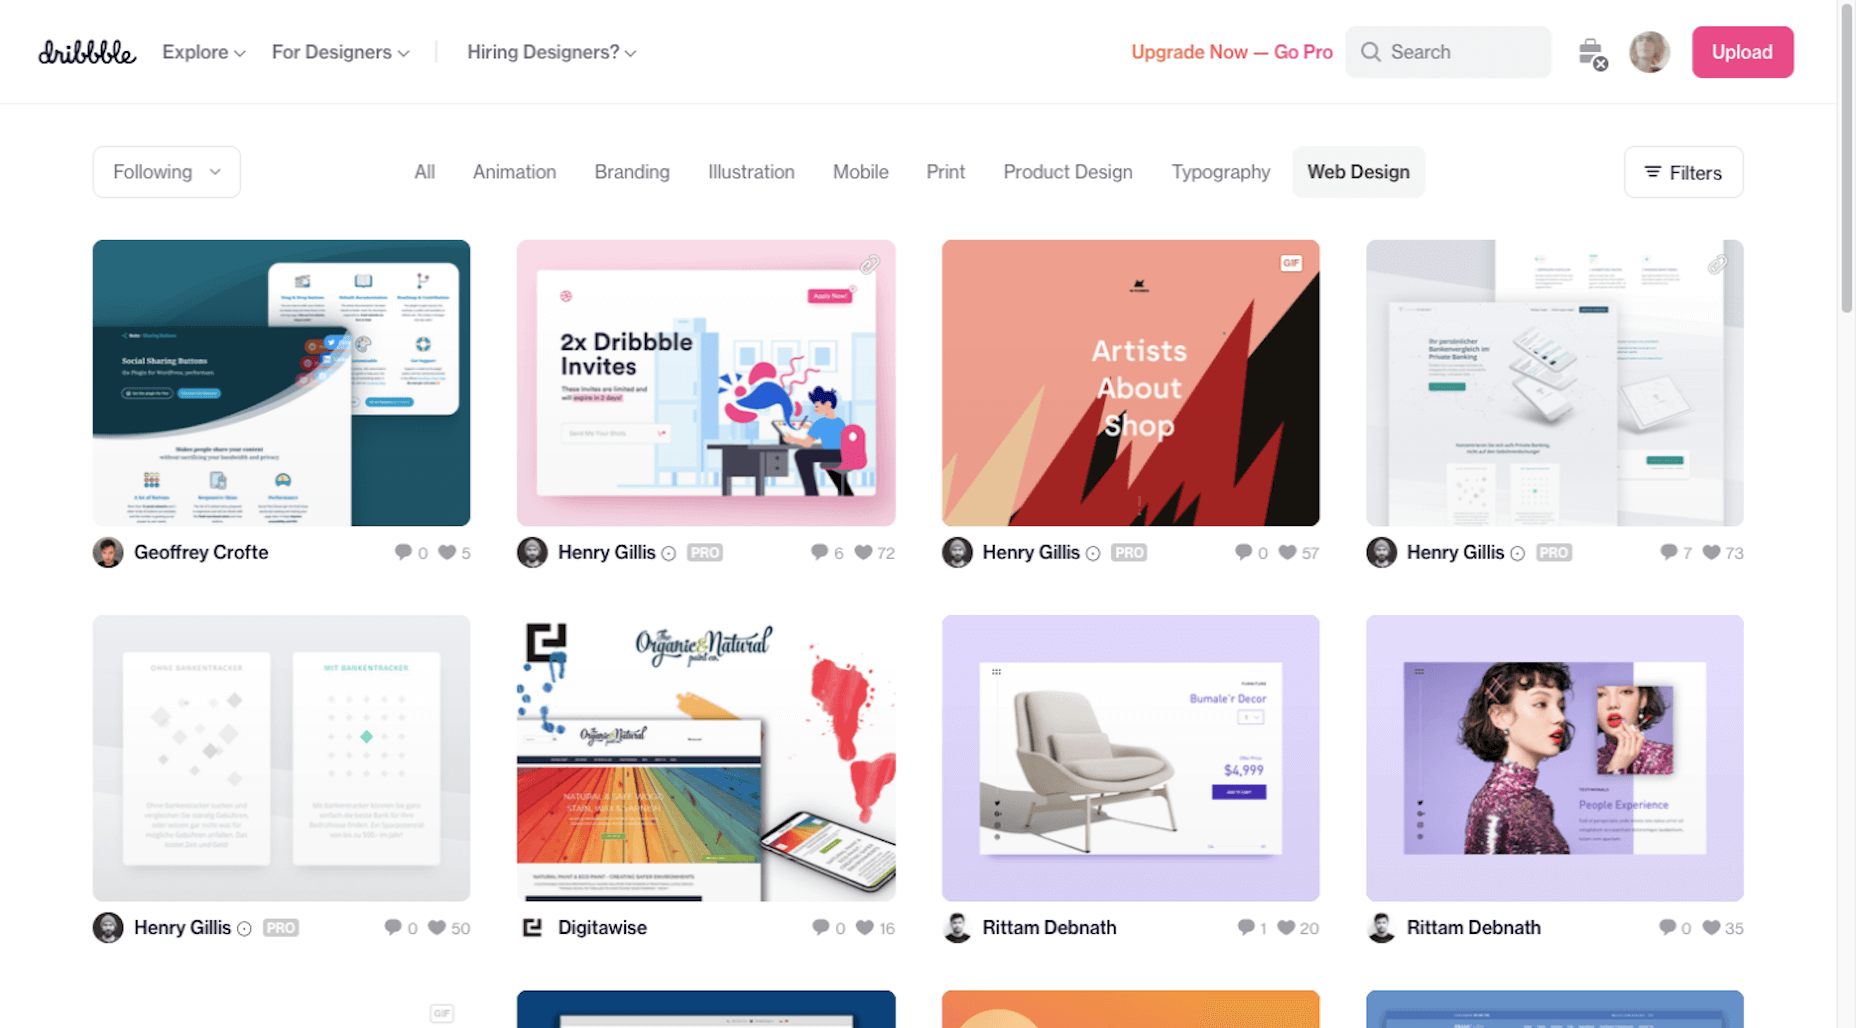
Share your work on Dribbble.

While you could use Instagram or Pinterest to show off your work, you might get more traction on a design-specific platform like Dribbble. Serve as inspiration for others and potentially get discovered by prospects looking for designers there.

Down the line you might decide to expand your business into recurring revenue opportunities like online courses. In that case, a platform like YouTube would be great. For now, focus your efforts on the main ones above.

To Do:

  • Create your social media accounts;
  • Brand them to match your website — both the visual component as well as the bio;
  • Start sharing content on a regular basis. You can automate sharing with a social media management tool, but remember to log in at least a couple times a week so you can engage with others, too;
  • Be careful not to commit these social media faux pas.

Wrap-Up

I realize this is a ton of information to throw at you. However, if you want to get your new business online and for it to succeed, you need to maximize the opportunities that are available to you.

I hope this three-part guide to starting a new business has been helpful. If you have any questions on the tips provided along the way, let me know in the comments.


Featured image via Pexels.

Source


Source de l’article sur Webdesignerdepot

Since there are so many CMS plugins out there, it can be overwhelming to choose the best ones for your website. We’ve done the research for you; this list contains the top new CMS plugins for November 2020. You’ll find useful plugins for WordPress, Craft, Shopify, and Joomla.

Let’s get started…

WordPress

404 Page Editor

404 Page Editor is a simple WordPress plugin that helps you add custom text to the default 404 page on your website. The plugin comes with seasonal and industry-related 404 templates. One useful feature of the plugin is that it backups your current 404 page before changing it. So you can restore the backup page anytime you choose. The plugin duplicates your current 404.php page to wp-content/uploads/404-page-editor/ so you can easily find it. You can also change the text on the plugin to fit your local dialect. 

UnusedCSS Power-Up

Most WordPress themes and plugins load their CSS in the wrong areas of your website. This can slow down your site. A slow website will reduce user experience and lead to increased bounce rates.

UnusedCSS will help reduce the size of your website’s CSS files by up to 95%. The best part is that the plugin works automatically. It will remove any unused CSS when visitors view any page on your website. UnusedCSS will automatically reduce your website’s load times by reducing your CSS files and page size. The plugin also optimizes the performance of other WordPress plugins and extensions. UnusedCSS also works with WooCommerce themes and plugins.

Simple Redirects

Simple Redirects is a WordPress plugin that helps you to automatically redirect requests to another page on your site or any other place on the web. The plugin allows you to easily redirect users from your old web pages to new pages using 301 or 302 redirects. You don’t have to worry about losing backlinks or page rank. Any incoming links to the old web page will be automatically passed along to the new page. The page rank on the old page is also transferred to the new page. The plugin is useful when migrating a WordPress site when don’t want to retain the URL structure. 

HTML Validation

HTML Validation plugin helps you identify any HTML validation errors on your website. The plugin works automatically in the background of your website and will send you regular reports. There is a progress bar on the report screen to show you the progress of the scan. The plugin uses WordPress Cron to scan the content of your website. There is also an option for the plugin to automatically fix any HTML validation issues on your website. You can also choose to fix the issues manually. 

Just Highlight

Just Highlight is a simple WordPress plugin that helps you highlight text in your posts or pages. You can use this plugin to highlight any portion of the page you want to draw the reader’s attention to. You can highlight the background of the page and also add animation to the highlighted text. In the WordPress admin area, you can change the speed and color of the animation. The plugin is compatible with Gutenberg, and the WordPress classic editor. 

DeviantArt Embed

DeviantArt Embed is a simple plugin that helps you embed any work from Deviant Art into a post. The plugin provides a block for the WordPress block editor so you can easily embed the image. It uses a DeviantArt oEmbed API to pull the images and their descriptions, and creates an embedded image. 

Static Optimizer

Static Optimizer is a static file optimization plugin that serves and optimizes static files on your website. The plugin will help you increase your website speed by automatically compressing your static files. It is easy to set up, you just need an API key to get started. Other useful features that the plugin offers include automatic JS and CSS minification, automatic image optimization, and processing of responsive images. You don’t have to worry about losing your files if their server is down. The plugin automatically backs up your files and will load your original files when their servers are down (either because of an upgrade, maintenance, or outage).  By default, only images are compressed when you activate the plugin; you can also choose to optimize fonts, CSS, and JS files. 

RankBear

RankBear is a keyword rank tracker plugin that helps you analyze your SEO efforts. With RankBear, you can track the keywords for each of the posts and pages on your site. While the plugin has a paid plan, you can track up to five keywords for free. On the free plan, you will receive weekly reports on each keyword you are tracking. You can search for the rank and volume of a keyword in every location supported by the Google search engine. RankBear is a lightweight software-as-a-service plugin hosted by Amazon Cloud Services. The plugin also offers the option to download the keyword reports to CSV. 

Table of Contents Block

Table of Contents Block is a plugin that allows you to easily create a Table of Contents for your WordPress posts. The plugin is lightweight and will automatically add a Table of Content in your website’s posts and pages. You can select the heading tags you want to add to the Table of Content. It also has a dedicated support team to assist you. The plugin works fine with all standard WordPress themes. 

Markease For WooCommerce

Markeaze is an all-in-one communication plugin that allows you to add live chat to your online stores. The plugin will help you improve your customer service by decreasing your response times. With the plugin, you can collect your visitor’s contact information via a widget. This feature is useful in building a subscriber database. You can also use the plugin to track customer behavior on your site, inform customers about new products, help customers with active orders, and collect customer feedback. You can also use the auto-reply function to answer commonly asked questions. 

Craft CMS

Image Toolbox

Image Toolbox is a Craft CMS plugin that offers image-related tools for your templates. The plugin will automatically create a WebP variant of the images you upload. It also has a fallback for browsers that do not support WebP images. Other useful features the plugin offers include automatic creation of placeholder images and generation of responsive images with multiple variants. The plugin also supports Imager-X (or old Imager). 

Element Panel

Element Panel plugin allows you to add elements and an eager-loading panel to the debug toolbar. This feature will help you benchmark your templates in Craft CMS. For elements, the panel has a dashboard that shows how many elements are populated. It also shows how many elements are duplicates. The plugin also shows you how many eager-loading elements are detected. Duplicate elements are grouped by field name. 

Shopify 

VStore Shoppable Videos

VStore Shoppable Videos is a Shopify plugin that allows your customers to shop directly from your videos. The plugin allows you to embed your products into any video. Since videos have a high engagement rate, this plugin will significantly improve your store’s conversion rates. 

ProofMotion Video Testimonials

ProofMotion Video Testimonials plugin helps you to easily collect video testimonials. The plugin sends an automated email or SMS requests to customers asking for their satisfaction feedback after making a purchase. The responses are analyzed to determine whether the customer had a negative or positive experience. Customers that offer negative feedback are sent to customer care to help them with the problem they encountered. Happy customers are prompted to make video testimonials of their positive shopping experience. ProofMotion guides the customer through the interview so they can give the best testimonial. They also offer an on-site widget so you can easily share your testimonials. 

Real ID

Real ID is a Shopify plugin that allows you to verify customers’ real identity using a photo ID and facial biometrics. The plugin is perfect for orders that have an age restriction, verifying flagged fraud goods, and selling expensive goods. Real ID will help you identify whether a government-issued-ID is fake during fulfilment. All the customer needs to do is take a selfie on their phone. This way, even if a customer has access to a stolen physical ID, they won’t still be able to make any purchase. The plugin can verify documents such as passports, visas, national IDs, driver licenses, and more. Real ID will help you handle GDPR compliance. The plugin is available in hundreds of countries around the world. 

Joomla

Accessibility

Accessibility is a Joomla plugin that allows your website visitors to easily access your website content. The plugin will remove any barrier between the visitor and your Joomla site. There is no coding required and you can customize the plugin directly from the module manager. The plugin has a useful feature called Dyslexic Readability; this feature allows your visitors to set the entire document font to a dyslexic-friendly font. Visitors can also grayscale the page, resize the fonts, and resize the word space. From the backend module, you can add any custom CSS and JS. The plugin is also available in 12 different languages. 

Reading Time

Reading Time is a simple plugin that will help you easily show the reading time of your Joomla articles. The plugin is easy to set up and does not require any coding. You can customize every parameter, including the text, in minutes. You can also choose to exclude categories, articles, and menu items. Reading Time also allows you to easily add custom CSS code from the plugin parameters. 


Featured image via Pexels.

Source


Source de l’article sur Webdesignerdepot

How can your customer reach you? If a client arrives on your website after searching on Google, what can they do to take the next step in a relationship with your brand, without buying anything?

One of the primary aims of any website is to drive conversions. However, it usually takes between 5 and 8 touchpoints to generate a viable sales lead. People don’t want to convert straight away.

Since building a relationship with customers is crucial to success, it makes sense that the contact page would be an essential part of driving results. Unfortunately, a lot of website owners pay virtually no attention to that page. They ask their designer to create a page with their address and phone number on – and that’s it.

What many business owners don’t realize, is that the contact page is the door to deeper, more lucrative relationships with potential prospects. The design of this essential website element needs to be fantastic to drive results.

So, where do you start?

Defining a Well-Designed Contact Page

Let’s start with the basics, what makes a great contact page?

The complete answer to that question depends on the target audience. Some customers will want to see fun and friendly contact pages, complete with social media sharing buttons. Others will want to see a map that shows them exactly how to reach an office or business.

There are a few golden rules to keep in mind, of course. Contact pages should be:

  • Easy to find: Don’t hide the link to the contact page on the website footer. Make it easy for customers to find out how they can get in touch.
  • Simple: Don’t put too much content on this page or it will overwhelm your audience. Just let them know where they can go to get answers to various questions.
  • Professional: Even if you have a friendly brand personality, your contact form still needs to be grammatically correct and well-designed to show a professional edge.
  • Convenient: Make your phone number clickable so customers can use it on Skype. The same can apply for your email address. Provide easy access to social media profiles, and if you have a contact form – keep it short and sweet.
  • Informative: Include all of your contact information in the same place. This may include your address, a map to your location, social media pages, email addresses, and even forums.
  • Accurate: Ensure that the information on your contact page matches the information listed elsewhere. Check directories and Google my Business listings to be sure.
  • Attractive: Yes, a contact page needs to look good too. Plenty of white space will make essential information stand out. A good layout will guide the eye through the page.
  • Consistent: Make sure the contact form on your website matches the brand personality that appears on all of your other pages.

Take a look at the Tune Contact page:
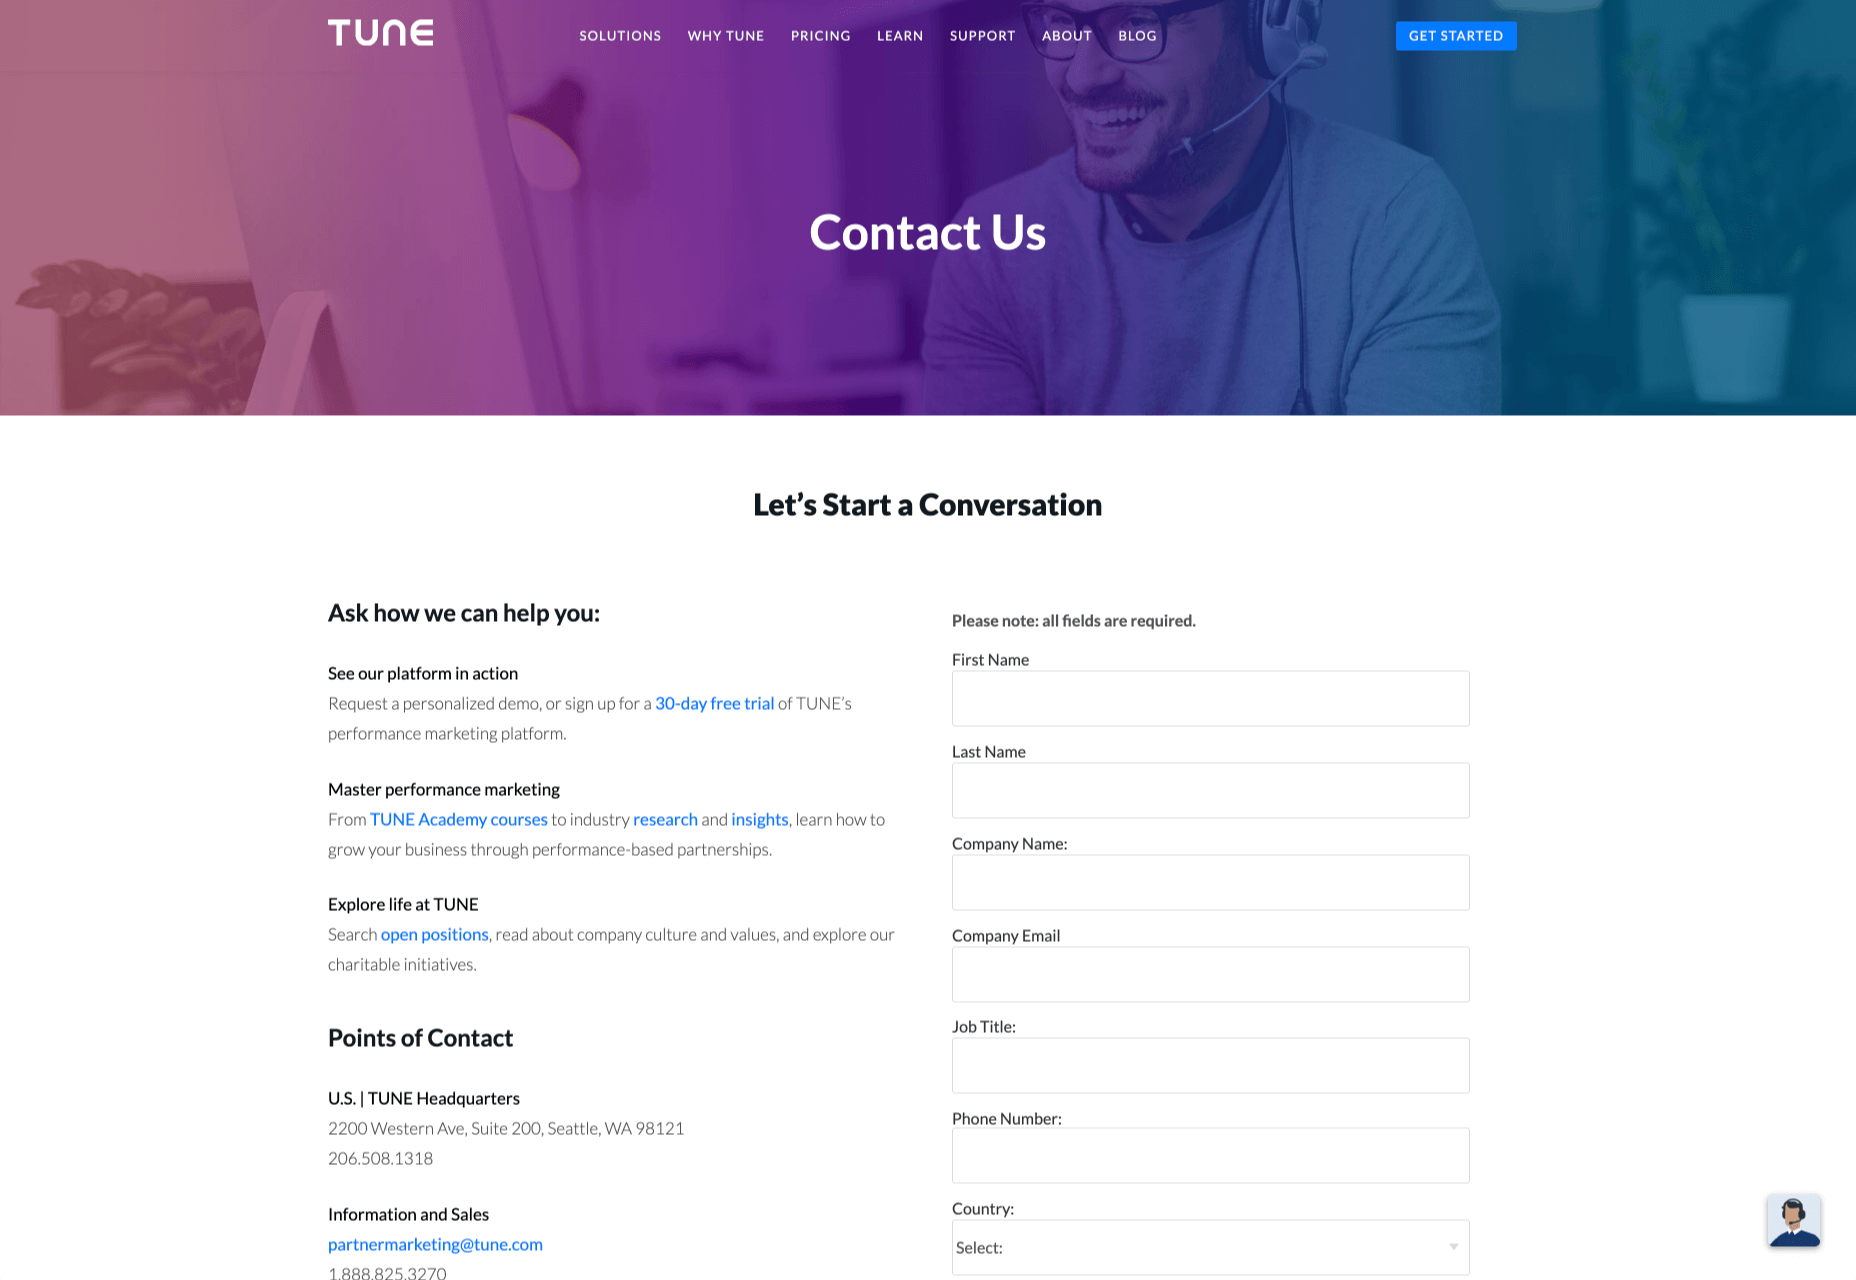
It’s beautifully laid out, with clear information that’s easy to read. The company shows exactly why customers might want to get in touch and how they can reach out. As you scroll through the page, you’ll find additional office locations, email addresses for different teams (sales and support), and links to social media accounts too.

How to Drive Engagement on a Contact Us Page

A good contact page needs to look fantastic, showcase the company’s personality, and capture audience attention. However, there’s a big difference between a contact page that gets the job done, and one that convinces your audience they have to connect with you.

Here are some excellent ways to make your contact us page stand out.

Step 1: Using Color Correctly

Color and color psychology have a massive impact on user experience.

Studies constantly demonstrate the conversion powers of having the right shades on certain pages throughout your website. For instance, changing a CTA button from red to green can increase click-through rates by 27%.

However, every audience is different. The colors that drive engagement on a contact page for your company will depend on your target customer. A/B testing color palettes that match your brand personality is a good way to get started.

One interesting example of colors that make the right impact on a Contact Us page comes from Hubspot. Here, the brand maintains it’s brand color (orange), but it also introduces some new shades that convey trustworthiness and professionalism.

Blue is the most calming and credible color for any brand, The gradient that Hubspot uses here blends perfectly with its brand identity, allowing for a stunning contact page, with CTA buttons that still stand out.

Experiment with colors that can generate the right emotional response from your audience, but don’t ignore the golden rules of color in web design. You still need to showcase your brand identity, and you still need a way of making crucial information stand out.

Step 2: Humanizing the Customer Service Team

Some of the customers that arrive at a contact page are interested in your product or inspired by the potential of your service. Other customers will be looking for assistance because they’re frustrated with something or stressed out.

If you’ve ever had a problem with a product and wanted to reach out to the brand about it, you’ve probably noticed how annoying it is to find a blank contact page with nothing but an email address. The lack of effort and humanity in the contact page is enough to convince you that you probably won’t get a response.

But what if you add some happy smiling faces to the page?

Research indicates that brains are fine-tuned to recognize and appreciate human faces. Having a picture of your customer service team, or just any human being on your contact page makes you instantly more approachable. Your customers start to feel like they’re reaching out to a person – not an empty website.

Look at how engaging and personalized this contact page from Amber McCue looks:
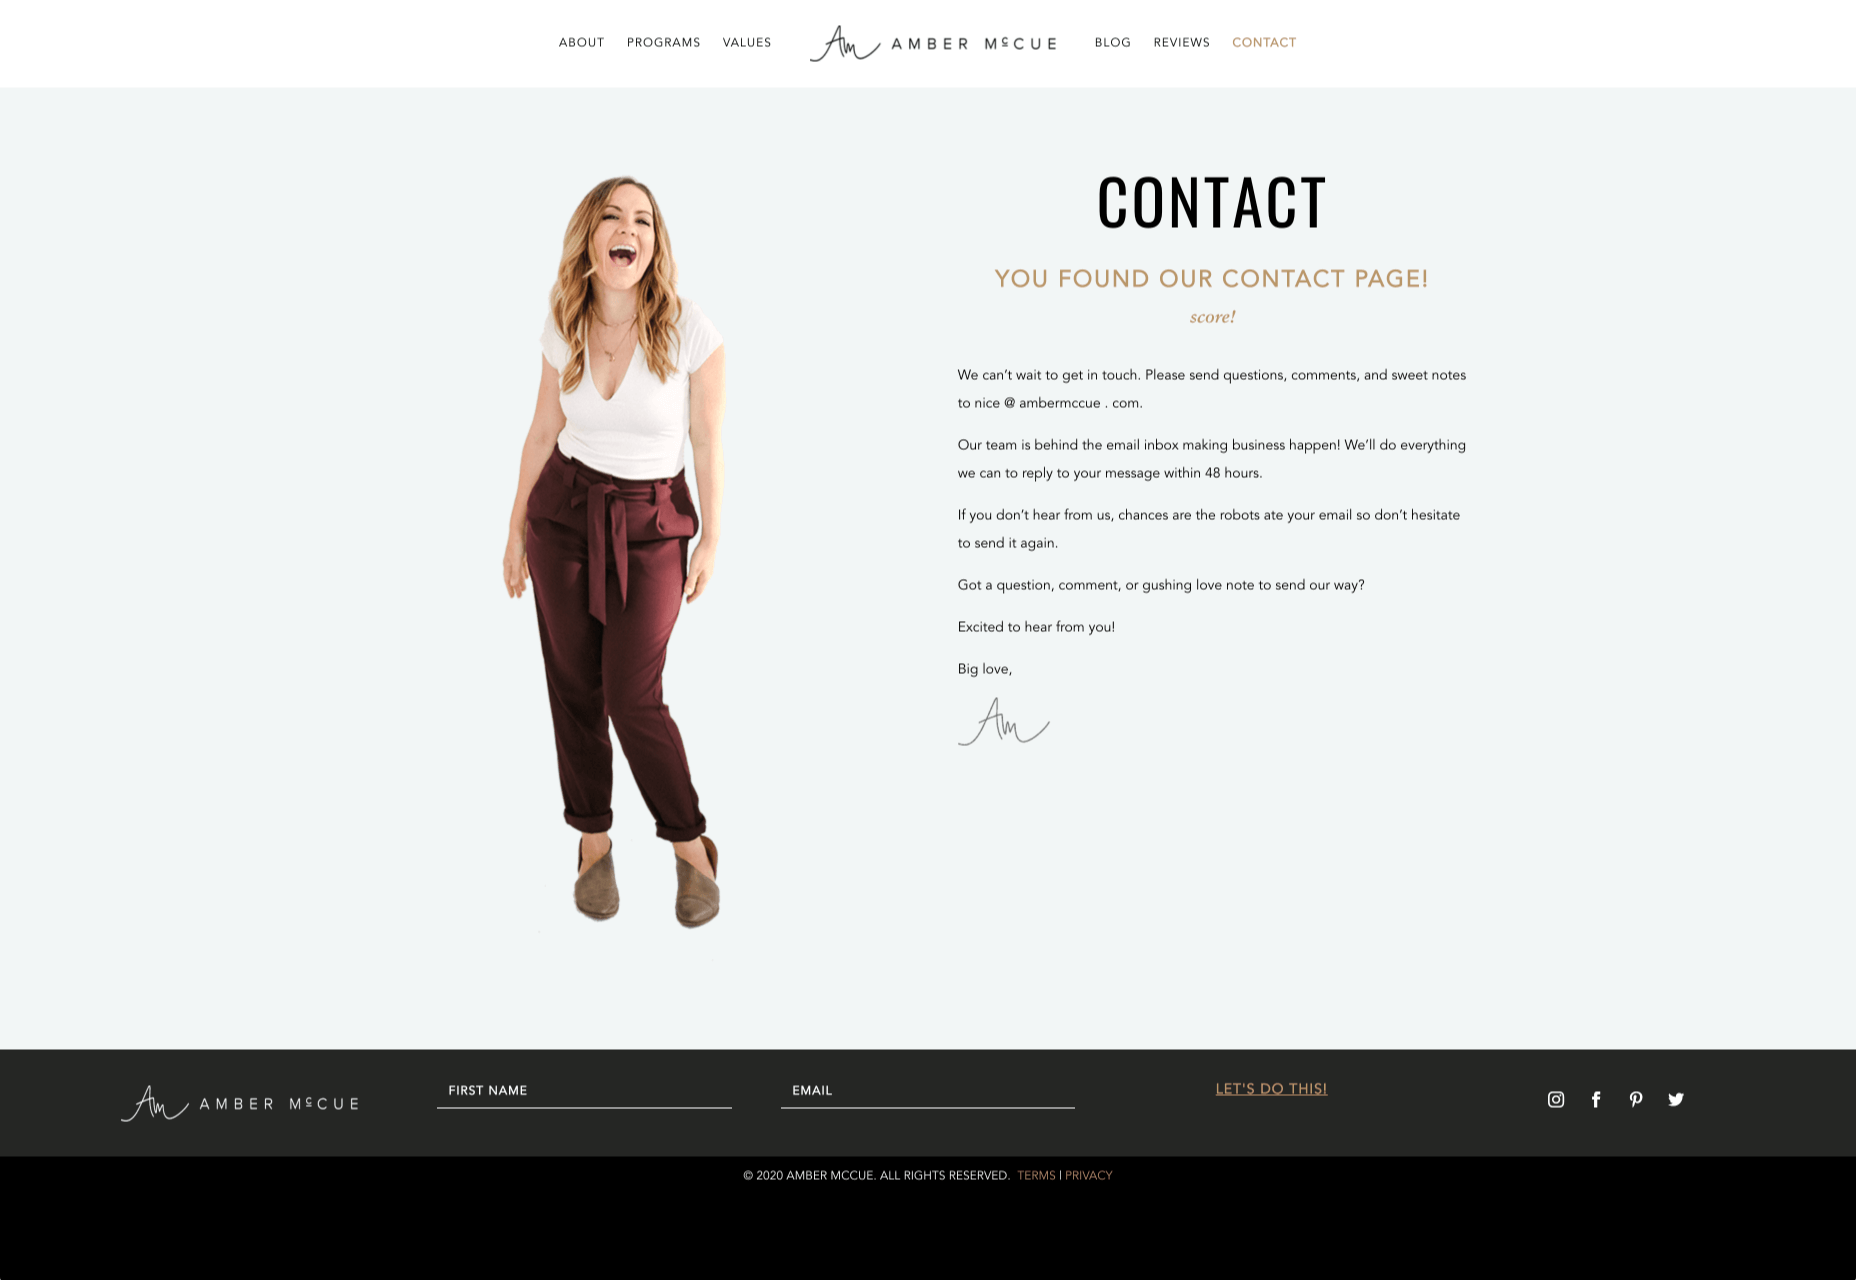
Although you can show any human face on your contact page and potentially get results, showing your actual agents will be more likely to drive positive results. It’s a great way to showcase the authenticity and humanity of your team.

Step 3: Making it Easy to Find

A surprisingly large amount of the time, companies shove their contact information into the footer of their website, forcing customers to spend forever looking for them. However, your audience might not want to spend an age searching for your details if they’re in a hurry to get answers.

Stowing a contact page in a footer is also a problem for those visiting your website via mobile, as they might not be able to see all your footer details and links as well.

A Contact Us page doesn’t have to be a massive part of your website navigation if you don’t want it to be. However, it should be one of the first things your audience can see. Putting the information on the header of your website, or even sticking it to the top of the page as your users scroll is very helpful.

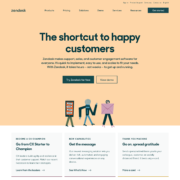
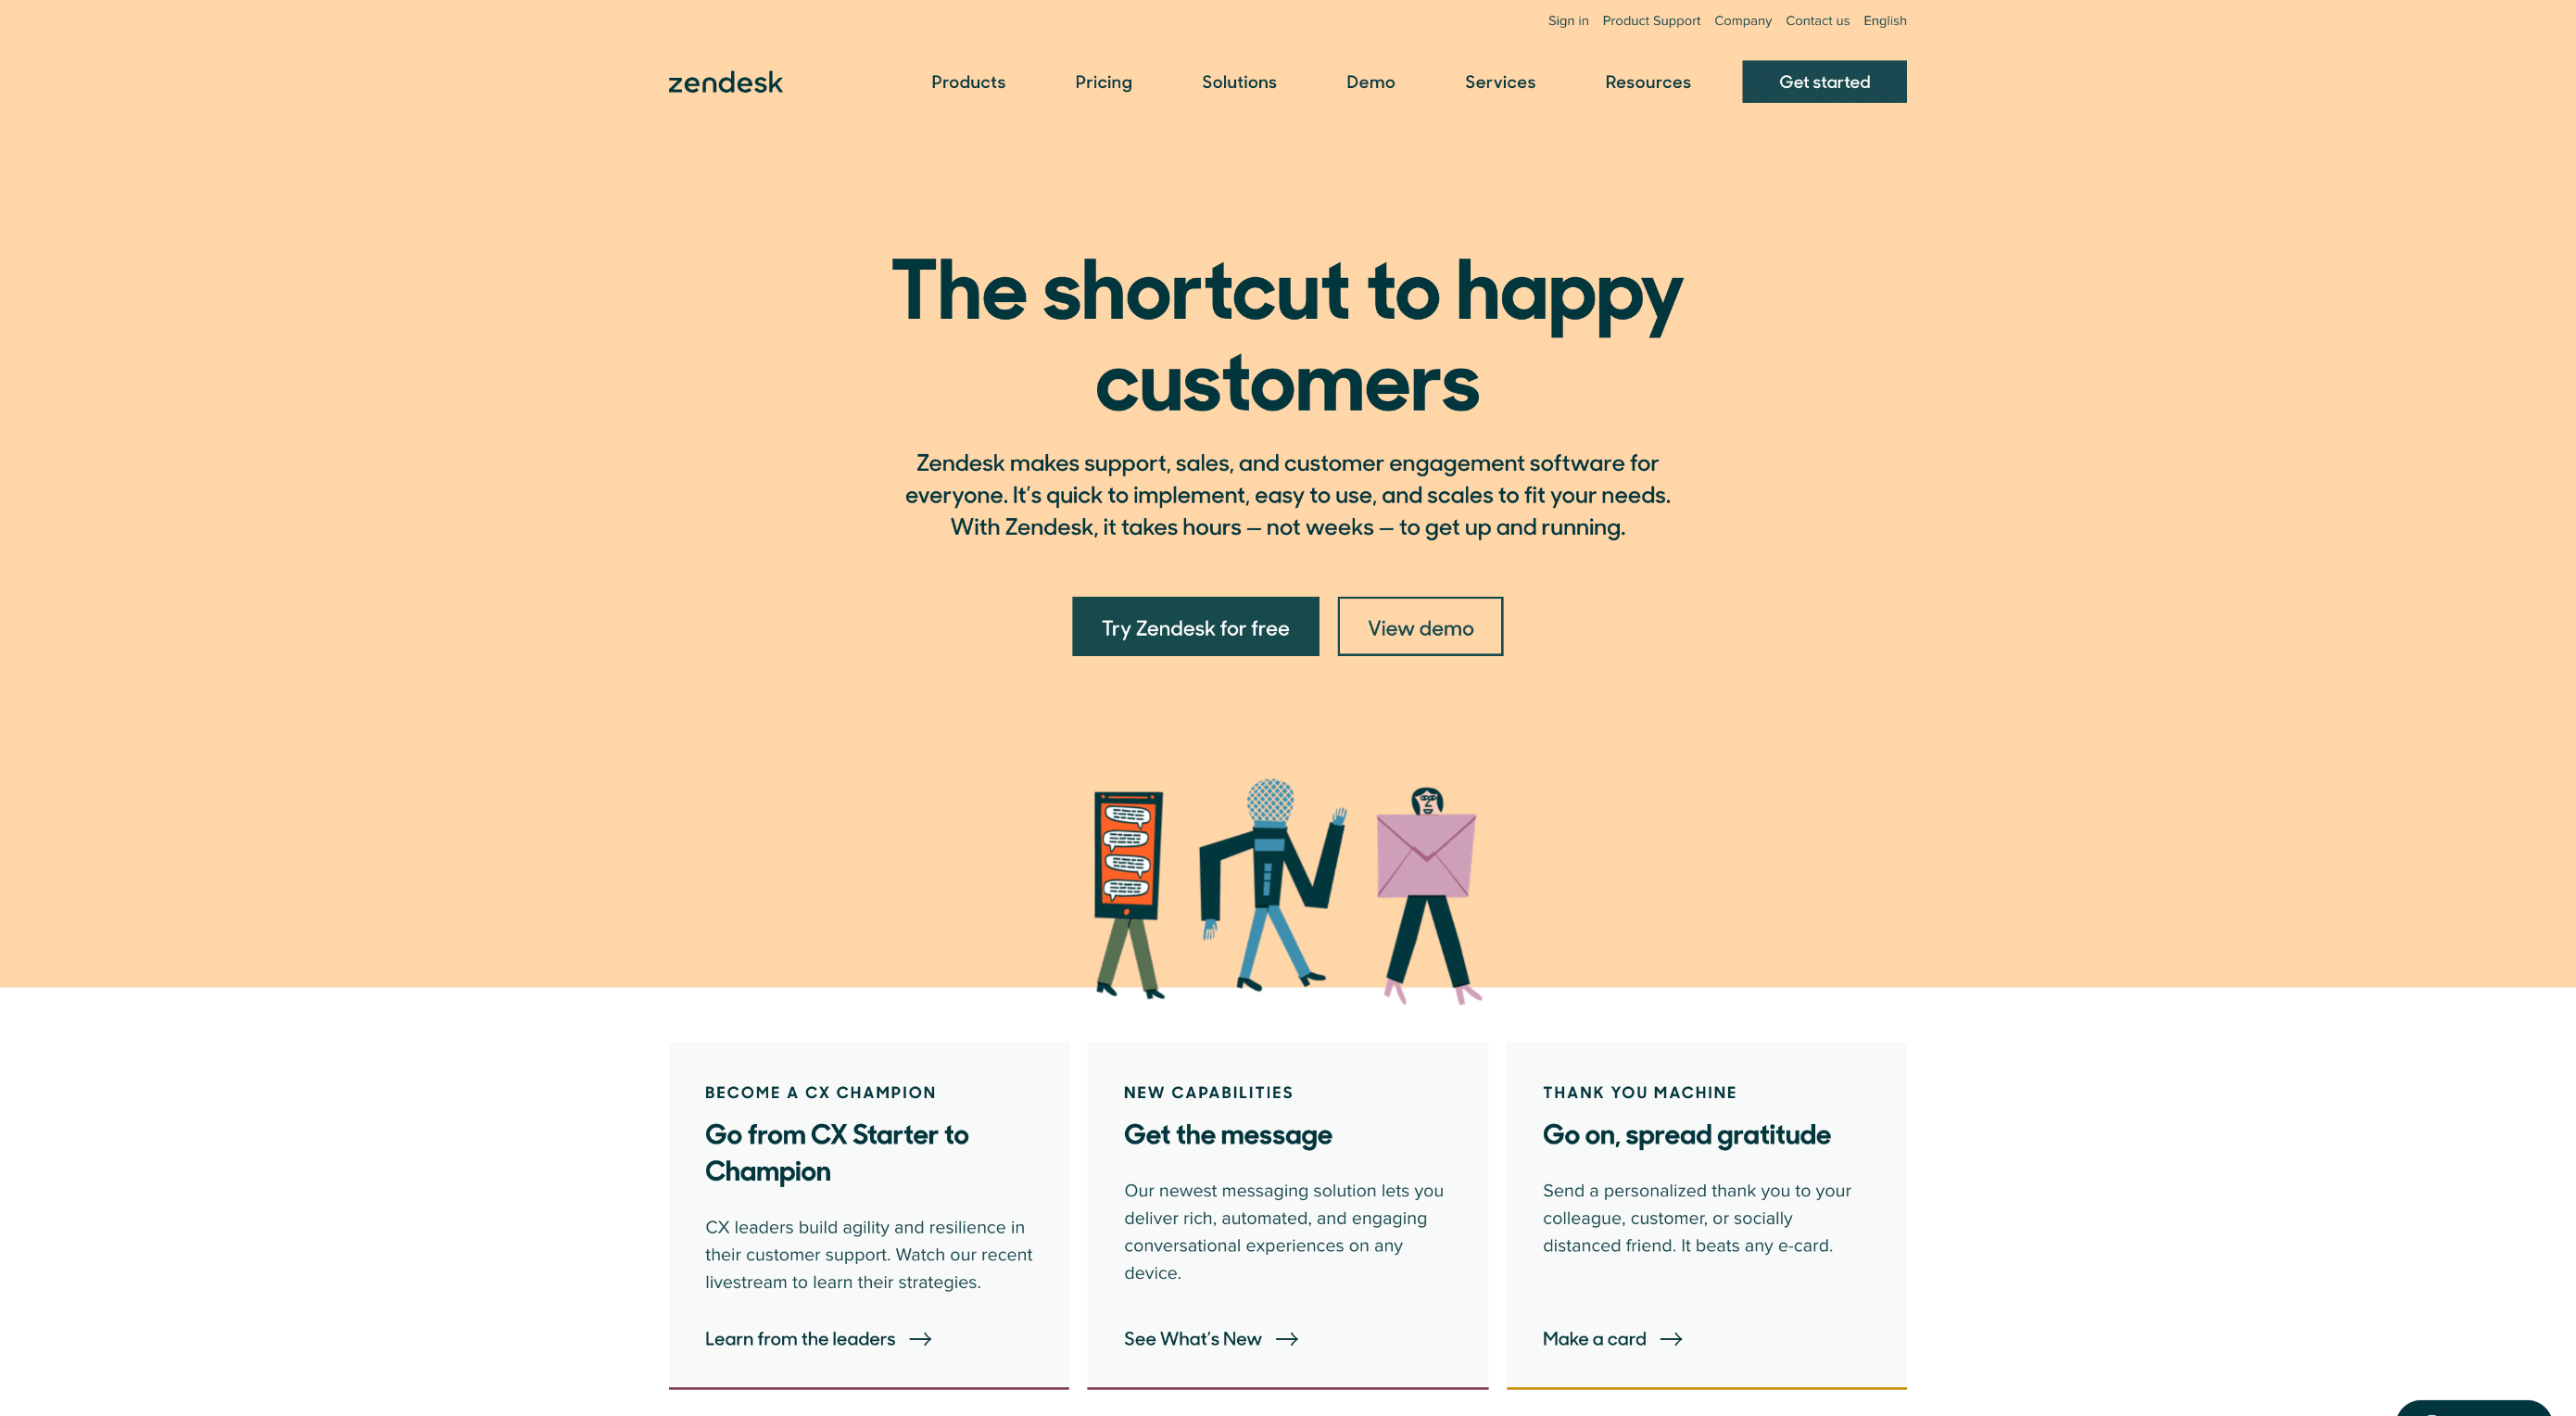
Zendesk makes it easy for customers to get in touch in multiple ways. First, the Contact section of the website is clear at the top of the page. Secondly, if you start scrolling through the Zendesk website, a “Get Help” button pops up, so you don’t have to scroll back to find assistance:
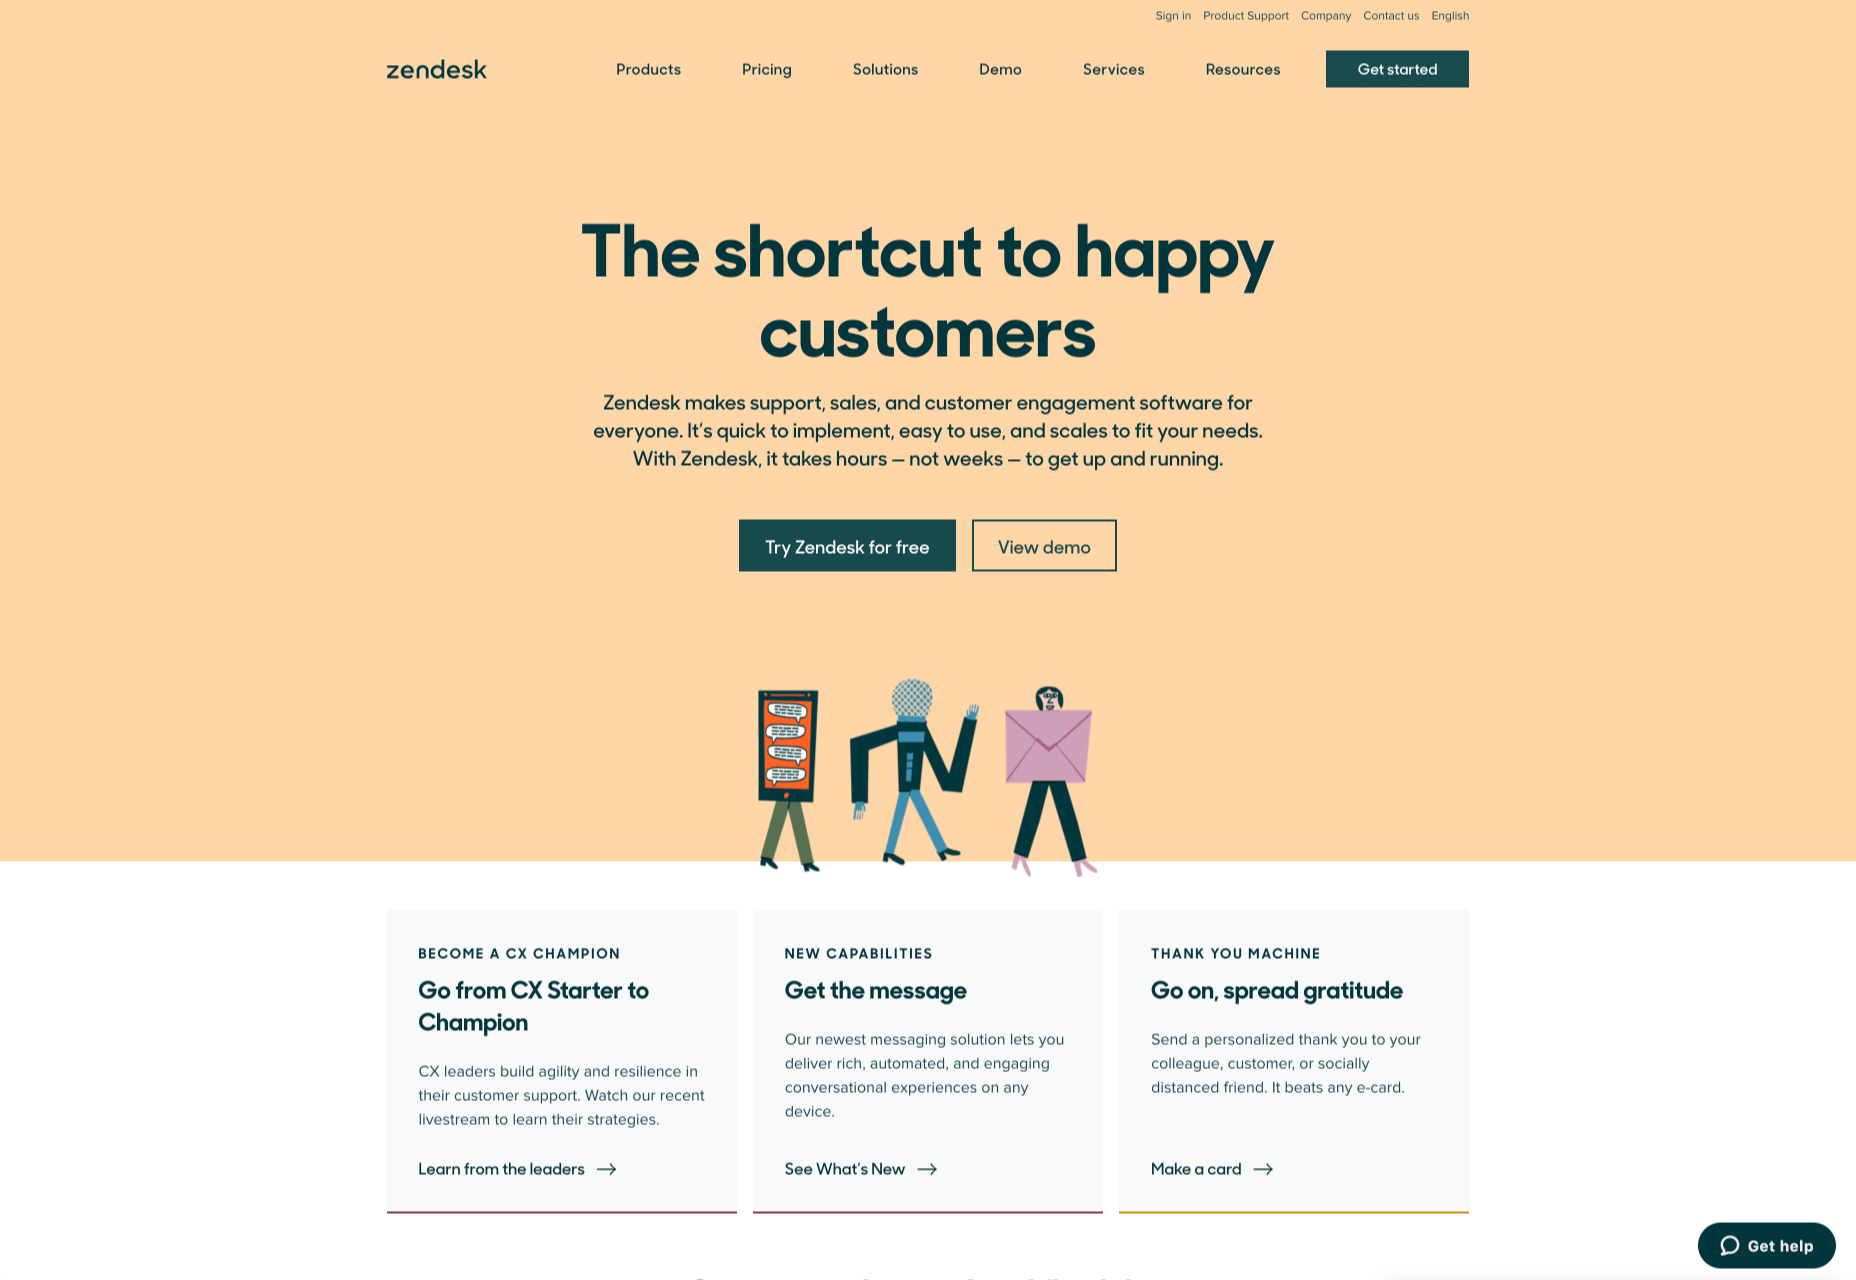
Remember, aside from making sure that your contact page appears in the right part of your website, it’s also worth ensuring that it’s easy to understand. Don’t use unusual terms like “Chat”, or “Chill with us”. Stick to tried-and-true options like Help, Contact, or Support.

Step 4: Making the Experience Relevant

There’s a reason why it’s practically impossible to find a one-size-fits-all contact page.

It’s because different customers need different things from your brand.

Some customers will be looking for the answer to a question; others will want to discuss something with your sales team. That’s why many companies are using adaptive contact pages that can change to suit the situation.

For instance, you may start by asking customers what they need help with. Zapier takes this approach with its Contact page:

By asking the client what they need straight away, Zapier can make sure that the visitor finds the right information, and the right number or email address for the appropriate agent. You can even scroll down the help page and look for something in the available help centre, using the search bar. Or you can click on View our experts to hire a Zapier pro.

Creating a dynamic and customized experience like this does a few things. First, it ensures that the customer will reach the right person to help them first-time around. This reduces the number of inappropriate calls your employees have to deal with, and the number of transfers.

Secondly, you deliver a better experience overall for your client, because they don’t have to repeat their issue to multiple people or start a massive email thread. They get the support they need immediately.

Dynamic contact pages can even save you some money and time. If clients decide to solve an issue themselves, using your resources, that’s great for your busy agents.

Step 5: Direct People to the Right Place

The central focus of your contact us page needs to be the available contact options. Centralizing the contact options on a page is an excellent way to make sure that they get the right amount of attention. Centralizing also means that your customers can spend less time searching for the contact details that they need, which is great for usability.

The Melonfree.com website uses a contact us form that’s centralized to immediately pull attention to the customer’s options for getting help.
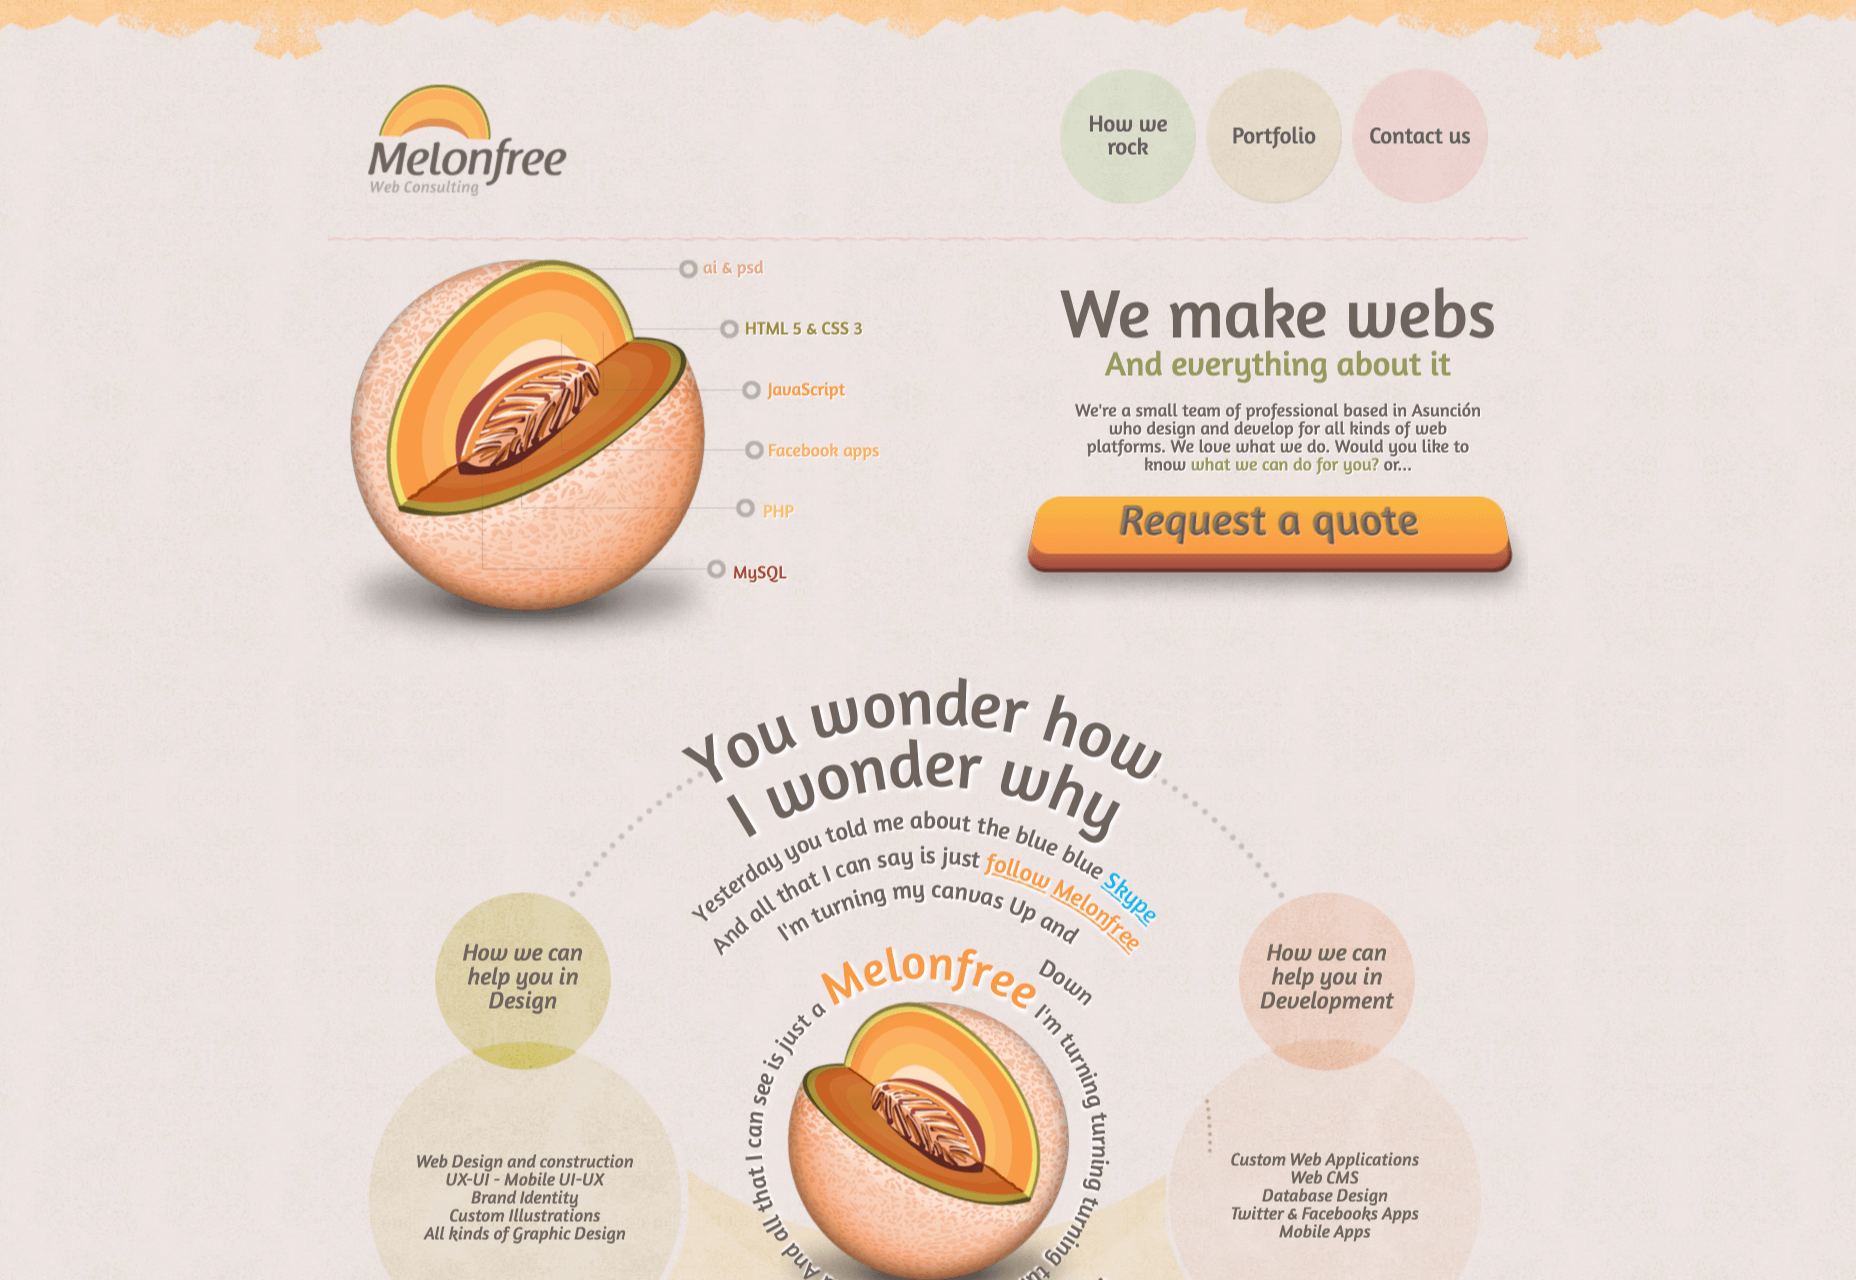
Centralization isn’t the only way of using design principles to guide visitors on a contact page. According to Ray Hyman and Edmund Hick, increasing the number of choices on a page often increases the time it takes for people to make a decision.

When it comes to connecting with a brand, the right option for each customer will depend on the person and the situation they’re trying to overcome. For instance, a customer that needs to reset their password will probably be able to get the solution they need from an FAQ page.

On the other hand, someone who needs help using a new feature might need the guidance of a professional. To help guide customers to the right solution, Basecamp gives customers a variety of steps to follow to get the right solution fast.
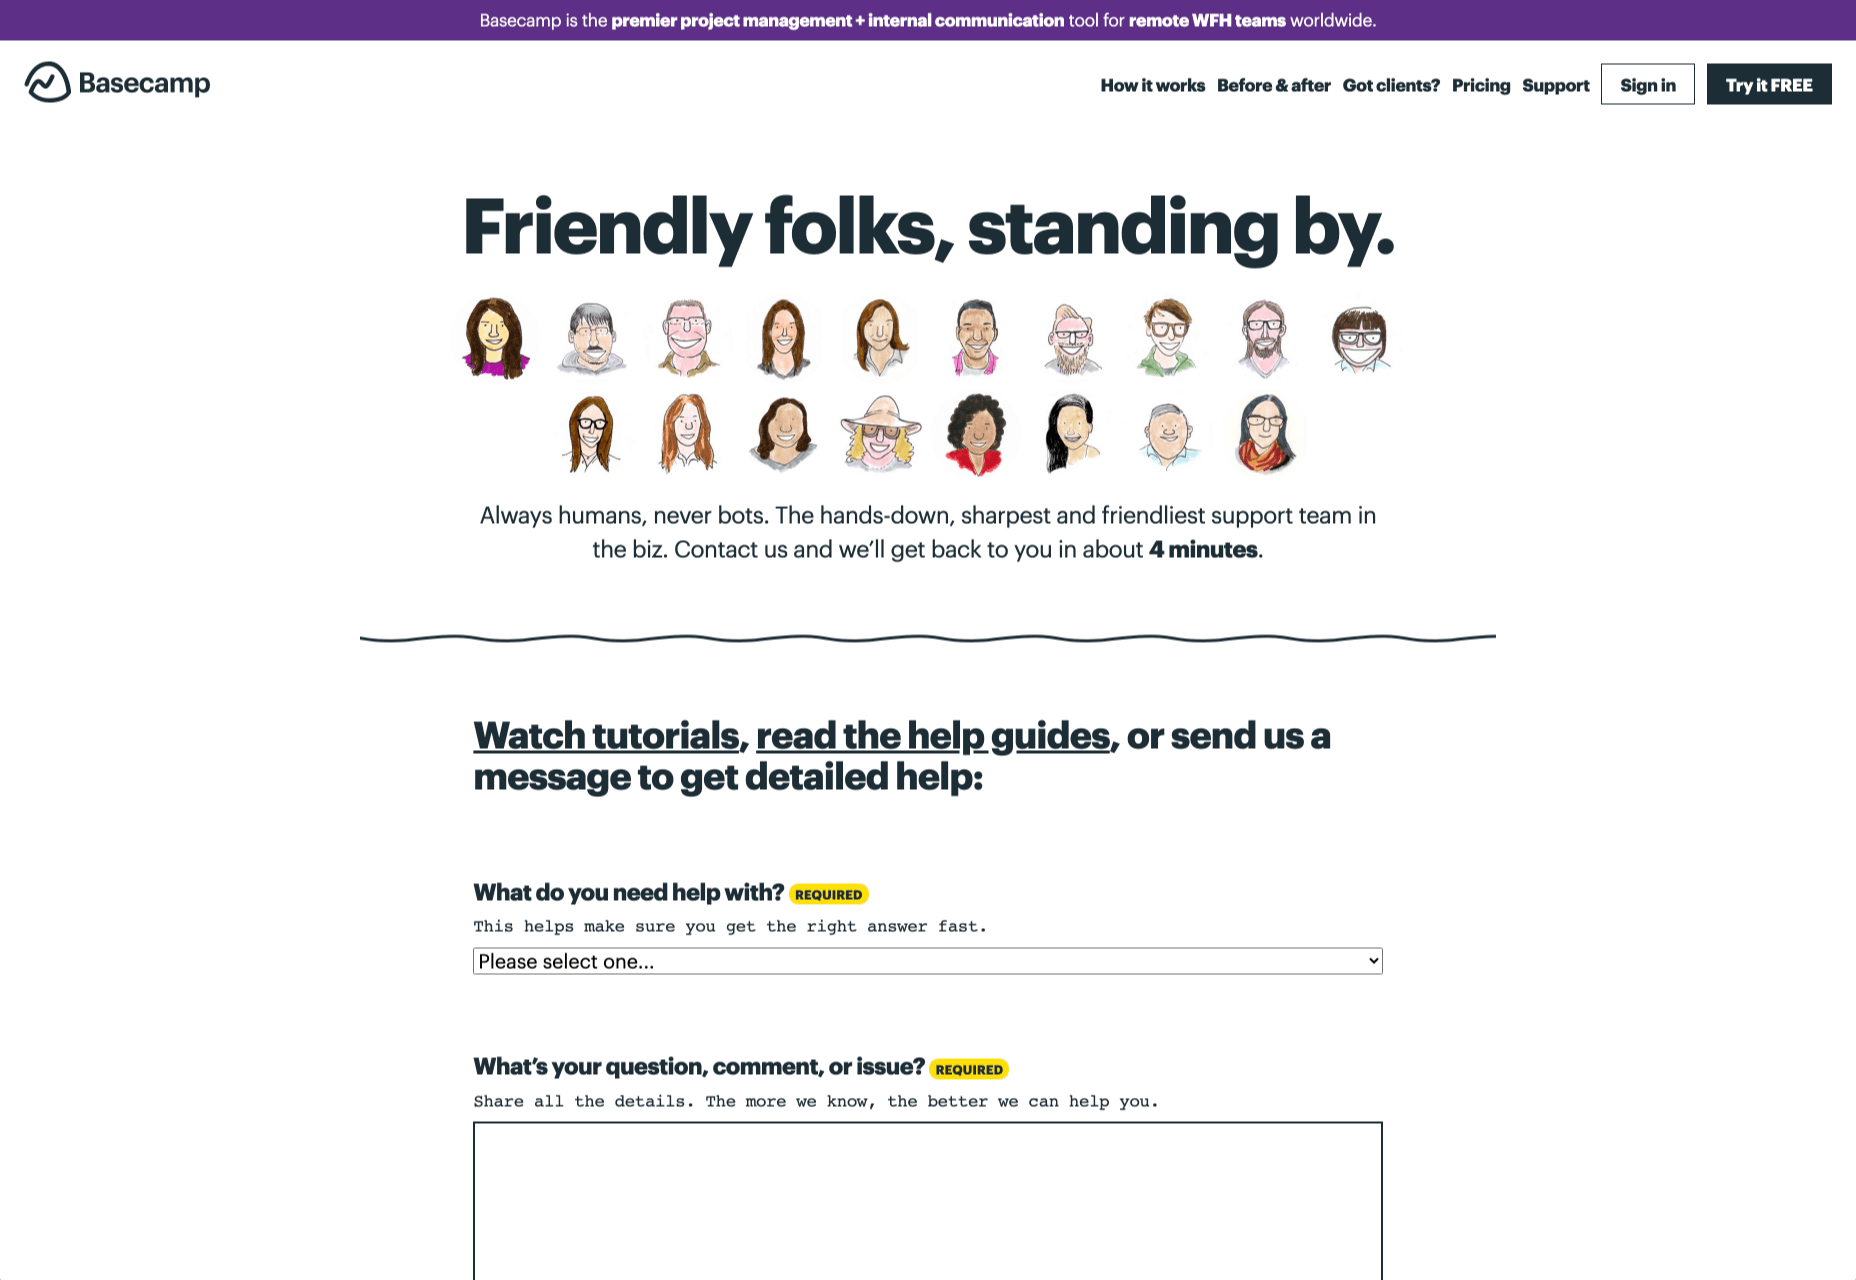
The main purpose of the contact page is to help customers get the right answer with an informative form. However, there are unobtrusive alternative options available too. If all you’re looking for is a way to help yourself fix a problem, you can click on the help guides link before you ever scroll down to the form.

Step 6: Support the Contact Team Too

The best contact us pages aren’t just a great way to improve customer experience. Well-designed solutions also help the customer service team to save time and stay productive.

One of the primary metrics that companies consider when evaluating the success of a service team, is the number of replies required before an issue is resolved. However, if the initial question from a customer doesn’t contain enough information, this number often increases.

Using the design of the contact form to access the right information helps with:

  • Automatically routing people to the right team member: Companies can set up segmentation rules that automatically send certain emails to different employees based on keywords. You might have questions that go to the sales team, and separate queries that you direct straight to the customer service team.
  • Show appropriate support options and FAQs: Remember to give the audience a chance to help themselves before they reach out for extra support. Links to an FAQ page or self-service options can really reduce the pressure on a team. Some companies even add automated chatbots to the mix to help with self-service.
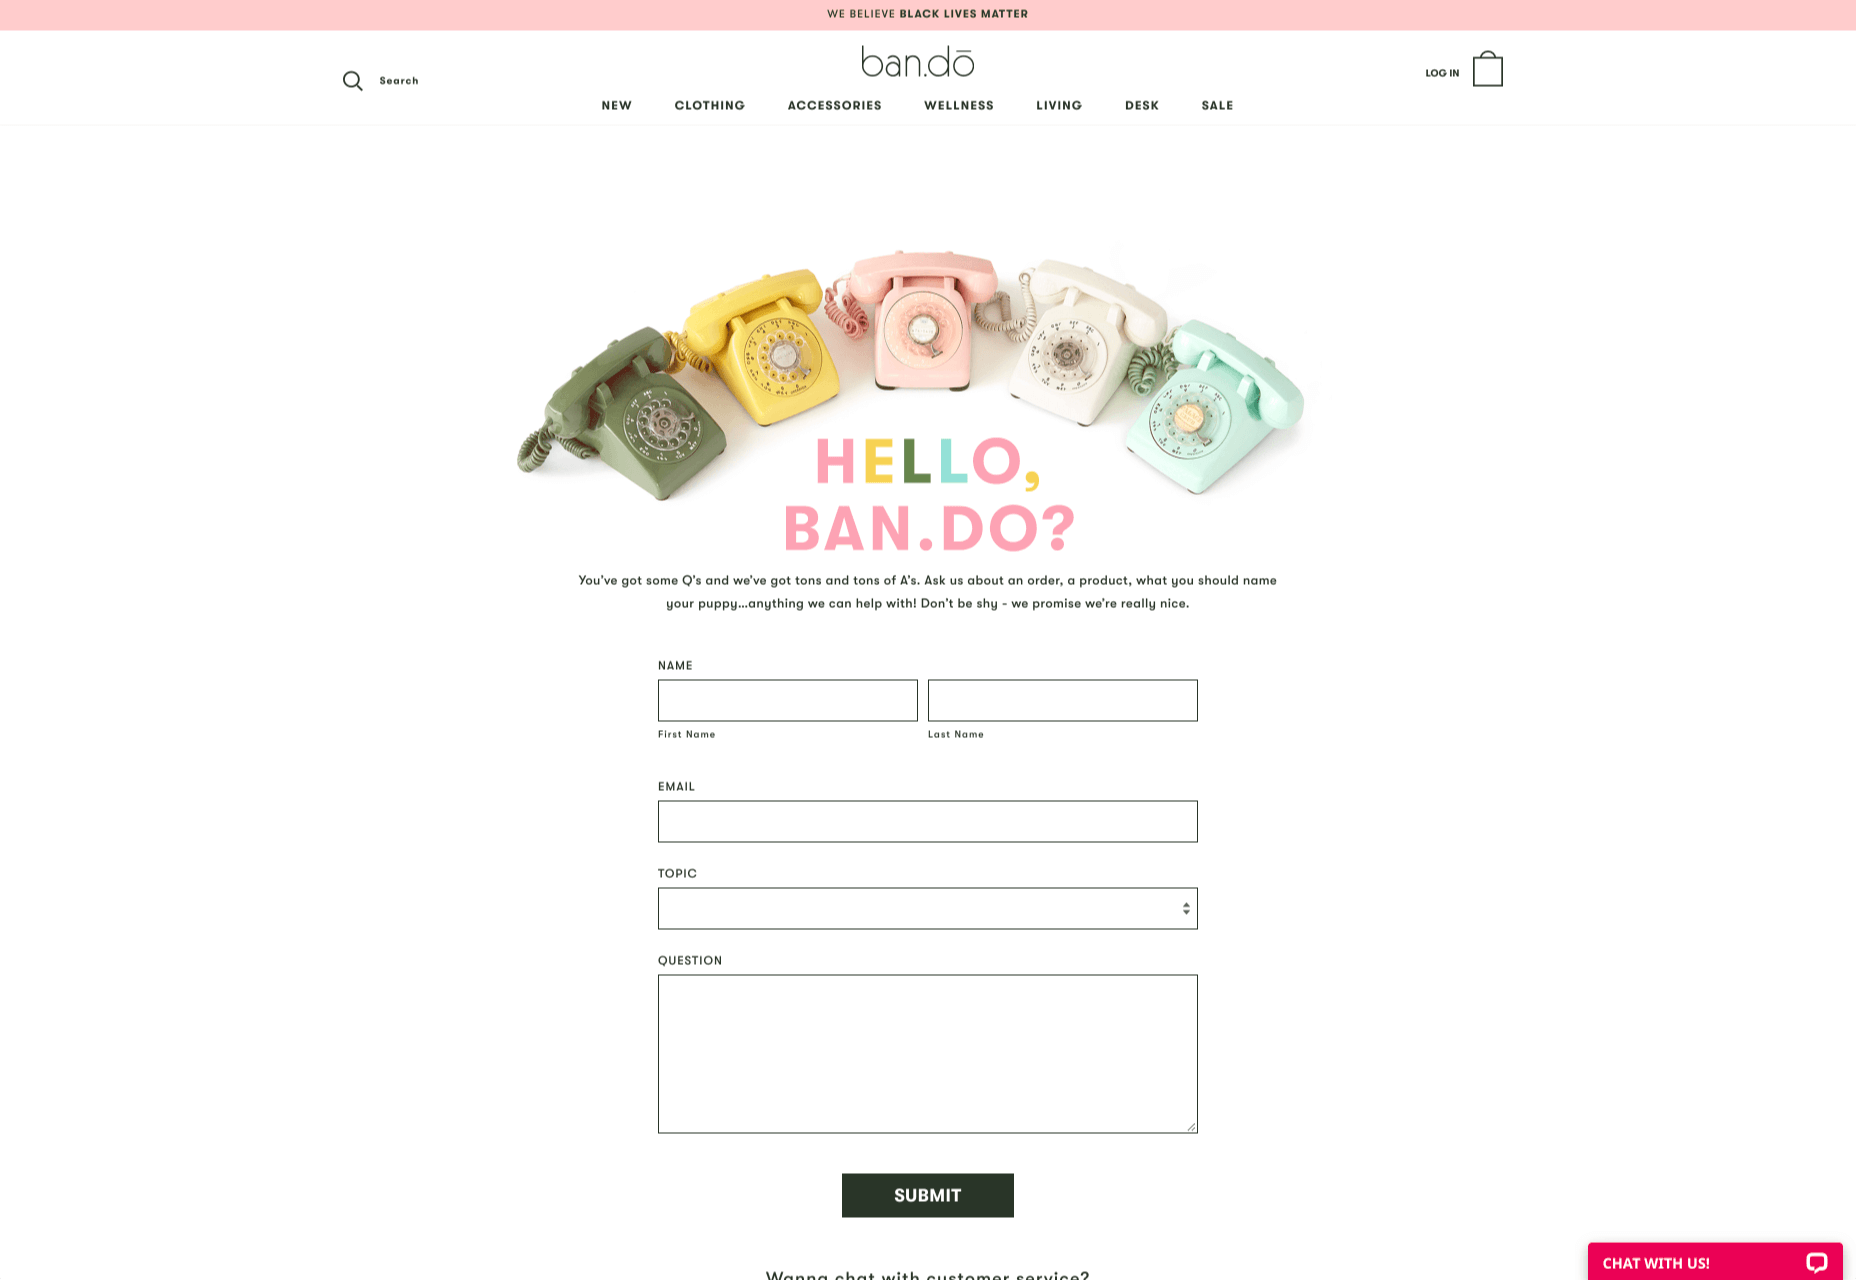
  • Prompt for extra context: Although not every customer will take advantage of an opportunity to add extra information to a form, some will. Adding a box to your contact form for “anything we need to know?” is a great way to generate more information. Ban.do includes a simple “question” box where customers can add as much detail as they like. An option to add screen shots or documents might be a nice touch too.
Building Your Own Contact Us Page

Every customer has their own specific set of needs. The right contact page for another business might not be the right one for you. That’s why it’s so important to take some time getting to know your customers and speaking to your support team.

When you’re planning your contact page, it helps to ask yourself some basic questions about what you want to achieve. For instance:

  • What kind of channels will our customers want to use to connect with us? Look at things like social media messaging, email, or phone calls. If you’ve got a relatively tech-savvy audience, then they might want to use things like instant messaging with chat bots too.
  • How can we direct clients to the appropriate channels in as little time as possible? Having a system in place to automatically route your customers to the right agent will reduce the time to resolution for your customers. The faster you solve problems, the better your reputation becomes.
  • What can we do to set customer expectations and build confidence before they speak to us? Designing a professional-looking contact page will increase customer confidence, while an FAQ section shows that you’re ready to answer common questions.
  • How can we showcase a unique brand personality without making the page complicated? Everything from using distinct brand colors on a contact page, to adding images and illustrations reminds customers that they’re in the right place.
  • What can we do to reduce the friction points in a customer’s path to contact? Avoid adding too many input options to a contact form and ensure that it’s easy to reach out when your clients have a problem.

Understanding exactly what your audience needs from you, and what they’re looking for when they come to your team for help reduces the effort involved for your client when they reach out for help. Remember, today’s digitally-savvy customers expect their interactions with companies to be as streamlined and simple as possible.

Make the Most of Your Contact Page

Contact pages are frequently an afterthought in the website design process. However, they’re one of the most valuable tools your company has. With a good contact page, you ensure that your customers can always reach you when they have problems. What’s more, you boost your chances of people wanting to reach out to the sales team too!

Good luck creating a contact page that encourages engagement from your target audience. Don’t forget to track your results from each design, and A/B test for optimization.

Source


Source de l’article sur Webdesignerdepot

And so we arrive to the third and -for now- last entry in our adventure about connecting a sensor at home and sending the measurements to the Onesait Platform.

In the first entry, we saw how to choose the working environment and set up both the ontology and the API service to ingest the data. In the second part, I told you how to hook the cables between the boards, how to configure the Arduino IDE to work, how to write the code that collects and sends the measurements to the Platform, and how to see that it was indeed received correctly.

Source de l’article sur DZONE

In this article, we will set up an HTTP connector and will work with the listener configurations to build a simple HTTP service to return a static message as the response. The Anypoint studio version used will be version 7.6 and the mule run time version will be 4.3 for this demonstration and better to use the same version of Anypoint studio and mule run time if in case you are planning to try out to build the project.

Setting up a simple HTTP service:

Source de l’article sur DZONE

Artificial intelligence. Just hearing the phrase has been a trigger for many in the technology world since that creepy Haley Joel Osment film circa 2001. But more recently, artificial intelligence and machine learning strike fear into the hearts of skilled workers for an entirely different reason: job security, or lack thereof.

Smart-home devices, streaming services, self-checkouts, even Google searches are ways that artificial intelligence has seeped into everyday life, exemplifying the abilities of computers and machines to master both simple and complex tasks. In some instances, these technological advancements make our lives easier, but for some people, their proliferation has meant job loss and skill replacement. There’s no wonder that when artificial intelligence starts being mentioned along with web design and site creation, the spidey senses of designers all over the world start tingling.

designers think outside the box, something that AI just can’t do

But let’s get real about what AI and automation really mean for designers for a second. Talented designers with busy schedules should view these advancements as virtual assistants. For some small businesses on a limited budget, the websites that artificial intelligence can pump out might be fine…for a while. However, as businesses grow, change, require updating and customization to adapt to their customer base, the expertise of creative and talented designers will always be needed. Even the best AI that we see today is limited by evaluating, replicating, and revising what already exists. It may be able to mix 1,000 different color schemes into 10 million potential combinations, but great designers think outside the box, something that AI just can’t do.

In fact, rather than being scared of automation, designers ought to embrace automation and artificial intelligence as a way to unleash their creative thinking. Delegate repetitive, straightforward tasks to the right software, and suddenly you have time to bring your best ideas to the table and push the boundaries of your own innovation. 

Where AI has Failed in Design

The ultimate goal of artificial intelligence and automation in design work is a grand vision that has yet to be realised.

Consider the case of The Grid, which began as a crowdfunding campaign in 2014. The “revolutionary” product posed itself as an artificial intelligence solution for building thoughtfully, yet automatically, designed websites in five minutes. Research “Reviews of the Grid” in any search engine and you’ll be met with scathing criticism with only some small praise sprinkled in. Most of the initial users cite underwhelming results, the feeling of being duped by the Grid’s marketing tactics, nonsensical placement of text, and ultimately, the Grid being a complete waste of money for the resulting product. Even at the low cost of $100, compared to hiring a talented designer, most users felt their investment was wasted.

For the AI capabilities that exist now, most small business owners, or those looking to put together a simple website, are better off using drag and drop site builders (Wix, Squarespace, Weebly, etc) that have been around for ages. Even so, there are plenty of businesses still willing to hire designers to take this simple task off their plate due to a lack of technical expertise or lack of time. And let’s be honest, are there even enough talented (keyword here!) designers out there to keep up with the millions of websites created every year, without each one working themselves to death? 

Where Automation Shines for Designers

Fortunately for good designers, it appears for now that the days of artificial intelligence completely taking over their jobs is a fantasy. However, what AI and automation do offer designers is a solid starting point for success, eliminating much of the lower-level grunt work that most designers would rather skip anyway.

Even well-received AI website builders like Firedrop still require a basic eye for design and specialised knowledge to produce truly unique, high-converting, and user-friendly websites. Tools and practices that designers should adopt are the artificial intelligence and automation resources that will help them do their jobs better, faster, and leave them with more time to focus on project elements that AI cannot accomplish on its own.

Bridging the Gap Between Designers and Developers

Well-established brands are likely to already have design systems in place that guide the creation of new elements across their digital profiles whether on social media, various mobile apps, or different sections of a website. But even in large corporations — excepting those who have perfected the process — there’s often a breakdown between a designer’s vision and resulting product from the developers. It stems from the basic difference in how they each approach their work and the limitations of the systems they use.

While component libraries — or even full design systems for that matter — won’t reconcile every question, they provide both developers and designers a source of truth to work from that both parties can understand. Design collaboration tools like Invision and Visme, specifically, keep designers and developers on the same page with automated version saving and code-friendly workflows.  

Understanding the Consumer

I don’t suggest using artificial intelligence to produce content for your site

Digging into and understanding the behaviours and habits of site users is a relatively new component of site design, but offers invaluable insights. Tools like HotJar, Mouseflow, or Smartlook make it simple to see holes or leaks in your conversion funnels, detect which page elements users are interacting with, and which they’re not interested in to refine the look and feel of a page for maximum conversions. Even though these tools provide the data, it still takes a keen eye and understanding of design to implement the right changes to improve site performance.

Site content is another way that artificial intelligence has the potential to improve our understanding of customer behaviour and improve site performance for individual users. I don’t suggest using artificial intelligence to produce content for your site, no matter how much the results have improved. However, static landing pages or a single set of further reading recommendations are unlikely to appeal to the majority of site visitors. Artificial intelligence tools like CliClap and Personyze instantly collect and analyse consumer data to provide dynamic, personalised experiences that drive more leads and encourage conversions. Creative designers will also learn from this data to improve customer experience with other pages or elements throughout the site.

Removing Distracting, Time-Sucking Administrative Tasks

Because “artificial intelligence” has become a term with such negative connotations, we often overlook the simple way that AI actually makes our work lives better and easier. Machine learning in email filtering is a great example of this. Consider a simple interface like a Gmail inbox. We have the option to mark certain senders as spam or as important, and our inbox learns that type of communication is and isn’t useful to the user. Pandora, Spotify, Apple Music, and more all take cues from the user behaviour of liking a certain song, artists, or genre of music to build customised playlists. There are a myriad of ways that artificial intelligence and its branches of disciplines merge with our everyday lives. 

Some of the most useful automations for business, and especially for designers, are related to the administrative tasks that frequently take time away or distract from more pressing projects. A perfect example of automation that can relieve stress and cut down on mindless work is an email autoresponder. I’ve always found that having time blocked off in my calendar to tackle complex or important projects helps me to focus on the task at hand and be more efficient. In order to more effectively block out my time, closing my email and setting an autoresponder to reply to all incoming emails serves two purposes: 

  1. Lets those trying to get in touch with me know that I only check my email at certain times of the day and that my response may not be immediate — tempering their expectations of when they might hear from me.
  2. Relieves my personal stress of being tethered to my inbox, splitting my focus, and also saves the time of having to initially respond to each email individually. 

This is just one simple way to use automation in your email, although there are many others to explore.

While Zapier isn’t the only workflow automation service on the market, it’s probably the most well known. Workflow automation reduces time spent on mind-numbing, repetitive tasks and helps designers connect apps that might not natively work together. Do you keep a task list in Todoist? Set up a Zap, then create a task in Todoist anytime someone mentions you on Asana or assigns you a task in Trello.

This is especially helpful for freelance designers who work with multiple clients across various project management platforms. The potential for automation to relieve unnecessary mental overhead for designers is nearly limitless.

Don’t be Afraid of AI, Embrace It

The bottom line of this brief overview of artificial intelligence and automation in design is that this emerging technology isn’t something designers should be scared of. In fact, it’s something to welcome with open arms because ultimately it can make our jobs, and our lives, better. Leave the monotonous tasks of collecting and analysing huge amounts of data or administrative minutiae to the machines; they can handle it.

Save the interesting, creative, abstract work for the talented designers who can turn AI recommendations into unique and intuitive digital experiences. Making the relationship between artificial intelligence and design symbiotic will yield the best results for every entity involved: the business, the AI, and yes, even the designer.


Featured image via Unsplash.

Source


Source de l’article sur Webdesignerdepot

It’s no secret that having a custom domain name is an essential piece of any company’s branding strategy. While there are a myriad of hosting plans available that offer domains like your company.webhost.com, making the shift from one of those to simply yourcompany.com is an important step.

However, your domain branding strategy need not end there. Domain mapping offers an opportunity for web developers and online business owners the ability to improve their marketing campaigns, protect their brands from competitors, cut down on costs, and develop a more efficient workflow.

What is Domain Mapping?

Domain mapping refers to how visitors to your website are directed to different domains and subdomains and what URLs will be displayed in the visitors’ browsers.

When you first set up your online business, one of the very first things that you do is register a domain name for your company website. But depending on the business, it could be wiser to actually register multiple domain names at once. This is because you will want to lease the primary domain name you plan on using in addition to all related TLDs. This way, cybersquatters will not be able to hold your domain name hostage, especially once you have grown into a more established brand.

For example, if you register the name yourcompany.com, you might also want to register yourcompany.net and yourcompany.org. Then you might set up a URL redirect so that visitors to the latter two sites will be redirected to yourcompany.com. However, with a domain redirect, visitors to yourcompany.net and yourcompany.org will be redirected to yourcompany.com, meaning the URL in their browser will appear as yourcompany.com no matter what they typed.

With domain mapping, this isn’t the case. A visitor to yourcompany.net will still see that URL in their browser even if the content is actually being hosted on yourcompany.com.

Benefits of Domain Mapping

Although domain mapping may seem a bit esoteric and complex at first, it serves several purposes and offers many benefits:

1. Make Web Addresses Easier to Remember

Imagine that your restaurant chain, Larry’s Lunches, just opened a new chain on 116th Street in New York City. Your first instinct may be to direct customers to larryslunches.com/116thstnyc, but that domain is a bit long and hard to remember. Instead, you might want to register the domain larrys116th.com for customers for that specific store.

With domain mapping, you can serve up the content from your main domain, larryslunches.com, while still having your visitors see larrys116th.com. This makes it easier to brand your sites without having to manage several different sites.

2. Boost Your Web Development Career

If you are a web developer yourself but are not admittedly well-acquainted with domain mapping already, you would do well to change that.

One of the easiest ways would be to look at online web development programs that one can take to read through documentation to get caught up to speed on how domain mapping can help their efforts and how to implement it. These kinds of programs can be more comprehensive than university courses and offer an impressive 88% job success rate for those who successfully complete the programs.

3. Shield Your Brand from Competitors

Remember, it’s a good idea to purchase several different related domains in anticipation of competitors snatching them up from you. Choosing the right domain names is essential to protecting your brand.

For example, Larry’s Lunches might want to snag larrysnyclunches.com and larrysfamouslunches.com as well. However, simply leaving those domains parked can be a bit of a waste, and managing multiple domains can be a pain in and of itself.

But with domain mapping, you can manage those domains just as easily as if they were your primary site, so you no longer need to leave them empty.

4. Save Time and Lower Development Expenses

Development isn’t cheap, and time is money. While the maintenance costs for a website are already high enough, adding in separate domains can sometimes break the bank due to the increased complexity of managing so many different moving pieces.

Domain mapping can lower expenses and save time by keeping everything tidy and in one place. By managing everything from a single WordPress installation, for example, you can push updates to all your subdomains at once, saving you from the tedium of going through each domain and making the same updates.

5. Manage Client Sites from One Place

If you’re a freelance developer or run an agency, using domain mapping for some of your clients’ sites can save you time as well. For example, if several clients want blogs, and you use the same infrastructure for them, you can easily push updates and changes to all of them at the same time. In short, domain mapping can make maintaining sites much easier and quicker.

How to Implement Domain Mapping

If you’re sold on the benefits of domain mapping, here’s a quick primer on the steps you’ll need to take to get started:

  1. Choose a domain registrar: The ideal registrar you choose should come with a number of important features including adequate hosting for keeping your website visitor friendly, SSL certification to ensure security, 24/7 customer support, comprehensive packages that make it easy to operate your online business.
  2. Register the domains you’re interested in: These can either be domain misspells (otherwise known as typosquatting), like youcompany.com, yourcmpany.com, etc, or related domains like yournewproduct.com, yournewlocation.com, etc. Whatever you decide to go with, you’ll need to have it registered before you can get started.
  3. Install WordPress Multisite: WordPress is one of the easiest ways to develop websites, and that holds true for domain mapped sites as well. Plus, considering WordPress sites account for over a third of the entire internet, you can’t go wrong with the famed CMS. All you need to do is install WordPress and, once that’s installed, open wp-config.php and add define(‘WP_ALLOW_MULTISITE’, true) above the /*.
  4. Configure your DNS settings: Next, you’ll need to point all your name servers to your hosting account. These changes can take up to 72 hours to go into effect.
  5. Add domains to your hosting plan: From your hosting platform, you’ll need to link your custom domains. You can usually do this from your cPanel.
  6. Map subsites to your custom domains: Once you have your domains set up, you’ll need to link them through WordPress. To do so, simply login and navigate to Sites -> Add New. After you assign them a subdomain or subdirectory name, you can click Edit and add your custom domain. Then just hit Save Changes, and you’re good to go.

Take note that domain mapping is not necessary for transferring a domain name. When you map a domain, you’re simply telling your domain where it can find your website on the internet through having your name servers updated. When you change your name, it only affects where the domain has been resolved.

The Bottom Line

While domain mapping isn’t necessary for all websites, it can still be a major timesaver. By utilizing it properly, you can greatly improve the standing of your online business by saving time and money, making website management easier, and improving the branding of your sites.


Featured image via Unsplash.

Source


Source de l’article sur Webdesignerdepot