Articles

Paris, France & Walldorf, Allemagne, le 16 févr. 2022SAP SE (NYSE : SAP) et le cabinet de conseil en management et technologie BearingPoint ont annoncé unir leurs forces dans le domaine des solutions liées à l’empreinte carbone et environnementale. Les entreprises collaboreront afin de faire progresser la conception et le développement d’une solution de pointe aidant les clients à atteindre l’objectif de neutralité carbone.

Mesurer, contrôler et piloter l’empreinte carbone est un élément clé pour atteindre l’objectif de neutralité carbone et fait partie du programme d’action climatique promu par SAP. Les entreprises sont soumises à une pression croissante pour déterminer leur empreinte carbone, non seulement au niveau de l’entreprise, mais également au niveau des produits. Cependant, l’acquisition, la consolidation et la cartographie des données sont des défis auxquels de nombreuses entreprises sont confrontées. Avec le récent lancement de SAP® Cloud for Sustainable Enterprises les solutions SAP pour le développement durable et la longue expérience de BearingPoint en matière de calcul des émissions sur le marché, les entreprises sont bien équipées pour développer des solutions innovantes permettant de répondre aux préoccupations de leurs clients en matière d’empreinte environnementale sur l’ensemble de leur chaîne de valeur.

« Le partenariat de codéveloppement entre SAP et BearingPoint permettra de réunir deux propositions de valeur fortes. BearingPoint a une longue expérience dans l’identification des potentiels de réduction des émissions de gaz à effet de serre et l’atteinte des objectifs de développement durable des clients. SAP apporte des capacités d’innovation, un large éventail de systèmes et un accès aux clients. Ensemble, en tant que partenaires, nous repousserons les limites pour faire avancer l’économie sur la voie de la neutralité carbone », a déclaré Gunther Rothermel, SVP, responsable du développement durable de SAP S/4HANA, SAP.


Bilan carbone pour l’ensemble de la chaîne de valeur : scope 1, 2 et 3

Si de nombreuses entreprises ont déjà évalué leurs émissions de scope 1 et 2, il est essentiel d’évaluer l’ensemble de la chaîne de valeur en introduisant les émissions de scope 3. Pour ce faire, les réseaux environnementaux doivent permettre l’échange de données avec des partenaires tels que les fournisseurs, les clients, les auditeurs et les pouvoirs publics, même s’ils utilisent des systèmes informatiques différents. S’appuyant sur le savoir-faire approfondi de BearingPoint en matière de calculs et d’algorithmes relatifs à l’empreinte des produits et des entreprises, la solution SAP Product Footprint Management prend en charge la collecte et le calcul des données permettant la réalisation d’un bilan carbone et environnemental de bout en bout. La solution SAP est entièrement intégrée à SAP® S/4HANA et à l’architecture d’entreprise intelligente, mais se connecte également à d’autres sources de données. Cela lui permet d’effectuer des évaluations automatisées des empreintes à travers la chaîne de valeur, y compris dans des paysages de systèmes hétérogènes.

« Avec SAP, nous allons codévelopper – en utilisant notre logiciel propriétaire – et fournir une solution unique sur le marché permettant de mesurer et d’optimiser l’impact climatique des produits tout au long de leur cycle de vie. SAP Product Footprint Management dispose de fonctionnalités sophistiquées permettant de déterminer l’empreinte carbone d’un seul produit. Notre expérience industrielle éprouvée depuis plus de 10 ans dans le calcul et l’optimisation de l’empreinte « CO2 » des produits et des entreprises permettra à nos clients communs d’atteindre leurs objectifs de dé-carbonisation. Chez BearingPoint, nous sommes convaincus qu’avec les solutions innovantes de SAP, son organisation commerciale et son expertise du marché, nous pouvons avoir un impact positif sur le climat », a déclaré Donald Wachs, Responsable des Business Services et membre du comité de Direction BearingPoint.

« Le partenariat avec BearingPoint accélère la feuille de route de la solution SAP Product Footprint Management et contribuera à faire de nous un leader du marché des solutions de calcul des empreintes produit aidant nos clients à optimiser la durabilité de leurs produits et services », a déclaré Peter Maier, président de la division Industries et conseil à la clientèle de SAP.


À propos de SAP

La stratégie de SAP est d’aider chaque entreprise à fonctionner comme une entreprise intelligente. En tant que leader du marché des logiciels d’application d’entreprise, nous aidons les entreprises de toutes tailles et de tous secteurs à fonctionner au mieux : les clients de SAP génèrent 87% du commerce mondial. Nos technologies de machine learning, d’Internet des objets (IoT) et d’analyse avancée contribuent à transformer les activités des clients en entreprises intelligentes. SAP permet aux personnes et aux organisations d’avoir une vision approfondie de l’activité et favorise la collaboration, cela les aidant à garder une longueur d’avance sur leurs concurrents. Nous simplifions la technologie pour les entreprises afin qu’elles puissent consommer nos logiciels comme elles l’entendent, sans interruption. Notre suite d’applications et de services de bout en bout permet aux entreprises et aux administrations publiques de 25 secteurs d’activité dans le monde entier de fonctionner de manière rentable, de s’adapter en permanence et de faire la différence. Avec un réseau mondial de clients, de partenaires, d’employés et de leaders d’opinion, SAP aide le monde à mieux fonctionner et améliore la vie des gens.

Pour plus d’informations, visitez www.sap.com.


À propos de BearingPoint

BearingPoint est un cabinet de conseil en management et technologie indépendant aux racines européennes et à la couverture mondiale.

Le cabinet est structuré autour de trois entités.  La première couvre les activités de conseil en mettant clairement l’accent sur les domaines d’expertises clés du cabinet à développer dans le monde entier. La deuxième fournit des solutions technologiques avancées combinant conseil et logiciel, et offre des services gérés à forte valeur ajoutée aux clients. La troisième se concentre sur des investissements innovants ; par exemple dans des solutions logicielles très spécifiques permettant de répondre aux exigences réglementaires ou d’accompagner la transformation numérique. Elle a également pour vocation d’explorer des business models innovants avec les clients et les partenaires, en favorisant la création d’écosystèmes, le financement et le développement de start-ups.

BearingPoint compte parmi ses clients les plus grandes organisations mondiales publiques et privées ; fort d’un réseau international de plus de 10 000 collaborateurs, BearingPoint accompagne ses clients dans plus de 75 pays et les aide à obtenir des résultats mesurables et durables.


Informations complémentaires:

Site Internet: www.bearingpoint.com

LinkedIn: www.linkedin.com/company/bearingpoint

Twitter: @BearingPoint_de


Contact presse Bearing Point

Alexander Bock

Global Manager Communications

Téléphone: +49 89 540338029

E-mail: alexander.bock@bearingpoint.com


Publicis Consultants pour SAP

Chloé Jalaguier : chloe.jalaguier@publicisconsultants.com

Robin Legros : robin.legros@publicisconsultants.com

The post SAP et BearingPoint s’associent sur la voie de la neutralité carbone appeared first on SAP France News.

Source de l’article sur sap.com


WordPress is by far the world’s most popular CMS. Not only does it dominate the CMS market with a 64% market share, but it also powers 39.6% of all websites. It has taken the internet by storm by democratizing the web for all. Now, anyone can build, manage, and host a successful website without needing a college degree or coding expertise.

However, while WordPress is great at managing many technical aspects, it still can’t do everything for you. Built mostly on PHP, there are often concerns regarding how performant WordPress is. And, with performance impacting everything from bounce rates to SEO rankings to conversions, it’s something that should be on your radar too.

If you don’t know it yet, images are one of the main causes of slow-loading websites. In recent years, WordPress has stepped up its efforts to try and help users with image optimization out-of-the-box.

Still, as we’ll show, it’s not a total solution, and there is still plenty you can do to deliver better experiences on your WordPress website through image optimization.

What is WordPress Image Optimization? Why is it Important?

Simply put, image optimization is anything you do to make images load faster on your website pages. Almost all websites that use images can benefit from some form of image optimization, even those using WordPress.

Why?

Well, performance is a hugely significant factor when it comes to the competitiveness of your website today.

Google has also made performance an increasingly important factor when it comes to SEO rankings. In fact, performance is a direct ranking signal that carries significant weight.

Google’s Page Experience Update that went live in 2021 has been the biggest move in that direction yet. Soon, Google might even use visual indicators in SERP results to distinguish high-performing websites from the rest.

In Google’s own words, “These signals measure how users perceive the experience of interacting with a web page and contribute to our ongoing work to ensure people get the most helpful and enjoyable experiences from the web.”

So, Why Should We Target Images For Performance Optimization?

According to Google, images are the largest contributor to page weight. Google has also singled out image optimization specifically as the factor with the most untapped potential for performance optimization.

This problem isn’t going away soon. According to data by the HTTP Archive, there are roughly 967.5 KB bytes of image data on desktop web pages and 866.3 KB of image data on mobile pages. This is an increase of 16.1% and 38.8%, respectively, over the last five years.

Thanks to popular e-commerce tools like Woocommerce, it’s estimated that up to 28% of all online sales happen on WordPress websites.

And don’t forget, images are both a key part of conveying information to the user and integral to the design of your website. If they take significantly longer to load than your text, for example, it will negatively impact the user experience in a variety of ways.

In summary, optimized images help your WordPress website by:

  • Improving user satisfaction.
  • Improving various traffic metrics, like bounce rates, time-on-page, etc.
  • Boosting your SEO rankings.
  • Contributing to higher conversions (and sales).

How Does Image Optimization in WordPress Work?

WordPress is so popular because it’s a CMS (content management system) that allows anyone to build, design, and manage a website without any coding or advanced technical experience. Advanced features can be installed with just a few clicks, thanks to plugins, and you rarely have to touch the code behind your website unless you want to make some unique modifications.

In short, using a CMS like WordPress shields you from many of the day-to-day technicalities of running a website.

WordPress Image Optimization: What It Can Do

As we mentioned, one of the main reasons WordPress is so popular is because it takes care of many of the technical aspects of running a website. With that in mind, many think that WordPress should also automatically take care of image optimization without them having to get involved at all.

Unfortunately, that’s not really the case.

True, WordPress does offer some built-in image optimization. Whenever you upload an image to WordPress, it currently compresses the quality to about 82% of the original (since v4.5).

In v4.4, WordPress also introduced responsive image syntax using the srcset attribute. This creates four breakpoints for each image you upload according to the default WordPress image sizes:

  • 150px square for thumbnails
  • 300px width for medium images
  • 768px max-width for medium_large images
  • 1024px max-width for large images.

Here you can see an example of the actual responsive syntax code generated by WordPress:

<img loading="lazy" src="https://bleedingcosmos.com/wp-content/uploads/2021/12/33-1024x683.jpg" alt="" class="wp-image-9" width="610" height="406" srcset="https://bleedingcosmos.com/wp-content/uploads/2021/12/33-1024x683.jpg 1024w, https://bleedingcosmos.com/wp-content/uploads/2021/12/33-300x200.jpg 300w, https://bleedingcosmos.com/wp-content/uploads/2021/12/33-768x512.jpg 768w, https://bleedingcosmos.com/wp-content/uploads/2021/12/33-1536x1024.jpg 1536w" sizes="(max-width: 610px) 100vw, 610px">

Depending on the screen size of the device from which a user visits your webpage, WordPress will let the browser pick the most appropriately sized image. For example, the smallest version for mobile displays or the largest for 4K Retina screens, like those of a Mac.

While this may seem impressive, it’s only a fraction of what can be achieved using a proper image optimization solution, as we’ll show later.

Lastly, WordPress implemented HTML native default lazy loading for all images starting with version 5.5.

So, in short, WordPress offers the following image optimization capabilities baked-in:

  • Quality compression (limited)
  • Responsive syntax (up to 4 breakpoints)
  • Lazy loading

WordPress Image Optimization: What it Cannot Do

There are other issues many have with both the implementation of image compression and responsive syntax as it’s used by WordPress. This leads to some users even purposefully deactivating WordPress’ built-in image optimization so they can fully take control of it themselves.

Here are some of the reasons why:

  • WordPress uses a very basic form of quality compression. It does not use advanced technologies like AI and machine learning algorithms to compress images while maintaining maximum visual quality. It’s also lossy compression, so the quality is lost for good. You can clearly see the difference between an original HD image and the compressed version created by WordPress.
  • WordPress only compresses most images by up to 20%, while advanced image optimization tools can reduce all image sizes intelligently by up to 80%.
  • Responsive syntax can provide significant performance improvements over simply uploading a single HD image to be served on all devices and screens. However, it’s still only limited to a set number of breakpoints (typically 3 or 4). Since it’s not dynamic, a whole spectrum of possible image sizes is not created or used.
  • Responsive syntax code is not scalable and can quickly lead to code that’s bloated, messy, and hard to read.
  • WordPress doesn’t accelerate image delivery by automatically caching and serving them via a global CDN, although this can be done using other tools.

Another important optimization feature that WordPress does not have is auto-conversion to next-gen image file formats. Different image formats offer different performance benefits on different devices. Some formats also enable higher levels of compression while maintaining visual fidelity.

Next-gen formats like WebP, AVIF, and JPEG-2000 are considered to be the most optimal formats on compatible devices. For example, until recently, WebP would be the optimal choice on Chrome browsers, while JPEG-4000 would be optimal on Safari browsers.

However, WordPress will simply serve images in the same formats in which they were originally uploaded to all visitors.

How to Measure the Image Performance of a WordPress Website?

As the undisputed king of search engines, we’ll base most of our performance metrics on guidelines established by Google.

Along with its various performance updates, Google has released a number of guidelines for developers as well as the tools to test and improve their websites according to said guidelines.

Google introduced Core Web Vitals as the primary metrics for measuring a web page’s performance and its effect on the user experience. Thus, Core Web Vitals are referred to as “user-centric performance metrics.” They are an attempt to give developers a testable and quantifiable way to measure an elusive and abstract concept such as “user experience.”

Combined with a number of other factors, Core Web Vitals constitute a major part of the overall page experience signal:

You can find a complete introduction to Core Web Vitals here. However, they currently consist of three main metrics:

  • LCP (Largest Contentful Paint): The time it takes the largest above-the-fold element on your page to load. This is typically a full-sized image or hero section.
  • FID (First Input Delay): The delay from the moment a user first interacts with an element on the page until it becomes responsive.
  • CLS (Cumulative Layout Shift): The visual stability with which the elements on a page load.

Here is an illustration of how these metrics are scored:

While these are the three most important metrics to optimize, they are not the only ones. Google still measures other metrics like the FCP (First Contentful Paint), SI (Speed Index), as well as the TTFB (Time to First Byte), TBT (Total Blocking Time), and TTI (Time to Interactive).

A number of these metrics are directly affected by the images used on your web pages. For example, LCP, FCP, and SI are direct indicators of how fast the content of your web page loads and depends on the overall byte size of the page. However, it can also indirectly affect FID by keeping the main thread busy with rendering large amounts of image content or the perceived CLS by delaying the time it takes large images to load.

These metrics apply to all websites, whether they are custom-made or built using a CMS like WordPress.

When using tools like Lighthouse or PageSpeed Insights, you’ll also get scored based on other flags Google deems important. Some of them are specific to images, such as properly sizing images and serving images in next-gen formats.

If you only use built-in WordPress image optimization, you’ll get flagged for the following opportunities for improvement:

Some of the audits it will pass, however, are deferring offscreen images (lazy loading) and efficiently coding images (due to compression):

A Better Way to Optimize WordPress Images: ImageEngine

Billions of websites are all vying for prime real estate on Google SERPs, as well as the attention of an increasingly fussy internet-using public. Every inch matters when it comes to giving your website a competitive advantage.

So, how can you eliminate those remaining performance flags and deliver highly optimized images that will keep both your visitors and Google happy?

Sure, you could manually optimize images using software like PhotoShop or GIMP. However, that will take you hours for each new batch of images. Plus, you still won’t benefit from any automated adaptive optimization.

A more reasonable solution in today’s fast-paced climate is to use a tool developed specifically for maximum image optimization: an image CDN like ImageEngine.

ImageEngine is an automated, cloud-based image optimization service using device detection as well as intelligent image compression using the power of AI and machine learning. It can reduce image payloads by up to 80% while maintaining visual quality and accelerating delivery around the world thanks to its CDN with geographically dispersed PoPs.

Why is ImageEngine Image Optimization Better Than WordPress?

When making a head-to-head comparison, here are the reasons why ImageEngine can deliver better performance:

  • Device Detection: ImageEngine features built-in device detection. This means it picks up what device a visitor to your website is using and tailors its optimization strategy to what’s best for that specific device.
  • Client hints: By supporting client hints, ImageEngine has access to even more information regarding the device and browser to make better optimization decisions.
  • Next-gen formats: Based on optimal settings, ImageEngine automatically converts and serves images in next-gen formats like WebP, AVIF, JPEG2000, and MP4 (for GIFs).
  • Save data header: When a Chrome user has save-data mode enabled, ImageEngine will automatically compress images more aggressively to save on data transfer.
  • CDN with dedicated edge servers: ImageEngine will automatically cache and serve your optimized image assets using its global CDN. Each edge server has device awareness built-in to bring down latency and accelerate delivery. You can also choose to prioritize specific regions.

So, the key differentiator is that ImageEngine can tailor optimizing images for what’s optimal for each of your visitors. ImageEngine is particularly good at serving mobile visitors thanks to WURFL device detection, which can dynamically resize images according to most devices and screen sizes in use today. As of now, this is a completely unique capability that none of its competitors offer.

It allows for far better and more fine-tuned optimization than WordPress’ across-the-board approach to compression and responsive syntax.

If you want, you could turn off WordPress responsive syntax and compression, and you would still experience a performance increase using ImageEngine. However, ImageEngine also plays nice with responsive syntax, so it’s not completely necessary unless you want to serve the highest-fidelity/low-byte-size images possible.

How Does ImageEngine Work with WordPress?

The process ImageEngine uses to integrate with WordPress can be broken down into a few easy steps:

  • Sign up for an ImageEngine account: ImageEngine offers three pricing plans depending on the scale and features you need as well as a no-commitment 30-day free trial.
  • Specify your image origin: This tells ImageEngine where to find the original versions of your images. For a WordPress website, you can just use your domain, e.g., https://mywordpresswebsite.com. ImageEngine will then automatically pull the images you’ve uploaded to your WordPress website.

  • Copy the Delivery Address: After you create an account and specify your image origin, ImageEngine will provide you with a Delivery Address. A Delivery Address is your own unique address that will be used in your <img> tags to point back to the ImageEngine service. Delivery Addresses may be on a shared domain (imgeng.in) or customized using a domain that you own. A Delivery Address typically looks something like {random_string}.cdn.imgeng.in. If your images are uploaded to the default WordPress folder /wp-content/uploads/, you can access your optimized images from ImageEngine simply by changing your website domain. For example, by typing {imageengine_domain}.cdn.imgeng.in/wp-content/uploads/myimage.jpg into your browser, you’ll see the optimized version of that image. Just press the copy button next to the Delivery Address and use it in the next step configuring the plugin.

  • Install the ImageEngine Optimizer CDN plugin: The plugin is completely free and can be installed just like any other plugin from the WordPress repository.
  • Configure and enable ImageEngine Plugin in WordPress: Just go to the plugin under “ImageEngine” in the main navigation menu. Then, copy and paste in your ImageEngine “Delivery Address,” tick the “Enabled” checkbox, and click “Save Changes” to enable ImageEngine:

Now, all ImageEngine basically does is replace your WordPress website domain in image URLs with your new ImageEngine Delivery Address. This makes it a simple, lightweight, and non-interfering plugin that works great with most other plugins and themes. It also doesn’t add unnecessary complexity or weight to your WordPress website pages.

ImageEngine vs Built-in WordPress Image Optimization

So, now let’s get down to business by testing the performance improvement you can expect from using ImageEngine to optimize your image assets.

To do this test, we set up a basic WordPress page containing a number of high-quality images. I then used PageSpeed Insights and the Lighthouse Performance Calculator to get the performance scores before and after using ImageEngine.

Importantly, we conducted this test from a mobile-first perspective. Not only has mobile internet traffic surpassed desktop traffic globally, but Google themselves have committed to mobile-first indexing as a result.

Here is a PageSpeed score using the Lighthouse calculator for WordPress with no image optimization:

As we can see, both Core Web Vitals and other important metrics were flagged as “needs improvement.” Specifically, the LCP, FCP, and TBT. In this case, both the LCP and FCP were a high-res featured image at the top of the page.

If we go to the opportunities for improvement highlighted by PageSpeed, we see where the issues come from. We could still save as much as 4.2s of loading time by properly resizing images and a further 2.7s by serving them in next-gen formats:

So, now let’s see how much ImageEngine can improve on that.

The same test run on my WordPress website using ImageEngine got the following results:

As you can see, we now have a 100 PageSpeed score. I saved roughly 2.5s on the SI (~86%) as well as roughly 1.7s on the LCP (~60%). There was also a slight improvement in the FCP.

Not only will you enjoy a stronger page experience signal from Google, but this represents a tangible difference to visitors regarding the speed with which your website loads. That difference will lead to lower bounce rates, increased user satisfaction, and more conversions.

There was also a 53% overall reduction in the total image payload. This is impressive, considering that it’s on top of WordPress’ built-in compression and responsive syntax.

Conclusion

So, as someone with a WordPress website, what can you take away from this?

Well, first of all, WordPress does feature some basic image optimization. And while not perfect, it should help you offer reasonable levels of performance, even if you use a lot of image content.

However, the caveat is that WordPress applies aggressive, across-the-board compression, which will lead to a noticeable reduction in visual quality. If you use WordPress for any type of website where premium quality images are important, this is a concern — for example, as a photography portfolio, exhibition, or image marketplace like Shutterstock.

By using ImageEngine, you can reduce image payloads and accelerate delivery even further without compromising too harshly on visual quality. What’s more, ImageEngine’s adaptive image optimization technology will provide greater improvements to more of your visitors, regardless of what device(s) they use to browse the web.

Whether or not you still want to use WordPress’ built-in optimizations, ImageEngine will deliver significant improvements to your user experience, traffic metrics, and even conversions.

Plus, true to the spirit of WordPress, it’s extremely simple to set up without any advanced configuration. Just sign up for ImageEngine in 3 easy steps, install the plugin, integrate ImageEngine by copy/pasting your image domain, and you’re good to go.


[ This is a sponsored post on behalf of ImageEngine ]

Source

The post WordPress Website Analysis: Before & After ImageEngine first appeared on Webdesigner Depot.

Source de l’article sur Webdesignerdepot

User Experience (UX) design and User Interface (UI) design are two terms people sometimes mistakenly use interchangeably. While aspects of each are interconnected, there are distinct differences between UI/UX design.

According to Internet Live Stats, there are over 1.9 billion websites, but not all are active at the same time. No matter how you slice it, there’s a lot of competition to grab and keep user attention. Good UX is just part of the equation. For a genuinely stellar site, you must also offer an excellent interface.

Learning the ins and outs of good UI and UX requires a bit of knowledge of how the two differ and what works. Although they weave in and out of the same design, they are different.

What Is the Biggest Difference Between Good UX and UI?

UI is the functionality of the design and what users see. How do they interact with various elements? UX is more the way things come together — both visual and interactive features — to create a feel for the user. You can certainly see why people confuse the two as they both apply to interacting with a website or app.

Top design firms often have team members specializing in each discipline. However, UX designers are also aware of UI, and UI designers are also mindful of UX. How can you ensure you’re offering excellent UI/UX design while covering the full spectrum of requirements for each?

Ensuring Effective UX Design

Good UX design increases conversion rates by 400% or more. The site visitor walks away feeling understood and not frustrated. What are some of the most important aspects of good UX design?

1. Create a Good Structure

What is the hierarchy of your site? What is the first thing the user sees when they pull it up? How do they navigate from one page to the next? A well-designed website classifies different aspects of the page, and new content naturally falls into the appropriate category as it grows.

When creating a structure for your site, think about how it might expand in the next five years. You want the hierarchy to work from day one, but you also want to think through significant shifts in the content you might see down the road.

Even your navigational hierarchy should accommodate new areas easily. Plan for the unexpected, so you know how to work it into the overall design when you must.

2. Choose Beautiful Aesthetics

You have a few seconds to make an excellent impression on your site visitors. Take the time to make sure your design functions and is visually appealing. Your color palette should work, images should be crisp and relevant, and typography should be readable and engaging.

Step back from your computer and look at your design from a distance. Does anything stand out that isn’t pleasing to the eye? Get feedback from visitors about what they like and dislike. Since the focus is on user experience, your best source of constructive criticism is from your target audience. Listen to their concerns and ideas.

3. Communicate With Site Visitors

Most experts agree that users want an element of interactivity on sites and apps. People want to know you hear them and get a response. Some ideas include adding a live chat option to your site or engaging in SMS customer support.

Put yourself in their shoes. A customer may visit your site for the first time, having never heard of your brand. They have no reason to trust you or that you’ll follow through on your promises. Potential leads may have a few questions before parting with their hard-earned dollars.

Adding various ways to communicate shows them you’ll be there should they have a problem. It’s much easier to trust a company when you know you can phone, engage in live chat or shoot off an email and get an almost immediate response.

4. Add Clear Direction

Excellent UX is intuitive. You should add calls to action (CTAs) and images pointing the user where they should go next. You can use graphics of arrows, people looking or pointing toward the next step, words, or CTA buttons.

Get feedback on how clear the directions are and tweak them as needed. The user should never have to stop and ponder what to do next. Everything on the page should guide them toward the ultimate goal.

5. Break Down Complex Data

Every industry has complicated data that is difficult for non-experts to understand. Part of good UX is breaking down complex information and sharing it in a simplified way.

One example might be the registration process. Instead of just showing text, a good UX designer would number the steps. Visualizations help add to understanding.

Embracing Effective UI Design

User Interface impacts UX and involves how the design works. The UI designer thinks through visitor expectations and then creates an interface that isn’t frustrating. UI works within the framework of a website to develop functional features. User experience isn’t the complete focus of UI, but it does tie into the planning phases. What are some elements of good UI design?

1. Set Standards

For a design to have good UI, it must perform as expected. Have you ever clicked on a button, and nothing happened? Determine how you want things to work and the minimum acceptable standards for your site.

For example, what happens when someone clicks on a link or button? How does the user know their action created the expected result? Consistency is crucial to how a site performs.

2. Choose the Right Colors

While UX designers look at the emotional impact of various colors, UI designers look at whether the shades match branding and how well the different ones contrast for readability and usability. UI/UX design often bridges a single designer’s work, so the employee ensures everything works as intended, both emotionally and functionally.

You may work with another designer to make the site aesthetically pleasing while also tapping into the emotions driving users. For example, some people love blue, so a blue button can have positive results.

UX and UI designers utilize split testing to see which users respond best to. Then, make adjustments as indicated by how site visitors respond.

3. Focus on Cognitive Matters

According to the Interaction Design Foundation, people can only retain around five things in their short-term memory. Designers should work with recognition instead, as users tend to rely on cues to find what they need.

UI designers may develop an intuitive navigation system and then use the same cues on every page, such as placement, color, and language. Users can then recognize the system without having to memorize it.

4. Prevent Errors

Your job is to ensure errors are kept to a minimum when designing a website or app. One of the most significant parts of a designer’s job is testing and retesting.

Think about all the potential problems a user might run into, such as broken links, images not showing, or incomplete actions. How can you keep those problems from occurring in the first place?

Error prevention is particularly vital when designing software as a service (SaaS) or apps. Users grow frustrated quickly and will find another solution rather than troubleshooting an issue. You’re much better off avoiding the error in the first place.

How Do UX and UI Work Together?

You’ve likely already figured out how closely UX and UI entwine to create a usable experience. The UX designer pays attention to function and interactivity, and the UI designer thinks through how the interface looks.

UX pays attention to the flow of the website and where users start, go next and end up. On the other end, UI figures out how the elements look to the viewer and where everything is placed.

The UX team may decide to add an extra button to the page. The UI team must determine where to place it, if any sizing needs must occur, and how it impacts usability on desktop and mobile devices.

Although each has a different function, user experience and user interface must work together to create a usable site the target audience responds to. You can’t have excellent UX without excellent UI, and vice versa. The best designers consider both and implement them to their fullest potential.


Featured image via Pexels.

Source

The post What’s the Difference Between Good UI and Good UX? first appeared on Webdesigner Depot.

Source de l’article sur Webdesignerdepot

Few things are more important to a web designer or developer’s chances of success than having the proper workflow. The term “workflow” applies to the set of standardized steps you or your company uses to create, test, and deploy designs or products.

Over the years, as development processes have evolved, so too have the workflows experts use to bring their ideas to life. The MVP workflow, or “Minimum Viable Product” strategy, is one of the most popular options in 2022.

Here’s what you need to know about the MVP workflow and how it differs from some of the other standard workflows developers may be used to.

What is the Designer/Developer Workflow?

As mentioned above, the designer/developer workflow is a series of steps used by experts in the web design world to achieve a creative goal. The process includes the steps taken to start a project, evolve it, and finish it. Since software is never developed without tools, the technology you’ll access throughout the development process is also considered in most workflows.

An example of a standard development workflow might look like this:

  • Scaffolding: This is the stage wherein you start your new web project, creating a git repo, downloading libraries, preparing file structures, and completing other tasks to make sure your product is ready to roll out into the world.
  • Develop: This is where you’ll spend most of your time writing code for your application or website. The development process may include various specific tools and support from other staff members.
  • Test: In this stage, you examine the functionality of your code to determine if everything works as it should. If there are errors or issues, you can go back and develop fixes to the potential problems. Your code may go through the development/test process several times before you can move to the next stage.
  • Integrate: This is when you merge the code for your part of the development process with the rest of the team. You can also integrate your code into websites and existing apps at this point. If you’re working solo, you can skip this process.
  • Optimize: You prepare all your assets for use on a production server during the optimization stage. Files are generally optimized to ensure your visitors can view your site easily or access your applications with ease.
  • Deploy: In the deployment stage, developers push code and assets up into the server and allow for changes to be viewed by the public.

What is MVP? (Minimum Viable Product)

Now you know what a developer workflow looks like, you can begin to assess the concept of the “MVP” workflow. The term “MVP” stands for Minimum Viable Product.

The idea of “Minimum Viable Product” applies to a range of industries, from education to healthcare and government entities. This term comes from lean start-up practices and focuses heavily on the value of learning and changing during the development process.

When you adapt your workflow to focus on an MVP, you’re essentially adjusting your focus to a point where you can create a stripped-back version of something new – like an app or a website. The MVP is built just with the core features (the minimum), so you can bring the idea to market and test it as quickly as possible.

For instance, if your goal were to create an attractive new website for a client, an MVP would focus on implementing the crucial initial tools, and nothing else. While you may create checkout pages, product pages, and other aspects of the site, you wouldn’t populate it with content or start experimenting with bonus widgets and apps.

So, how does this offer a better alternative to the standard workflow?

Simply put, an MVP workflow is quick, agile, and easy. The idea is you can validate key concepts with speed, fail quickly, and learn just as fast. Rather than having to build an entire app and almost start over from scratch every time you find an error, you can race through the iteration and development process.

MVP workflows are also highly appealing to start-ups and entrepreneurs hoping to validate ideas without a massive amount of upfront investment.

Examples of MVP Workflows

Still confused? The easiest way to understand how an MVP workflow works is to look at an example.

Let’s start with a conceptual example. Say you were building a voice transcription service for businesses. The desired features of this product might include the ability to download transcription, translate them into different languages, and integrate them into AI analytics tools.

However, using the MVP approach, you wouldn’t try to accomplish all of your goals with your software at once. Instead, you’d focus on something simple first – like the ability to download the transcripts. Once you confirm you can do that, you can start a new workflow for the next most important feature for the app.

One excellent example of a company with an MVP approach is Airbnb. The entrepreneurs behind this unicorn company, Joe Gebbia and Brian Chesky, didn’t have a lot of cash to build a business with at first. They had to use their own apartment to validate the idea of creating a website where people could share their available “space” in a home or apartment with the public.

To begin, Airbnb only created a very basic website, published photos of their property, and waited to see the results. After discovering people were genuinely interested in renting another person’s home, the company was able to begin experimenting with new ideas to make a site where people could list their properties for travelers.

The Pros and Cons of an MVP Workflow

There are a lot of benefits to the MVP workflow – particularly when it comes to gaining agility and developing new products quickly. However, there are downsides too.

Pros

  • With an MVP approach, you can maximize your learning opportunities and create a more innovative, successful product at speed. You get to test every step of the way.
  • You release iterations or versions of your product quickly, which means you discover problems faster, allowing you to quickly solve these issues.
  • You build on the benefits of customer fans, “evangelists” in the marketplace who are keen to help your product or service grow.
  • An MVP gives you more freedom to try out unique ideas and “risks” you might otherwise avoid with a traditional workflow.
  • Because you’re focusing on creating only the “minimum viable product,” you don’t have to spend a fortune on initially setting up your workflows.

Cons

  • Agile work with an MVP flow requires a lot of effort in collecting constant feedback from customers and releasing iterations.
  • You’ll need to dedicate yourself to releasing many small and frequent product releases on a tight schedule.
  • You might have to revise the functionality of your product or app a number of times.

Creating Your MVP Workflow

If you believe an MVP workflow might be effective for you, the first step is defining your “Minimum Viable Product.” The app, website, or product you design needs to align with your team’s strategic goals, so think about what your company is trying to achieve at this moment – before you get started. If you have limited resources, or specific purposes, like improving your reputation as a reliable company, now might not be the right time to develop a new MVP.

Ask what purpose your minimum viable product will serve and what kind of market you’re going to be targeting. You’ll need to know your target customer to help you test the quality and performance of each iteration of your MVP. Once you know what your ideal “product” is, ask yourself what the most important features will be.

You can base these decisions on things like:

  • User research
  • Competitive analysis
  • Feedback from your audience

For example, if you’re producing an AI chatbot that helps companies to sort through customer inquiries, the most important “initial feature” may be the ability to integrate that bot into existing websites and apps owned by the company.

MVP Approach Guidelines

Once you have your hierarchy of most valuable features for your minimum viable product, you can translate this into an action plan for development. Remember, although you’re focusing on the “minimum” in development, your product still needs to be “viable.” In other words, it still needs to allow your customer to achieve a specific goal.

  • Review your features: Reviewing your prioritized product requirements and the minimum level of functionality you can deliver with each of these “features.” You need to ensure you’re still providing value to your customer with anything you produce.
  • Build your solution: Build your minimum set of features for the product or service. Remember to build only what is required. You can use methodologies like the agile or waterfall method to help guide your team during this process.
  • Validate your solution: Release your offering into the market, and ensure you have tools in place to gather feedback from early adopters. Use beta programs, focus groups, and market interviews to understand how your solution works for your customers and where you can improve on your current offer.
  • Release new iterations: Based on what you learn from your target audience, release improvements to your product quickly. Use your validation strategies to collect information from your audience with each release.
  • Review again: Go back to your product requirements and desired features and start the process over again, this time focusing on the next most valuable functionality. Over time, the value of your minimum viable product will increase.

Using the MVP Workflow Approach

While the MVP workflow approach might not be the right solution for every development or design team, it can work very effectively in the right circumstances. The MVP approach doesn’t minimize the importance of understanding market problems and delivering value. Instead, the focus is on delivering quick value that gradually increases and evolves over time.

As many developers and designers know, the most useful form of product validation in most cases is real-world validation. When your customers have had an opportunity to use a product on a day-to-day basis, they can provide much more effective feedback.

Just keep in mind that committing to the MVP approach also means changing your workflow and committing to iterations – otherwise, other features may never be completed. You’ll need to be willing to work quickly and in small bursts without getting too heavily caught up in one feature or functionality.


Featured image via Pexels.

Source

The post How to Get Started with the MVP Workflow first appeared on Webdesigner Depot.

Source de l’article sur Webdesignerdepot

Picture a dark office, blinds drawn. Picture a UX designer smoking a cigar. See the light filtered through the smoke whipped to fog by a spinning ceiling fan. Watch as the UX designer sits at a desk and considers the website.

The UX designer has devised a series of tests to determine if a green button is better than a red button. One of them involves tipping a tortoise onto its back. He looks the website over carefully and says, “Describe in single words, only the good things that come to mind about your mother.”

The website pauses, sweating under pressure, then replies, “Let me tell you about my mother…”

BLAM! The website pulls the trigger of an unseen gun, and the UX designer collapses, leaving the project to be rebuilt from scratch in Material by Harrison Ford, with overuse of Post-its delegated to Edward James Olmos.

Who Does UX Testing Actually Serve?

In the past’s bleak dystopian future (1982’s Blade Runner was set in 2019) no one benefitted from asking the wrong questions. And little has changed.

Designing any test to verify UX is fraught with as many complications as administering the test. Questions are skewed by bias, conscious or otherwise, and competing agendas. Even with something as apparently simple as a split test, the potential for distortion is immense.

When planned by a designer, a UX test offers little benefit to a client; the benefit is to the designer, who can then say their ideas are validated (or not).

Imagine hiring a developer to code a website, only to discover that the developer didn’t know CSS and expected to be paid to learn it before completing the work. You would hire someone else because that developer isn’t qualified.

From a client’s perspective, a UX designer should know, through experience, whether a green button is better than a red button. Designing an elaborate test to split-test the button color serves little purpose other than indemnifying the designer against mistakes.

The ROI of UX Testing

It’s widely accepted that there is substantial ROI (Return On Investment) from UX testing. We’ve all heard apocryphal stories about sites that split-tested their checkout and improved retention by 5%.

I’m going to go out on a limb and say that without user testing, that site could have improved its checkout retention by 4.9% simply by hiring a competent, experienced designer. But what about the remaining 0.1%? Well, for most sites, 0.1% represents very little profit. And the cost of recovering it via testing far exceeds the benefits.

When a company the size of Amazon, Netflix, Spotify, or Google split tests a website, it can afford to allocate $25k for user testing because it stands to gain 0.1%, and that represents far more than $25k. To meet the same 0.1% improvement, a small business has to design and run the same tests, incurring the same costs. But in the case of a small business, $25k could eat up all of its profits.

UX testing almost always works. But it is only profitable at scale.

If a good UI designer with a grounding in UX can improve checkout retention by 4.9%, tripling the project budget for just 0.1% more is a tough sell. Bluntly, that $25k is better spent on advertising.

What UX Designers Can Learn From Psychiatry

We all have the tendency to think we’re unique. It’s a survival trait attributed to our prehistoric brain. That belief in uniqueness is particularly strong in highly competitive people. We all think our site, our side-project, our approach are original. And we’re all wrong.

When a psychiatrist sits down with a patient, they have two immediate goals: categorize that patient into an established diagnosis, and assess the severity of the condition. It may be that the patient is depressed or anxious or even suffering from a potentially more debilitating condition like schizophrenia. What the psychiatrist is not trying to do, is define a new illness.

Occasionally — perhaps once per decade — a genuinely unusual patient will present themselves, and a new form of illness is considered. New treatments are found and tested. These treatments are rarely developed on behalf of individual patients; doctors work with grants from governments, medical schools, or the pharmaceutical industry and publish their results.

The vast majority of websites face similar problems. They deal with similar demographics, work within a similar culture, and deal with similar technology. As such, they can be categorized in the same manner a psychiatrist categorizes patients.

The key to delivering successful UX solutions is not UX testing in individual cases, but rather UX research, examining similar projects, and cribbing their solutions. If you categorize a project accurately, you’ll find a solution readily available.

Replacing User Testing With UX Best Practices

Your client doesn’t need to pay for UX testing to benefit from it. Enterprise sites, government sites, and even personal projects will test UX patterns. Sites like Shopify or Stripe will user-test their checkout processes at scale and enable companies to benefit from the results by adopting their platforms.

If you’re currently testing designs for small business, one of two things is true: either you’re wasting your client’s money investigating a problem someone else has already solved, or you’re designing something so original that it has no precedent (and you probably shouldn’t be).

Designers should be opinionated. Designers should know UX best practices and how they apply to a range of scenarios. Designers should be capable of making an educated guess. Designers should be self-validating.

Once or twice in your career, you may find a legitimate need to test something. However, the vast majority of the time, the correct answer is to tip the tortoise back onto its feet and choose whichever color button has the higher contrast.

Featured image: Still of Brion James in Blade Runner. Copyright Warner Bros. Entertainment

Source

The post The Case Against UX Testing first appeared on Webdesigner Depot.

Source de l’article sur Webdesignerdepot

Après avoir adopté l’ERP SAP S/4HANA, METEX NØØVISTAGO a souhaité améliorer son processus d’élaboration budgétaire. Une tâche confiée à SAP Analytics Cloud Planning, déployé par le Groupe KPC.

METEX NØØVISTAGO est un acteur industriel à la pointe de la bio-industrie.L’entreprise produit des ingrédients fonctionnels (principalement des acides aminées à ce jour) par fermentation pour le marché de la nutrition animale et bientôt de la cosmétique : 1 usine, 100KT d’acide aminées par an, 200M€ de CA annuel, et 350 salariés.

En juin 2020, METEX NØØVISTAGO a déployé un nouveau système d’information en mode greenfield, comprenant l’ERP intelligent SAP S/4HANA, un data warehouse SAP BW/4HANA et l’outil d’analyse de données SAP Analytics Cloud. « Un changement de taille pour METEX NØØVISTAGO,qui avait travaillé pendant 35 ans sur IBM AS/400 », explique Paul Stoffaes, DSI de l’entreprise.

Reste un processus qui n’avait pas été refondu : la planification budgétaire. « Le processus de forecast était réalisé sur Excel, ce qui était long, laborieux et source de nombreuses erreurs. Le contrôle de gestion passait plus de temps à consolider les données qu’à les analyser. Quant au processus d’élaboration budgétaire, il était encore plus fastidieux ».

METEX NØØVISTAGO a donc décidé de mettre en place une solution capable de livrer des prévisions au mois, à l’année et sur plusieurs années, avec une agilité permettant l’intégration aisée de nouveaux produits ou de nouveaux processus. L’objectif est de libérer du temps au contrôle de gestion, afin qu’il puisse se focaliser sur son cœur de métier, l’analyse et le pilotage.

SAP Analytics Cloud Planning déployé sur l’élaboration budgétaire

La société a confié la modélisation de son processus à l’un des modules de SAP Analytics Cloud, le module de Planning. « L’utilisation de SAP Analytics Cloud Planning permet de faciliter l’intégration avec l’ERP SAP S/4HANA, constate Paul Stoffaes. Il y a également une certaine logique à l’utiliser, car nos collaborateurs connaissent déjà SAP Analytics Cloud dans le cadre de la Business Intelligence. »

Le déploiement de la brique Planning de SAP Analytics Cloud a été confié à KPC : « Ils ont bien compris nos enjeux et ont su proposer un déroulé de projet et une méthodologie adaptés, ainsi qu’un chiffrage lisible. Leur capacité à s’engager au forfait sur un planning serré a également été une des raisons du choix de KPC. » METEX NØØVISTAGO avait en effet fixé comme contrainte une réalisation du projet dans un délai restreint de 5 mois.

Le cœur fonctionnel de la solution mise en place est un P&L présenté par produit, accompagné de plusieurs modèles de simulation. Chaque équipe dispose de son propre accès à la solution, afin d’y faire remonter ses données et prévisions : commerciaux, production, achats, logistique… Les informations sont synchronisées chaque jour – dans les deux sens – entre les référentiels SAP S/4HANA, SAP BW/4HANA et SAP Analytics Cloud, au travers de SAP Data Hub.

Voici le détail du processus mis en place :

  • L’équipe de vente fait remonter ses informations : volumes, prix, commissions…
  • L’équipe en charge des achats définit les prix moyens pondérés.
  • L’équipe de production travaille en parallèle sur la définition des nomenclatures.
  • Le contrôle de gestion pilote l’ensemble du processus, en intervenant lorsque nécessaire.

Un projet réussi, qui renforce l’adoption de SAP Analytics Cloud

« De notre point de vue, le projet est une réussite, résume Paul Stoffaes. Il a été mené à bien dans les délais, avec un budget maîtrisé. KPC a su faire preuve d’une solide expertise fonctionnelle et technique. Nous avions séparé le projet sous forme de lots, permettant de dispatcher les livrables tout au long du développement, ce qui s’est avéré très confortable. »

Quels bénéfices a identifié METEX NØØVISTAGO?

  • Des gains de productivité, avec une réduction de la durée du processus et une plus grande autonomie des parties prenantes.
  • Des gains en fiabilité, les données étant extraites puis remontées directement depuis et vers l’ERP SAP S/4HANA.
  • Des gains de flexibilité : « Auparavant, évaluer chacune des hypothèses pouvait tourner rapidement au cauchemar. Aujourd’hui, nous sommes beaucoup plus sereins. »

Le tout avec comme résultat global une amélioration des prévisions. Mais aussi un bénéfice inattendu : un intérêt renouvelé des collaborateurs pour SAP Analytics Cloud. « L’utilisation de SAP Analytics Cloud Planning a poussé certains utilisateurs à se pencher sur SAP Analytics Cloud BI », confirme Paul Stoffaes. La DSI s’attendait à une adoption rapide de SAP Analytics Cloud Planning par les utilisateurs de SAP Analytics Cloud BI. La fertilisation a finalement aussi été constatée dans l’autre sens !

The post L’industriel METEX NØØVISTAGO s’appuie sur SAP Analytics Cloud Planning pour son élaboration budgétaire appeared first on SAP France News.

Source de l’article sur sap.com

Paris, le 10 janvier 2022 – Gémo se dote aujourd’hui de nouvelles solutions technologiques centrées sur la data, avec l’offre de migration RISE with SAP. Objectif : développer une approche omnicanale de pointe, conjuguant parfaitement ses lieux de ventes physiques et son commerce en ligne. Le maillage de ses entrepôts et de ses magasins représente en effet un atout clé pour l’enseigne familiale du groupe Eram, qui entame, grâce à SAP S/4HANA, une stratégie d’accélération de sa transformation numérique pour en faire un véritable levier de croissance.

SAP, Google Cloud et delaware, trois acteurs au service de la simplification

SAP, fidèle à ses ambitions, démontre une fois de plus sa capacité à apporter tous les outils nécessaires pour s’adapter aux évolutions du marché et notamment à celui du prêt-à-porter. Fort de son expertise de leader des logiciels de gestion d’entreprise sur de multiples industries, SAP a en effet toutes les cartes en main pour accompagner Gémo dans le challenge que l’enseigne souhaite relever à horizon 2025.

Le choix de Google Cloud s’inscrit dans une logique de capital technologique. A travers cette migration dans le cloud, réfléchie, progressive et déterminée, Gémo souhaite valoriser la stratégie de big data déjà engagée avec Google. Pouvoir intégrer parfaitement les données SAP, tout en bénéficiant de la sécurité, de la flexibilité, des capacités d’analyses et de la résilience de l’infrastructure, a été décisif dans la sélection de Google Cloud.

Pour intégrer SAP S/4 HANA et ses modules spécialisés, Gémo s’adosse à un acteur local et international reconnu sur le marché SAP. delaware, est un expert de l’intégration SAP dans l’industrie du retail / fashion et est notamment présent à Nantes près du siège de Gémo. Il a su démontrer la valeur ajoutée de la solution SAP pour Gémo et déployer les équipes d’experts nécessaires pour accompagner cette transformation.

Avec 440 magasins, 4 000 collaborateurs et plus de 12 000 références produits, l’enseigne Gémo habille aujourd’hui 1 français sur 5, et ambitionne d’entrer dans le top 5 des acteurs du marché de l’équipement de la personne. La modernisation des outils, basée sur un cœur SAP, doit permettre de répondre aux ambitions de croissance omnicanale, en France et à l’international, en intégrant de nouveaux modèles de business.

Une transformation numérique engagée pour soutenir la croissance à venir

Les technologies proposées aujourd’hui par l’offre « Business Transformation as a Service » de RISE with SAP ont été bâties dans le but de soutenir cette croissance et d’apporter les solutions innovantes afin :

  • d’accélérer le Time To Market de l’ensemble des projets : les distributeurs producteurs se doivent d’être rapides pour répondre immédiatement aux demandes des consommateurs ;
  • de tenir les engagements dans le taux de service ;
  • de personnaliser l’expérience client ;
  • d’assurer la fluidité et l’efficacité de la chaîne d’approvisionnement et de distribution ;
  • d’apporter le meilleur sur la disponibilité des collections selon les saisons et sur la centralisation de l’offre ;
  • et de garantir la pérennité de l’entreprise et préserver sa rentabilité.

« L’accompagnement de la stratégie de transformation de Gémo est la raison d’être de ce partenariat  à haute valeur ajoutée avec SAP, Google Cloud et delaware. C’est en effet en trouvant de nouveaux relais de croissance avec une approche omnicanale, en améliorant l’expérience de nos clients et en garantissant l’excellence opérationnelle de nos chaînes logistiques que nous assurerons à notre groupe une place de leader dans le secteur hautement compétitif de l’équipement de la personne en France, et à l’international, pour les prochaines décennies », annonce Philippe Thirache, Directeur Général Gémo.

« Accompagner l’enseigne Gémo dans sa transformation numérique est une grande fierté pour nous aujourd’hui. D’autant que nous avançons avec la même vision, toujours tournée vers le client et avec l’ambition d’améliorer et de simplifier la vie de chacun. Nous avons hâte de constater le fruit de ce nouveau partenariat et de permettre à Gémo de déployer sa stratégie omnicanale.» précise Frédéric Chauviré, Directeur Général SAP France

« Nous sommes fiers d’accompagner une marque comme Gémo et un groupe comme Eram, fleurons de la distribution française, dans leur accélération numérique, et de démontrer notre pertinence technologique dans leur stratégie de croissance, de soutenir l’enrichissement constant de leur expérience et de leur satisfaction client. » explique Anthony Cirot, Directeur général de Google Cloud France.

« Gémo est une entreprise engagée, ancrée sur son territoire, et fait partie des leaders sur son marché. Nous sommes ainsi particulièrement fiers de participer à la transformation de cette enseigne française reconnue. Les experts et la direction de delaware sont mobilisés pour faire de ce projet une réussite à la hauteur des ambitions de Gémo. A travers ce programme et avec le concours du groupe Eram, nous continuerons de favoriser la démarche invest in digital people en faveur de la reconversion professionnelle dans le secteur du numérique » complète Aymeric Fosset, associé delaware.


The post SAP, Google Cloud et delaware accompagnent la marque de prêt-à-porter Gémo dans sa stratégie omnicanale appeared first on SAP France News.

Source de l’article sur sap.com

If you are a designer and have never dealt with designer’s block, you are probably a superhero. For us mortals, designer’s block is a pretty common problem. There are occasions when we sit in front of our screen, and our creativity just evaporates.

I have spent many hours trying to get rid of this annoying wall. It took some time, but I have found some tactics that work best for me. So, do not panic! In this article, we will share five ways you can overcome designer’s block and get back on track.

From innovative sources of inspiration to the importance of collaboration and food, nothing will be left out. But first, let us analyze what designer’s block is and how common it is among creatives.

What is the Designer’s Block? Can You Force Creativity?

In a few words, designer’s block is nothing but a situation where you are stuck as a designer. In this unpleasant moment, you feel like you are losing your design skills and creativity.

Fortunately, this is not permanent. Of course, you are still a great designer. You should know and embrace that designer’s block happens to almost every creative out there. Even the most experienced of us. So the first thing you should do is to stay calm.

Remember that you can not force creativity. When designer’s block comes knocking on your door, you need some time to recover.

So instead of panicking, take to heart some practical tips that will help you regain your confidence and creativity.

How to Get Rid of Designer’s Block?

1. Take Care of Yourself

In some cases, designer’s block is your own body’s reaction. Think about it. How can you perform well when you are tense with pressure? There are many ways to take care of your mental and physical health. For example, you can take a break and have a snack.

Sleep is also critical when it comes to avoiding designer’s block. Recent research has shown that creative thinking is directly related to our periods of sleep. Lack of concentration, more mistakes, and erratic behavior are just some of the consequences of insufficient sleep.

For this reason, napping is a smart solution to designer’s block. So if you are feeling unproductive, first make sure you are not tired or hungry.

2. Change Your Location, Get Inspired

But what if you’re not hungry or tired? There are situations where we are stuck in front of a project. If that’s the case, you should decide to take an inspirational break.

The first thing you can do is to change your location. If you are working from home, you should get some fresh air. There are numerous sources of inspiration that can help you overcome designer’s block. Personally, I take a break and visit one of the following sources:

  • Parks: Nature will calm you and help you get inspired.  
  • Art Galleries: A designer’s best friend. Visiting an art gallery can help you find the missing elements for your upcoming project. 
  • Coffee shops: Quiet coffee shops are an intelligent way to get inspired. What’s better than a big mug of coffee and relaxing music?

Alternatively, watch a movie or a TV series. This may sound like an unorthodox way to get inspired, but it works perfectly when overcoming designer’s block.

3. Explore the Power of Collaboration

More than 90% of graphic designers in the world are freelancers. Although freelancing is an exciting job, it can be pretty lonely. The next time you are struggling with designer’s block, you might want to ask for some help.

Other UI or UX designers can help you see a project through different eyes and find the missing design elements. For this reason, collaborating with other designers is a great way to overcome designer’s block.

On the other hand, you can also ask your friends or family for ideas and feedback. Remember that inspiration can come from anyone.

4. Plan and Break the Project into Chunks

Most times, I get stuck as a designer, it is entirely my fault. To be precise, there are many cases when we do not plan the project efficiently. When the work is overwhelming, the lack of a well-organized plan can be why.

The best thing you can do is to take a step back. Take a look at the work that needs to be done. Then, you can start breaking your project down into small sections. If you reorganize everything, you can get rid of designer’s block in a matter of minutes.

Try not only to organize your tasks but also to manage the time you will spend on each chunk. This will probably help you understand that you have more time than you think.

5. Apply Some Pressure, Just Start

Unfortunately, few of us have infinite time to find inspiration. Most professional designers work with deadlines. That’s why putting pressure on yourself is not always a bad thing.

After following the above tips, all you have to do is start. Don’t forget that the designer’s block will remain until you start designing.

When I try to apply some pressure, my first drafts are usually bad. But after a while, everything comes back to normal.

Wrap Up

If none of the tactics analyzed above helped, you can always use one (or more) of the following quick tips:

  • Take a short break (5 minutes or so);
  • Start with the most challenging task;
  • Go for a walk or exercise;
  • Ask for more information about the project. Sometimes, the client can help you overcome designer’s block;
  • Think about what is distracting you and solve it.

Remember, every creative out there has faced designer’s block at least once. So there’s no need to panic at all. Of course, not all of us deal with it in the same way. That’s why you should first try out the tips above and find out what works best for you. This will help you overcome designer’s block and regain your skills as a designer.


Featured image via Pexels.

Source

The post 5 Brilliant Ways to Tackle Designer’s Block first appeared on Webdesigner Depot.

Source de l’article sur Webdesignerdepot

Many people believe that UX design is all about creating slick, engaging images and top-notch user flows. While those things have their merits, UX designers do much more than that.

UX writing is an essential skill in developing an app or solving a UX problem for a client. UX writing is when we craft UI text to communicate with a product/service user. UX writing includes valuable text like instructions, buttons, menus, just-in-time warnings, etc.

This article will analyze what you need to look out for even before you start writing. After that, we will explore ten crucial tips for UX writing that every UX designer should know.

Practical Tips and Tricks to Improve Your UX Writing

As with UX design in general, UX writing is about achieving a goal. Think of a wireframe you have created: The first thing you do when designing is to identify the real problem and set out to find the right solution. The same goes for UX writing.

Accordingly, before you start writing, make sure that you:

  • Have identified the UX problem;
  • Understand the goals of the client’s digital product;
  • Are familiar with the target audience;
  • Know the style and tone of voice you should use.

Once you are familiar with all of the above, you are ready to start writing. Let us explore all the tips and tricks you can follow to improve your UX writing.

1. Be Concise

This is one of the most important tips concerning UX writing. UX designers should always seek the shortest path from point A to point B. This is not only true for UX writing.

So conciseness is all about shortening your sentences and writing only what is necessary. This way, you’ll achieve a better user experience. Remember that most people tend to quickly scan instead of actually reading.

2. Be Clear and Helpful

If you are concise, the text you write will be clear and valuable. Since our goal is a compelling user experience, you should avoid being wordy. Our text needs to be helpful to the reader. What does a user need to know about the product or service?

All you need to do is anticipate what users need and what they are concerned about. Then, by analyzing your target audience, you can easily remove unnecessary text and make your UX text clear and useful.

3. Be Positive

You want the user to have a positive feeling when they first engage with your digital product. Well, for the target audience to be positive, your writing needs to be positive as well. To achieve that, you should avoid negative statements.

Of course, this is not a rule that you must always follow. For example, using “don’t” is not always bad because you can use it for emphasis. Nevertheless, try to avoid such words when describing your product or service.

4. Be Consistent 

Consistency has everything to do with sticking to the guidelines you (or a client) set at the beginning of the UX project. Your UX text must always match the style and tone you have chosen.

Try to pay attention to details. For example, when it comes to numbers, you can write 2,000 follows, 2.000 follows, and 2000 follows. It does not matter which you choose, as long as you remain consistent throughout the project.

5. Use Active Voice

Although it is not always wrong to write in the passive voice, the active voice is generally more helpful for UX writing. Your text will be more precise, tailored to your audience, and more potent with the active voice. And when your written text is clear and powerful, it is also more engaging.

6. Don’t Get Wordy

In most cases, when you are done writing, you believe that your text is clear and valuable. And that’s reasonable. However, it is wise to reread your text and delete all the filler words.

Adjectives and adverbs are usually unnecessary, and you can remove them from your UX text.

7. Choose Strong Verbs

But if you have no adjectives and adverbs, how can you emphasize and strengthen your text? All you need to do is use the correct persuasive verb. Strong verbs help you formulate compelling CTAs without being wordy.

8. Use “You” Words

Now that we have mentioned CTAs, there is nothing more convincing than the word “you.” Words and phrases like “you,” “you will,” “you are,” “you have,” “your,” “yours,” etc., are the best way to connect with your target audience and let them be the leading character on your UX Journey Map.

9. Avoid Articles and Exclamation Points

Although it may sound bizarre, the use of articles is not necessary for people to understand what you are saying. The same goes for exclamation points. Of course, you can use exclamation points for emphasis, but not always. Save them for the most exciting aspects of your project.

10. Don’t Use UX Writing to Point Out UI

This is a widespread mistake made by us UX designers. If you have to point out an interface element of your design with text, there is probably something wrong with the design.

Remember, UX text is not about explaining your user interface; it’s about providing valuable and transparent information about your digital product.

Wrap Up

You should keep in mind that the above tips are only guidelines and not strict rules. For example, there are occasions when the passive voice or an exclamation point should be used in UX writing. In any case, you will be one step closer to your goal if you make sure that your UX text is concise, clear, valuable, and consistent.


Featured image via Unsplash.

Source

The post 10 Tips for Effective UX Writing first appeared on Webdesigner Depot.

Source de l’article sur Webdesignerdepot

According to Klipfolio research, users spend on average 52 seconds on a webpage. With minimal time to impress, you must consider how to best help your consumers understand what your product or service does and why they should care about it. It’s not enough to describe your value – great landing pages will go the extra step and show this as well.

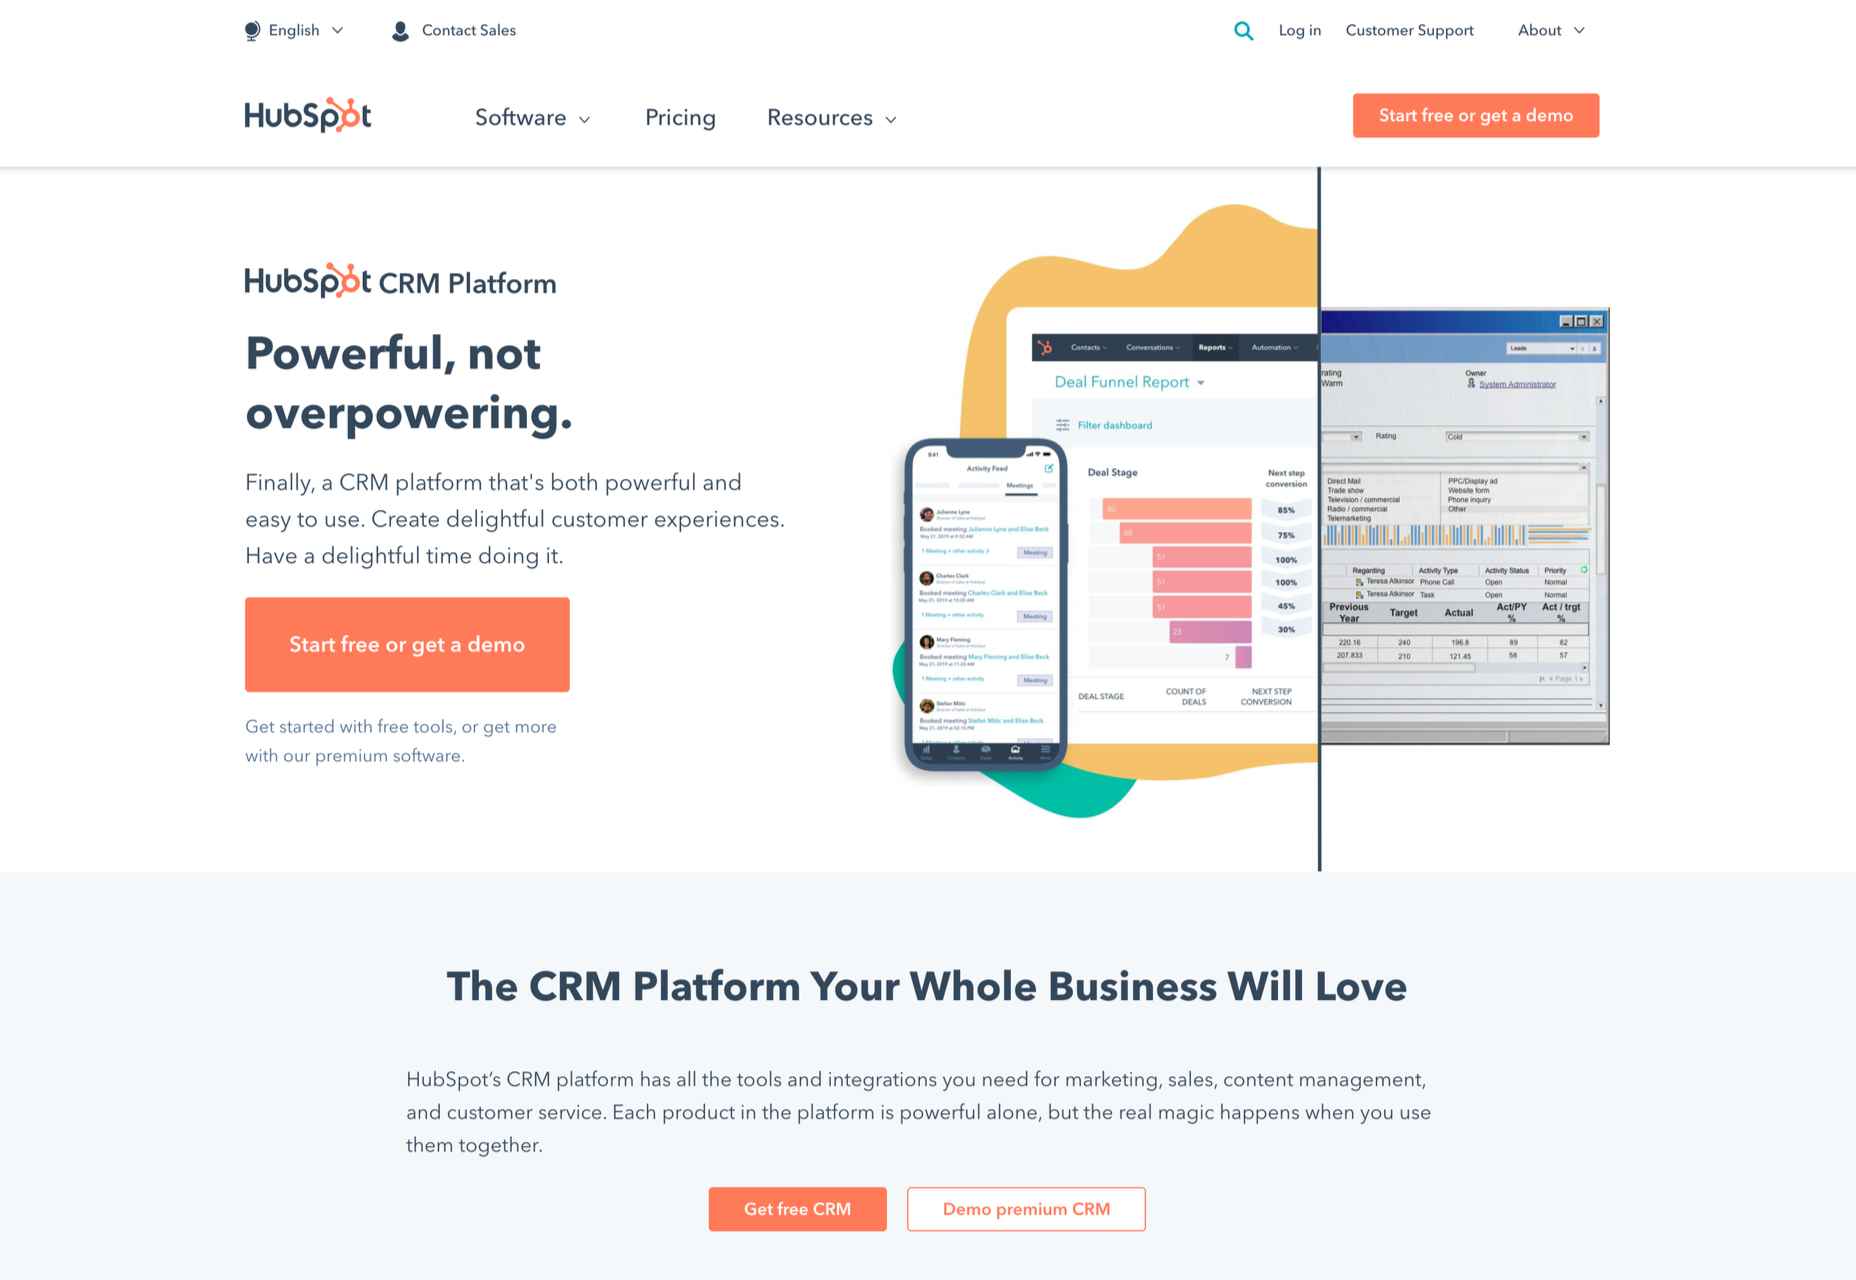
One powerful method to do this is by providing a real-life, responsive teaser to show what your product looks like, how it works, and what value it can create. This means incorporating specific elements from your functional, responsive product into the landing page. However, this should be a “mini-product experience” that users can experiment with rather than a freemium version of your product. If done well, the dynamics will pay off in captivating users for longer, increasing their consideration time, and driving your conversion rate as a result.

Building more dynamic landing pages through product experience can change the game completely. These are some strategies to consider.

“Ask & Alter” for Greater Personalization

“Ask & alter” is valuable for services with multiple potential value propositions for different audiences. The simple fix here is to have a pop-up box that asks the visitor which profile they are (and alternatively a few more questions). You can then trigger the page to alter according to their input, ensuring a more customized experience and increasing their chance of conversion. By doing this, you’re taking the onus off the consumer to figure out what’s relevant to them, eliminating any potential confusion.

A great example of this is the Penn Foster University website. It has a developed UX optimized for organizations, high school degree seekers, and upskillers alike. Each has an entirely different, carefully designed interface, matching the diverse needs of visitors. For example, while a high schooler might enjoy browsing the career pathways section, an upskiller is likely to search specific career fields. Such distinction is key to consider, as intentional and strategic user experience can raise conversion rates by as much as 400%.

Real-Time Demos to Hook the User

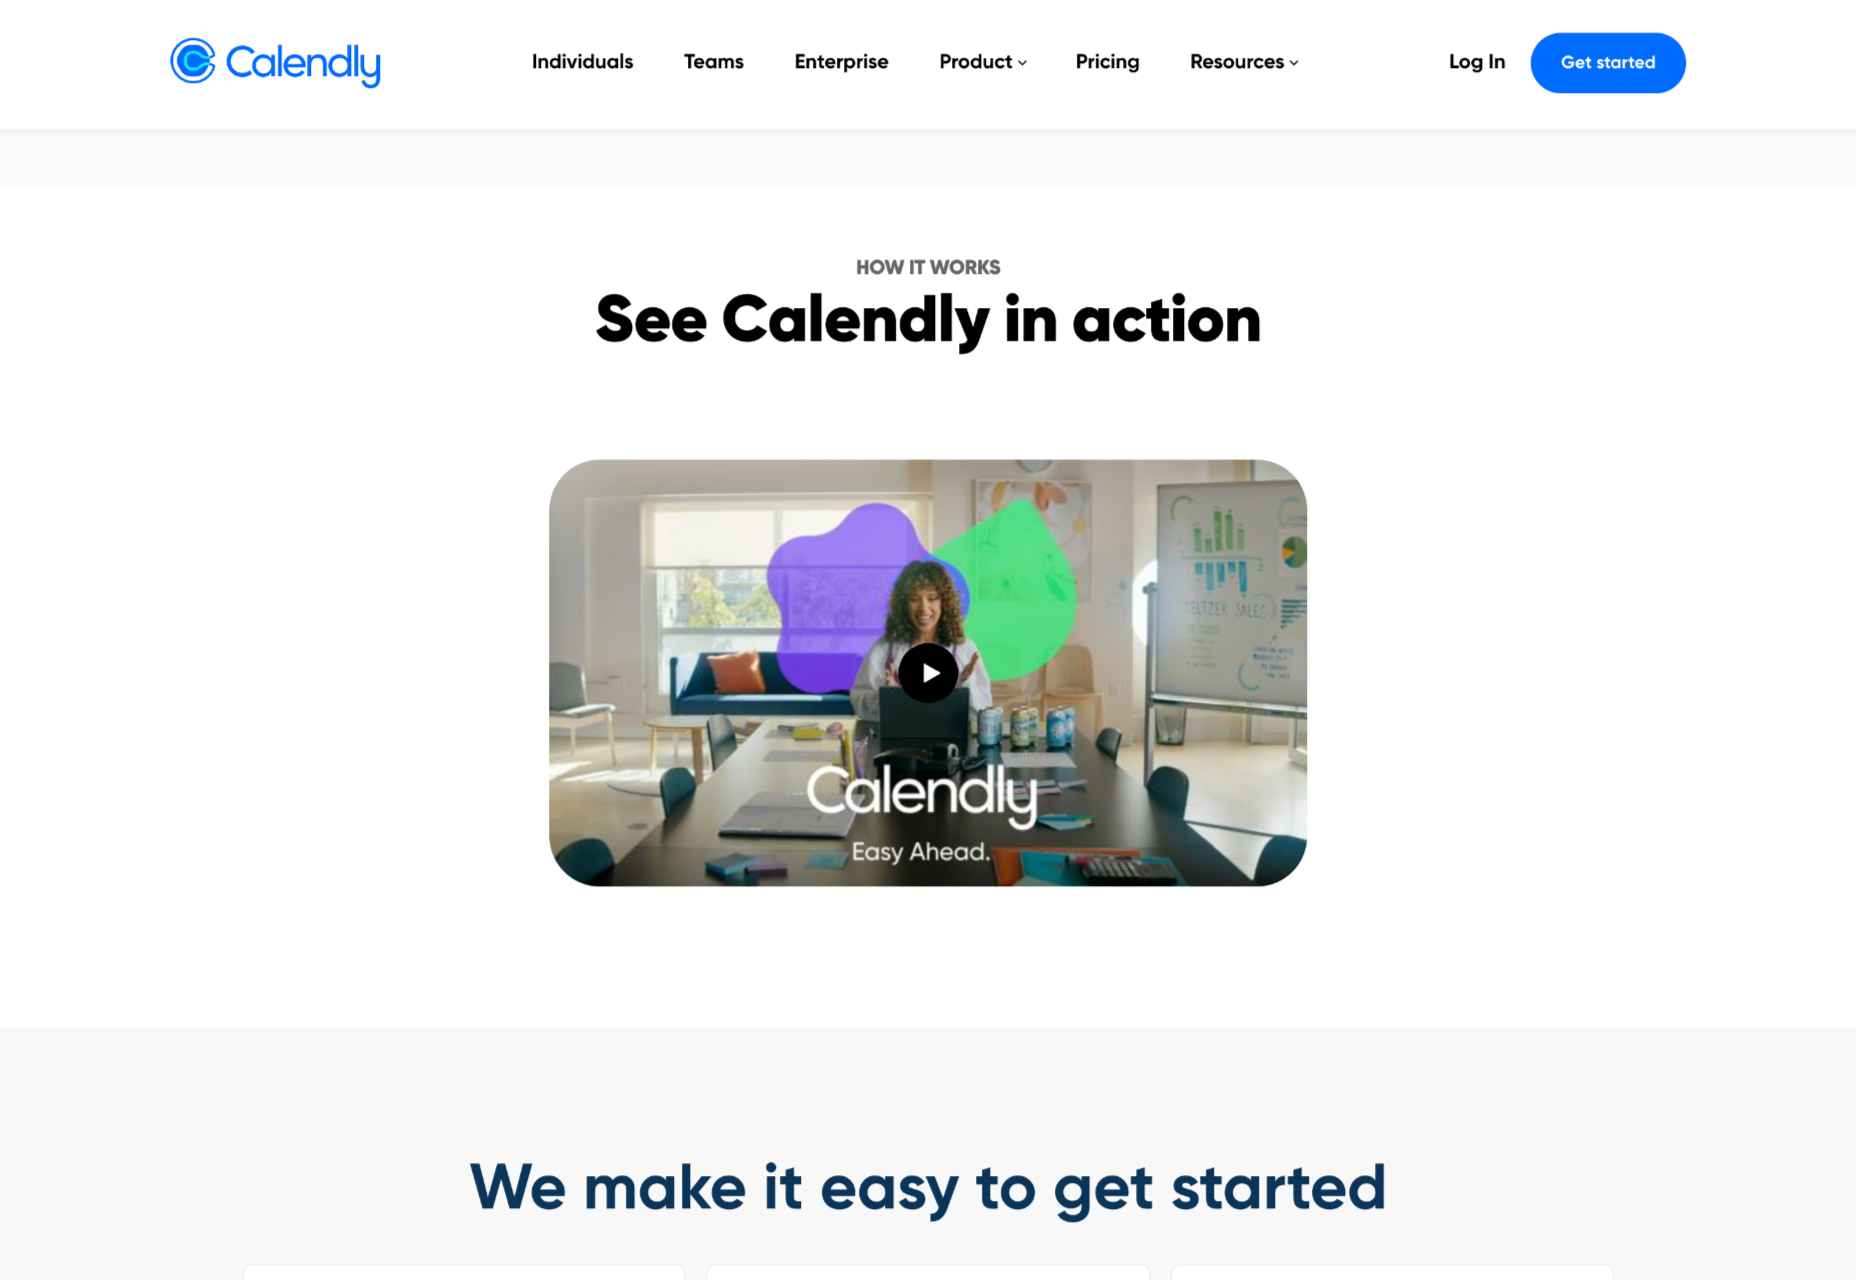
Real-time demos mean that you take a full instance or version of your product that is clickable and responsive and embed it into the flow of your landing page. This way, the user can get a quick “test drive,” and you easily communicate the value that would otherwise be abstract or difficult for the user to imagine or even visualize. Additionally, users always want to know how a product could personally impact them, and live demos offer them a hands-on experience.

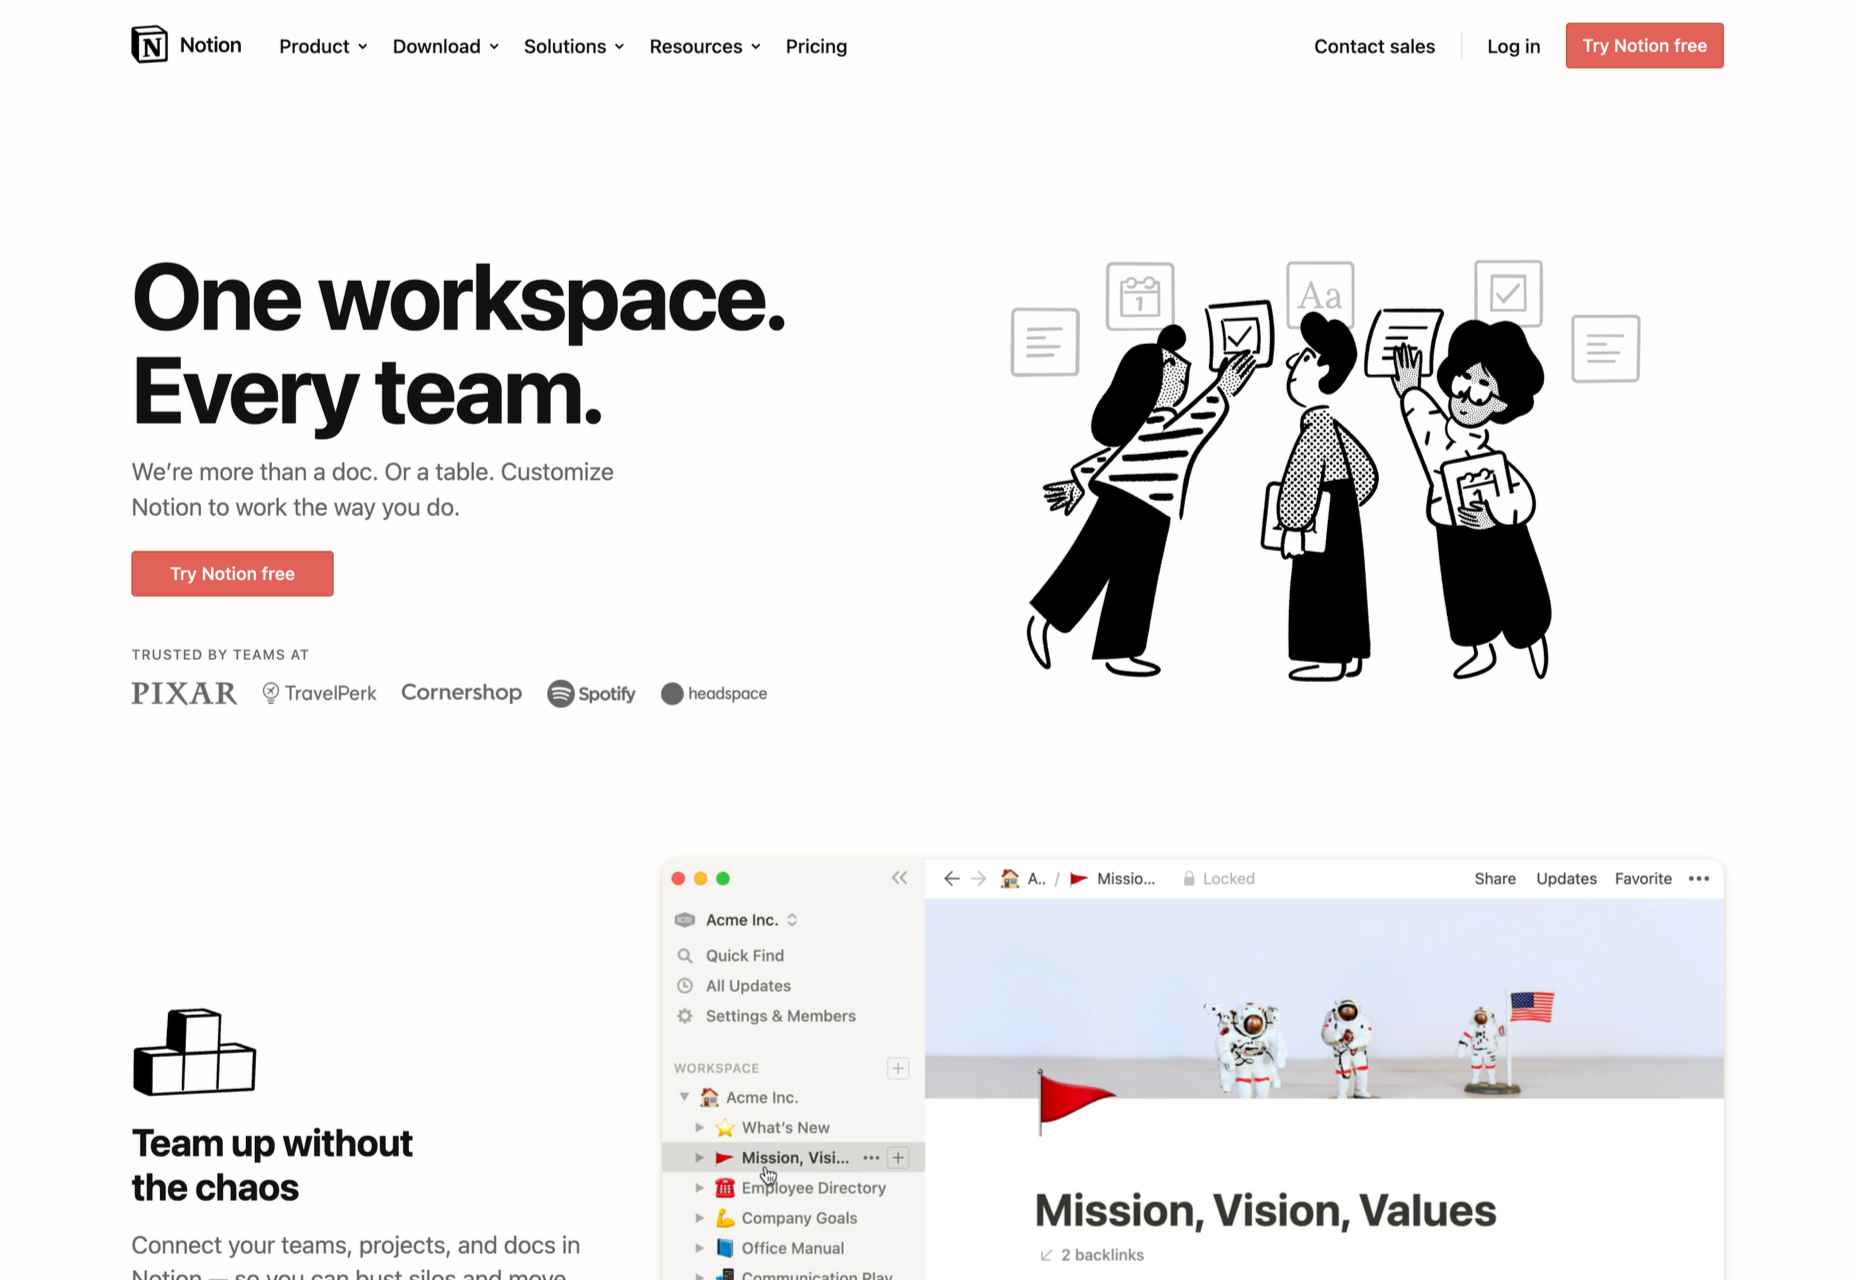
Companies incorporating live demos have proven the power to engage a user’s curiosity and create a strong link with their products or services. Notion, for instance, uses a “templates” section with pre-built pages that can be easily opened and browsed through without needing to register or download anything. This product’s beauty lies in the simplicity and efficiency it offers, rather than overwhelming a user with a self-promotional copy. Even a simple live demo like that can help build considerable trust in the product and encourage users to make a high-value purchase.

Calculators Provide Value

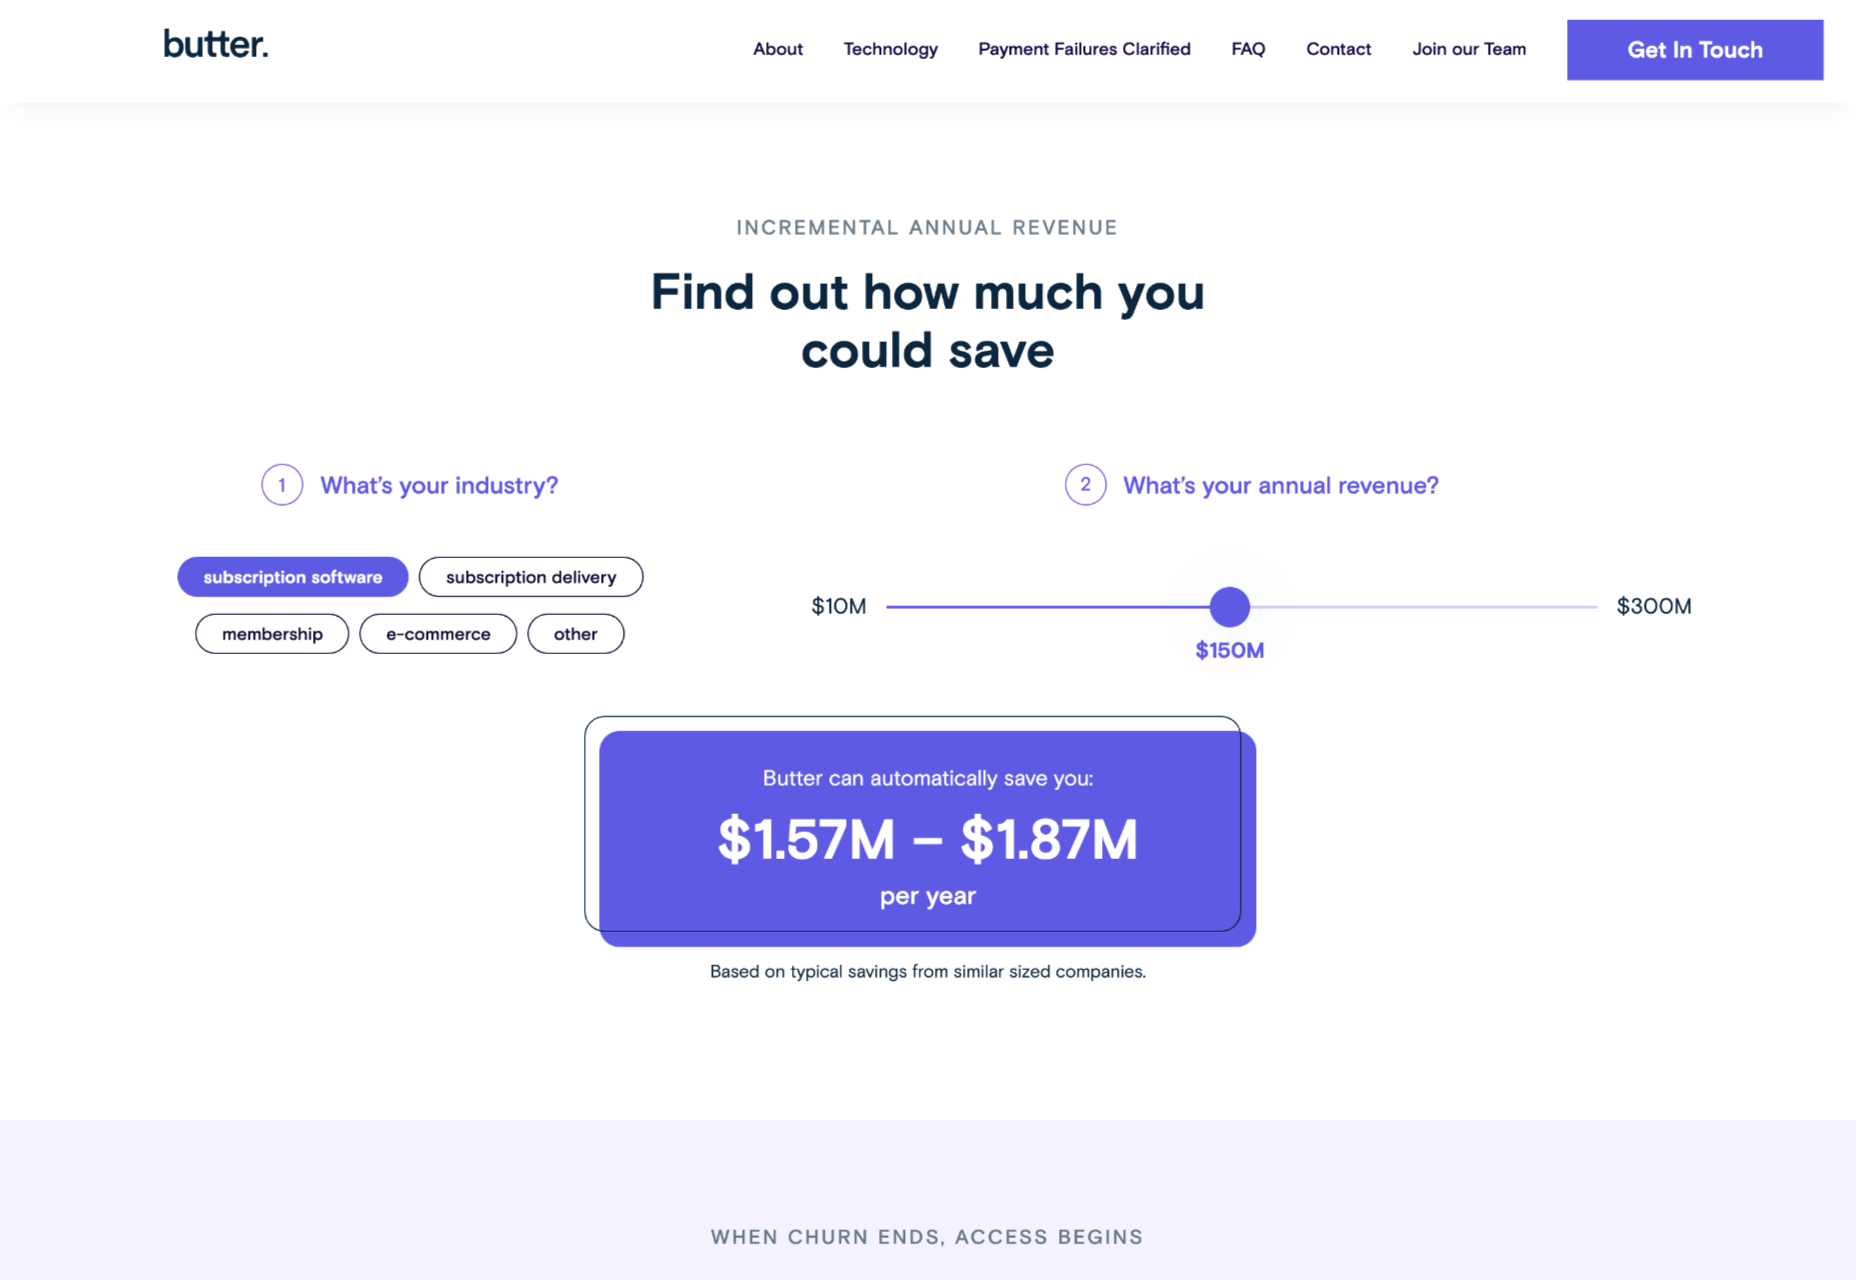
Despite their simplicity, calculators can increase audience engagement by 38%. Their main benefit is undoubtedly providing a personalized solution to users’ actual needs and expectations. ROI and savings calculators can be particularly interesting, especially when they speak of value that isn’t easy to calculate or when the user wouldn’t intuitively know that there are savings to be had by using a particular product.

Butter Payment, uses this tool very effectively. As its customers necessarily don’t know they have an involuntary churn problem that is worth solving for, it uses a calculator on its site to demonstrate the problem and enumerate the value-add to potential customers.

HubSpot, too, has mastered the tool: Its Ad ROI Calculator visually presents the results that its software can bring. Then, HubSpot’s interactive website grader directs the user towards its comprehensive marketing offerings. It is this graphic visualization that companies must adopt to communicate real value.

The Charm of Experiential Interaction

Interactive design is said to drive the responsiveness and real-time interaction of a site through the roof. By incorporating an interactive or experiential page, even if it’s not directly on your landing page, you can craft a unique experience aimed at leaving a lasting, meaningful impression of your product or service.

Calm’s “Do Nothing for two minutes” is a simple yet effective way to show users the value of meditation in their daily life and lead them to download the app.

But it works great for consumer products, too: Nike’s Digital Foot Measurement tool is another excellent feature, allowing users to “try shoes on” with their cameras and scan their feet for the right measurement through AR.

Videos are Attention Magnets

Considering that viewers absorb some 95% of the message while watching videos, compared to only 10% when reading text, there’s no reason why you should avoid incorporating videos into your landing pages. Beyond that, videos can be incredibly straightforward: Insert a graphic illustration or real imagery to explain the product, show the step-by-step process, and convey value with raw, unfiltered footage.

Calendly, for example, has various videos on its landing page, including a 56-second, upbeat, colorful clip showing how simple it is to get started with the product.

Guiding GIFs to Visualize Product Features

As small animations, GIFs represent the perfect middle ground between images and videos. They allow you to show users the value your product adds, providing an engaging glimpse into the actual interface. The small scope of GIFs is both a limitation and a benefit: You can only show a particular feature of your product but can also focus on triggering an exact user emotion.

Grammarly, a grammar correction tool, relies on GIFs to give users a taste of their UX. With a quick overview of the product’s functionality across popular platforms, including email and social media, users can see exactly how the product can make their everyday lives easier. And by incorporating GIFs into the right side of the landing page, the scrolling experience of the user isn’t disrupted.

Interactive product experiences can both entertain and tackle pain points, adding dynamics to an otherwise static page. Particularly when customizing based on user attributes, the key benefit of these features is that the users engaging with them are likely the same people interested in the paid product. To ensure that the product experience doesn’t directly compete with the primary offering, clearly differentiate it and guide the user towards a direct call to action.

Source

The post The Case for Building More Dynamic Landing Pages first appeared on Webdesigner Depot.

Source de l’article sur Webdesignerdepot