Articles

“Minimum Viable Product,” or “MVP,” is a concept of agile development and business growth. With a minimum viable product, you focus on creating the simplest, most basic version of your product, web application, or code possible.

Minimum viable products include just enough features to attract early adopters and validate your idea in the early stages of the development lifecycle. Choosing an MVP workflow can be particularly valuable in the software environment because it helps teams receive, learn from, and respond to feedback as quickly as possible.

The question is, how exactly do you define the “minimum” in MVP? How do you know if your MVP creation is basic enough while still being “viable”?

Defining the Minimum Viable Product: An Introduction

The concept of “Minimum Viable Product” comes from the Lean Start-up Methodology, introduced by Eric Ries. The purpose of MVP is to help companies quickly create versions of a product while collecting validated insights from customers for each iteration. Companies may choose to develop and release minimum viable products because they want to:

  • Introduce new products into the market as quickly as possible;
  • Test an idea with real users before committing a large budget to product development;
  • Create a competitive product with the use of frequent upgrades;
  • Learn what resonates with the target market of the company;
  • Explore different versions of the same product.

Aside from allowing your company to validate an idea for a product without building the entire concept from scratch, an MVP can also reduce the demand on a company’s time and resources. This is why so many smaller start-ups with limited budgets use the MVP and lean production strategy to keep costs as low as possible.

Defining an MVP: What your Minimum Viable Product Isn’t

When you’re building a Minimum Viable Product, you’re concentrating on developing only the most “essential” features that need to be in that product. For instance, you might be building a shopping app for a website. For the app to be “viable,” it would need to allow customers to search through products and add them to a basket or shopping cart. The app would also need a checkout feature and security components.

However, additional functionality, like the ability to send questions about an item to a customer service team or features that allow clients to add products to a “wish list,” may not be necessary straight away. Part of defining a minimum viable product is understanding what it isn’t. For instance, an MVP is not:

  • A prototype: Prototypes are often mentioned alongside MVPs because they can help with early-stage product validation. However, prototypes are generally not intended for customers to use. The “minimum” version of a viable product still needs to be developed enough for clients and users to put it to the test and provide feedback.
  • A minimum marketable product: An MVP is a learning vehicle that allows companies to create various iterations of an item over time. However, a minimum marketable product is a complete item, ready to sell, with features or “selling points” the company can highlight to differentiate the item from the competition.
  • Proof of concept: This is another similar but distinct idea from MVP. Proof of concept items test an idea you have to determine whether it’s attainable. There usually aren’t any customers involved in this process. Instead, companies create small projects to assess business solutions’ technical capabilities and feasibility. You can sometimes use a proof of concept before moving on to an MVP.

Finding the Minimum in your MVP

When finding the “minimum” in a minimum viable product, the primary challenge is ensuring the right balance. Ideally, you need your MVP to be as essential, cost-effective, and straightforward as possible so that you can create several iterations in a short space of time. The simpler the product, the easier it is to adapt it, roll it out to your customers, and learn from their feedback.

However, developers and business leaders shouldn’t get so caught up focusing on the “Minimum” part of Minimum Viable Product that they forget the central segment: “Viable”; your product still needs to achieve a specific purpose.

So, how do you find the minimum in your MVP?

1. Decide on Your Goal or Purpose

First, you’ll need to determine what your product needs to do to be deemed viable. What goal or target do you hope to achieve with your new product? For instance, in the example we mentioned above, where you’re creating an ecommerce shopping app, the most basic thing the app needs to do is allow customers to shop for and purchase items on a smartphone.

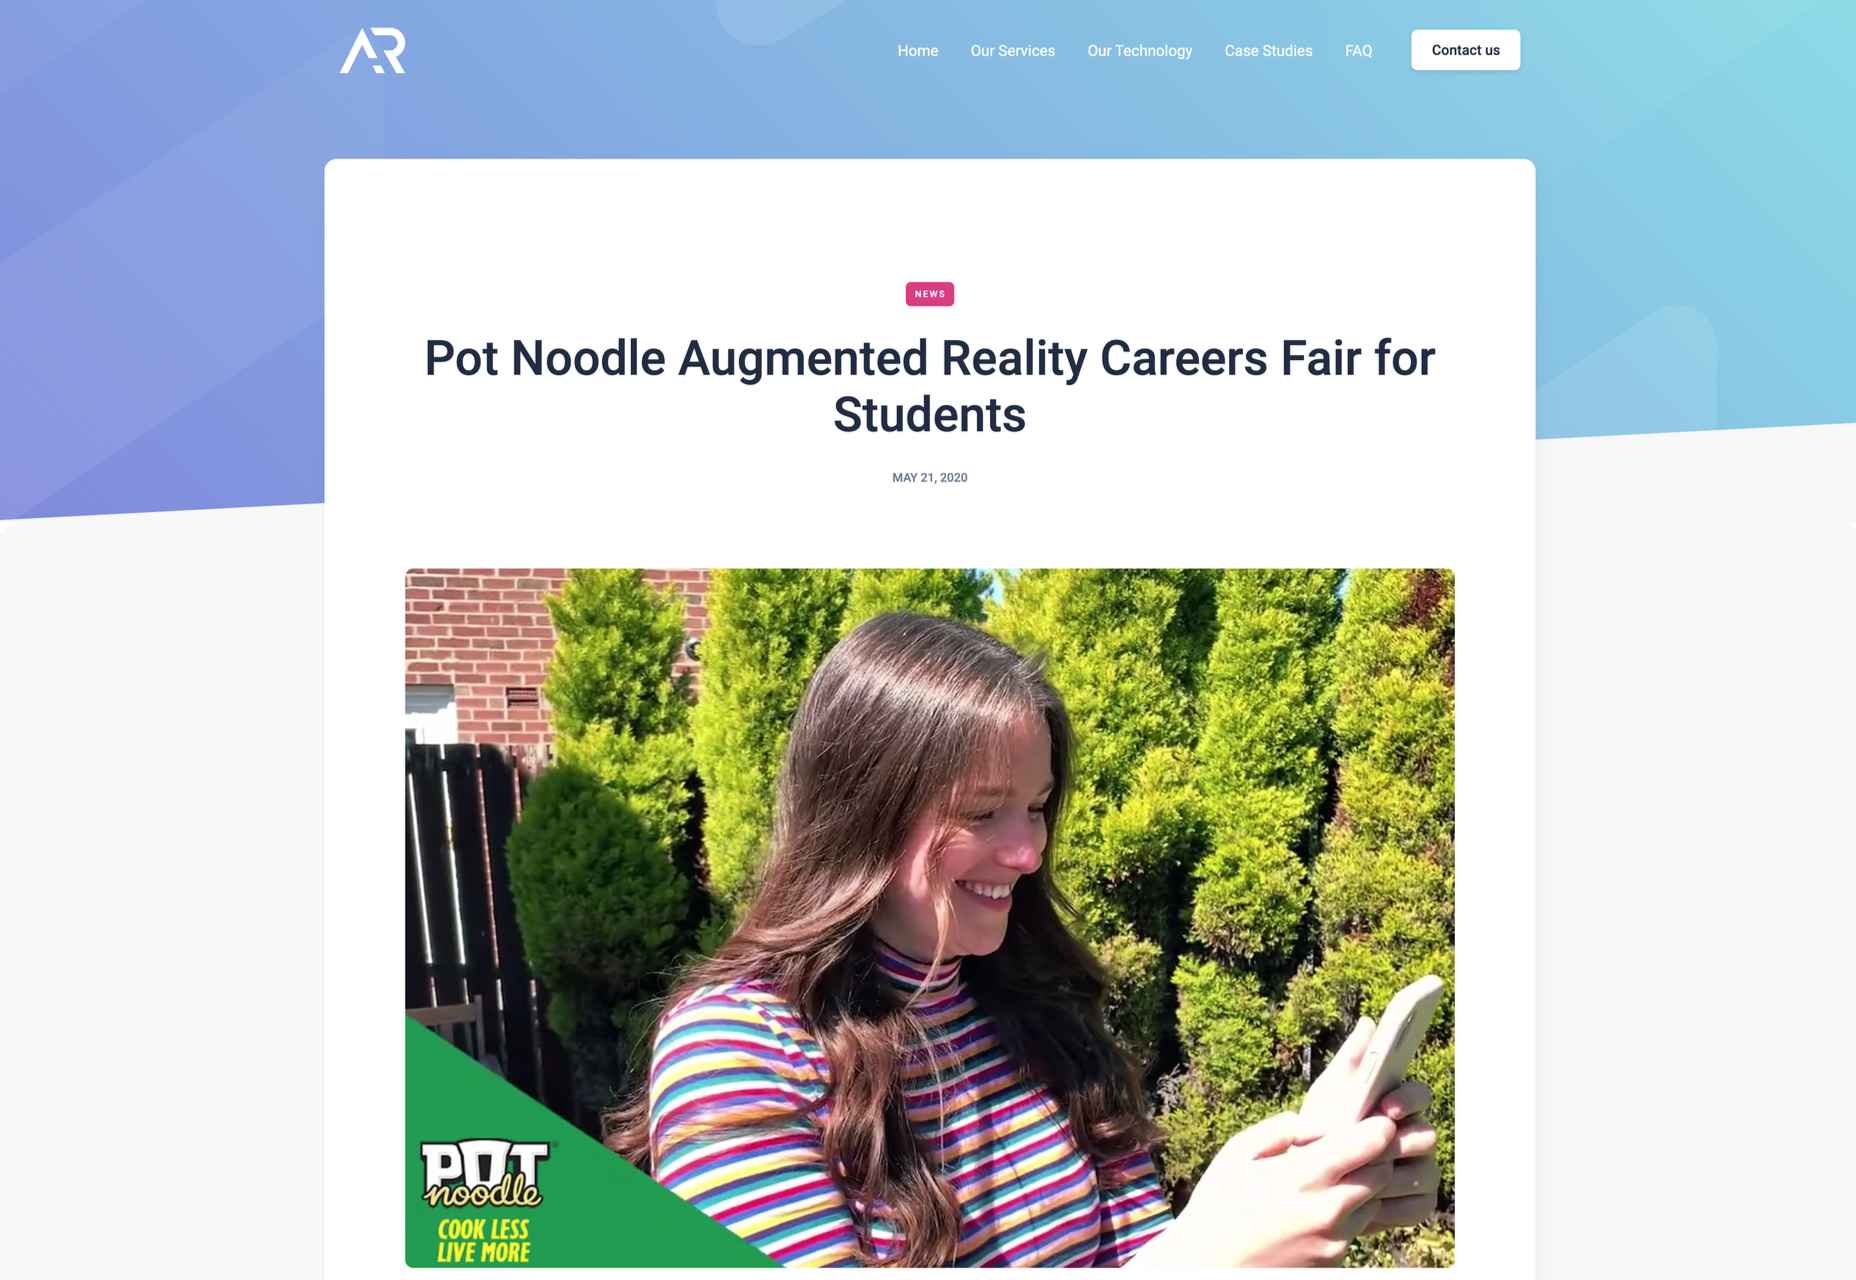
Consider the overall selling point of your product or service and decide what the “nice to haves” are, compared to the essential features. For instance, your AR app needs to allow people to interact with augmented digital content on a smartphone, but it may not need to work with all versions of the latest AR smart glasses.

2. Make a List of Features

Once you know the goal or purpose of your product, the next step is to make a list of features or capabilities you can rank according to importance. You can base your knowledge of what’s “most important” for your customers by looking at things like:

  • Competitor analysis: What do your competitors already offer in this category, and where are the gaps in their service or product?
  • User research: Which features or functionalities are most important to your target audience? How can you make your solution stand out from the crowd?
  • Industry knowledge: As an expert in your industry, you should have some basic understanding of what it will take to make your product “usable.”

3. Create Your Iterations

Once you’ve defined your most important features, the next stage is simply building the simplest version of your product. Build the item according to what you consider to be its most essential features and ask yourself whether it’s serving its purpose.

If your solution seems to be “viable,” you can roll it out to your target audience or a small group of beta testers to get their feedback and validate the offering. Use focus groups and market interviews to collect as much information as possible about what people like or dislike.

Using your feedback, you can begin to implement changes to your “minimum” viable product to add more essential features or functionality.

Understanding the “Minimum Viable Product”

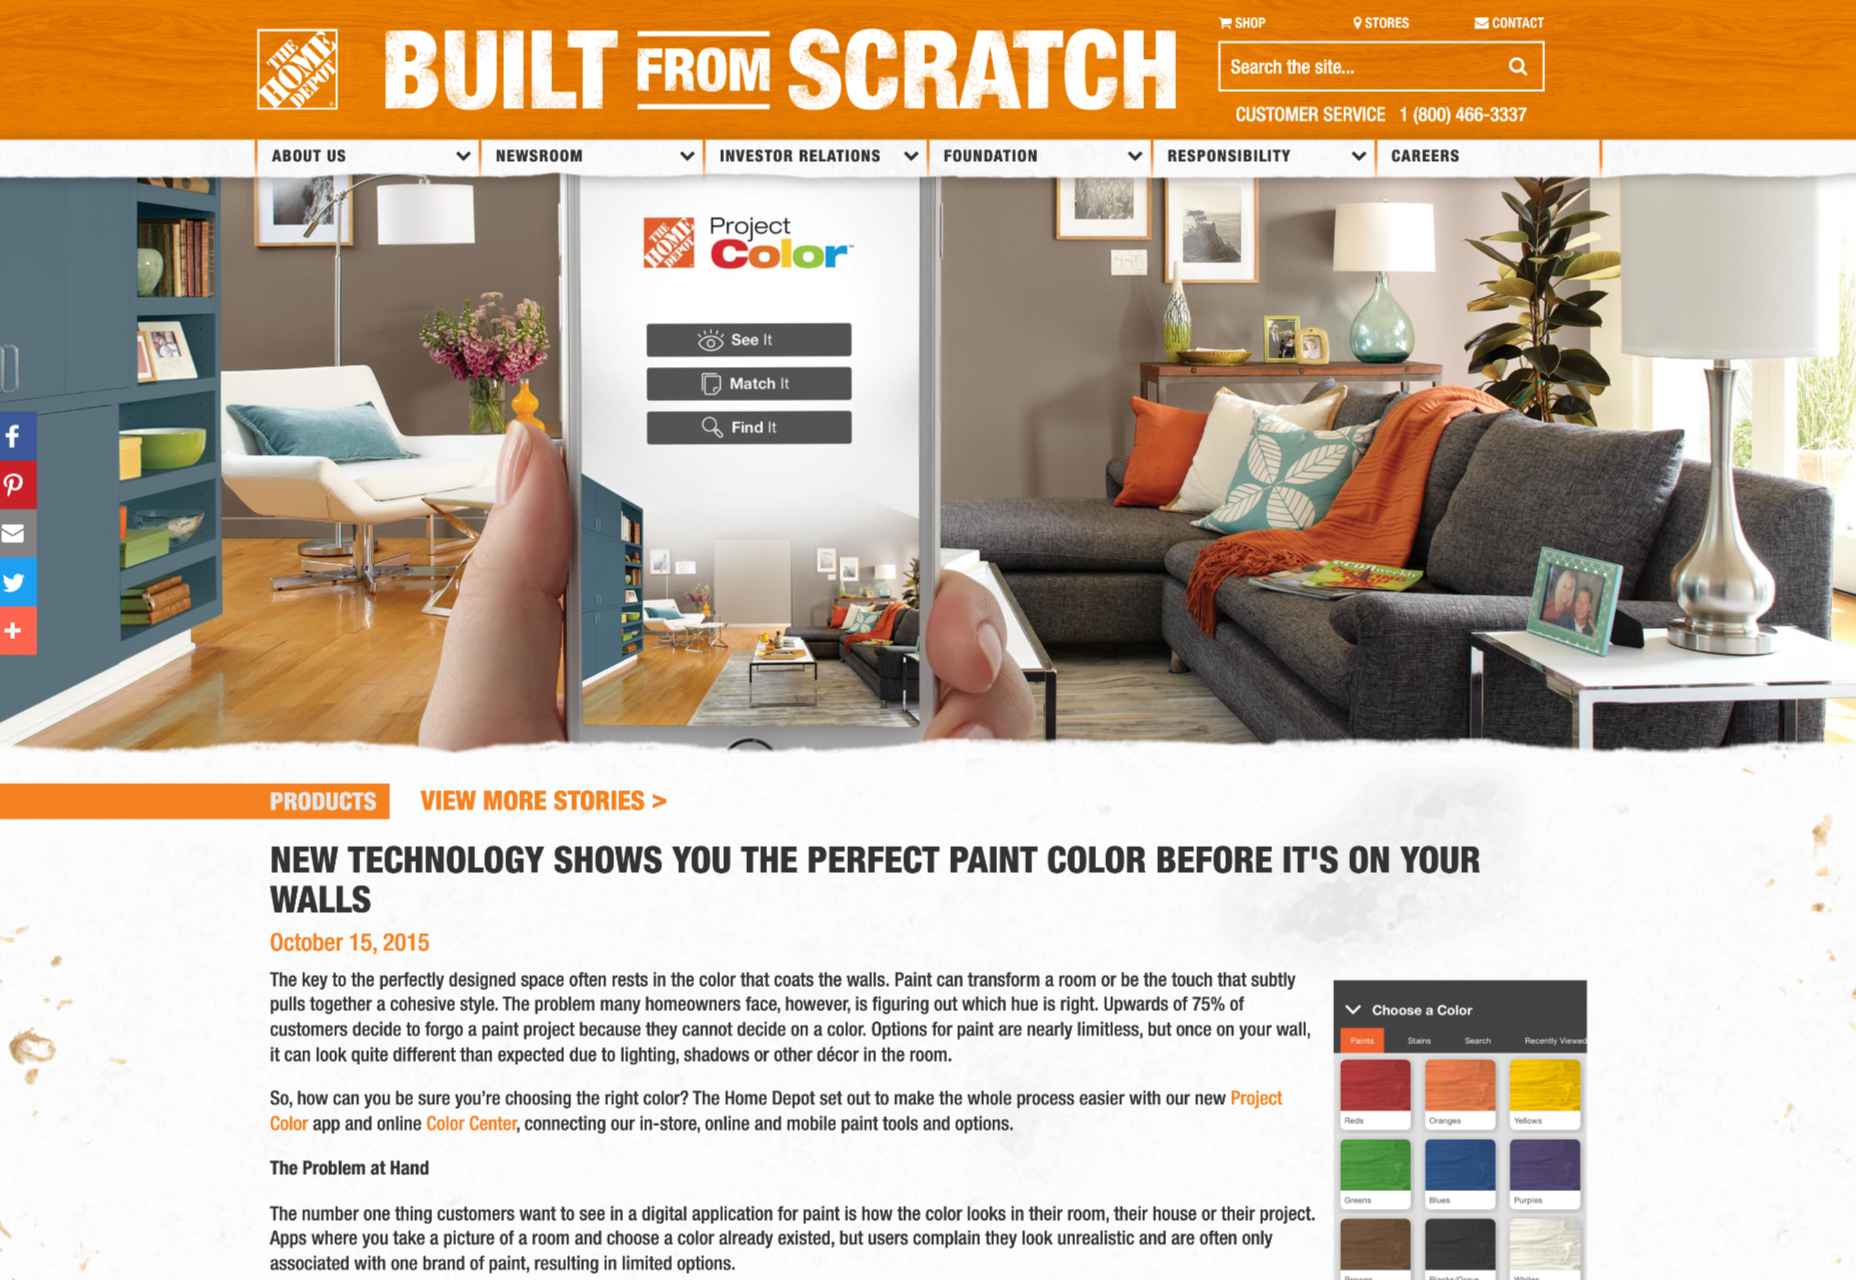
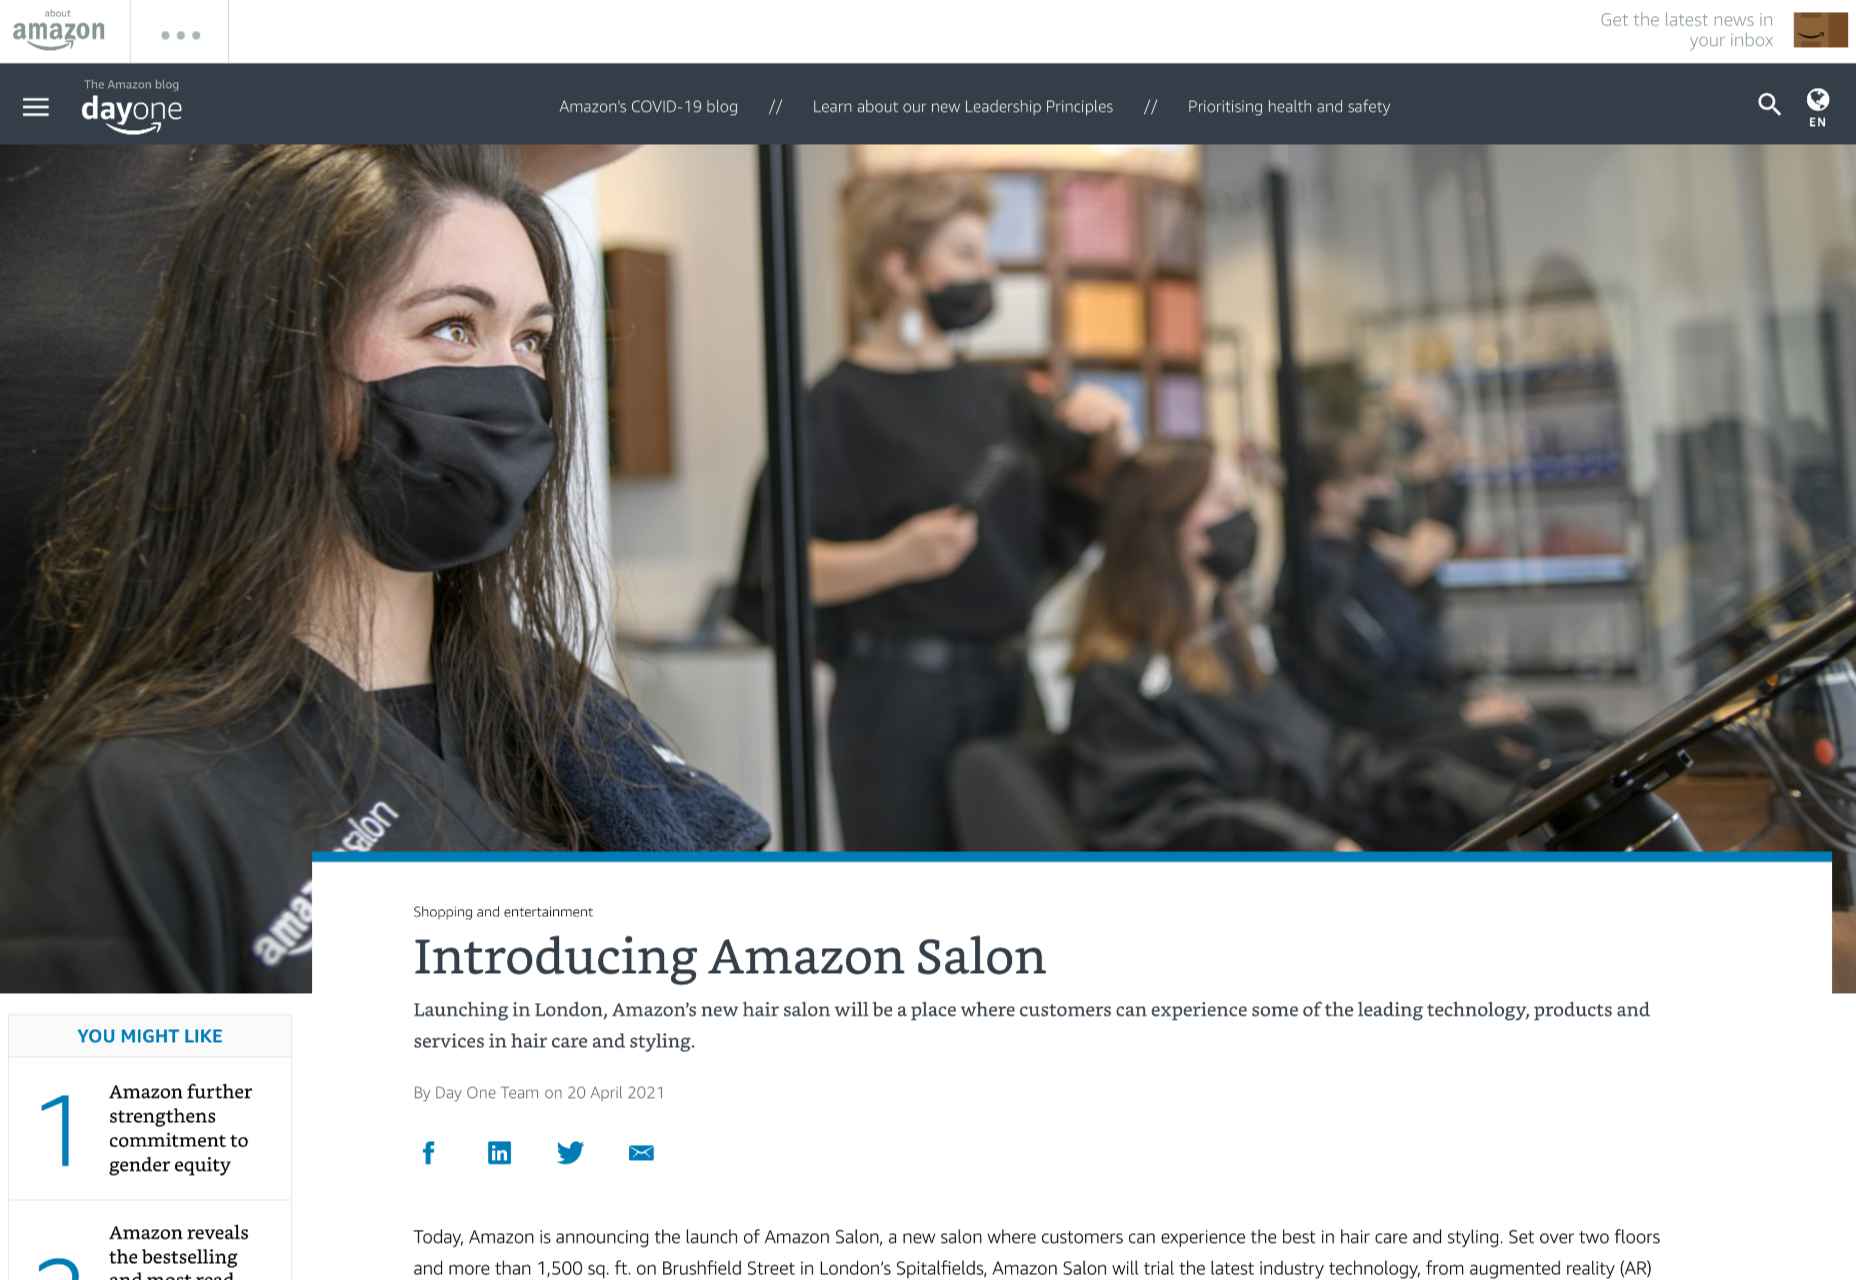
Minimum viable products are evident throughout multiple industries and markets today – particularly in the digitally transforming world. For instance, Amazon might be one of the world’s most popular online marketplaces today, but it didn’t start that way. Instead, Jeff Bezos began purchasing books from distributors and shipping them to customers every time his online store received an order to determine whether the book-selling landscape would work.

When Foursquare first began, it had only one feature. People could check-in at different locations and win badges. The gamification factor was what made people so excited about using the service. Other examples include:

  • Groupon: Groupon is a pretty huge discount and voucher platform today, operating in companies all around the world. However, it started life as a simple minimum viable product promoting the services of local businesses and offering exclusive deals for a short time. Now Groupon is constantly evolving and updating its offerings.
  • Airbnb: Beginning with the use of the founders’ own apartment, Airbnb became a unicorn company giving people the opportunity to list places for short-term rental worldwide. The founders rented out their own apartment to determine whether people would consider staying in someone else’s home before eventually expanding.
  • Facebook: Upon release, Facebook was a simple social media tool used for connecting with friends. Profiles were basic, and all members were students of Harvard University. The idea quickly grew and evolved into a global social network. Facebook continues to learn from the feedback of its users and implement new features today.

Creating Your Minimum Viable Product

Your definition of a “minimum viable product” may not be the same as the definition chosen by another developer or business leader. The key to success is finding the right balance between viability – and the purpose of your product, and simplicity – or minimizing your features.

Start by figuring out what your product simply can’t be without, and gradually add more features as you learn and gain feedback from your audience. While it can be challenging to produce something so “minimalistic” at first, you need to be willing to release those small and consistent iterations if you want to leverage all the benefits of an MVP.

Suppose you can successfully define the meaning of the words “Minimum” and “Viable” simultaneously with your new product creations. In that case, the result should be an agile business, lean workflows, and better development processes for your entire team.


Featured image via Pexels.

Source

The post What is the “Minimum” in Minimum Viable Product? first appeared on Webdesigner Depot.

Source de l’article sur Webdesignerdepot

What stands out as an incredible web design project for you? Do you count your creation as a success if it’s modern, minimal, and accessible? Maybe you’re the kind of designer that’s constantly experimenting with the latest dynamic design tools or state-of-the-art technology. Perhaps your websites are vivid, animated, and brimming with unique components?

Sometimes, creating the ideal design means thinking carefully about what you want to accomplish for your client. The purpose of your web creation has a significant impact on the components that you need to consider. For instance, if you’re hoping for a highly emotive and human design, it may be worth combining some of your sleek lines and graphics with hand-drawn elements. 

The Value of Hand-Drawn Graphics in Web Design

Hand-drawn elements are just like the other components of web design; that way may use to express individuality in a cluttered digital environment. In a world where everyone focuses on futuristic and virtual creations, hand-drawn elements can pull attention back to the importance of humanity in your content. 

As web designers, we know that visual components often impact people more than text-based content. Illustrations are highly engaging functional elements that capture audience attention and convey relevant information. 

The main difference between hand-drawn elements and graphics built with vectors and other digital components is that one appears to be more influenced by the human hand than the other. Even if your illustrations are created on a screen, just like any other web design component, it pushes an audience to see something more straightforward, more natural, and authentic. 

For a brand trying to convey innocence and humanity in its personality, hand-drawn design can speak to the part of the human psyche that’s often unappreciated by web design. Perhaps more than any other visual, the content reminds your audience that there’s a human behind the web page

The Value of Hand-Drawn Features in Web Design

Any image can have a massive impact on the quality of your web design. Visuals deliver complex information in an easy-to-absorb format. In today’s world of fast-paced browsing, where distractions are everywhere, visuals are a method of capturing attention and delivering value fast. 

However, with hand-drawn elements, you go beyond the basic functionality of images to embrace the emotional side of the content. Benefits include:

  • A memorable experience: Web illustrations are becoming more popular among leading brands like Innocent Smoothies and Dropbox. However, the time that goes into these components means that they’re still scarce. If you want to stand out online, illustrations can help you do that. 
  • Brand personality: One of the most significant benefits of hand-drawn web design is showcasing your brand personality. The blocky lines of imperfect content that go into illustrated images highlight the human nature of your company. So many businesses are keen to look “perfect” today to make the human touch much more inviting. 
  • Differentiation: As mentioned above, hand illustrations are still rare in the digital design landscape. If you’re struggling to find a way to make your brand stand out, this could be it. Although there needs to be meaning behind your design, the result could be a more unique brand if you can convey that meaning properly. 

Tips for Using Hand Drawn Elements in Web Design 

Hand-drawn components, just like any other element of visual web design, demand careful strategy. You don’t want to overwhelm your websites with these sketches, or you could end up damaging the user experience in the process. 

As you work on your web designs, pulling hand-drawn elements into the mix, think about how you can use every illustration to accomplish a crucial goal. For instance:

Create Separation

Hand-drawn design components can mix and match with other visual elements on your website. They work perfectly alongside videos and photos and help to highlight critical points. 

On the Lunchbox website, the company uses hand-drawn elements. This helps make the site stand out, and it provides additional context for customers scanning the website for crucial details.

Engage Your Audience

Sometimes, hand-drawn elements are all about connecting with end-users on a deeper, more emotional level. One of the best ways to do this is to make your hand-drawn elements fun and interactive pieces in the design landscape. 

One excellent example of this is in the Stained Glass music video here. This interactive game combines an exciting web design trend with creative interactive components so that users can transform the web experience into something unique to them.

Highlight Headers with Typography

Sometimes, the best hand-drawn elements aren’t full illustrations or images. Hand-drawn or doodle-like typography can also give depth to a brand image and website design. 

Typography styles that mimic natural, genuine handwriting are excellent for capturing the audience’s attention. These captivating components remind the customer of the human being behind the brand while not detracting from the elegance of the website. 

This example of hand-drawn typography from the Tradewinds hotel shows how designers can use script fonts to immediately capture customer attention. Notice that the font is still easy to read from a distance, so it’s not reducing clarity. 

Set the Mood

Depending on the company that you’re designing for, your website creation choices can have a massive impact on the emotional resonance that the brand has with its audience. Hand-drawn elements allow websites to often take on a more playful tone. They can give any project a touch of innocence and friendliness that’s hard to accomplish elsewhere. 

A child-like aesthetic with bright colors and bulky fonts combines with hand-drawn elements on the Le Puzz website. This is an excellent example of how web designers can use hand-drawn elements to convey a mood of creativity and fun.

Animated Elements

Finally, if you want to combine the unique nuances of hand-drawn design with the modern components of what’s possible in the digital world today, why not add some animation. Animated elements combined with illustrations can help to bring a website to life. 

In the Kinetic.com website, the animated illustrated components help to highlight the punk-rock nature of the fanzine. It’s essential to ensure that you don’t go too over-the-top with your animations here. Remember that too many animations can quickly slow down a website and harm user-friendliness.

Finishing Thoughts on Hand-Drawn Elements

Hand-drawn elements have a lot to offer to the web-design world. 

Even if you’re not the best artist yourself, you can still simulate hand-drawn components in your web design by using the right tools and capabilities online. 

Although these features won’t fit well into every environment, they can be perfect for businesses that want to show their human side in today’s highly digitized world. Hand-drawn components, perhaps more than any other web design feature, showcase the innocence and creativity of the artists that often exist behind portfolio pages and startup brands. 

Could you experiment with hand-drawn design in your next project?

Source

The post How to Use Hand-Drawn Elements in Web Design first appeared on Webdesigner Depot.

Source de l’article sur Webdesignerdepot

User Experience (UX) design and User Interface (UI) design are two terms people sometimes mistakenly use interchangeably. While aspects of each are interconnected, there are distinct differences between UI/UX design.

According to Internet Live Stats, there are over 1.9 billion websites, but not all are active at the same time. No matter how you slice it, there’s a lot of competition to grab and keep user attention. Good UX is just part of the equation. For a genuinely stellar site, you must also offer an excellent interface.

Learning the ins and outs of good UI and UX requires a bit of knowledge of how the two differ and what works. Although they weave in and out of the same design, they are different.

What Is the Biggest Difference Between Good UX and UI?

UI is the functionality of the design and what users see. How do they interact with various elements? UX is more the way things come together — both visual and interactive features — to create a feel for the user. You can certainly see why people confuse the two as they both apply to interacting with a website or app.

Top design firms often have team members specializing in each discipline. However, UX designers are also aware of UI, and UI designers are also mindful of UX. How can you ensure you’re offering excellent UI/UX design while covering the full spectrum of requirements for each?

Ensuring Effective UX Design

Good UX design increases conversion rates by 400% or more. The site visitor walks away feeling understood and not frustrated. What are some of the most important aspects of good UX design?

1. Create a Good Structure

What is the hierarchy of your site? What is the first thing the user sees when they pull it up? How do they navigate from one page to the next? A well-designed website classifies different aspects of the page, and new content naturally falls into the appropriate category as it grows.

When creating a structure for your site, think about how it might expand in the next five years. You want the hierarchy to work from day one, but you also want to think through significant shifts in the content you might see down the road.

Even your navigational hierarchy should accommodate new areas easily. Plan for the unexpected, so you know how to work it into the overall design when you must.

2. Choose Beautiful Aesthetics

You have a few seconds to make an excellent impression on your site visitors. Take the time to make sure your design functions and is visually appealing. Your color palette should work, images should be crisp and relevant, and typography should be readable and engaging.

Step back from your computer and look at your design from a distance. Does anything stand out that isn’t pleasing to the eye? Get feedback from visitors about what they like and dislike. Since the focus is on user experience, your best source of constructive criticism is from your target audience. Listen to their concerns and ideas.

3. Communicate With Site Visitors

Most experts agree that users want an element of interactivity on sites and apps. People want to know you hear them and get a response. Some ideas include adding a live chat option to your site or engaging in SMS customer support.

Put yourself in their shoes. A customer may visit your site for the first time, having never heard of your brand. They have no reason to trust you or that you’ll follow through on your promises. Potential leads may have a few questions before parting with their hard-earned dollars.

Adding various ways to communicate shows them you’ll be there should they have a problem. It’s much easier to trust a company when you know you can phone, engage in live chat or shoot off an email and get an almost immediate response.

4. Add Clear Direction

Excellent UX is intuitive. You should add calls to action (CTAs) and images pointing the user where they should go next. You can use graphics of arrows, people looking or pointing toward the next step, words, or CTA buttons.

Get feedback on how clear the directions are and tweak them as needed. The user should never have to stop and ponder what to do next. Everything on the page should guide them toward the ultimate goal.

5. Break Down Complex Data

Every industry has complicated data that is difficult for non-experts to understand. Part of good UX is breaking down complex information and sharing it in a simplified way.

One example might be the registration process. Instead of just showing text, a good UX designer would number the steps. Visualizations help add to understanding.

Embracing Effective UI Design

User Interface impacts UX and involves how the design works. The UI designer thinks through visitor expectations and then creates an interface that isn’t frustrating. UI works within the framework of a website to develop functional features. User experience isn’t the complete focus of UI, but it does tie into the planning phases. What are some elements of good UI design?

1. Set Standards

For a design to have good UI, it must perform as expected. Have you ever clicked on a button, and nothing happened? Determine how you want things to work and the minimum acceptable standards for your site.

For example, what happens when someone clicks on a link or button? How does the user know their action created the expected result? Consistency is crucial to how a site performs.

2. Choose the Right Colors

While UX designers look at the emotional impact of various colors, UI designers look at whether the shades match branding and how well the different ones contrast for readability and usability. UI/UX design often bridges a single designer’s work, so the employee ensures everything works as intended, both emotionally and functionally.

You may work with another designer to make the site aesthetically pleasing while also tapping into the emotions driving users. For example, some people love blue, so a blue button can have positive results.

UX and UI designers utilize split testing to see which users respond best to. Then, make adjustments as indicated by how site visitors respond.

3. Focus on Cognitive Matters

According to the Interaction Design Foundation, people can only retain around five things in their short-term memory. Designers should work with recognition instead, as users tend to rely on cues to find what they need.

UI designers may develop an intuitive navigation system and then use the same cues on every page, such as placement, color, and language. Users can then recognize the system without having to memorize it.

4. Prevent Errors

Your job is to ensure errors are kept to a minimum when designing a website or app. One of the most significant parts of a designer’s job is testing and retesting.

Think about all the potential problems a user might run into, such as broken links, images not showing, or incomplete actions. How can you keep those problems from occurring in the first place?

Error prevention is particularly vital when designing software as a service (SaaS) or apps. Users grow frustrated quickly and will find another solution rather than troubleshooting an issue. You’re much better off avoiding the error in the first place.

How Do UX and UI Work Together?

You’ve likely already figured out how closely UX and UI entwine to create a usable experience. The UX designer pays attention to function and interactivity, and the UI designer thinks through how the interface looks.

UX pays attention to the flow of the website and where users start, go next and end up. On the other end, UI figures out how the elements look to the viewer and where everything is placed.

The UX team may decide to add an extra button to the page. The UI team must determine where to place it, if any sizing needs must occur, and how it impacts usability on desktop and mobile devices.

Although each has a different function, user experience and user interface must work together to create a usable site the target audience responds to. You can’t have excellent UX without excellent UI, and vice versa. The best designers consider both and implement them to their fullest potential.


Featured image via Pexels.

Source

The post What’s the Difference Between Good UI and Good UX? first appeared on Webdesigner Depot.

Source de l’article sur Webdesignerdepot

AR (Augmented Reality) continues to build as one of the most exciting technology innovations to appear in recent years. More accessible than virtual reality experiences, since no specialist headset is required, AR has quickly emerged as a crucial tool for building unique experiences.

Although interest in AR as a tool for customer interaction and experience has been growing, demand has skyrocketed in recent years. In addition, since the pandemic of 2020, companies no longer have the same in-person opportunities available to create meaningful relationships with customers.

To ensure a client is fully invested in your brand today, you need to find a new way of building that emotional link. As an immersive, experience-led solution for brand building, AR can improve a company’s chance of earning brand loyalty. What’s more, around 71% of consumers say they would shop more often if AR technology were available.

The question is, how do you develop your own AR branded experiences?

Creating Branded Experiences in AR

For an augmented reality experience to be effective, you need more than just the right technology; you need a strategy for how you’re going to engage, empower, and support your target audience.

The best AR branded experiences aren’t just multi-dimensional advertisements; they’re tools intended to engage, inform, and entertain your audience in a new, highly immersive realm. Before you can begin to work on your AR app, you need to think about what kind of branded experience you want to develop. Here are some excellent examples to get you started.

AR Try-Before-You-Buy Interactions

Globally, ecommerce sales are growing at an astronomical pace. Going forward, there’s no question that the digital landscape will become the new platform for shopping and transactions. But, unfortunately, there are some limitations when it comes to shopping online.

While the right website developer or designer can create a stunning site packed with information about a product or service, there’s only so much that a webpage can do. Delivering a truly immersive user experience for your target audience involves replicating the kind of in-person experiences they would get in a digital format.

The best example of this is the “try-before-you-buy” AR app. Most commonly seen in the clothing and beauty industries, this app allows customers to use AR filters to see what everything from a new hair color to a shade of lipstick might look like on them. The experience is highly accessible and engaging because it builds on customers’ familiarity with filters and similar effects on social media channels like TikTok and Instagram.

A popular example of an AR try-before-you-buy experience comes from Sephora, with the “Virtual Artist” application. Originally installed within the Sephora app in 2016, the technology uses Modiface to scan and track the eyes and lips of the customer using a smartphone camera. After that, the system can overlay eye-shadows, lipsticks, and other products, to give the customer idea of what they might look like in real-life.

As AR applications become more mainstream, new solutions are emerging for companies concerned about things like privacy. Consumers who don’t want to load their image into a system for try-before-you-buy experiences can still access the benefits of AR with the right tools.

For instance, ASOS created the new “See My Fit” service in 2020 to help customers shop for clothing during the pandemic. The solution allows users to see what clothing will look like on a model with a similar body type to their own. This helps to show shoppers how products realistically look in similar bodies while reducing the risk of returns.

ASOS certainly saw the benefit of this innovation, with an increase in revenues of around 24% in the six months leading to the end of February 2021.

AR for Product Catalogs and Visualization

We all remember what it was like to flick through the glossy pages of a magazine or catalog for our favorite stores. Unfortunately, in today’s digital age, these paper brochures are far from the most efficient tool for shopping. We need a more digital experience that allows us to select products, see what they will look like, and add them to our virtual baskets.

One excellent example of how companies can use AR to improve the overall shopping and visualization experience for customers comes from Home Depot. The brand was one of the first to upgrade its user experience strategy with a new Project Color application in 2015. Although this app might seem a little outdated by today’s standards, it’s still an excellent insight into what companies can do to improve their customer’s brand experience.

The Home Depot app used AR to scan a room and implement the color a customer chose for their walls into that space, considering things like furniture, shadow, and lighting, to allow for a more realistic insight. The app has updated significantly over the years to become increasingly immersive.

Visualizing products in a real, contextual space is hugely beneficial for a customer’s purchasing experience and perception of a specific brand. If your customer sees buying the right product from you as simple and convenient, they’re more likely to stick with your organization long-term.

The product catalog and visualization approach to AR in brand development has grown increasingly popular in the last two years, perhaps driven by the demand for more online shopping opportunities. In 2020, Wayfair announced the release of an updated version of its “View in Room” app, which now uses LiDAR technology to provide enhanced utility when shopping for home products.

According to Wayfair, the LiDAR technology and “RealityKit” software give customers a more authentic and realistic view, so they can make better decisions about what they want to buy. According to Apple, customers are 11 times more likely to buy an item of furniture if they have seen how it looks in their home using AR.

Creating Unique Brand Experiences

AR is one of the technology innovations in our current landscape, helping blur the lines between digital worlds and reality. In a future defined by the rise of the metaverse, AR could have a significant impact on how we spend our time in a more virtual world.

Already, companies are taking advantage of this, with things like virtual pop-up shops and temporary experiences intended to differentiate their brands. For instance, Machine-A, a London-based concept store, is usually committed to showcasing contemporary fashion designs.

When it became apparent that London fashion week for 2020 would be virtual, Machine-A came up with a virtual boutique enabled by AR. By scanning a QR code embedded into billboards and posters across London, users could enter the boutique virtually from their phones and experience the designs themselves.

The concept created by Machine-A has opened the minds of countless business brand teams and marketers to new methods of increasing engagement and awareness among customers. In a world where you can’t necessarily interact with your top customers in person, providing them with a new and immersive experience can be a great way to generate loyalty.

The companies more willing to invest in innovative solutions like AR are also more likely to stand out as innovators in their field. Other companies have experimented with similar “pop-up” experiences and unique ways to capture audience attention. For example, Burberry placed a QR code in a Harrods store, which customers could scan to visit a branded experience, where an Elphis statue walked around in their surroundings through the lens of their smartphone camera.

It’s even possible to use AR experiences to attract the attention of new audience groups. For instance, the retail brand, Pull & Bear launched an AR game created with Facebook to help the company reach the 90% of Gen Z customers who identify as “gamers.”

Provide New Levels of Customer Support

As many of today’s businesses know, memorable branding isn’t just about having the right image or website; it’s also about providing the correct level of customer service and support. Most purchasing and brand loyalty decisions made today are based on customer experience.

Providing customers with unique experiences to improve their shopping journey is sure to make your company stand out in the new digital age. But it’s also possible to go even further with AR in your brand CX strategy too.

Amazon Salon, for instance, the first bricks-and-mortar hair salon created by Amazon, was partially established to test new technology. The “point and learn” service, for example, allowed customers to point a product they were interested in on a display or shelf and immediately access educational content. Users could also scan QR codes to visit the product page on the QR site.

This helps customers immediately get to the product they want to buy without relying on input from human services agents. In a similar vein, AR could be an excellent way to onboard a customer, learning how to use a new product for the first time.

Imagine having a user’s manual your customer can enjoy scanning through, thanks to AR technology. All your customer needs to do is scan the QR code on the back of a product, and they can see the item they need to build or install coming to life in front of them. This reduces the risk of customers having to call for help from tech support and means clients can see the value in their purchases a lot faster.

Companies can embrace AR as a virtual learning experience, helping users collect information and learn how to do things through an immersive first-hand experience. This kind of immersive technology could help to make any brand stand out as more user-experience-focused. Even car companies could essentially provide their customers with a complete virtual HUD showing them how each button and dial on their dashboard works.

Upgrade Website Design

Perhaps the most common way companies will be using AR to create branded experiences today is by updating their website. You’ve probably already seen examples of AR being used in a host of retail sites, with new experiences designed specifically for the age of augmented reality.

360-degree images, for instance, allow customers to essentially “look around” a product, and see it from different angles, just like they would if they were looking at the item in-store. We can see an excellent example of this on the BMW build-your-own web page, where vehicle browsers can see their vehicles from every angle.

The 360-degree product viewing experience lets you check everything from the side molding to the sculpted edges in perfect detail.  

QR codes and app downloads can also allow customers to take their AR experience even further, looking at things like what life would be like behind the wheel of one of these virtually augmented vehicles.

As AR becomes more commonplace and the tools available for designers in this arena continue to expand, there will be even more opportunities available to bring AR into the website experience. Even essential website upgrades today might include allowing customers to upload pictures of themselves or their homes, then using augmented reality technology to implement parts of a product catalog into the space.

AR Virtual Events

Finally, when it comes to exploring all the unique ways you can build a better brand experience and excellent customer relationships with AR, it’s worth looking at the event space. The event landscape has struggled significantly over the last couple of years. The pandemic forced most live events to be canceled, and although the post-pandemic era holds new hope for upcoming in-person experiences, the landscape will be very different.

Going forward, most companies plan to avoid a complete shift back to in-person events by creating “hybrid” experiences and augmented reality events instead. Augmented and virtual reality tools allow customers to step into an event arena from wherever they are.

For instance, the Pot Noodle Unilever brand hosted a virtual alternative careers fair in AR, where people could use their phones to navigate through a range of graduate employer booths. The unique career fair experience was designed to replace the more common in-person interactions graduates might have as they approached the end of their education.

The custom-developed 3D booths featured a range of different employers, and students could tap on the booth screen they were interested in to see a video from each employer. As an added bonus, the connection to the Pot Noodle AR careers fair website meant that students could also instantly apply for any of the jobs they were interested in.

Similar events could help brands recreate some of the meaningful experiential experiences that their customers have been missing out on in the last couple of years. They could also act as a valuable tool for bringing together people in a hybrid event, where someone visiting an in-person demo table could scan a QR code to send virtual demonstrations of a product back to their team.

This would reduce the number of people who needed to be present in an event environment at any given time, reducing the risk of health issues.

Bringing Brands to Life with AR

In the new consumer landscape, brand relationships are more important than ever. As a result, customers are making more careful choices about who they purchase from, based on their understanding of that company’s values and differentiators.

Now that you won’t always have an opportunity to interact with customers in-person to earn their trust, AR could be the solution for a lot of companies in search of new engagement tools. All you need to do is figure out how you’ll leverage all the benefits AR can offer.

Will you be creating an app, building a new website with enhanced 360-degree photos, or designing in-person experiences? Hopefully, these examples have inspired you to start exploring your options.


Featured image via Unsplash.

Source

The post How to Use AR in Brand Experiences first appeared on Webdesigner Depot.

Source de l’article sur Webdesignerdepot

Websites as we know them are going to change very soon. The days of text, images, and basic interactions in a 2D browser window have served us well, but virtual, augmented, and mixed reality experiences are getting better all the time. Developers and designers need to think beyond the browser window and prepare for an immersive future.

Many have been very skeptical about VR and AR in the past because despite grand promises about what they would achieve, they’ve mostly failed to deliver on the scale that the industry hoped for.

But it’s different this time: industry leaders like Meta, Apple, and Microsoft are pursuing a range of different mixed reality projects; they see the opportunity and are dropping hints about what’s next.

In a survey from Perkins Coie LLP and the XR Association, nearly 9 in 10 respondents said that by the year 2025, immersive technologies—including augmented reality, virtual reality, and mixed reality — will be as ubiquitous as mobile devices.

That’s a bold prediction, but it could be our new reality.

Use Cases

VR and AR aren’t a logical fit for every website, and that’s fine. There’s no need to force an immersive experience on something better suited to a standard viewing experience.

But when they’re done right, 3D experiences can add a lot to your website. Check out the demo experience from Mozilla, the 3D tours from Matterport, and the immersive storytelling from Within.

Here are a few areas where these technologies shine:

  • Retail – VR can be used to provide a virtual showroom where customers browse through products. AR can even bring the products into your home by showing you how a piece of furniture will fit in your room, what a painting will look like on your wall, or in Apple’s case, how a product will look on your desk.
  • News – Coverage of events can be enriched by providing a 360-degree view and placing viewers in the center of the story.
  • Training – AR can generate virtual overlays over physical equipment so employees can have hands-on training that’s more effective.

Define Your Platform

Adding immersive experiences to your website will require various skills based on what you’re trying to create. Whether you’re new to web development or are a seasoned developer with many years of experience, the main difference from classic web development is that you’re switching from a 2D to a 3D experience. Development in VR/AR is much closer to developing 3D video games than creating web applications.

First of all, you need to decide on the hardware that you’re building for. Are your viewers mainly using computers, smartphones, or a headset like the Oculus Quest? Each hardware category offers a different set of capabilities for what’s possible.

Next, when we look at 3D engines and frameworks on the market, some big names like Unity, Unreal Engine, and CRYENGINE stand out. Most of these engines were spun out of game development and are based on programming languages like C, C++, or C#. While very powerful, they’re overkill for anyone trying to create a basic immersive web experience.

The good news for web developers is that the WebXR Device API is an open standard specified by the W3C with a JavaScript API that makes immersive experiences possible in the browser. So if you already have a background in web development, you can use your knowledge of JavaScript to get started.

There are some useful frameworks and platforms that make working with WebXR more convenient:

  • A-Frame – A web framework for building 3D experiences.
  • React 360 – A framework for the creation of interactive 360-degree experiences that run in the web browser. As the name already suggests, it builds on React and reuses the concepts you already know.
  • Amazon Sumerian – A managed service that lets you create and run 3D, AR, and VR applications. Since it’s integrated into the AWS ecosystem, it’s also possible to add AI-enabled elements into your generated world.

Create Your Content

No one wants to read long blocks of text in 3D. Since we’re talking about visual experiences, it’s logical that the emphasis should be on creating content that is pleasing to the eye and interesting to look at. What works on a normal website probably isn’t going to feel natural in a 3D environment, so you need to decide what visuals you should create to suit the format.

What high-resolution images and assets do you need? Can you add videos? How about 360-degree videos? Will viewers just be looking at something, or will they be able to interact with it?

You also can’t forget about sound because it’s a critical part of immersive experiences. What music and sounds should you create to make the content come alive?

Not everyone is going to have the latest and greatest device or 5G coverage. The requirements for bandwidth and transmission quality are much higher with 3D content. A few milliseconds of latency can go unnoticed on a typical website, but in a VR/AR setting, it can make the experience laggy or unusable.

Try to optimize your content to be the highest quality it can be within a reasonable file size. If the experience starts to suffer from too many assets downloading at the same time, it’s better to create a more streamlined experience that maintains a high performance rate.

It’s important to consider your hosting infrastructure, as well. This shouldn’t be a big problem, but it is worth mentioning that you need to add new content types to your configurations, and your CDN needs to support these new types, too.

Make Your Content Flexible

When we’re talking about getting your website ready for immersive experiences, we’re not just talking about having people scroll through your regular website in VR. That isn’t compelling for your audience.

The idea is to take some content that’s already on your website and separate it from the presentation layer so you can use it in a 3D environment or any other platform that you want. Classic content management takes place in silos, which means you cannot easily reuse the content from your website.

This separation can be achieved by using a classic database, but if you want developers and content teams to collaborate, a headless CMS is front-end agnostic and more user friendly.

Start Experimenting Today

Building 3D content experiences may seem intimidating, but as we’ve seen, you likely already have the web development skills necessary to get started and try out some different ideas.

What you build today will prepare you for the 3D future of tomorrow.


Featured image via Pexels.

Source

The post How to Prepare for the Immersive Web first appeared on Webdesigner Depot.

Source de l’article sur Webdesignerdepot

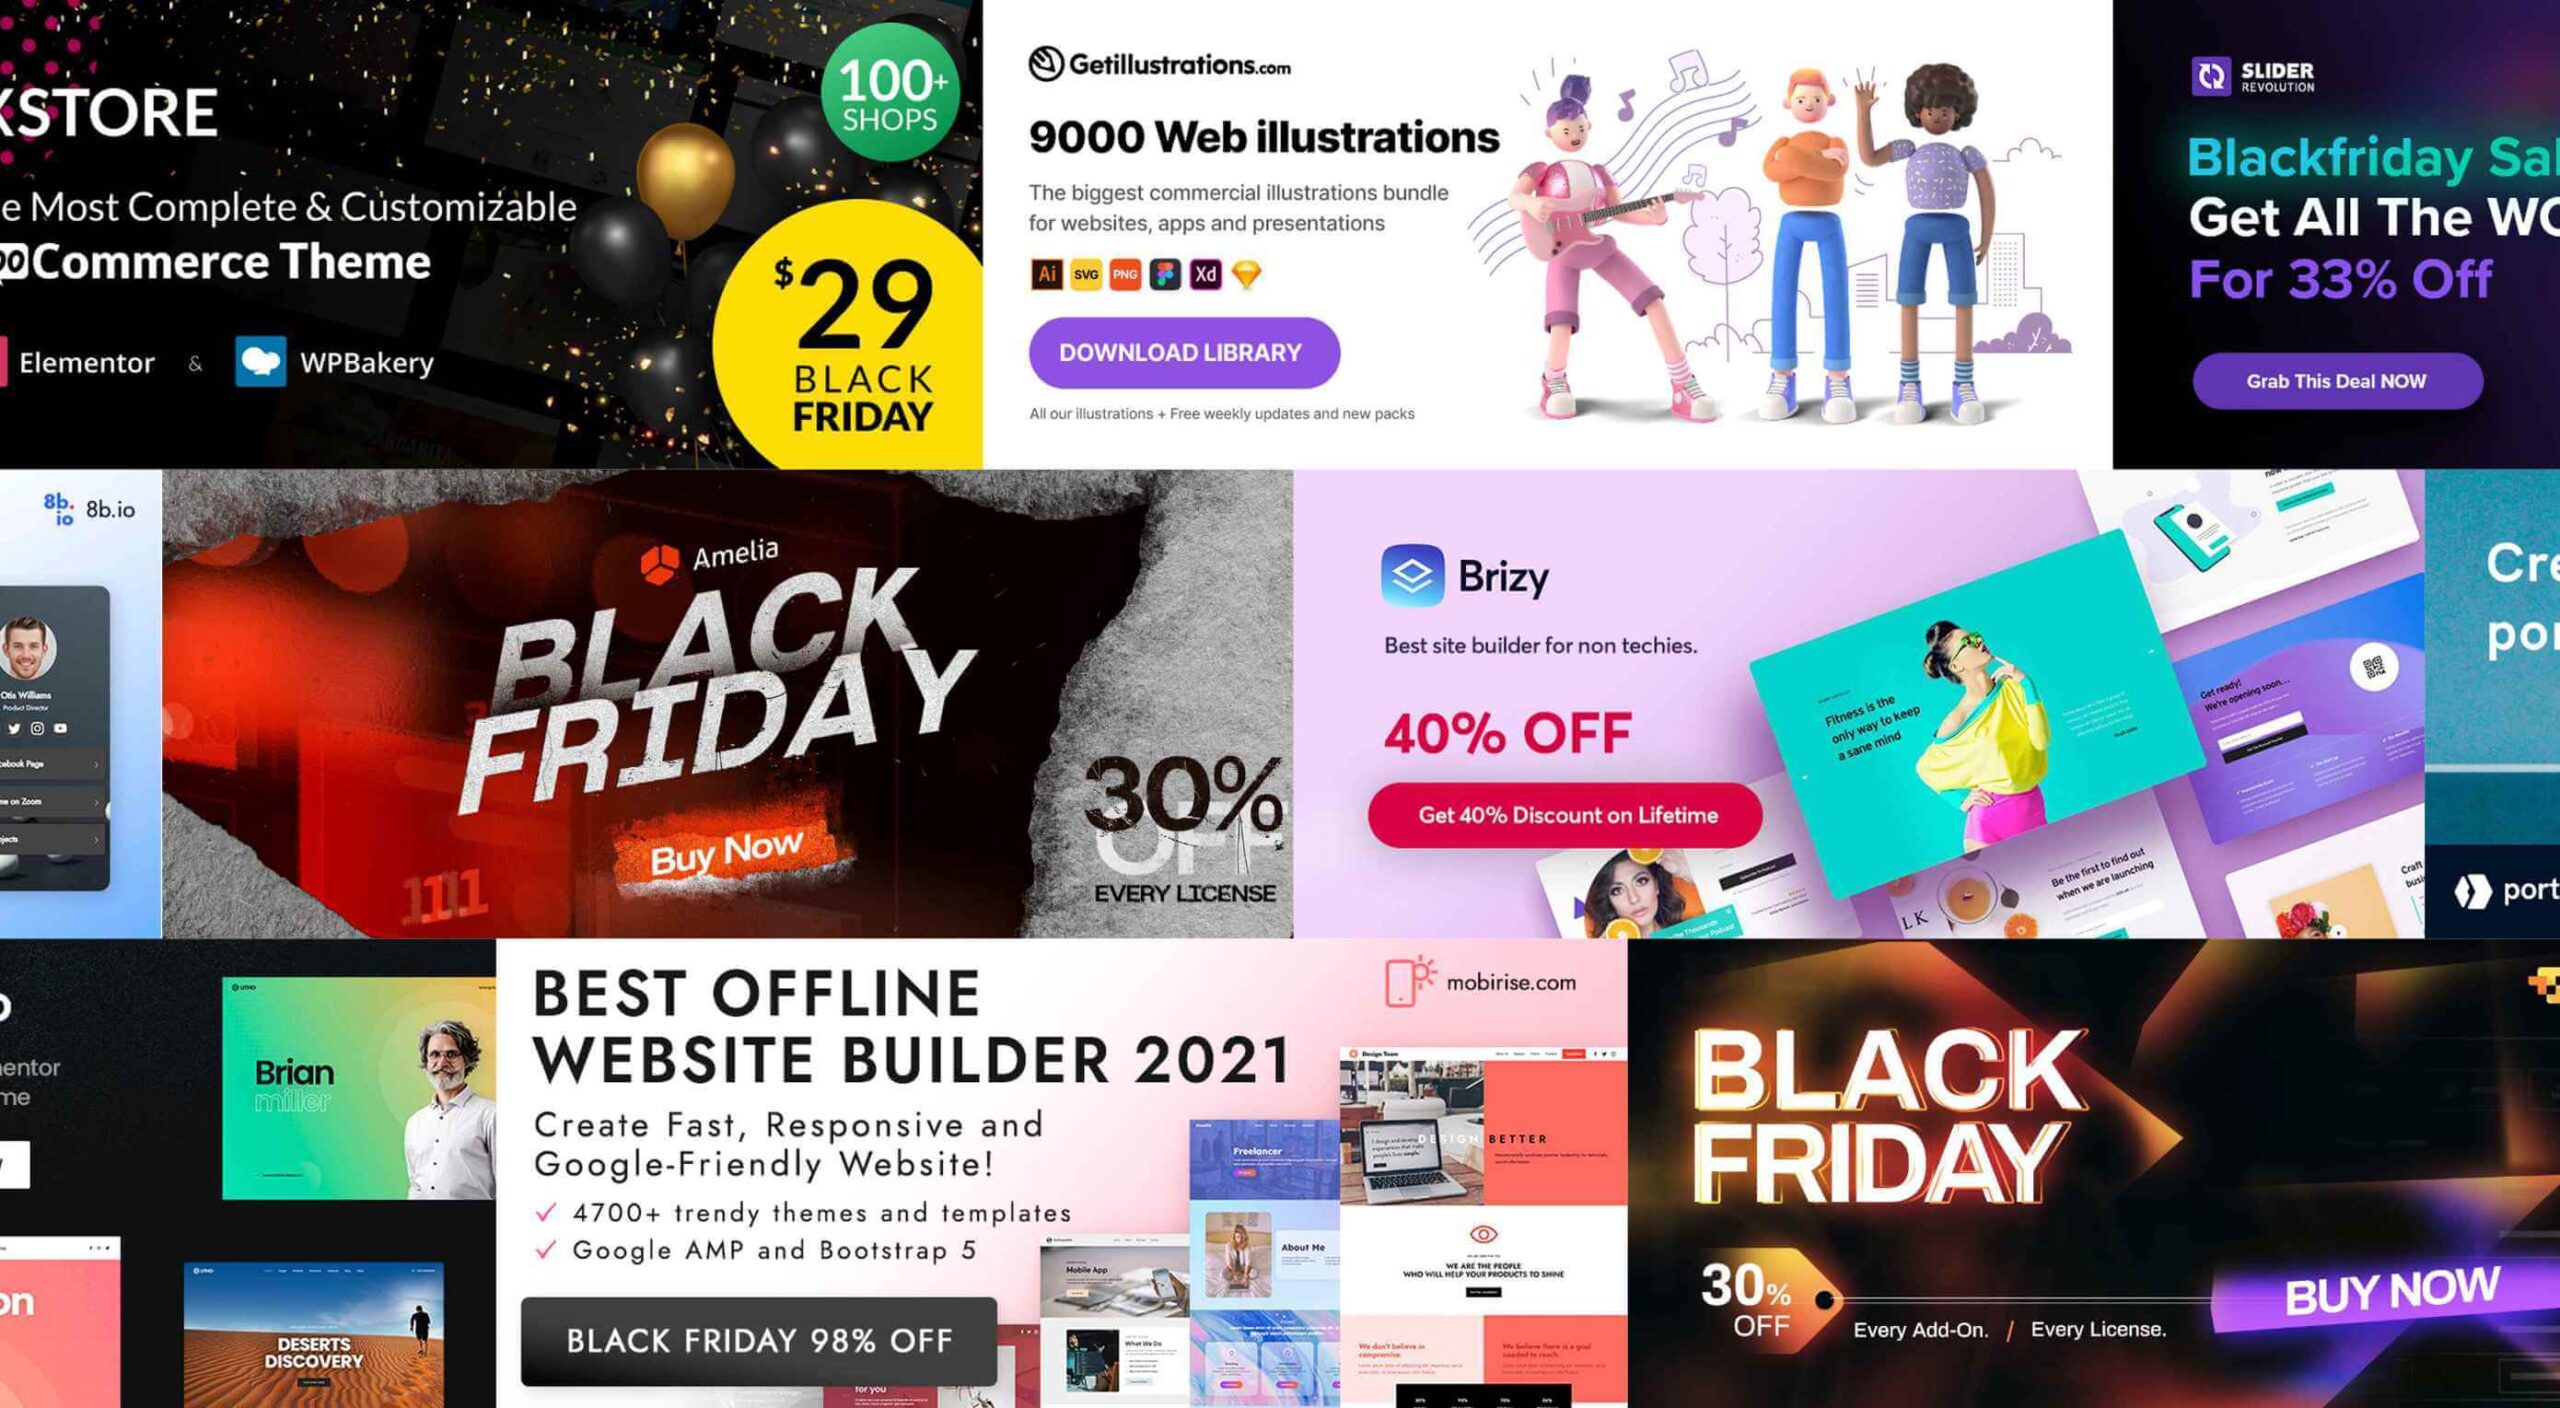
It’s that time again. Black Friday. November 26, to be exact. And the many enticing deals you’ve been looking forward to at this time of the year are here as well.

There are three types of Black Friday shoppers. Those who are successful because they have prepared. Those who are successful because they got lucky. And, those who let some good deals simply slip away.

Your best bet, of course, is to be prepared, which is the purpose of this guide.

As you go down this list, you’ll find discounts, some pretty amazing offers, a few surprises perhaps – and plenty of inspiration.

We’ve been keeping close tabs on the various Black Friday discounts and promotions, and we’ve corralled the best of the bunch for you.

Starting with:

1. Brizy – The No-Code Website Builder For Non-Techies

Brizy is a fast and easy-to-use website builder for designers and agencies. Take advantage of Brizy’s Black Friday special and tap into the skills of a team that has been creating website-building tools for over 11 years.

This premier website builder gets better with each update.

  • Web designers can choose between Brizy for WordPress and the Brizy Cloud website builder, which includes hosting;
  • Agencies can choose among several white-label options;
  • Brizy brings power to the novice; use the pre-made designs or start with a blank page and let the imagination be the guide.

Black Friday is a time to take advantage of great deals, and this year is no different.

  • Big discounts are available on Brizy’s white label agency plans;
  • Participate at no cost to win a MacBook PRO;
  • Partner perks and discounts;
  • And exclusive new designs.

Design or coding experience is not a requirement to use Brizy’s drag and drop visual builder.

Click on the banner to take advantage of these great Black Friday specials.

2. Portfoliobox

A 50% discount on any portfolio website builder would seem like a good deal. On the other hand, getting one at 50% off that enables you to quickly create a portfolio website that reflects your creative personality and will truly set you apart from the crowd is definitely worth taking advantage of.

Portfoliobox offers:

  • Mix and match templates to help achieve a unique look;
  • Powerful eCommerce functionality built right into the platform;
  • Safe and secure private client galleries;
  • An included Domain (custom domain with Pro plans);
  • Fantastic 24/7 support to keep problems to a minimum;
  • Affordable, transparent pricing plans that let you know what you are getting before you buy.

Click on the banner to find out more about this fast, affordable, and easy to work with a portfolio website builder for creatives.

3. wpDataTables

wpDataTables is a popular, power-packed plugin that can manage vast amounts of data in seconds and organize it to build a table or chart the way you want.

  • wpDataTables and charts are responsive, customizable, and easy to edit and maintain;
  • wpDataTables readily accepts data from a variety of data sources, from multiple database connections, and in the most used formats;
  • Tables and charts can be configured to nicely blend in with other website content and a website’s overall design, plus it is easy to add spice to a table or chart by using colors, adjusting font sizes, and highlighting key data using conditional formatting.

wpDataTables features Elementor and Gutenberg integration, provides the ability to connect WordPress tables with Google API, allows cascade data filtering, and much more.

Click on the banner to take advantage of the 30% off Black Friday special.

4. Amelia WordPress Booking Plugin

Amelia can be a genuine time and money saver for a variety of business types. Amelia automates and streamlines a business’s booking process.

  • Amelia relieves business owners and managers from the task of managing multiple appointments and events;
  • Clients and customers love the ability to make and manage their appointments 24/7;
  • Bookings and events are managed from a single platform, even when multiple locations are involved.

Annual and lifetime subscriptions are available.

5. Mobirise Free Website Builder

As it is an offline builder, Mobirise does not tie you to any platform, you can host it anywhere, and you have total control over creating the website you have in mind.

Mobirise:

  • is drag and drop and easy and simple use;
  • is based on the latest Google AMP or Bootstrap 5, so your site will be mobile-friendly and crazy fast;
  • comes with eCommerce, huge selections of themes, blocks and templates, and a shopping cart.

Mobirise is free for both personal and commercial use.

6. Slider Revolution

There is a difference between an “interesting” website and one whose WOW effects cause it to stand far above the competition.

Slider Revolution specializes in WOW effects that can take any website to the next level, and it can be yours on Black Friday at a 33% discount on all licenses.

The Slider Revolution package includes:

  • Innovative templates and add-ons;
  • Advanced automation and special effects tools.

Grab the Black Friday offer now.

7. Getillustrations Bundle – Commercial illustrations for the web

Digital illustrations help attract attention to and pique interest in your website.

Getillustrations.com features a package of more than 9000 commercial web and app illustrations in a wide range of topics.

  • This package features all the design formats you’re likely to need, e.g., Ai, SVG, PNG, Figma, Sketch, and more;
  • Great illustrations to spice up landing pages are included.

The package is available at a 25% discount. Use coupon code EliteDesingers25.

8. Litho – Multipurpose Elementor WordPress Theme

Litho is a creative, modern, and highly customizable theme that can be used for any type of business niche as well as for creating eCommerce, blog, and portfolio websites.

This multipurpose Elementor WordPress theme’s features include –

  • 36+ ready home pages, 200+ creative elements, and a 300+ template library;
  • One-click demo import;
  • Top loading speed and SEO result capabilities.

Litho also features detailed online documentation and top-of-the-line customer support.

9. 8bio – Linktree Alternative

Instagram and TikTok enthusiasts, take note!

With the 8bio tool at your fingertips, you can add a clickable URL to your social media platform profiles so visitors can visit your website, product page, or any other important page.

8bio offers:

  • Beautiful skins and catchy animated backgrounds;
  • The ability to link to your own domain or to *.8b.io;
  • Powerful SEO and tracking options.

The 8bio tool can also be used for your Twitter, Facebook, and YouTube posts.

10. XStore – Highly Customizable WordPress WooCommerce Theme

XStore is designed to work with the best page builders on the market and is fully compatible with the Elementor and WPBakery builders.

The XStore package includes

  • $510 worth of carefully handpicked Premium Plugins for WooCommerce;
  • More than 110+ awesome Prebuilt Shops;
  • A built-in AMP for WooCommerce, a Full Ajax Shop, multi-vendor support, and much more.

Become one of XStore’s more than 60,000+ happy customers by taking advantage of the Black Friday special.

Knowing that it’s the early bird that gets the worm, we’ve worked hard to place before you and your fellow website designers and agencies this enticing selection of the best Black Friday offers.

You will no doubt find some of the products familiar. A few might not be. In either case, the opportunities are here for you to get some great deals on some premier products.

Happy shopping!

Source

The post Live Now: Top 10 Black Friday 2021 Deals for Designers and Agencies first appeared on Webdesigner Depot.

Source de l’article sur Webdesignerdepot

Customer reviews are incredibly valuable to your company. Around 95% of customers say they read reviews before they make a purchase. Another 72% say that they won’t even consider buying your items until they’ve read the reviews associated with your business or product. 

No matter how good your marketing and promotion strategies might be, your audience will always turn to other customers for a credible insight into what buying from your brand is really like. That’s why it’s so important to leverage as much social proof as you can.

Unfortunately, gathering reviews and displaying them correctly on your website can be challenging.

In this article, we’re going to look at what you can do to make your reviews stand out when you’re ready to display them online. 

The Different Kinds of Review

Before we get into looking at all the different ways you can effectively display your reviews on your website, let’s get the basics out of the way. 

There’s more than one type of review. Some are simply comments left on the bottom of your product pages by customers that were impressed by whatever you sold. Other reviews are available in the form of videos or badges. When you want your website to look as credible as possible, the best thing you can do is decide which types of reviews will have the most impact. 

Ideally, you’ll want a combination of different review types to add depth to your site. Putting various kinds of reviews on your website increases your credibility while also boosting your SEO

Here are your main options:

The Testimonial

Testimonials are one of the most common types of review. Essentially, these are the messages shared by your customers that highlight the things they liked and didn’t like about your product. Testimonials often include a picture of the person leaving the message, and their name, to give them a greater sense of authenticity. You might also include a link to a website or case study with a testimonial to give it more depth. 

Most testimonials go at the bottom of pages. You can showcase these reviews on your home page to start generating credibility as soon as someone interacts with your brand. Alternatively, you could allow users to place their reviews on product pages. Here’s an example of what a testimonial might look like from ducttapemarketing.com:

Review Badges and Widgets

If your customers tend to leave reviews about your company on other sites, like Angie’s List or Yelp, then you can add a widget or badge to your website that makes it easier for other customers to find them. Sometimes, you’ll just include a small button on the bottom of a website pay that says, “find us on Yelp.” Other times, you can add your star rating too.

Some review sites will also give you the option to showcase the actual reviews in a widget that frequently updates with new messages. 

If you’re only showing reviews from one third-party site on your website, it’s best to focus on Google reviews, as it’s one of the most recognizable options. 

Provided that you’re using them correctly, badges and review widgets shouldn’t slow your website down too much, and many can be customized to suit the style of your site too. However, it’s essential to ensure that you don’t add too many widgets to your site if you want to avoid performance issues. 

Case Studies

Case studies go beyond the basics of the standard review and provide potential leads with a tremendous amount of information about how you’ve previously interacted with other companies. With a case study, you’ll often create a structured document that demonstrates a customer’s problem and your strategies to overcome those issues. 

Case studies often exist on their own pages, so you can go in-depth with sharing valuable information. For example, you’ll include an overview that introduces the customer you worked with and details on the outcomes you achieved together. 

Although it’s much harder to interview customers for complete case studies and get all the statistics and numbers that make these reviews appealing, it’s often worth the effort. Particularly if you’re running a B2B company, case studies demonstrate the effort you go through to support your customers. They also act as proof of your success and set valuable expectations for customers. Here’s an example of a case study page by Fabrikbrands.com:

The Rating

If you’re just posting basic five-star ratings on your website or asking your customers to give you a number between one and ten for how positively they’d rate your service, then you can use a few handy automation tools to create one of these visuals. 

All you need to do is add a little basic CSS to your website or use a star rating widget that automatically calculates your average score based on all of the reviews that you collect from customers. 

Just make sure that your star ratings are positive not just on your website but on other review sites too. For instance, if you give yourself five stars by adjusting the CSS and then get three stars from Yell, customers will begin questioning your authenticity. 

Notably, while star ratings grab customer attention, they are a little basic if you’re trying to convert people and convince them to buy an expensive product. Most customers will often need more information than a basic star rating can provide. 

How to Display Reviews on Your Website

Now that you know what kind of reviews customers can leave about your product or brand, you can start exploring ways to display them on your website. 

You could decide to let your reviews show up on other third-party sites and leave it at that. For instance, if you’re a hotel manager, you may know that your customers are already leaving reviews on Booking.com and TripAdvisor. However, leaving your audience to seek your reviews out for themselves means that they spend less time where you want them – on your website. 

There’s also a risk that failing to add reviews to your site will make you look less credible. If you don’t own your rating or score, customers might wonder what you have to hide. 

Fortunately, we’ve got some great options to help you get started.

1. Create a Testimonials Page

The first and perhaps most accessible option for showcasing your reviews and testimonials is to design a page where your customers can easily find all the information they need about your brand. Having a dedicated testimonials page can be a great way to demonstrate transparency as a brand and show your customers that you’re not hiding anything. 

You could even add a form at the bottom of your testimonials page that allows other customers to leave their reviews and information. Just make sure that you have a CAPTCHA or another security measure in place to prevent people from spamming your site. 

It makes sense to showcase some of your most positive reviews at the top of your page, so your customers see those first. However, it could also be a good idea to showcase some negative reviews alongside them. That’s because customers generally expect to see at least some negativity associated with your brand. If all your reviews are positive, they might assume that you’re hiding something.

When displaying your negative reviews, make sure you also show that you’ve responded to them and are working hard to address any issues. You can even publish the “thank you” you get from an unhappy customer after rectifying the problem. 

2. Show Reviews in Your Website Header

The great thing about using reviews and testimonials on your website is that if you have a little coding knowledge and the correct information, you can display them wherever you choose. Most companies leave the reviews at the bottom of the website, but this could mean you’re missing out on an excellent opportunity to connect with your audience as soon as they visit you. 

Having a positive review highlighted at the top of your page could immediately boost your credibility and give your audience a reason to keep reading. Remember that a picture of the person sharing the review and their name can make them look a lot more credible when you’re trying to build trust. 

3. Add Some Reviews to Your About Us Page

It’s best not to hide your reviews somewhere your customers will have to search for them, but that doesn’t mean that you can’t scatter a few testimonials around other pages. A great way to give more credibility to your brand and your website is to create a sidebar on your “About Us” page or just showcase a handful of reviews underneath the description of your business. 

Suppose you don’t want to show customer testimonials on your About Us page. In that case, you could always show different kinds of reviews, like badges that show your certification with certain industry bodies or awards and recognition you’ve received.

Showing that you’re connected with major industry groups and that you’ve been recognized in your sector is a kind of review in itself. It indicates that other people have already assessed your business and see you in a positive light. 

Every review doesn’t necessarily have to come from your customers. Any business or person who can give more credibility to your business deserves some representation too!

4. Embed a Carousel on Your Site

As your business begins to grow, the number of regular reviews and testimonials you get from happy customers should start to skyrocket too. You might even get to a point where you’re not sure how to fit all the reviews you want to showcase onto the same page of your website. If you already have a dedicated “reviews” page where people can go to get more insights into your growing collection of social proof, try a carousel. 

Carousels are a great and dynamic way to showcase customer reviews while getting your audience more involved with your website. Give them a button they can click so that they can browse through a broader range of reviews after they’ve seen the ones that show up straight away on your carousel. It’s also worth including a link nearby the carousel widget that the user can click to visit your review page or your company’s page on a dedicated review website. 

If you want to go beyond putting carousels on your home page, remember that you can add them to your product pages and menus too. Online reviews impact around 67.7% of purchasing decisions, so it makes sense to put them somewhere your customers will see them when they’re figuring out whether or not they should hit the buy button. 

5. Add Reviews to Your Social Media Ads

Reviews can be an excellent way to add an extra spark to your advertisements elsewhere in the digital landscape. Telling your audience on Facebook that you have the best steaks in the country is great – but it’s not going to make a significant impact on most of them. That’s because every business claims to be the best. Most of your clients expect you to speak well of yourself. 

However, if you can combine an attractive image on social media with a quoted review from one of your happy customers, your ads will make more of an impact. You can include the quote from your customer in the text above your Facebook ad or create an image to display it instead.

Remember to add any hashtags and extra information that might make your ad more appealing and share it as often as you can with the right audience. Targeting your audience carefully towards people who are in the “consideration” stage of the buyer journey may help you to get more conversions. 

While customers usually scroll past dozens of social media ads every day, a genuine statement from a real person still shakes up the status quo and grabs attention. Include a button below the ad so your customer can learn more about the product the customer is talking about. 

6. Link to Reviews in Email Signatures

Finally, social media ads aren’t the only way to bring attention to your reviews outside of your website. If you want to get more external customers to go and check out your products or rediscover what your business is all about, you can add review links to your email signature too. These links can go directly to the case study or review pages on your website, reminding customers what it is that makes your service or product special. Alternatively, you can get dedicated signatures for your email that link to specific review sites too. 

Showing your clients how many ratings you have on Yelp or how many stars your products have earned with Google Reviews gives every message you send a lot more credibility. Most email marketing software solutions make it relatively easy to add information like this to the footer of your email.

Remember, your signature shouldn’t take up too much space in your email, so don’t add any specific reviews from customers. A star rating and a link back to a page where consumers can get more information will spruce up your content without weighing down your emails. 

Show Off Your Social Proof

Successfully collecting positive reviews that show your prospects how much customers love your company can be challenging enough. However, that’s just the first piece of the puzzle. Once you’ve got all those great reviews, you also need to show them off in the most effective way. From dedicated pages on your website to scrolling carousels and Facebook ads, there are a million ways to prove your credibility to your customers with testimonials.


Featured image via Pexels.

Source

The post How To Leverage Social Proof Successfully first appeared on Webdesigner Depot.


Source de l’article sur Webdesignerdepot

User experience is one of the most important principles of web design. There’s no doubt that you focus on UX with every page you design on the web, whether it’s a portfolio, a profile page, or an entire website. 

Unfortunately, what many experts forget is that UX doesn’t just apply to digital pages. That means that you need to discover the right UX strategies for everything from your website homepages to your email marketing messages and even your listings on Google. 

Today, we’re going to explore ways you can apply UX principles to your client’s image on search engines. 

Why Your Search Engine Listing Matters

Let’s start with the basics…

89% of customers start their purchasing process with a search engine. 

That means that whether you’re creating a portfolio to sell your services or building a website for a client, the first connection a customer has with your design isn’t on the homepage.

Developers and designers know that first impressions count when it comes to succeeding online. However, they assume that those first impressions happen on a social media channel, a landing page, or a home page. 

The truth is that most of the time, you’re driving a specific experience for an end-user before you even realize it. Before you can wow an audience with a beautiful site design or a fantastic CTA offer, you need to convince them to click on your Google link.

Just as UX on a website is all about giving your audience what they need in an informed and strategic manner, UX in search engine results works the same way. 

How to Make Your Search Listing Stand Out with UX

So, how do you begin to apply the principles of UX to your Google Search results?

It’s much easier than you’d think. 

Step 1: Show Immediate Value 

Delivering an excellent experience on a website often means providing end-users with the information they need as quickly as possible. Imagine designing a landing page; you wouldn’t want your audience to scroll forever to find what they need. Instead, you’d make sure that the value of the page was immediately apparent. 

When creating an image for your search engine listing, you’ll need to take the same approach. This often means thinking carefully about two things:

  • Your headline
  • Your meta description

Around 8 out of 10 users say that they’ll click a title if it’s compelling. That means that before you do anything else to improve your SEO strategy, you need to make sure that the title of your web page is going to grab the audience’s attention. 

The best titles deliver instant value.

Immediately, these titles tell the audience exactly what they’re going to get when they click onto the page. The promise drives action, while clarity highlights the informed nature of the brand. 

The great thing about using an excellent title for a page is that it doesn’t matter where you’re ranked on the search results. Whether you’re number 2 or number 5, your customers will click if they find something they want. 

It’s just like using a CTA on a landing page. Make sure your titles are:

  • Informative: Show your audience value immediately
  • Optimized for mobile: Remember, your audience might not see your full title on some screens. That means that you need to make the initial words count.
  • Easy to read: Keep it short, simple, and straightforward. Speak the end-user’s language

Step 2: Build Trust with Your URLs

Trust factors are another essential part of good UX

When designing a website for a new brand, you know that it’s your job to make visitors feel at ease. Even in today’s digital world, many customers won’t feel comfortable giving their money or details to a new company. 

Within the website that you design, you can implement things like trust symbols, reviews, and testimonials to enhance brand credibility. In the search engines, it all starts with your URL. 

Search-friendly URLs that highlight the nature of the page will put your audience’s mind at ease. When they click on a page about “What is SEO” in the SERPs, they want to see an URL that matches, not a bunch of numbers and symbols

Use search-friendly permalink structures to make your listing seem more authoritative. This will increase the chances of your customer clicking through to a page and make them more likely to share the link with friends. 

Once you decide on a link structure, make sure that it stays consistent throughout the entire site. If a link doesn’t appear to match the rest of the URLs that your audience sees for your website, they may think they’re on the wrong page. That increases your bounce rate. 

Step 3: Be Informative with Your Meta Description

To deliver excellent UX on a website, you ensure that your visitor can find all the answers to their most pressing questions as quickly as possible. This includes providing the right information on each page and using the correct navigational structure to support a visitor’s journey. 

In the SERPs, you can deliver that same informative experience with a meta description. Although meta descriptions often get ignored, they can provide a lot of value and help you or your client make the right first impression. 

To master your meta descriptions:

  • Use the full 160 characters: Make the most of your meta description by providing as much useful information as you can within that small space. 
  • Include a CTA: Just as CTAs help guide customers through the pages on a website, they can assist with pulling in clicks on the SERPs. A call to action like “read about the” or “click here” makes sense when you’re boosting your search image. 
  • Focus on value: Concentrate on providing your customers with an insight into what’s in it for them if they click on your listing.

Don’t forget that adding keywords to your meta description is often helpful too. Keywords will boost your chances of a higher ranking, but they’ll also show your audience that they’re looking at the right result. 

Step 4: Draw the Eye with Rich Snippets

You’ve probably noticed that the search engine result pages have changed quite a bit in the last couple of years. As Google strives to make results more relevant and informative, we’ve seen the rise of things like rich snippets. Rich snippets are excellent for telling your audience where to look. 

On a website, you would use design elements, like contrasting colors and animation, to pull your audience’s attention to a specific space. In search engines, rich snippets can drive the same outcomes. The difference is that instead of telling a visitor what to do next on a page, you’re telling them to click on your site, not a competitor’s. 

When Google introduced rich snippets, it wanted to provide administrators with a way of showcasing their best content. Rich snippets are most commonly used today on product and contact pages because they can show off reviews. 

Install a rich snippet plugin into your site if you’re a WordPress user or your client is. When you enter the content that you need into the website, use the drop-down menu in your Rich snippet tool to configure the snippet.

Ideally, you’ll want to aim for the full, rich snippet if you want to stand out at the top of the search results. Most featured snippets have both text and an image. You need to access both of these by writing great content and combining it with a relevant image. 

Step 5: Provide Diversity (Take Up More of the Results)

As a website designer or developer, you’ll know that different people will often be drawn to different things. Some of your visitors might immediately see a set of bullet-points and use them to search for the answer to their question. Other visitors will want pictures or videos to guide them. So, how do you deliver that kind of diversity in the SERPS?

The easiest option is to aim to take up more of the search result pages. Google now delivers a bunch of different ways for customers to get the answers they crave. When you search for “How to use Google my Business” on Google, you’ll see links to blogs, as well as a list of YouTube Videos and the “People Also Ask” section. 

Making sure that you or a client has different content rankings for the same keywords can significantly improve any customer’s experience on the search engines. Often, the process of spreading your image out across the SERPs is as simple as creating some different kinds of content. 

To access the benefits of video, ask your client to create YouTube videos for some of their most commonly asked questions or most covered topics. If you’re helping with SEO marketing for your client, then make sure they have an FAQ page or a way of answering questions quickly and concisely on articles, so they’re more likely to appear in “People Also Ask”.

Step 6: Add Authority with Google My Business

Speaking of Google My Business, that’s another excellent tool for improving UX in the search results. It allows business owners to manage how information appears in the search results. 

With this service, you can manage a company’s position on Google maps, the Knowledge Graph, and any online reviews. Establishing a company’s location is one of the most important things you can do to help audiences find a business quickly. Remember, half of the customers that do a local search on a smartphone end up visiting the store within the same day. 

Start by setting up the Google Business listing for yourself or your client. All you need to do is hit the “Start Now” button and fill out every relevant field offered by Google. The more information you can add to Google My Business, the more your listing will stand out. Make sure you:

  • Choose a category for a business, like “Grocery store.”
  • Load up high-quality and high-resolution images
  • Ensure your information matches on every platform
  • Use a local number for contact
  • Encourage reviews to give your listing a five-star rating

Taking advantage of a Google My Business listing will ensure that your audience has all the information they need to make an informed decision about your company before they click through to the site. This means that you or your client gets more warm leads and fewer people stumbling onto your website that might not want to buy from you. 

Step 7: Use Structured Data Markup to Answer Questions

If you’re already using rich snippets in your Google listings, you should also have a plan for structured schema markup. Schema markup on Google tells the search engines what your data means. This means that you can add extra information to your listings that will more accurately guide your customers to the support they need. 

Providing additional schema markup information to your listings gives them an extra finishing touch to ensure that they stand out from the competition. For example, you might add something like a “product price” to a product page or information about the product’s availability.

Alternatively, you could provide the people who see a search result with other options. This could be an excellent option if you’re concerned that some of the people who might come across your listing might need slightly different information. 

For instance, you can ask Google to list other pages along with your search results that customers can “jump to” if they need additional insights.

Baking structured data into your design process when you’re working on a website does many positive things. First, it makes the search engine’s job easier so that you can ensure that you or your client ranks higher. Additionally, it means that your web listings will be more thorough and valuable.

Since UX is all about giving your audience the best possible experience with a brand, that starts with making sure they get the information they need in the search results. 

Constantly Improve and Experiment

Remember, as you begin to embed elements of UX into your search engine listings, it’s essential to be aware of relevant evolutions. Ultimately, the needs of any audience can change very rapidly. Paying attention to your customers and what kind of links they click on the most will provide you with lots of valuable data. You can use Google analytics to A/B test things like titles, pictures, featured snippets, and other things that may affect UX. 

At the same time, it’s worth noting that the Google search algorithms are constantly changing too. Running split tests on different pages will give you an insight into what your customers want. However, you’ll need to keep an eye on the latest documentation about Google Search if you want to avoid falling behind the competition. 

Like most aspects of exceptional UX, mastering your SERP position isn’t a “set it and forget it” strategy. Instead, you’ll need to work on constantly expanding your knowledge if you want to show clients that you can combine UX and SEO effectively. 

Make sure you have plenty of tools set up to offer reports and insights into the kind of changes that you may need to make to align with search engine expectations. 

Making the Most of UX in the SERPS

It’s easy to forget that there’s more to UX than making your buttons clickable on mobile devices or ensuring that scrolling feels smooth. For a designer or developer to deliver excellent UX for a brand, they need to consider every interaction that a company and customer has. 

This means starting with the way a website appears when it’s listed on the search engines most of the time. Getting your SEO listing right doesn’t just boost your chances of a good ranking. This strategy also improves your reputation with your audience and delivers more meaningful moments in the buyer journey. 

Don’t underestimate the power of UX in SERPs. 


Featured image via Pexels.

Source

The post 7 UX Principles to Boost SERPs first appeared on Webdesigner Depot.


Source de l’article sur Webdesignerdepot

Content is the king of the digital world. This is an undisputed fact among marketers and business owners alike.

However, not all content is created equal. Interactive content is a more immersive form of marketing specifically intended for the digital age. Great for companies that need to develop deeper relationships with their audience. 

There are various kinds of interactive content for brands to explore these days. For example, you can create a poll where your customers vote for certain answers to questions. In addition, some companies hire developers to build immersive gaming experiences with prizes and rewards. 

Even standard content like blogs and articles can become more interactive with things like animations, buttons, and elements that ask visitors to do something. 

One of the most valuable forms of interactive content is the quiz. So, how can companies use quizzes to engage their audience effectively? Let’s find out…

The Benefits of Quizzes in Interactive Content

According to studies, 93% of marketers believe interactive content is extremely effective for educating and entertaining customers. Interactive content is meaningful because it’s engaging, and many marketers state that creating engaging content is one of their toughest challenges. 

In an environment where the average attention span is constantly dwindling, interactive content reduces the risk that your customer will end up being distracted by something else before they have a chance to convert on your website. 

Quizzes are an excellent form of interactive content, but many marketers don’t take full advantage of them yet. Quizzes, like some other forms of interactive content, can come in different styles. For example, you could have a personality quiz that tells your customer what kind of vegetable they would be. That might sound odd, but it helps to give your customer a sense of belonging, gives them a feeling of being understood, and offers entertainment. 

Some quizzes can answer questions for your customer. 

For instance, a quiz on “what to buy your dad for father’s day” is an excellent way to solve a customer’s problem while guiding them towards potential products that you sell. 

Z Gallerie, a retail company, launched a quiz called “What is your Z Gallerie Style personality?” The quiz offers a personalized recommendation experience on what to purchase for every current and potential customer. 

The personality quiz became a great way of bringing product recommendations to leads without being pushy. Z Gallerie could, therefore, consistently provide a unique experience to each customer based on their results. 

So, how do you make a quiz that’s really effective for your content marketing plan?

Step 1: Creating the Quiz

Quizzes are a kind of interactive content that can almost feel like a conversation with a brand. They’re an opportunity for you to show your audience how well you understand them. 

According to TryInteract, people take quizzes because they want to know themselves better or want to confirm what they think they already know about themselves. These content solutions solve problems, even if they’re handling a person’s curiosity about what kind of celebrity they’re most like. 

Before you start making your quiz, you need to know your goal and what you’re trying to do for your audience. If your goal is to get more people to feel more attuned to your company, you might need to create something that demonstrates how well you know your visitors.

The goal for the company is to demonstrate a deep knowledge of the industry and target market. If the quiz is helpful and informative, it adds to the brand’s credibility and makes it more likely that customers will want to continue purchasing.

Before you build your quiz, ask yourself:

  • What do you want to get out of your audience taking this quiz? (More conversions, better brand loyalty, improved engagement?)
  • Why would your audience want to take the quiz? (Is it relevant to their interests, will it give them some vital information?)

Knowing exactly what you and your audience should accomplish with the quiz will give you a good platform to begin building on. 

Step 2: Choose the Title and Quiz Type

Titles are important in any content marketing. 80% of readers decide whether to check out an article based on its title. The same process is common for people who want to decide whether they should take a quiz or not. 

There are a lot of great ways to pique your visitor’s attention with a quiz title. For instance, you could challenge your audience to prove their knowledge with the word “actually.” For instance, “How much do you actually know about Kale?” That kind of title immediately appeals to the competitive nature of the human being. 

Another great example of a challenging title is to tell your audience that they can’t do something. Buzzfeed did that with its millennial quiz. The great thing about this quiz title is that it speaks to the competitive nature of the reader but also gives that reader a chance to show that they belong to a specific community. 

Another option could be to ask a question and hope that curiosity will do the rest of the work for you. For instance, “Which celebrity chef are you most like?” The key to success here is understanding your audience and knowing exactly what they most want to know. 

Once you’ve figured out the title, choosing the kind of quiz you want to create is the next step. For instance, you can try:

  • Personality quizzes: People like hearing good things about themselves because of a psychological phenomenon called self-serving bias. A personality quiz that recognizes the features your customers like about themselves will make them feel happier and more connected to your brand.
  • The knowledge test: Commonly found on social media, these quizzes challenge a person’s knowledge on a specific subject. The benefit here is that your audience can learn something and share their knowledge with their friends for social points. This quiz from Unicef is an excellent example of the “knowledge” style quiz.

Step 3: Crafting Quiz Questions

Once you have a good idea of the kind of quiz you want to create and the title you’re going to put alongside it, you’ll need to begin bringing your interactive content to life. That means designing the right questions. 

Writing questions for a quiz is just like creating any excellent content. First, you need to keep your target audience in mind. Next, think about the kind of personality you’re trying to appeal to. Breathing some life into your quiz by injecting your unique sense of personality into it will be an excellent way to strengthen your bond with your customers. 

Other tips for making the most of your quiz questions include:

  • Use visuals in your questions: Having text-only questions is fine in some cases, but it’s worth looking into images too. Using pictures helps to keep things relevant and interesting and makes your quiz feel a lot more immersive. 
  • Don’t make questions too long: In-depth and complicated questions will only scare your audience away. Remember that they’re looking for something fun and lighthearted to do. This means that your questions should be as short as possible. 
  • Make it interesting: Don’t just ask basic questions like “what’s your favorite color” try to go beyond what your customers usually see on quizzes and make it relevant to the quiz topic. Again, this is your chance to show your audience how much you know.

Step 4: Creating Results That People Want to Share

If you want to design a quiz that really blows your audience away, then the results are one of the most important things to focus on. The results you offer your customers dictate whether they enjoy your quiz so much that they want to share it with other people. Creating share-worthy results is how you boost your chances of finding new customers and even going viral. 

So, how do you design results that people want to share? Start by helping your customers to feel positive about themselves. The results should make them feel like a better person or confirm the good things they already believe about themselves. Research tells us that positive emotions are more likely to promote sharing

For instance, this quiz from the PBS company makes people feel good by demonstrating that they know their books. This confirms a customer’s idea that they are well-read.

Using share-worthy images is another way to improve your chances of designing results that people want to share. You’ll need to use interesting pictures here that speak to your audience. Bright and entertaining pictures will make results more eye-catching on a social media feed. 

Don’t forget to include a call-to-action on your results page too. It’s always helpful to give your audience a nudge in the direction you want them to move in. Providing a call-to-action that asks your customers to share their results increases your chances of positive sharing behavior. 

Step 5: Know How to Distribute Your Quiz

Once you’ve put all of the essential components of your quiz together, the next step is ensuring you can distribute that quiz and share it with as many people as possible. For instance, you can promote your quiz on social media to reach more possible customers. Twitter and Facebook are always great places to get started but don’t be afraid to experiment elsewhere. 

Sharing snippets of the quiz experience in an Instagram Story could be a great way to generate engagement or posting a picture on your Instagram feed. 

When promoting your interactive content on social media, use an attractive image to highlight the experience and ensure you make that captivating headline stand out. Share both the caption and image with a shortened link to measure results. Shorter links are more likely to attract audience attention and encourage sharing later. If your links are too long, they can end up looking spammy or unprofessional. That’s not the image you want to build with your quiz content. 

If you need an extra boost for your quiz, promoting through Facebook advertising could be the ideal solution. Paid ads are a great way to get extra attention, but you need to choose your target audience carefully. Select your audience according to demographics, behaviors, connections, and locations. 

Remember that Facebook gives you plenty of opportunities to track down the kind of customers you want to speak to. Creating a custom audience could be a handy step too. This is always useful if you have a lot of information from an email list or a collection of contacts you’ve generated over time.

Step 6: Following Up on Your Quiz

Once you’ve successfully attracted people to your quiz experience, the next step is to follow up on the leads you’ve hopefully collected. When designing a quiz, it’s always a good idea to ask your customer for their email addresses before you give their results. This ensures that you can collect plenty of leads in the long term for nurturing purposes. 

Marketing company, The Foundation, designed a quiz that asked customers whether they had an entrepreneurial mindset. The quiz was based on an existing eBook offered by the company. The quiz, combined with a Facebook ad campaign, helped the business collect new leads to advertise their ebook. The Foundation managed to reduce its cost per lead from $6 to $3.80 using this method. 

When following up on your quiz experience, make sure that you get the tone right. The first thing you need to do is thank your audience for taking the quiz in the first place. After someone opts in and offers their email address, send a quick email that shares their results and says “thanks.” 

After a couple of days, you can follow up on your thank you email by asking your audience to retake the quiz or take a new one. Encourage these repeat customers to share their testimonials and gradually introduce more interesting content you have that’s connected to your quiz. For instance, if you create a quiz to determine whether someone has an entrepreneurial mind, you could advertise articles that cover similar topics. 

Finally, after regular engagement from your audience, you can begin to implement strategies that might convince your audience to purchase your products. This could mean showing off your entrepreneurial eBook, asking someone to sign up for a webinar, or something else entirely.

Don’t forget to track the performance of every quiz too. Examining metrics like click-through rates for your quiz advertisements and conversion rates will help you see which quizzes generate the most attention and action from your intended audience. 

Time to Add Quizzes to Your Interactive Content Strategy?

A content marketing strategy is one of the best ways to engage with your audience and strengthen your position in any industry. The right content demonstrates your knowledge, develops trust, and helps you to attract new customers. With interactive content, you can take the relationship you build with your audience to the next level. It’s your chance to engage with your customers and create an emotional relationship. 

Quizzes are one of the most effective forms of interactive content, and they’re also one of the easiest to implement into your existing strategy. It doesn’t take a lot of time or money to create a good quiz, and you can usually find tools online to help you with things like structure and formatting. You could even hire a professional to design a quiz for you. 

Once you’ve got the kind of quiz that’s really going to interest your target audience, the next step is distributing it in a way that generates as much attention as possible. Remember, you can advertise on social media and various other channels. However, it’s also helpful to pay attention to your options for helping do your promotion for you. For example, many customers will be more than happy to share quiz results that confirm the identity they’re trying to build online.


Featured image via Unsplash.

Source

The post How to Use Quizzes More Effectively in Interactive Content first appeared on Webdesigner Depot.


Source de l’article sur Webdesignerdepot