Articles

If you are a designer and have never dealt with designer’s block, you are probably a superhero. For us mortals, designer’s block is a pretty common problem. There are occasions when we sit in front of our screen, and our creativity just evaporates.

I have spent many hours trying to get rid of this annoying wall. It took some time, but I have found some tactics that work best for me. So, do not panic! In this article, we will share five ways you can overcome designer’s block and get back on track.

From innovative sources of inspiration to the importance of collaboration and food, nothing will be left out. But first, let us analyze what designer’s block is and how common it is among creatives.

What is the Designer’s Block? Can You Force Creativity?

In a few words, designer’s block is nothing but a situation where you are stuck as a designer. In this unpleasant moment, you feel like you are losing your design skills and creativity.

Fortunately, this is not permanent. Of course, you are still a great designer. You should know and embrace that designer’s block happens to almost every creative out there. Even the most experienced of us. So the first thing you should do is to stay calm.

Remember that you can not force creativity. When designer’s block comes knocking on your door, you need some time to recover.

So instead of panicking, take to heart some practical tips that will help you regain your confidence and creativity.

How to Get Rid of Designer’s Block?

1. Take Care of Yourself

In some cases, designer’s block is your own body’s reaction. Think about it. How can you perform well when you are tense with pressure? There are many ways to take care of your mental and physical health. For example, you can take a break and have a snack.

Sleep is also critical when it comes to avoiding designer’s block. Recent research has shown that creative thinking is directly related to our periods of sleep. Lack of concentration, more mistakes, and erratic behavior are just some of the consequences of insufficient sleep.

For this reason, napping is a smart solution to designer’s block. So if you are feeling unproductive, first make sure you are not tired or hungry.

2. Change Your Location, Get Inspired

But what if you’re not hungry or tired? There are situations where we are stuck in front of a project. If that’s the case, you should decide to take an inspirational break.

The first thing you can do is to change your location. If you are working from home, you should get some fresh air. There are numerous sources of inspiration that can help you overcome designer’s block. Personally, I take a break and visit one of the following sources:

  • Parks: Nature will calm you and help you get inspired.  
  • Art Galleries: A designer’s best friend. Visiting an art gallery can help you find the missing elements for your upcoming project. 
  • Coffee shops: Quiet coffee shops are an intelligent way to get inspired. What’s better than a big mug of coffee and relaxing music?

Alternatively, watch a movie or a TV series. This may sound like an unorthodox way to get inspired, but it works perfectly when overcoming designer’s block.

3. Explore the Power of Collaboration

More than 90% of graphic designers in the world are freelancers. Although freelancing is an exciting job, it can be pretty lonely. The next time you are struggling with designer’s block, you might want to ask for some help.

Other UI or UX designers can help you see a project through different eyes and find the missing design elements. For this reason, collaborating with other designers is a great way to overcome designer’s block.

On the other hand, you can also ask your friends or family for ideas and feedback. Remember that inspiration can come from anyone.

4. Plan and Break the Project into Chunks

Most times, I get stuck as a designer, it is entirely my fault. To be precise, there are many cases when we do not plan the project efficiently. When the work is overwhelming, the lack of a well-organized plan can be why.

The best thing you can do is to take a step back. Take a look at the work that needs to be done. Then, you can start breaking your project down into small sections. If you reorganize everything, you can get rid of designer’s block in a matter of minutes.

Try not only to organize your tasks but also to manage the time you will spend on each chunk. This will probably help you understand that you have more time than you think.

5. Apply Some Pressure, Just Start

Unfortunately, few of us have infinite time to find inspiration. Most professional designers work with deadlines. That’s why putting pressure on yourself is not always a bad thing.

After following the above tips, all you have to do is start. Don’t forget that the designer’s block will remain until you start designing.

When I try to apply some pressure, my first drafts are usually bad. But after a while, everything comes back to normal.

Wrap Up

If none of the tactics analyzed above helped, you can always use one (or more) of the following quick tips:

  • Take a short break (5 minutes or so);
  • Start with the most challenging task;
  • Go for a walk or exercise;
  • Ask for more information about the project. Sometimes, the client can help you overcome designer’s block;
  • Think about what is distracting you and solve it.

Remember, every creative out there has faced designer’s block at least once. So there’s no need to panic at all. Of course, not all of us deal with it in the same way. That’s why you should first try out the tips above and find out what works best for you. This will help you overcome designer’s block and regain your skills as a designer.


Featured image via Pexels.

Source

The post 5 Brilliant Ways to Tackle Designer’s Block first appeared on Webdesigner Depot.

Source de l’article sur Webdesignerdepot

There are a lot of factors that contribute to a better user experience on a website. Pages need to load quickly to give users peace of mind and efficiency. Navigation must be clear and straightforward, with direct pathways for visitors to follow when finding your contact pages, blog posts, and products. Your colors need to work seamlessly together while providing just enough contrast in the areas that need it most.

Excellent user experience needs to be considered for every part of your website that acts as a touchpoint with a potential customer or user.

One of the most significant touchpoints of all is your forms.

All websites need some form of interactive content to thrive. Users need to be able to do something with the site, whether it’s looking for information with a search bar, contacting a team for a quote, making a booking, or completing a purchase. Forms power the majority of the interactive activities available on websites.

If you know how to master great UX on a form, you can contribute to more meaningful interactions between your brands and their customers. But not all web forms are the same. Here are some of the top types of forms you need to master and how you can optimize them.

The “Opt-In” Form

The Opt-in Form is probably the best-known form in the digital landscape. It’s essentially a form that asks visitors to “opt-in” to a specific offer. Sometimes, this means signing up for a webinar; other times, it’ll be agreeing to an email newsletter or a regular series of blog updates.

Opt-in forms grab attention quickly and ask for something specific from the audience. For instance, this example from HuffPost encourages visitors to “Subscribe to the Morning Email.”

Opt-in forms are all about generating action.

Sometimes, they’re placed at the bottom of a landing page after a company has had a chance to explain precisely what they’re offering. Other times, you’ll find the opt-in form situated on a sidebar of a website, constantly enticing people to “sign up” if they like what they see on a blog post or article.

It’s also common for opt-in forms to appear as pop-ups and exit pop-ups on modern websites. For example, a brightly colored opt-in form that promises an immediate benefit to a customer could encourage them to hand over their details before they abandon your website.

How to Design a Great Opt-In Form

So what kind of best practices go into an excellent opt-in form?

  • Start with simplicity: If you’re asking your visitors to do something, don’t overwhelm them with too big of a request straight away. Keep the form short and simple, so it doesn’t seem like too much extra work for the visitor. Something like “Subscribe to our newsletter” should ask for nothing more than an email. 
  • Highlight the benefits: Most customers won’t want to give you a place in their inbox or the opportunity to interact with them further unless you can offer something in return. Even if you’re asking for something small, like an email address, let the customer know what’s in it for them. In the HuffPost example above, the company highlights that you can wake up to the day’s “most important news.” 
  • Give the visitor the power: Let your visitor know they’re in control here. They want to see that they’re getting exactly what they need from you in exchange for their contact details. This means reassuring them that their email address won’t be used for spam, like H&B Sensors does here: 

The Contact Form 

The Contact Form is another crucial part of building an effective UX for your website – but it’s also an element that web designers and business owners often overlook. When customers decide they want to learn more about a business, they need a quick and easy way to get in touch.

Contact forms need to be easy to find and use on any website. Usually, your user will expect to see a link to the contact form situated somewhere at the bottom of your webpage. It might be called “Contact Us” or “Customer Support.” Avoid anything that would go over the user’s head.

Aside from being easy to track down, your contact form also needs to reassure an audience that they’re making the right decision by getting in touch. Therefore, the content needs to be short, sweet, and authoritative—highlight why the user might contact your company and how they can do so.

Avoid any unnecessary information in the contact form. For example, you don’t need to know your client’s age and their job to answer a question about where their nearest physical branch is. Keep form fields to the point, or you’ll chase customers away.

How to Design a Great Contact Form

Design something personalized but straightforward to make the most of your contact form. Use features like smart content and conditional logic, if possible, to adapt the page to the user’s needs. Dynamic content is becoming increasingly valuable these days. Other best practices include:

  • Set the right expectations: Let your customers know how active you are and how quickly they can expect to hear back from you. Imagery and the right fonts can also set expectations about the kind of communication your audience can expect. For example, this contact page from the Marvel app is fun and playful, like the company itself:

  • Provide multiple options: If your customer doesn’t want to use your contact form, give them another way to get in touch. Ensure the contact page includes information like where to find you on social media and your professional phone number. 
  • Simplify things on your end: To ensure that you can contact your audience as quickly as possible, allow your customers to choose a specific subject that their query is connected to. Allowing them to choose “Sales” or “Order issues” means you can automatically direct the message to the right team member on the back-end. 

The Online Payment Form 

Sometimes, when your customers have seen what you have to offer and they’ve checked out the competition, they decide to go ahead with their purchase. To facilitate this, you’re going to need an online payment form. Online forms ensure that your customers can safely enter their credit or debit card details to purchase whatever you have to offer.

Most payment processing companies like PayPal, Square, and Stripe come with payment forms included, so you can easily embed them into a website in minutes. However, there’s always the option to customize those payment forms.

For instance, ideally, you’ll need a payment form that keeps your customer on the same page, so they don’t have to log into another browser to make their purchase. The fewer transitions your client has to make, the safer they’ll feel.

How to Design a Great Payment Form

When designing any payment form, simplicity and security are the two most important factors. Your customer should be able to enter their information quickly and easily and get through the transaction process without worrying about their details.

Remember to:

  • Keep it simple: The fewer fields the visitor has to fill out, the better. Customers still feel uncomfortable sharing personal information and payment details online. Make the experience as painless as possible. If your client already has an account with your business, you might create a system that automatically fills some of the fields, such as their email address, name, and billing address. 
  • Offer the right integrations: The proper payment forms will integrate with the payment services your customers prefer to use. Options include PayPal, Stripe, Square, Verified by Visa, and Mastercard. Get a developer to integrate the right APIs with your form to give your customers the broadest range of options. 
  • Ensure security: Give customers peace of mind by providing as much security evidence as possible. An SSL certificate that places the padlock on the top of the browser next to the URL is a great way to make customers feel more secure. Integrating verification options so your customers can avoid fraud issues is another significant step. Sometimes just putting logos from the card types you accept on the page will make a customer feel more secure. 

Support Forms

Some companies bundle the contact form and the support form together. Others have a separate support form to get their queries routed directly to the people most capable of helping them. If you want to take the second route, it might be a good idea to design a “help” section on your website where you can locate the support form.

The “Help” section on a site often appears alongside other links on the footer. For instance, it could appear alongside “About” links and “Contact” options. Here’s an example of Hubspot’s Customer Support options:

The best customer support pages come with various ways for clients to help themselves and find answers to their most pressing questions. For example, you might have a search bar where your audience can search for the answers to their queries or a knowledge base full of helpful blogs.

Hubspot allows users to choose between a blog, knowledge base, academy training center, community forum, developer discussion board, and assistance from a certified partner.

How to Design a Great Customer Support Form

Designing a good customer support form is about getting your audience the information they need as quickly as possible. Once again, you’ll need to stick to as few form fields as possible here to avoid angering an already frustrated customer. Also, remember to:

  • Ask for the right information: Find out what the query is about by giving the customer a drop-box menu full of possible topics to choose from. If you need a product reference number or something similar, ask for that at the top of the form, then allow the customer to provide extra information about their query underneath. 
  • Set expectations: Let your customers know when they can expect to get a response to their concerns and provide them with advice on what to do next. For instance, you could invite them to check out your knowledge base while they wait for a response. 
  • Keep it simple: Avoid using technical jargon on your support request forms. Be direct in your requests for summaries of the issue at hand, contact information, and other supplemental data. 

Customer Feedback Forms

According to Microsoft, around 96% of customers say that customer service is crucial in determining their loyalty to a specific brand. Another 52% of global customers believe that companies need to respond to the feedback provided by customers.

To ensure your customer service strategies are on-par with what your customers expect, you need to get feedback from your audience. That’s where a feedback form comes in. Customer feedback forms often appear after a client has finished purchasing on the “thank you” screen. They may also occur after a customer has completed a service interaction online.

Here’s an example of an Apple feedback form:

How to Design a Great Customer Feedback Form

By leaving you feedback, your customer is doing you a massive favor. They’re giving you a chance to learn from your mistakes and improve the service you can give next time around. Feedback is one of the best tools for any business that wants to grow and thrive.

If you want your customers to use your feedback forms, you’ll need to make them as simple as possible. Your customers don’t have time to waste on a complex form.

  • Don’t make any fields mandatory: Don’t stop your customers from submitting a form unless they’ve completed every field. Allow them to enter the information they consider to be the most important, and that’s it. You can even fill some of the form out for your customer, if possible, by entering their name and email address if they’re already a member of your site.
  • Make it mobile responsive: Remember there are around 3.5 billion smartphone users worldwide. You can’t afford to lose feedback because your form isn’t responsive. Every form should look and feel incredible on any device. 
  • Include a rating option: If your customers don’t have much to say about your service, or they’re not wordsmiths, they might prefer a rating option instead. A one-to-five rating system that allows your customer to judge your product or service on a scale of poor to wonderful is a great way to gain quick information. Check out the Uber Engineering example here:

Though you can pre-enter some information on a feedback form to make your customer’s life easier, don’t overstep your bounds. Adding your customer’s email address to the form is fine if they’re already a customer with you. Pre-selecting the “very satisfied” rating above would look presumptuous.

Top Tips to Improve Every Form Design

The online form is an essential part of any web design project, but it’s also frequently overlooked. Unfortunately, without a good set of forms, your customers will struggle to interact with your company in a meaningful way.

When creating any form, remember:

  • Reduce friction: Reduce the friction for your customers by asking as few questions as possible. The less your customer has to answer, the better. If you can pre-populate forms with information like your customer’s name and email address, this could help. 
  • Keep it simple: Make sure that the form is clean and easy to use. Your customers shouldn’t be confused about where to click or how to submit their information. A single-column design is often better than a multi-column option.
  • Be clear in error messages: Don’t just tell your visitors that something has gone wrong. Let them know what they need to do to submit the form successfully. If possible, use inline validation with real-time feedback to let your audience know that you recognize the information they’ve submitted.
  • Keep data secure: Make sure your audience feels safe by letting them know how you will use this information and why you’re asking for it. If you’re asking for an email address, make the benefits of entering that information clear. 
  • Make fields optional: Allow your audience to add more information to a form if they want to – but don’t demand it. Give some freedom to the visitor. 

The better your forms are, the more effective your interactions with customers will be. Remember, it’s not just the face-to-face interactions that your customers judge when making decisions about your business and whether to trust you. Today’s digital world has prompted a new demand for more meaningful virtual experiences.

Your form could be the first interaction you have with a client, whether it’s a contact form, a booking form, or something else entirely. Get that right, and you can improve your chances of your customers coming back to interact with you again later.


Featured image via Pexels.

Source

The post The Top 5 Form Types to Use in Your Web Design  first appeared on Webdesigner Depot.

Source de l’article sur Webdesignerdepot

Every year, at this time, blogs like this one like to try and predict what’s going to happen in the year ahead. It’s a way of drawing a line under the archive and starting afresh. A rejuvenation that, as humans, we find life-affirming.

Ten years ago, I would have had high confidence in these predictions — after all I was eventually right about SVG adoption, even if it took a decade. But the last few years have shown that web design is tightly interwoven with the muggle world, and that world is anything but predictable.

So as we look at what might occur in the next year (or five), think of it less as a set of predictions and more as a wishlist.

Last Year’s Predictions

When I write this post every January, I like to keep myself honest by glancing back at the previous year’s predictions to gauge how accurate (or not) my predictions have been.

Last year I predicted the long-term trend for minimalism would end, WordPress would decline, cryptocurrency would go mainstream, and then hedged my bets by saying we’d make both more and fewer video calls.

Gradients, maximalism, and the nineties revival pulled us away from minimalism. It’s still popular, just not as dominant.

WordPress is still the biggest CMS in the world and will continue to be for some time. But the relentless grind of no-code site builders at the low end, and being outperformed by better CMS at the high end, mean that WordPress has passed its peak.

Over-inflated predictions for BitCoin reaching $100k by December 2021 turned out to be a damp squib. In the end, Bitcoin only tripled in value in 2021. However, with micro-tipping and major tech companies moving into the arena, it’s clear digital currency arrived in the public consciousness in 2021.

And how could I be wrong about more but also fewer video calls? So I’m calling that my first clean sweep ever. With that heady boast, let’s take a look at the next twelve months.

What Not to Expect in 2022

Do not expect the Metaverse to be significant in anything but marketing speak. Yes, the hardware is slowly becoming more available, but the Metaverse in 2022 is like playing an MMORPG on PS5: theoretically, great fun, until you discover that absolutely none of your friends can get their hands on a console.

Ignore the blog posts predicting a noughties-era retro trend. All those writers have done is looked at the nineties-era trend and added a decade. Fashions aren’t mathematical; they’re poetic. Retro happens when people find a period that rhymes with present-day hopes and fears. After the last couple of years, if we revisit a decade, it’s likely to be the late-forties.

Finally, don’t expect seismic change. Material design, parallax scrolling, and jQuery are still with us and are still valid choices under the right circumstances. Trends aren’t neat; they don’t start in January and conclude in December.

5 Web Design Predictions for 2022

Predictions tend to be self-fulfilling. So we’ve limited ourselves to five trends that we believe are either positive or, at worst harmless. Of course, there are no guarantees, but if these come to pass, we’ll be in good shape for 2023.

1. The Blockchain is Coming

Underpinning the cryptocurrency industry are blockchains. In simple terms, they’re a set of data that can be appended to but can’t be edited or deleted. Think of it as version control for data.

As with most technology, the first wave has been a way to make a fast buck. However, the exciting development is blockchain technology itself and the transformative nature of the approach. For example, Médecins Sans Frontières reportedly stores refugees’ medical records on the blockchain.

Imagine the Internet as a set of data, editable for a micro-fee, and freely accessed by anyone anywhere. Instead of millions of sites, a single, secure, autonomous source of truth. Someone somewhere’s working on it.

2. Positivity & Playfulness & A11y

Even before world events descended into an endless tirade of grim news, time was running out for dull, corporate, geometric sans-serif design.

We added gradients, we added personality, we embraced humor. And contrary to the established business logic, we still make money. Over the past few years, there have been extraordinary efforts by designers and developers to examine, test, and champion accessibility, and thanks to them, inclusive design is no longer reliant on the lowest common denominator.

In 2022 you can get experimental without obstructing 10%+ of your users.

3. Everything Green

Green is a fascinating color, the primary that isn’t (except in RGB, when it is).

Green has the same visual weight as blue, is substantially more flexible, and yet to date, has been radically underutilized in digital design.

Green has a prominent cultural association with the environment. At a time when tech companies are desperate to emphasize their ethical credentials, marketing companies will inevitably begin promoting a brand color shift to green as a quick fix for all those dumped chemicals, strip mines, and plastic-filled seas.

We’ve already seen earthy hues acquire popular appeal. At the other end of the vibrancy scale, neons are popular. Green spans both approaches with everything from calm sages to acidic neons.

In 2022, if you’re looking for a color to capture the moment, look to green.

4. Hero Text

A picture is supposed to be worth 1000 words, although I’m not sure anyone has actually tried to measure it. The problem is that sites increasingly rely on stock images, so the 1000 words that we’re getting may or may not accurately reflect 100% of our message.

In 2022, a handful of well-chosen words will be worth more than an image, with hero images taking a back seat to large hero text. This is aided by a number of minor trends, the most notable of which is the willingness of businesses to look beyond the geometric sans-serif to a more expressive form of typography.

Reading through the prediction posts on sites other than this, almost everyone agrees on large hero text replacing images, which virtually guarantees it won’t happen. Still, at the start of 2022, this seems to be the direction we’re taking.

5. Bring the Noise

One of the unexpected consequences of the past couple of years has been a renewed connection with nature. The effortless complexity in nature is endlessly engaging.

We’ve already begun to popularise gradients — there are no flat colors in nature — and the next logical step is the addition of noise.

In visual terms, noise is the grainy texture that sits so beautifully in vector illustrations. Noise has dipped in and out of trends for years, hampered a little by the leap in file size it creates. However, with WebP and Avif file types, noise is now usable on production sites.

Designing in 2022, when in doubt, throw some noise at it.


Featured image via Unsplash.

Source

The post 5 Big Web Design Predictions for 2022 first appeared on Webdesigner Depot.

Source de l’article sur Webdesignerdepot

Many people believe that UX design is all about creating slick, engaging images and top-notch user flows. While those things have their merits, UX designers do much more than that.

UX writing is an essential skill in developing an app or solving a UX problem for a client. UX writing is when we craft UI text to communicate with a product/service user. UX writing includes valuable text like instructions, buttons, menus, just-in-time warnings, etc.

This article will analyze what you need to look out for even before you start writing. After that, we will explore ten crucial tips for UX writing that every UX designer should know.

Practical Tips and Tricks to Improve Your UX Writing

As with UX design in general, UX writing is about achieving a goal. Think of a wireframe you have created: The first thing you do when designing is to identify the real problem and set out to find the right solution. The same goes for UX writing.

Accordingly, before you start writing, make sure that you:

  • Have identified the UX problem;
  • Understand the goals of the client’s digital product;
  • Are familiar with the target audience;
  • Know the style and tone of voice you should use.

Once you are familiar with all of the above, you are ready to start writing. Let us explore all the tips and tricks you can follow to improve your UX writing.

1. Be Concise

This is one of the most important tips concerning UX writing. UX designers should always seek the shortest path from point A to point B. This is not only true for UX writing.

So conciseness is all about shortening your sentences and writing only what is necessary. This way, you’ll achieve a better user experience. Remember that most people tend to quickly scan instead of actually reading.

2. Be Clear and Helpful

If you are concise, the text you write will be clear and valuable. Since our goal is a compelling user experience, you should avoid being wordy. Our text needs to be helpful to the reader. What does a user need to know about the product or service?

All you need to do is anticipate what users need and what they are concerned about. Then, by analyzing your target audience, you can easily remove unnecessary text and make your UX text clear and useful.

3. Be Positive

You want the user to have a positive feeling when they first engage with your digital product. Well, for the target audience to be positive, your writing needs to be positive as well. To achieve that, you should avoid negative statements.

Of course, this is not a rule that you must always follow. For example, using “don’t” is not always bad because you can use it for emphasis. Nevertheless, try to avoid such words when describing your product or service.

4. Be Consistent 

Consistency has everything to do with sticking to the guidelines you (or a client) set at the beginning of the UX project. Your UX text must always match the style and tone you have chosen.

Try to pay attention to details. For example, when it comes to numbers, you can write 2,000 follows, 2.000 follows, and 2000 follows. It does not matter which you choose, as long as you remain consistent throughout the project.

5. Use Active Voice

Although it is not always wrong to write in the passive voice, the active voice is generally more helpful for UX writing. Your text will be more precise, tailored to your audience, and more potent with the active voice. And when your written text is clear and powerful, it is also more engaging.

6. Don’t Get Wordy

In most cases, when you are done writing, you believe that your text is clear and valuable. And that’s reasonable. However, it is wise to reread your text and delete all the filler words.

Adjectives and adverbs are usually unnecessary, and you can remove them from your UX text.

7. Choose Strong Verbs

But if you have no adjectives and adverbs, how can you emphasize and strengthen your text? All you need to do is use the correct persuasive verb. Strong verbs help you formulate compelling CTAs without being wordy.

8. Use “You” Words

Now that we have mentioned CTAs, there is nothing more convincing than the word “you.” Words and phrases like “you,” “you will,” “you are,” “you have,” “your,” “yours,” etc., are the best way to connect with your target audience and let them be the leading character on your UX Journey Map.

9. Avoid Articles and Exclamation Points

Although it may sound bizarre, the use of articles is not necessary for people to understand what you are saying. The same goes for exclamation points. Of course, you can use exclamation points for emphasis, but not always. Save them for the most exciting aspects of your project.

10. Don’t Use UX Writing to Point Out UI

This is a widespread mistake made by us UX designers. If you have to point out an interface element of your design with text, there is probably something wrong with the design.

Remember, UX text is not about explaining your user interface; it’s about providing valuable and transparent information about your digital product.

Wrap Up

You should keep in mind that the above tips are only guidelines and not strict rules. For example, there are occasions when the passive voice or an exclamation point should be used in UX writing. In any case, you will be one step closer to your goal if you make sure that your UX text is concise, clear, valuable, and consistent.


Featured image via Unsplash.

Source

The post 10 Tips for Effective UX Writing first appeared on Webdesigner Depot.

Source de l’article sur Webdesignerdepot

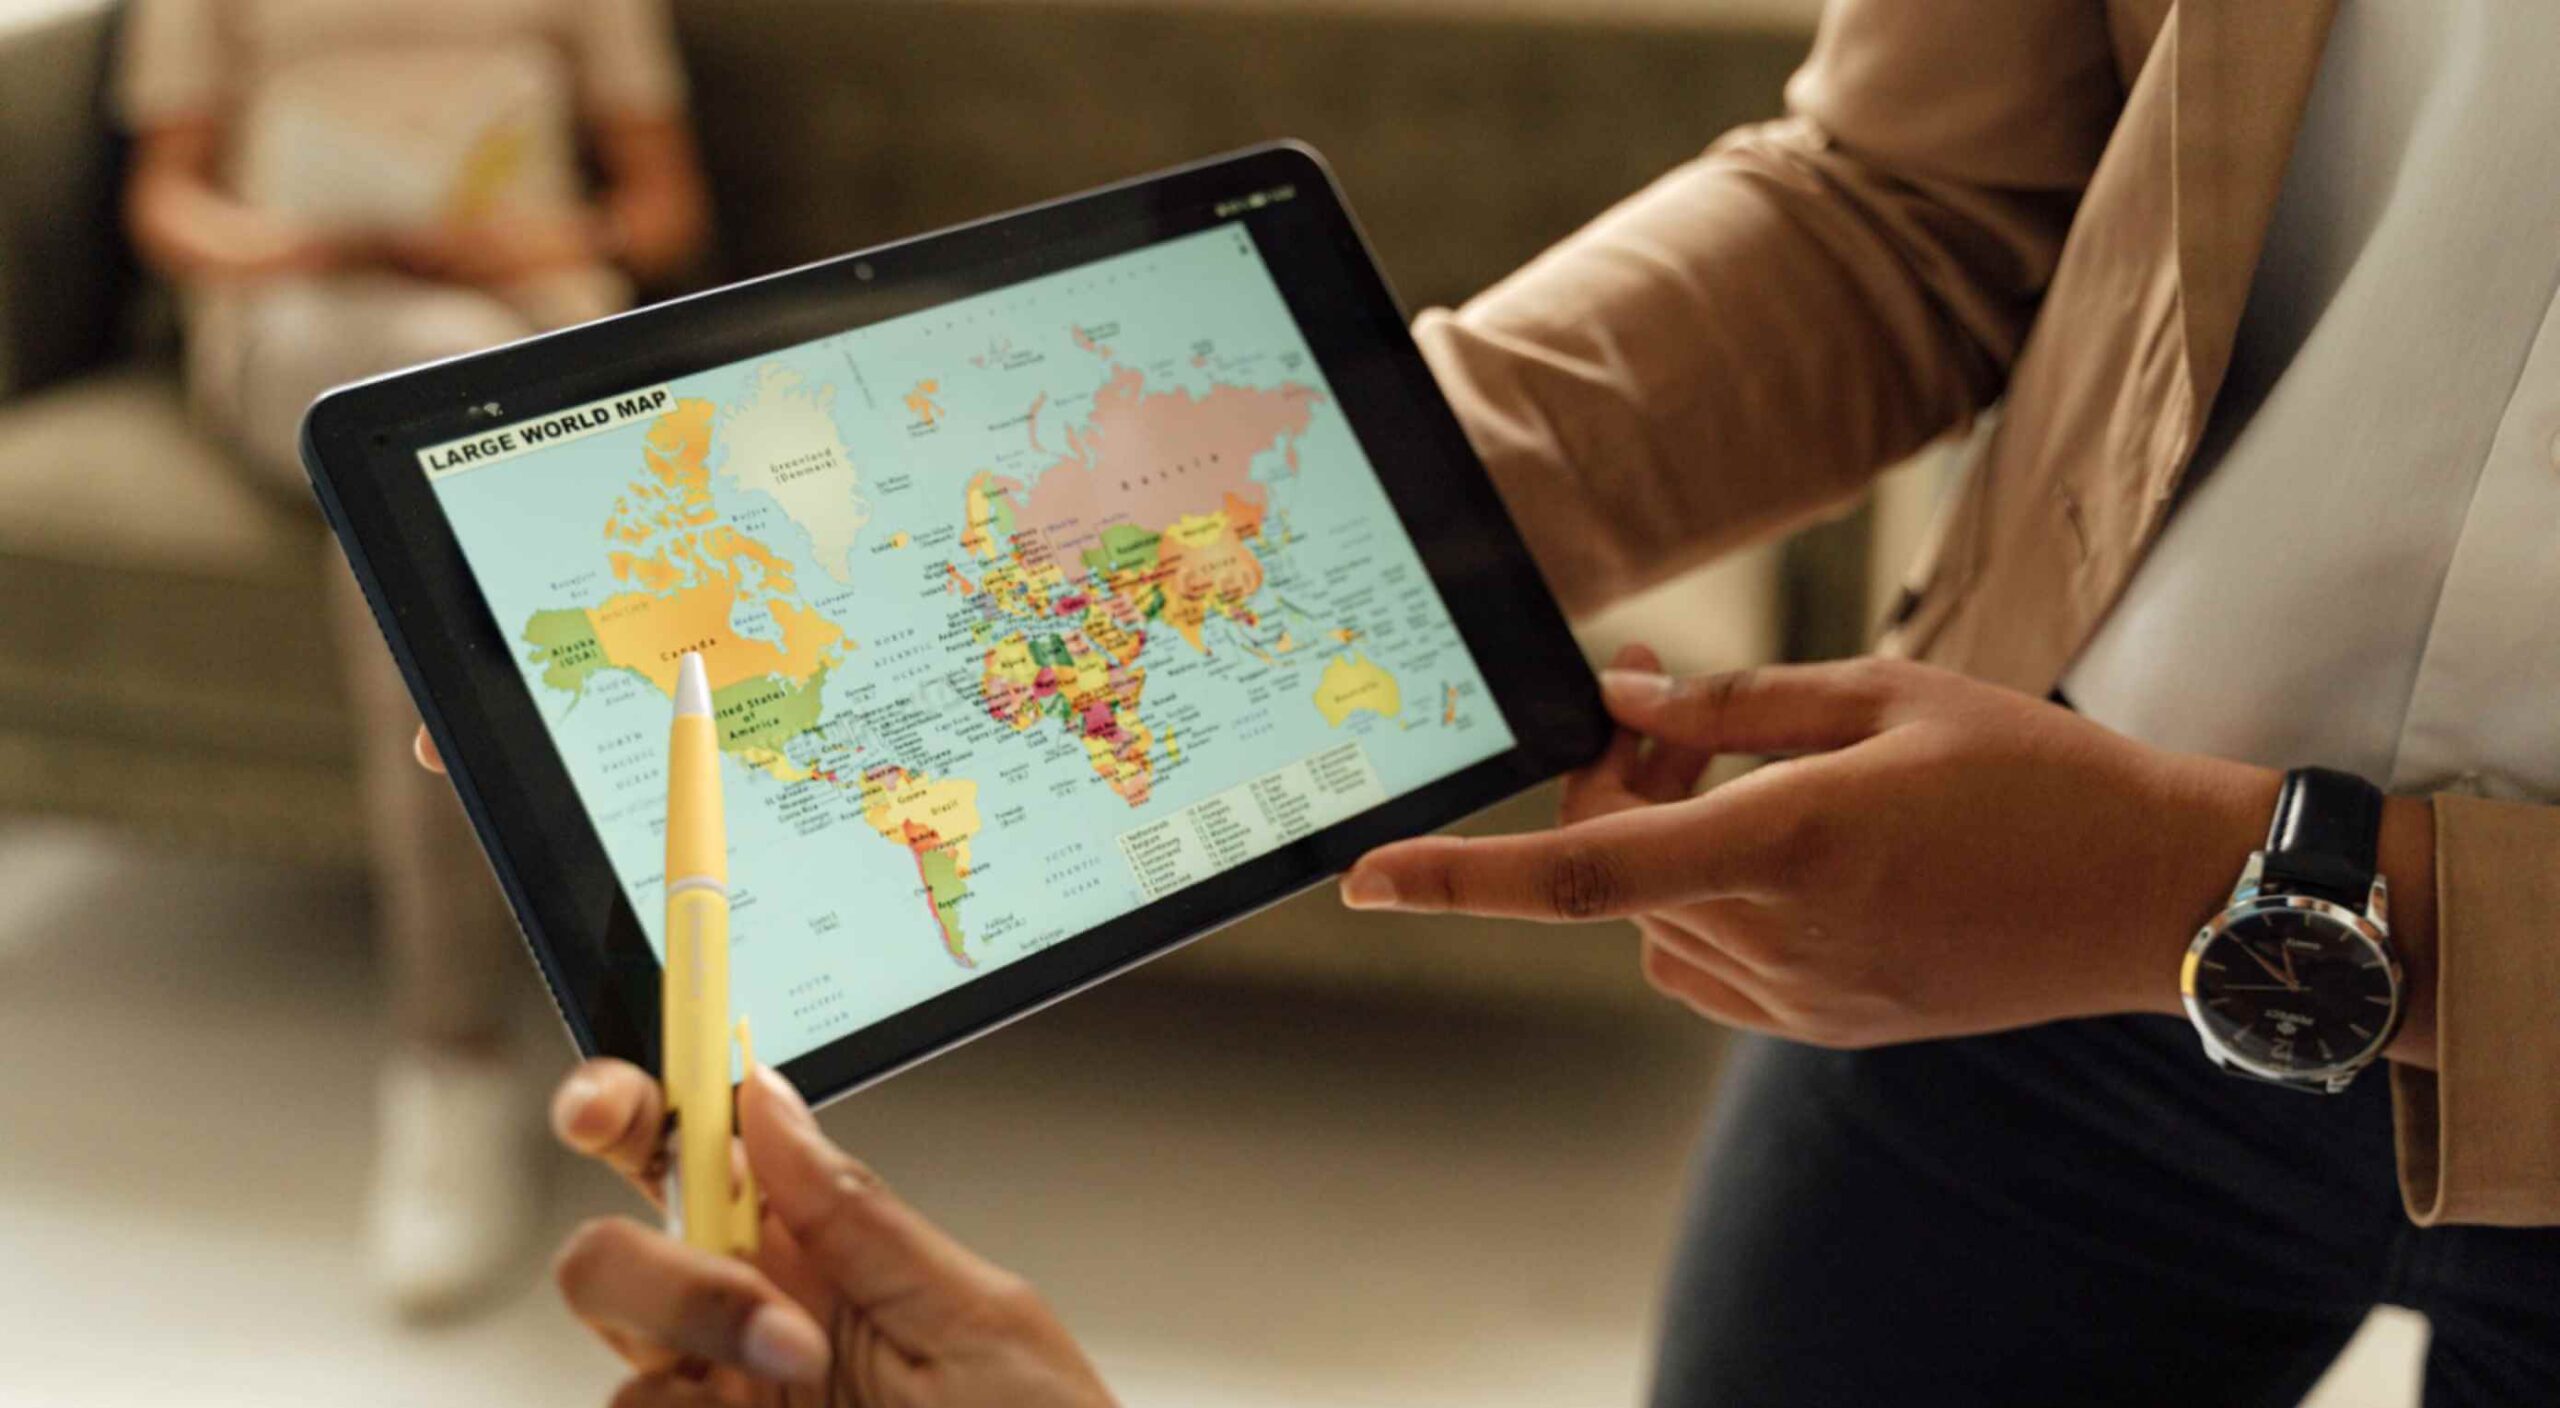
Maps are a fascinating method for delivering content. At their best, they can create an intuitive way of presenting information and interacting with it. This is the advantage that digital maps, through mobile apps and websites, have over print maps and images where no interactivity is possible.

But it’s important to understand that more data ≠ better experiences. We all now have so much data available to us through multiple services that, arguably, the greatest challenge isn’t sourcing information but filtering it out. We can only handle so much information input before we become overloaded. This issue risks being omnipresent with maps. There are so many potential points of interest on a map that it’s essential to be clear about what needs to be exposed to users.

Also, UX design, map design, and user interface are all critical. While maps can be a powerful way of drawing people in, if end-users feel that you didn’t even consider the visual design, they’ll ‘bounce off’ your site or app in moments.

Common Use Cases

When are maps useful, and what problems do they solve? Let’s dive right into the most common use cases for maps used in web design.

Navigation and Direction

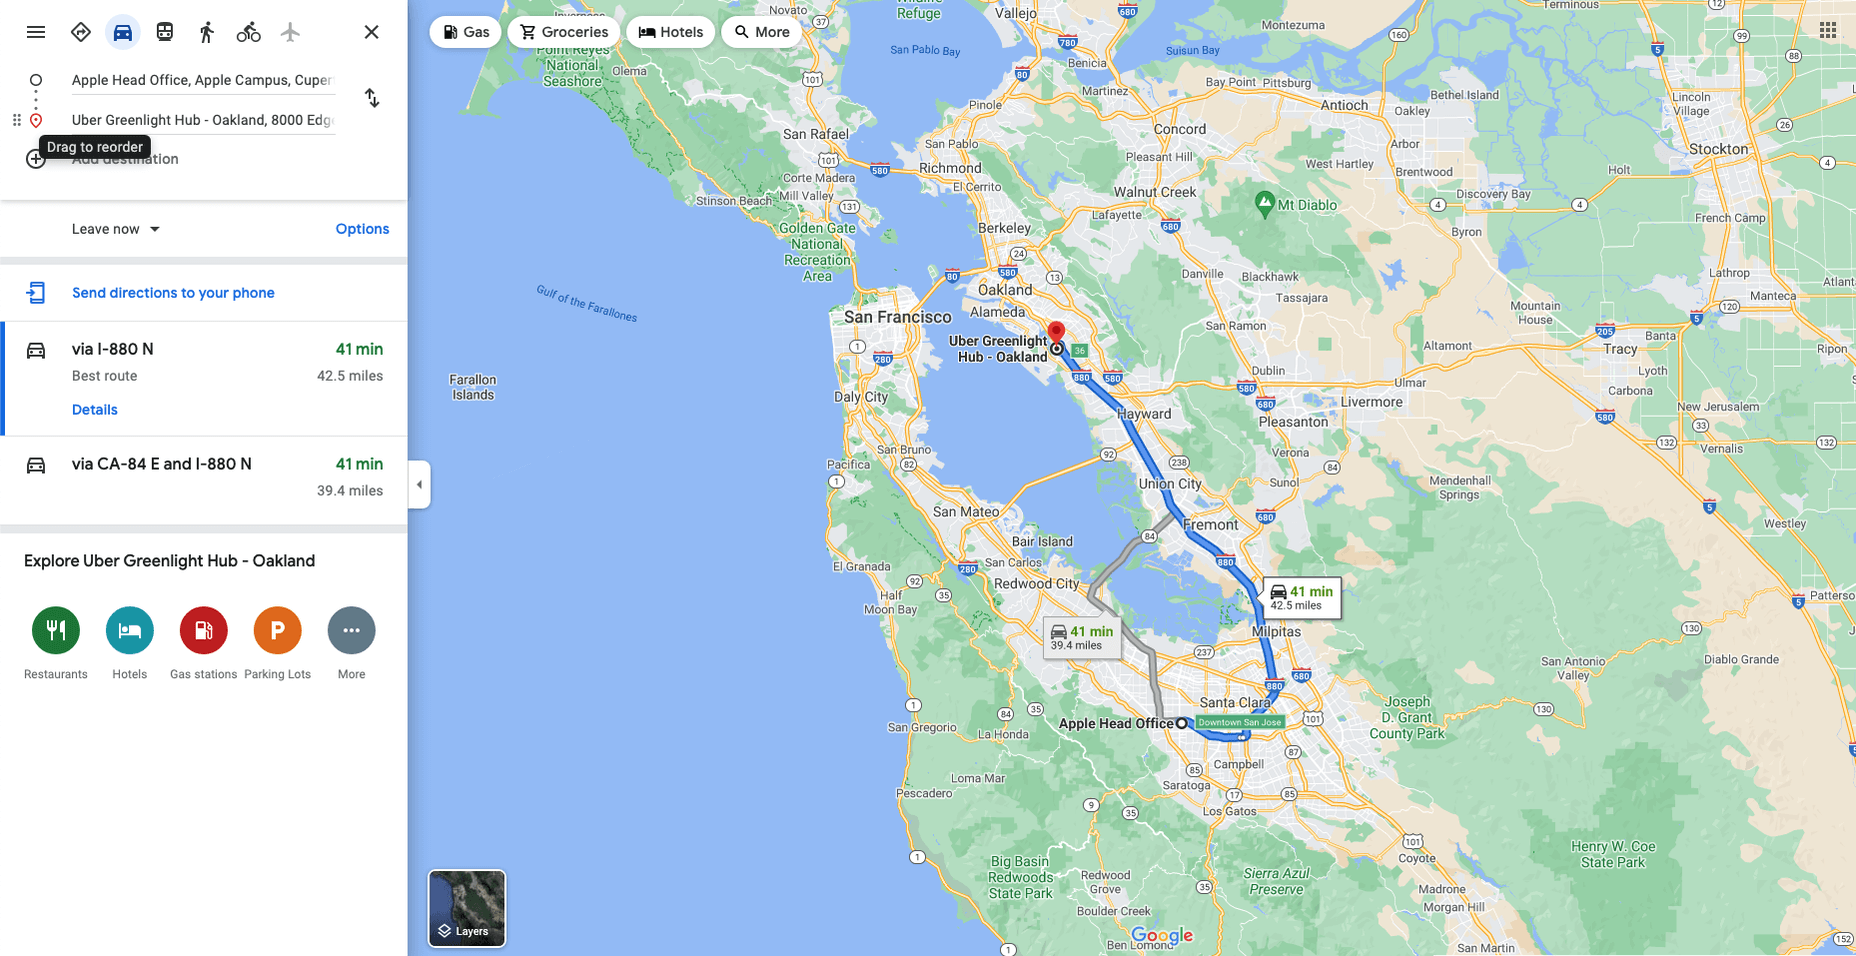
Like Google Maps shows, navigation and direction are arguably the classic case study for interactive maps. You are in one place and need to get to another. You can enter your destination, your current location, and the map will present suggestions for getting there. You can select the method of travel and adjust desired departure or arrival times. But you need to understand first what functionality your users need. How these options are exposed to users is a critical piece of UX design.

Also, if users are searching for options such as somewhere to eat, it’s not so straightforward. Then, how your map handles panning in real-time as users swipe around a city is going to be a big issue.

Showing Relationships and Trends Geographically

This is something that you’ll see in every election in any western country. We’re all used to seeing maps that give us a state-of-play for which state or seat is held by which party. Then, we might see projections based on voter intentions and projected voting swings deriving from that. Then, exit poll data can be projected with the map updated on an ongoing basis until the final result is confirmed.

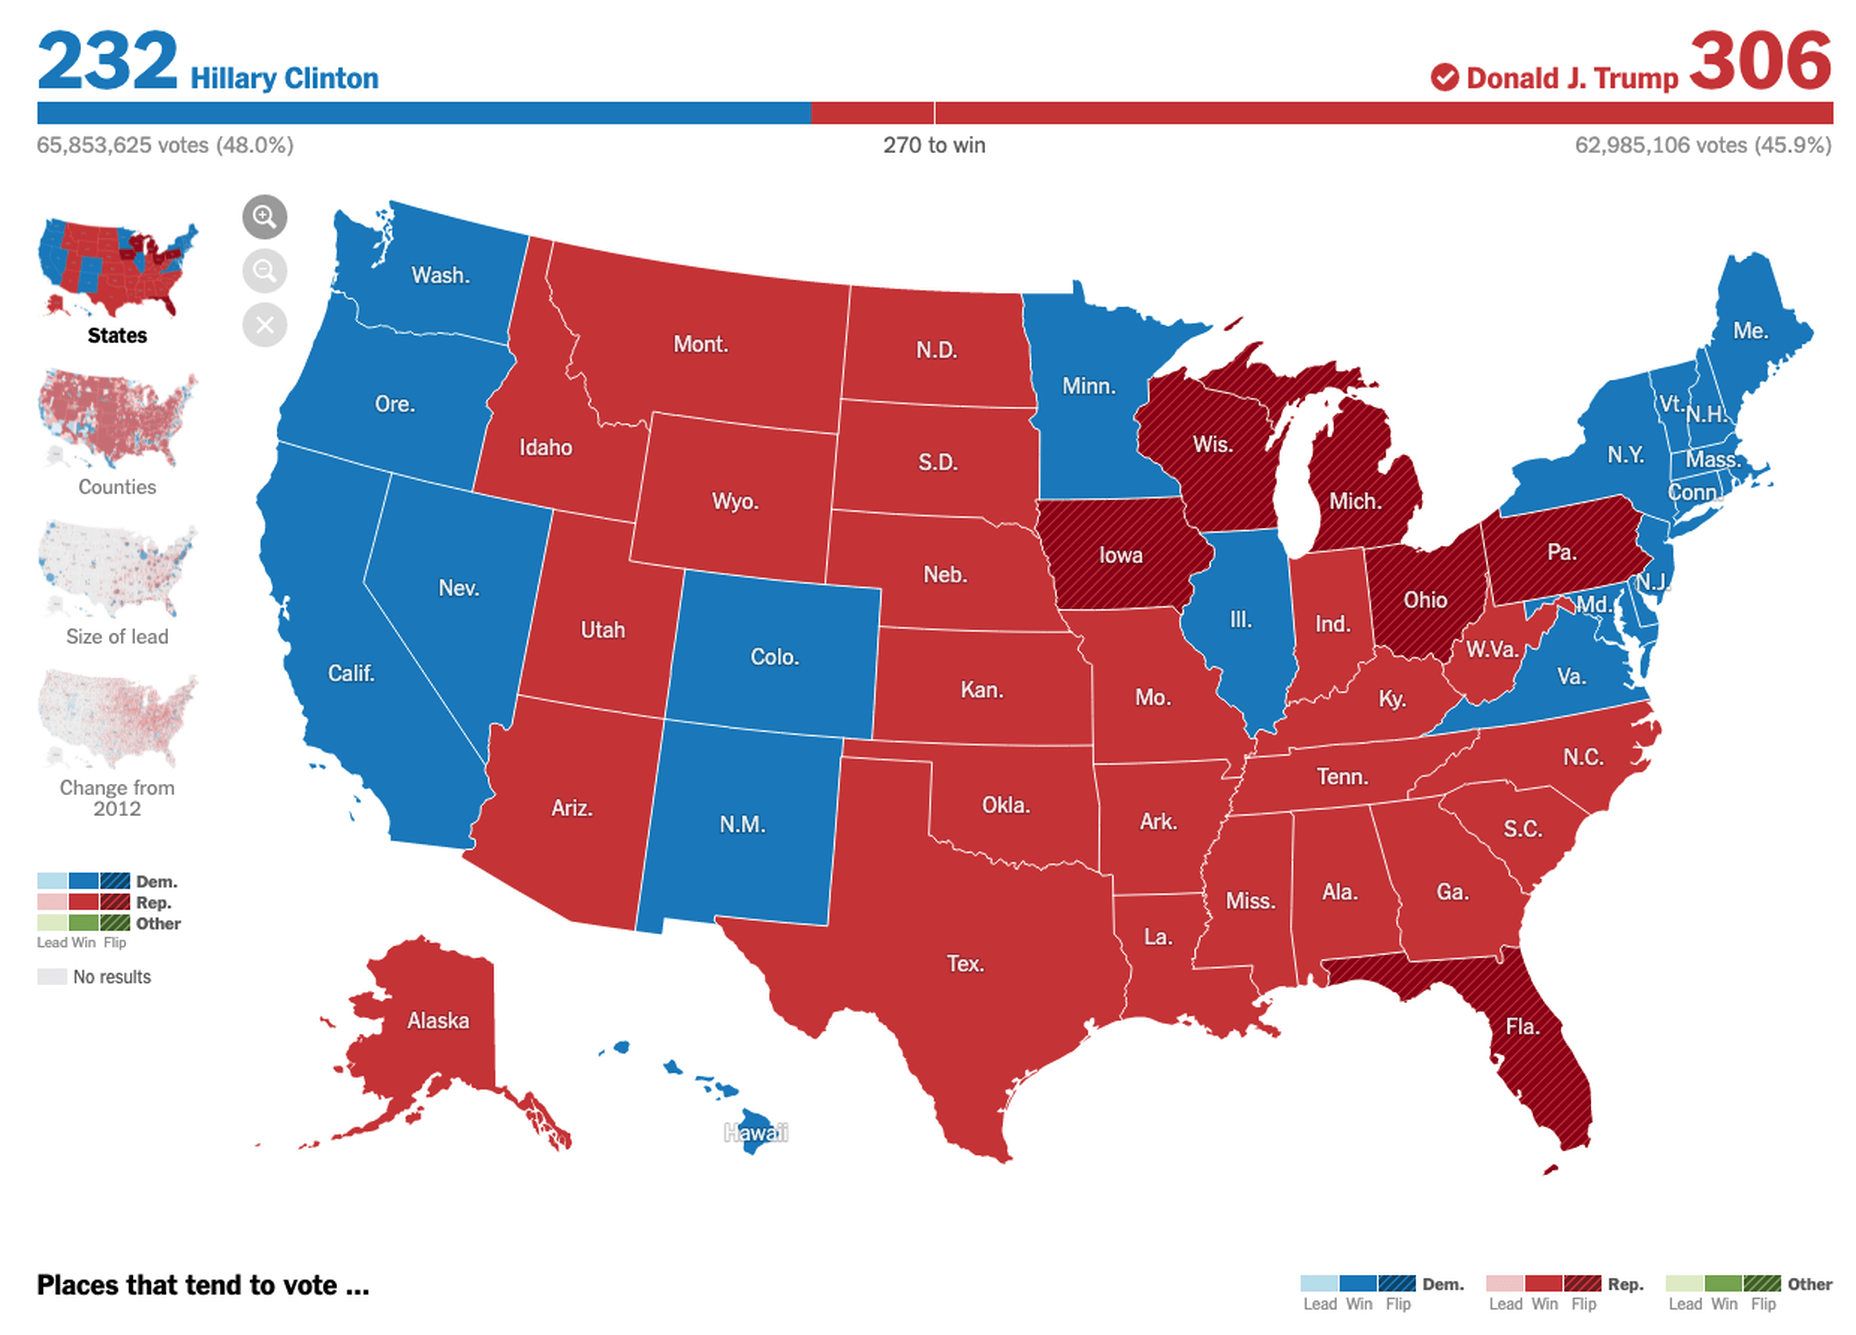
The capability to do this is essential because if a static map were used, it’d be out of date any time a new poll was released. Also, voting intentions can change over a campaign, so such maps need to be dynamic. Of course, such maps are only as accurate as the available data, as the US 2016 election map showed.

Show Points of Interest

As mentioned previously, there’s a lot of data that can be exposed to map users. However, that doesn’t automatically mean that it should be. Usability is key. For example, when you look at a map, you’ll typically first see key points of interest. Which points of interest are going to be presented to you can vary.

One variant is zoom level. If your map is currently showing an entire city, the level of detail the map presents is deliberately limited. You’ll see districts, large roads, or geographic features such as rivers. If more detailed information were presented, users on mobile devices, in particular, would be overwhelmed. Even at this level, you’ll notice typography differences. These can include the city name being in bold or the names of different areas in capital letters. So the level of detail is coupled with the scale of the map. Zooming in a few notches will expose significant points of interest, such as museums. Zooming in to specific districts will reveal restaurants, coffee shops, and universities. This visual hierarchy is a critical way of managing the exposed level of information.

But information is still being abstracted away. It’s not until you tap on the museum that you’ll see information on opening hours and busy times. This is also typically presented with user photos and reviews. Context is also taken into account, so you’ll start to see local hotels and restaurants. So it’s not just individual points of interest that are important, but the connections between them.

6 Tips For Improving Interactive Maps

What are the challenges of creating effective maps, and how do people address the data overload problem? We’ll answer this question and go over the must-know aspects of map creation.

1. Ensure Security and Brand Trust

GDPR or General Data Protection Regulation. This is a critically important European law that extends a wide range of legal protection to European citizens regarding personal data. It’s not possible here to cover the full extent of the law, but here are some quick key points:

  • Consent is required for the processing of personal data; it cannot be assumed
  • You need to have a retention policy for information that’s capable of identifying people

Be aware that the latter doesn’t just cover commercial purposes. Research students have to submit GDPR forms that address what kind of data they’re sourcing and how they’ll be retaining it.

But the most crucial context is commercial. If a business suffers a data breach, it can be fined up to 20 million euros or 4% of annual worldwide turnover in the preceding financial year, whichever is greater. Therefore, any business storing data that could identify their customers will need to assess risk and compliance. Remember: it’s 4% of worldwide turnover, not EU turnover.

Also, anything of your business that you expose to your customers or users is an extension of your brand. Therefore, you need to assess your maps for brand compliance too. If you have primary brand colors and your map doesn’t abide by them, that’s a very poor look. Source the color hex codes directly from your brand team and involve them in design.

2. Use the Appropriate Type of Map

It’s also important to consider what type of map is most appropriate for your use case. Think carefully about what your users need, what you’re trying to communicate, what information you need to present, and how best to present it.

For example, points of interest style maps in a tourist app will be way more helpful than heat maps: people want to know where something is, key data like opening hours, and how to get there. A heat map showing the number of visitors to each attraction or area of a city is unlikely to be useful to tourists. However, it could be useful to the attractions themselves to map their visitors by heat map over time. This could help larger museums chart which exhibits are most popular.

Transport for London is charting passenger movement on the London Underground by detecting when a device with Wi-Fi comes into range and then passes out of range. They’re using this to understand overall user journeys and movements within individual stations to better manage disruptions.

3. Avoid Pop-Ups

It should go without saying by now that auto pop-ups are despised. It doesn’t matter what they’re doing or what they’re offering; an unwanted pop-up can only get in the way. The level of impact is even greater on a phone where pop-ups take up even more screen space.

Given this, many users close them without even reading them. So if you’re using pop-ups, don’t kid yourself. You’re likely just irritating users and increasing the likelihood that they’ll ‘bounce off’ or uninstall.

4. Avoid Auto-Geolocation

Auto-geolocation sounds incredibly convenient but can result in some real problems. For example, if there are any bugs with auto-geolocation, you could get false results. If someone connects through public building Wi-Fi, you could get false results. If they’re connecting through a VPN then, unless you get the user’s IP address and check if it’s the exit portal of a VPN, you could get false results.

The problem is most significant with mobile maps. If a map user is looking at a points of interest map, they likely have a specific and immediate use. This means it’s in their best to get the most accurate results possible. So why not just ask them?

Precision and Accuracy

These terms have specific meanings in geolocation. ‘Precision’ is the exactness of the data. ‘Accuracy’ is how closely the information on a map matches the real world. So you want precision and accuracy to be spot on, or data risks losing value. This applies not just to the gathering of data but to the representation of it. For example, if you have street-level data but your maps don’t present individual streets, then any representation of data on that map is likely to have poor accuracy. That map might succeed in abstracting irrelevant information but presenting an imprecise and inaccurate view.

5. Avoid Map Legends as Much as Possible

In many cases, primarily points-of-interest maps, they’re just not needed anymore. An essential part of user experience design isn’t just visual hierarchy but information hierarchy. You can mouse over on a desktop or laptop to get the essentials of a location, e.g., the museum’s name and its opening hours. On a mobile device, you can tap on that location to get the essentials, and you can tap on another location to move on; you don’t even have to press back. Given that, a legend would get in the way. So this simple piece of information design solves information overload issues.

As with all rules, there are exceptions. A good one is a heat map where a density of what’s being measured needs to be communicated. It doesn’t matter what the data is; it just needs to be something where mapping provides greater insight, especially if it informs decision-making. Sales is an excellent example for a national or multinational company. Of course, weather forecasting can make use of literal heat maps.

6. Accessibility Compliance

Not everyone has perfect eyesight. Even if someone has excellent vision, they could still be colorblind (8% of men and 0.5% of women are). Given that, take the W3C’s accessibility standards into account and treat them as a baseline or minimum barrier to entry for compliance. You shouldn’t feel good about the possibility of excluding 8% of your potential audience or customers. Ensure you keep your UX designers involved and don’t shy away from creating senior-friendly web designs.

Put simply: imagine if you could appeal to a new demographic that’s not catered to. If your competitors ignore them, you could give them a real reason to choose you instead by taking some straightforward steps. If your competitors are catering to them, you also need to. If you don’t, you’re just giving potential customers a big reason to ignore you.

Conclusions

The key takeaway is that there’s far more to creating good maps than just good cartography. That can be critical, too, though this may vary depending on the use case.

This will be a team effort because your map will involve data sets, design decisions, and, yes, cartography. You’re going to need to involve brand and IT too. So think about design principles and development methodologies.

First and foremost, what are your users’ needs? If you haven’t done any user research or taken the time to understand the customer journey, are you adding anything or getting in the way? It’s easy to see the department that requested the map as stakeholders, but you should probably view your users as stakeholders too.

This sounds complex, but as you hopefully now appreciate, a map is probably more complicated than you thought.


Featured image via Pexels.

Source

The post The UX of Maps in Web Design first appeared on Webdesigner Depot.

Source de l’article sur Webdesignerdepot

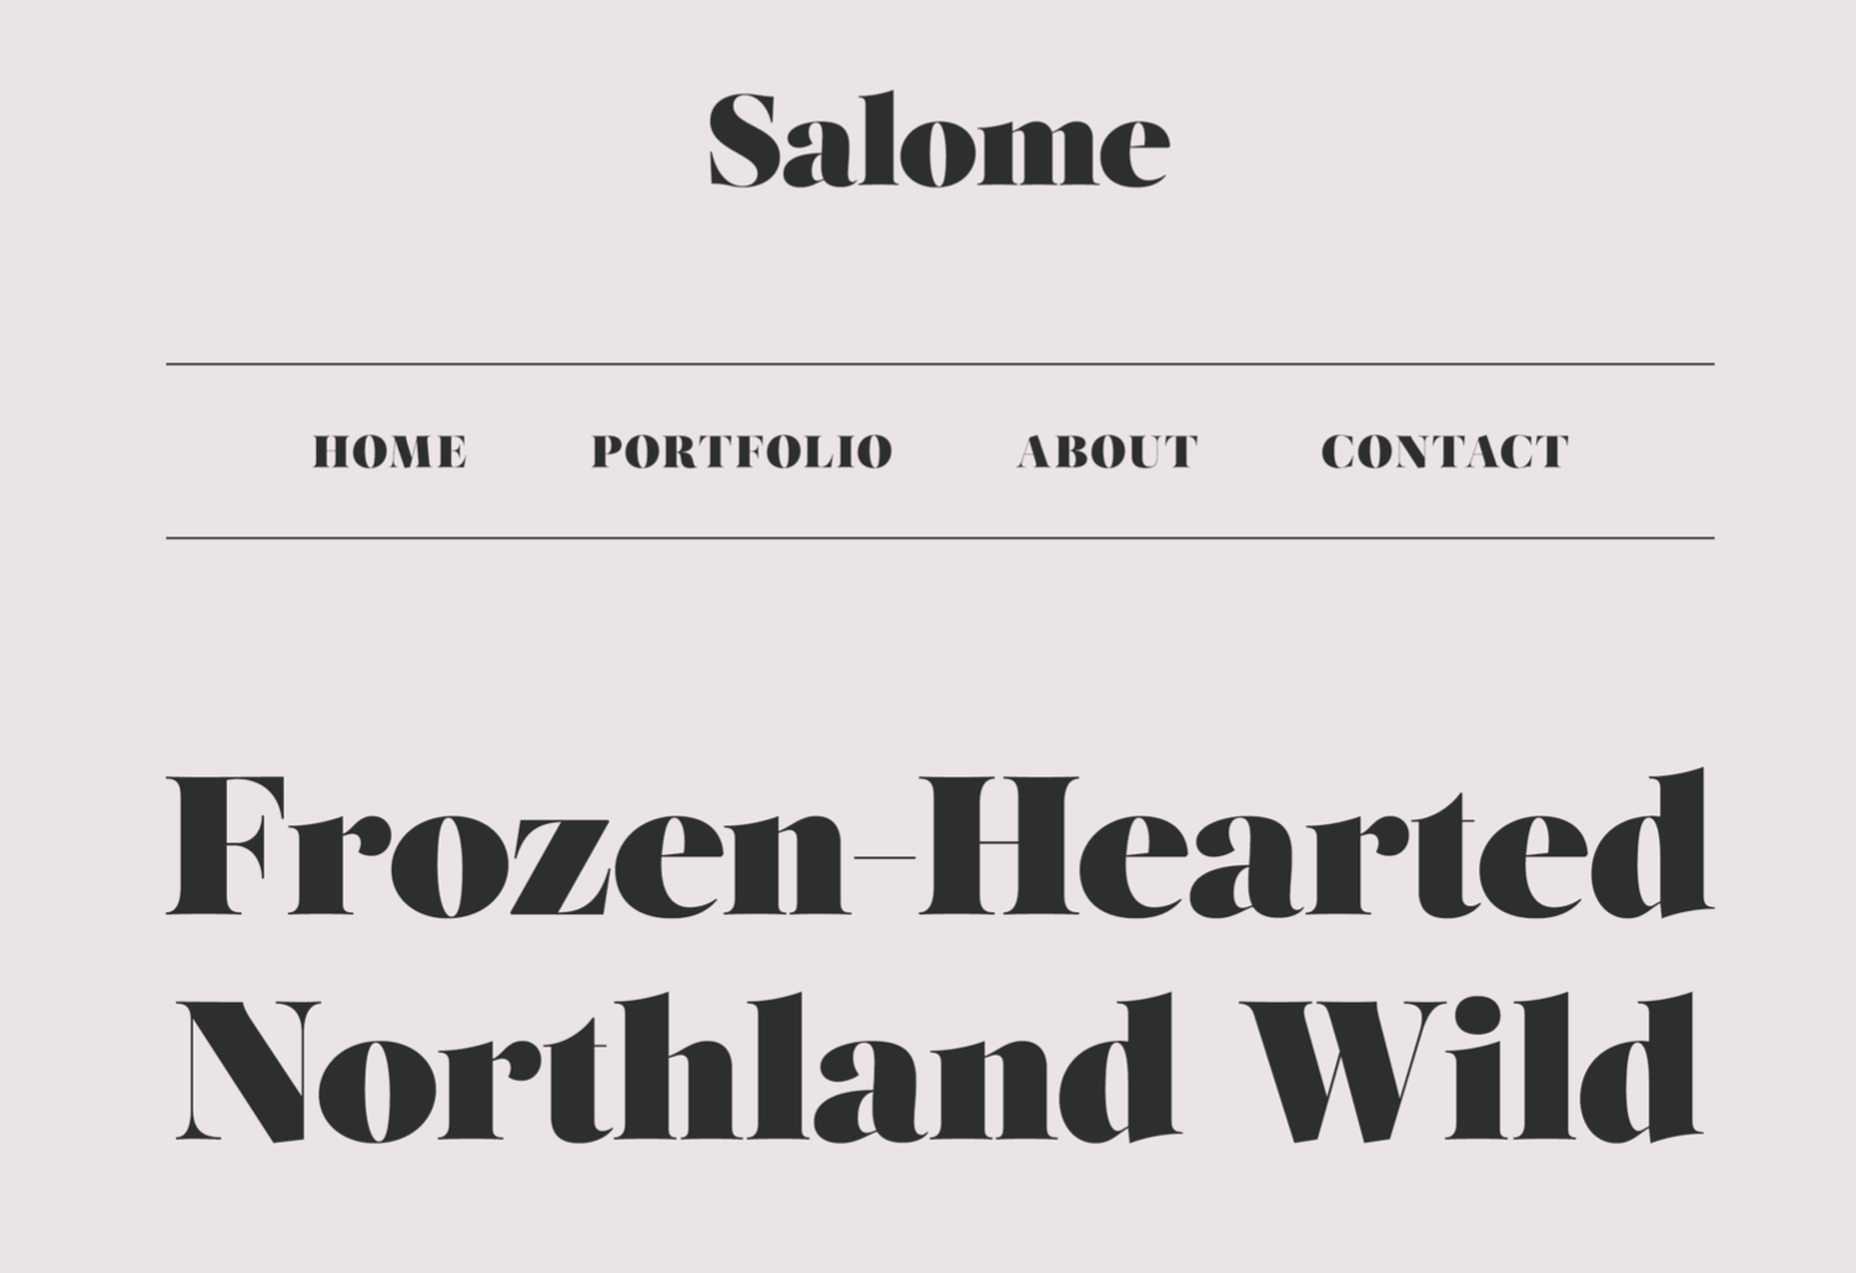
With a new year here, it’s time to try out some new fonts.

Whether you’re designing a brand new website or redesigning an existing one, the following list of fonts has you covered. In addition to the dependable serifs and sans serifs we use to create attractive and readable content, this roundup also has some fun additions, including one you can use for websites advertising Valentine’s Day deals next month.

Antona

Antona is a geometric sans serif font family with 16 different styles. The solid structures and ample white space within the characters give off a safe and friendly vibe.

Aromanis

Aromanis is a small font family with just two variations: Regular and Shadow. This new font supports nearly 70 languages and has an extensive Latin character set with localized forms. This font works best in branding for youthful companies with a playful vibe — from logos to posters and everything in between.

Black Coopy

Black Coopy is an edgy display typeface that would work well for sporty brands. In addition to the standard alpha, numeric, and punctuation sets, the font also comes with a variety of “swash” characters that can be used to frame your bold headlines.

Cimory Love

Don’t wait until February to start thinking about how to infuse a little romance into your designs. Cimory Love is a script font that comes in two styles: Regular and Italic. In addition to using it to promote Valentine’s Day sales, this could also be a cute font to use on websites for small gift shops, bakeries, and so on.

Cotford

Cotford is a contemporary serif font with a ton of flexibility built into it. It comes with eight variations — three text and five display weights. Designers can use one of the many pre-designed styles or they can modify this dynamic font set to make it suit their specific needs.

Digno

Digno is a beautiful, informal serif font that’s easy on the eyes. The font family comes with 14 weights covering a wide spectrum — lights, mediums, heavies, and even a couple of “Book” weights are thrown in if you want to add some personality to those text-dense pages of yours.

Dogly Comika

Dogly Comika is a rounded display font with two styles: Regular and outline. While it’s promoted as a font for animals and pets, you could use it for any type of website hero image, mobile app splash screen, video game, or social media graphic for brands with a fun vibe.

Guzzo

Guzzo is a nostalgic typeface inspired by mid-century grotesques. With 24 styles ranging from Condensed Thin to Extended Black and unexpected character variations (like the random cursives in the italics), you could realistically create interesting font pairings right from within this family.

Idem

Idem is a contemporary serif with nine wide-ranging styles that would work well for headers and text alike. Inspired by literary publications and commercial artists from the earlier part of the 20th century, this font family has a highly legible structure with a bold flare.

Jantur Type

Jantur Type is a geometric sans font that supports over 200 Latin-based languages. While you could use one of the Thin or Regular weights for editorial content, this font will be most effective in shorter headers and paragraphs where it can make a greater impact on messaging.

Loretta

Loretta is an elegant serif designed specifically for the body of your web pages. Because of its calligraphic roots, this particular font would work great for high-end digital publications or blogs that promote luxury lifestyles and goods.

Rebrand

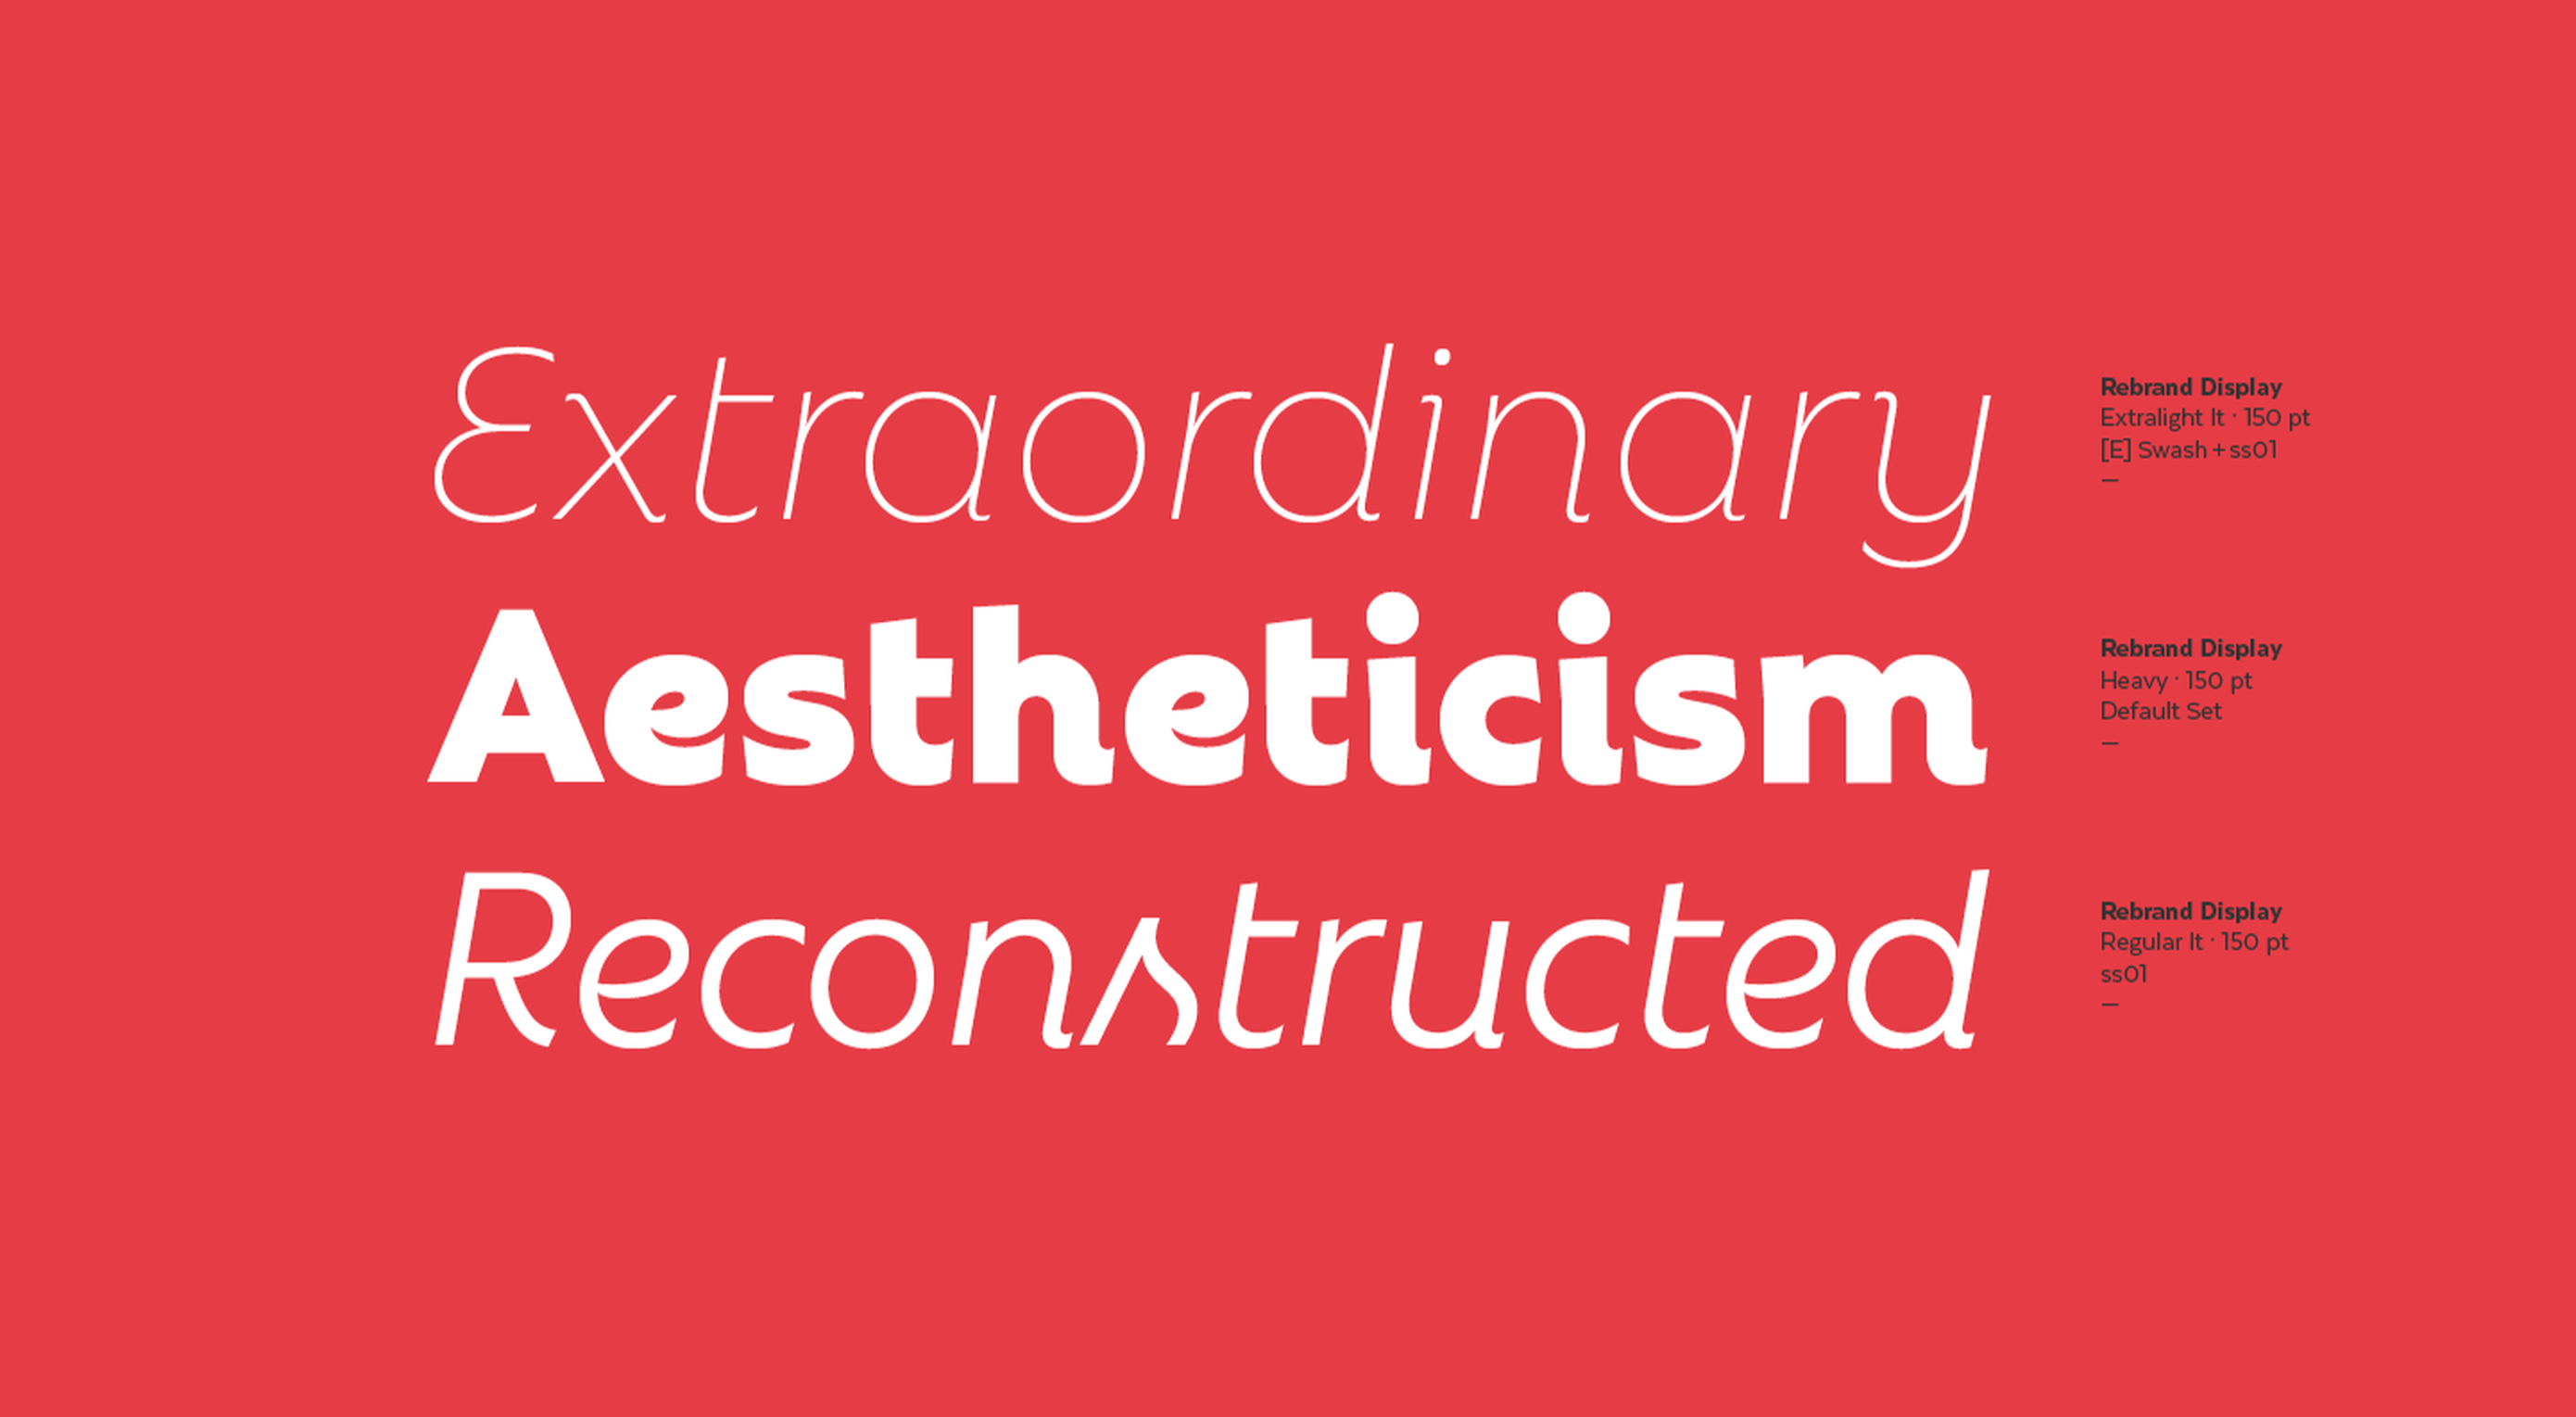
Rebrand is an exciting take on geometric sans. There are two sub-families in Rebrand: Display comes with nine weights as well as alternative characters and dingbats; Text comes with seven weights that cover a broad spectrum of styles. Because of the size and variety of this font family, you could easily make this the go-to font for a company’s branding, headers, and body type.

Royal Grotesque

Royal Grotesque is a resurrection of a 1914 sans serif font called Wotan. Only one version of this font is available (Regular) and it would work great pretty much anywhere on the web with its clean and neutral design.

Selva

Selva is an attractive Scotch typeface that has a traditional Roman serif family, an italicized version of each Roman, as well as a script family. If you’re considering using a script font for branding or headlines, the classic and delicate details of this particular font would make for an interesting choice.

Sunset Gothic

Sunset Gothic is a sans serif inspired by signage found near and around Los Angeles. Because this signage was often painted directly onto shop windows and building facades, the letterforms had to be extremely legible for passersby and drivers alike. This font draws upon the hand-painted, vector-based styling of those painted promotions.

Source

The post 15 Best New Fonts, January 2022 first appeared on Webdesigner Depot.

Source de l’article sur Webdesignerdepot

The choice of typeface is one of the most critical factors in any design; it gives the text its voice. It can be desperately frustrating to find the right voice for your project, only to discover it’s outside your client’s budget.

Who doesn’t love a free font? There’s no question that something for nothing is an attractive proposition. When it comes to fonts, the problem is that high-quality fonts require months, sometimes years of work; high-quality fonts are expensive to produce; as a result, many free fonts have to cut corners.

However, decreasing costs for font design software and an open-source culture is making the industry more accessible, leading to hundreds of free fonts as good, if not better, than their premium rivals.

The challenge for designers is where to look. The solution is Typewolf’s Definitive Guide to Free Fonts. This tremendous, 107 page PDF covers everything you need to know to find the best, high-quality free fonts on the web.

Typewolf is one of the most trusted names in digital typography, with an excellent track record of educational guides; you can be sure the suggestions in this guide are second to none.

The guide is split into four sections:

  • Section one covers the closest free alternative to every font on Typewolf. The free alternatives list focuses on the popular, and in many cases, the most expensive fonts used by professional designers. That means you’ll have access to over 1,000 recommendations, all listed alphabetically for easy look-ups. Simply find the premium font you want, and you’ll find the closest free font available listed alongside it. In many cases, there are multiple suggestions to give you some agency.
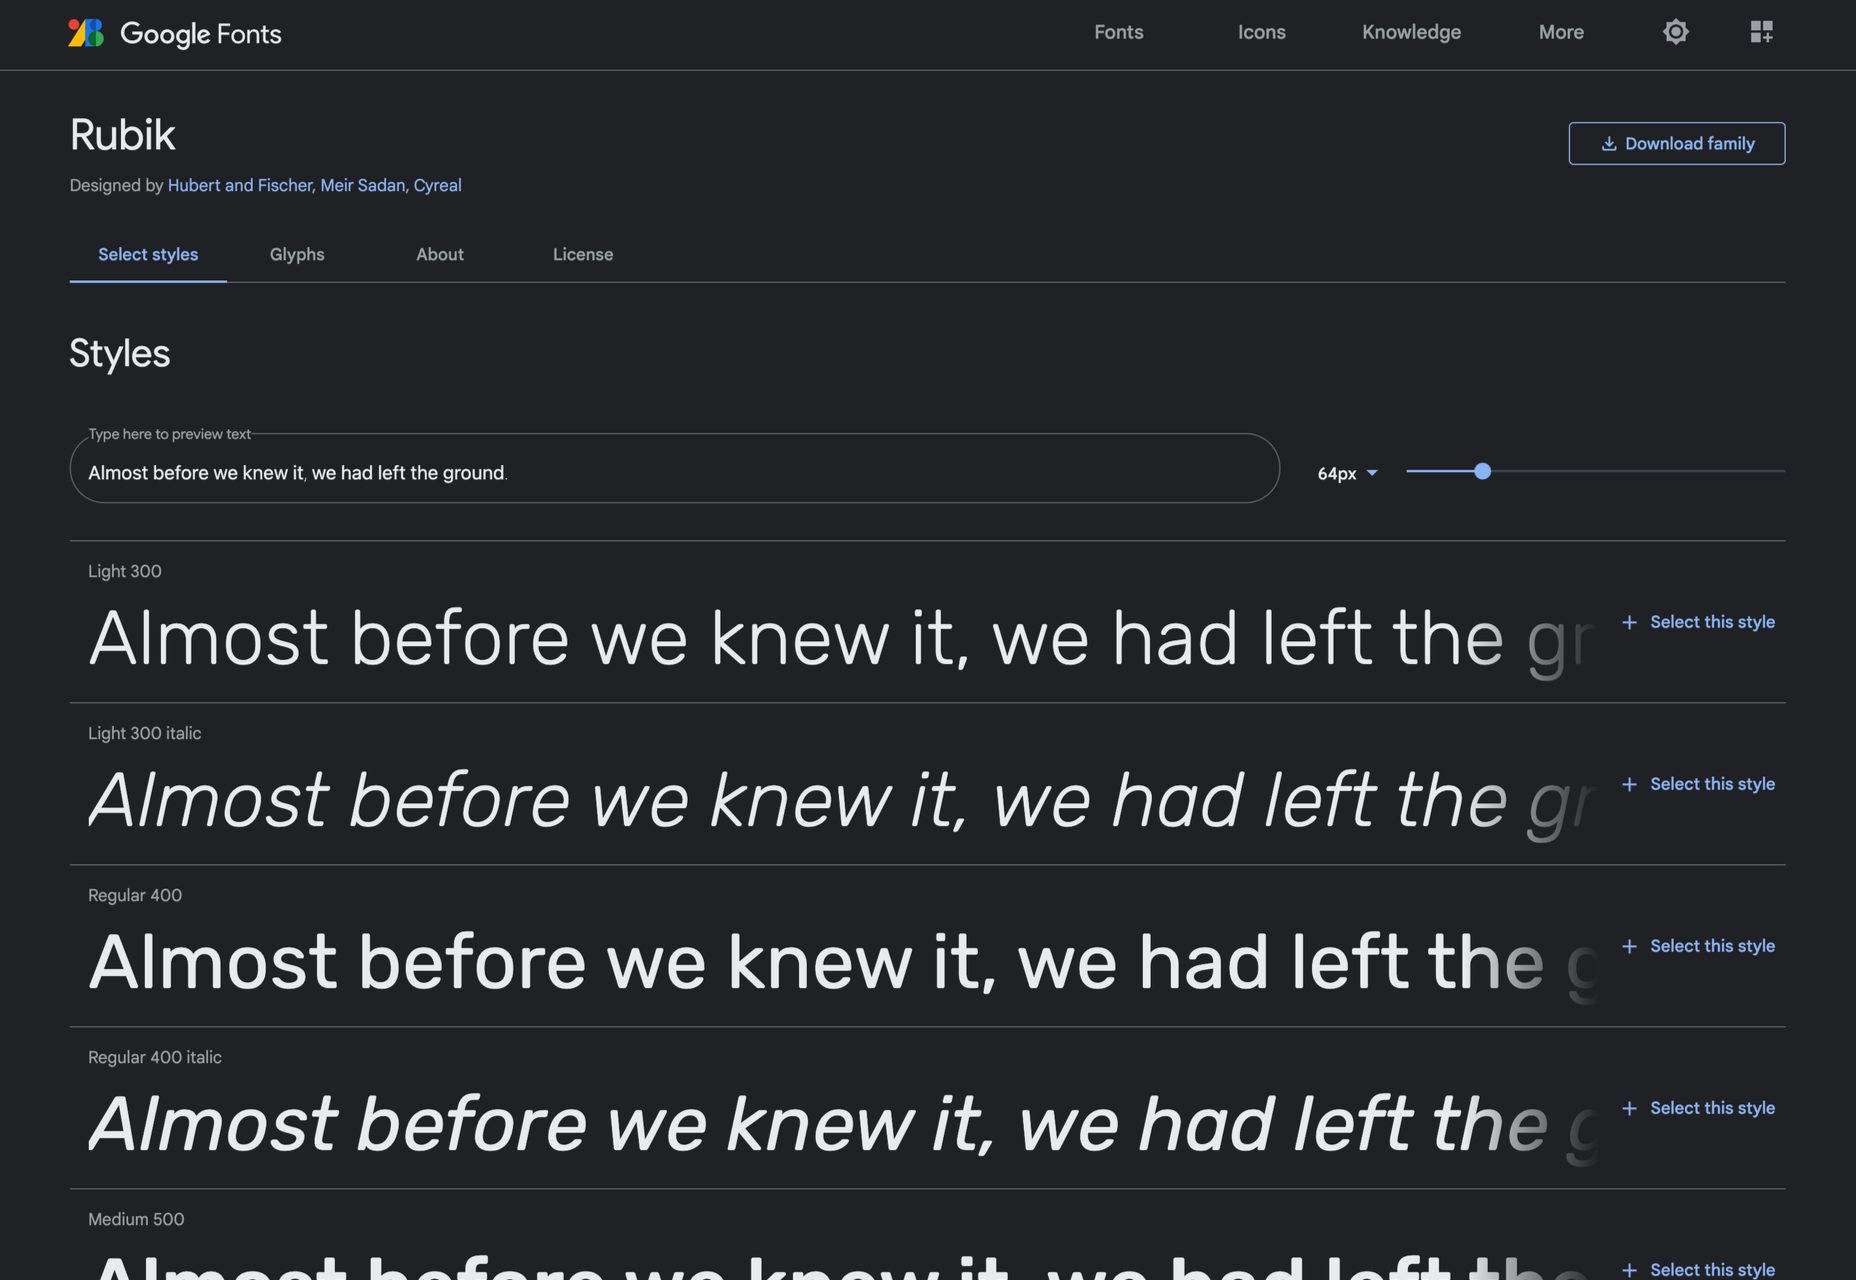
  • Google Fonts is an excellent source of free fonts, but its own recommendations are weak. So the second section of the guide is dedicated to the ten best serif and sans-serif combinations on Google Fonts. The best serif and sans-serif combinations include visual examples, and explanations of why these typefaces complement each other, so you don’t find yourself designing in the dark. This section is excellent for anyone who’s unsure where to start with free fonts and needs to identify an effective pairing quickly.
  • As good as Google Fonts is, it’s not the only source of free fonts, and if you only look there, you’ll miss out on some real gems. That’s why section three of this guide introduces the 40 best free fonts that aren’t on Google Fonts. Each font listed is carefully presented to preview it at display and body sizes.
  • Lastly, to finish off this excellent ebook are the ten best free “hipster” fonts. You know the ones: they’re perfect for coffee shops, small-batch brewers, tattoo parlors, and anywhere Rockabilly is still in style.

All told, there are enough recommendations in this guide to last you an entire career. So no matter what you’re looking for, whether it’s a free version of a particular typographic voice or some fresh inspiration, you’ll find it in this essential ebook.

What’s more, you’ll receive lifetime updates for free. With new content added weekly, this ebook will be a source of knowledge and inspiration you return to again and again. Lifetime access means you can re-download the guide every time you have a project that needs free fonts. You’ll also get access to an exclusive section of Typewolf that showcases only free fonts, so you can see how free fonts can be used well.

Every good designer understands the value of high-quality typography, but not every project has the budget to allow you to use premium fonts from top type foundries. This guide helps you leap that hurdle by offering carefully selected, free alternatives. If you’re new to the world of typography, this helpful guide will give you some practical insight on how to locate free fonts for use in your design work.

This guide will save you hours trying to find the suitable typeface for your project, as well as introduce you to some excellent designs that you might not have considered.

You can download Typewolf’s Definitive Guide to Free Fonts today for the bargain price of $39. You could even gift it to the typophile in your life.

Source

The post Typewolf’s Definitive Guide to Free Fonts first appeared on Webdesigner Depot.

Source de l’article sur Webdesignerdepot

Every day design fans submit incredible industry stories to our sister-site, Webdesigner News. Our colleagues sift through it, selecting the very best stories from the design, UX, tech, and development worlds and posting them live on the site.

The best way to keep up with the most important stories for web professionals is to subscribe to Webdesigner News or check out the site regularly. However, in case you missed a day this week, here’s a handy compilation of the top curated stories from the last seven days. Enjoy!

63 Open Source Web Development Tools

Worst UI Design Features that Should Be Avoided

Free Logos by Larkef

How to Create a Skeleton Screen Loading Effect

Plasmic – The Headless Page Builder

Exciting New Tools for Designers, Holidays 2021

Logo Design Trends 2022: The Future of Logos

The Ideal Line Length & Line Height in Web Design

An Introduction to UI Sounds

This New Font Breaks the Big, Unspoken Rule in Typefaces

Source

The post Popular Design News of the Week: December 13, 2021 – December 19, 2021 first appeared on Webdesigner Depot.

Source de l’article sur Webdesignerdepot

Branding is a core skill for designers. Even designers who don’t work on brand design, work with it by following style guides and creating designs to complement a brand’s voice.

How much do you really know about the process of branding, its history, and key terminology? Take our fun quiz to find out!


Featured image via Pexels.

Source

The post Quiz: The Baffling Branding Brainteazer first appeared on Webdesigner Depot.

Source de l’article sur Webdesignerdepot

AR (Augmented Reality) continues to build as one of the most exciting technology innovations to appear in recent years. More accessible than virtual reality experiences, since no specialist headset is required, AR has quickly emerged as a crucial tool for building unique experiences.

Although interest in AR as a tool for customer interaction and experience has been growing, demand has skyrocketed in recent years. In addition, since the pandemic of 2020, companies no longer have the same in-person opportunities available to create meaningful relationships with customers.

To ensure a client is fully invested in your brand today, you need to find a new way of building that emotional link. As an immersive, experience-led solution for brand building, AR can improve a company’s chance of earning brand loyalty. What’s more, around 71% of consumers say they would shop more often if AR technology were available.

The question is, how do you develop your own AR branded experiences?

Creating Branded Experiences in AR

For an augmented reality experience to be effective, you need more than just the right technology; you need a strategy for how you’re going to engage, empower, and support your target audience.

The best AR branded experiences aren’t just multi-dimensional advertisements; they’re tools intended to engage, inform, and entertain your audience in a new, highly immersive realm. Before you can begin to work on your AR app, you need to think about what kind of branded experience you want to develop. Here are some excellent examples to get you started.

AR Try-Before-You-Buy Interactions

Globally, ecommerce sales are growing at an astronomical pace. Going forward, there’s no question that the digital landscape will become the new platform for shopping and transactions. But, unfortunately, there are some limitations when it comes to shopping online.

While the right website developer or designer can create a stunning site packed with information about a product or service, there’s only so much that a webpage can do. Delivering a truly immersive user experience for your target audience involves replicating the kind of in-person experiences they would get in a digital format.

The best example of this is the “try-before-you-buy” AR app. Most commonly seen in the clothing and beauty industries, this app allows customers to use AR filters to see what everything from a new hair color to a shade of lipstick might look like on them. The experience is highly accessible and engaging because it builds on customers’ familiarity with filters and similar effects on social media channels like TikTok and Instagram.

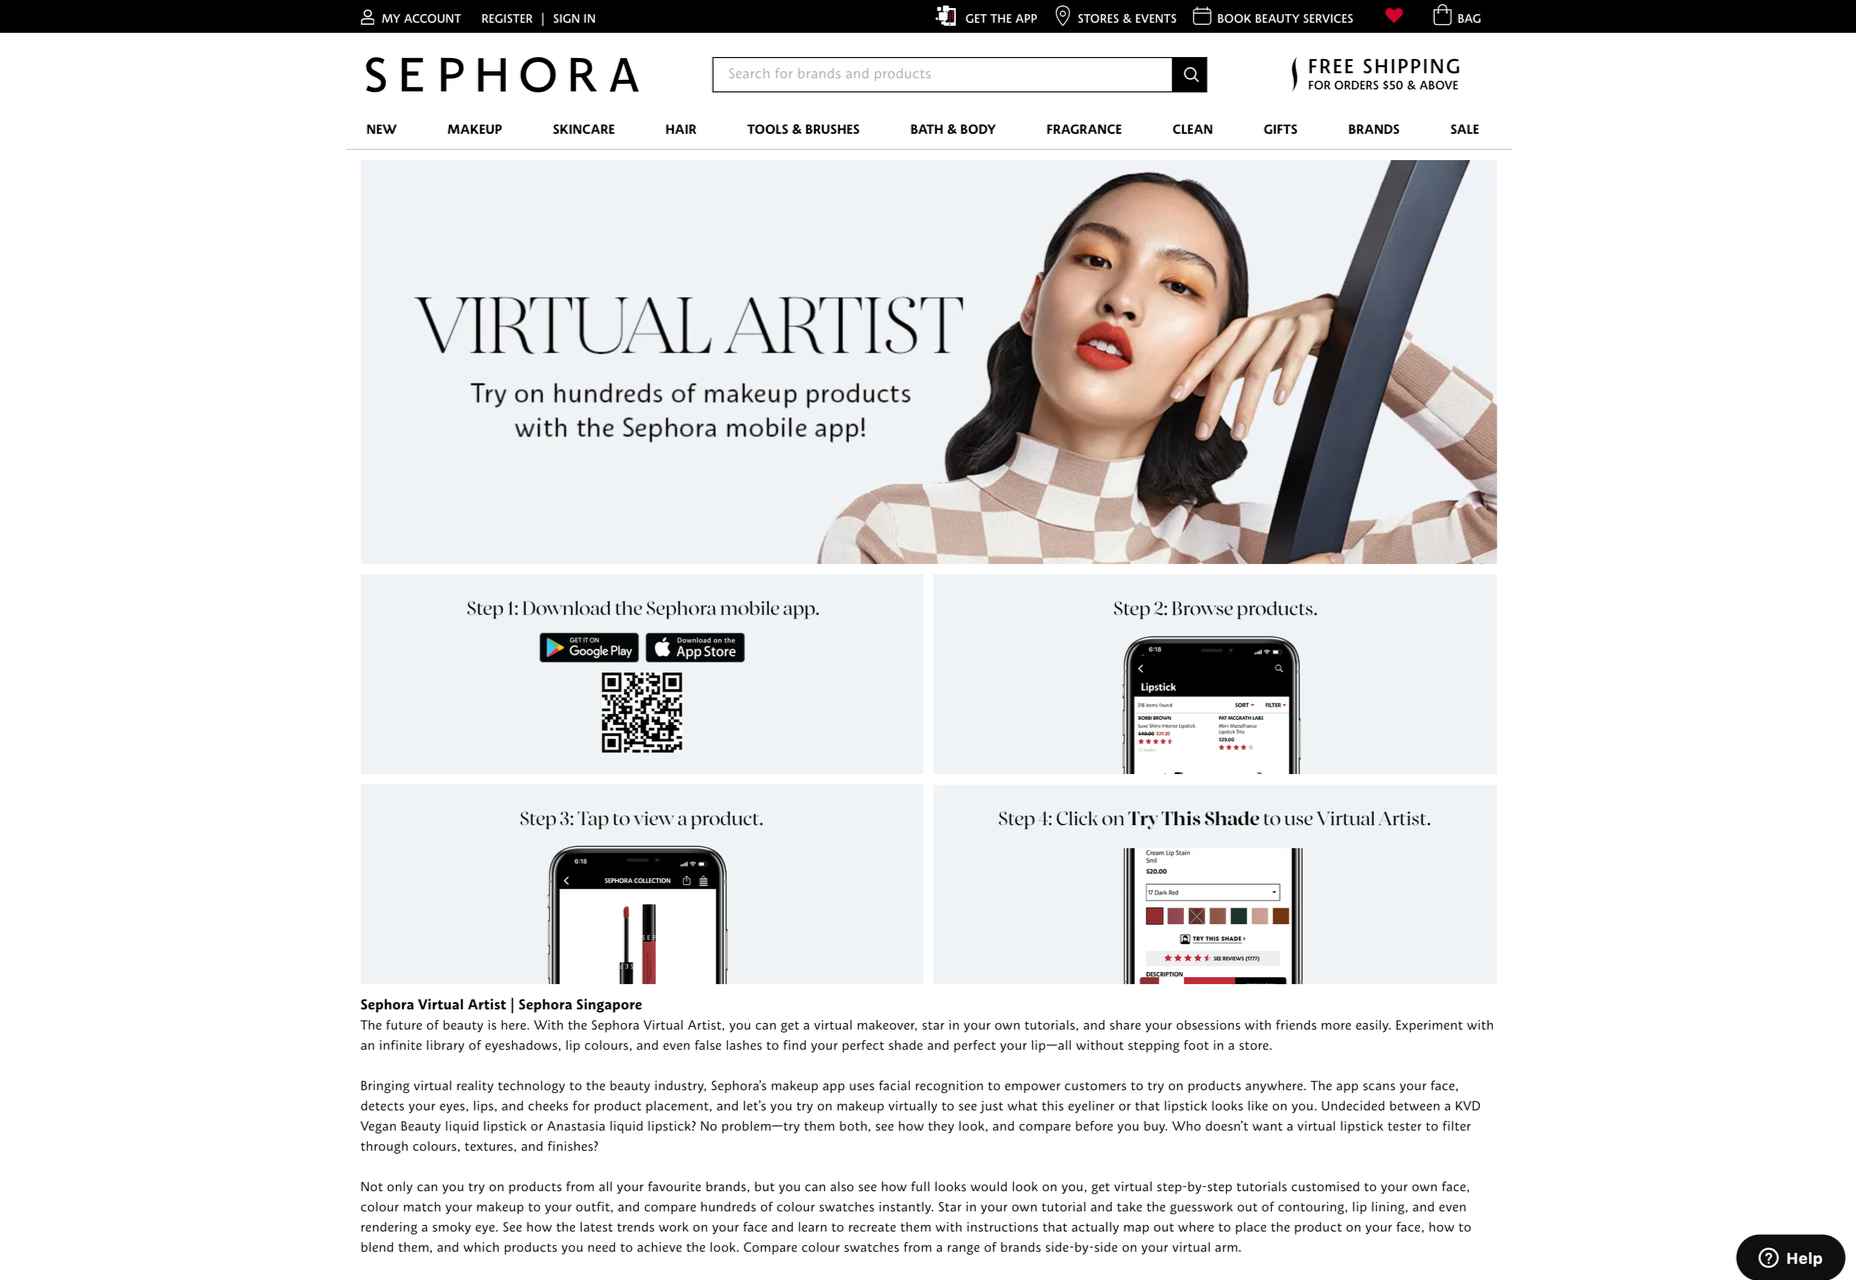
A popular example of an AR try-before-you-buy experience comes from Sephora, with the “Virtual Artist” application. Originally installed within the Sephora app in 2016, the technology uses Modiface to scan and track the eyes and lips of the customer using a smartphone camera. After that, the system can overlay eye-shadows, lipsticks, and other products, to give the customer idea of what they might look like in real-life.
As AR applications become more mainstream, new solutions are emerging for companies concerned about things like privacy. Consumers who don’t want to load their image into a system for try-before-you-buy experiences can still access the benefits of AR with the right tools.

For instance, ASOS created the new “See My Fit” service in 2020 to help customers shop for clothing during the pandemic. The solution allows users to see what clothing will look like on a model with a similar body type to their own. This helps to show shoppers how products realistically look in similar bodies while reducing the risk of returns.

ASOS certainly saw the benefit of this innovation, with an increase in revenues of around 24% in the six months leading to the end of February 2021.

AR for Product Catalogs and Visualization

We all remember what it was like to flick through the glossy pages of a magazine or catalog for our favorite stores. Unfortunately, in today’s digital age, these paper brochures are far from the most efficient tool for shopping. We need a more digital experience that allows us to select products, see what they will look like, and add them to our virtual baskets.

One excellent example of how companies can use AR to improve the overall shopping and visualization experience for customers comes from Home Depot. The brand was one of the first to upgrade its user experience strategy with a new Project Color application in 2015. Although this app might seem a little outdated by today’s standards, it’s still an excellent insight into what companies can do to improve their customer’s brand experience.
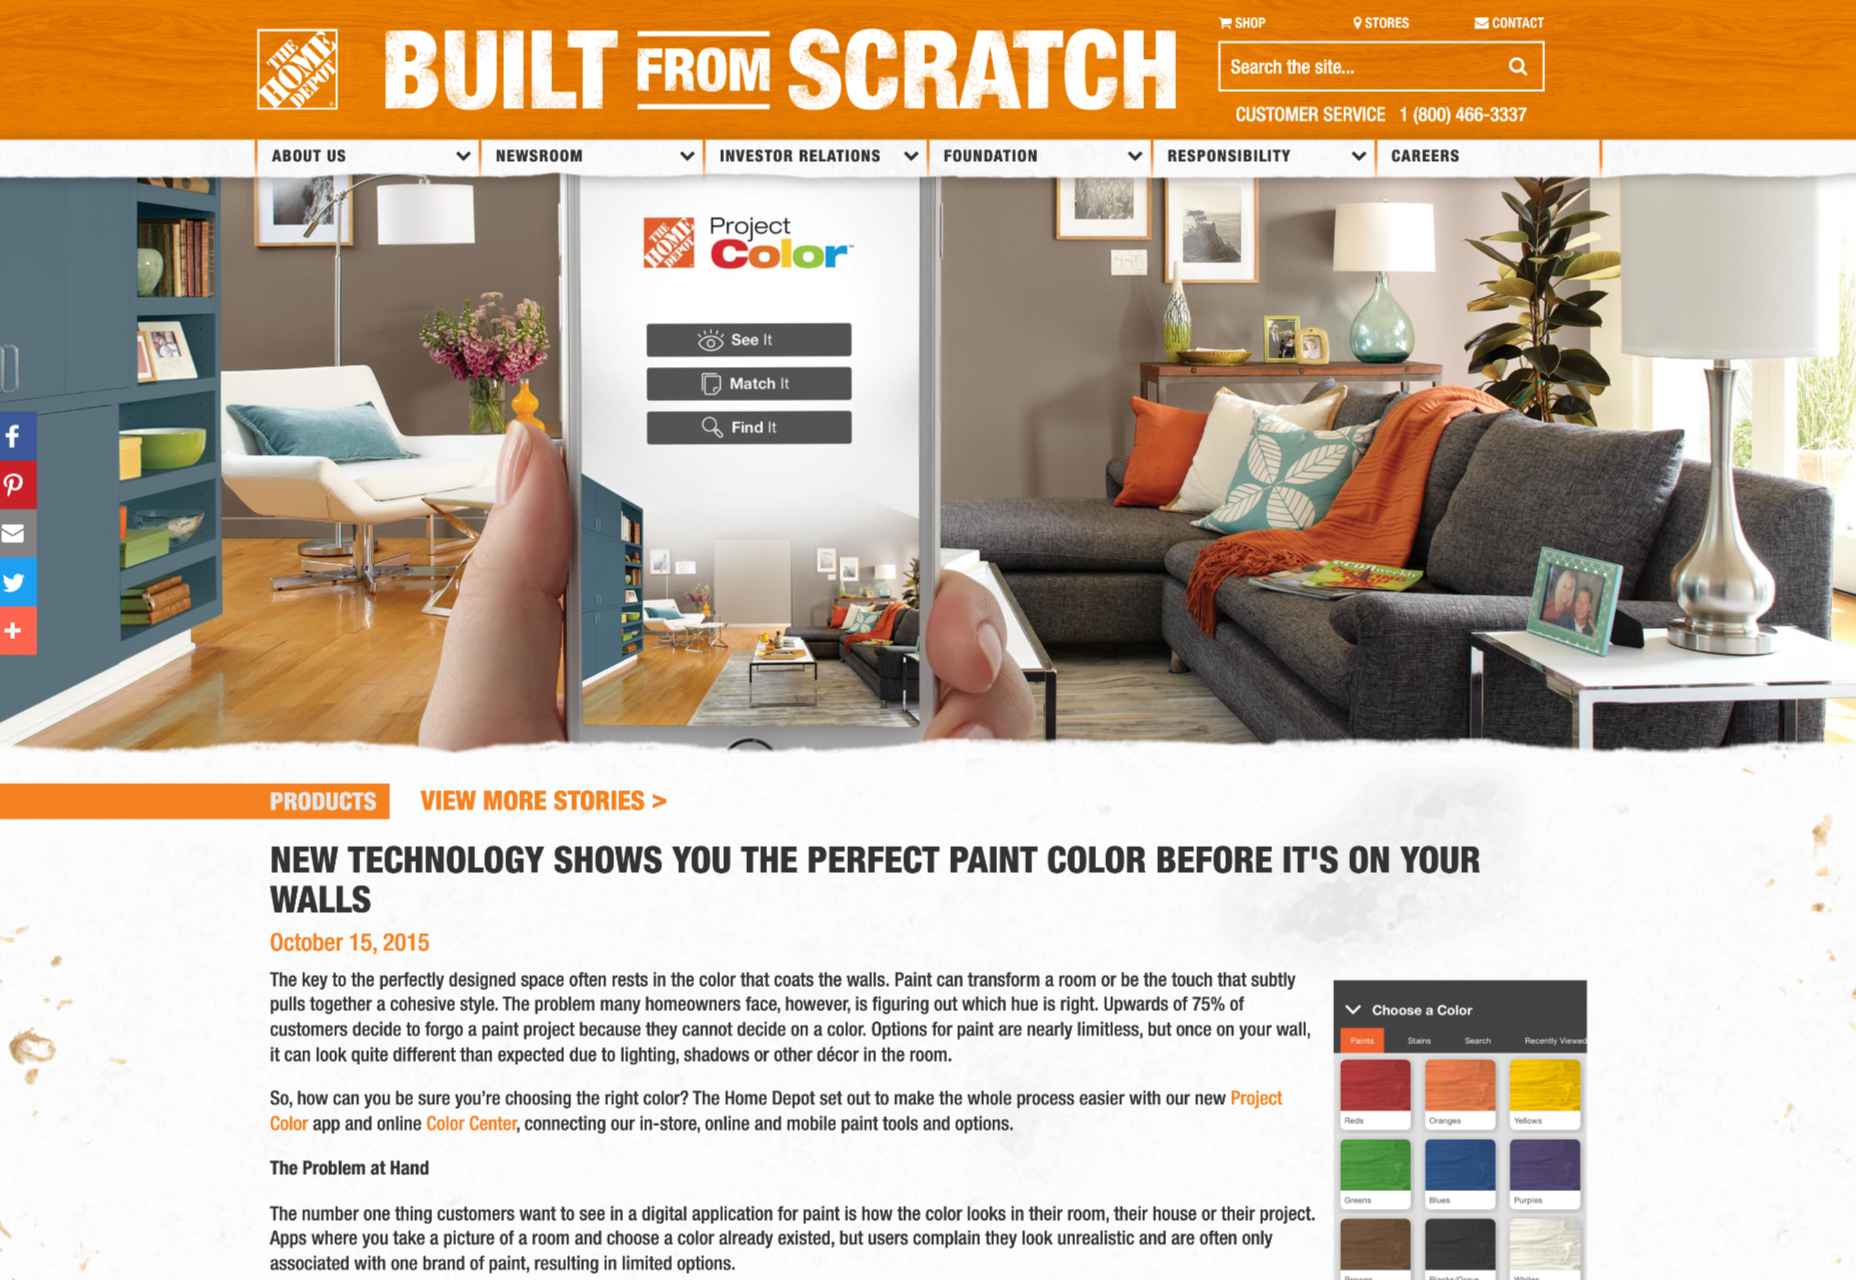
The Home Depot app used AR to scan a room and implement the color a customer chose for their walls into that space, considering things like furniture, shadow, and lighting, to allow for a more realistic insight. The app has updated significantly over the years to become increasingly immersive.

Visualizing products in a real, contextual space is hugely beneficial for a customer’s purchasing experience and perception of a specific brand. If your customer sees buying the right product from you as simple and convenient, they’re more likely to stick with your organization long-term.

The product catalog and visualization approach to AR in brand development has grown increasingly popular in the last two years, perhaps driven by the demand for more online shopping opportunities. In 2020, Wayfair announced the release of an updated version of its “View in Room” app, which now uses LiDAR technology to provide enhanced utility when shopping for home products.

According to Wayfair, the LiDAR technology and “RealityKit” software give customers a more authentic and realistic view, so they can make better decisions about what they want to buy. According to Apple, customers are 11 times more likely to buy an item of furniture if they have seen how it looks in their home using AR.

Creating Unique Brand Experiences

AR is one of the technology innovations in our current landscape, helping blur the lines between digital worlds and reality. In a future defined by the rise of the metaverse, AR could have a significant impact on how we spend our time in a more virtual world.

Already, companies are taking advantage of this, with things like virtual pop-up shops and temporary experiences intended to differentiate their brands. For instance, Machine-A, a London-based concept store, is usually committed to showcasing contemporary fashion designs.

When it became apparent that London fashion week for 2020 would be virtual, Machine-A came up with a virtual boutique enabled by AR. By scanning a QR code embedded into billboards and posters across London, users could enter the boutique virtually from their phones and experience the designs themselves.

The concept created by Machine-A has opened the minds of countless business brand teams and marketers to new methods of increasing engagement and awareness among customers. In a world where you can’t necessarily interact with your top customers in person, providing them with a new and immersive experience can be a great way to generate loyalty.

The companies more willing to invest in innovative solutions like AR are also more likely to stand out as innovators in their field. Other companies have experimented with similar “pop-up” experiences and unique ways to capture audience attention. For example, Burberry placed a QR code in a Harrods store, which customers could scan to visit a branded experience, where an Elphis statue walked around in their surroundings through the lens of their smartphone camera.
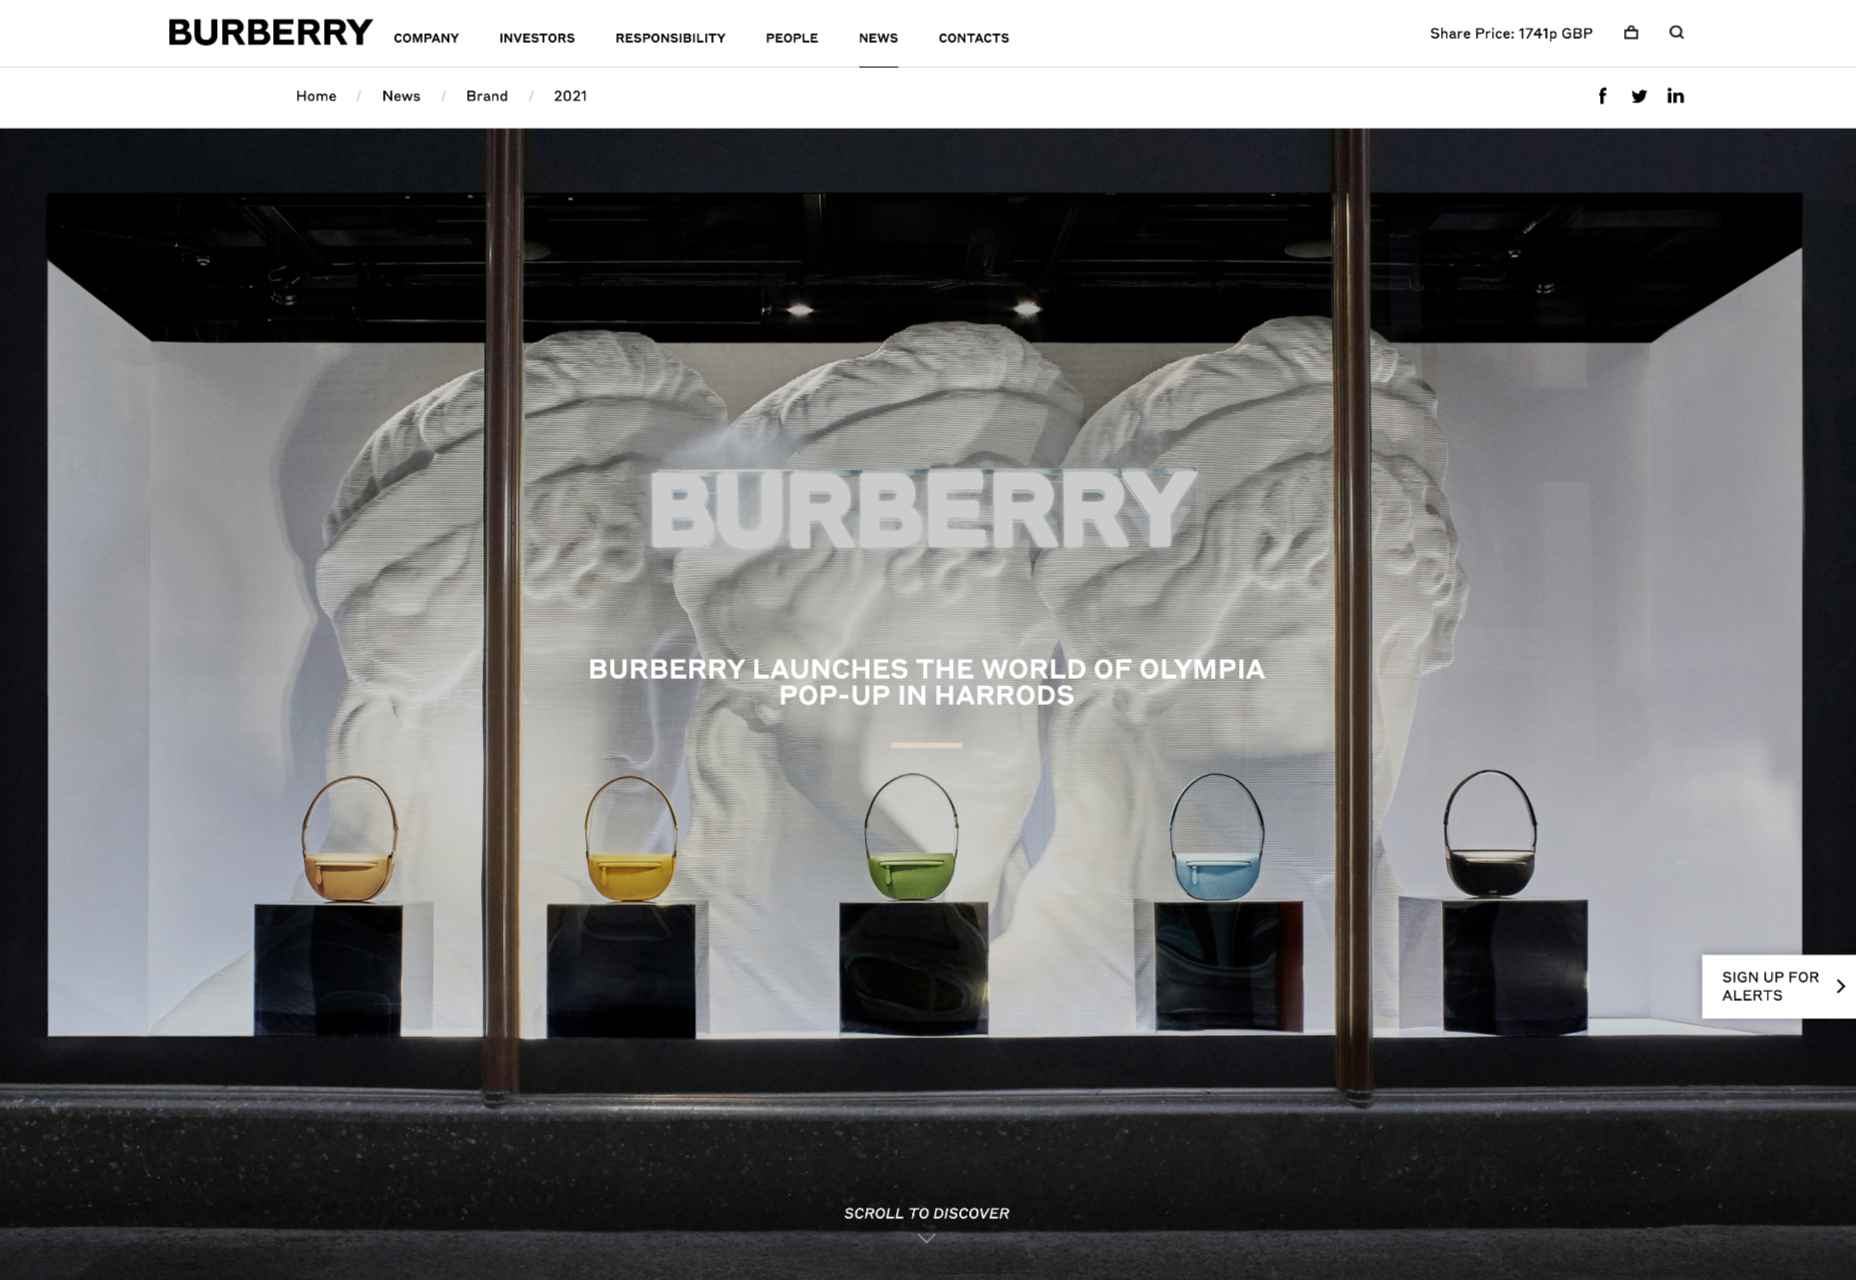
It’s even possible to use AR experiences to attract the attention of new audience groups. For instance, the retail brand, Pull & Bear launched an AR game created with Facebook to help the company reach the 90% of Gen Z customers who identify as “gamers.”

Provide New Levels of Customer Support

As many of today’s businesses know, memorable branding isn’t just about having the right image or website; it’s also about providing the correct level of customer service and support. Most purchasing and brand loyalty decisions made today are based on customer experience.

Providing customers with unique experiences to improve their shopping journey is sure to make your company stand out in the new digital age. But it’s also possible to go even further with AR in your brand CX strategy too.

Amazon Salon, for instance, the first bricks-and-mortar hair salon created by Amazon, was partially established to test new technology. The “point and learn” service, for example, allowed customers to point a product they were interested in on a display or shelf and immediately access educational content. Users could also scan QR codes to visit the product page on the QR site.

This helps customers immediately get to the product they want to buy without relying on input from human services agents. In a similar vein, AR could be an excellent way to onboard a customer, learning how to use a new product for the first time.

Imagine having a user’s manual your customer can enjoy scanning through, thanks to AR technology. All your customer needs to do is scan the QR code on the back of a product, and they can see the item they need to build or install coming to life in front of them. This reduces the risk of customers having to call for help from tech support and means clients can see the value in their purchases a lot faster.

Companies can embrace AR as a virtual learning experience, helping users collect information and learn how to do things through an immersive first-hand experience. This kind of immersive technology could help to make any brand stand out as more user-experience-focused. Even car companies could essentially provide their customers with a complete virtual HUD showing them how each button and dial on their dashboard works.

Upgrade Website Design

Perhaps the most common way companies will be using AR to create branded experiences today is by updating their website. You’ve probably already seen examples of AR being used in a host of retail sites, with new experiences designed specifically for the age of augmented reality.

360-degree images, for instance, allow customers to essentially “look around” a product, and see it from different angles, just like they would if they were looking at the item in-store. We can see an excellent example of this on the BMW build-your-own web page, where vehicle browsers can see their vehicles from every angle.

The 360-degree product viewing experience lets you check everything from the side molding to the sculpted edges in perfect detail.  

QR codes and app downloads can also allow customers to take their AR experience even further, looking at things like what life would be like behind the wheel of one of these virtually augmented vehicles.

As AR becomes more commonplace and the tools available for designers in this arena continue to expand, there will be even more opportunities available to bring AR into the website experience. Even essential website upgrades today might include allowing customers to upload pictures of themselves or their homes, then using augmented reality technology to implement parts of a product catalog into the space.

AR Virtual Events

Finally, when it comes to exploring all the unique ways you can build a better brand experience and excellent customer relationships with AR, it’s worth looking at the event space. The event landscape has struggled significantly over the last couple of years. The pandemic forced most live events to be canceled, and although the post-pandemic era holds new hope for upcoming in-person experiences, the landscape will be very different.

Going forward, most companies plan to avoid a complete shift back to in-person events by creating “hybrid” experiences and augmented reality events instead. Augmented and virtual reality tools allow customers to step into an event arena from wherever they are.

For instance, the Pot Noodle Unilever brand hosted a virtual alternative careers fair in AR, where people could use their phones to navigate through a range of graduate employer booths. The unique career fair experience was designed to replace the more common in-person interactions graduates might have as they approached the end of their education.
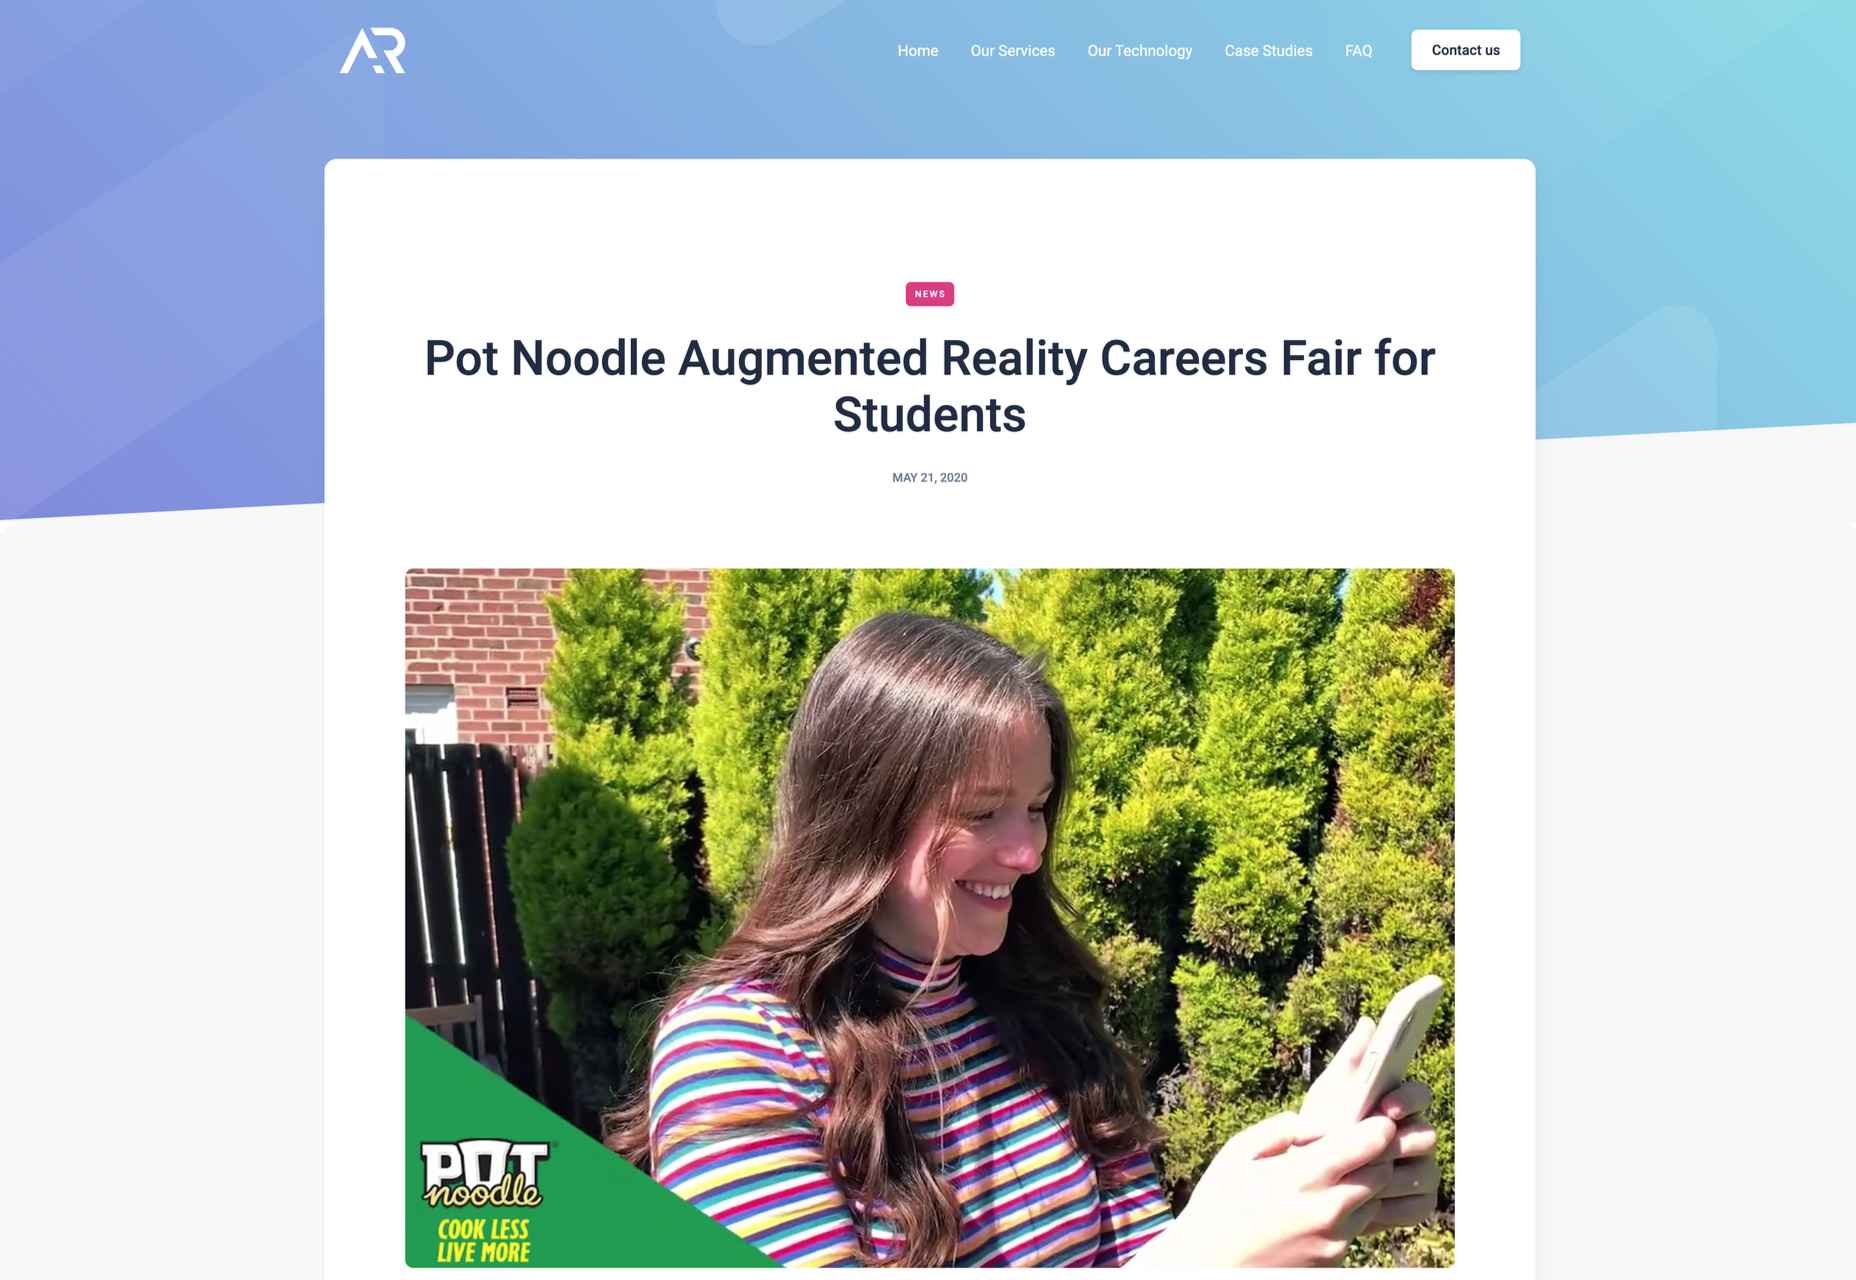
The custom-developed 3D booths featured a range of different employers, and students could tap on the booth screen they were interested in to see a video from each employer. As an added bonus, the connection to the Pot Noodle AR careers fair website meant that students could also instantly apply for any of the jobs they were interested in.

Similar events could help brands recreate some of the meaningful experiential experiences that their customers have been missing out on in the last couple of years. They could also act as a valuable tool for bringing together people in a hybrid event, where someone visiting an in-person demo table could scan a QR code to send virtual demonstrations of a product back to their team.

This would reduce the number of people who needed to be present in an event environment at any given time, reducing the risk of health issues.

Bringing Brands to Life with AR

In the new consumer landscape, brand relationships are more important than ever. As a result, customers are making more careful choices about who they purchase from, based on their understanding of that company’s values and differentiators.

Now that you won’t always have an opportunity to interact with customers in-person to earn their trust, AR could be the solution for a lot of companies in search of new engagement tools. All you need to do is figure out how you’ll leverage all the benefits AR can offer.

Will you be creating an app, building a new website with enhanced 360-degree photos, or designing in-person experiences? Hopefully, these examples have inspired you to start exploring your options.


Featured image via Unsplash.

Source

The post How to Use AR in Brand Experiences first appeared on Webdesigner Depot.

Source de l’article sur Webdesignerdepot