Articles


Introduction

The COVID-19 pandemic has forced the corporate business world to network with associates and communicate with potential clients using online communication tools. Hence, given the current market conditions – having a functional and efficient communication system has become the need of the hour. Due to which platforms offering text, voice, and video chat features must ensure they offer enterprise-level models. These platforms must be customizable and scalable. It is also important for the communication platform to be of a certain standard that supports a huge number of users with minimal latency rates. Nevertheless, with multiple options in the market, it can be difficult to choose the right real-time communication platform.

Twilio

So, what is Twilio? Twilio is one of the top-rated cloud communication platforms in the market that uses a PaaS model. Twilio offers developers tools or software-based platforms to integrate voice, video, or messaging into any mobile app. Twilio is basically a developer’s platform, which means that this platform cannot be used by a marketer or a non-developer. Twilio as a communication platform provides a powerful API system for phone services offering companies to make and receive phone calls and send and receive text messages instantly.

Source de l’article sur DZONE

Every week users submit a lot of interesting stuff on our sister site Webdesigner News, highlighting great content from around the web that can be of interest to web designers.

The best way to keep track of all the great stories and news being posted is simply to check out the Webdesigner News site, however, in case you missed some here’s a quick and useful compilation of the most popular designer news that we curated from the past week.

Web Typography Rules: What You Need to Know


How Microsoft Crushed Slack


Graphic Design Trends for Social Media in 2021


UX Christmas


Traxr – Monitor Links with 100% Accuracy


Hexometer 2.0: Monitor Website Issues and Performance Actively


Designing Data Science Tools at Spotify


Cow Pilot – The Deadline Driven To-Do List


Roy – A Simple & Delightful Color Picker for Designers


5 New SEO Tools for Marketers


21 Unique Web Design Trends for 2021


Newsletter Spy – A Database of 20,000+ Substack Newsletters


Visme 2.0 – All-in-one Design Platform


2020 Year in Review


How to Build a Web App: Key Steps for Starters


How to Create a Style Guide to Enhance your Brand’s UX


WordPress 5.6: New Features, Changes, and What Else to Expect


The Dos and Don’ts of Creating your Product Roadmap


Pantone Reveals Two Choices for its Colour of the Year 2021


Headlime 2.0 – Professional Marketing Copy for Anyone


Design for Sales: 10 Creative UI Designs for Ecommerce


How to Build a Strong Mobile App Brand


10 New Rules of Design


Remake 2.0: Make Web Apps with Just HTML and CSS


A Step-by-step Guide to Designing a New Feature for a Popular Product


Want more? No problem! Keep track of top design news from around the web with Webdesigner News.

Source


Source de l’article sur Webdesignerdepot

This article was originally published at Coder Society, and we’ll explore GraphQL’s core features, how to interact with a GraphQL API, and some development and operational challenges.

The Story of GraphQL

Nowadays, REST seems to be the default approach for building APIs, typically based on the familiar HTTP protocol. While REST is relatively simple to work with and enjoys widespread popularity, its use of multiple endpoints to address resources sometimes gets in the way of flexibility.

Source de l’article sur DZONE

As someone who became a Salesforce developer by accident 10 years ago and parlayed that into a career and business, I’m fully aware of the dividends that investing in continuous learning and brushing up on the latest in my industry can yield.  Even after years of working in the Salesforce ecosystem, earning 11 certifications, and going through several hundred different projects, I’ve found it’s difficult to make the time to keep up with all the new tools and features of modern development (and usually I have the TrailheaDX and Dreamforce conferences each year to get caught up!).  

Due to the COVID-19 travel restrictions, in-person conferences are canceled. However, a new video series piqued my interest. In particular, two Salesforce Developer Advocates, Mohith Shrivastava and Julián Duque, are doing a series on Modern App Development on Heroku/Salesforce.

Source de l’article sur DZONE

By the end of the year, the number of global smartphone users is expected to reach 3.5 billion. That’s a significant 9.3% increase over the last 12 months.

In a world where everyone is constantly connected to their mobile devices, it makes sense that web developers and designers would need to consider new rules for how they create engaging experiences. After all, most of us find browsing from our smartphones to be much more convenient than sitting down at a laptop each day.

With a little luck, you’re already taking steps to mobile optimize your website but standards are changing all the time. To make sure your website is up to scratch, here’s your guide to prioritizing your site for mobile, ready for the new year.

Understanding Mobile-First Design

The first step in updating your web design and development principles, is understanding the concept of mobile first design, and how it’s changed.

With a responsive website, you create something that adjusts to the screen size of any device; with a mobile-first site, you’re focusing first-and-foremost on the user experience that people get when they’re on mobile, taking that as your starting point, and building from there. Instead of building your website for the desktop and using mobile as an afterthought, you start with a consideration of mobile.

Even Google is highlighting the demand for this process lately, with the mobile-first indexing algorithm. If you can’t design for mobile-first, then you could risk your clients being unable to rise up the search engine ranks.

So, how do you get started?

1. Start With the Right Tools

Web developers and designers are nothing without a great toolkit.

The good news is that there are solutions out there that can help you to master the right skills for a mobile-focused user experience. For instance, Skeleton is excellent for small-scale projects that require fluid grids and minimal compiling.

Alternatively, Bootstrap can offer a one-size-fits-all solution for the front-end development for mobile devices. There’s a default grid system available, plenty of components, and JavaScript plugins to work with.

With the right tools, you can minimize and prioritize the content that’s most valuable for your website projects. This is crucial for maximizing website speed and creating clarity when it comes to content and imagery.

For instance, check out the ESPN website; it’s split into very easy-to-follow categories of content that are perfect for scrolling on a smartphone. The grid of videos makes it feel like you’re using a tool like YouTube.

2. Prioritize Mobile-First Elements

Once you have the right tools to assist you, it’s time to begin building your mobile-first website from the ground up. Rather than jumping straight into considerations of the latest design trends, it’s important to start with the foundations.

For instance, navigation within a mobile page is usually hidden under a hamburger button. However, you can take this concept to the next level too. For example, the Shojin mobile website only demonstrates the most important website options within the navigation bar to avoid overwhelming users.

The key here is to keep things as simple as possible, without restricting what your audience can do when they visit your website. Although you want to keep the number of interactive elements on your site small, you also need to ensure that those elements are easy to find and use.

All buttons and CTAs should be clear and tappable. Fonts need to be large enough to read from any screen, and your navigation system needs to be 100% simple, without slowing anything down.

On average, we recommend making all clickable elements at least 48 pixels in height.

3. Use Responsive Imagery and SVGs

Images are a crucial part of any website. They add context and appeal to your design. However, they can also seriously slow down your website if you’re not careful.

Remember, different devices have different demands when it comes to imagery. A desktop page may need a 1200px wide image, while a mobile-only needs the image to be 400px wide at most. The old way of making your images work was to load a large resolution image and use the same file on every platform. Unfortunately, this slows downloading time significantly.

Instead, it’s better to have at least two different versions of the same image for your mobile and desktop solutions. You can also consider SVG.

SVGs are incredibly scalable – more so than bitmaps. With SVG, you can ensure any icon or graphic continues to look sharp and clickable across all devices. Because these files are often smaller, your site loads quicker too! Hubspot is great at using SVGs.

Intricate illustrations are a massive component of HubSpot’s brand. If those images were saved as PNGs or other alternative files, then they would take forever to load. Because they’re all SVGs, you can enjoy the same consistent experience across desktop and mobile.

4. Get the Typography Right

It’s not just the big graphics and images that make a huge difference to your website when it comes to mobile-first design. You also need to think about the legibility and clarity of your website across all devices and platforms. If people can’t read the value proposition of the company that you’re designing for, you’re going to have a major problem.

Focus on making your content as easy to read as possible. Look into the typefaces that seem most appealing on a range of devices.

Remember to balance the body and heading font sizes for the device size too. You’ll need to ensure that the experience feels consistent and smooth as your users scroll through each page. Just take a look at the mobile version of the IMPACT website, for instance.

The headings aren’t as huge as they are on the desktop version of the website, and they’re displayed below, rather than above the featured image. However, this helps to give a more immediately eye-catching and structured experience to mobile users.

There’s even a handy “Search Engine Optimization” tag included, that users can click on if they want to find more related articles.

When it comes to typography, remember that it’s not just size and clarity that matter, but how things are structured throughout your website too. Your type should naturally guide your visitors along the page.

5. Master Available Device Features

Finally, on smartphones, you can accomplish a range of amazing things that you might not be able to do when using a desktop device. Your users can make calls, open apps, send messages, and more, all from within their mobile browser. They can also move their smartphone around a room, taking advantage of concepts like AR and VR.

Taking advantage of the unique capabilities that smartphone design can offer gives you a chance to get unique with your user experience.

Making the most of the mobile experience can be much simpler than you’d think. For instance, on a desktop site, you could list your phone number on a contact page. On a mobile site, the number can begin a call when clicked. You can also take the same approach with email addresses, and social media icons too.

Depending on how experimental you feel, there’s also plenty of opportunities to go above and beyond with your mobile features. You may decide to create a mobile app version of a website that your customers can download onto their phones.

Alternatively, you can look into things like AR technology. This could allow your users to practice placing items of furniture that they may be thinking of buying from an online retailer into their house, so they can see how well they work with their other interior design choices.

Making the Most of Mobile-First Design

Ultimately, having a responsive website that works on both mobile and desktop devices is mandatory in the modern world. However, going above and beyond with mobile-first design is a great way to get ahead of the game.

If you can focus on building a website that puts the experiences of mobile users first, then you can create something that’s much more likely to grab audience attention and deliver amazing experiences.

If nothing else, showing your clients that you have what it takes to design for mobile is an excellent way to ensure that you can gain as many new project opportunities as possible.

Source


Source de l’article sur Webdesignerdepot

As human beings, we like to think that we’re rational creatures.

We tell ourselves that we make our decisions based on fact and logic. However, that’s rarely the full truth. As much as we try to make choices guided by rationality, the truth is that we’re often highly emotional people, driven by the way that things make us feel.

So, what does that mean for a website designer?

Though designing a functional and logical website is important, it’s crucial not to forget about the emotional impact of each interaction that your customer has with the sites that you build.

Sites that don’t elicit any kind of emotional response aren’t just boring; they’re forgettable.

A forgettable website is poison to any website designer’s portfolio.

That’s why we’re going to introduce you to some easy ways to use emotion in your designs this year.

Getting to the Bottom of Emotion in Web Design

First, you need to understand the part that emotion plays in user decisions.

Don Norman’s book Emotional Design says that there are many things that designers can do to make their designs more emotional. Even something as simple as focusing on the aesthetic impact of your website can make it more likely that you’ll reach your audience on an emotional level.

One important thing to remember about emotional design, is that it’s not just about making your customers feel good. Emotion can be both positive and negative. Sometimes negative emotion is more impactful than positive feelings – it all depends on the kind of site you’re trying to create.

A website selling health products to customers needs to make that audience feel comfortable and confident that they’re buying a trustworthy item. However, it may also need to trigger small feelings of worry or concern in the audience about what might happen if they don’t buy.

Knowing how to walk that balance between positive and negative feelings is how a designer takes a simple website design and turns it into something incredible.

So, where do you get started?

Step 1: Use Visual Elements to Trigger Emotion

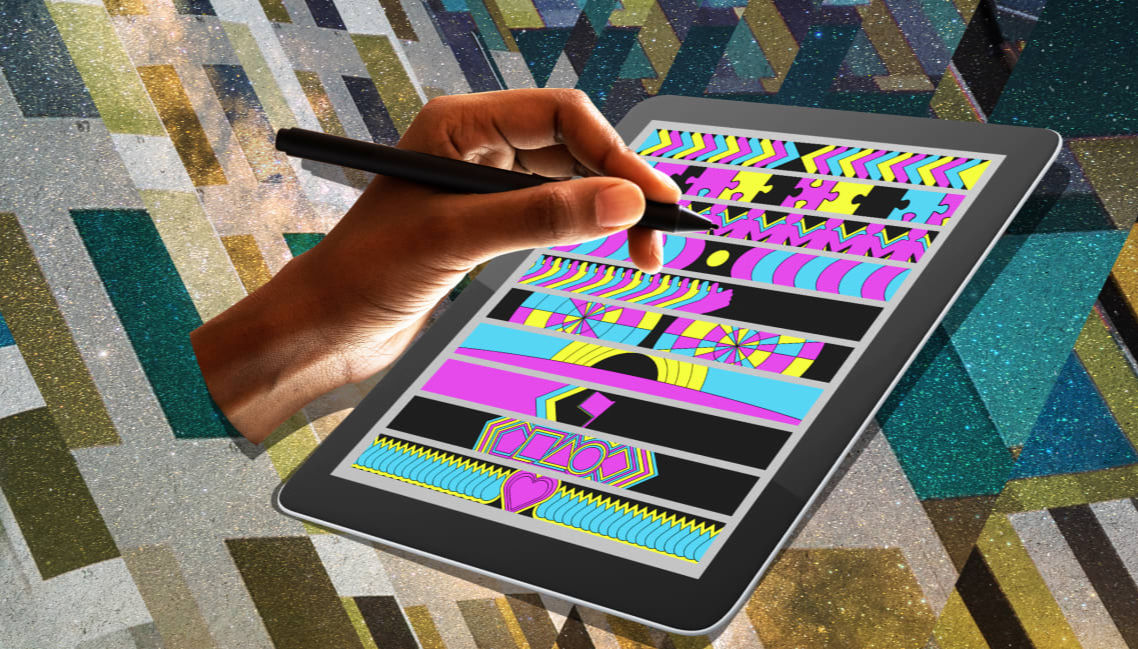
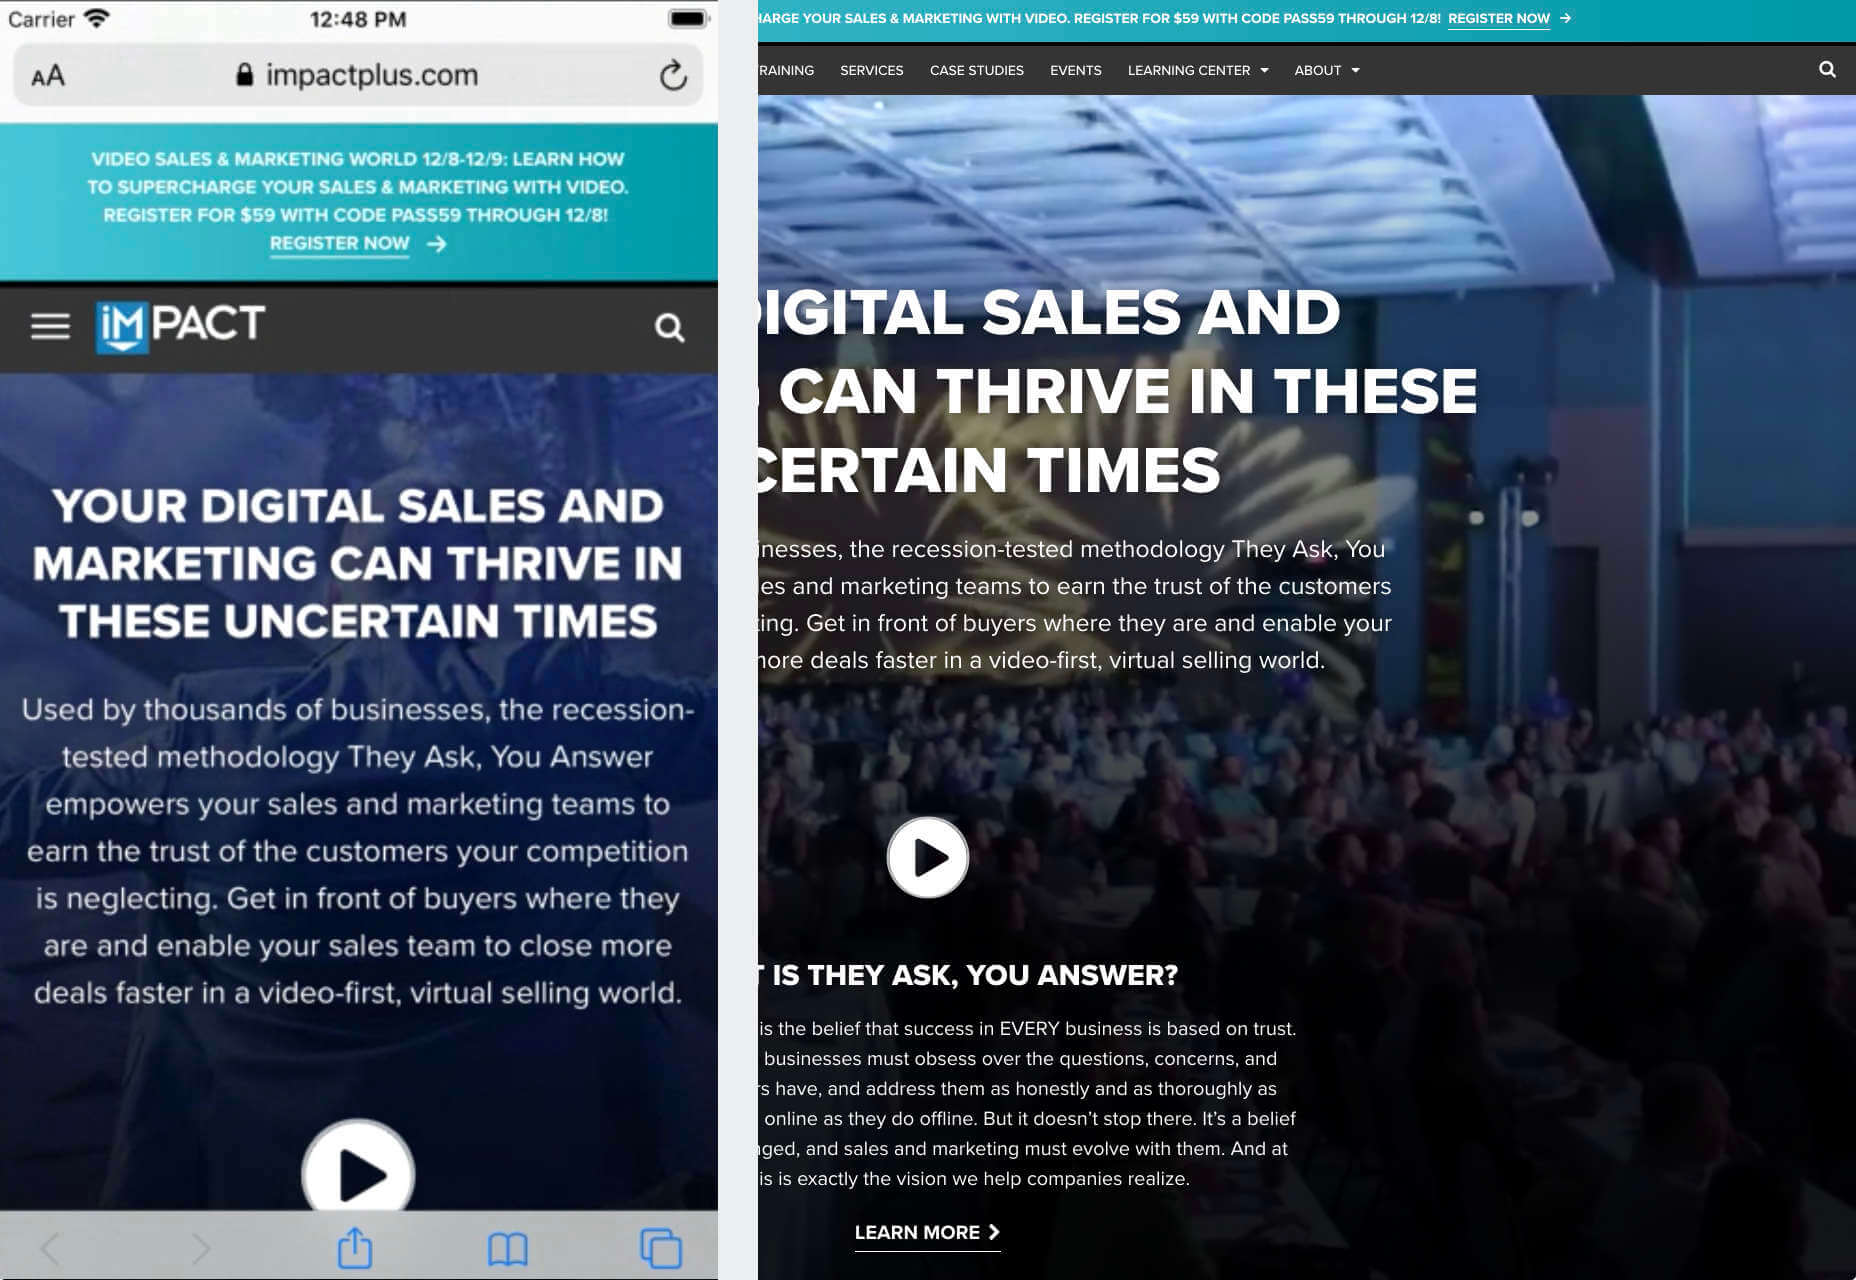
Visual elements are one of the easiest points to get started with when you’re designing for emotion. That’s because visuals are fantastic at drawing out feelings.

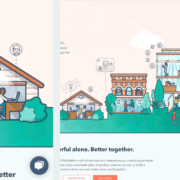
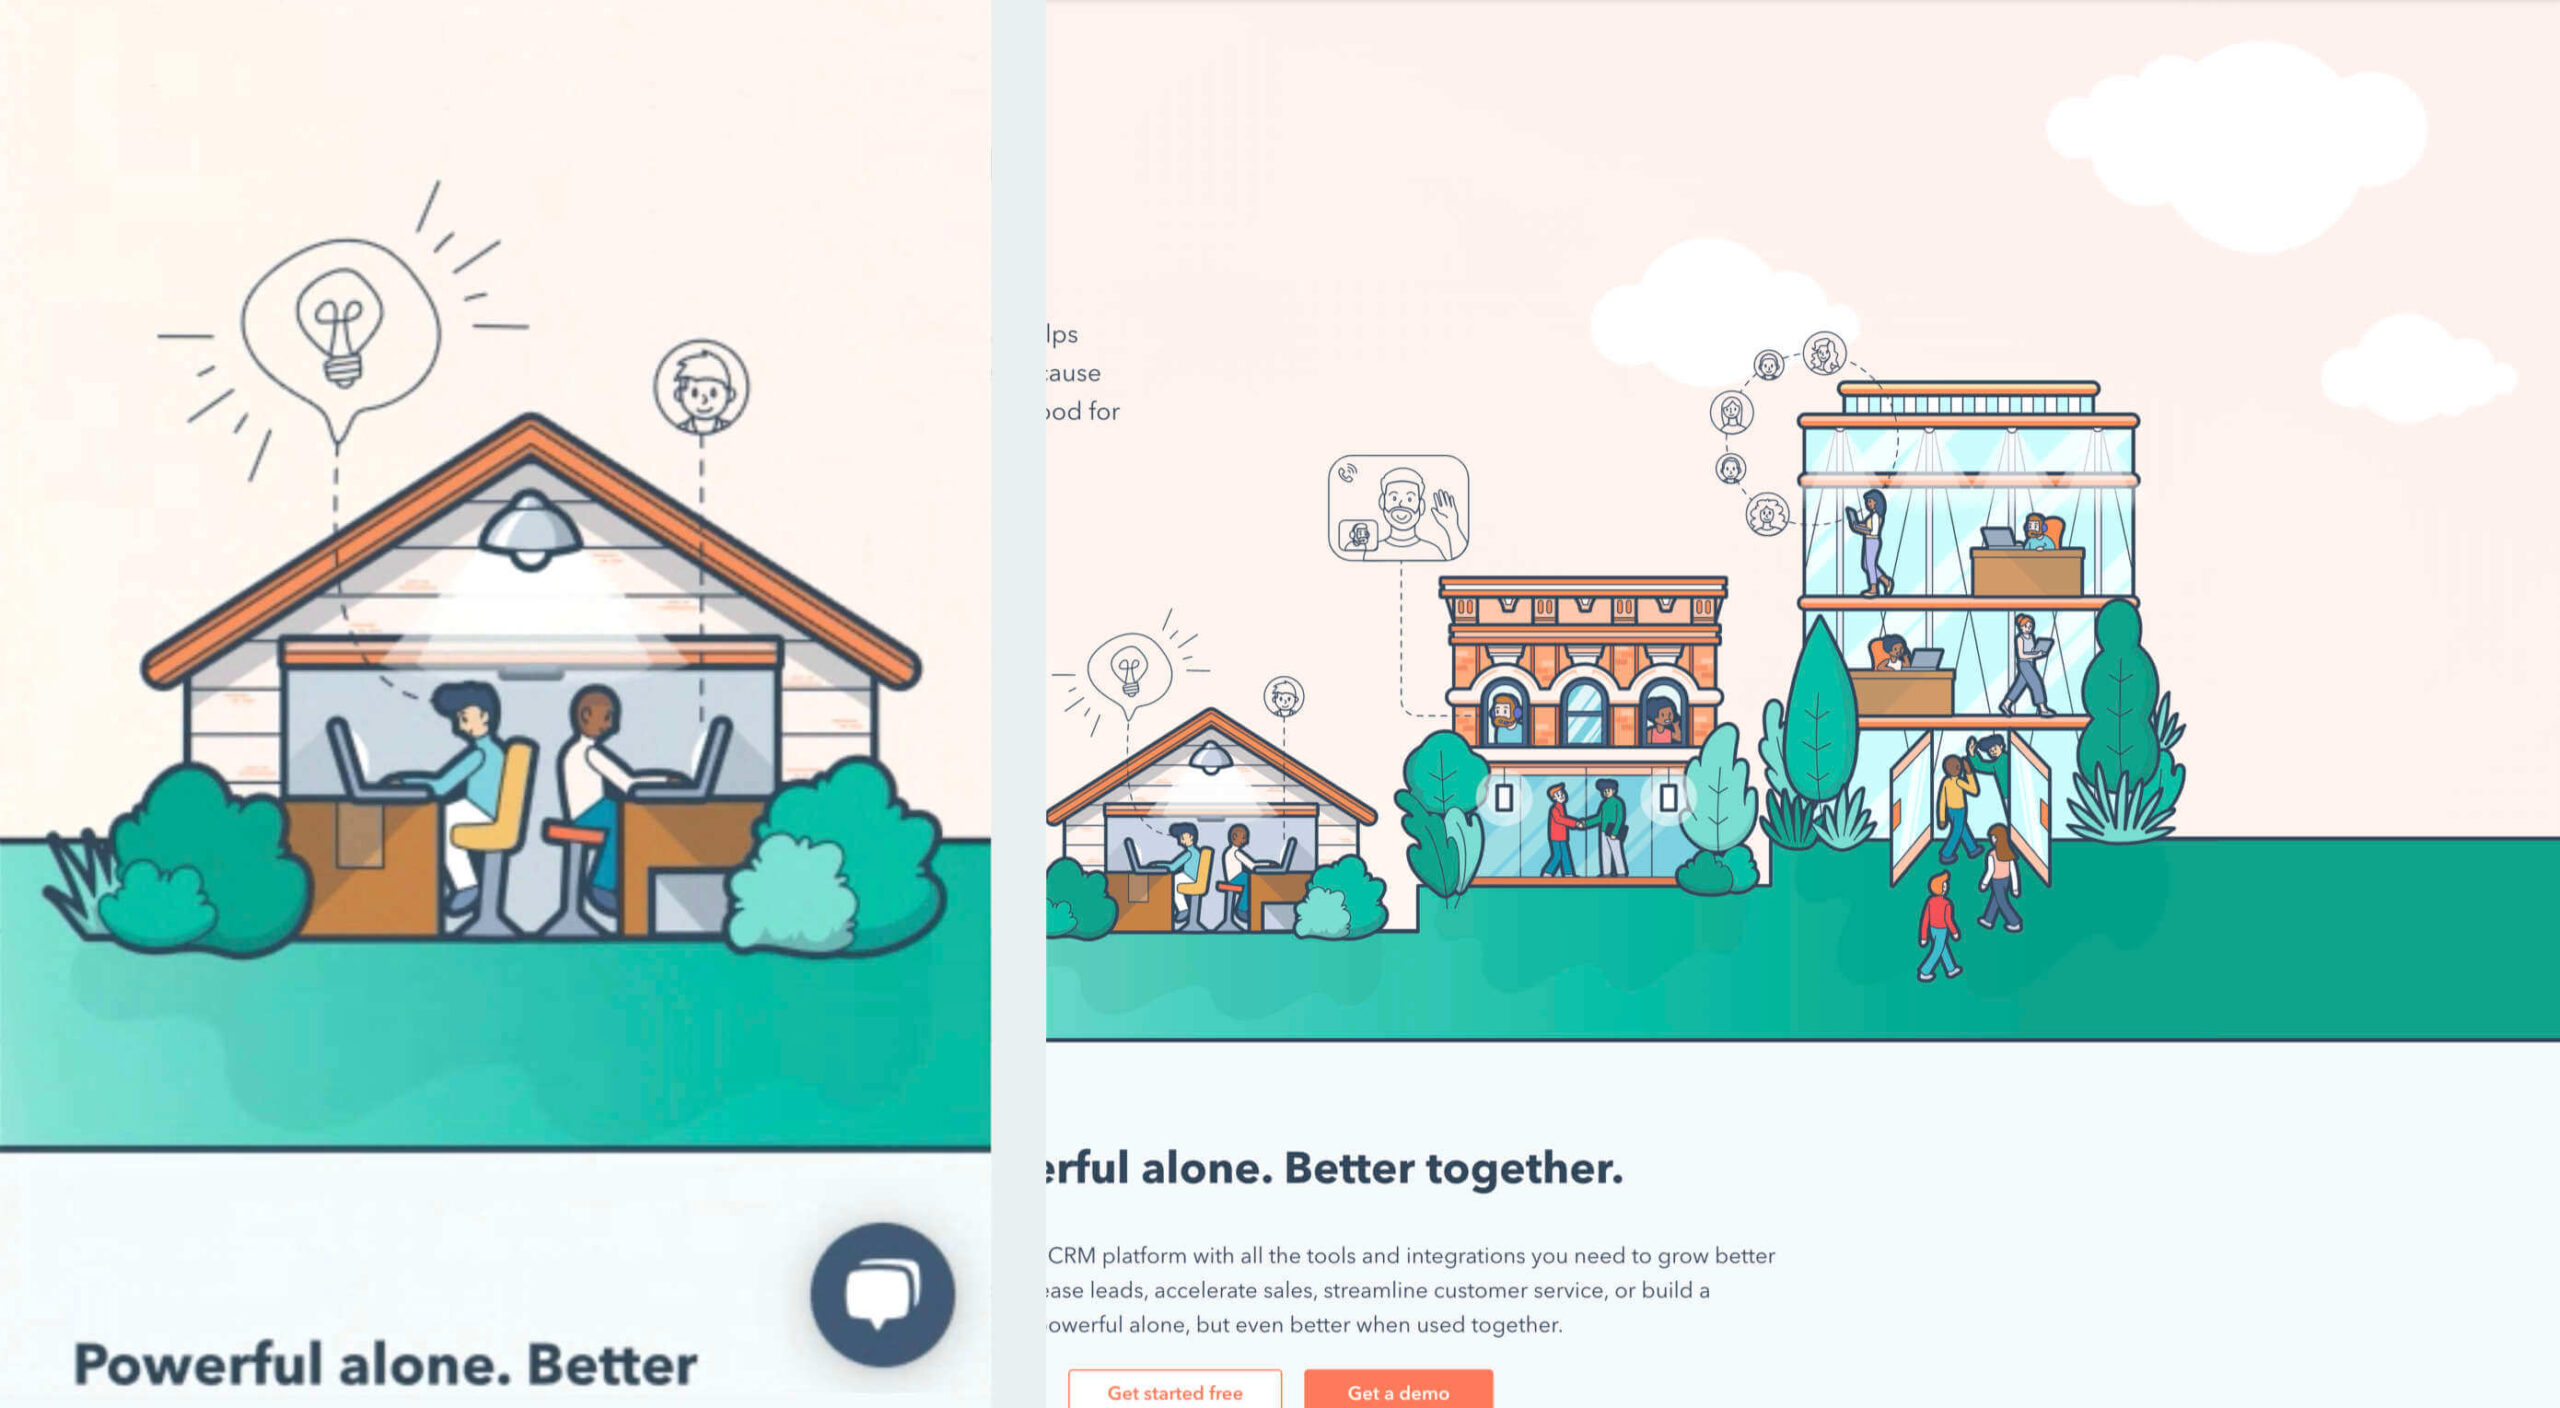
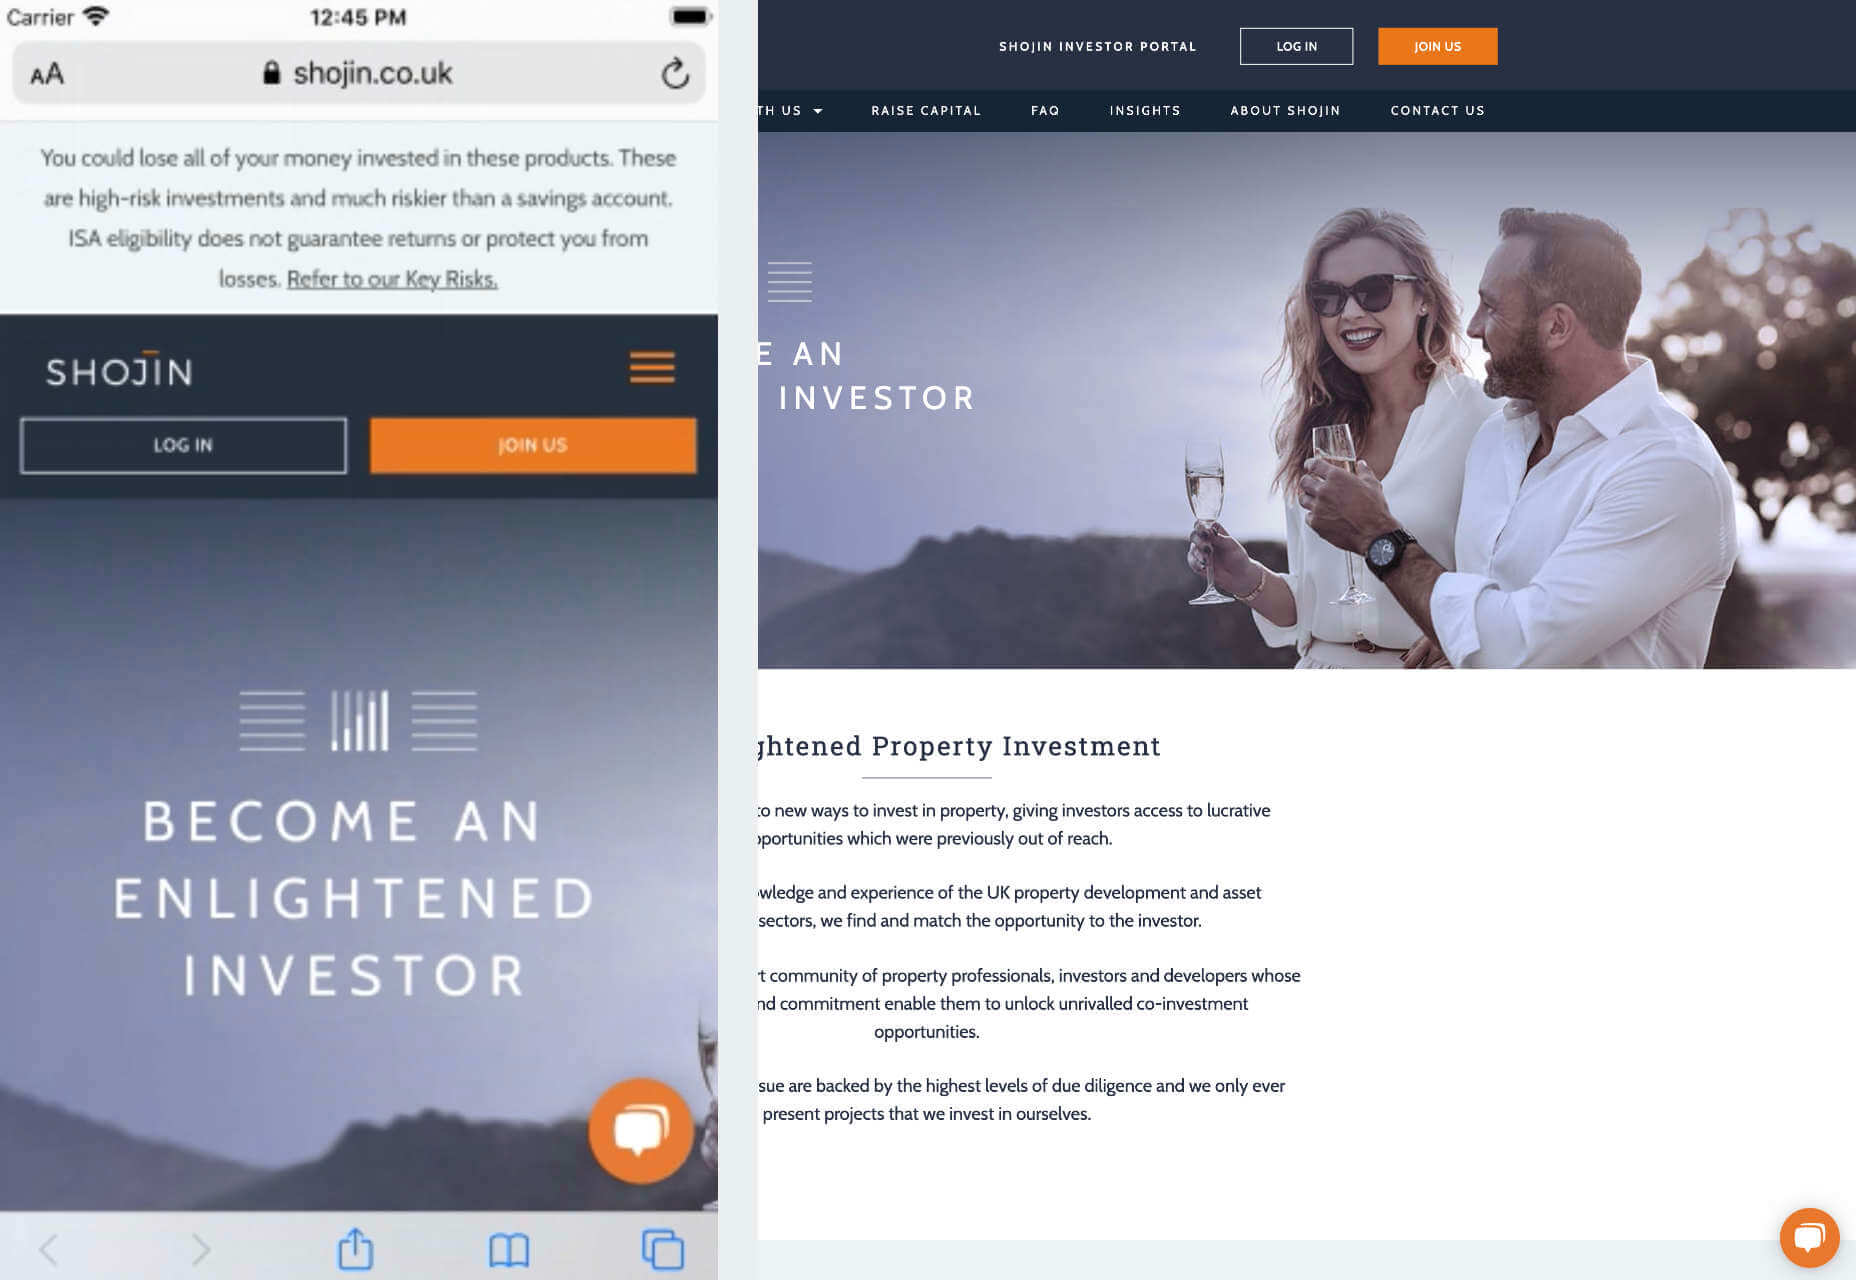
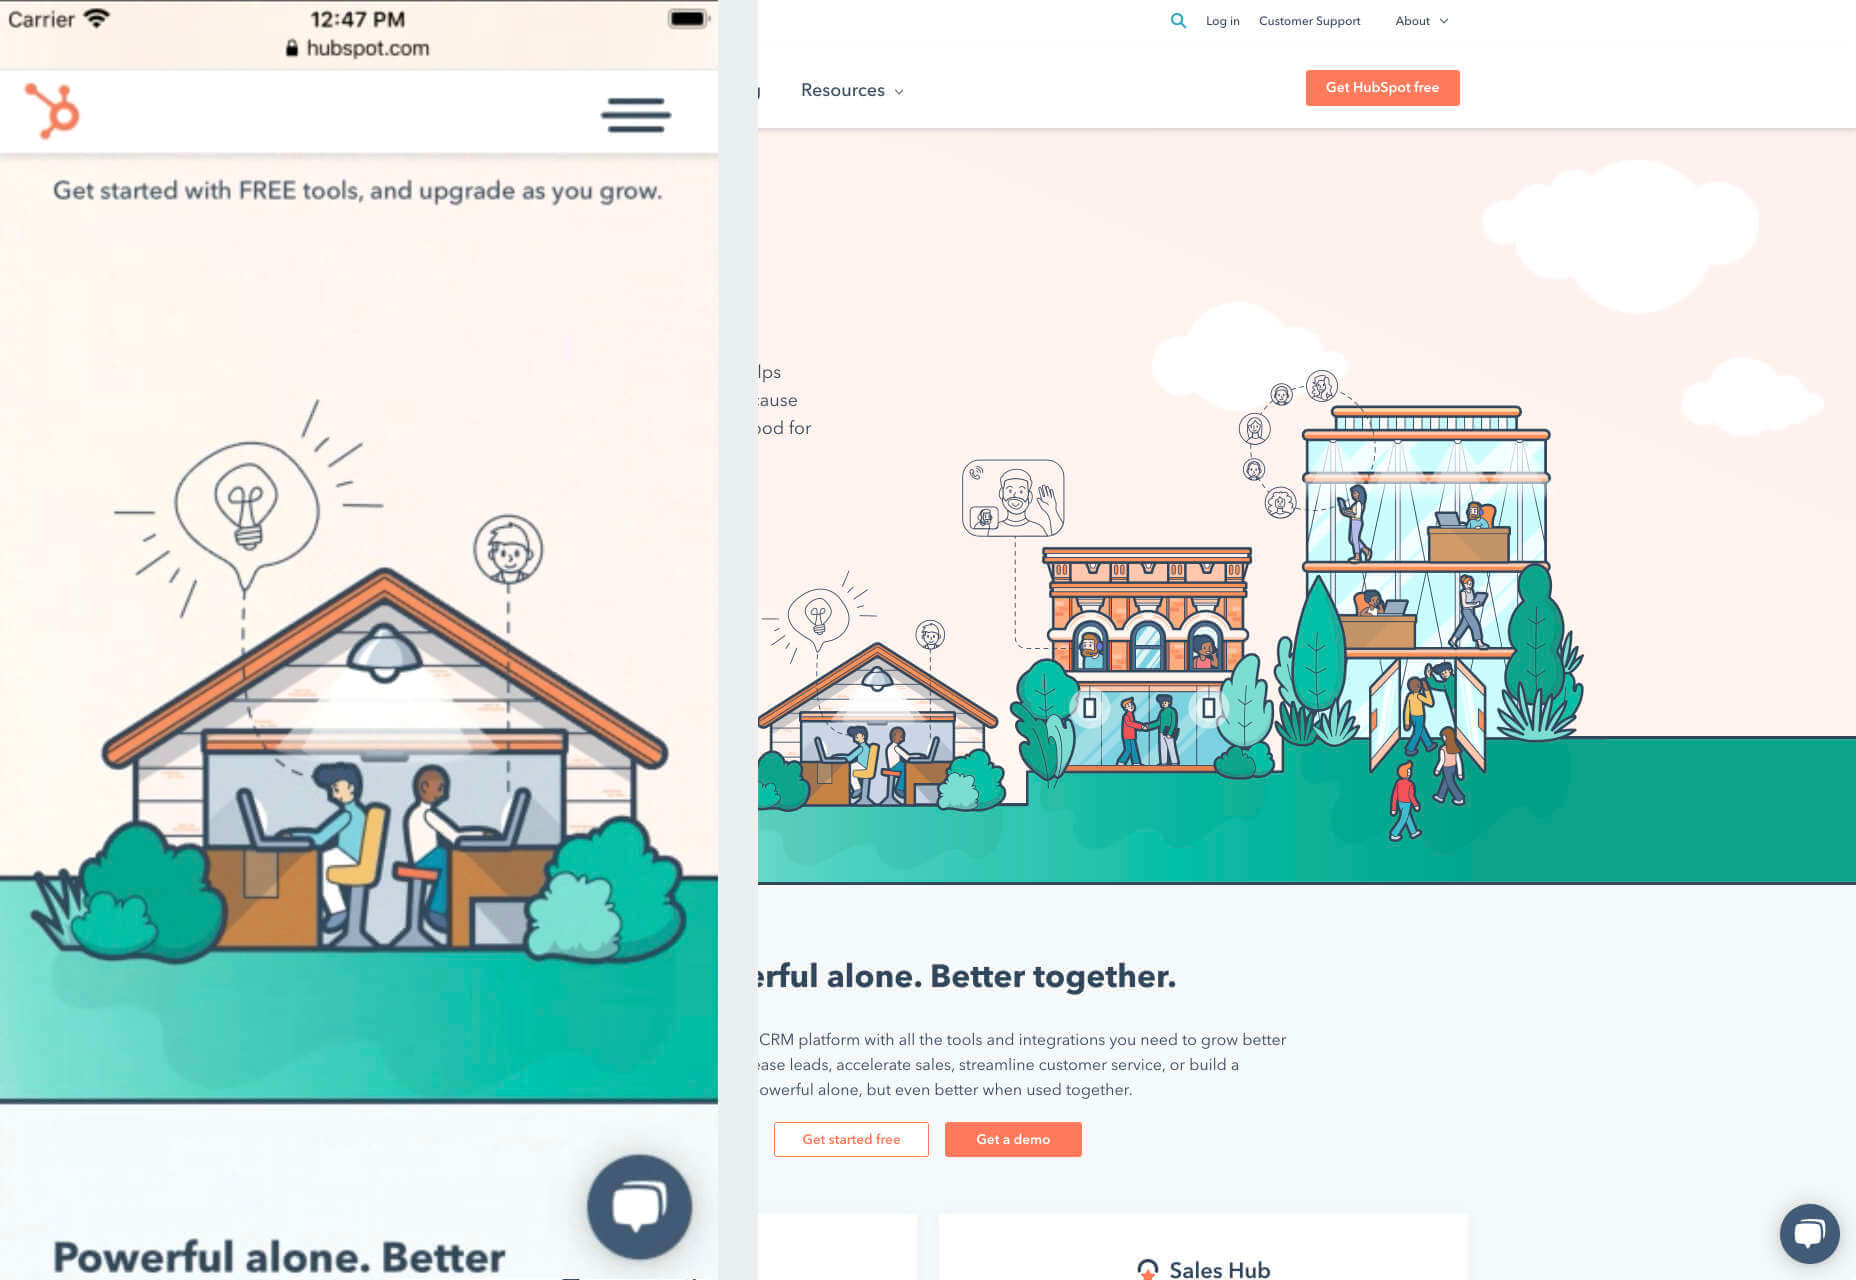
An animation can create an emotional connection with your audience by helping them to understand how your product works or making them laugh when they land on your page. A genuine photograph of your team working together can inspire trust and feelings of affinity.

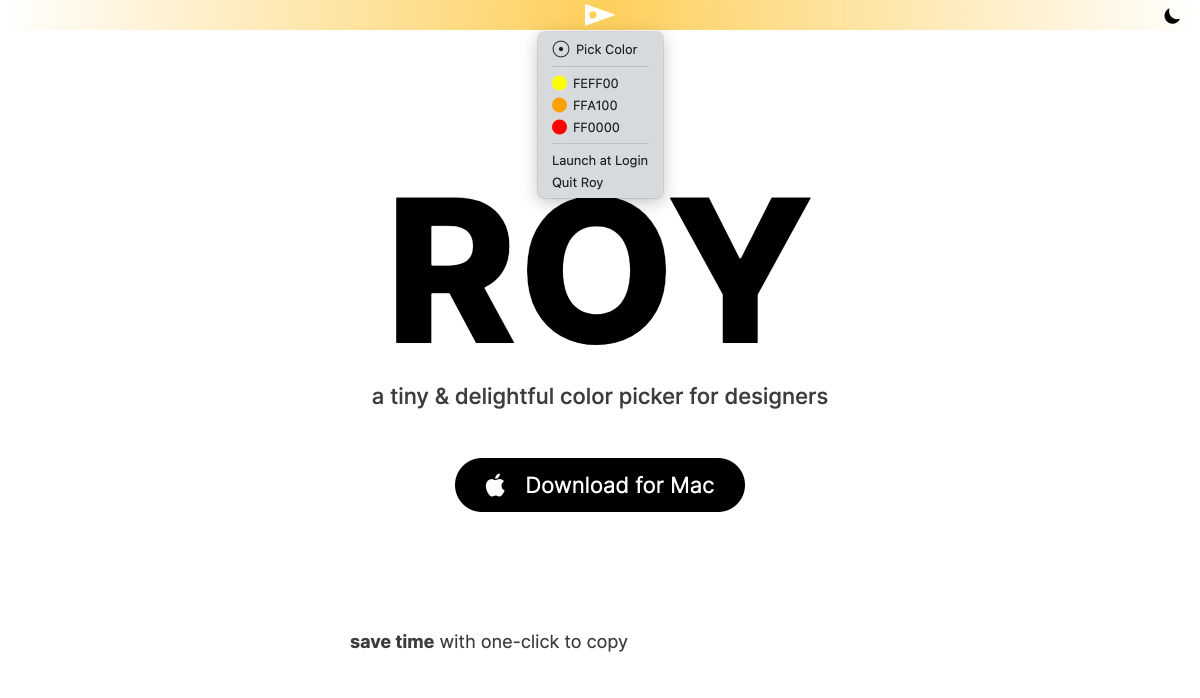
One of the most common visual elements used to trigger emotion is color.

Shades like blue and green in the digital design world are more likely to drive feelings of calmness and comfort. On the other hand, red and yellow often encourage feelings of enthusiasm and happiness.

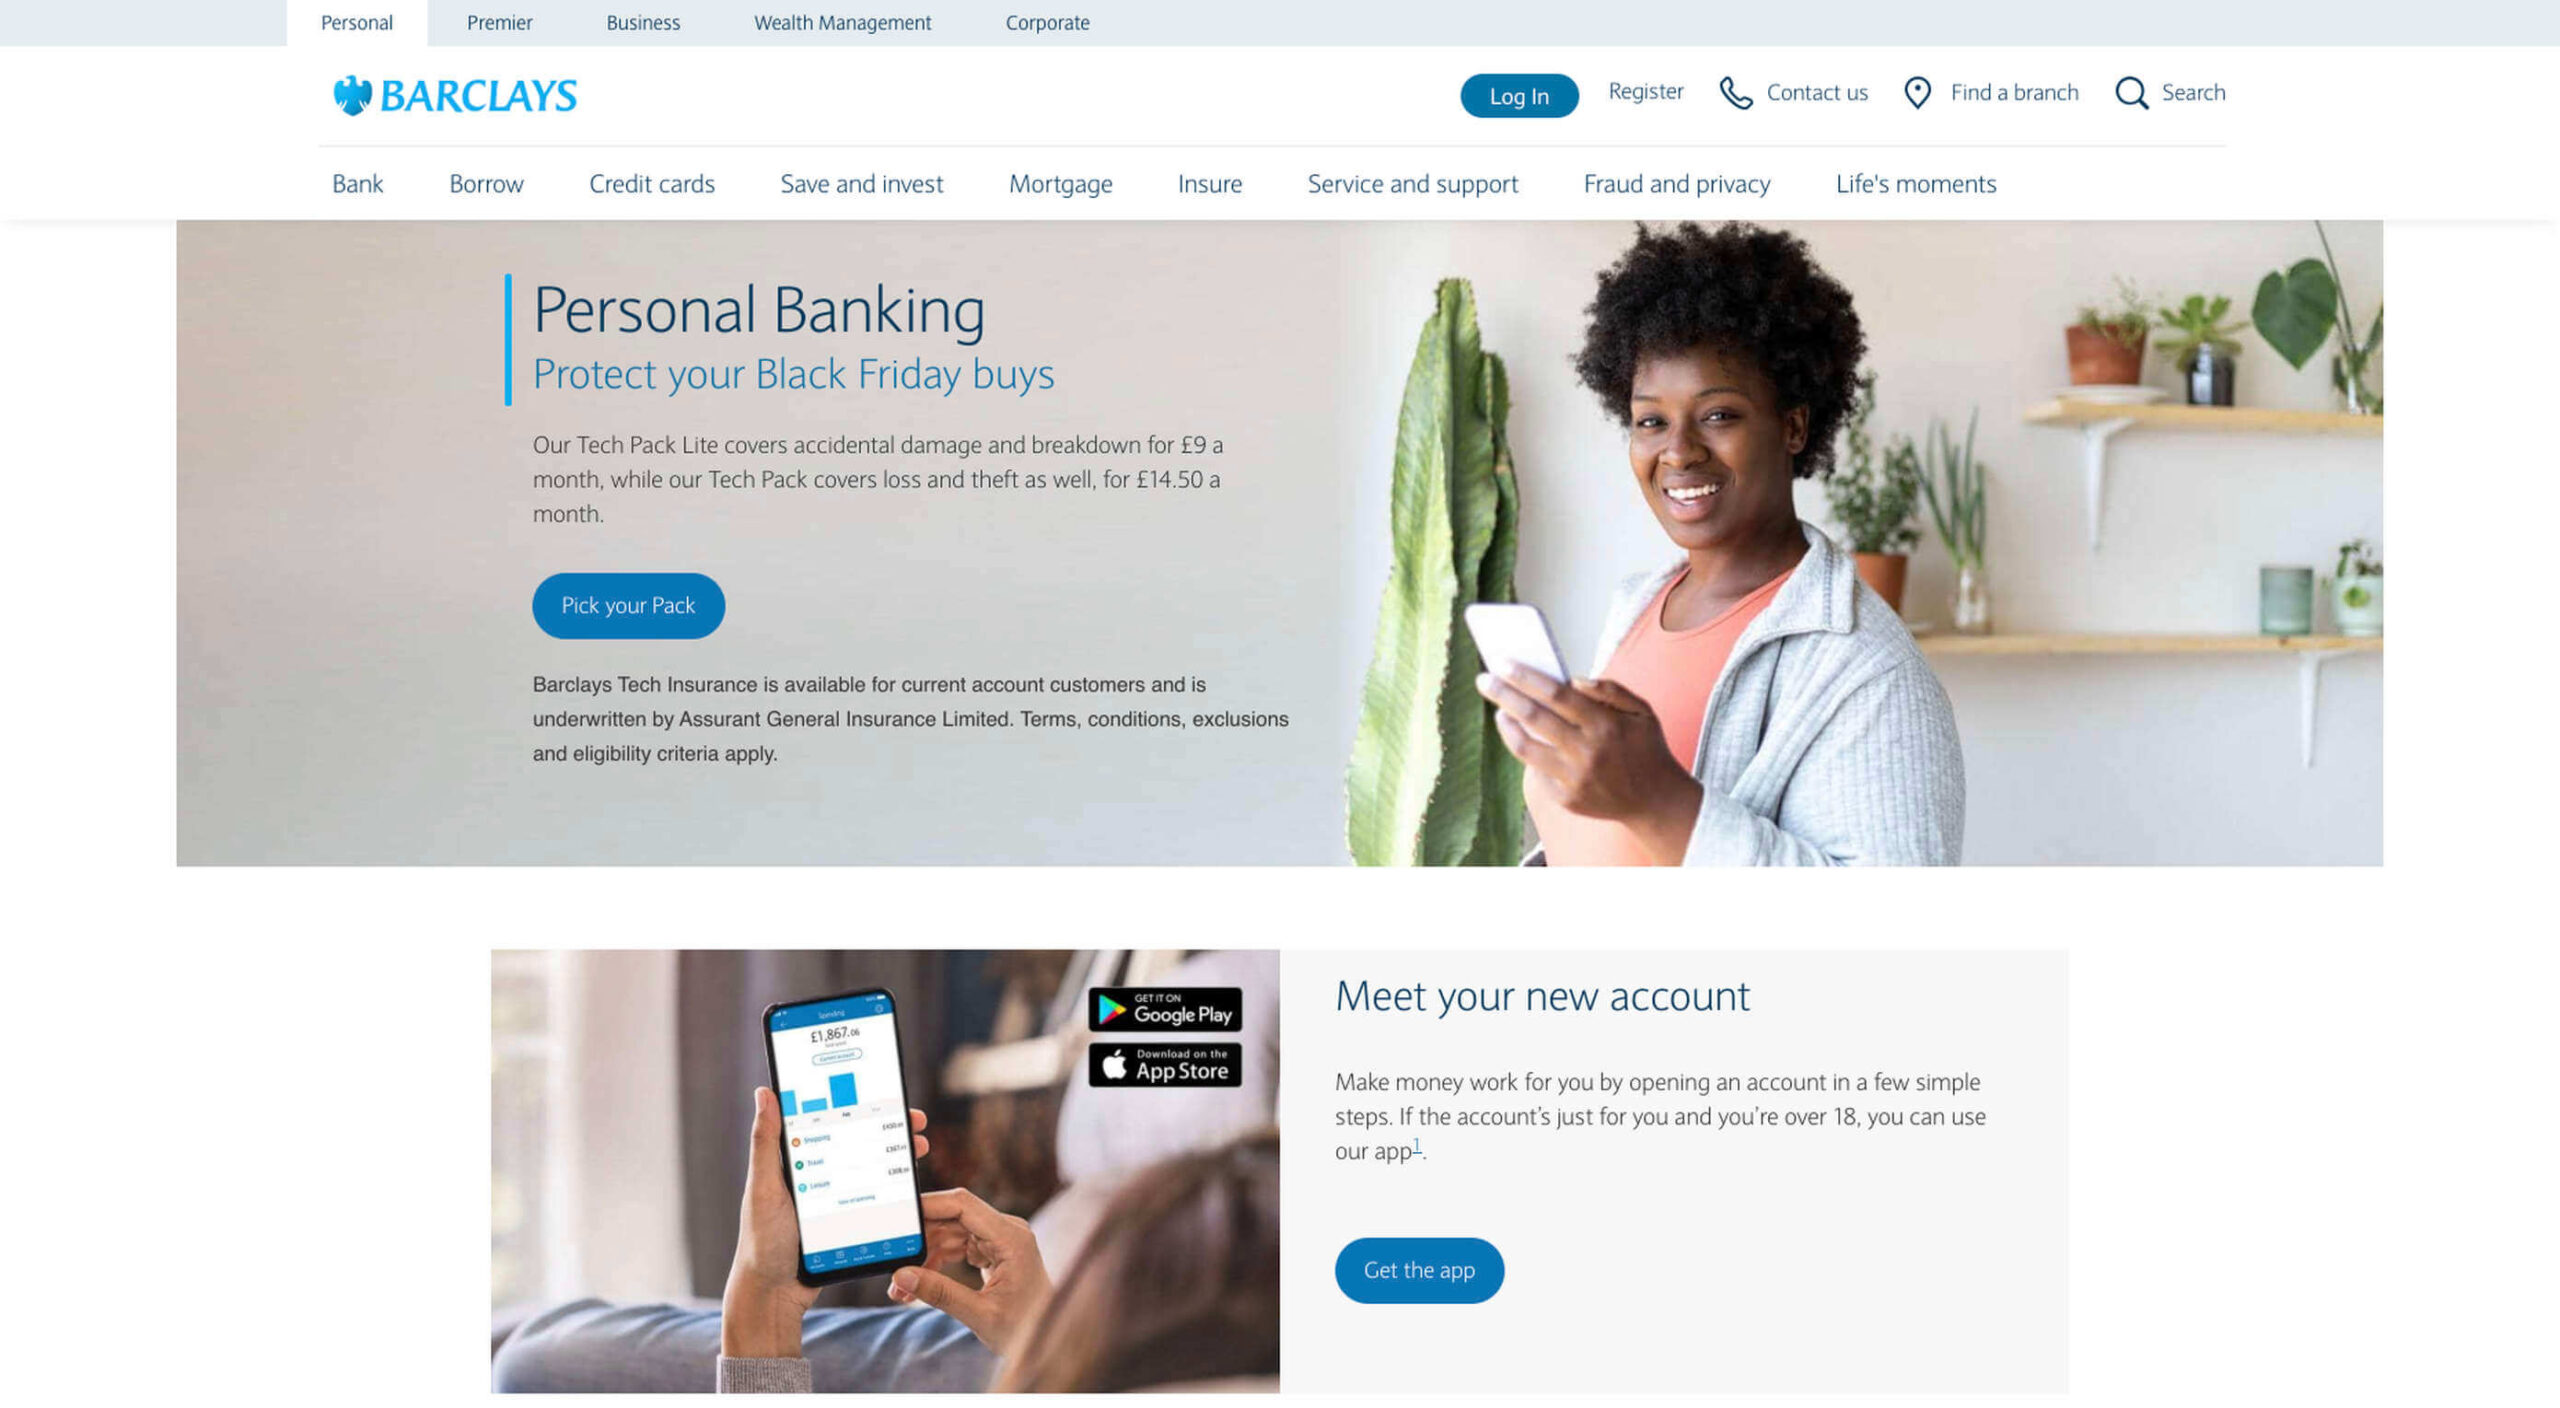
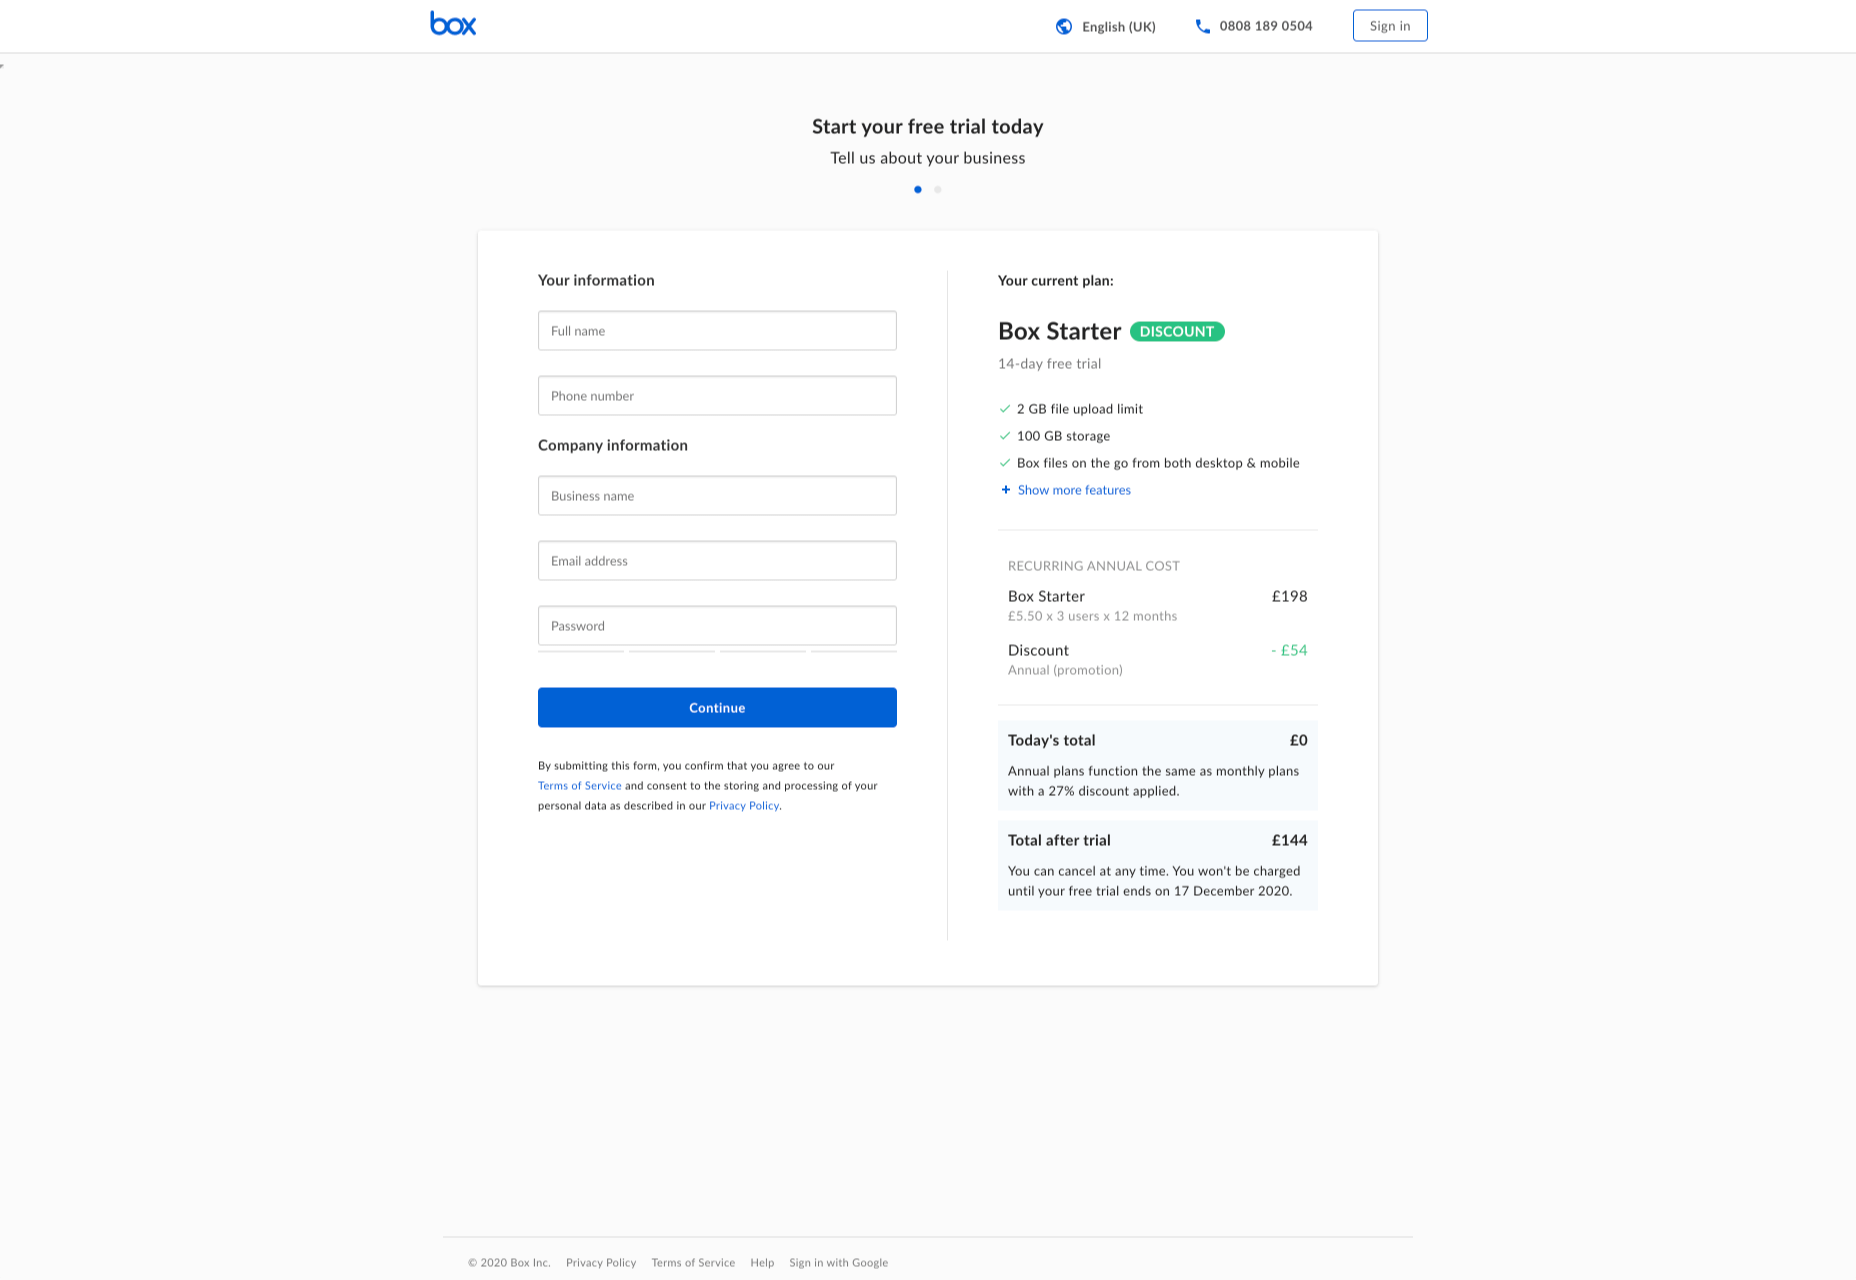
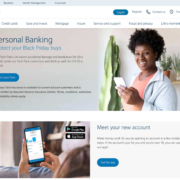
The way that you use color can make a massive difference to how users feel when they arrive on a website. For instance, the Barclay’s website would have been pretty boring if it was just a basic black and white screen. However, a banking site can’t afford to go over the top with animations or illustrations in most cases, as this can detract from its professional image.

Adding small patches of blue in a way that complements the brand’s color palette is a great way to generate feelings of trust. Combined with the image of a genuine real-life person, and calm tones, the bank instantly presents itself as something approachable and honest.

At the same time, the clear hierarchical layout of the bank’s website, with an easy-to-follow navigation bar, easy-to-read font, and clear headings and buttons comfort the customer. Users get exactly what they expect when they come to a financial website, and that makes users feel as though they’re in the right place.

Step 2: Create Engaging and Emotional Interactions

Visual elements are a great way to embed emotion into digital design. However, they’re just the first step. The emotional aspects of your web design choices should also appear throughout the interactions that customers have with the website.

A good interaction on a website or app needs to be simple and straightforward enough that users feel comfortable taking the next step in their journey. However, it also needs to drive the right emotional response from users too.

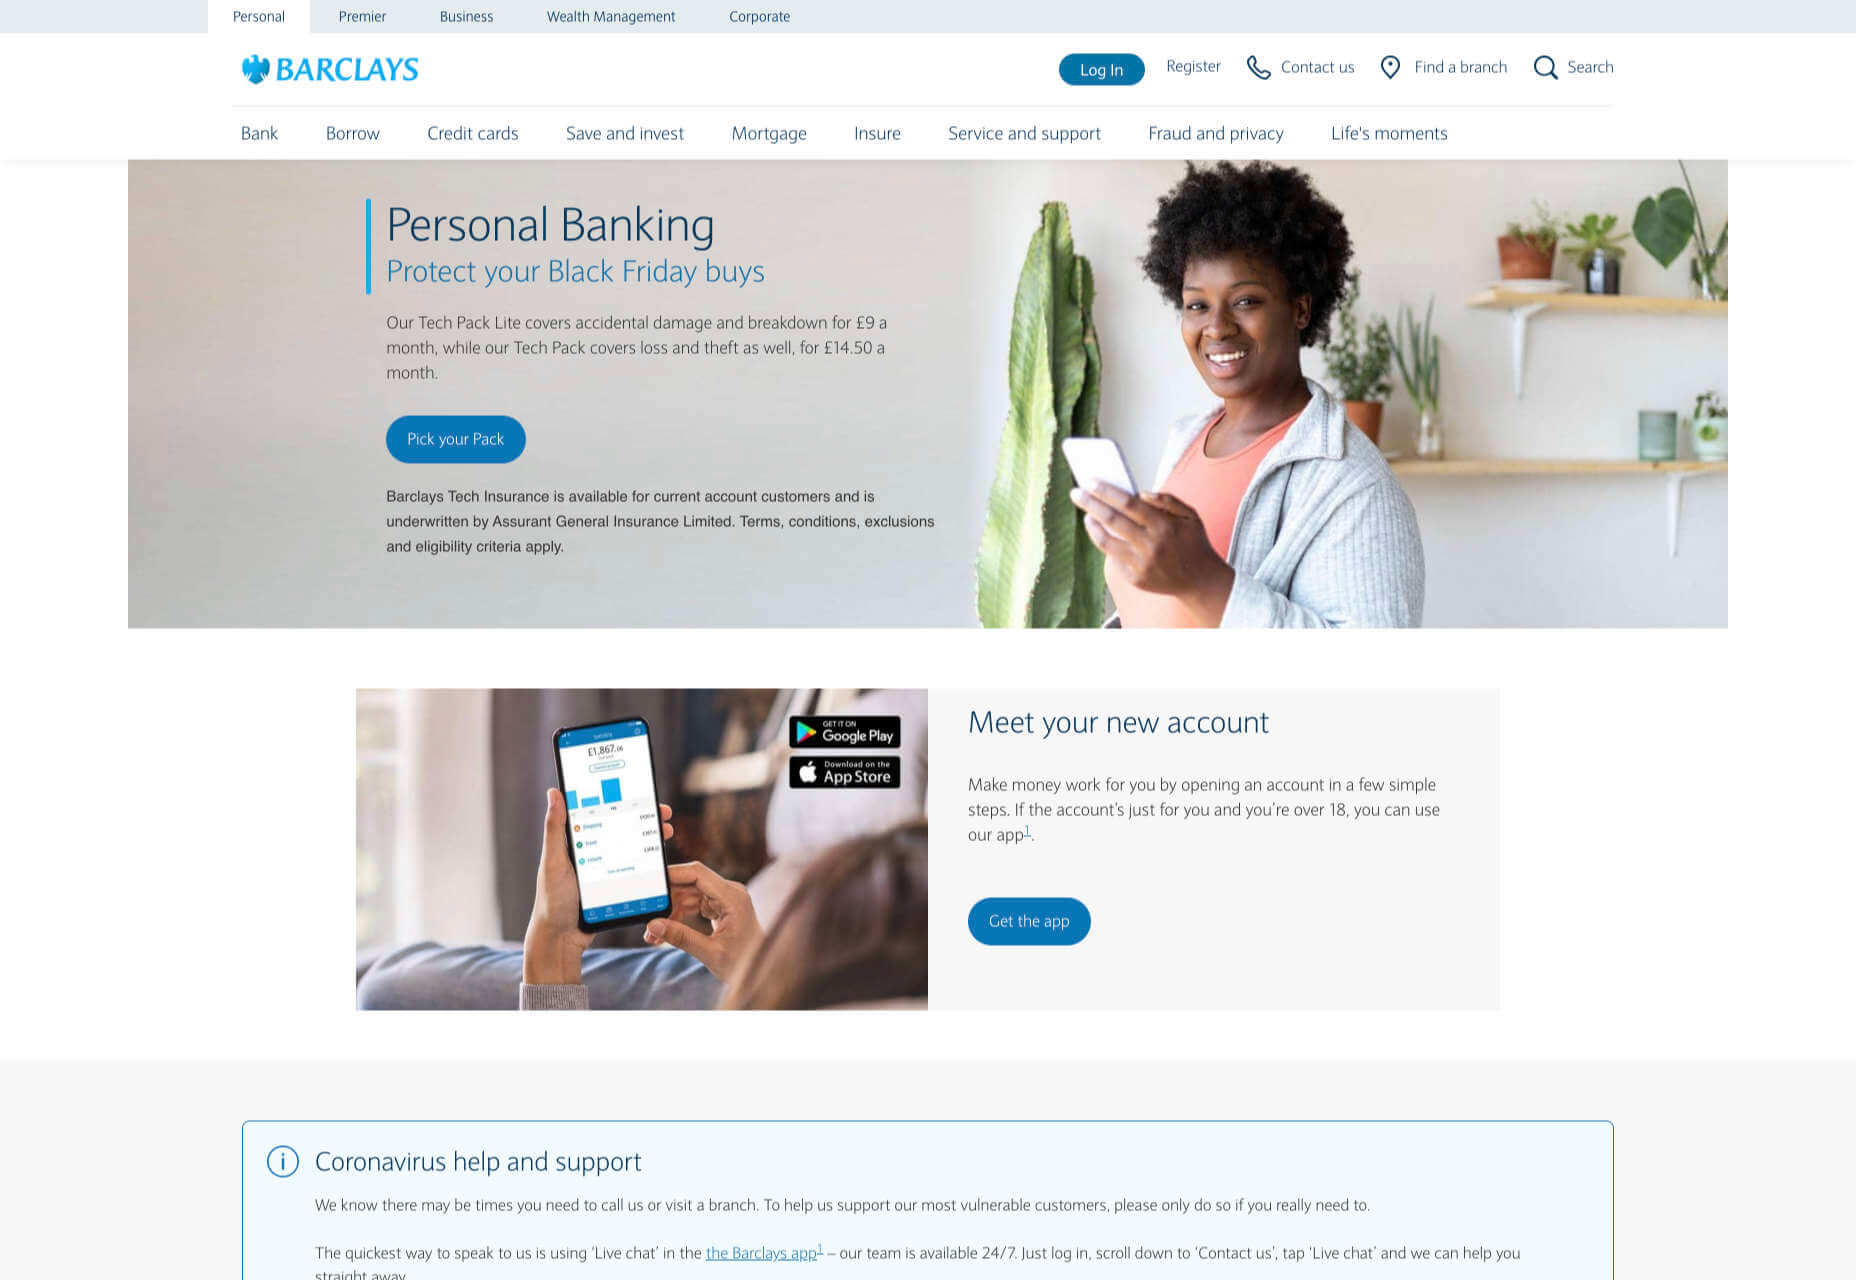
For instance, when you sign up for a free account trial from Box.com, you don’t just get a form full of information that you need to fill out.

Next to the form, you also get information about what you’re signing up for, complete with small checks next to each of the free features you’re getting. This helps to put the customer’s mind at ease and remind them that they’re in the right place.

The use of a box, including discount information next to the sign-up form also helps to make the interaction more emotional, by reminding customers that they’re getting something for free.

Every time a customer interacts with a website, there’s another opportunity to engage them on an emotional level. On the Firebox website, when a customer adds something to their cart, there’s a small animation on the cart icon that informs them that something is waiting for them.

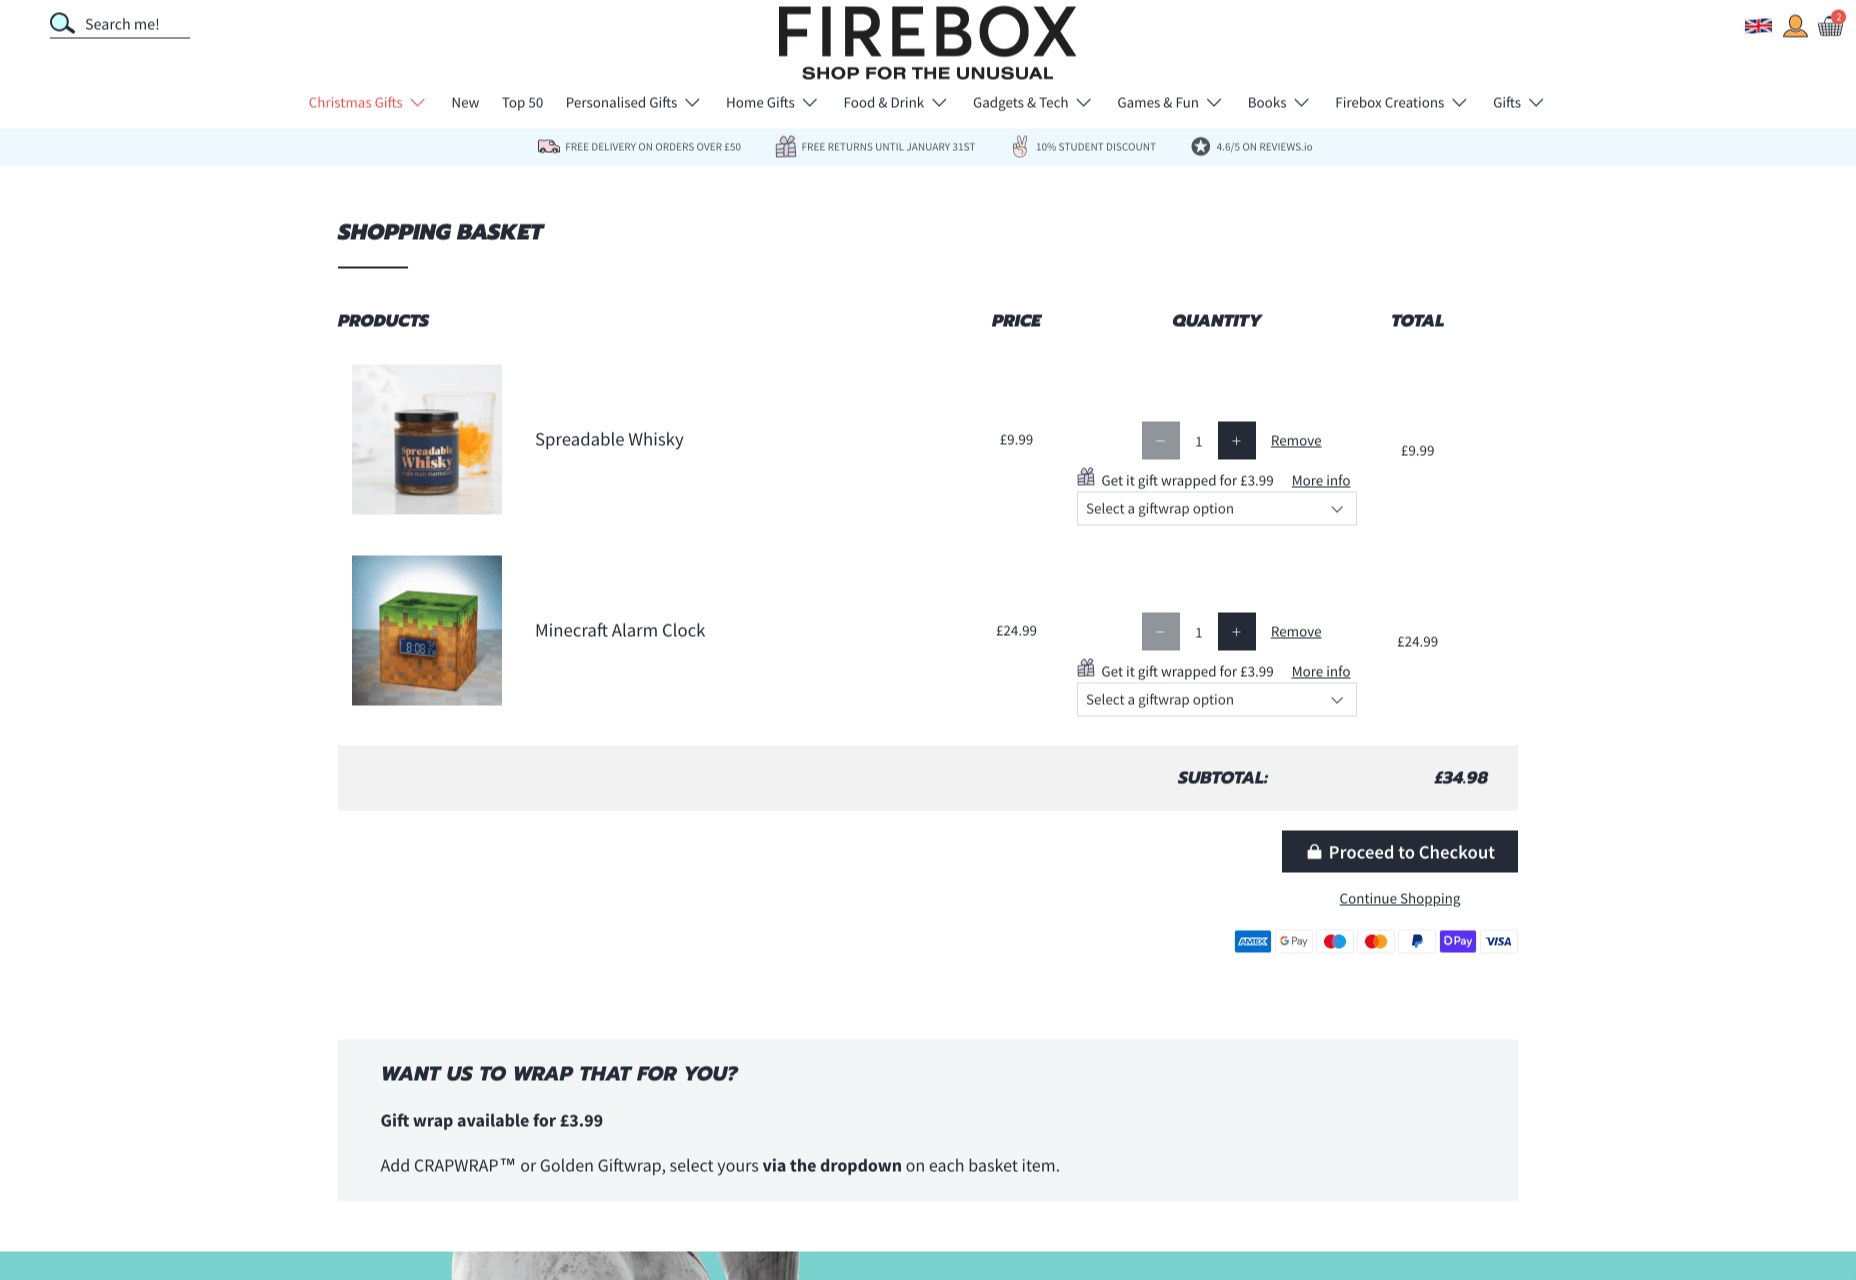
When they click through to the checkout, they get instant information, including what they can do to “gift wrap” their item, and buttons showing the various payment options available.

Whenever you’re designing a page for a website, whether it’s the checkout page, a product page, or something else entirely, think about the interaction that the visitor is having at that moment. How can you ensure that each customer feels more comfortable, delighted, informed, or engaged?

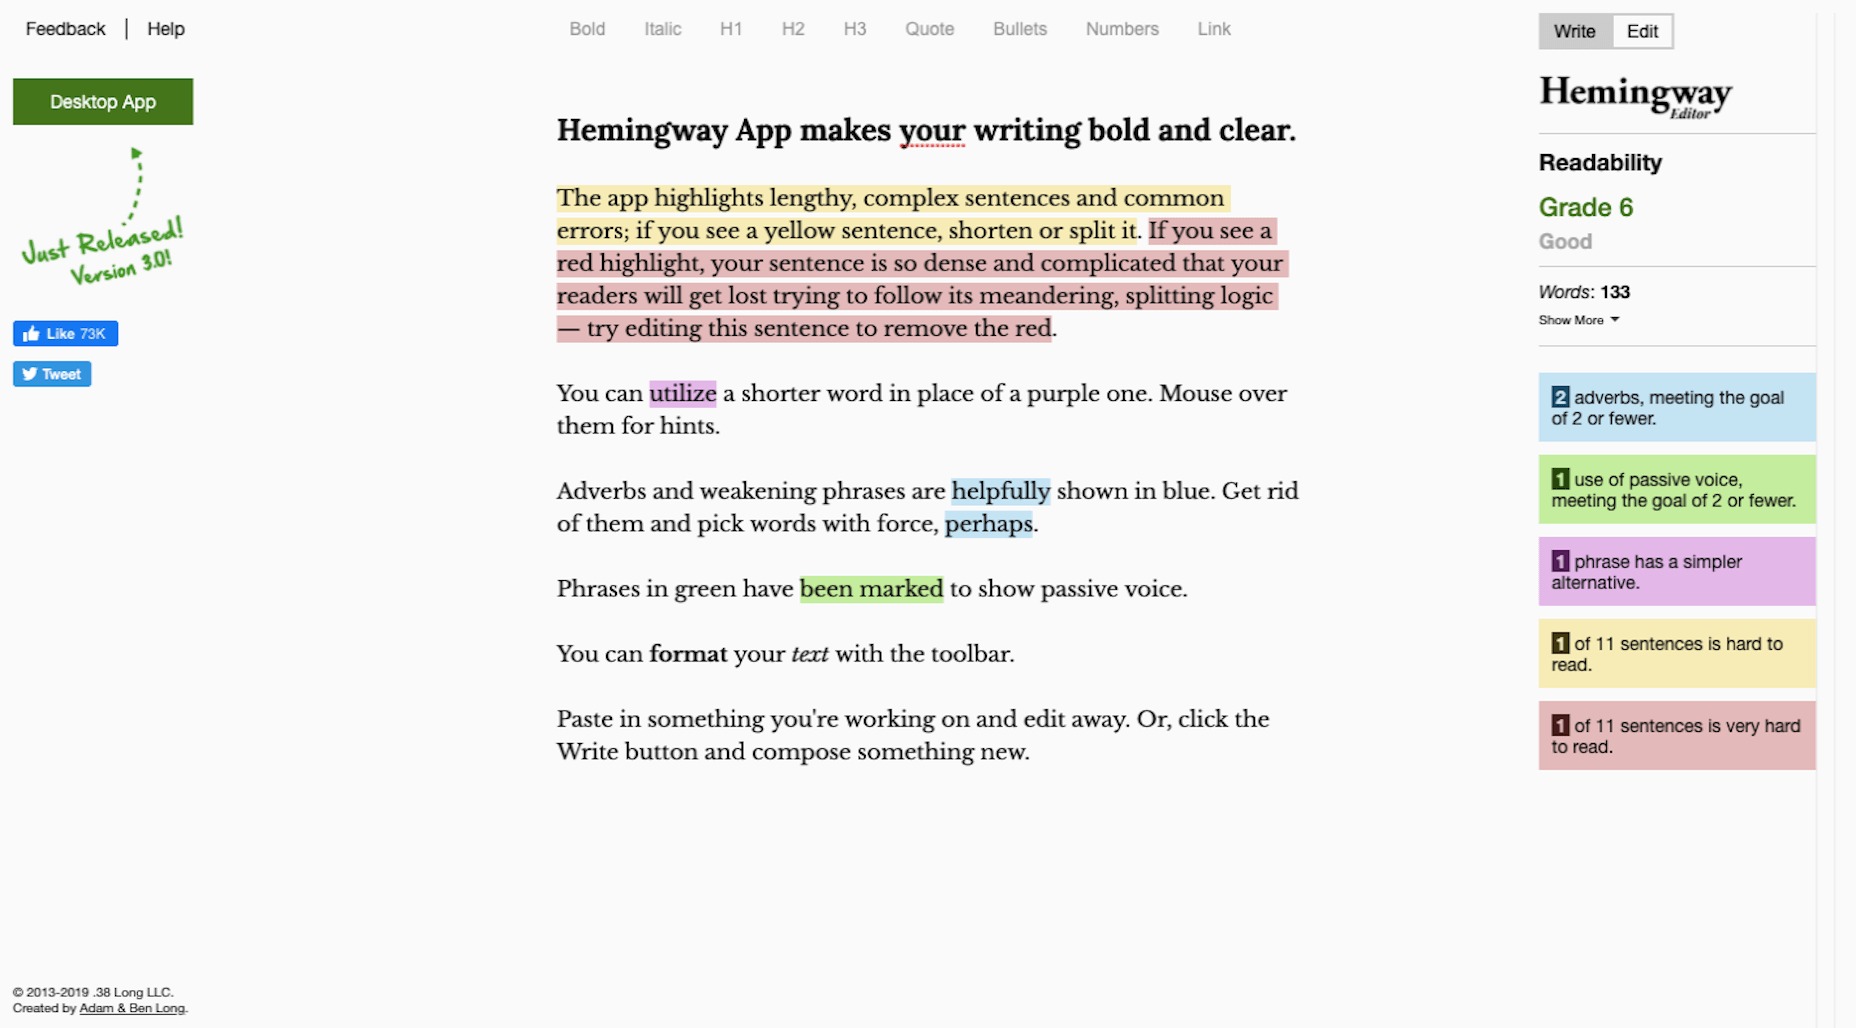
Step 3: Leverage Microcopy and Detail to Express Emotions

Visuals are an excellent way to express emotions.

However, they’re not the only option.

As a designer, you’ll need to think about how you can combine web design with the use of microcopy to connect with customers on a deeper level.

Rather than drawing attention to tedious, dull, or impersonal instructions, notifications, and error messages on a site, how you can you make sure that everything on the website delivers the same emotional impact?

The simple addition of a tiny illustration is enough to provide a much more emotional experience to customers. Compelling micro copy and illustrations on 404 pages can also strengthen the connections that customers have with the sites they visit.

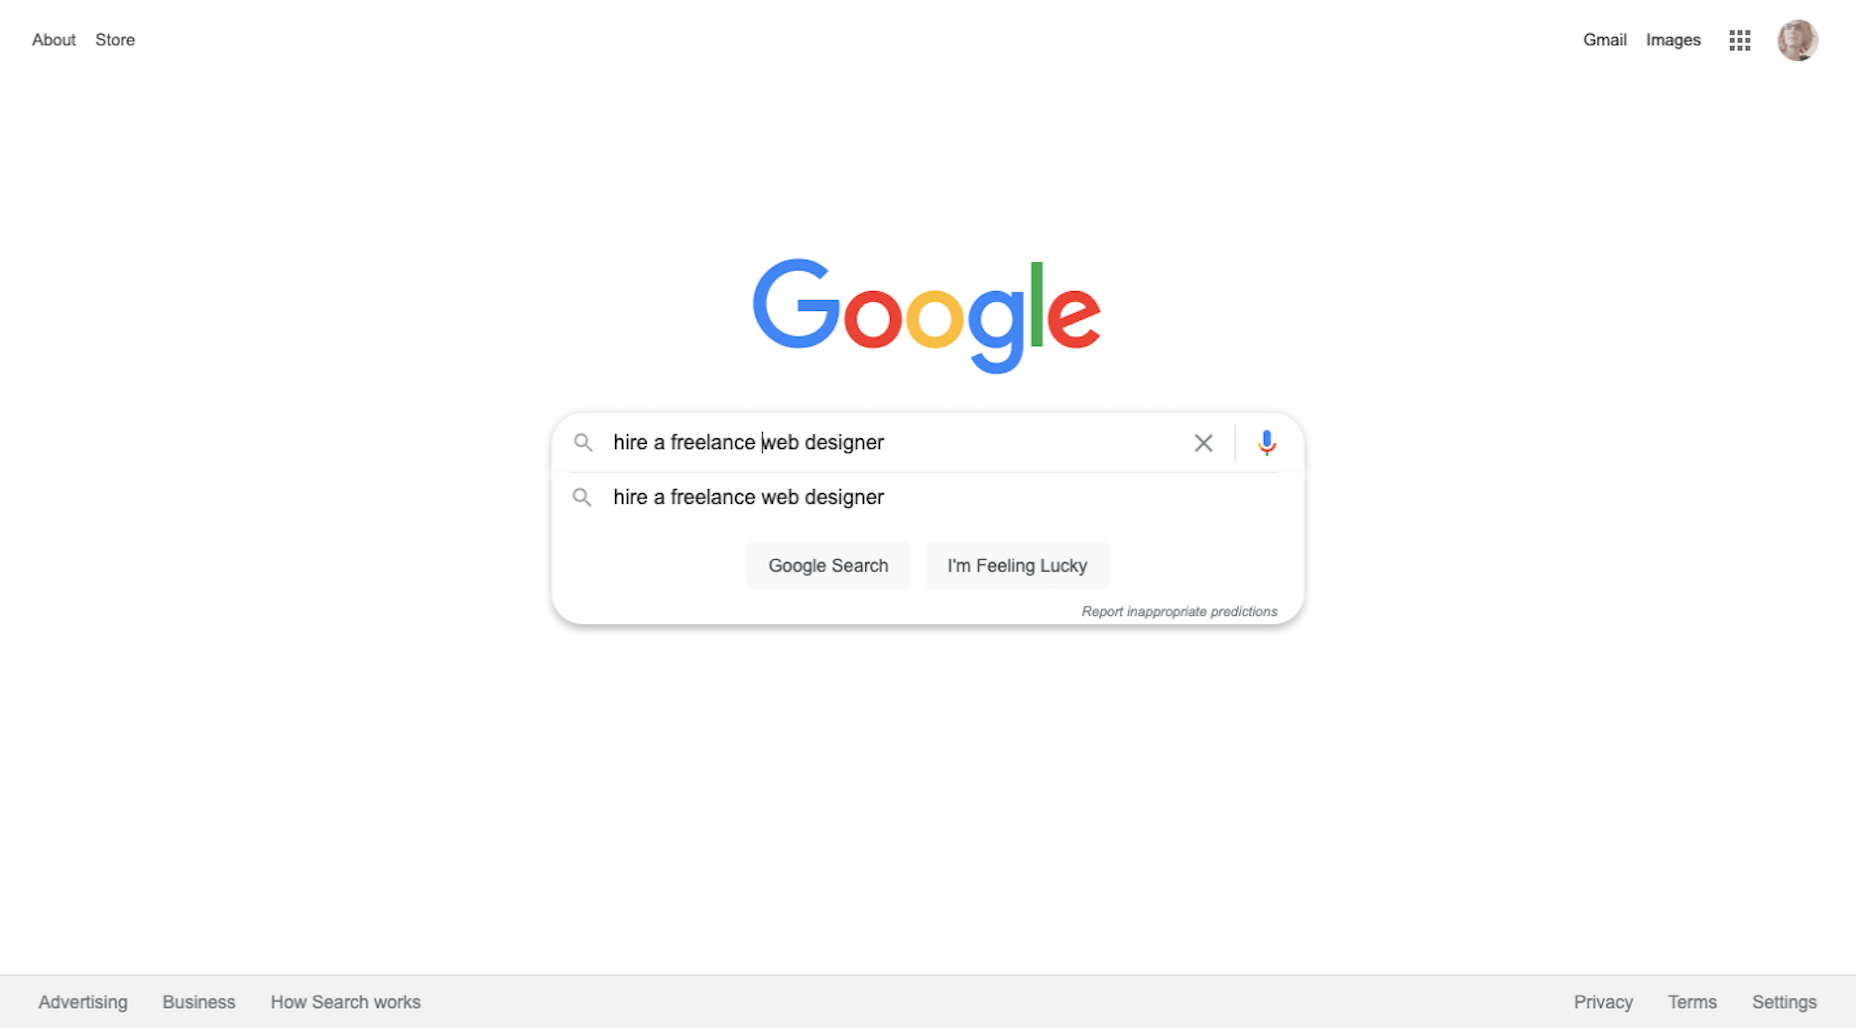
Just look at how Google added a dinosaur game to the page that customers are sent to when they don’t have an internet connection.

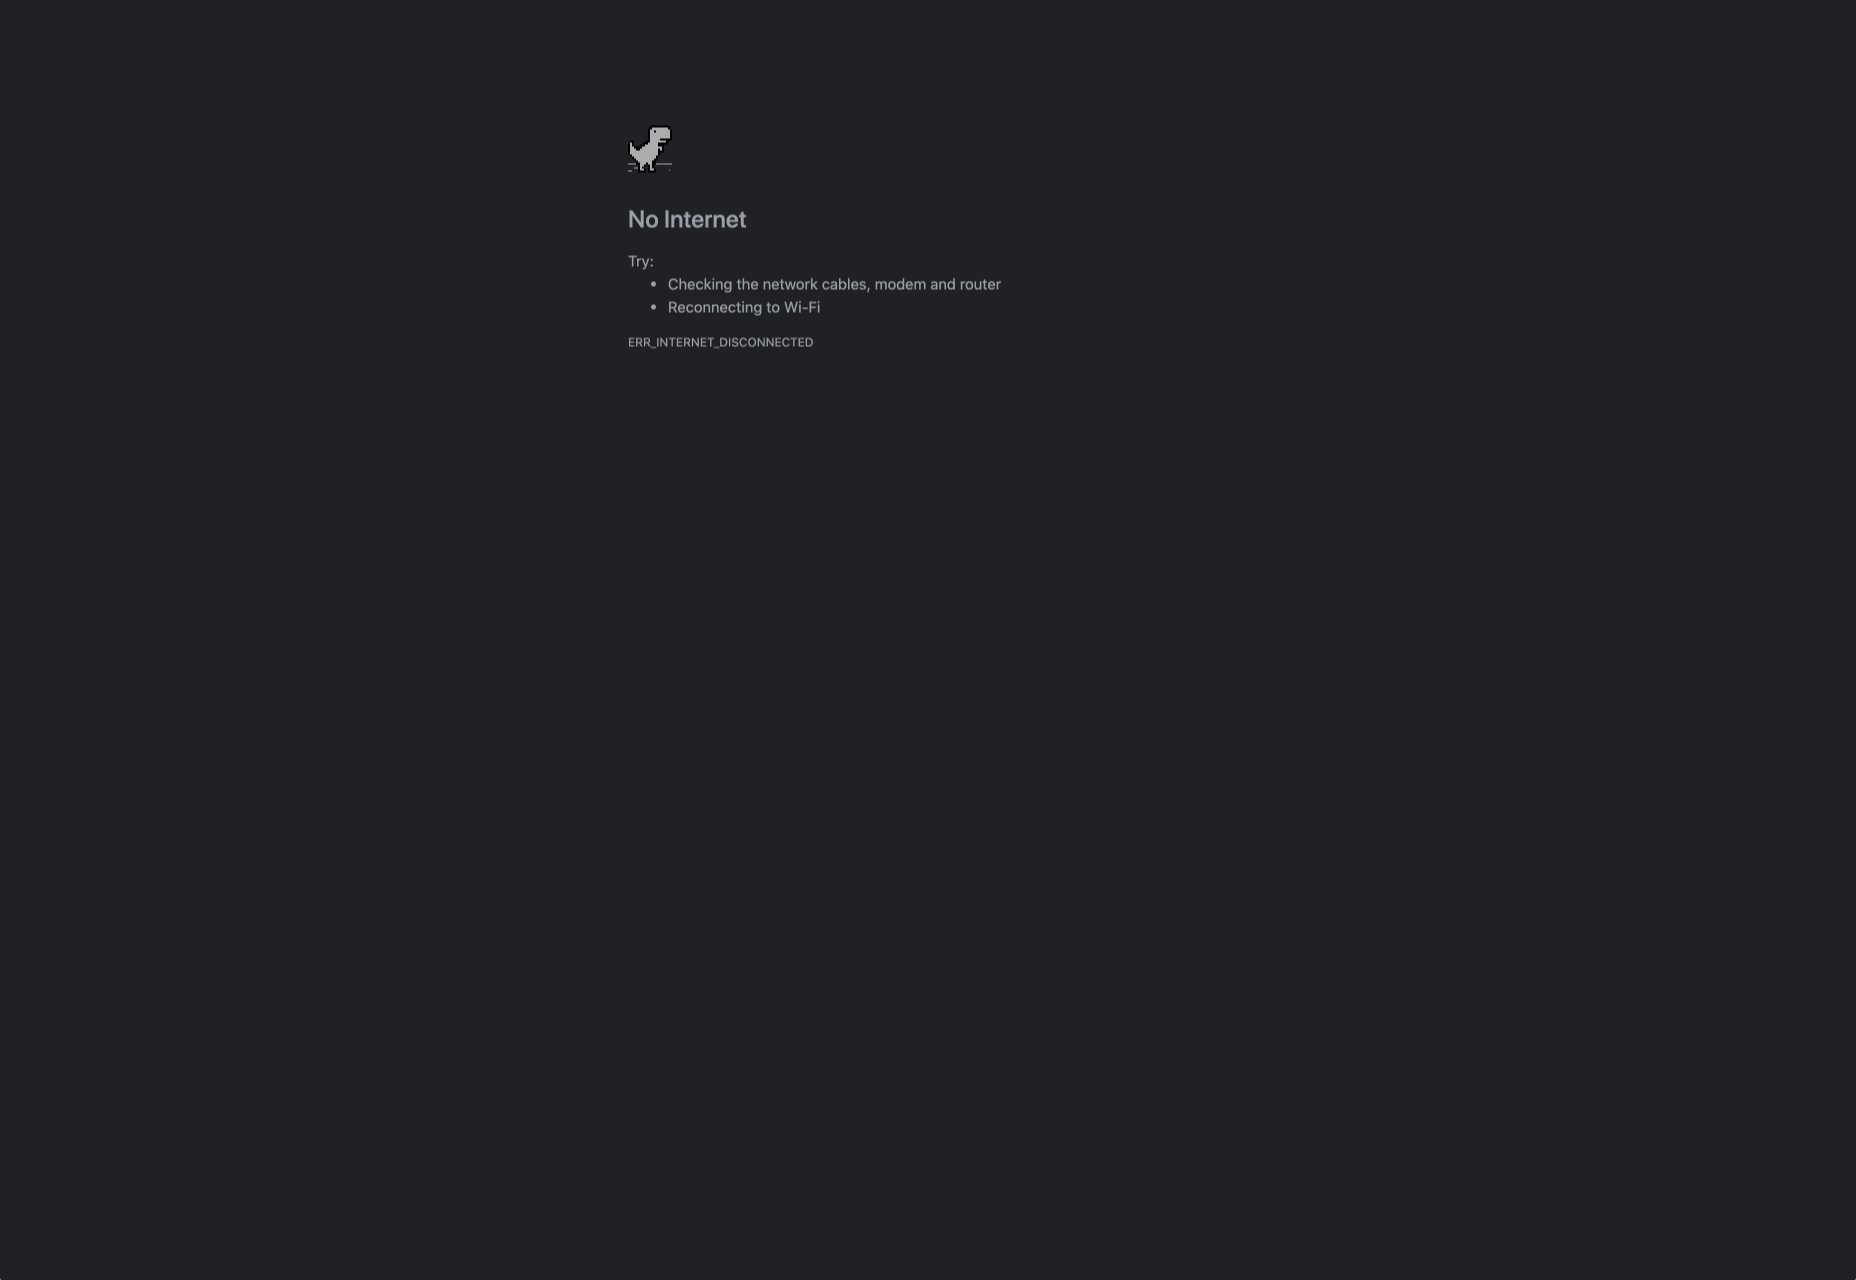
The right micro copy and interactions can instantly transform even a negative experience, like not being able to connect to the internet, into something emotionally engaging and positive.

When it comes to making an emotional connection between your customer and their end users, web designers need to remember that often the smallest details can make the biggest differences. Little extra features, like implementing a way for customers to have fun when their internet connections aren’t working, are the things that make websites more memorable from an emotional perspective.

Don’t Choose Emotion Over Functionality

Although emotional impact can be an essential aspect of a fantastic website design, it’s important not to get carried away. Adding too much to a website in the form of little extra graphics and unique interactions could end up weighing down a site and making it slow to load.

Although it’s valuable to think about how every interaction an end-user has with a website will make them feel, it’s important not to overlook the basics of web design when you’re at it. You’ll still need to ensure that the finishing design is easy to use, engaging, and attractive.

Pay attention to the basics of user experience design, and make sure that the extra emotional elements you’re infusing into your sites aren’t going to damage the experience that end-users get.

If you can get the blend right between emotional impact and functionality, then you could create the kind of website that audiences will never forget.

It pays to implement emotion into your design portfolio.

Source


Source de l’article sur Webdesignerdepot

You’ve named your business. You’ve sorted out the visual branding piece. Now, it’s time to get your business online so you can start making money.

In this post, we’re going to look at where your web design business needs to set up shop online and how to get it up and running quickly.

Step 1: Set Up Your Website

As a web designer or developer, having a website is non-negotiable.

Not only does a website provide prospective clients with all the information they need about you, it can help you automate many of those annoying tasks that get in the way of your actual paid work.

So, let’s start here:

Buy Your Domain Name

If you haven’t done so already, use the business name generator exercise to come up with a domain name. You then have a couple of options for buying it.

To Do:

  • Buy it from a domain name provider like GoDaddy or Domain.com;
  • Or buy it from your web hosting company;
  • Check the next step to see which option makes the most sense for you.

Choose a CMS

Use the same CMS as the one you’ll use to build your clients’ sites. That way, clients don’t wonder why you’d use something like Squarespace for your site, but then recommend WordPress for theirs, for example.

To Do:

  • If you use a self-hosted CMS (like WordPress, Drupal, or Joomla), hold on this until you purchase your web hosting;
  • If you use a hosted CMS (like Wix, Squarespace, or Shopify), you won’t need to do the next step. Instead, just sign up for your website builder and buy your domain name now.

Buy Your Web Hosting

If you’re wondering what the difference is between the various types of web hosting, read this post.

Basically, this is what you’re looking for:

  • A hosting company with a good reputation that provides expert and timely support;
  • An affordable starter plan — either shared or cloud hosting;
  • Server locations near you (at the very least, in the same country as you);
  • Top-notch security features at the server level as well as the physical hosting facility;
  • Caching and other speed optimizations built into the server and on-site equipment;
  • Compatibility with your CMS (look for one-click install, too).

Also, look for add-ons like SSL certificates, CDNs, and, of course, a free domain name.

To Do:

  • Sign up for the hosting plan you want along with your domain name and SSL certificate (this is a must for SEO);
  • Install your CMS from the control panel once you’re ready to go.

Build Your Website

Ultimately, you have two goals here:

  1. To build a website that convinces prospective clients that you’re the real deal;
  2. To build a website that prospects would want for themselves.

So, there’s no need to go crazy with outlandish features or futuristic animations and design. Keep it simple. Keep it neat. And give prospects an honest portrayal of who you are, and what you can do for them.

Design It

The first thing to do is take all that work you did to create your visual branding and use it to design your website.

If you’re building a WordPress website, consider starting with one of these multipurpose themes.

Build Out the Pages You Need

A theme will automatically create the pages you need (most of them, anyway). If you’re not sure which ones to start with, these are the ones your prospects are going to be looking for:

You may also want to add separate pages for Testimonials and Case Studies once you’ve accumulated enough of them to show off. For now, you can include samples of your work in the Portfolio page and testimonials on the Home page.

Fill in the Content

Even if writing isn’t your strong suit, that’s okay. So long as the content you write for your site is free of spelling and grammar errors, your prospective clients are going to focus on what you’re telling them, not on how proficient a writer you are.

That said, if you’re nervous about this piece of your website, here are some tips to help you out:

1. Be concise, it’s not just minimal design that goes over well with modern audiences. Minimal copy does, too.

2. Be transparent. Tell prospects what exactly they can expect when they work with you and why your web design services are going to be different from the competition.

3. Consumers don’t trust companies that use meaningless buzzwords and make empty claims. Instead, focus on writing about the real and very competitive skills you have. According to research from NIDO Student, these are the skills employers look for when hiring a designer:

4. Let your images tell some of the story for you. Just make sure you use (or create) images that will impress your audience.

5. After you’ve written your content, take a step back and tackle the structure and formatting from a designer’s POV.

6. Before you hit the “Publish” button, run your copy through Hemingway Editor to ensure your content is error-free.

Add the Right Features

When I talk about features, I’m referring to anything outside the main design and content on your website. These are usually sales and marketing tools like:

  • Chatbot/live chat
  • Contact forms
  • Pop-ups or notification banners
  • Discovery call scheduler
  • Cookies consent notice

Only add the features you absolutely need. In other words, the features that will automate the marketing and sales tasks you’d otherwise have to manage on your own.

Step 2: Optimize Your Website for Search Engines

Search engine optimization (SEO) is a very important part of the work you do to get your business online. Here’s why:

After you launch your business and website, the next thing you’re going to focus on is getting clients. This can take a lot of work as you pore over the following resources for referrals and leads:

  • Your existing contact list (i.e. family, friends, old employers, colleagues, etc.);
  • Freelance job boards;
  • Industry-specific job boards;
  • Social media posts, pages, and groups;
  • Google search results for “we’re hiring”;
  • And so on…

And when you’re not busy cold-emailing prospective clients or talking to them on the phone, you’re probably going to be working on your business’ processes. Running a business is very time-consuming.

So, what happens when you finally start working on website projects? It’s not like the client search ends there. It’s an ongoing thing. Which is why your website needs to be optimized for search.

Once your site gets indexed by Google and starts to generate authority, your pages will rank better and the increased visibility will start generating leads without you having to actively make the first move.

SEO is a huge topic, so I’m not going to cover it here. However, the links below will do a good job of guiding you towards your next steps.

To Do:

Step 3: Get Active on Social Media

Your website is going to play a lot of roles:

  • Digital business card;
  • Authority builder;
  • Marketing vehicle;
  • Sales platform;
  • Content marketer.

But there’s one very critical thing it can’t do and that’s directly converse with your audience and grow your network. This is why you need to spend time building out your social media once your website is good to go.

As for which social media platforms to use (as there are way too many), here are my thoughts:

Become an authority on Twitter.

Twitter is a good place to share daily thoughts and interesting content you’ve found on the web.

Get discovered on LinkedIn.

LinkedIn is useful because it’s another place to get noticed by potential employers, so make sure your relevant work experience and portfolio are up-to-date.

Connect with other creatives on Facebook.

It’s really hard to get noticed on Facebook unless you pay to play. Instead, use it to find groups that you can turn to for support, referrals, and brainstorming.

Share your work on Dribbble.

While you could use Instagram or Pinterest to show off your work, you might get more traction on a design-specific platform like Dribbble. Serve as inspiration for others and potentially get discovered by prospects looking for designers there.

Down the line you might decide to expand your business into recurring revenue opportunities like online courses. In that case, a platform like YouTube would be great. For now, focus your efforts on the main ones above.

To Do:

  • Create your social media accounts;
  • Brand them to match your website — both the visual component as well as the bio;
  • Start sharing content on a regular basis. You can automate sharing with a social media management tool, but remember to log in at least a couple times a week so you can engage with others, too;
  • Be careful not to commit these social media faux pas.

Wrap-Up

I realize this is a ton of information to throw at you. However, if you want to get your new business online and for it to succeed, you need to maximize the opportunities that are available to you.

I hope this three-part guide to starting a new business has been helpful. If you have any questions on the tips provided along the way, let me know in the comments.


Featured image via Pexels.

Source


Source de l’article sur Webdesignerdepot

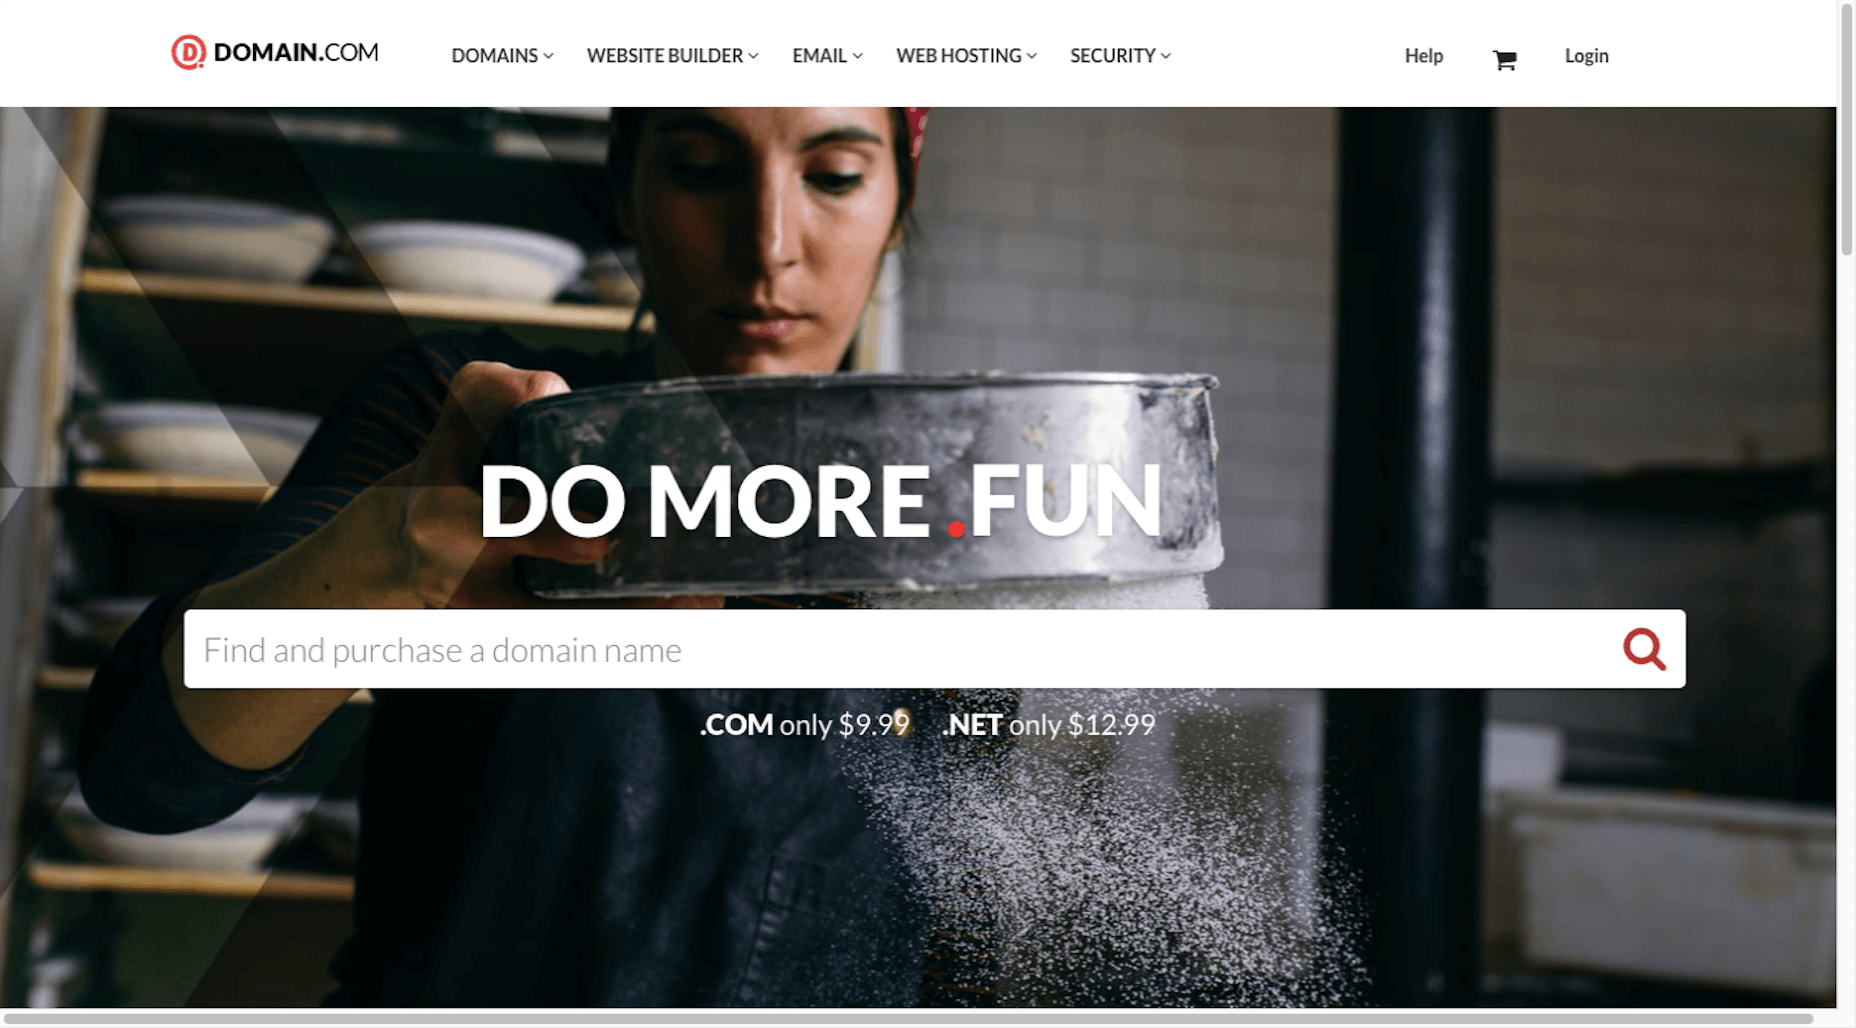
If you’re interested in a sneak peek of this year’s best Black Friday deals, stick around. You’ll find a few web designers’ favorites, including a stellar deal or two.

This year, more than a few of the popular retail outlets are shifting away from the traditional “camp out all night and bust open the doors when the store opens” shopping model. You might just prefer this less chaotic, ecommerce approach.

All of us are trying to adjust to what may eventually become a “new normal”. We may not like some aspects of this new normal, but there are bright spots as well.

More shoppers are likely going to shop online because of the coronavirus. That means you don’t have to fight the crowds while desperately attempting to socially distance. The shelves aren’t as apt to go bare, and shopping is easy, convenient, and safe.

1. Slider Revolution

You will find the Slider Revolution plugin incorporated in a host of WordPress theme tools and products. This premium plugin can in fact boast of more than 7 million users around the globe.

What you may not be aware of is that it is much more than just a WordPress slider. With it in your web design toolbox, you can in fact create just about anything you can imagine.

Expect to find:

  • A stunning selection of elements including sliders and carousels;
  • Attention-getting hero sections designed to make your home pages really stand out;
  • Single-page websites with layouts unlike anything you’ve seen before;
  • Modular structuring that allows you to rearrange and reuse sections however you choose and the ability to mix and match modules with any WordPress content;
  • Add-ons whose cutting edge features push the boundaries of web design possibilities.

There’s more of course. To celebrate Black Friday and Cyber Monday you can NOW get any Slider Revolution subscription plan or one-time payment at a 33% discount.

Just click on the banner and use the BLACKFRIDAY code at checkout.

2. Amelia

When done manually, booking and managing appointments can be tedious and subject to mistakes and errors. Amelia provides an automated booking process that is oh-so easy to work with and is error free; just what you need to help you acquire more happy customers.

Key features of Amelia’s fully responsive design include:

  • A dashboard system that enables you to track approved and pending appointments, booking changes, and revenue;
  • Zoom Integration, Google Calendar, and Outlook Calendar sync;
  • The ability to accept and easily manage recurring appointments that customers can schedule;
  • Front-end customer and employee appointment and event managing and backend appointment adding, editing, and rescheduling;
  • Email notifications for pending and approved appointments and events.

And much more that will save you loads of energy and a ton of time. Give Amelia a try, and if you like what you see (and you will), take advantage of the 30% Black Friday discount.

3. wpDataTables

wpDataTables 3.0, with its fresh, new look, gives you a host of different ways to generate attractive, customizable, and responsive tables and charts, and a host of different ways to present them.

  • Tables can be created from most data sources, the most common being MySQL query, PHP array, Google Spreadsheet, Excel files CSV files, and JSON and XML inputs;
  • A working knowledge of SQL is not required!
  • Addons include Gravity Forms, Formidable Forms, Report Builder, and Powerful Filter;
  • wpDataTables users can generate Tables and Charts quickly from massive amounts of data (saving hours of effort);
  • Tables and charts are customizable and maintainable (editable once placed in use);
  • Tables can be created manually if you wish.

Click on the banner now and take advantage of wpDataTables 30% Black Friday discount on all licenses and addons.

4. TheGem – Creative Multi-Purpose High-Performance WordPress Theme

In TheGem, the ultimate WordPress multipurpose toolbox, you will find:

  • A rich selection of 400+ premium pre-built multi-page and one-page websites, all available for Elementor and WPBakery page builders;
  • The ability to mix and match any of this demos, layouts and page sections to create your own unique look;
  • Extended WooCommerce layouts & tools for making online shops, which convert better;
  • TheGem Blocks: an ultimate tool for building webpages at the speed of light.

And much more. Just click on the banner and check this 5-star product out.

5. Mobirise Website Builder

Creating a Google-friendly can take time, unless you have Mobirise at your fingertips, in which case you have a number of helpful tools to speed things up.

  • No coding, it’s all drag and drop;
  • 3,600+ website templates are at your disposal plus sliders, popups, forms, and more;
  • Many eCommerce features, including a shopping cart;
  • Latest Google Amp and Bootstrap4;
  • You can download Mobirise for free.

And, because it’s Black Friday, everything is yours at a 94% discount!

6. Get Illustrations

Get Illustrations offers royalty free and landing page Illustrations ready to drag and drop into your web design. You’ll have access to:

  • An extensive library of 4000+ illustrations with more added every week;
  • A wealth of design formats, including AI, PNG, SVG, Figma, Adobe XD, and Sketch;
  • Free updates and new illustrations weekly (included in the bundle).

Click on the banner and use the Coupon Code BLACKDEAL for your 30% discount.

7. XStore | Responsive Multi-Purpose WooCommerce WordPress Theme

For anyone planning on creating an eCommerce store, the XStore name says it all. Key features you’ll find in this powerful and flexible WooCommerce theme include:

  • More than 95 good-to-go-shops plus a full AJAX shop to get you started;
  • 300+ pre-defined shop/page sections, a header builder, and a single product page builder;
  • Elementor, WPBakery and $510+ worth of premium plugins.

Click on the banner and sign up to become one of XStore’s 55,000+ happy customers.

8. Kalium – Creative Theme For Multiple Uses

Kalium is an easy-to-use, easily maintainable multipurpose theme for WordPress users that is always updated to use the latest WordPress standards.

  • Kalium provides its users with a host of professionally-designed pre-built demos and elements;
  • Many plugins such as: Slider Revolution, WPBakery, Elementor, Layer Slider, Advanced Custom Fields PRO, Product Filter for WooCommerce, Product Size Guide,WooCommerce and other premium plugins are included.

Kalium is responsive, GDPR compliant, and gives you full eCommerce and top-quality customer support. It has a 5-star rating after 36k sales on ThemeForest – seriously impressive!

***** 

If you hit the retail stores remember to social distance.

Or, if you would rather take a brief break from the demands of Covid-19, take advantage of one or more of the above ecommerce sales. As you can see, there are some excellent ones!


[– This is a sponsored post –]

Source


Source de l’article sur Webdesignerdepot

Since there are so many CMS plugins out there, it can be overwhelming to choose the best ones for your website. We’ve done the research for you; this list contains the top new CMS plugins for November 2020. You’ll find useful plugins for WordPress, Craft, Shopify, and Joomla.

Let’s get started…

WordPress

404 Page Editor

404 Page Editor is a simple WordPress plugin that helps you add custom text to the default 404 page on your website. The plugin comes with seasonal and industry-related 404 templates. One useful feature of the plugin is that it backups your current 404 page before changing it. So you can restore the backup page anytime you choose. The plugin duplicates your current 404.php page to wp-content/uploads/404-page-editor/ so you can easily find it. You can also change the text on the plugin to fit your local dialect. 

UnusedCSS Power-Up

Most WordPress themes and plugins load their CSS in the wrong areas of your website. This can slow down your site. A slow website will reduce user experience and lead to increased bounce rates.

UnusedCSS will help reduce the size of your website’s CSS files by up to 95%. The best part is that the plugin works automatically. It will remove any unused CSS when visitors view any page on your website. UnusedCSS will automatically reduce your website’s load times by reducing your CSS files and page size. The plugin also optimizes the performance of other WordPress plugins and extensions. UnusedCSS also works with WooCommerce themes and plugins.

Simple Redirects

Simple Redirects is a WordPress plugin that helps you to automatically redirect requests to another page on your site or any other place on the web. The plugin allows you to easily redirect users from your old web pages to new pages using 301 or 302 redirects. You don’t have to worry about losing backlinks or page rank. Any incoming links to the old web page will be automatically passed along to the new page. The page rank on the old page is also transferred to the new page. The plugin is useful when migrating a WordPress site when don’t want to retain the URL structure. 

HTML Validation

HTML Validation plugin helps you identify any HTML validation errors on your website. The plugin works automatically in the background of your website and will send you regular reports. There is a progress bar on the report screen to show you the progress of the scan. The plugin uses WordPress Cron to scan the content of your website. There is also an option for the plugin to automatically fix any HTML validation issues on your website. You can also choose to fix the issues manually. 

Just Highlight

Just Highlight is a simple WordPress plugin that helps you highlight text in your posts or pages. You can use this plugin to highlight any portion of the page you want to draw the reader’s attention to. You can highlight the background of the page and also add animation to the highlighted text. In the WordPress admin area, you can change the speed and color of the animation. The plugin is compatible with Gutenberg, and the WordPress classic editor. 

DeviantArt Embed

DeviantArt Embed is a simple plugin that helps you embed any work from Deviant Art into a post. The plugin provides a block for the WordPress block editor so you can easily embed the image. It uses a DeviantArt oEmbed API to pull the images and their descriptions, and creates an embedded image. 

Static Optimizer

Static Optimizer is a static file optimization plugin that serves and optimizes static files on your website. The plugin will help you increase your website speed by automatically compressing your static files. It is easy to set up, you just need an API key to get started. Other useful features that the plugin offers include automatic JS and CSS minification, automatic image optimization, and processing of responsive images. You don’t have to worry about losing your files if their server is down. The plugin automatically backs up your files and will load your original files when their servers are down (either because of an upgrade, maintenance, or outage).  By default, only images are compressed when you activate the plugin; you can also choose to optimize fonts, CSS, and JS files. 

RankBear

RankBear is a keyword rank tracker plugin that helps you analyze your SEO efforts. With RankBear, you can track the keywords for each of the posts and pages on your site. While the plugin has a paid plan, you can track up to five keywords for free. On the free plan, you will receive weekly reports on each keyword you are tracking. You can search for the rank and volume of a keyword in every location supported by the Google search engine. RankBear is a lightweight software-as-a-service plugin hosted by Amazon Cloud Services. The plugin also offers the option to download the keyword reports to CSV. 

Table of Contents Block

Table of Contents Block is a plugin that allows you to easily create a Table of Contents for your WordPress posts. The plugin is lightweight and will automatically add a Table of Content in your website’s posts and pages. You can select the heading tags you want to add to the Table of Content. It also has a dedicated support team to assist you. The plugin works fine with all standard WordPress themes. 

Markease For WooCommerce

Markeaze is an all-in-one communication plugin that allows you to add live chat to your online stores. The plugin will help you improve your customer service by decreasing your response times. With the plugin, you can collect your visitor’s contact information via a widget. This feature is useful in building a subscriber database. You can also use the plugin to track customer behavior on your site, inform customers about new products, help customers with active orders, and collect customer feedback. You can also use the auto-reply function to answer commonly asked questions. 

Craft CMS

Image Toolbox

Image Toolbox is a Craft CMS plugin that offers image-related tools for your templates. The plugin will automatically create a WebP variant of the images you upload. It also has a fallback for browsers that do not support WebP images. Other useful features the plugin offers include automatic creation of placeholder images and generation of responsive images with multiple variants. The plugin also supports Imager-X (or old Imager). 

Element Panel

Element Panel plugin allows you to add elements and an eager-loading panel to the debug toolbar. This feature will help you benchmark your templates in Craft CMS. For elements, the panel has a dashboard that shows how many elements are populated. It also shows how many elements are duplicates. The plugin also shows you how many eager-loading elements are detected. Duplicate elements are grouped by field name. 

Shopify 

VStore Shoppable Videos

VStore Shoppable Videos is a Shopify plugin that allows your customers to shop directly from your videos. The plugin allows you to embed your products into any video. Since videos have a high engagement rate, this plugin will significantly improve your store’s conversion rates. 

ProofMotion Video Testimonials

ProofMotion Video Testimonials plugin helps you to easily collect video testimonials. The plugin sends an automated email or SMS requests to customers asking for their satisfaction feedback after making a purchase. The responses are analyzed to determine whether the customer had a negative or positive experience. Customers that offer negative feedback are sent to customer care to help them with the problem they encountered. Happy customers are prompted to make video testimonials of their positive shopping experience. ProofMotion guides the customer through the interview so they can give the best testimonial. They also offer an on-site widget so you can easily share your testimonials. 

Real ID

Real ID is a Shopify plugin that allows you to verify customers’ real identity using a photo ID and facial biometrics. The plugin is perfect for orders that have an age restriction, verifying flagged fraud goods, and selling expensive goods. Real ID will help you identify whether a government-issued-ID is fake during fulfilment. All the customer needs to do is take a selfie on their phone. This way, even if a customer has access to a stolen physical ID, they won’t still be able to make any purchase. The plugin can verify documents such as passports, visas, national IDs, driver licenses, and more. Real ID will help you handle GDPR compliance. The plugin is available in hundreds of countries around the world. 

Joomla

Accessibility

Accessibility is a Joomla plugin that allows your website visitors to easily access your website content. The plugin will remove any barrier between the visitor and your Joomla site. There is no coding required and you can customize the plugin directly from the module manager. The plugin has a useful feature called Dyslexic Readability; this feature allows your visitors to set the entire document font to a dyslexic-friendly font. Visitors can also grayscale the page, resize the fonts, and resize the word space. From the backend module, you can add any custom CSS and JS. The plugin is also available in 12 different languages. 

Reading Time

Reading Time is a simple plugin that will help you easily show the reading time of your Joomla articles. The plugin is easy to set up and does not require any coding. You can customize every parameter, including the text, in minutes. You can also choose to exclude categories, articles, and menu items. Reading Time also allows you to easily add custom CSS code from the plugin parameters. 


Featured image via Pexels.

Source


Source de l’article sur Webdesignerdepot

In this article, we will see how to implement a data pipeline from an application to Mongo DB database and from there into an Elastic Search keeping the same document ID using Kafka connect in a Microservice Architecture. In recent days and years, all the microservices architectures are asynchronous in nature and are very loosely coupled. At the same time, the prime approach to have minimum code (minimum maintenance and cost), no batch systems (real-time data), and promising performance without data loss fear. Keeping all the features in mind Kafka and Kafka connect is the best solution so far to integrate different sources and sinks in one architecture to have very robust and reliable results.

We will Depp drive and implement such a solution using Debezium Kafka connect to achieve a very robust pipeline of data from one application into Mongo and then into Elastic cluster.

Source de l’article sur DZONE