Articles

The underlying theme of this month’s collection of new tools and resources is development. Almost every tool here makes dev a little easier, quicker, or plain fun. There are a few great tutorials in the mix to help you get into the spirit of trying new things and techniques.

Here’s what is new for designers this month…

Cryptofonts

Cryptofonts is a huge open-source library of icons that represent cryptocurrencies. There are more than 1,500 CSS and SVG elements in the collection. Cryptofonts includes all scalable vector icons that you can customize by size, color, shadow, or practically anything else. They work with Sketch, Photoshop, Illustrator, Adobe XD, Figma, and Invision Studio, and there’s no JavaScript.


Reasonable Colors

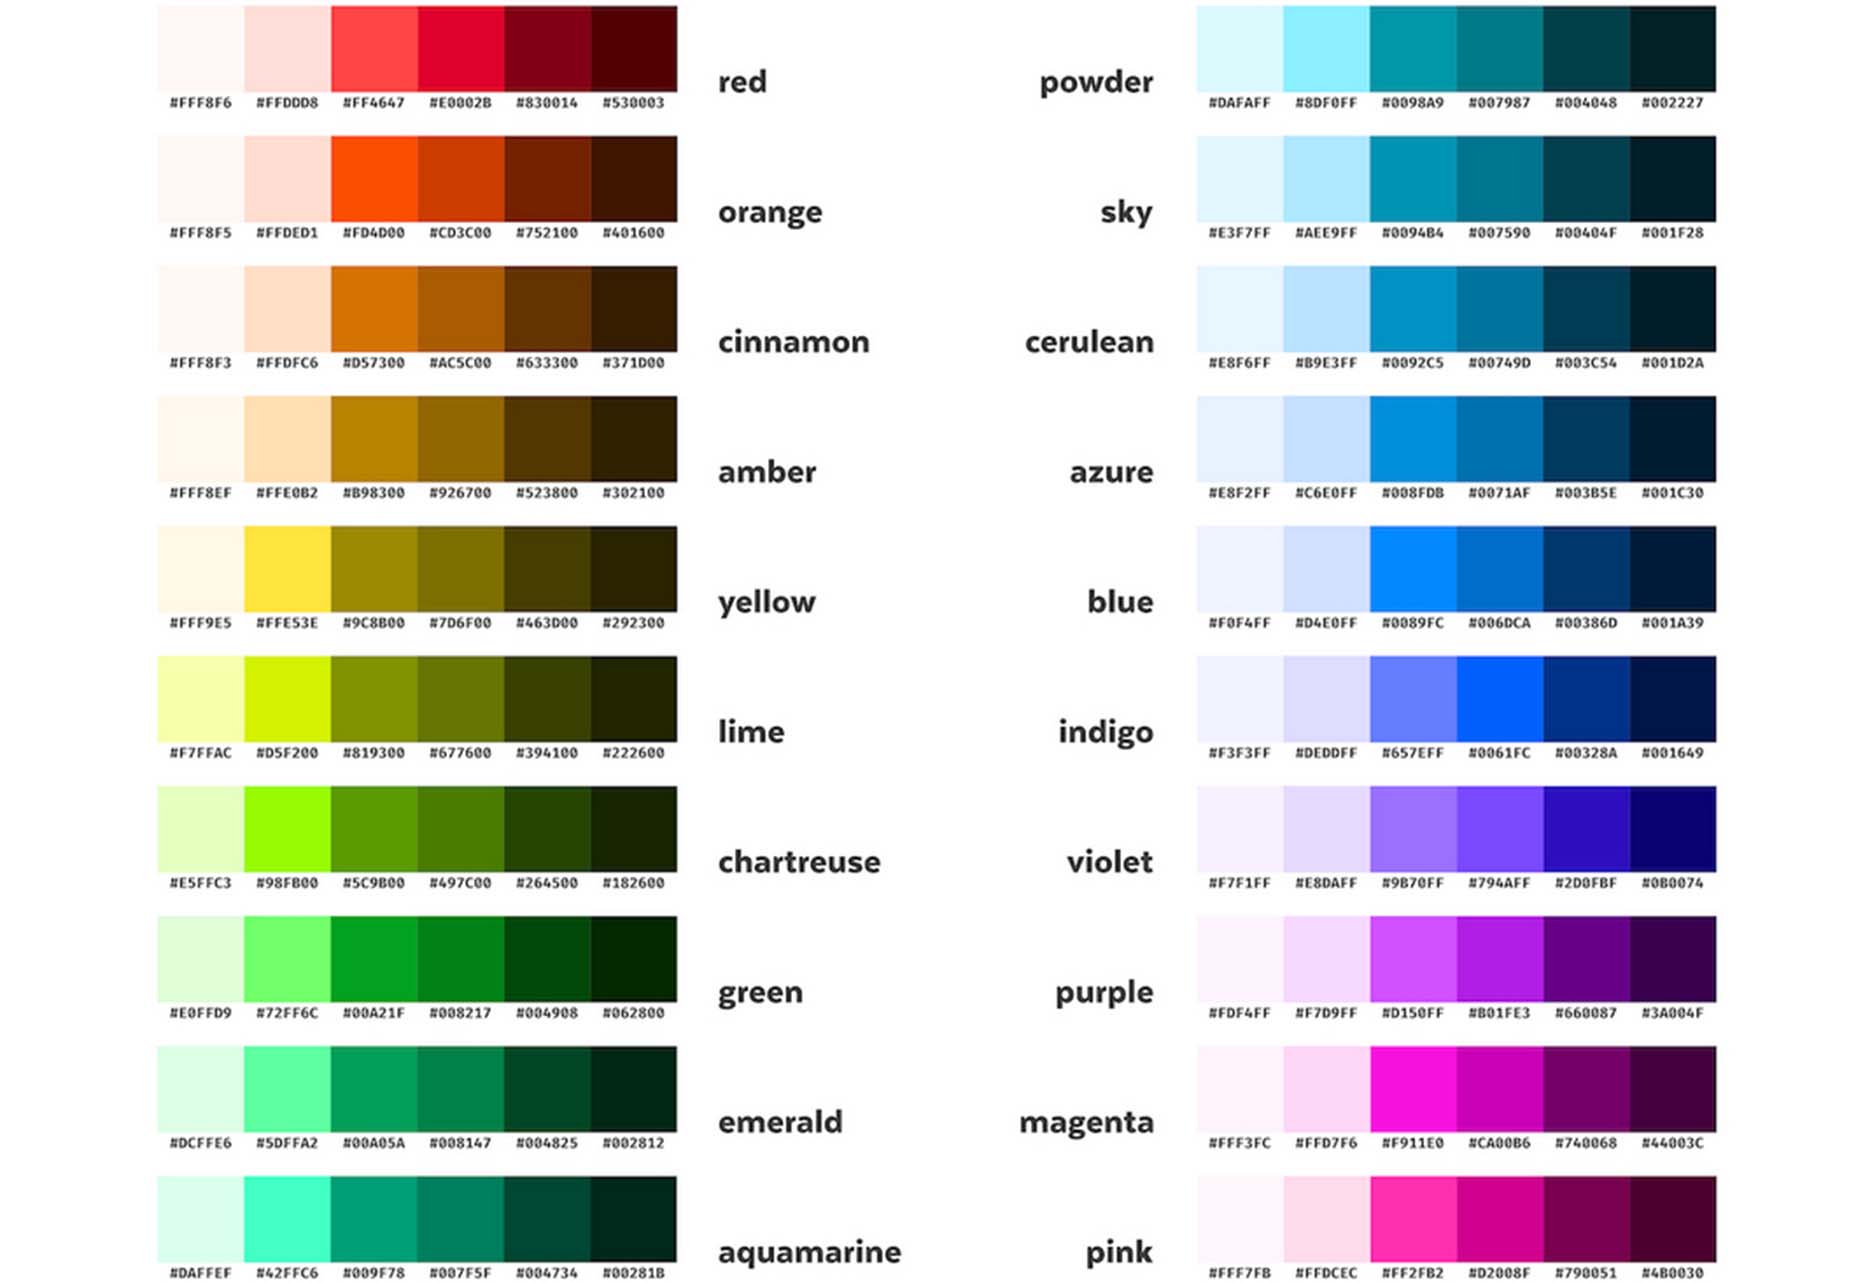
Reasonable Colors is an open-source color system for building accessible and beautiful color palettes. Colors are built using a coded chart. Each color comes in six numbered shades. The difference between their shade numbers can infer the contrast between any two shades. The differences correspond to WCAG contrast ratios to help you create an accessible palette. This is a smart project and a valuable tool if you work on projects where color contrast and accessibility are essential (which is all of them).


Chalk.ist

Chalk.ist is a fun tool to make your code snippets look amazing. Add your code (there’s a vast language selector), pick some colors and backgrounds, and then download it as a shareable image. Your code has never looked so beautiful!


WeekToDo

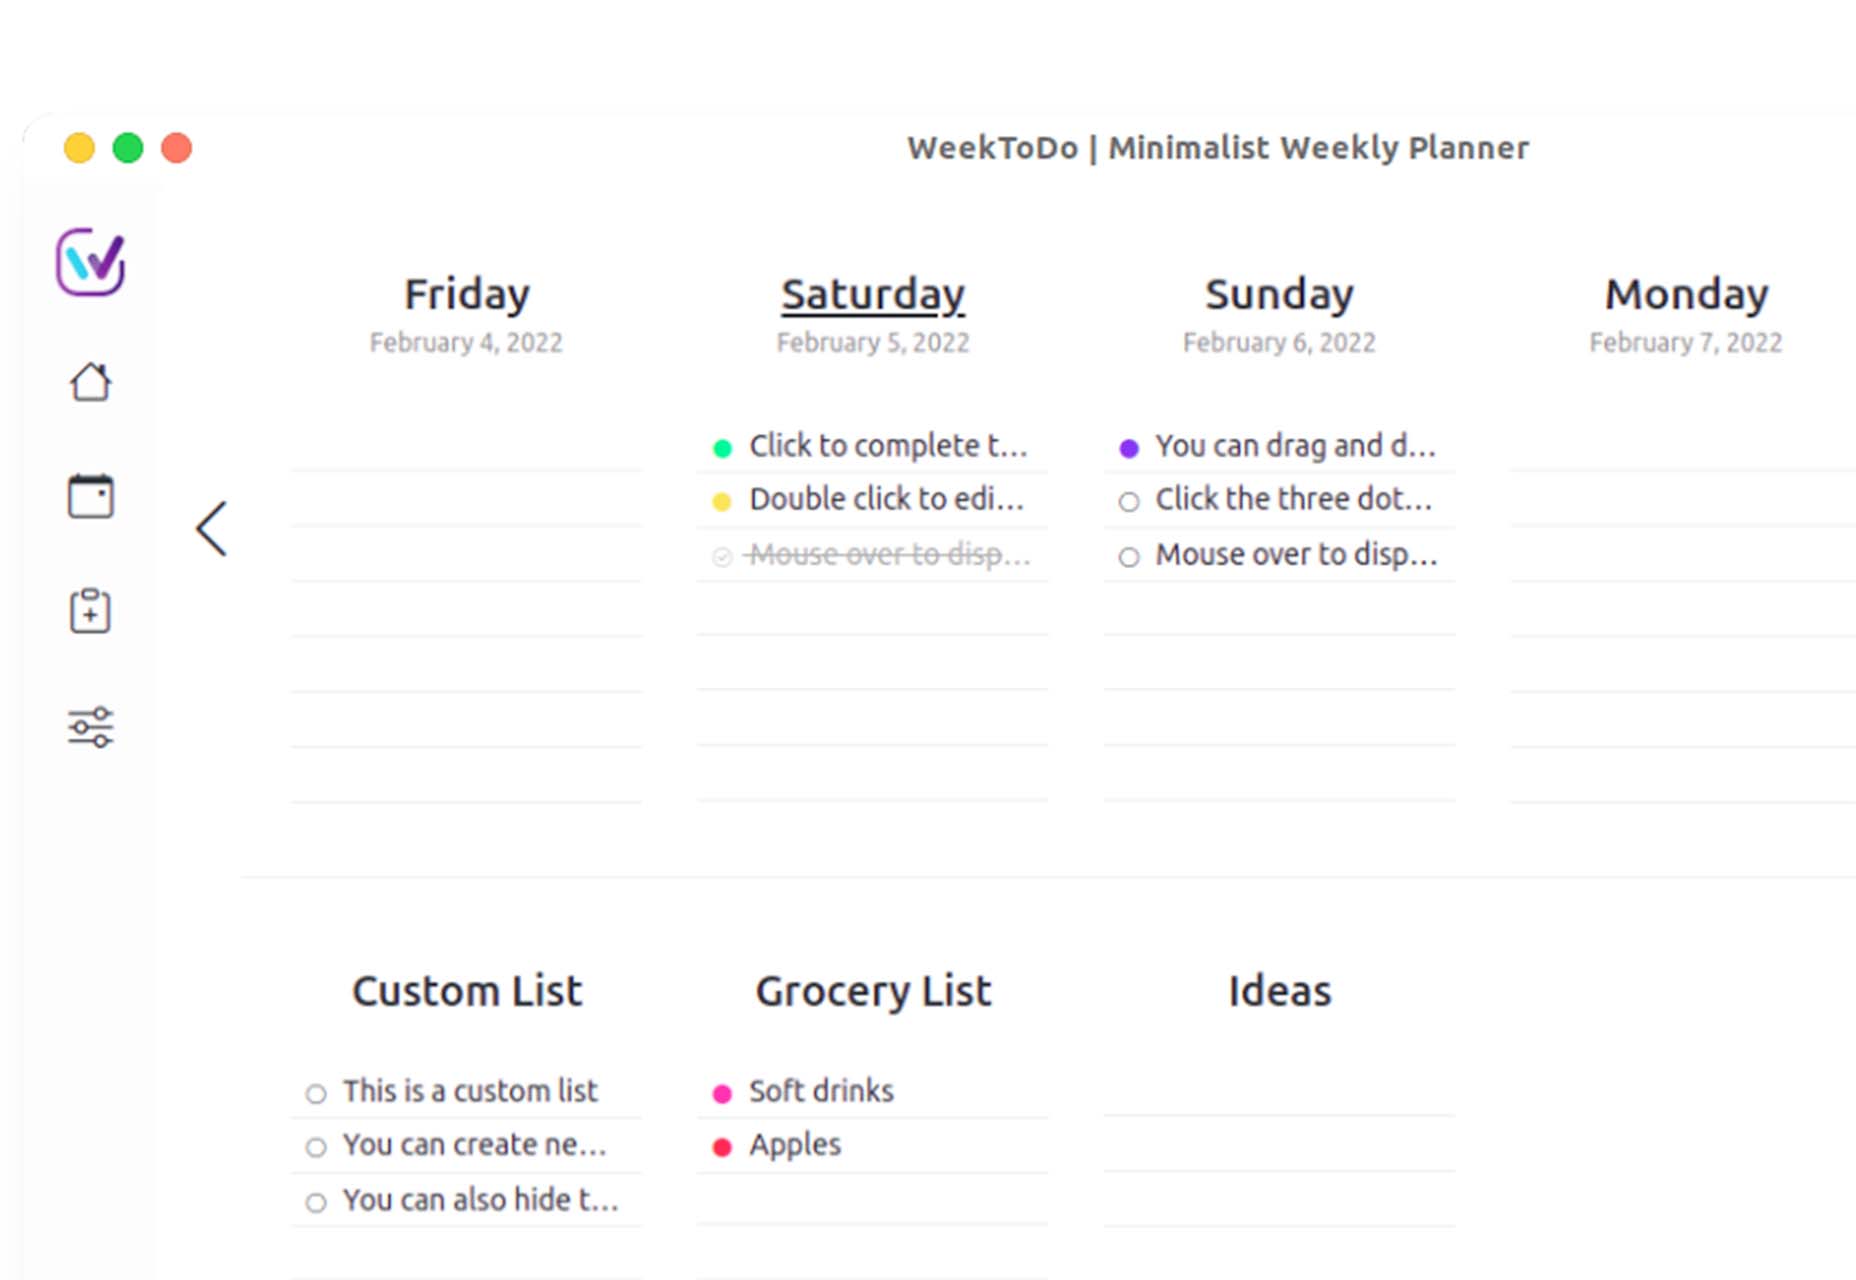
WeekToDo is a free minimalist weekly planner. Improve productivity by defining and managing your week and life easily and intuitively. Plus, this tool is focused on privacy with data that is stored on your computer (in your web browser or the application). The only person who has access to it is you.


Bio.Link

Bio.Link is a tool that collects all your links – from social media to blog posts to any other kind of link you want to share. It’s free to use, includes 15 design themes, visitor stats, and is super fast.


Spacers

Spacers are a set of three-dimensional space characters that you can use in projects. Characters are in multiple poses and ultra high-def formats to play with.

11ty

11ty is a super simple, static website generator. Try it for small projects and read the documentation to see everything you can do with this tool.

Scrollex

Scrollex is a react library that lets you build beautiful scroll experiences using minimal code. You can create scroll animations in all kinds of combinations – vertical, horizontal, almost anything you want to try. The documentation is fun and easy to understand if you’re going to see how it works.

GetCam

GetCam is an app that lets you turn your smartphone into a webcam for your computer. It works with any iPhone and a Mac or Windows computer. It works with most video conference and streaming tools as well as browser-based apps.

Flatfile

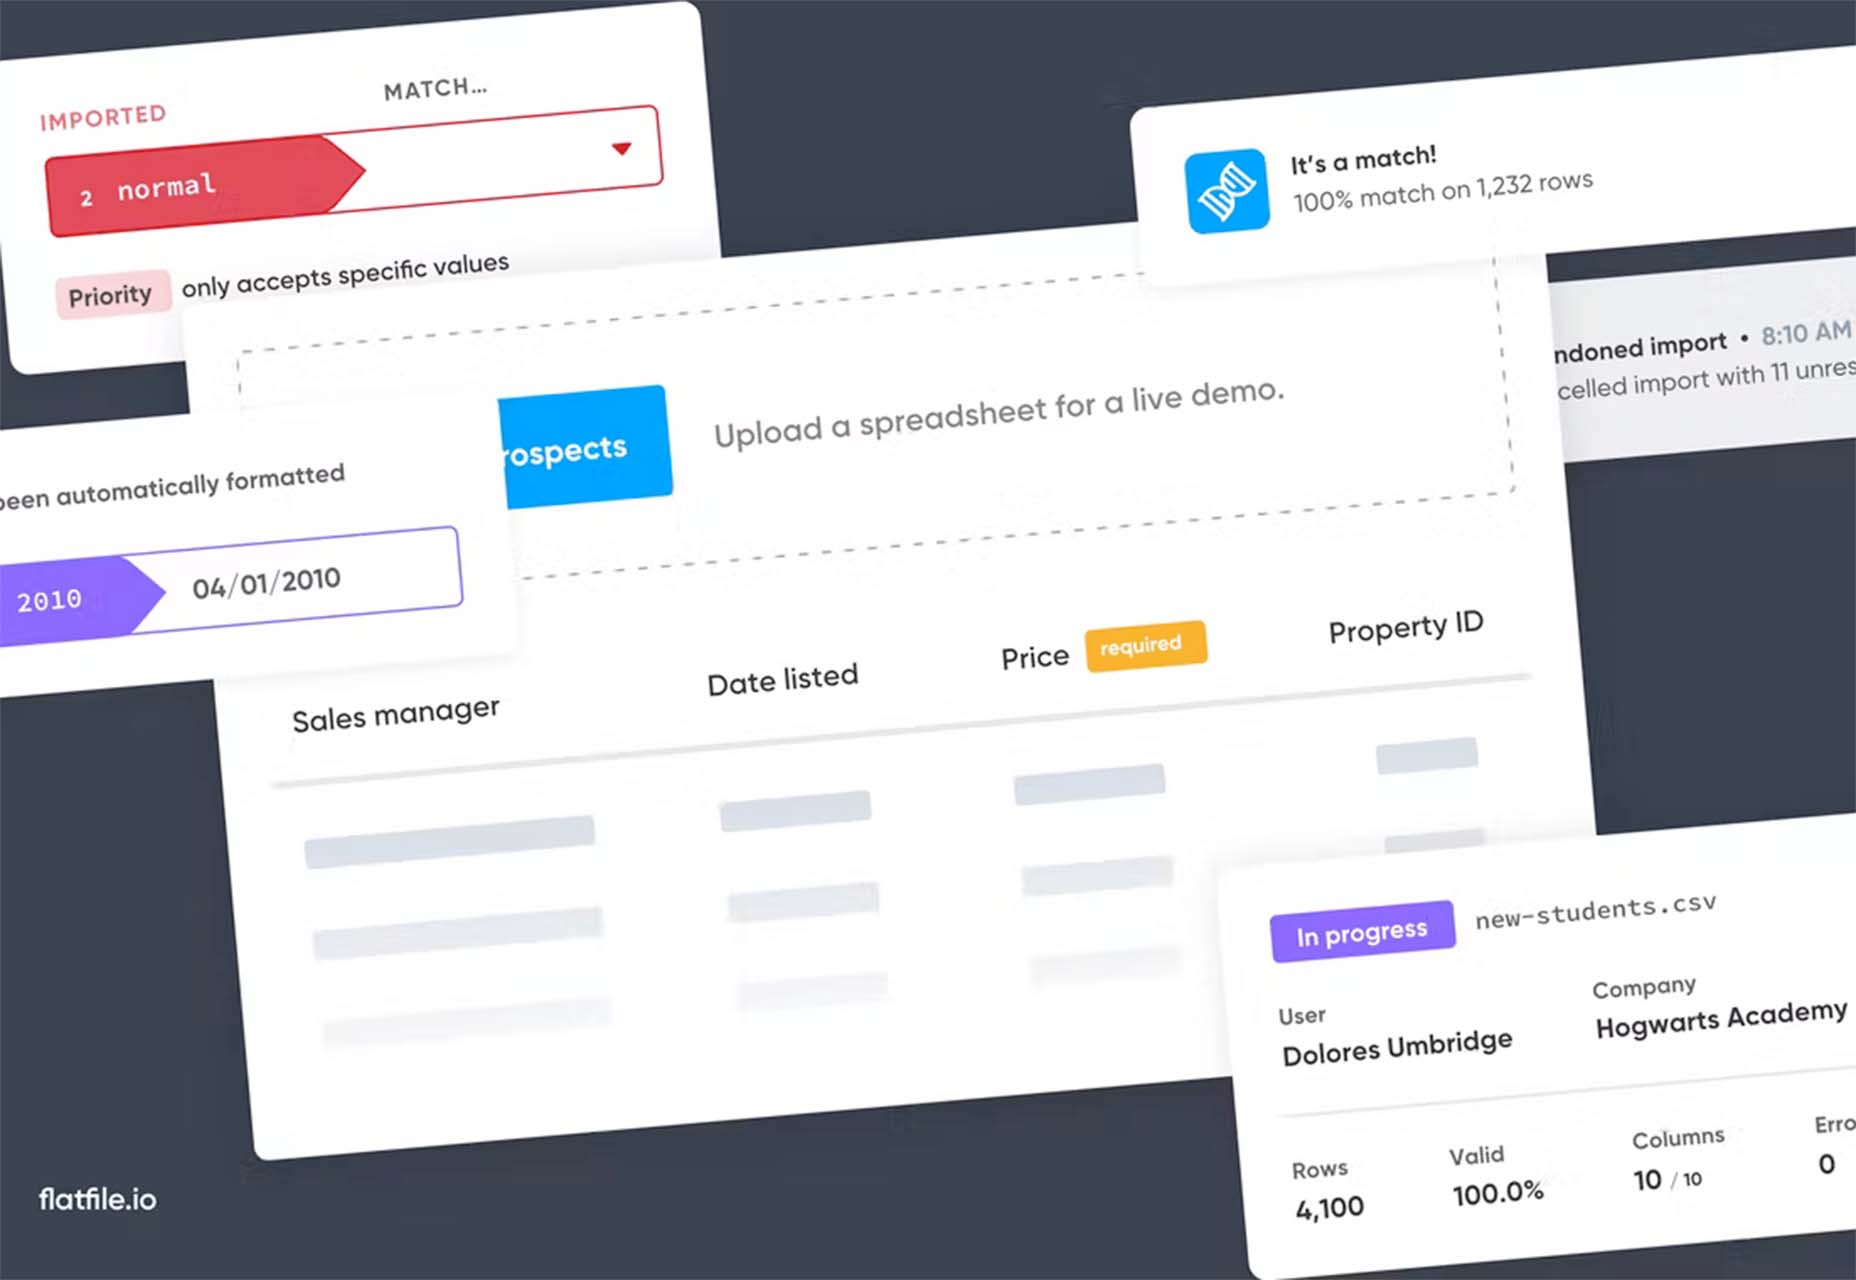
Flatfile is a data onboarding platform that intuitively makes sense of the jumbled data customers import and transforms it into the format you rely on. You won’t have any more messy spreadsheets or have to build a custom tool.

Loaders

Loaders is a collection of free loaders and spinners for web projects. They are built with HTML, CSS, and SVG and are available for React and copypasta.

Lexical

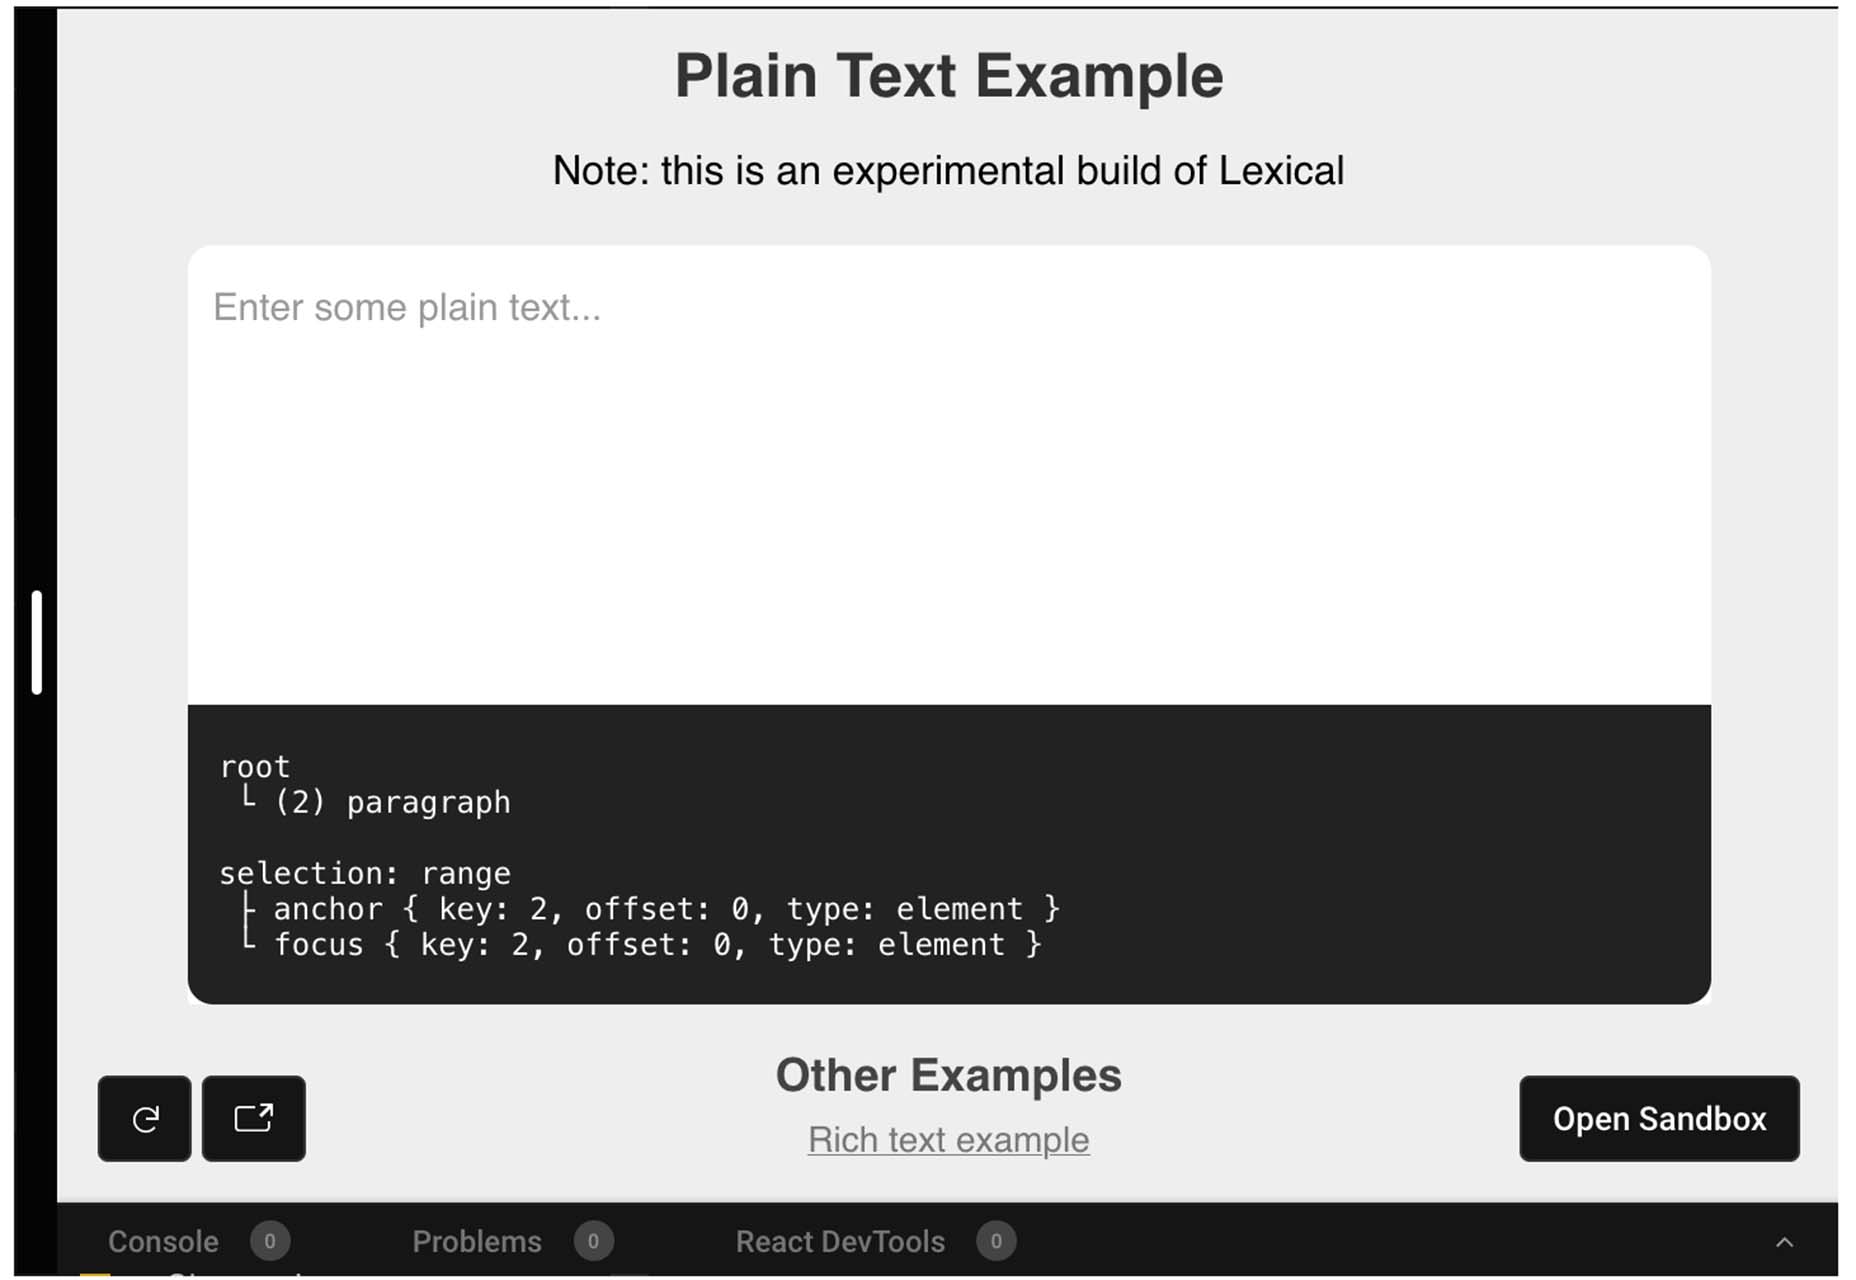
Lexical is an extensible JavaScript web text-editor framework emphasizing reliability, accessibility, and performance. It’s made for developers, so you can easily prototype and build features with confidence. Combined with a highly extensible architecture, Lexical allows developers to create unique text editing experiences that scale in size and functionality.

Picture Perfect Images with the Modern img Element

This tutorial is a primer on why the img element is such a powerful tool in your development box. Images are so prominent that they are part of the most important content in over 70% of pages on both mobile and desktop, according to the largest contentful paint metric. This post takes you through how to better optimize and improve core web vitals simultaneously.

Building a Combined CSS-Aspect-Ratio-Grid

Building a Combined CSS-Aspect-Ratio-Grid provides two solutions for creating the title effect. You can define an aspect ratio for the row or use Flexbox with a little flex grow magic. Learn how to try it both ways.

QIndR

QIndR is a QR code generator made for events and appointments. The form is designed to capture your event information so you can quickly build and use a QR code for listings and even allow users to add it to their calendars! It’s super quick and easy to use.

On-Scroll Text Repetition Animation

On-Scroll Text Repetition Animation shows you how to create an on-scroll animation that shows repeated fragments of a big text element. This is a fun and easy lesson that you can use right away.

Eight Colors

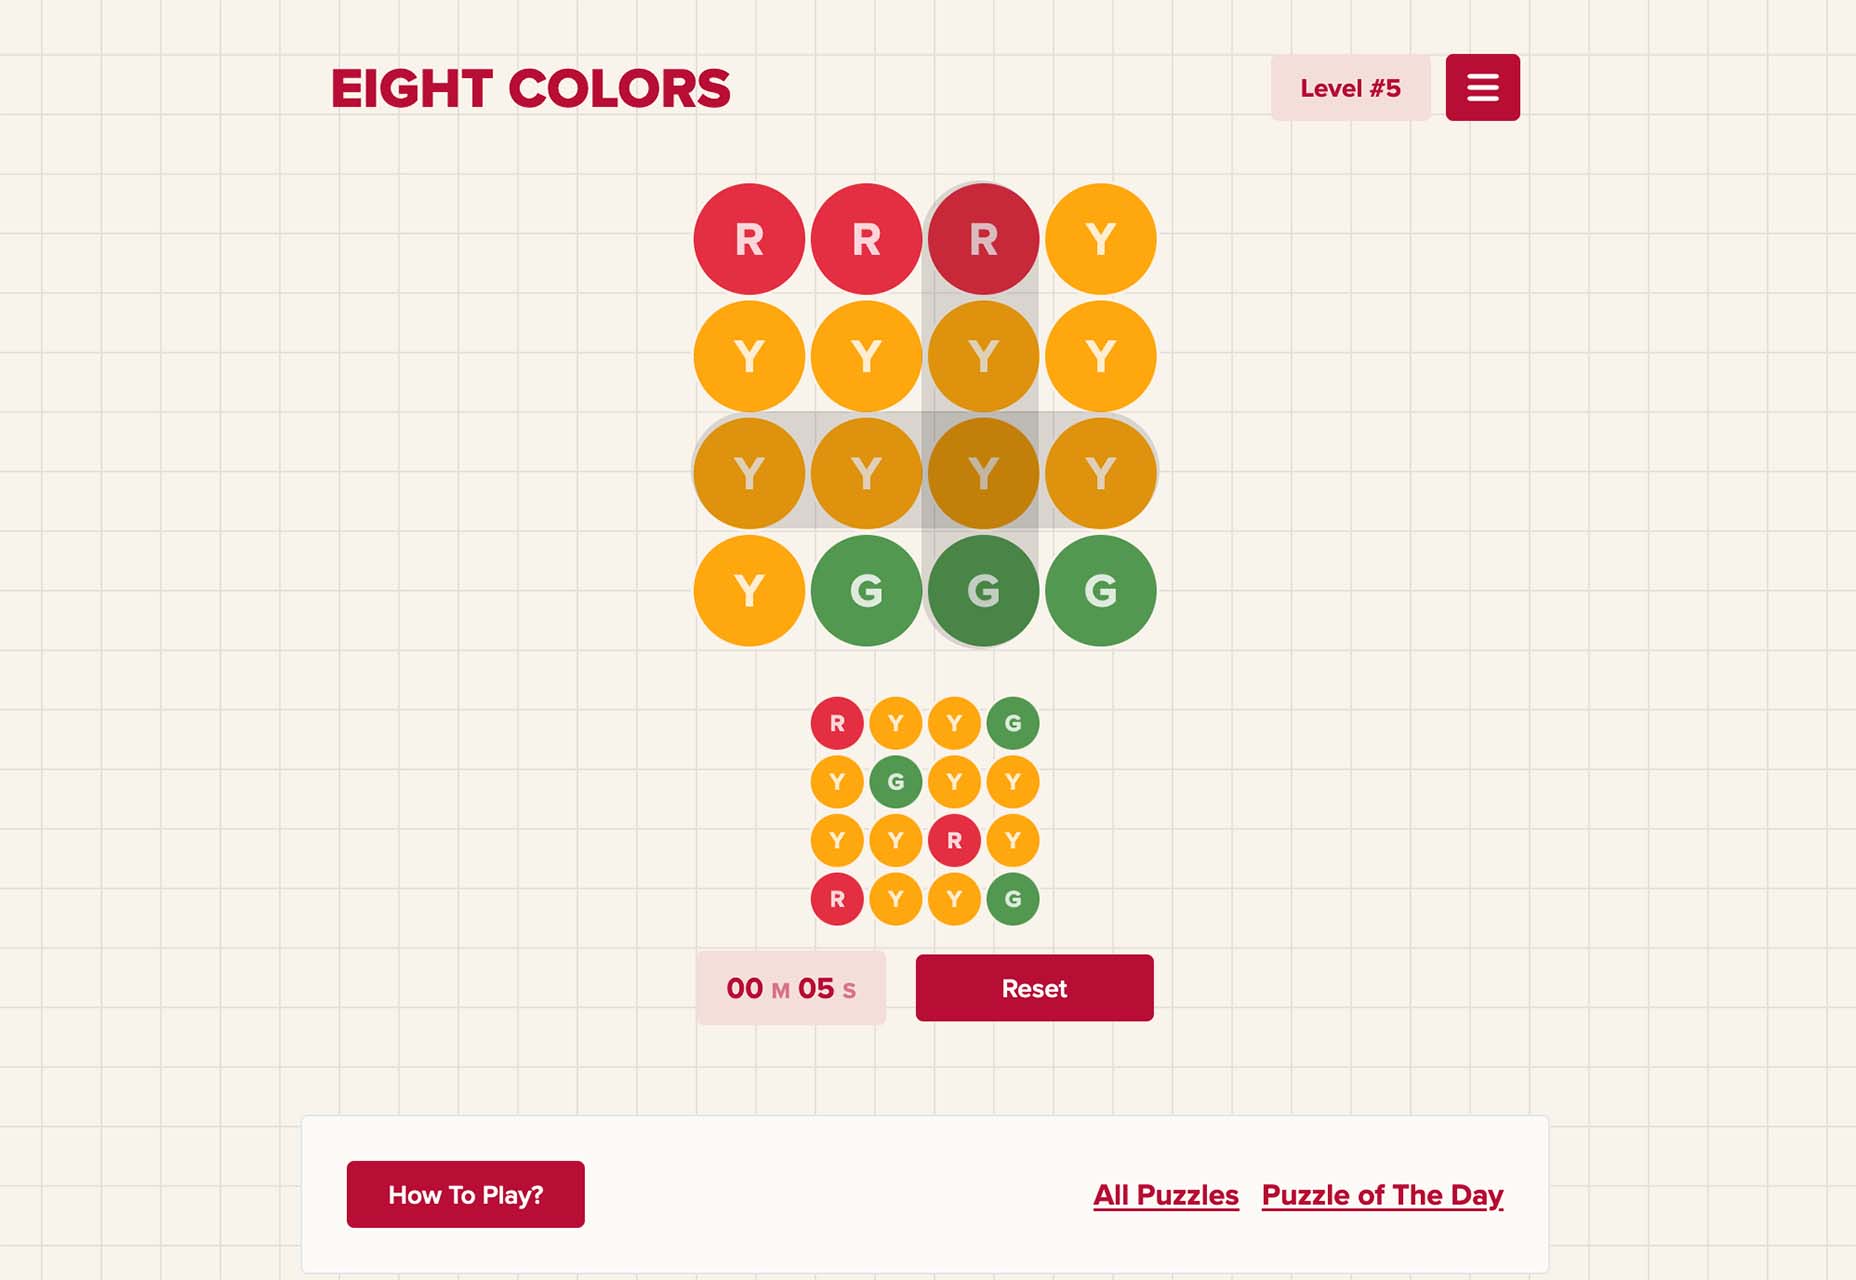
Eight Colors won’t do anything for your productivity, but it is a fun game that you may not be able to stop playing. It is a block-shifting game with the goal to shift circular blocks to reach the target given.

Creative Vintage

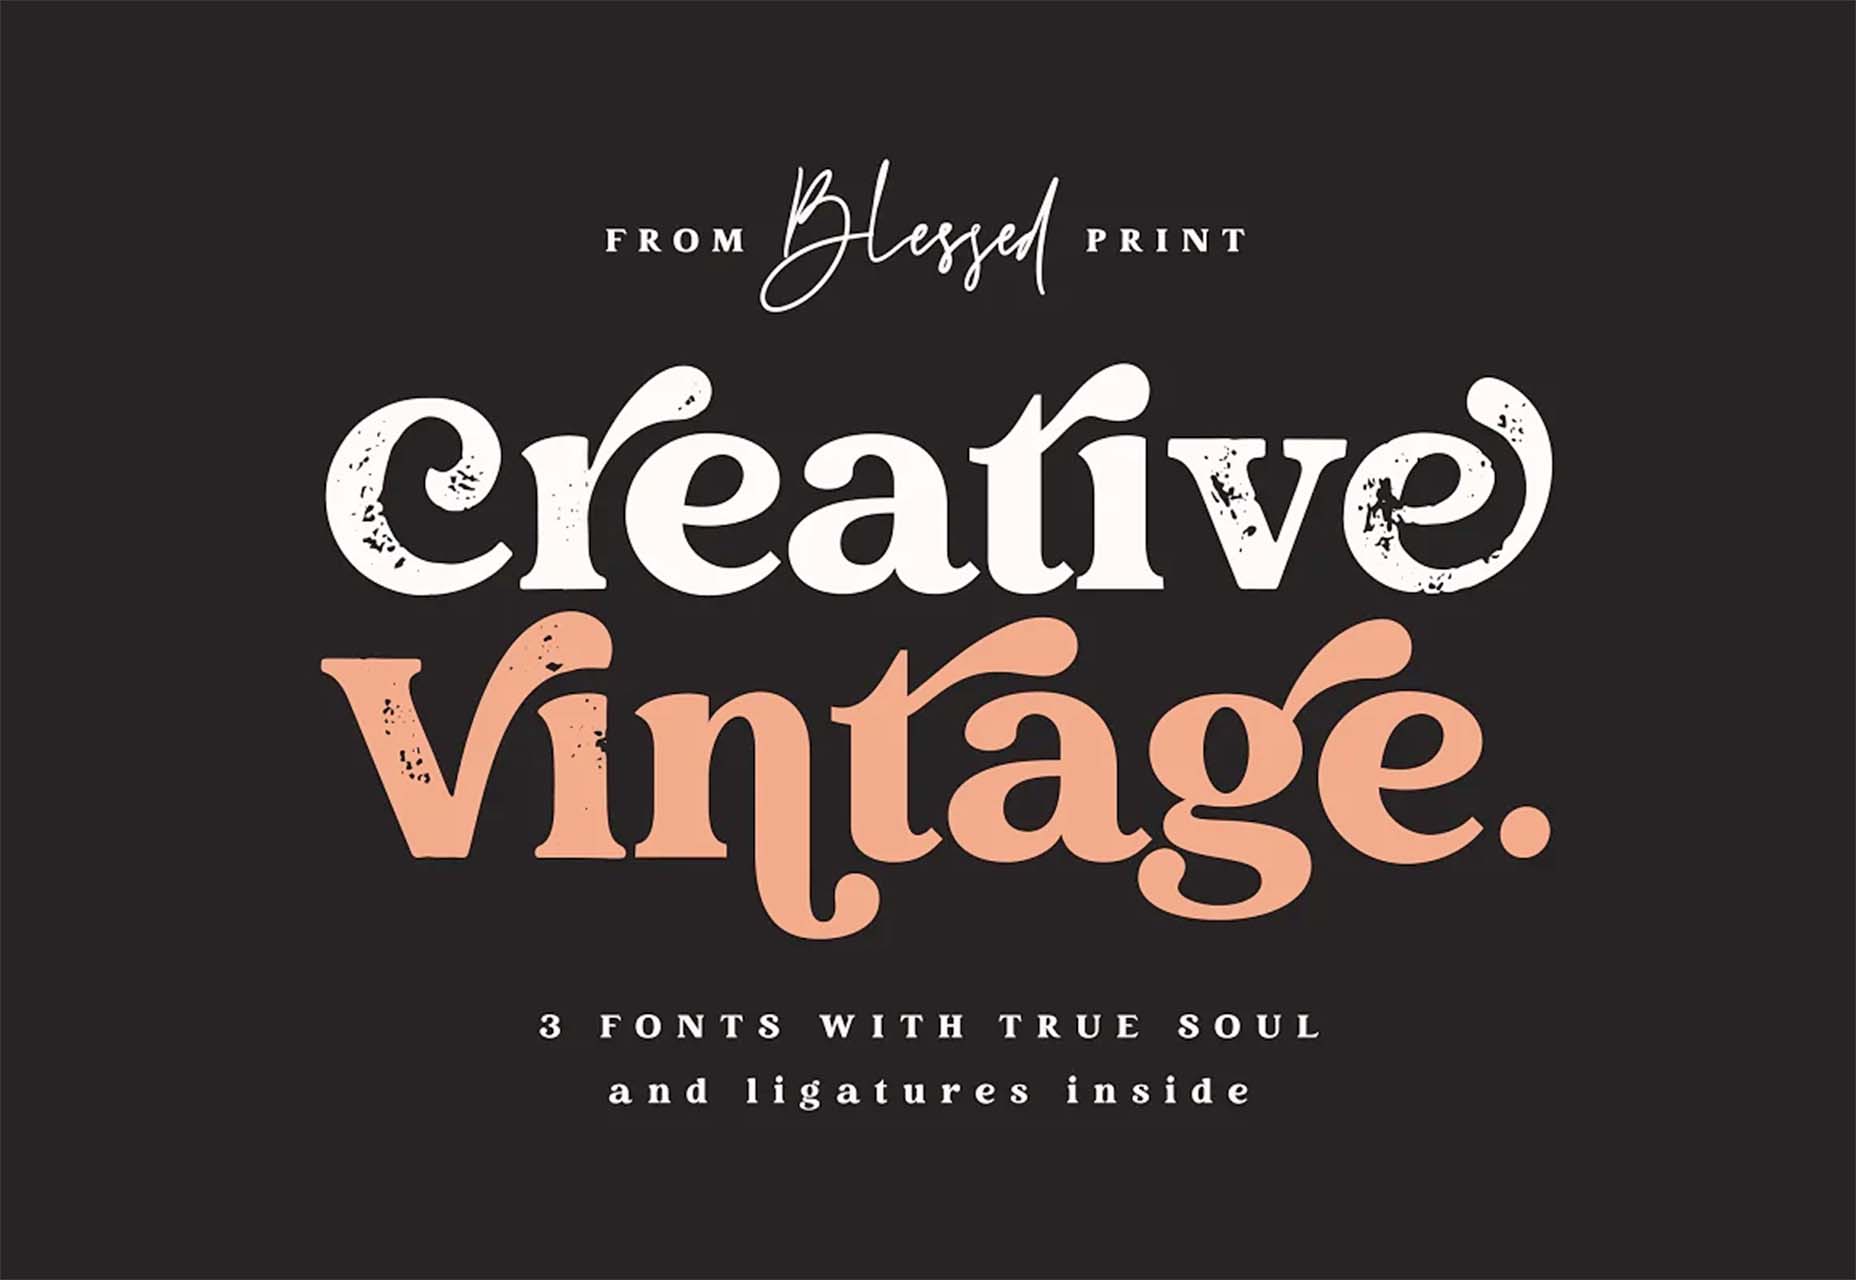
Creative Vintage is a pair of typefaces including a thin script and vintage slab serif (with rough and smooth styles). The pair is designed to work together for various uses or can be used independently.

Hardbop

Hardbop is a vintage-style typeface with a lot of personality. It would work great for display, and the family includes seven full-style character sets.

Kocha

Kocha is a funky ligature-style typeface perfect for lighter design elements, including logos or packaging. It includes clean and rough versions.

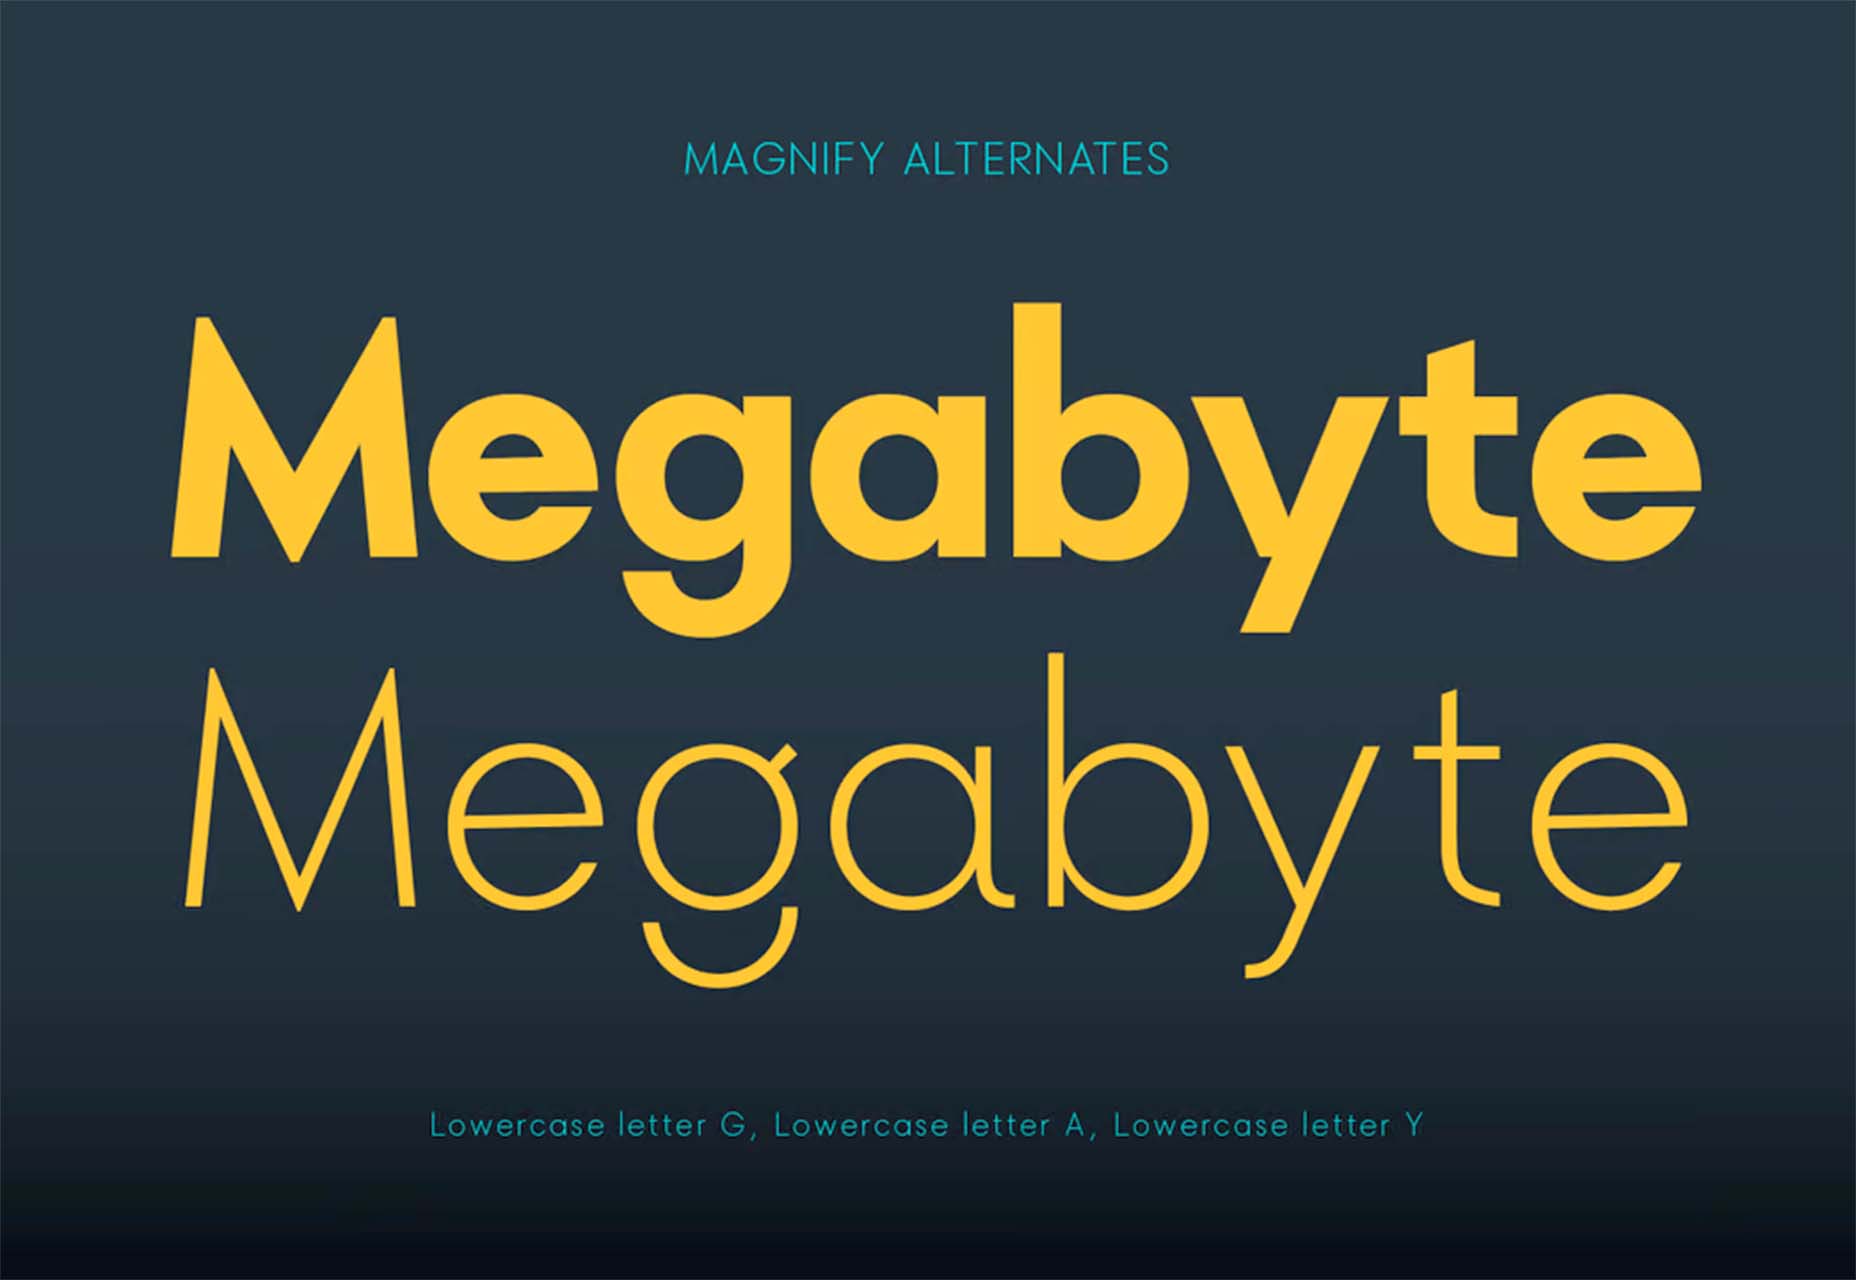
Magnify

Magnify is a large font family with 16 styles and plenty of fun alternates. You can use it straight or with the more funky styles that create less traditional character forms.

Stacker

Stacker is a fun and futuristic style font with a triple outline style. Use it for display when you really want to make an impression.

Source

The post Exciting New Tools for Designers, May 2022 first appeared on Webdesigner Depot.

Source de l’article sur Webdesignerdepot

As I’m becoming a senior developer in terms of age, I’ve transitioned from one language to another. One of my main interests has always been clean, easy-to-understand UIs (User Interface). That journey started for me with Director (to create multimedia CD-ROMs), Flash website animation, and Flex Rich Internet Applications (= « Flash on steroids »). When I started developing with Java over 10 years ago, we had some projects with the early versions of Vaadin and JavaFX. As I went on with serverside applications, I only continued with JavaFX for some personal and side projects and loved the way you can create a UI both with XML (FXML actually) and code, exactly the same approach I loved with Flex. Since then, my love for Java and JavaFX only grew and it’s still my major programming environment.

But JavaFX has one missing piece: running it in the browser… Yes, JPRO can do this, but it needs a license and a dedicated server. And yes, there are some projects ongoing to bring JavaFX fully to the browser, but they are ongoing and not mature yet… Let’s look at another approach: Vaadin Flow and run it on a Raspberry Pi to control a LED and show the state of a button.

Source de l’article sur DZONE

Nous sommes entrés dans une ère de transformation numérique en accélération constante dans un monde des affaires très concurrentiel, et cela ne devrait qu’augmenter avec le temps.

Chaque entreprise travaille ardemment à la mise à jour de ses processus. Cependant, pour que les entreprises puissent soutenir ces évolutions rapides, leurs collaborateurs doivent constamment affiner leurs compétences pour répondre aux besoins technologiques croissants. Pour rester à la pointe des changements et des enjeux auxquels seront confrontés tous les secteurs d’activité dans les prochaines années, il est essentiel que les employés aient accès à une formation continue et à une évolution de carrière intéressante, pour parvenir à la fois à la rétention des talents essentiels et à une culture d’entreprise de l’innovation continue.

Pour relever ces défis, de nombreuses entreprises et personnes se tournent vers des ressources, des cours et des certifications facilement accessibles sur le site SAP Learning afin de combler leur déficit de compétences. SAP est classée parmi les leaders dans le rapport d’Évaluation des prestataires de formation informatique de l’IDC MarketScape U.S. et MarketScape Europe. Cette recherche porte sur l’analyse des entreprises de formation informatique les plus connues, dotées de portefeuilles de formation adaptés aux entreprises qui envisagent d’importantes initiatives de transformation.

Les formations SAP favorisent l’acquisition de compétences innovantes

Le portefeuille de formations SAP Learning aide à répondre aux besoins de formation individuels et à renforcer les aptitudes technologiques des entreprises. SAP estime que les ressources de formation et de certification sont de plus en plus nécessaires dans l’environnement de travail actuel. Selon le rapport d’Évaluation des prestataires de formation informatique de l’IDC MarketScape U.S. les points forts de l’offre SAP sont les suivants :

  • Les clients apprécient les services de formation supplémentaires.
  • Les clients apprécient l’offre de préparation des tests de certification.
  • Les clients disent qu’ils l’utiliseront plus souvent l’année prochaine.
  • Elle peut aider les clients à personnaliser le contenu ou les parcours.
  • Elle a un point de vue important sur l’utilité de la formation.
  • Elle dispose d’un excellent processus d’actualisation et de mise à jour de son contenu.
  • Elle contient des exemples concrets d’amélioration des processus client.
  • Elle intègre des travaux pratiques dans une bonne partie de son contenu.
  • Elle propose une gamme intéressante de tarification et de packages.
  • Les apprenants apprécient l’utilisation des quiz pour valider les apprentissages.

Prenons l’exemple de Neils Wijsbeek, spécialiste chez Deloitte Consulting B.V. Malgré ses sept années d’expérience des solutions SAP, Wijsbeek continue de se former en permanence et valide ses compétences en passant régulièrement les certifications sur les solutions SAP SuccessFactors. Wijsbeek constate que le fait de continuer à mettre à jour ses certifications est important pour sa carrière et permet de démontrer son expertise de manière très visible. «Le processus de certification, notamment sa préparation, vous oblige à approfondir le contenu et à développer rapidement vos compétences », dit-il. À une époque où il n’a jamais été aussi crucial de rester à l’avant-garde des évolutions dans le secteur numérique, il a également déclaré que le contenu delta obligatoire de la certification SAP exige des utilisateurs qu’ils se forment sur les nouveautés des versions et les derniers développements, ce qui implique un accroissement de l’expertise tant individuelle que de son entreprise auprès des clients.

Notre équipe chez SAP se consacre à la création d’expériences de formation épanouissantes telles que celles de Wijsbeek, qui permettent aux collaborateurs d’approfondir facilement et souvent leurs compétences. Les responsables de recrutement sont actuellement confrontés à des défis de fidélisation des collaborateurs, ce qui limite considérablement la croissance de leurs entreprises. Avec l’avancée rapide des progrès technologiques, les meilleurs talents sont constamment sollicités et débauchés, ce qui crée des ruptures au niveau des compétences et des collaborateurs surchargés de travail. Par exemple, bien que la plupart des entreprises soient devenues multi-cloud, 86 % des professionnels de l’informatique pensent qu’un manque de compétences ralentira les projets Cloud.

Chez SAP Learning, nous veillons à ce que les entreprises puissent facilement transformer et perfectionner leurs compétences, ce qui donne aux collaborateurs des opportunités de développement de leur carrière et participe grandement à leur motivation. Pour aider les entreprises à accomplir cette tâche et rencontrer les besoins des individus à chaque étape de leur parcours d’apprentissage, nous avons lancé un nouveau site SAP Learning qui devient le point d’accès unique et simplifié à l’ensemble des ressources de formation SAP.


Formation SAP disponible pour les apprenants quelque soit leur niveau

SAP Learning offre à tous des opportunités de perfectionnement, de reconversion et de validation de compétences SAP. Par exemple, avec notre récente version du site SAP Learning, nous offrons un accès gratuit à plusieurs contenus pour la mise à niveau des compétences sur la plateforme SAP Business Technology Platform (SAP BTP), y compris un tout nouveau parcours de formation axé sur le développement d’applications Low-code/No- code. Cela permet de garantir que des apprenants, quelque soit leur niveau, depuis les développeurs débutants jusqu’à ceux qui occupent déjà un poste de développeur confirmé, peuvent facilement acquérir des compétences SAP dans des domaines d’innovation clés et se préparer à une certification SAP gratuitement.

Afin de soutenir l’effort des entreprises pour consolider les compétences d’innovation de leurs employés, SAP fournit les ressources d’apprentissage nécessaires, permettant d’accroître la compétitivité globale de leur business. La mise à disposition de formations et de certifications SAP dans une organisation est devenue un élément essentiel d’atteinte des objectifs stratégiques.

Les solutions SAP Learning aident à valider les compétences et l’expérience SAP des utilisateurs et permettent aux apprenants tout au long de leur vie professionnelle, comme Wijsbeek, de rester à la pointe de l’évolution du secteur et de se présenter, ainsi que leur organisation, comme des leaders de l’innovation. « La façon dont les programmes de formation ont évolué au fil des années permet de trouver très facilement les supports nécessaires, notamment pour maintenir sa certification à jour grâce au contenu delta », explique Wijsbeek.

Alors que SAP Learning continue d’évoluer pour satisfaire les besoins des apprenants partout dans le monde, je suis extrêmement enthousiasmé par le dévouement de notre équipe pour faciliter la progression des compétences et de la carrière des apprenants SAP, alors que nous entamons cette année supplémentaire de transformation de nos formations en mode digital.


Jan Meyer est responsable des systèmes de formation pour SAP Learning.

*IDC MarketScape, Évaluation des fournisseurs de formations informatiques États-Unis 2021 (doc. #US47541121, décembre 2021)
**IDC MarketScape : Évaluation des fournisseurs de formation informatique européenne 2021 (doc. #EUR148400521, décembre 2021)

The post SAP classée parmi les leaders de la formation informatique aux États-Unis et en Europe par IDC MarketScape appeared first on SAP France News.

Source de l’article sur sap.com

“Minimum Viable Product,” or “MVP,” is a concept of agile development and business growth. With a minimum viable product, you focus on creating the simplest, most basic version of your product, web application, or code possible.

Minimum viable products include just enough features to attract early adopters and validate your idea in the early stages of the development lifecycle. Choosing an MVP workflow can be particularly valuable in the software environment because it helps teams receive, learn from, and respond to feedback as quickly as possible.

The question is, how exactly do you define the “minimum” in MVP? How do you know if your MVP creation is basic enough while still being “viable”?

Defining the Minimum Viable Product: An Introduction

The concept of “Minimum Viable Product” comes from the Lean Start-up Methodology, introduced by Eric Ries. The purpose of MVP is to help companies quickly create versions of a product while collecting validated insights from customers for each iteration. Companies may choose to develop and release minimum viable products because they want to:

  • Introduce new products into the market as quickly as possible;
  • Test an idea with real users before committing a large budget to product development;
  • Create a competitive product with the use of frequent upgrades;
  • Learn what resonates with the target market of the company;
  • Explore different versions of the same product.

Aside from allowing your company to validate an idea for a product without building the entire concept from scratch, an MVP can also reduce the demand on a company’s time and resources. This is why so many smaller start-ups with limited budgets use the MVP and lean production strategy to keep costs as low as possible.

Defining an MVP: What your Minimum Viable Product Isn’t

When you’re building a Minimum Viable Product, you’re concentrating on developing only the most “essential” features that need to be in that product. For instance, you might be building a shopping app for a website. For the app to be “viable,” it would need to allow customers to search through products and add them to a basket or shopping cart. The app would also need a checkout feature and security components.

However, additional functionality, like the ability to send questions about an item to a customer service team or features that allow clients to add products to a “wish list,” may not be necessary straight away. Part of defining a minimum viable product is understanding what it isn’t. For instance, an MVP is not:

  • A prototype: Prototypes are often mentioned alongside MVPs because they can help with early-stage product validation. However, prototypes are generally not intended for customers to use. The “minimum” version of a viable product still needs to be developed enough for clients and users to put it to the test and provide feedback.
  • A minimum marketable product: An MVP is a learning vehicle that allows companies to create various iterations of an item over time. However, a minimum marketable product is a complete item, ready to sell, with features or “selling points” the company can highlight to differentiate the item from the competition.
  • Proof of concept: This is another similar but distinct idea from MVP. Proof of concept items test an idea you have to determine whether it’s attainable. There usually aren’t any customers involved in this process. Instead, companies create small projects to assess business solutions’ technical capabilities and feasibility. You can sometimes use a proof of concept before moving on to an MVP.

Finding the Minimum in your MVP

When finding the “minimum” in a minimum viable product, the primary challenge is ensuring the right balance. Ideally, you need your MVP to be as essential, cost-effective, and straightforward as possible so that you can create several iterations in a short space of time. The simpler the product, the easier it is to adapt it, roll it out to your customers, and learn from their feedback.

However, developers and business leaders shouldn’t get so caught up focusing on the “Minimum” part of Minimum Viable Product that they forget the central segment: “Viable”; your product still needs to achieve a specific purpose.

So, how do you find the minimum in your MVP?

1. Decide on Your Goal or Purpose

First, you’ll need to determine what your product needs to do to be deemed viable. What goal or target do you hope to achieve with your new product? For instance, in the example we mentioned above, where you’re creating an ecommerce shopping app, the most basic thing the app needs to do is allow customers to shop for and purchase items on a smartphone.

Consider the overall selling point of your product or service and decide what the “nice to haves” are, compared to the essential features. For instance, your AR app needs to allow people to interact with augmented digital content on a smartphone, but it may not need to work with all versions of the latest AR smart glasses.

2. Make a List of Features

Once you know the goal or purpose of your product, the next step is to make a list of features or capabilities you can rank according to importance. You can base your knowledge of what’s “most important” for your customers by looking at things like:

  • Competitor analysis: What do your competitors already offer in this category, and where are the gaps in their service or product?
  • User research: Which features or functionalities are most important to your target audience? How can you make your solution stand out from the crowd?
  • Industry knowledge: As an expert in your industry, you should have some basic understanding of what it will take to make your product “usable.”

3. Create Your Iterations

Once you’ve defined your most important features, the next stage is simply building the simplest version of your product. Build the item according to what you consider to be its most essential features and ask yourself whether it’s serving its purpose.

If your solution seems to be “viable,” you can roll it out to your target audience or a small group of beta testers to get their feedback and validate the offering. Use focus groups and market interviews to collect as much information as possible about what people like or dislike.

Using your feedback, you can begin to implement changes to your “minimum” viable product to add more essential features or functionality.

Understanding the “Minimum Viable Product”

Minimum viable products are evident throughout multiple industries and markets today – particularly in the digitally transforming world. For instance, Amazon might be one of the world’s most popular online marketplaces today, but it didn’t start that way. Instead, Jeff Bezos began purchasing books from distributors and shipping them to customers every time his online store received an order to determine whether the book-selling landscape would work.

When Foursquare first began, it had only one feature. People could check-in at different locations and win badges. The gamification factor was what made people so excited about using the service. Other examples include:

  • Groupon: Groupon is a pretty huge discount and voucher platform today, operating in companies all around the world. However, it started life as a simple minimum viable product promoting the services of local businesses and offering exclusive deals for a short time. Now Groupon is constantly evolving and updating its offerings.
  • Airbnb: Beginning with the use of the founders’ own apartment, Airbnb became a unicorn company giving people the opportunity to list places for short-term rental worldwide. The founders rented out their own apartment to determine whether people would consider staying in someone else’s home before eventually expanding.
  • Facebook: Upon release, Facebook was a simple social media tool used for connecting with friends. Profiles were basic, and all members were students of Harvard University. The idea quickly grew and evolved into a global social network. Facebook continues to learn from the feedback of its users and implement new features today.

Creating Your Minimum Viable Product

Your definition of a “minimum viable product” may not be the same as the definition chosen by another developer or business leader. The key to success is finding the right balance between viability – and the purpose of your product, and simplicity – or minimizing your features.

Start by figuring out what your product simply can’t be without, and gradually add more features as you learn and gain feedback from your audience. While it can be challenging to produce something so “minimalistic” at first, you need to be willing to release those small and consistent iterations if you want to leverage all the benefits of an MVP.

Suppose you can successfully define the meaning of the words “Minimum” and “Viable” simultaneously with your new product creations. In that case, the result should be an agile business, lean workflows, and better development processes for your entire team.


Featured image via Pexels.

Source

The post What is the “Minimum” in Minimum Viable Product? first appeared on Webdesigner Depot.

Source de l’article sur Webdesignerdepot


WordPress is by far the world’s most popular CMS. Not only does it dominate the CMS market with a 64% market share, but it also powers 39.6% of all websites. It has taken the internet by storm by democratizing the web for all. Now, anyone can build, manage, and host a successful website without needing a college degree or coding expertise.

However, while WordPress is great at managing many technical aspects, it still can’t do everything for you. Built mostly on PHP, there are often concerns regarding how performant WordPress is. And, with performance impacting everything from bounce rates to SEO rankings to conversions, it’s something that should be on your radar too.

If you don’t know it yet, images are one of the main causes of slow-loading websites. In recent years, WordPress has stepped up its efforts to try and help users with image optimization out-of-the-box.

Still, as we’ll show, it’s not a total solution, and there is still plenty you can do to deliver better experiences on your WordPress website through image optimization.

What is WordPress Image Optimization? Why is it Important?

Simply put, image optimization is anything you do to make images load faster on your website pages. Almost all websites that use images can benefit from some form of image optimization, even those using WordPress.

Why?

Well, performance is a hugely significant factor when it comes to the competitiveness of your website today.

Google has also made performance an increasingly important factor when it comes to SEO rankings. In fact, performance is a direct ranking signal that carries significant weight.

Google’s Page Experience Update that went live in 2021 has been the biggest move in that direction yet. Soon, Google might even use visual indicators in SERP results to distinguish high-performing websites from the rest.

In Google’s own words, “These signals measure how users perceive the experience of interacting with a web page and contribute to our ongoing work to ensure people get the most helpful and enjoyable experiences from the web.”

So, Why Should We Target Images For Performance Optimization?

According to Google, images are the largest contributor to page weight. Google has also singled out image optimization specifically as the factor with the most untapped potential for performance optimization.

This problem isn’t going away soon. According to data by the HTTP Archive, there are roughly 967.5 KB bytes of image data on desktop web pages and 866.3 KB of image data on mobile pages. This is an increase of 16.1% and 38.8%, respectively, over the last five years.

Thanks to popular e-commerce tools like Woocommerce, it’s estimated that up to 28% of all online sales happen on WordPress websites.

And don’t forget, images are both a key part of conveying information to the user and integral to the design of your website. If they take significantly longer to load than your text, for example, it will negatively impact the user experience in a variety of ways.

In summary, optimized images help your WordPress website by:

  • Improving user satisfaction.
  • Improving various traffic metrics, like bounce rates, time-on-page, etc.
  • Boosting your SEO rankings.
  • Contributing to higher conversions (and sales).

How Does Image Optimization in WordPress Work?

WordPress is so popular because it’s a CMS (content management system) that allows anyone to build, design, and manage a website without any coding or advanced technical experience. Advanced features can be installed with just a few clicks, thanks to plugins, and you rarely have to touch the code behind your website unless you want to make some unique modifications.

In short, using a CMS like WordPress shields you from many of the day-to-day technicalities of running a website.

WordPress Image Optimization: What It Can Do

As we mentioned, one of the main reasons WordPress is so popular is because it takes care of many of the technical aspects of running a website. With that in mind, many think that WordPress should also automatically take care of image optimization without them having to get involved at all.

Unfortunately, that’s not really the case.

True, WordPress does offer some built-in image optimization. Whenever you upload an image to WordPress, it currently compresses the quality to about 82% of the original (since v4.5).

In v4.4, WordPress also introduced responsive image syntax using the srcset attribute. This creates four breakpoints for each image you upload according to the default WordPress image sizes:

  • 150px square for thumbnails
  • 300px width for medium images
  • 768px max-width for medium_large images
  • 1024px max-width for large images.

Here you can see an example of the actual responsive syntax code generated by WordPress:

<img loading="lazy" src="https://bleedingcosmos.com/wp-content/uploads/2021/12/33-1024x683.jpg" alt="" class="wp-image-9" width="610" height="406" srcset="https://bleedingcosmos.com/wp-content/uploads/2021/12/33-1024x683.jpg 1024w, https://bleedingcosmos.com/wp-content/uploads/2021/12/33-300x200.jpg 300w, https://bleedingcosmos.com/wp-content/uploads/2021/12/33-768x512.jpg 768w, https://bleedingcosmos.com/wp-content/uploads/2021/12/33-1536x1024.jpg 1536w" sizes="(max-width: 610px) 100vw, 610px">

Depending on the screen size of the device from which a user visits your webpage, WordPress will let the browser pick the most appropriately sized image. For example, the smallest version for mobile displays or the largest for 4K Retina screens, like those of a Mac.

While this may seem impressive, it’s only a fraction of what can be achieved using a proper image optimization solution, as we’ll show later.

Lastly, WordPress implemented HTML native default lazy loading for all images starting with version 5.5.

So, in short, WordPress offers the following image optimization capabilities baked-in:

  • Quality compression (limited)
  • Responsive syntax (up to 4 breakpoints)
  • Lazy loading

WordPress Image Optimization: What it Cannot Do

There are other issues many have with both the implementation of image compression and responsive syntax as it’s used by WordPress. This leads to some users even purposefully deactivating WordPress’ built-in image optimization so they can fully take control of it themselves.

Here are some of the reasons why:

  • WordPress uses a very basic form of quality compression. It does not use advanced technologies like AI and machine learning algorithms to compress images while maintaining maximum visual quality. It’s also lossy compression, so the quality is lost for good. You can clearly see the difference between an original HD image and the compressed version created by WordPress.
  • WordPress only compresses most images by up to 20%, while advanced image optimization tools can reduce all image sizes intelligently by up to 80%.
  • Responsive syntax can provide significant performance improvements over simply uploading a single HD image to be served on all devices and screens. However, it’s still only limited to a set number of breakpoints (typically 3 or 4). Since it’s not dynamic, a whole spectrum of possible image sizes is not created or used.
  • Responsive syntax code is not scalable and can quickly lead to code that’s bloated, messy, and hard to read.
  • WordPress doesn’t accelerate image delivery by automatically caching and serving them via a global CDN, although this can be done using other tools.

Another important optimization feature that WordPress does not have is auto-conversion to next-gen image file formats. Different image formats offer different performance benefits on different devices. Some formats also enable higher levels of compression while maintaining visual fidelity.

Next-gen formats like WebP, AVIF, and JPEG-2000 are considered to be the most optimal formats on compatible devices. For example, until recently, WebP would be the optimal choice on Chrome browsers, while JPEG-4000 would be optimal on Safari browsers.

However, WordPress will simply serve images in the same formats in which they were originally uploaded to all visitors.

How to Measure the Image Performance of a WordPress Website?

As the undisputed king of search engines, we’ll base most of our performance metrics on guidelines established by Google.

Along with its various performance updates, Google has released a number of guidelines for developers as well as the tools to test and improve their websites according to said guidelines.

Google introduced Core Web Vitals as the primary metrics for measuring a web page’s performance and its effect on the user experience. Thus, Core Web Vitals are referred to as “user-centric performance metrics.” They are an attempt to give developers a testable and quantifiable way to measure an elusive and abstract concept such as “user experience.”

Combined with a number of other factors, Core Web Vitals constitute a major part of the overall page experience signal:

You can find a complete introduction to Core Web Vitals here. However, they currently consist of three main metrics:

  • LCP (Largest Contentful Paint): The time it takes the largest above-the-fold element on your page to load. This is typically a full-sized image or hero section.
  • FID (First Input Delay): The delay from the moment a user first interacts with an element on the page until it becomes responsive.
  • CLS (Cumulative Layout Shift): The visual stability with which the elements on a page load.

Here is an illustration of how these metrics are scored:

While these are the three most important metrics to optimize, they are not the only ones. Google still measures other metrics like the FCP (First Contentful Paint), SI (Speed Index), as well as the TTFB (Time to First Byte), TBT (Total Blocking Time), and TTI (Time to Interactive).

A number of these metrics are directly affected by the images used on your web pages. For example, LCP, FCP, and SI are direct indicators of how fast the content of your web page loads and depends on the overall byte size of the page. However, it can also indirectly affect FID by keeping the main thread busy with rendering large amounts of image content or the perceived CLS by delaying the time it takes large images to load.

These metrics apply to all websites, whether they are custom-made or built using a CMS like WordPress.

When using tools like Lighthouse or PageSpeed Insights, you’ll also get scored based on other flags Google deems important. Some of them are specific to images, such as properly sizing images and serving images in next-gen formats.

If you only use built-in WordPress image optimization, you’ll get flagged for the following opportunities for improvement:

Some of the audits it will pass, however, are deferring offscreen images (lazy loading) and efficiently coding images (due to compression):

A Better Way to Optimize WordPress Images: ImageEngine

Billions of websites are all vying for prime real estate on Google SERPs, as well as the attention of an increasingly fussy internet-using public. Every inch matters when it comes to giving your website a competitive advantage.

So, how can you eliminate those remaining performance flags and deliver highly optimized images that will keep both your visitors and Google happy?

Sure, you could manually optimize images using software like PhotoShop or GIMP. However, that will take you hours for each new batch of images. Plus, you still won’t benefit from any automated adaptive optimization.

A more reasonable solution in today’s fast-paced climate is to use a tool developed specifically for maximum image optimization: an image CDN like ImageEngine.

ImageEngine is an automated, cloud-based image optimization service using device detection as well as intelligent image compression using the power of AI and machine learning. It can reduce image payloads by up to 80% while maintaining visual quality and accelerating delivery around the world thanks to its CDN with geographically dispersed PoPs.

Why is ImageEngine Image Optimization Better Than WordPress?

When making a head-to-head comparison, here are the reasons why ImageEngine can deliver better performance:

  • Device Detection: ImageEngine features built-in device detection. This means it picks up what device a visitor to your website is using and tailors its optimization strategy to what’s best for that specific device.
  • Client hints: By supporting client hints, ImageEngine has access to even more information regarding the device and browser to make better optimization decisions.
  • Next-gen formats: Based on optimal settings, ImageEngine automatically converts and serves images in next-gen formats like WebP, AVIF, JPEG2000, and MP4 (for GIFs).
  • Save data header: When a Chrome user has save-data mode enabled, ImageEngine will automatically compress images more aggressively to save on data transfer.
  • CDN with dedicated edge servers: ImageEngine will automatically cache and serve your optimized image assets using its global CDN. Each edge server has device awareness built-in to bring down latency and accelerate delivery. You can also choose to prioritize specific regions.

So, the key differentiator is that ImageEngine can tailor optimizing images for what’s optimal for each of your visitors. ImageEngine is particularly good at serving mobile visitors thanks to WURFL device detection, which can dynamically resize images according to most devices and screen sizes in use today. As of now, this is a completely unique capability that none of its competitors offer.

It allows for far better and more fine-tuned optimization than WordPress’ across-the-board approach to compression and responsive syntax.

If you want, you could turn off WordPress responsive syntax and compression, and you would still experience a performance increase using ImageEngine. However, ImageEngine also plays nice with responsive syntax, so it’s not completely necessary unless you want to serve the highest-fidelity/low-byte-size images possible.

How Does ImageEngine Work with WordPress?

The process ImageEngine uses to integrate with WordPress can be broken down into a few easy steps:

  • Sign up for an ImageEngine account: ImageEngine offers three pricing plans depending on the scale and features you need as well as a no-commitment 30-day free trial.
  • Specify your image origin: This tells ImageEngine where to find the original versions of your images. For a WordPress website, you can just use your domain, e.g., https://mywordpresswebsite.com. ImageEngine will then automatically pull the images you’ve uploaded to your WordPress website.

  • Copy the Delivery Address: After you create an account and specify your image origin, ImageEngine will provide you with a Delivery Address. A Delivery Address is your own unique address that will be used in your <img> tags to point back to the ImageEngine service. Delivery Addresses may be on a shared domain (imgeng.in) or customized using a domain that you own. A Delivery Address typically looks something like {random_string}.cdn.imgeng.in. If your images are uploaded to the default WordPress folder /wp-content/uploads/, you can access your optimized images from ImageEngine simply by changing your website domain. For example, by typing {imageengine_domain}.cdn.imgeng.in/wp-content/uploads/myimage.jpg into your browser, you’ll see the optimized version of that image. Just press the copy button next to the Delivery Address and use it in the next step configuring the plugin.

  • Install the ImageEngine Optimizer CDN plugin: The plugin is completely free and can be installed just like any other plugin from the WordPress repository.
  • Configure and enable ImageEngine Plugin in WordPress: Just go to the plugin under “ImageEngine” in the main navigation menu. Then, copy and paste in your ImageEngine “Delivery Address,” tick the “Enabled” checkbox, and click “Save Changes” to enable ImageEngine:

Now, all ImageEngine basically does is replace your WordPress website domain in image URLs with your new ImageEngine Delivery Address. This makes it a simple, lightweight, and non-interfering plugin that works great with most other plugins and themes. It also doesn’t add unnecessary complexity or weight to your WordPress website pages.

ImageEngine vs Built-in WordPress Image Optimization

So, now let’s get down to business by testing the performance improvement you can expect from using ImageEngine to optimize your image assets.

To do this test, we set up a basic WordPress page containing a number of high-quality images. I then used PageSpeed Insights and the Lighthouse Performance Calculator to get the performance scores before and after using ImageEngine.

Importantly, we conducted this test from a mobile-first perspective. Not only has mobile internet traffic surpassed desktop traffic globally, but Google themselves have committed to mobile-first indexing as a result.

Here is a PageSpeed score using the Lighthouse calculator for WordPress with no image optimization:

As we can see, both Core Web Vitals and other important metrics were flagged as “needs improvement.” Specifically, the LCP, FCP, and TBT. In this case, both the LCP and FCP were a high-res featured image at the top of the page.

If we go to the opportunities for improvement highlighted by PageSpeed, we see where the issues come from. We could still save as much as 4.2s of loading time by properly resizing images and a further 2.7s by serving them in next-gen formats:

So, now let’s see how much ImageEngine can improve on that.

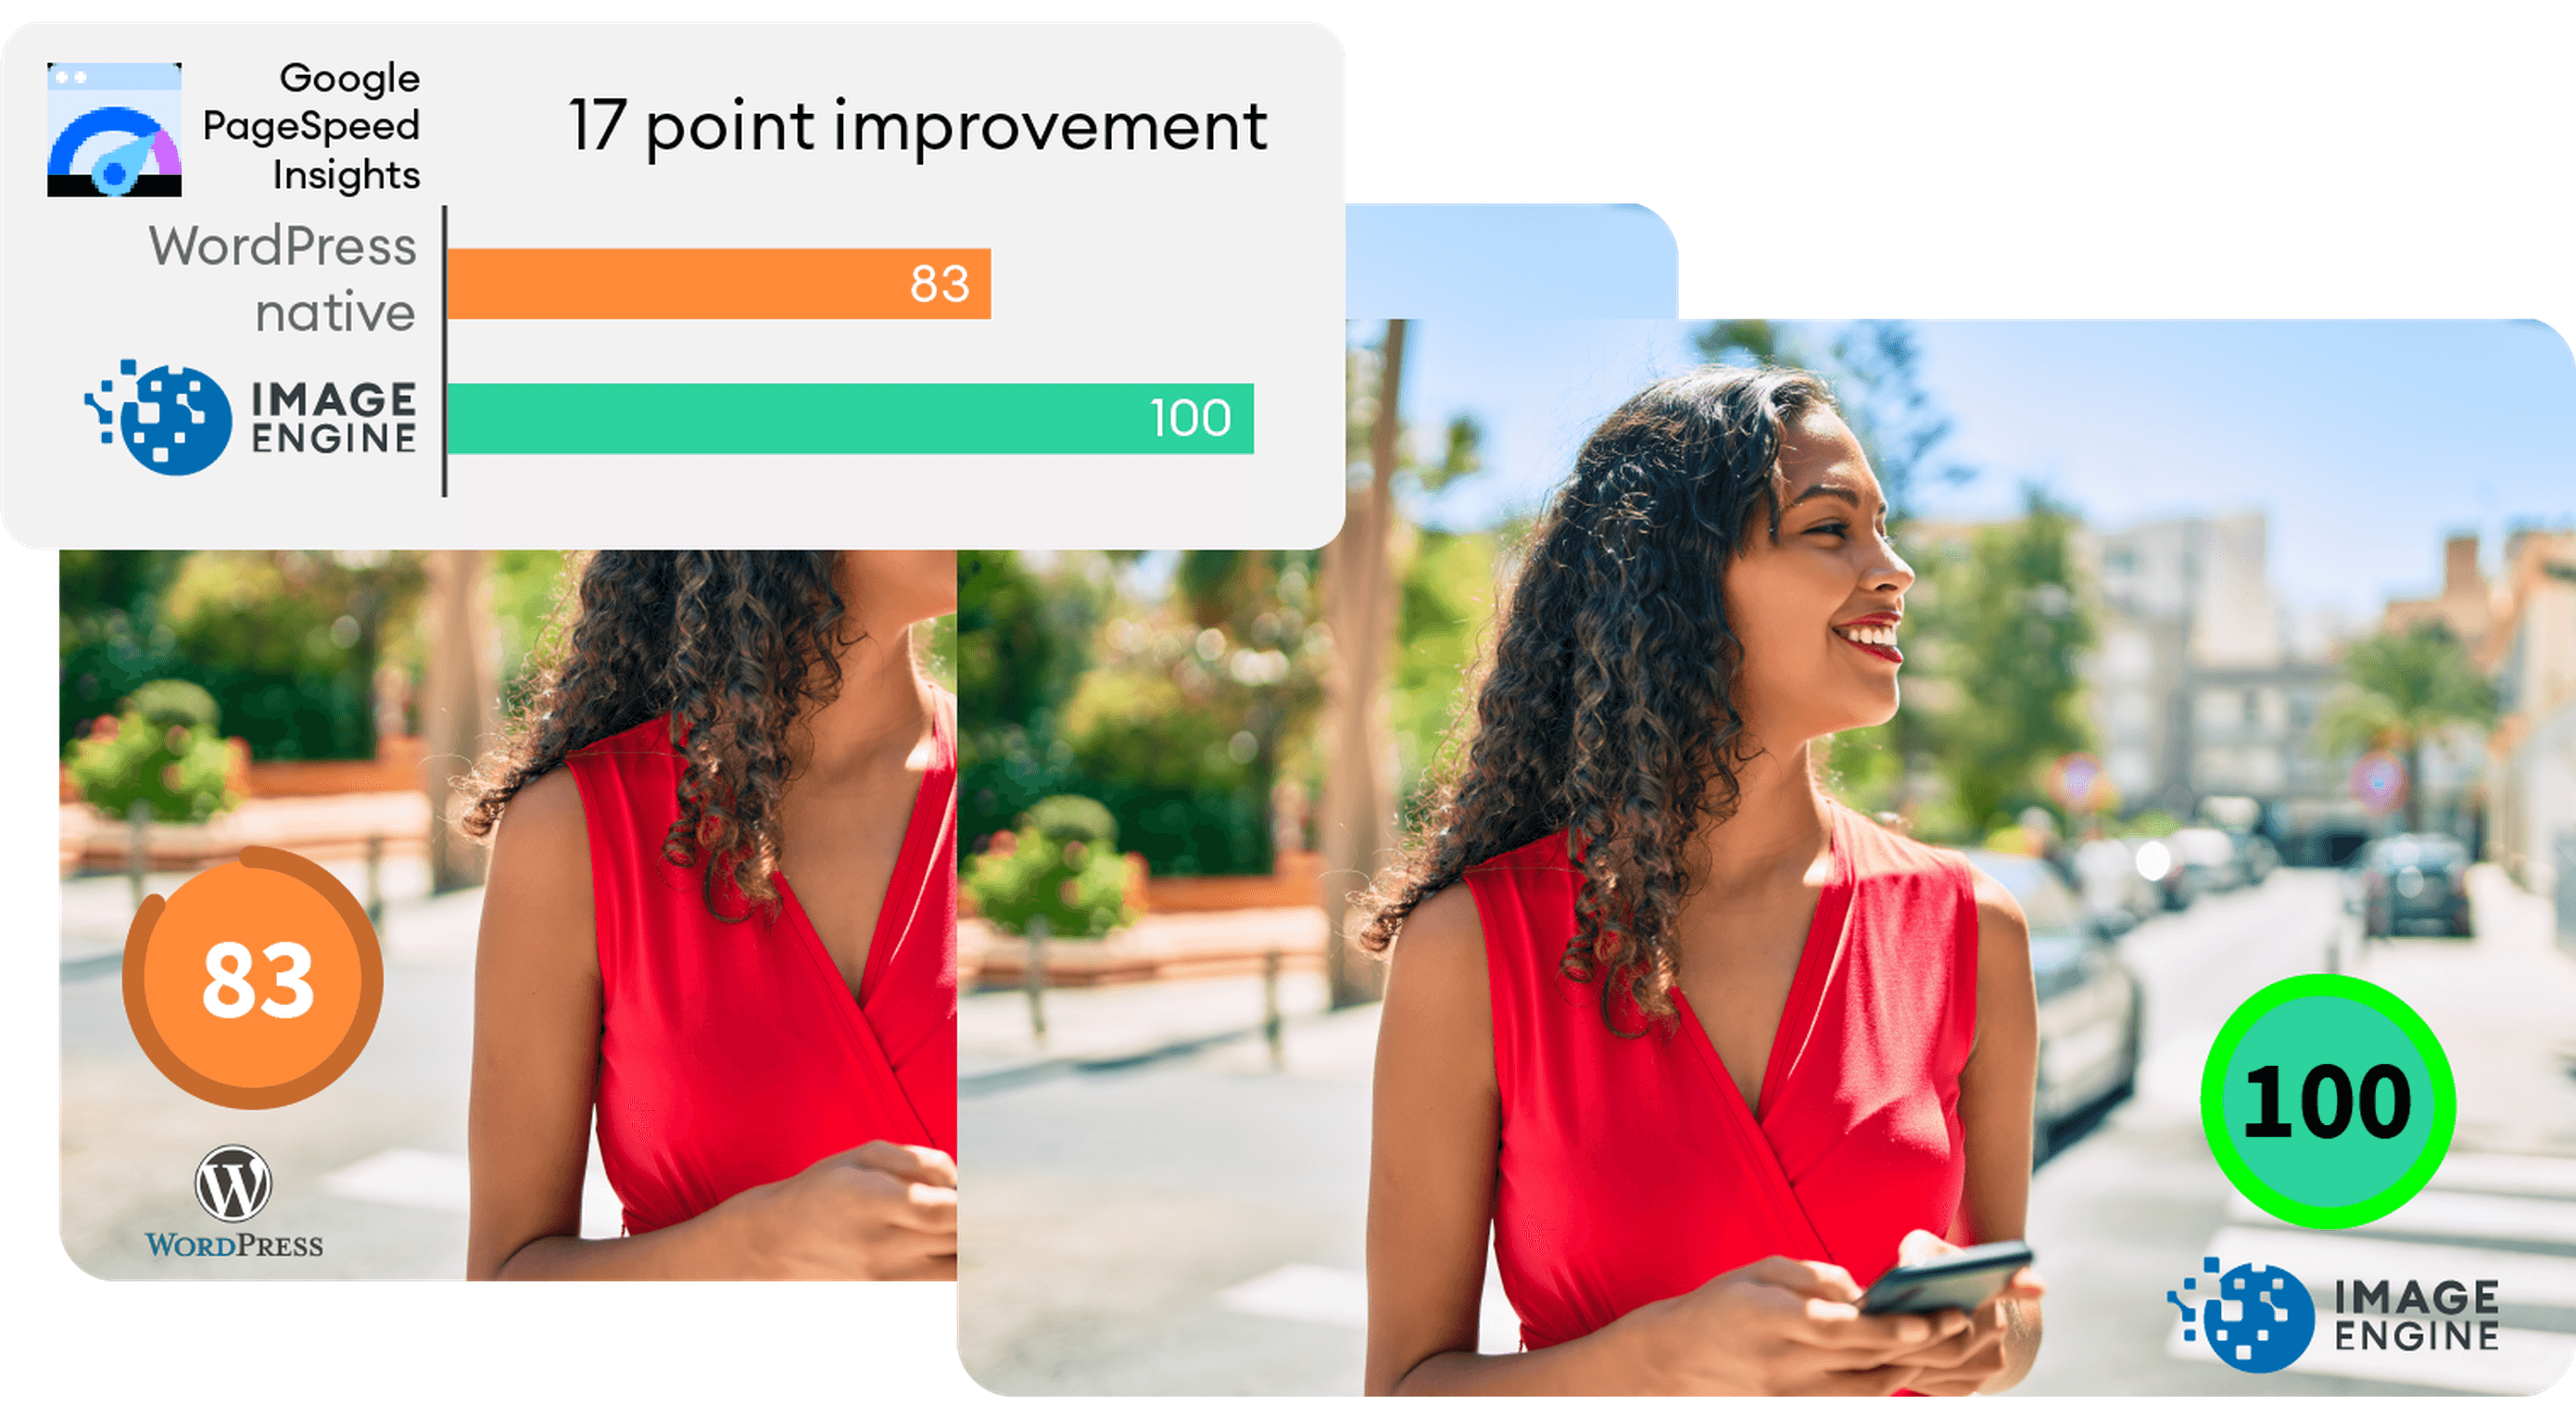
The same test run on my WordPress website using ImageEngine got the following results:

As you can see, we now have a 100 PageSpeed score. I saved roughly 2.5s on the SI (~86%) as well as roughly 1.7s on the LCP (~60%). There was also a slight improvement in the FCP.

Not only will you enjoy a stronger page experience signal from Google, but this represents a tangible difference to visitors regarding the speed with which your website loads. That difference will lead to lower bounce rates, increased user satisfaction, and more conversions.

There was also a 53% overall reduction in the total image payload. This is impressive, considering that it’s on top of WordPress’ built-in compression and responsive syntax.

Conclusion

So, as someone with a WordPress website, what can you take away from this?

Well, first of all, WordPress does feature some basic image optimization. And while not perfect, it should help you offer reasonable levels of performance, even if you use a lot of image content.

However, the caveat is that WordPress applies aggressive, across-the-board compression, which will lead to a noticeable reduction in visual quality. If you use WordPress for any type of website where premium quality images are important, this is a concern — for example, as a photography portfolio, exhibition, or image marketplace like Shutterstock.

By using ImageEngine, you can reduce image payloads and accelerate delivery even further without compromising too harshly on visual quality. What’s more, ImageEngine’s adaptive image optimization technology will provide greater improvements to more of your visitors, regardless of what device(s) they use to browse the web.

Whether or not you still want to use WordPress’ built-in optimizations, ImageEngine will deliver significant improvements to your user experience, traffic metrics, and even conversions.

Plus, true to the spirit of WordPress, it’s extremely simple to set up without any advanced configuration. Just sign up for ImageEngine in 3 easy steps, install the plugin, integrate ImageEngine by copy/pasting your image domain, and you’re good to go.


[ This is a sponsored post on behalf of ImageEngine ]

Source

The post WordPress Website Analysis: Before & After ImageEngine first appeared on Webdesigner Depot.

Source de l’article sur Webdesignerdepot

So here we are, in a brand spanking new year—time for looking forward with fresh ideas and renewed hope for the year ahead. We are kicking off 2022 with a mixed bag and, we hope, something for everyone.

Whether you’re looking for inspiration to update your site or a fresh approach to work for a new client or want to spend a little while browsing around some corners of the internet you might not usually, welcome to the first collection of the year. Enjoy!

Justice Reskill 

Justice Reskill offers a learning platform and support for people who have been through the justice system. Information is presented clearly in a positive, uplifting tone, emphasized by a bright color scheme and friendly type.

TBD Post 

TBD Post’s site is fuss-free, clean, and pleasant to navigate. Work is well presented, in an organized way, with just the right amount of supplementary information.

Speedy 

Speedy is an online business bank, and this is a pretty standard, slick fin-tech site for the most part. The added extra is that the five versions of the site–with the same content in each–have different color accents based on the flag of the specific country listed.

Nuka 

This site for Nuka eternal stationery is a beautifully simple single page. The use of handwritten type in places adds an intimacy while emphasizing the nature of the products.

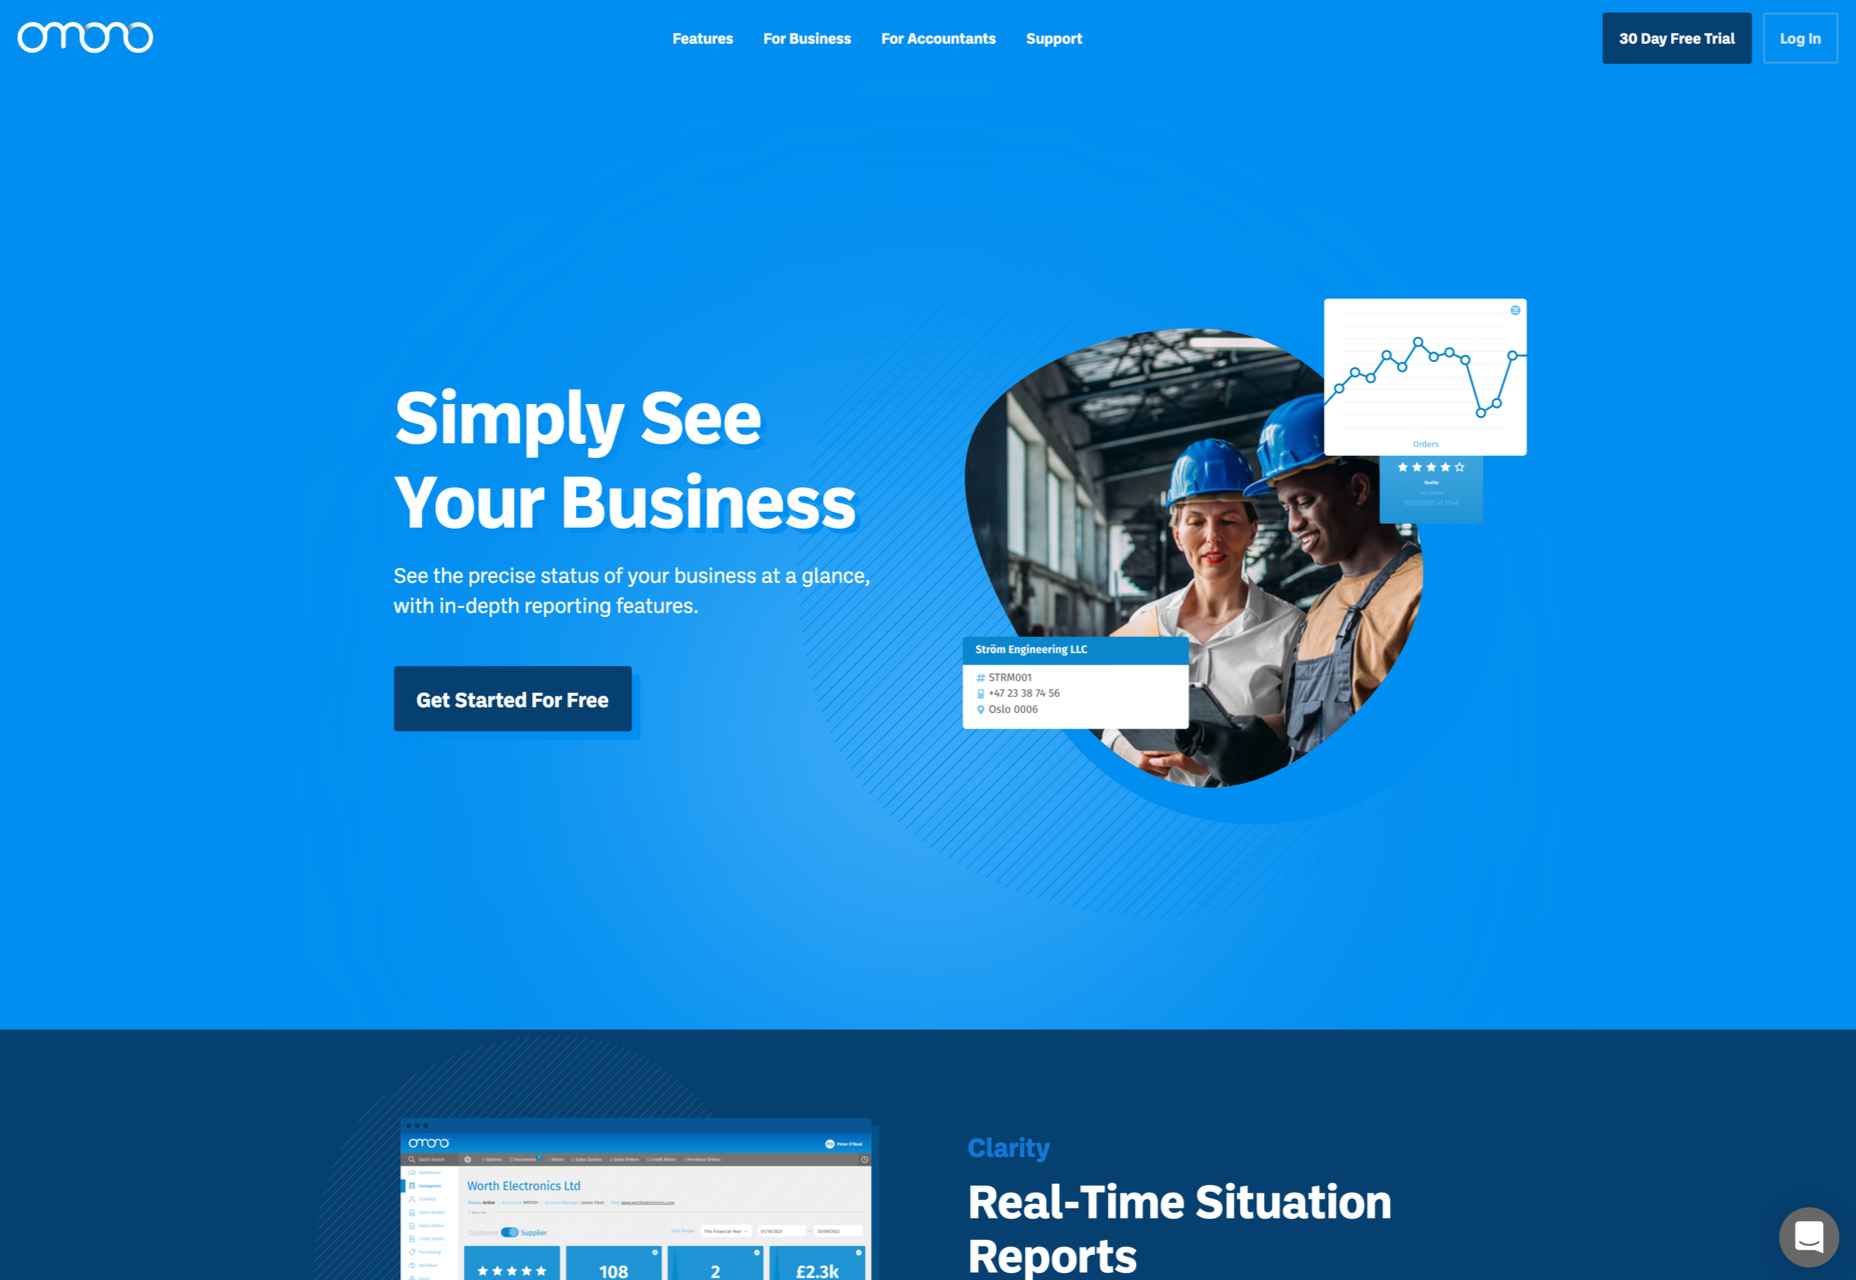
Omono 

This site for online business management app Omono presents a lot of information clearly, and with a calmness projected by the use of blues and greys and subtle animation.

Pienso 

A combination of bold type, a slightly tweaked red, green, and blue color scheme, and on-scroll animations makes this site for Pienso pop.

Maison Margiela 

Maison Margiela fully embraces the digital alternative to a live catwalk with this blend of single video and edited clips.

Marie O’Shepherd 

This portfolio site for book designer and art director Marie O’Shepherd takes a minimal approach and allows the work to take center stage.

Angry Ventures

Angry Ventures add personality and humor to their site to draw the user in and entertain, while their actual portfolio is only available on request.

Chapter One 

Chapter One’s site has light and dark theme options and some engaging animated graphics.

Vesti il Futuro 

Vesti il Futuro for Mani Tese uses comic book-style interactive graphics to raise awareness of issues surrounding the environment and fast fashion.

Gazelle No.1 

Some scroll-activated video enlivens this single-page site for Gazelle’s No.1 model.

TROA 

This site for creative agency Troa is an excellent example of the effectiveness of a monochrome color scheme, and there are some pleasing transitions too.

BDCC 

BDCC’s site has a bold, slightly jumbled feel that works really well. The falling lozenge menu items are a nice feature.

Mekanism

This is a great example of a stylish website for an agency portraying itself as well-established and super polished.

Redbrick 

Redbrick’s site has a youthful, vibrant feel with colors that change to match the product branding.

Accounting Box 

This site for Accounting Box makes good use of split-screen swapping from a vertical split on desktop to a horizontal split on mobile. The animations are pleasing too.

François-Joseph Graf 

The design for François-Joseph Graf’s site does the right thing by getting out of the way to avoid competing with the rather stunning products on show.

Monsta Cats 

Monsta Cats is a site dedicated to community focussed NFTs. The site is suitably anarchic and fun to browse.

Bien Fondé 

And finally, some customizable good wishes for the year ahead from digital agency Bien Fondé.

Source

The post 20 Best New Websites, January 2022 first appeared on Webdesigner Depot.

Source de l’article sur Webdesignerdepot

Few things are more important to a web designer or developer’s chances of success than having the proper workflow. The term “workflow” applies to the set of standardized steps you or your company uses to create, test, and deploy designs or products.

Over the years, as development processes have evolved, so too have the workflows experts use to bring their ideas to life. The MVP workflow, or “Minimum Viable Product” strategy, is one of the most popular options in 2022.

Here’s what you need to know about the MVP workflow and how it differs from some of the other standard workflows developers may be used to.

What is the Designer/Developer Workflow?

As mentioned above, the designer/developer workflow is a series of steps used by experts in the web design world to achieve a creative goal. The process includes the steps taken to start a project, evolve it, and finish it. Since software is never developed without tools, the technology you’ll access throughout the development process is also considered in most workflows.

An example of a standard development workflow might look like this:

  • Scaffolding: This is the stage wherein you start your new web project, creating a git repo, downloading libraries, preparing file structures, and completing other tasks to make sure your product is ready to roll out into the world.
  • Develop: This is where you’ll spend most of your time writing code for your application or website. The development process may include various specific tools and support from other staff members.
  • Test: In this stage, you examine the functionality of your code to determine if everything works as it should. If there are errors or issues, you can go back and develop fixes to the potential problems. Your code may go through the development/test process several times before you can move to the next stage.
  • Integrate: This is when you merge the code for your part of the development process with the rest of the team. You can also integrate your code into websites and existing apps at this point. If you’re working solo, you can skip this process.
  • Optimize: You prepare all your assets for use on a production server during the optimization stage. Files are generally optimized to ensure your visitors can view your site easily or access your applications with ease.
  • Deploy: In the deployment stage, developers push code and assets up into the server and allow for changes to be viewed by the public.

What is MVP? (Minimum Viable Product)

Now you know what a developer workflow looks like, you can begin to assess the concept of the “MVP” workflow. The term “MVP” stands for Minimum Viable Product.

The idea of “Minimum Viable Product” applies to a range of industries, from education to healthcare and government entities. This term comes from lean start-up practices and focuses heavily on the value of learning and changing during the development process.

When you adapt your workflow to focus on an MVP, you’re essentially adjusting your focus to a point where you can create a stripped-back version of something new – like an app or a website. The MVP is built just with the core features (the minimum), so you can bring the idea to market and test it as quickly as possible.

For instance, if your goal were to create an attractive new website for a client, an MVP would focus on implementing the crucial initial tools, and nothing else. While you may create checkout pages, product pages, and other aspects of the site, you wouldn’t populate it with content or start experimenting with bonus widgets and apps.

So, how does this offer a better alternative to the standard workflow?

Simply put, an MVP workflow is quick, agile, and easy. The idea is you can validate key concepts with speed, fail quickly, and learn just as fast. Rather than having to build an entire app and almost start over from scratch every time you find an error, you can race through the iteration and development process.

MVP workflows are also highly appealing to start-ups and entrepreneurs hoping to validate ideas without a massive amount of upfront investment.

Examples of MVP Workflows

Still confused? The easiest way to understand how an MVP workflow works is to look at an example.

Let’s start with a conceptual example. Say you were building a voice transcription service for businesses. The desired features of this product might include the ability to download transcription, translate them into different languages, and integrate them into AI analytics tools.

However, using the MVP approach, you wouldn’t try to accomplish all of your goals with your software at once. Instead, you’d focus on something simple first – like the ability to download the transcripts. Once you confirm you can do that, you can start a new workflow for the next most important feature for the app.

One excellent example of a company with an MVP approach is Airbnb. The entrepreneurs behind this unicorn company, Joe Gebbia and Brian Chesky, didn’t have a lot of cash to build a business with at first. They had to use their own apartment to validate the idea of creating a website where people could share their available “space” in a home or apartment with the public.

To begin, Airbnb only created a very basic website, published photos of their property, and waited to see the results. After discovering people were genuinely interested in renting another person’s home, the company was able to begin experimenting with new ideas to make a site where people could list their properties for travelers.

The Pros and Cons of an MVP Workflow

There are a lot of benefits to the MVP workflow – particularly when it comes to gaining agility and developing new products quickly. However, there are downsides too.

Pros

  • With an MVP approach, you can maximize your learning opportunities and create a more innovative, successful product at speed. You get to test every step of the way.
  • You release iterations or versions of your product quickly, which means you discover problems faster, allowing you to quickly solve these issues.
  • You build on the benefits of customer fans, “evangelists” in the marketplace who are keen to help your product or service grow.
  • An MVP gives you more freedom to try out unique ideas and “risks” you might otherwise avoid with a traditional workflow.
  • Because you’re focusing on creating only the “minimum viable product,” you don’t have to spend a fortune on initially setting up your workflows.

Cons

  • Agile work with an MVP flow requires a lot of effort in collecting constant feedback from customers and releasing iterations.
  • You’ll need to dedicate yourself to releasing many small and frequent product releases on a tight schedule.
  • You might have to revise the functionality of your product or app a number of times.

Creating Your MVP Workflow

If you believe an MVP workflow might be effective for you, the first step is defining your “Minimum Viable Product.” The app, website, or product you design needs to align with your team’s strategic goals, so think about what your company is trying to achieve at this moment – before you get started. If you have limited resources, or specific purposes, like improving your reputation as a reliable company, now might not be the right time to develop a new MVP.

Ask what purpose your minimum viable product will serve and what kind of market you’re going to be targeting. You’ll need to know your target customer to help you test the quality and performance of each iteration of your MVP. Once you know what your ideal “product” is, ask yourself what the most important features will be.

You can base these decisions on things like:

  • User research
  • Competitive analysis
  • Feedback from your audience

For example, if you’re producing an AI chatbot that helps companies to sort through customer inquiries, the most important “initial feature” may be the ability to integrate that bot into existing websites and apps owned by the company.

MVP Approach Guidelines

Once you have your hierarchy of most valuable features for your minimum viable product, you can translate this into an action plan for development. Remember, although you’re focusing on the “minimum” in development, your product still needs to be “viable.” In other words, it still needs to allow your customer to achieve a specific goal.

  • Review your features: Reviewing your prioritized product requirements and the minimum level of functionality you can deliver with each of these “features.” You need to ensure you’re still providing value to your customer with anything you produce.
  • Build your solution: Build your minimum set of features for the product or service. Remember to build only what is required. You can use methodologies like the agile or waterfall method to help guide your team during this process.
  • Validate your solution: Release your offering into the market, and ensure you have tools in place to gather feedback from early adopters. Use beta programs, focus groups, and market interviews to understand how your solution works for your customers and where you can improve on your current offer.
  • Release new iterations: Based on what you learn from your target audience, release improvements to your product quickly. Use your validation strategies to collect information from your audience with each release.
  • Review again: Go back to your product requirements and desired features and start the process over again, this time focusing on the next most valuable functionality. Over time, the value of your minimum viable product will increase.

Using the MVP Workflow Approach

While the MVP workflow approach might not be the right solution for every development or design team, it can work very effectively in the right circumstances. The MVP approach doesn’t minimize the importance of understanding market problems and delivering value. Instead, the focus is on delivering quick value that gradually increases and evolves over time.

As many developers and designers know, the most useful form of product validation in most cases is real-world validation. When your customers have had an opportunity to use a product on a day-to-day basis, they can provide much more effective feedback.

Just keep in mind that committing to the MVP approach also means changing your workflow and committing to iterations – otherwise, other features may never be completed. You’ll need to be willing to work quickly and in small bursts without getting too heavily caught up in one feature or functionality.


Featured image via Pexels.

Source

The post How to Get Started with the MVP Workflow first appeared on Webdesigner Depot.

Source de l’article sur Webdesignerdepot

Réduire l’empreinte carbone d’un produit nécessite une vision de bout en bout de son cycle de vie. Pour cela, il est nécessaire de casser la barrière IT existant entre la conception et la supply chain. SAP et Siemens proposent des intégrations avancées entre PLM et ERP. Avec Atos, ils s’allient pour aider les industriels à relever le défi climatique.

Les industriels sont confrontés à un triple défi : proposer des produits toujours plus complexes, dans des délais toujours plus serrés, tout en réduisant leur empreinte carbone. Le bilan de la COP26 de Glasgow est sans appel : constater la réalité du changement climatique ne suffit plus, il faut agir. Histoire de compliquer la situation, la raréfaction des matières premières s’ajoute aujourd’hui à l’urgence climatique.

Le sujet de l’empreinte carbone est crucial pour trois raisons principales :

  • Les clients sont toujours plus nombreux à demander comment sont fabriqués les produits qu’ils achètent et quelle est leur empreinte carbone. Une empreinte que l’entreprise doit être capable de mesurer.
  • La législation devient de plus en plus contraignante, poussant ainsi les entreprises à être plus vertueuses en matière d’environnement. Mais également à mettre en place des outils montrant la réalité de leurs actions dans ce domaine.
  • La RSE met en exergue le sens des responsabilités des entreprises. La green line (empreinte écologique) devient progressivement aussi importante que la top line (revenus) et la bottom line (marges).

Une problématique à traiter de bout en bout

« L’Union Européenne veut réduire ses émissions de gaz à effet de serre de 55% en 2030 et vise la neutralité carbone en 2050. 2030, d’un point de vue industriel, c’est presque aujourd’hui, constate Denis Goudstikker, Teamcenter Business development Executive chez Siemens Digital Industry Software. À ce jour, un tiers des entreprises se sont fixé un objectif zéro émission, mais seulement 9% de ces entreprises ont réellement lancé des actions en vue de les réduire. »

Pour qu’un produit ait un impact environnemental minimal, il faut l’optimiser de bout en bout, de la conception à la production en passant par son utilisation et son recyclage. « La plupart des entreprises se concentrent uniquement sur les émissions liées à leur activité, explique Olivier Everaert, Head of Green PLM chez Atos. Elles ne prennent pas en compte l’ensemble du cycle de vie du produit et de sa chaîne de valeur, ce qui mène à des résultats sous-optimaux. Il faut penser en termes de réseau, où tous tendent vers un but commun, du fournisseur de matière première à l’industriel… et jusqu’au consommateur. »

« La réduction des impacts environnementaux commence dès la conception du produit, enchaîne Bruno Hemery, Head of Siemens partnership, SAP France. Elle se poursuit avec les approvisionnements (matières premières, emballage, etc.). Puis lors de la fabrication : produire mieux permettra d’avoir moins de rebuts en bout de chaîne et de consommer moins d’énergie. La logistique peut aussi être optimisée, en regroupant par exemple les approvisionnements de plusieurs fournisseurs (parfois concurrents) devant livrer un même client. Il faut également être capable de mieux connaître l’usage des produits, ce qui permettra de les améliorer au fil des versions. Enfin, d’autres éléments sont à prendre en compte, comme le recyclage et l’économie circulaire. »

Les actions en faveur de l’environnement ne sont pas forcément des investissements coûteux. Réduire la quantité de déchets générée lors de la production se traduit ainsi par une diminution des besoins en matière première et donc un abaissement des coûts de revient.

SAP et Siemens, artisans de la continuité numérique

Pouvoir prendre en charge l’ensemble du cycle de vie d’un produit nécessite de casser une barrière dans le système d’information de l’entreprise, celle séparant la conception, pré carré du PLM, et les fonctions finance, achat, production, vente, prises en charge par l’ERP. « Il faut décloisonner ces deux mondes, afin de mettre en place une continuité numérique, confirme Bruno Hemery. L’information pourra ainsi circuler dans les deux sens, la conception influant sur la supply chain et – partie innovante – la supply chain et l’usage du produit pouvant influer plus directement sur la conception. La continuité numérique permet également de s’assurer que l’information est identique des deux côtés. »

Le partenariat annoncé le 14 juillet 2020 entre SAP et Siemens vise à donner corps à ce concept de continuité numérique. Il s’est traduit par la livraison de nouvelles intégrations entre les offres de Siemens et de SAP. « Cette intégration fine entre nos deux plateformes donne une compréhension de l’ensemble du cycle de vie d’un produit permettant de s’assurer dès sa conception que l’on va dans la bonne direction, tout en restant compétitifs. La clé de la réussite est d’être capable d’amener des processus vertueux et compétitifs, » résume Denis Goudstikker.

Par ailleurs, la réduction de l’empreinte carbone passe souvent par de l’innovation. C’est le cas par exemple lorsqu’un constructeur automobile adopte des motorisations électriques ou à hydrogène. « La continuité numérique permet de créer des conditions favorables à l’adoption d’innovations, tout en maîtrisant le risque et en préservant la compétitivité de l’organisation, poursuit Denis Goudstikker. C’est un environnement qui permet de se préparer à n’importe quel scénario. »

Des ateliers pédagogiques animés par Atos

Atos sait diagnostiquer la chaîne de valeur des entreprises, afin de les aider à mettre en place une supply chain durable. Chaîne de valeur dont la visibilité et la transparence seront assurées par la mise en place d’une continuité numérique. La grande majorité des entreprises restent toutefois au début de cette transformation. Atos propose des ateliers pédagogiques gratuits leur permettant de mieux comprendre les applications pratiques de cette approche.

« Nous présentons une vingtaine de cas d’usages qui couvrent l’ensemble du cycle de vie d’un produit et nous montrons quelle est leur contribution sur l’empreinte carbone, détaille Olivier Everaert. Lors du premier atelier, les participants sont invités à nous faire remonter leur avis sur ces cas d’usage. Sont-ils applicables à leurs métiers ? Semblent-ils valables ? Peuvent-ils être améliorés ? Le second atelier permet de faire une plongée sur quelques cas d’usage sélectionnés, puis de discuter avec les participants de leur feuille de route de transformation. »

Ces ateliers d’idéation mettent l’accent sur le codéveloppement des cas d’usages et la cocréation des trajectoires de transformation des entreprises. Un premier brainstorming avant le passage à l’action…

The post SAP, Siemens et Atos : la continuité numérique comme réponse au défi climatique appeared first on SAP France News.

Source de l’article sur sap.com