Articles

Few things are more important to a web designer or developer’s chances of success than having the proper workflow. The term “workflow” applies to the set of standardized steps you or your company uses to create, test, and deploy designs or products.

Over the years, as development processes have evolved, so too have the workflows experts use to bring their ideas to life. The MVP workflow, or “Minimum Viable Product” strategy, is one of the most popular options in 2022.

Here’s what you need to know about the MVP workflow and how it differs from some of the other standard workflows developers may be used to.

What is the Designer/Developer Workflow?

As mentioned above, the designer/developer workflow is a series of steps used by experts in the web design world to achieve a creative goal. The process includes the steps taken to start a project, evolve it, and finish it. Since software is never developed without tools, the technology you’ll access throughout the development process is also considered in most workflows.

An example of a standard development workflow might look like this:

  • Scaffolding: This is the stage wherein you start your new web project, creating a git repo, downloading libraries, preparing file structures, and completing other tasks to make sure your product is ready to roll out into the world.
  • Develop: This is where you’ll spend most of your time writing code for your application or website. The development process may include various specific tools and support from other staff members.
  • Test: In this stage, you examine the functionality of your code to determine if everything works as it should. If there are errors or issues, you can go back and develop fixes to the potential problems. Your code may go through the development/test process several times before you can move to the next stage.
  • Integrate: This is when you merge the code for your part of the development process with the rest of the team. You can also integrate your code into websites and existing apps at this point. If you’re working solo, you can skip this process.
  • Optimize: You prepare all your assets for use on a production server during the optimization stage. Files are generally optimized to ensure your visitors can view your site easily or access your applications with ease.
  • Deploy: In the deployment stage, developers push code and assets up into the server and allow for changes to be viewed by the public.

What is MVP? (Minimum Viable Product)

Now you know what a developer workflow looks like, you can begin to assess the concept of the “MVP” workflow. The term “MVP” stands for Minimum Viable Product.

The idea of “Minimum Viable Product” applies to a range of industries, from education to healthcare and government entities. This term comes from lean start-up practices and focuses heavily on the value of learning and changing during the development process.

When you adapt your workflow to focus on an MVP, you’re essentially adjusting your focus to a point where you can create a stripped-back version of something new – like an app or a website. The MVP is built just with the core features (the minimum), so you can bring the idea to market and test it as quickly as possible.

For instance, if your goal were to create an attractive new website for a client, an MVP would focus on implementing the crucial initial tools, and nothing else. While you may create checkout pages, product pages, and other aspects of the site, you wouldn’t populate it with content or start experimenting with bonus widgets and apps.

So, how does this offer a better alternative to the standard workflow?

Simply put, an MVP workflow is quick, agile, and easy. The idea is you can validate key concepts with speed, fail quickly, and learn just as fast. Rather than having to build an entire app and almost start over from scratch every time you find an error, you can race through the iteration and development process.

MVP workflows are also highly appealing to start-ups and entrepreneurs hoping to validate ideas without a massive amount of upfront investment.

Examples of MVP Workflows

Still confused? The easiest way to understand how an MVP workflow works is to look at an example.

Let’s start with a conceptual example. Say you were building a voice transcription service for businesses. The desired features of this product might include the ability to download transcription, translate them into different languages, and integrate them into AI analytics tools.

However, using the MVP approach, you wouldn’t try to accomplish all of your goals with your software at once. Instead, you’d focus on something simple first – like the ability to download the transcripts. Once you confirm you can do that, you can start a new workflow for the next most important feature for the app.

One excellent example of a company with an MVP approach is Airbnb. The entrepreneurs behind this unicorn company, Joe Gebbia and Brian Chesky, didn’t have a lot of cash to build a business with at first. They had to use their own apartment to validate the idea of creating a website where people could share their available “space” in a home or apartment with the public.

To begin, Airbnb only created a very basic website, published photos of their property, and waited to see the results. After discovering people were genuinely interested in renting another person’s home, the company was able to begin experimenting with new ideas to make a site where people could list their properties for travelers.

The Pros and Cons of an MVP Workflow

There are a lot of benefits to the MVP workflow – particularly when it comes to gaining agility and developing new products quickly. However, there are downsides too.

Pros

  • With an MVP approach, you can maximize your learning opportunities and create a more innovative, successful product at speed. You get to test every step of the way.
  • You release iterations or versions of your product quickly, which means you discover problems faster, allowing you to quickly solve these issues.
  • You build on the benefits of customer fans, “evangelists” in the marketplace who are keen to help your product or service grow.
  • An MVP gives you more freedom to try out unique ideas and “risks” you might otherwise avoid with a traditional workflow.
  • Because you’re focusing on creating only the “minimum viable product,” you don’t have to spend a fortune on initially setting up your workflows.

Cons

  • Agile work with an MVP flow requires a lot of effort in collecting constant feedback from customers and releasing iterations.
  • You’ll need to dedicate yourself to releasing many small and frequent product releases on a tight schedule.
  • You might have to revise the functionality of your product or app a number of times.

Creating Your MVP Workflow

If you believe an MVP workflow might be effective for you, the first step is defining your “Minimum Viable Product.” The app, website, or product you design needs to align with your team’s strategic goals, so think about what your company is trying to achieve at this moment – before you get started. If you have limited resources, or specific purposes, like improving your reputation as a reliable company, now might not be the right time to develop a new MVP.

Ask what purpose your minimum viable product will serve and what kind of market you’re going to be targeting. You’ll need to know your target customer to help you test the quality and performance of each iteration of your MVP. Once you know what your ideal “product” is, ask yourself what the most important features will be.

You can base these decisions on things like:

  • User research
  • Competitive analysis
  • Feedback from your audience

For example, if you’re producing an AI chatbot that helps companies to sort through customer inquiries, the most important “initial feature” may be the ability to integrate that bot into existing websites and apps owned by the company.

MVP Approach Guidelines

Once you have your hierarchy of most valuable features for your minimum viable product, you can translate this into an action plan for development. Remember, although you’re focusing on the “minimum” in development, your product still needs to be “viable.” In other words, it still needs to allow your customer to achieve a specific goal.

  • Review your features: Reviewing your prioritized product requirements and the minimum level of functionality you can deliver with each of these “features.” You need to ensure you’re still providing value to your customer with anything you produce.
  • Build your solution: Build your minimum set of features for the product or service. Remember to build only what is required. You can use methodologies like the agile or waterfall method to help guide your team during this process.
  • Validate your solution: Release your offering into the market, and ensure you have tools in place to gather feedback from early adopters. Use beta programs, focus groups, and market interviews to understand how your solution works for your customers and where you can improve on your current offer.
  • Release new iterations: Based on what you learn from your target audience, release improvements to your product quickly. Use your validation strategies to collect information from your audience with each release.
  • Review again: Go back to your product requirements and desired features and start the process over again, this time focusing on the next most valuable functionality. Over time, the value of your minimum viable product will increase.

Using the MVP Workflow Approach

While the MVP workflow approach might not be the right solution for every development or design team, it can work very effectively in the right circumstances. The MVP approach doesn’t minimize the importance of understanding market problems and delivering value. Instead, the focus is on delivering quick value that gradually increases and evolves over time.

As many developers and designers know, the most useful form of product validation in most cases is real-world validation. When your customers have had an opportunity to use a product on a day-to-day basis, they can provide much more effective feedback.

Just keep in mind that committing to the MVP approach also means changing your workflow and committing to iterations – otherwise, other features may never be completed. You’ll need to be willing to work quickly and in small bursts without getting too heavily caught up in one feature or functionality.


Featured image via Pexels.

Source

The post How to Get Started with the MVP Workflow first appeared on Webdesigner Depot.

Source de l’article sur Webdesignerdepot

Maps are a fascinating method for delivering content. At their best, they can create an intuitive way of presenting information and interacting with it. This is the advantage that digital maps, through mobile apps and websites, have over print maps and images where no interactivity is possible.

But it’s important to understand that more data ≠ better experiences. We all now have so much data available to us through multiple services that, arguably, the greatest challenge isn’t sourcing information but filtering it out. We can only handle so much information input before we become overloaded. This issue risks being omnipresent with maps. There are so many potential points of interest on a map that it’s essential to be clear about what needs to be exposed to users.

Also, UX design, map design, and user interface are all critical. While maps can be a powerful way of drawing people in, if end-users feel that you didn’t even consider the visual design, they’ll ‘bounce off’ your site or app in moments.

Common Use Cases

When are maps useful, and what problems do they solve? Let’s dive right into the most common use cases for maps used in web design.

Navigation and Direction

Like Google Maps shows, navigation and direction are arguably the classic case study for interactive maps. You are in one place and need to get to another. You can enter your destination, your current location, and the map will present suggestions for getting there. You can select the method of travel and adjust desired departure or arrival times. But you need to understand first what functionality your users need. How these options are exposed to users is a critical piece of UX design.

Also, if users are searching for options such as somewhere to eat, it’s not so straightforward. Then, how your map handles panning in real-time as users swipe around a city is going to be a big issue.

Showing Relationships and Trends Geographically

This is something that you’ll see in every election in any western country. We’re all used to seeing maps that give us a state-of-play for which state or seat is held by which party. Then, we might see projections based on voter intentions and projected voting swings deriving from that. Then, exit poll data can be projected with the map updated on an ongoing basis until the final result is confirmed.

The capability to do this is essential because if a static map were used, it’d be out of date any time a new poll was released. Also, voting intentions can change over a campaign, so such maps need to be dynamic. Of course, such maps are only as accurate as the available data, as the US 2016 election map showed.

Show Points of Interest

As mentioned previously, there’s a lot of data that can be exposed to map users. However, that doesn’t automatically mean that it should be. Usability is key. For example, when you look at a map, you’ll typically first see key points of interest. Which points of interest are going to be presented to you can vary.

One variant is zoom level. If your map is currently showing an entire city, the level of detail the map presents is deliberately limited. You’ll see districts, large roads, or geographic features such as rivers. If more detailed information were presented, users on mobile devices, in particular, would be overwhelmed. Even at this level, you’ll notice typography differences. These can include the city name being in bold or the names of different areas in capital letters. So the level of detail is coupled with the scale of the map. Zooming in a few notches will expose significant points of interest, such as museums. Zooming in to specific districts will reveal restaurants, coffee shops, and universities. This visual hierarchy is a critical way of managing the exposed level of information.

But information is still being abstracted away. It’s not until you tap on the museum that you’ll see information on opening hours and busy times. This is also typically presented with user photos and reviews. Context is also taken into account, so you’ll start to see local hotels and restaurants. So it’s not just individual points of interest that are important, but the connections between them.

6 Tips For Improving Interactive Maps

What are the challenges of creating effective maps, and how do people address the data overload problem? We’ll answer this question and go over the must-know aspects of map creation.

1. Ensure Security and Brand Trust

GDPR or General Data Protection Regulation. This is a critically important European law that extends a wide range of legal protection to European citizens regarding personal data. It’s not possible here to cover the full extent of the law, but here are some quick key points:

  • Consent is required for the processing of personal data; it cannot be assumed
  • You need to have a retention policy for information that’s capable of identifying people

Be aware that the latter doesn’t just cover commercial purposes. Research students have to submit GDPR forms that address what kind of data they’re sourcing and how they’ll be retaining it.

But the most crucial context is commercial. If a business suffers a data breach, it can be fined up to 20 million euros or 4% of annual worldwide turnover in the preceding financial year, whichever is greater. Therefore, any business storing data that could identify their customers will need to assess risk and compliance. Remember: it’s 4% of worldwide turnover, not EU turnover.

Also, anything of your business that you expose to your customers or users is an extension of your brand. Therefore, you need to assess your maps for brand compliance too. If you have primary brand colors and your map doesn’t abide by them, that’s a very poor look. Source the color hex codes directly from your brand team and involve them in design.

2. Use the Appropriate Type of Map

It’s also important to consider what type of map is most appropriate for your use case. Think carefully about what your users need, what you’re trying to communicate, what information you need to present, and how best to present it.

For example, points of interest style maps in a tourist app will be way more helpful than heat maps: people want to know where something is, key data like opening hours, and how to get there. A heat map showing the number of visitors to each attraction or area of a city is unlikely to be useful to tourists. However, it could be useful to the attractions themselves to map their visitors by heat map over time. This could help larger museums chart which exhibits are most popular.

Transport for London is charting passenger movement on the London Underground by detecting when a device with Wi-Fi comes into range and then passes out of range. They’re using this to understand overall user journeys and movements within individual stations to better manage disruptions.

3. Avoid Pop-Ups

It should go without saying by now that auto pop-ups are despised. It doesn’t matter what they’re doing or what they’re offering; an unwanted pop-up can only get in the way. The level of impact is even greater on a phone where pop-ups take up even more screen space.

Given this, many users close them without even reading them. So if you’re using pop-ups, don’t kid yourself. You’re likely just irritating users and increasing the likelihood that they’ll ‘bounce off’ or uninstall.

4. Avoid Auto-Geolocation

Auto-geolocation sounds incredibly convenient but can result in some real problems. For example, if there are any bugs with auto-geolocation, you could get false results. If someone connects through public building Wi-Fi, you could get false results. If they’re connecting through a VPN then, unless you get the user’s IP address and check if it’s the exit portal of a VPN, you could get false results.

The problem is most significant with mobile maps. If a map user is looking at a points of interest map, they likely have a specific and immediate use. This means it’s in their best to get the most accurate results possible. So why not just ask them?

Precision and Accuracy

These terms have specific meanings in geolocation. ‘Precision’ is the exactness of the data. ‘Accuracy’ is how closely the information on a map matches the real world. So you want precision and accuracy to be spot on, or data risks losing value. This applies not just to the gathering of data but to the representation of it. For example, if you have street-level data but your maps don’t present individual streets, then any representation of data on that map is likely to have poor accuracy. That map might succeed in abstracting irrelevant information but presenting an imprecise and inaccurate view.

5. Avoid Map Legends as Much as Possible

In many cases, primarily points-of-interest maps, they’re just not needed anymore. An essential part of user experience design isn’t just visual hierarchy but information hierarchy. You can mouse over on a desktop or laptop to get the essentials of a location, e.g., the museum’s name and its opening hours. On a mobile device, you can tap on that location to get the essentials, and you can tap on another location to move on; you don’t even have to press back. Given that, a legend would get in the way. So this simple piece of information design solves information overload issues.

As with all rules, there are exceptions. A good one is a heat map where a density of what’s being measured needs to be communicated. It doesn’t matter what the data is; it just needs to be something where mapping provides greater insight, especially if it informs decision-making. Sales is an excellent example for a national or multinational company. Of course, weather forecasting can make use of literal heat maps.

6. Accessibility Compliance

Not everyone has perfect eyesight. Even if someone has excellent vision, they could still be colorblind (8% of men and 0.5% of women are). Given that, take the W3C’s accessibility standards into account and treat them as a baseline or minimum barrier to entry for compliance. You shouldn’t feel good about the possibility of excluding 8% of your potential audience or customers. Ensure you keep your UX designers involved and don’t shy away from creating senior-friendly web designs.

Put simply: imagine if you could appeal to a new demographic that’s not catered to. If your competitors ignore them, you could give them a real reason to choose you instead by taking some straightforward steps. If your competitors are catering to them, you also need to. If you don’t, you’re just giving potential customers a big reason to ignore you.

Conclusions

The key takeaway is that there’s far more to creating good maps than just good cartography. That can be critical, too, though this may vary depending on the use case.

This will be a team effort because your map will involve data sets, design decisions, and, yes, cartography. You’re going to need to involve brand and IT too. So think about design principles and development methodologies.

First and foremost, what are your users’ needs? If you haven’t done any user research or taken the time to understand the customer journey, are you adding anything or getting in the way? It’s easy to see the department that requested the map as stakeholders, but you should probably view your users as stakeholders too.

This sounds complex, but as you hopefully now appreciate, a map is probably more complicated than you thought.


Featured image via Pexels.

Source

The post The UX of Maps in Web Design first appeared on Webdesigner Depot.

Source de l’article sur Webdesignerdepot

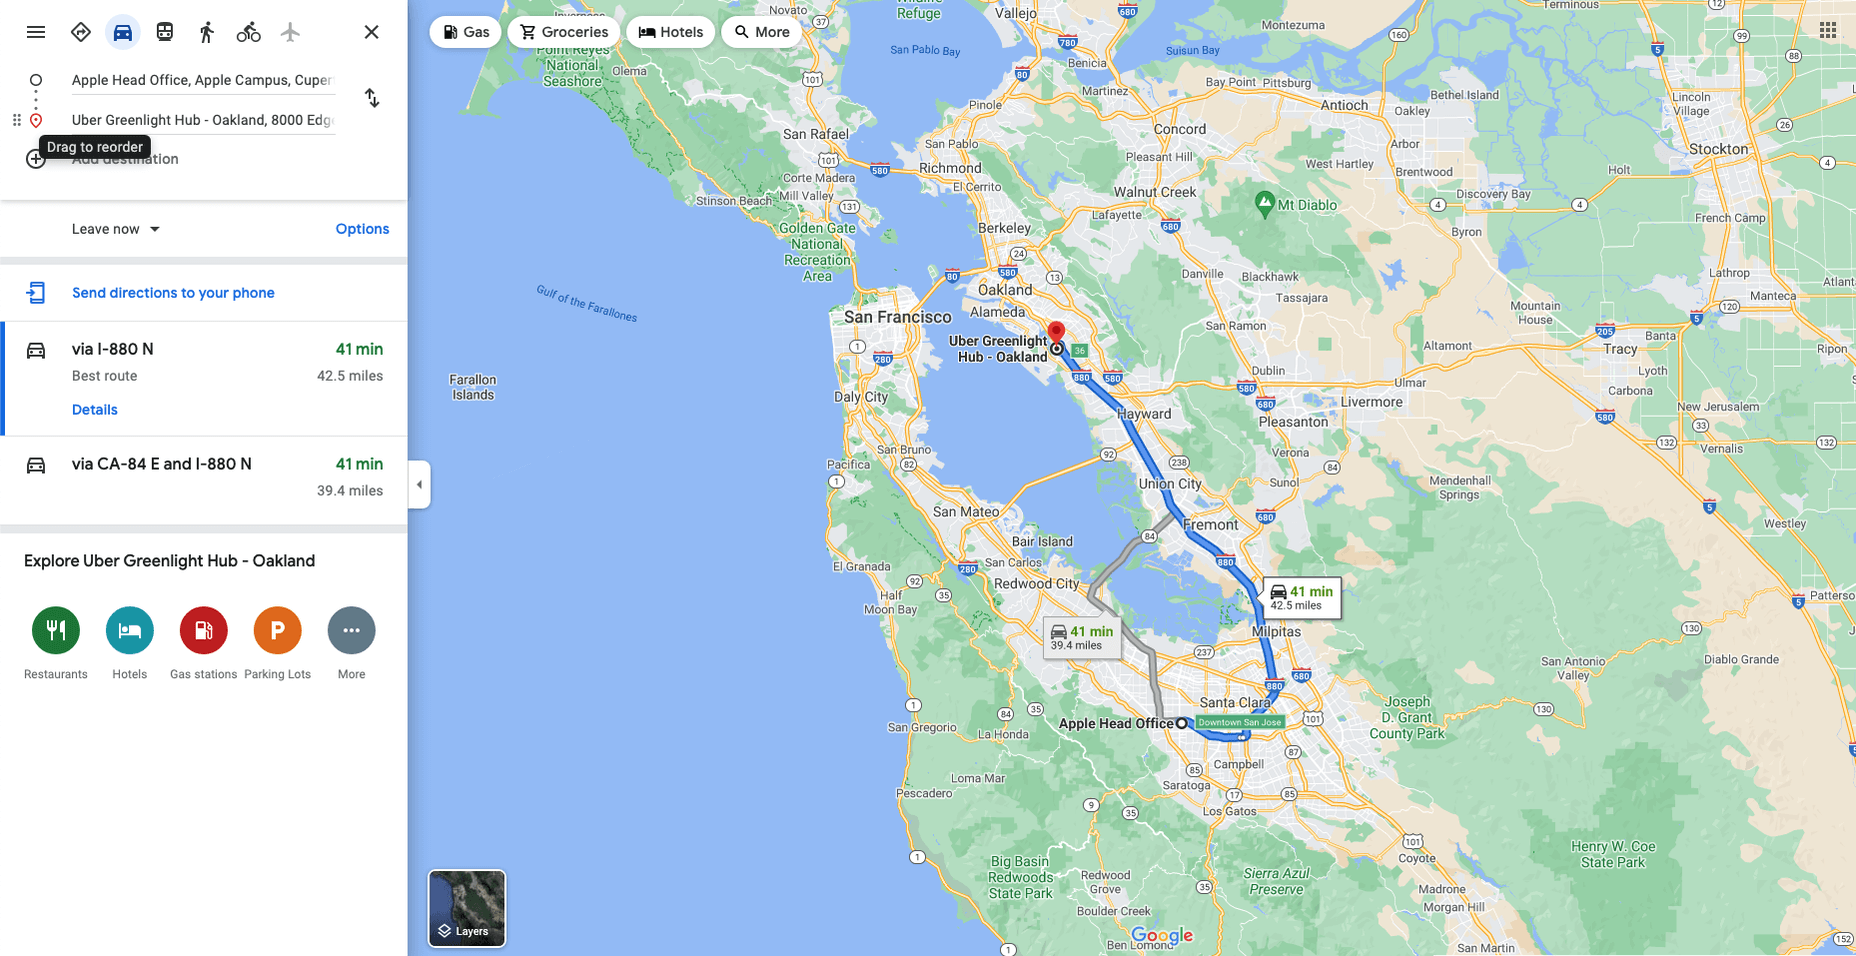
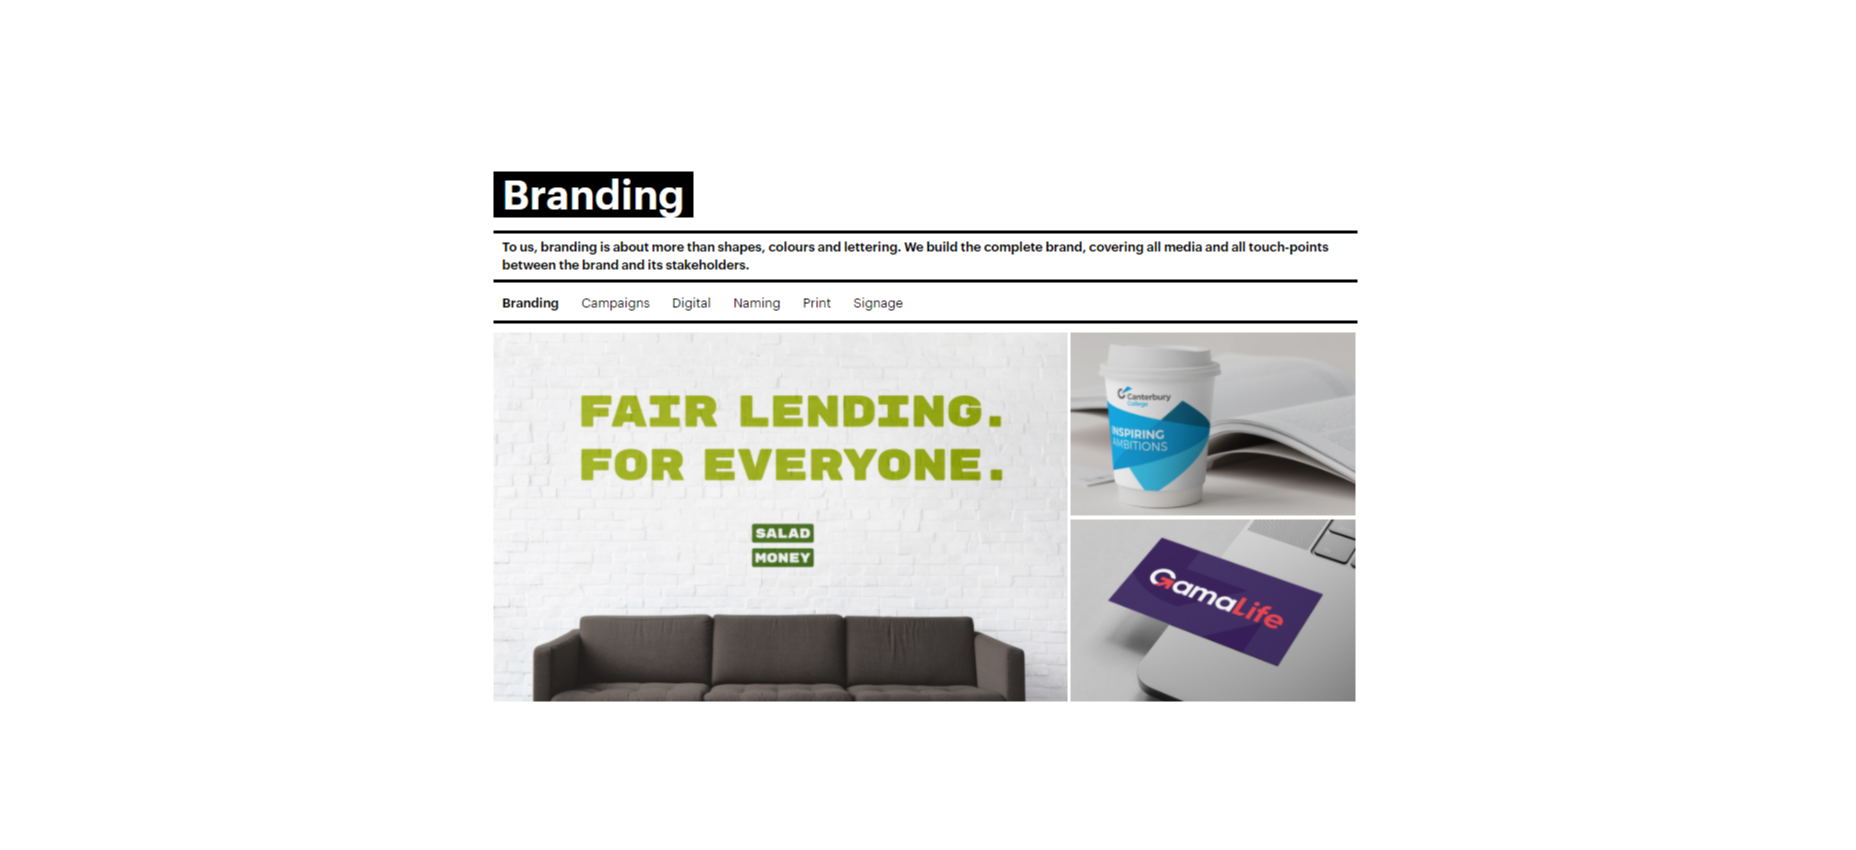
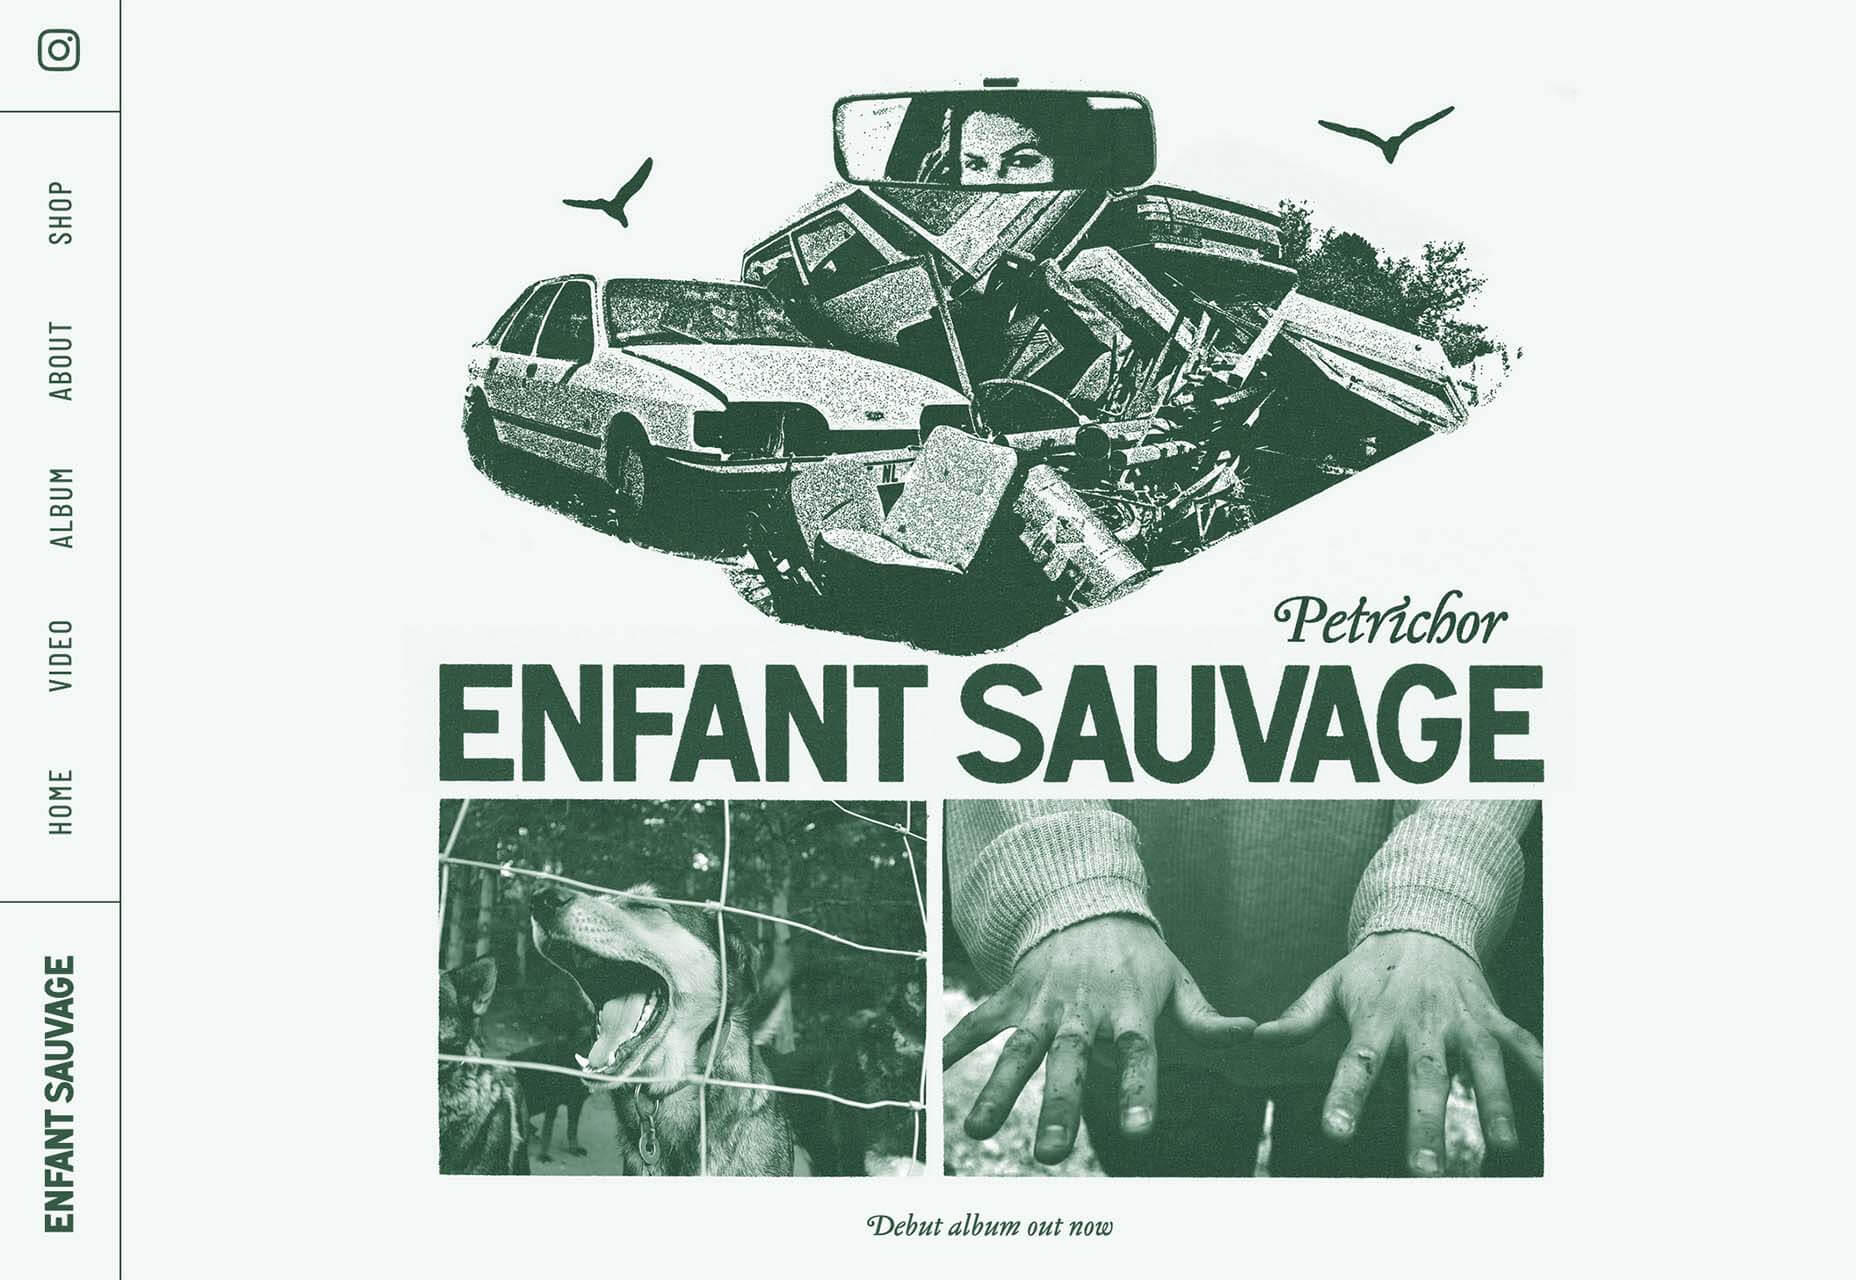
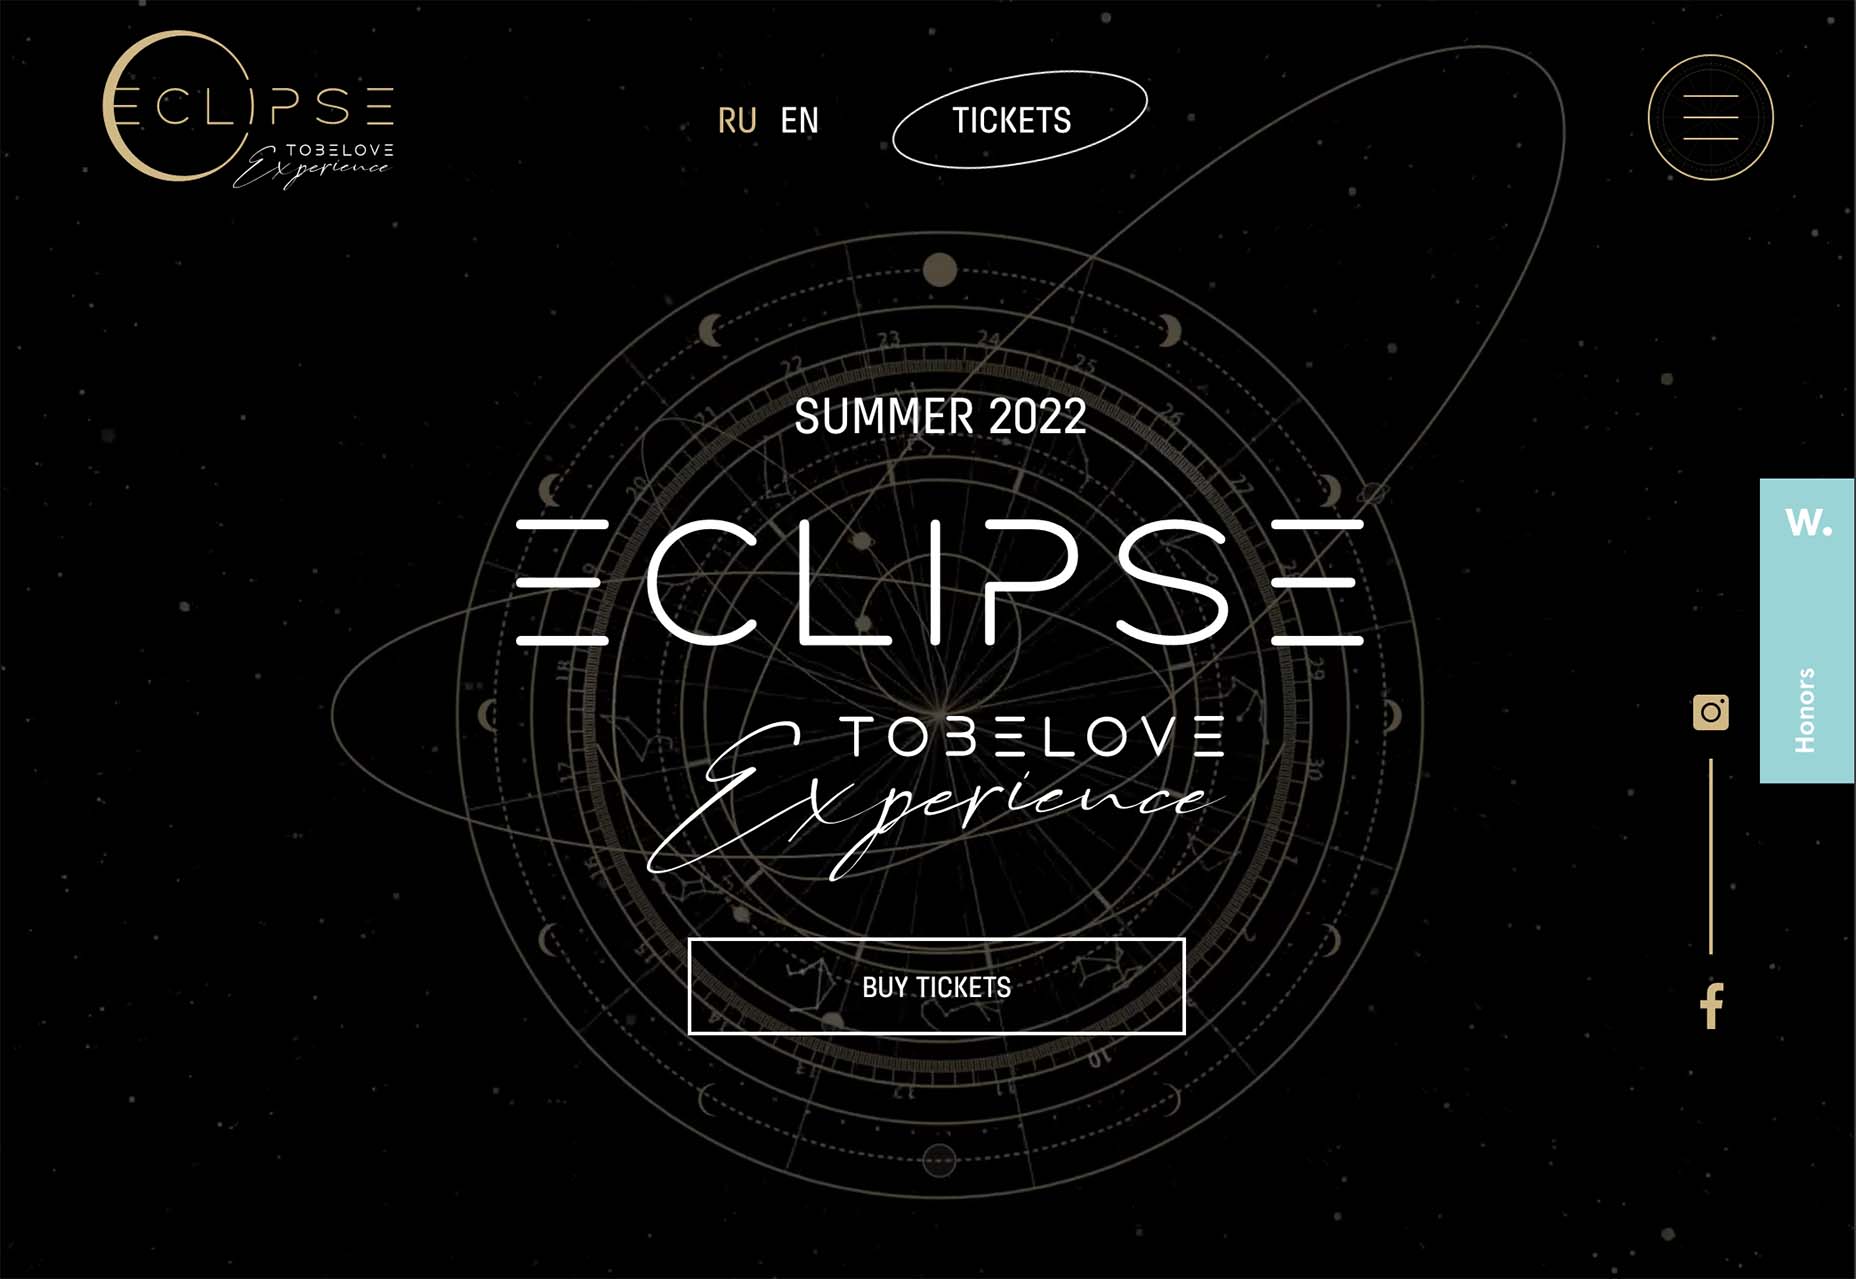
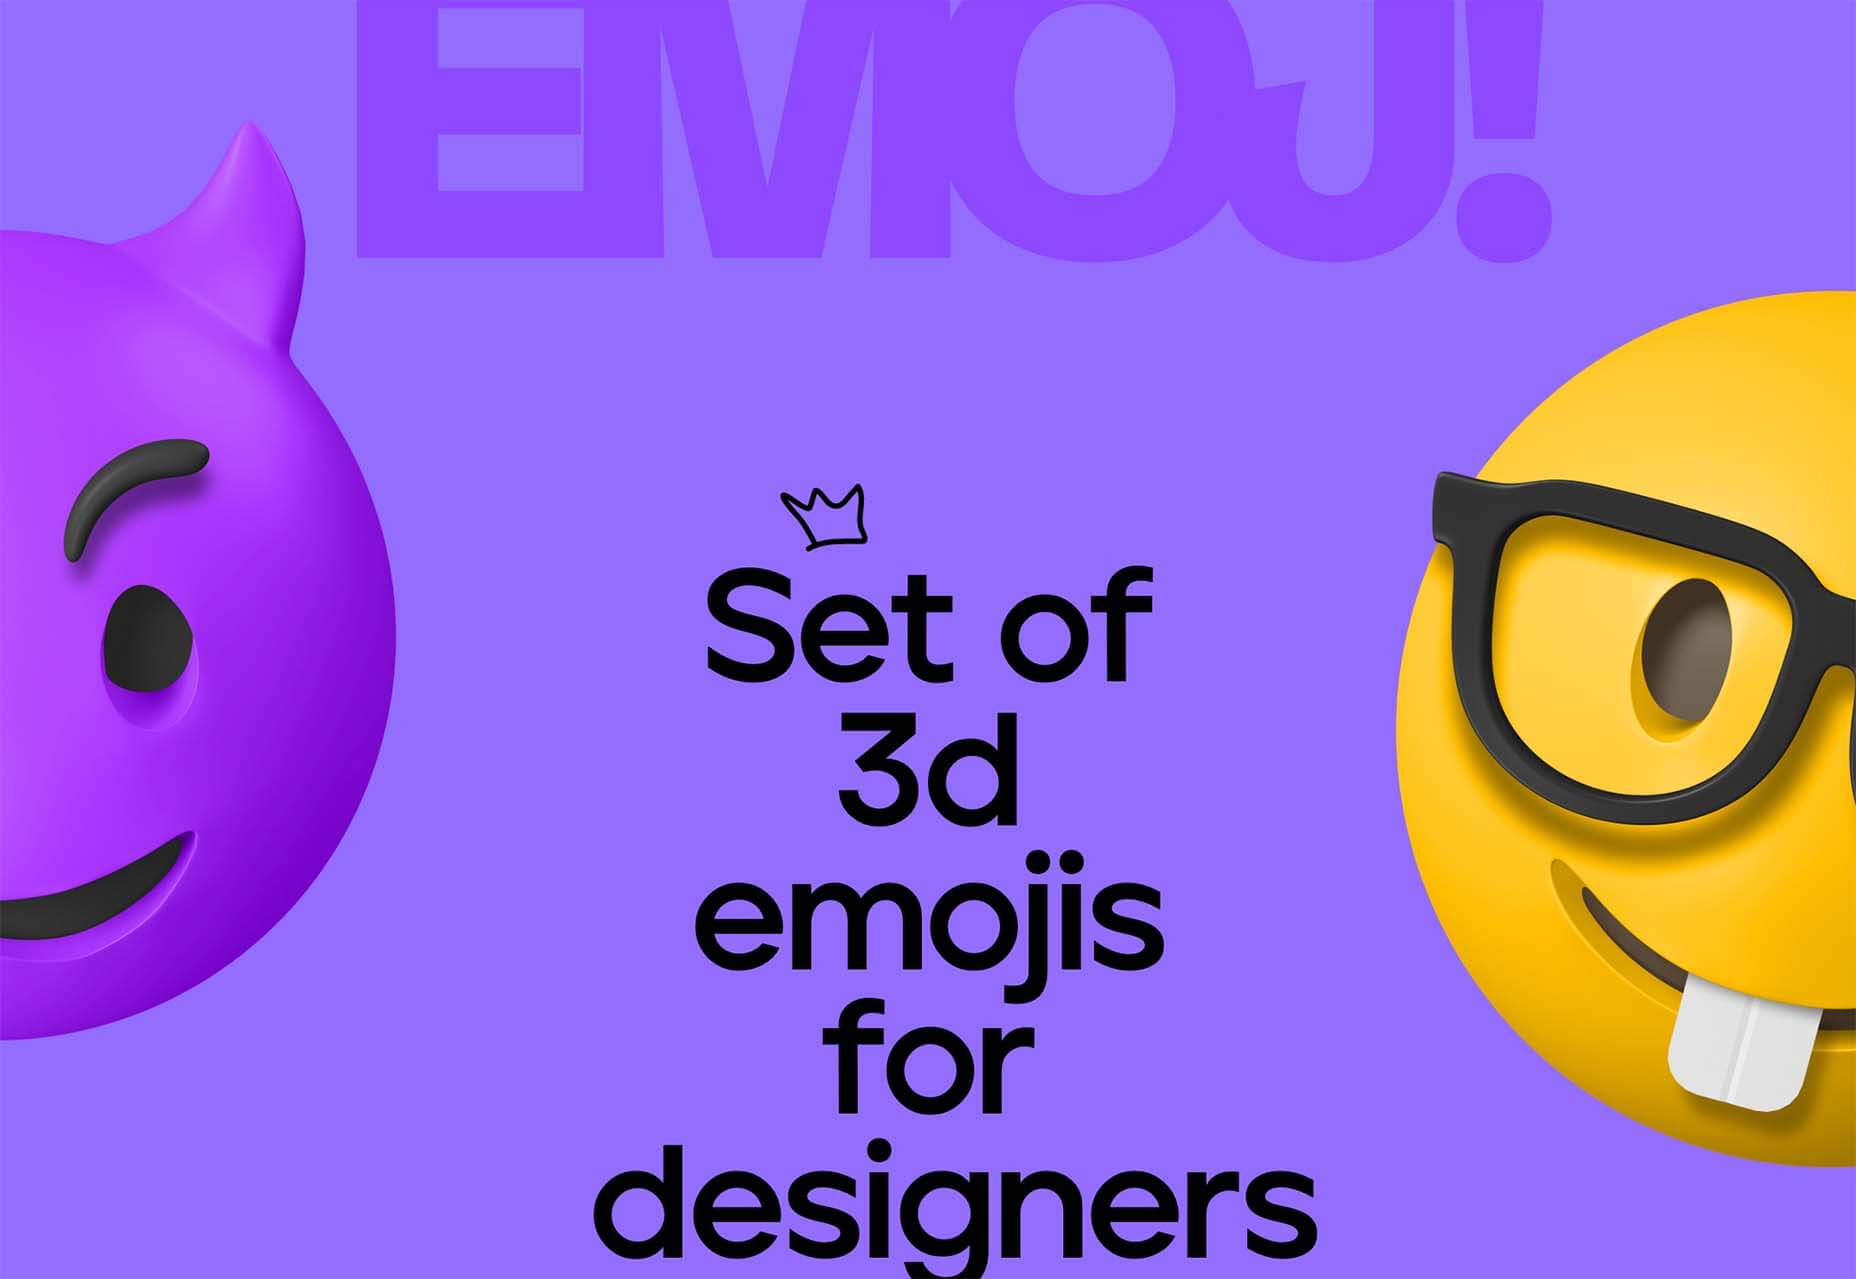
The year might be coming to an end, but plenty of design trends are still beginning to emerge. It’ll be interesting to see how many of these website design elements remain popular into the new year. From vintage elements to circles to happier feelings, there’s a lot to play with here.

Here’s what’s trending in design this month…

Old-School Print Inspired

Vintage design elements seem to circle back in new iterations at a pretty frequent pace. This time website designers are finding inspiration from old-school print design.

These projects mimic the look of old newspapers and magazines with styles that look like news or advertising content. One of the most exciting takeaways might be color, with beige backgrounds that almost seem like aged paper.

Note the font choices, scale, and imagery as well. All of these things have an old-school feel that’s modern enough to help encourage interaction.

Each of these designs keeps visitors engaged with trendy effects that pair with the vintage aesthetic so that while there’s an old-school look, the overall design is modern and fresh.

The portfolio of Niccolo Miranda feels like a “WAR” day on the front page of a major newspaper, but with modern touches – computer illustrations, animated images, and button-style icons.

Enfant Sauvage Music takes on the feel of an old-style newspaper or magazine ad with a single color design and grainy imagery. An oversized funky pointer on hover and side navigation keeps the design interesting.

Kalso uses a giant timeline with typography and effects that mimic the era on the screen. Animation and motion keep the design with the times and on-trend.

Center-Screen Circles

Circles seem to be a website design trend that just never goes out of style – it only evolves.

The newest iteration includes center-screen circles. And you can use them in all kinds of different ways. The nice thing about a circle is the shape is innately harmonious and can pull a design together and make everything feel together and unified.

They can be an excellent container for text or other elements or serve as a button.

Circles work with almost any overall design pattern, in any color, and with virtually any type of image or video. The shape is practically perfect! (That’s why it’s a trend that never really gets old.)

Each of these examples uses a center-screen circle in a slightly different way.

Aflote uses a center circle as part of its overall branding effort and to help draw the eye from the split-screen images to the center arrow, encouraging users to scroll to the next bit of content. Color helps here, and the circle is a container for brand and some other content with a nice layer on top of the images.

One Ocean Science uses one of the oldest circles we know – the globe – as a dominant art element that rotates in the center of the screen. The layer on top – the exact text in multiple languages – gets extra attention thanks to the center placement. The design also uses a top left corner circle for branding and a bottom right corner circle as a CTA, helping create a visual flow through the design from top to center to bottom to click.

To Be Love uses a fantastic animated set of concentric circles to pull together the name of the event and draw interest to the CTAs. The circle is just the right size in a sea of black sky to draw the eye to the content in the middle of the screen.

Lighter, Happier Designs

After a couple of years of pandemic life and a world that’s just been a little less than cheery, website designers include lighter, happier elements to projects. This might just be the design trend we all need right now.

This effect can be designed in several ways, including color, imagery, animation, scale, and even typography. It’s hard to pinpoint what makes a design lighter and happier until you see it, but when you do, you’ll know it. (It might just be that little grin at the corner of your mouth when you see it.)

Meanpug uses fun, animated illustrations as a load screen with a full-text homepage (you’ll have to click through to see it). Between color and animation, you can’t help but feel good looking at the design. What might be most interesting is that the website is for a marketing agency that works with law firms. (Probably not what you expected at all.)

Happy smiling faces are hard not to feel good about. Even the devil emoji seems somewhat joyful. Add in big, bold typography and the yellow smiley, and the world just feels a little less dark.

Oatly uses lots of small elements in a cartoon-style aesthetic that is light and interesting. In addition to fun fonts and animation, all of the words on the website also contribute to a feeling of ease and happiness. It’s a solid strategy for sales; make people feel good about what they are thinking of buying to help propel them toward a purchase.


Conclusion

One of the most exciting things that we’ve seen with design trends in the past year is how world events – from the pandemic to isolation to working remotely – have impacted design projects as a whole.

We’ve seen fewer faces, more illustrations and typography, and an overall shift in feeling to some of the lighter, happier design elements featured here. Cheers to 2022!

Source

The post 3 Essential Design Trends, December 2021 first appeared on Webdesigner Depot.

Source de l’article sur Webdesignerdepot

Jamstack (JAMstack), is one of the most popular (and rapidly growing) tools for app and website creation. A unique ecosystem of functionality, Jamstack promises developers the support they need to create powerful websites and progressive applications. 

For a while, Jamstack was mostly written off as just another buzzword in the developer space. However, today, it’s growing to become a powerful investment for many business leaders. Even big companies are getting involved, like Cloudflare, with Cloudflare pages, and Microsoft with Azure Static Web Apps. Elsewhere, we’ve seen brands like Shopify, PayPal, and Nike getting involved too.

So, what exactly is Jamstack, and is it time you transitioned over? Let’s find out…

What is Jamstack?

Jamstack, otherwise known as “JAMstack,” is the name of a developer ecosystem made up of JavaScript, APIs, and Markup (hence: JAM). The solution is a web development architecture allowing developers to access static website benefits, such as higher security and better performance, while still unlocking dynamic database-oriented CMS.

The Jamstack solution allows companies and developers to build a dynamic website where real assets are pre-rendered static files in a CDN. The dynamic environment runs on JavaScript client-side, through serverless functions. 

For a better insight, let’s compare Jamstack to the LAMP stack development strategy, which originated from the four open-source components many developers used to build sites: Linux, Apache HTTP, MySQL, and PHP.

With LAMP, each user request for a page forces the server to query a database — unless the page is cached — and combine the result with page markup data and plugins. Jamstack websites serve pre-built optimized assets and markup solutions quickly because the files are already compiled on a CDN. There’s no need to query the database. 

Jamstack workflows dramatically reduce cumbersome issues with development and excess maintenance, making them highly appealing to developers. 

What Are the Benefits of Jamstack?

Jamstack won’t be the ideal development tool for everyone, but it has a lot of benefits to offer. By fetching HTML from a CDN, the system doesn’t have to wait for HTML to be combined and returned to clients. The solution also provides an improved developer experience with static methods. 

Using Jamstack, developers can build fantastic static files ready to serve by request, hosted on a global CDN. Some of the biggest benefits of Jamstack include:

  • Performance: Because you’re serving pre-built static files from a CDN directly, you’ll achieve much faster loading times, unmatched by typical server-side rendering options. Because you’re serving static files, you’re also better equipped to handle any traffic spikes you might encounter, with minimal slowdown.
  • User experience: Better website performance significantly improves user experience and website traffic, as well as SEO efforts. User experience has always been a critical factor in ensuring the success of a website, and it’s essential to keeping your customers around for as long as possible. Websites optimized for performance will always delight users. 
  • Security: With Jamstack, there are no servers or databases to worry about. You use third-party solutions to handle these issues for you. The architecture of Jamstack means the back and front end of your development processes are decoupled, and you can rely on APIs to run server-side processes easily. Jamstack also comes with security benefits other approaches can lack. Clear separation of services is essential here. 
  • Hosting and scaling: Scaling and hosting can often be problematic in the development world, but because you’re serving files from a CDN, you’re less likely to encounter issues. CDNs are almost infinitely scalable, so you get excellent extensibility built into your development environment. CDN hosting for static files is also cheaper than traditional hosting, so you can keep costs low. 
  • Maintenance: Jamstack makes it easy to push your front end to the edge rather than managing infrastructure directly. Ditching plugins, databases, and other hosting services can help you to save more time and money on a significant scale. 
  • Developer experience: From a developer perspective, there are tons of benefits from Jamstack. You get the ease of a Github, CI/CD, CDN flow, and auto previews with simple rollback to reduce the need for backups. Local developer environments and the ability to run and debug cloud functions locally are all fantastic.

Does Jamstack Have any Limitations?

In a lot of ways, Jamstack is an innovative and revolutionary solution for development. It can help you to create a far more engaging website and present your company in an incredible way. Of course, that doesn’t mean there are no limitations to be aware of. 

Jamstack is developer-friendly, for instance, but it’s not beginner-friendly. You will need at least some knowledge of web development to start unlocking the benefits. You’ll need to understand things like Vue or React, but you should develop a tool anyone can use with a bit of work.

There’s also a handful of things you can’t pre-generate, like user-specific and real-time data. So, this means you may not be able to use Jamstack effectively on projects requiring these kinds of data. Building an analytics dashboard, for instance, probably isn’t a good idea with Jamstack. Other issues for some developers may include:

  • API complexity: It can be overwhelming to try and find the right solution for your needs among so many different options. Of course, this could also be something you’d say about the WordPress ecosystem and its huge variety of plugins. An API usually won’t break your production website, at least. 
  • Long building processes: If you have a large number of pages, there’s more likely to be an extensive building process to think about. Whenever you make a change to a single page, even a little one, you’ll need to rebuild your entire website. This is a problem if you run into a website with thousands of pages. There are solutions to this problem available, however.
  • Handling dynamics: Going with Jamstack doesn’t mean abandoning your backend. An important part of the approach is accessing serverless functions, which are becoming more effective over time. These serverless functions can also be executed on the edge. The backend parts of your website will require regular maintenance as they scale.

Best Jamstack Tools to Check Out

Now you know the basics of Jamstack, let’s look at some of the tools you can use to design an incredible website or application within the Jamstack environment. 

The Git Tool Landscape

There are tons of tools within the Git ecosystem common among Jamstack developers. Starting with Git itself. Git represents a powerful free, and open-sourced distributed version control system. With this solution, companies can handle everything from small to enterprise-level projects with efficiency and speed. The solution is extremely easy to use and learn, and outclasses a range of tools like Perforce, ClearCase and Subversion. 

GitHub Pages and GitLab pages are two hosting services for Git repositories with built-in services to host static pages from out of your codebase. This makes the two solutions fantastic for when you’re building a Jamstack website. You can access the functionality for free too. 

GitLab gives you a comprehensive DevOps platform to work with, where you can enjoy a comprehensive CI/CD toolchain out of the box. The comprehensive solution, delivered as a single application, changes the way security, development, and Ops teams integrate and collaborate. Gitlab helps to accelerate software delivery on a massive scale.

AWS Amplify

AWS Amplify, created by Amazon Web Services, is a development platform packed full of useful features for people in the Jamstack environment. The Amplify offering aims to reduce the complexities associated with Amazon Web Services for mobile and web deployment. You get 12 months of hosting for free with new accounts, and you get Storage with Amplify too. 

The Amazon Amplify solution dramatically improves the regular AWS workflow, especially if you’re just a novice user. There’s a huge documentation hub to help you too, which is way more convenient than Amazon’s usual documentation solutions. Amplify is still accessed from a somewhat bloated console, however. 

With AWS Amplify, companies can access features like a comprehensive data store to sync data between the cloud and websites. There’s also easy-to-use interface access across all different categories of cloud operations. The service works well with a range of JavaScript central tools. 

Netlify

Netlify is a pioneering solution in the Jamstack environment, allowing users to go dynamic with their websites and applications on their own terms. You can access a range of add-ons and integration, access your favorite tools, and make your own. The flexible environment enables developers to run websites on a multi-cloud infrastructure designed for speed and scale automation. 

Built to be entirely secure from the ground up, Netlify makes it easy to build a site that’s custom-made for performance and deployed directly. You don’t need to worry about managing, scaling and patching web services, which means you can more quickly implement your Jamstack architecture. 

Unlike other large legacy apps, Jamstack projects are neatly separate from your front-end pages and UI from the backend databases and apps with Netlify. Using this service, the entire front-end can be pre-built with highly optimized static assets and pages, and developers can deliver new web projects faster than ever before.

Next.JS

Inspired by the functionality of PHP, Next.JS is a solution for pre-rendered JavaScript modules. The solution allows developers to easily export the components of their apps and perform individual tests to determine how each element works. You can also access a wide range of components and modules from NPM. The Next offering allows developers to save time, removing the need to use webpack bundles and transform with compilers. 

The full solution is extremely intuitive, ensuring developers can create solutions quickly. What’s more, the technology you build will allow you to load only the bundle needed from your JavaScript workflow, rather than all the JavaScript at once. Pre-fetching, one of the features of Next.JS, also picks up where standard code-splitting leaves off, allowing for optimized bundles of code to load seamlessly. 

Next.JS also supports hot-module replacement. This means instead of reloading an entire application when you change the code, you only recreate the modules you’ve altered.

Angular

Probably the most widely-recognized of all the JavaScript frameworks, Angular, designed by Google engineers, appeared first in 2012, offering developers a new way to create dynamic pages. Before this technology, there were other opportunities for creating dynamic pages, but they were nowhere near as convenient or speedy. 

Angular is probably one of the most essential tools companies can use when building a Jamstack website or environment. The front-end web development tool attracts developers from all over the world. Every version is packed with features and constantly upgraded to ensure you can generate the best results. 

Angular extends HTML file functionality with powerful directives, and it requires very little effort to enable these directives too. All you do is add the ng- prefix to your HTML attributes and you’re ready to go. Angular also allows developers to create widgets leveraging editable data with two-way binding. This means developers don’t have to write code that syncs constantly between the model and view. 

With Angular, developers also get access to things like virtual scrolling, which can help with displaying large lists of elements performantly, rendering on the items that fit on the screen to reduce loading times. 

React

Another must-have tool in the JavaScript world for Jamstack, the React solution was launched first in 2013, and has won thousands of customers across the globe thanks to fantastic functionality. Today, the full landscape is maintained by Facebook, along with all the members of the standard developer community. The solution is used by some of the biggest giants in the tech industry, like Netflix, PayPal, and Apple. 

React is a true pioneer in the Jamstack ecosystem, with its sensational approach to simple and straightforward solutions for JavaScript management. You’ll be able to access batched and virtual DOM updates, which makes it easier to unlock components quickly, and write your components the way you see them. There’s also the added benefit that React is compatible with a lot of tools. 

You can build a comprehensive app or website with the help of React, and you’ll have no trouble accessing some of the top features, particularly with plenty of support available from the React community. 

Gatsby

Created from the ground up to improve user experience on a comprehensive level, Gatsby is a static site generator with heavy focus on things like SEO, performance, and accessibility. The solution offers plenty of out-of-the-box features to help developers deliver the most immersive solution for their users, without unnecessary complexity. 

Gatsby users pre-configuration to develop static websites giving developers faster loading pages, stronger code splitting, and server-side rendering. You can also access features like data prefetching, asset optimization, and quick image loading. Gatsby boasts excellent documentation and starter packs to help you get your site up and running more quickly.

The GraphQL data layer of Gatsby also means the system can collect your data from anywhere, including your CMS, JSON, Markdown, and APIs. More than just your standard site generator, this is a tool built specifically with performance in mind. 

Agility CMS

Developing an effective Jamstack website means having access to the right CMS technology. Agility CMS wasn’t the first CMS solution to support Jamstack, but it is one of the better-known options. As one of the first headless CMS solutions to hit the market, the company has quickly captured the attention of a huge range of developers worldwide.

Agility CMS is a Jamstack pioneer, capable of helping developers to build a foundation for any online ecosystem. The technology is an API-first CMS with support for REST APIs, so developers can connect all the third-party apps and front-end frameworks they like.

The technology also gives developers the freedom to code their solutions their way. You don’t have to follow a specific set of guidelines for how content is created, but templates are available to fast-track development. Agility CMS also hosts and abstracts your database, so you don’t have to worry about connection strings, backups, and maintenance. 

With a strong content architecture to help companies manage digital content and a partnership with Gatsby, Agility is ideal for Jamstack development strategies. 

Building Your Jamstack Website

The Jamstack solution is more than just a buzzword in today’s development world. This unique approach to building incredible development experiences delivers an excellent advantage to both developers and their end-users. Fast, scalable, and full of solutions for customization, Jamstack is a powerful way to bring websites to life with simplicity and speed. 

Every day, more companies take advantage of the Jamstack environment, and we’re constantly seeing a wide selection of new tools, APIs and offerings emerging to help enhance the Jamstack landscape too. This environment is definitely worth consideration for any developer looking to significantly speed up their development strategy.


Featured image via Pexels.

Source

The post Is it Time to Transition to JAMStack? first appeared on Webdesigner Depot.

Source de l’article sur Webdesignerdepot

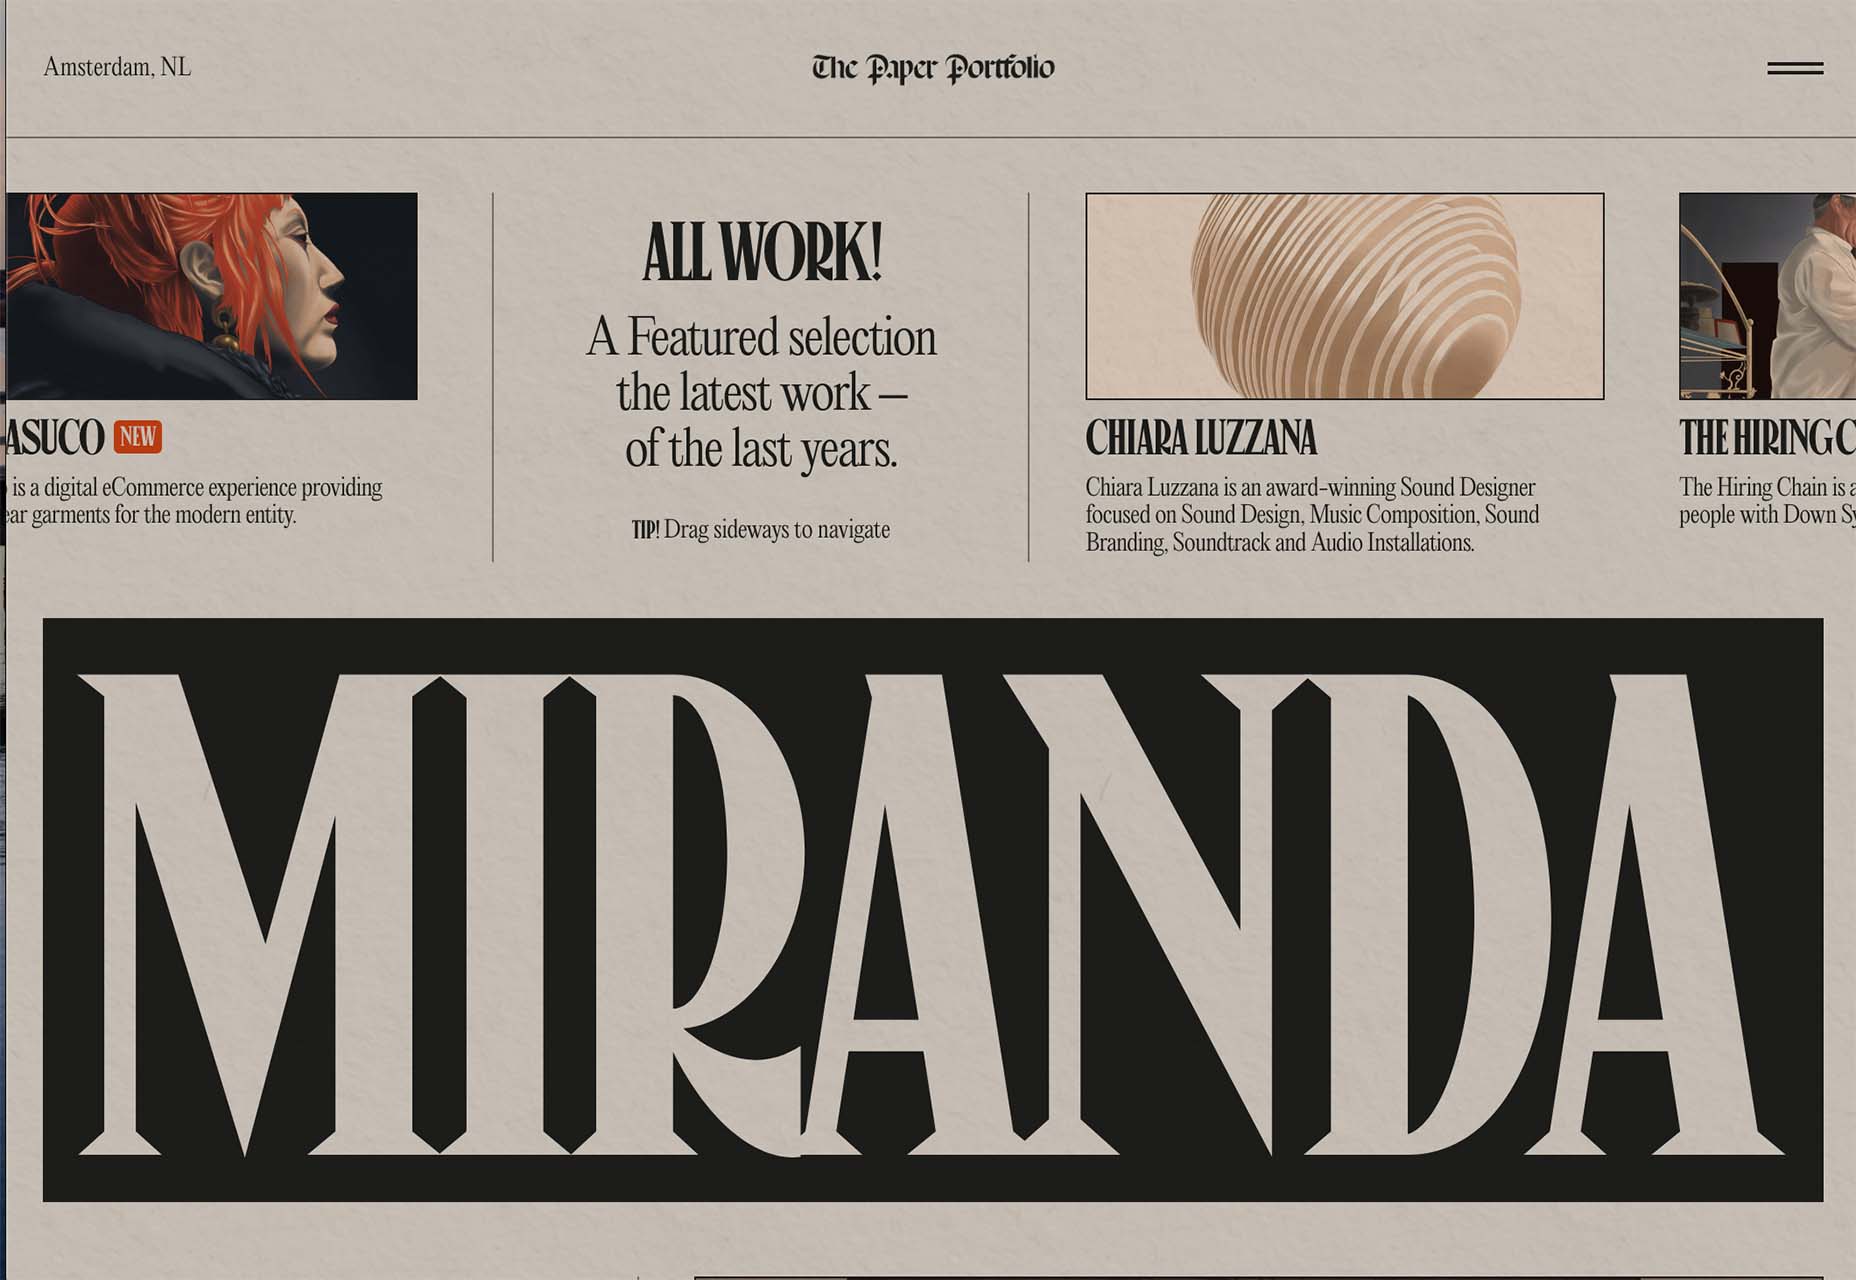
Is sketching essential to UX and UI designers? Well, if you think of sketching as a way to explore problems and record potential solutions, then yes, it absolutely is.

One of the most challenging tasks of any design process is capturing the initial idea. We’ve all spent countless hours thinking through an innovative solution to a project, only to lose the idea again. It turns out that sketching is a brilliant solution to this problem.

In this guide, you’ll learn how to improve your UX designs using sketching as a tool. First, we’ll answer the question of how sketching benefits design, then we’ll look at the tools you need, and finally what an efficient sketching process looks like. By the end of this 3-minute read, you’ll have valuable new knowledge that will help you as a designer.

Why Sketching Is Important For Designers

When you start working on a project, it’s tempting to jump straight into high-resolution wireframes. But in doing so, you run the risk of spending hours on each little detail, only to discover that the overall concept doesn’t work.

Sketching — unlike drawing, which is about communicating an idea — is a free-flowing, process that allows you to get your ideas down on paper (yes, paper!) fast.

If there’s one thing you take away from this guide, let it be this: sketches aren’t for clients, or colleagues, or Dribbble, sketches are just for you. They’re a non-written way of rapidly making notes. Sketches will help you recall all the possible routes to consider.

Sketching is all about visualizing your ideas quickly and efficiently. When you’re sketching, you don’t have to worry about details, and you don’t have to worry about communicating with anyone else.

By sketching ideas without detail, you can quickly explore numerous solutions for a project. It’s fascinating how sketching can help you visualize an idea and revise it again and again along the way with minimal effort.

So, what revolutionary new tools do you need?

What Tools Do You Need For Sketching?

Designers love new tools, but when it comes to sketching there are relatively few, and you probably already have them to hand.

First, you’re going to need paper. A notebook is fine, it doesn’t have to be high-quality paper; in fact, you will probably feel freer and less restrained if you make sure that it is cheap.

You’ll need something to make a mark on the paper. A pencil is fine, as is a pen, a biro, and just about anything else. Don’t worry about an eraser, sketching isn’t about correcting mistakes, but you will need a sharpener if you’re using a pencil — never draw with a blunt pencil!

Whatever implement you choose, it’s a good idea to have a heavy marker, like a Sharpie, to pick out an important detail, and perhaps a fine pen to add small detail (if required).

Finally, make sure you have a timer to hand. A chess clock is perfect for an old-school aesthetic, but a timer on your phone is perfectly fine. The timer is to make sure you don’t spend too long on one sketch, so you don’t have time to get wrapped up in perfecting the details.

Sketching 101: A Step-by-Step Process

When you’ve been sketching for a while, you’ll discover your own process, and preferred methods. But for anyone new, here’s how to get started.

1. The Initial Idea

As with designing a wireframe, the most challenging step is getting started. Usually, at the beginning of a project, we are overwhelmed. This is because there are so many ideas, and we do not know where to start. For this reason, a detailed analysis of the project is essential.

You can start by thinking about the most important interactions you need to create. This way, you will find out the most important and exciting aspects of the project.

Since most of us get caught up in the fine details, it is beneficial to think of sketching as a brainstorming session. This session is simply about coming up with an innovative solution for a project and visualizing it.

It’s fine to have an idea that you’ll ultimately disregard. This is not the time to edit yourself.

2. Start Sketching

Take a piece of paper and use your sketching tool to divide it into six sections. Set your timer for 5 minutes and start drafting mockups for the first interaction.

Often, designers struggle with this step, and fall back on what they’re used to, i.e. wireframing and high-res mockups. If you find that you’re struggling to start sketching, start by making a mark on the paper; any mark at all. Then, make a second mark. With the third mark, try to position it in a way that says something to you about the project, by its size, weight, position — anything at all. Keep going, and before you know it you’ll have a complete sketch.

It’s vital that you do not exceed the time you give to yourself because sketching is not about fine details. The time is better spent exploring multiple ideas, even if those ideas only serve to confirm that the first idea was the most promising.

Repeating this step can be very valuable. Once you are happy with the results, you can move on to the next and final step.

3. Self-Editing

Unfortunately, you can not take away every concept you have outlined. This step is about choosing your most effective ideas and expanding on them.

Most designers want to create top-notch, detailed designs, and that’s fine. However, sketches are only really helpful for the early stages of a project, and creating perfect sketches in the first stages of a project may not be productive — in fact, it can be restrictive.

It’s often a good idea to combine some of your designs. Redraw them together, and once you’ve done that expand and refine them.

Improve Your Design With Sketching

It doesn’t matter if you think you’re bad at sketching — no one is going to see your sketches except you. Many of us would struggle to sing in public, but are absolutely fine singing in the shower.

Remember that sketching is not about your artistic skills; it’s about capturing an idea and expanding on it. After all, once you have your final design, you will recreate it digitally.

You don’t have to be an artist to be a designer. And since sketching can improve your UX designs, there are many reasons you should give it a try.

Once you’re comfortable with sketching, you’ll find it an invaluable tool for identifying sticking points in a project, and solving them before you reach the wireframe stage.


Featured image via Pexels.

Source

The post How To Improve UX With Sketching first appeared on Webdesigner Depot.


Source de l’article sur Webdesignerdepot

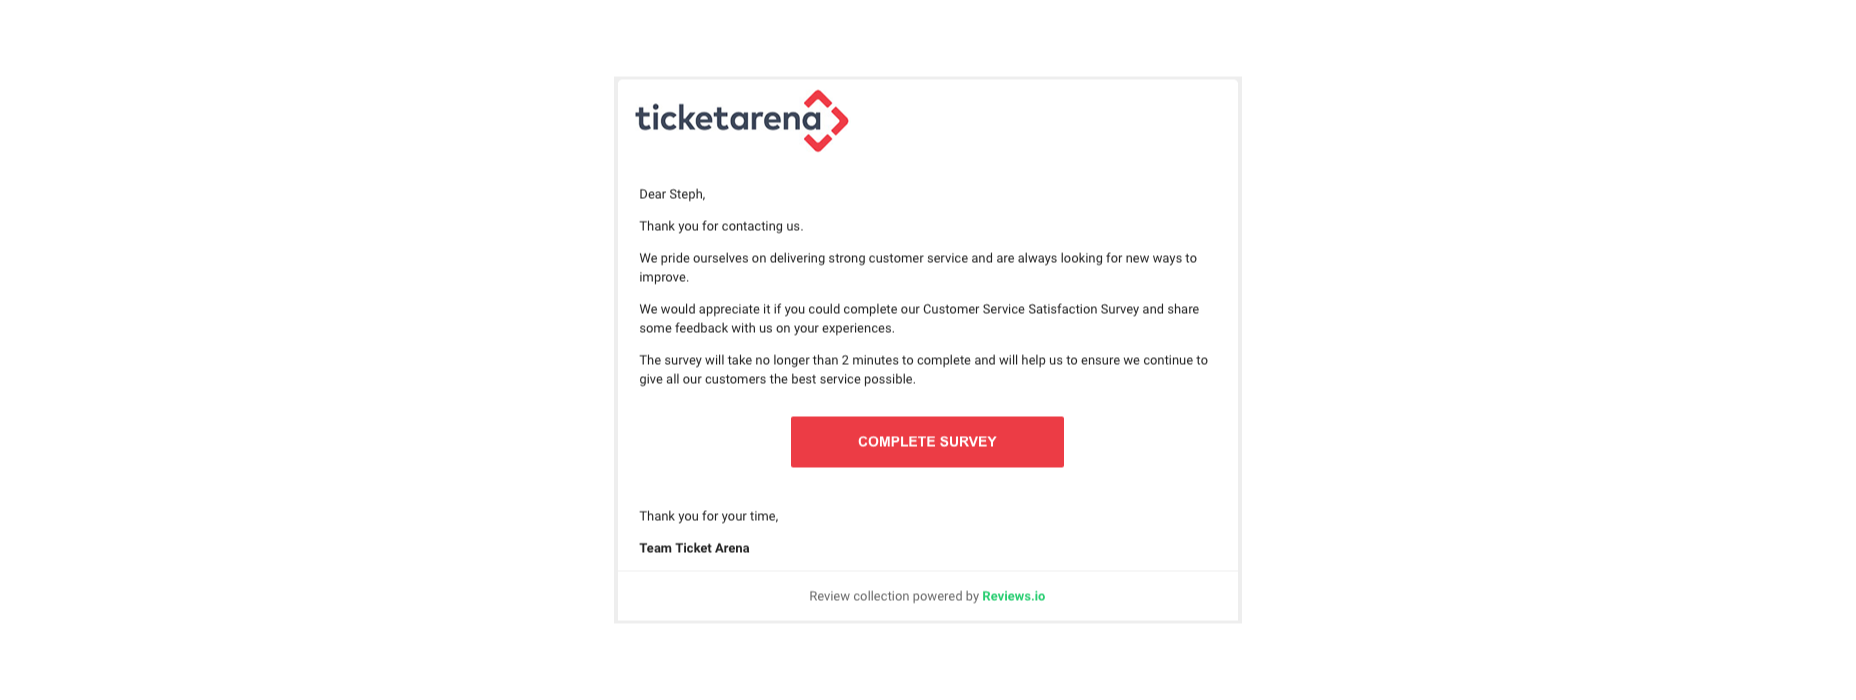
Customer reviews are incredibly valuable to your company. Around 95% of customers say they read reviews before they make a purchase. Another 72% say that they won’t even consider buying your items until they’ve read the reviews associated with your business or product. 

No matter how good your marketing and promotion strategies might be, your audience will always turn to other customers for a credible insight into what buying from your brand is really like. That’s why it’s so important to leverage as much social proof as you can.

Unfortunately, gathering reviews and displaying them correctly on your website can be challenging.

In this article, we’re going to look at what you can do to make your reviews stand out when you’re ready to display them online. 

The Different Kinds of Review

Before we get into looking at all the different ways you can effectively display your reviews on your website, let’s get the basics out of the way. 

There’s more than one type of review. Some are simply comments left on the bottom of your product pages by customers that were impressed by whatever you sold. Other reviews are available in the form of videos or badges. When you want your website to look as credible as possible, the best thing you can do is decide which types of reviews will have the most impact. 

Ideally, you’ll want a combination of different review types to add depth to your site. Putting various kinds of reviews on your website increases your credibility while also boosting your SEO

Here are your main options:

The Testimonial

Testimonials are one of the most common types of review. Essentially, these are the messages shared by your customers that highlight the things they liked and didn’t like about your product. Testimonials often include a picture of the person leaving the message, and their name, to give them a greater sense of authenticity. You might also include a link to a website or case study with a testimonial to give it more depth. 

Most testimonials go at the bottom of pages. You can showcase these reviews on your home page to start generating credibility as soon as someone interacts with your brand. Alternatively, you could allow users to place their reviews on product pages. Here’s an example of what a testimonial might look like from ducttapemarketing.com:

Review Badges and Widgets

If your customers tend to leave reviews about your company on other sites, like Angie’s List or Yelp, then you can add a widget or badge to your website that makes it easier for other customers to find them. Sometimes, you’ll just include a small button on the bottom of a website pay that says, “find us on Yelp.” Other times, you can add your star rating too.

Some review sites will also give you the option to showcase the actual reviews in a widget that frequently updates with new messages. 

If you’re only showing reviews from one third-party site on your website, it’s best to focus on Google reviews, as it’s one of the most recognizable options. 

Provided that you’re using them correctly, badges and review widgets shouldn’t slow your website down too much, and many can be customized to suit the style of your site too. However, it’s essential to ensure that you don’t add too many widgets to your site if you want to avoid performance issues. 

Case Studies

Case studies go beyond the basics of the standard review and provide potential leads with a tremendous amount of information about how you’ve previously interacted with other companies. With a case study, you’ll often create a structured document that demonstrates a customer’s problem and your strategies to overcome those issues. 

Case studies often exist on their own pages, so you can go in-depth with sharing valuable information. For example, you’ll include an overview that introduces the customer you worked with and details on the outcomes you achieved together. 

Although it’s much harder to interview customers for complete case studies and get all the statistics and numbers that make these reviews appealing, it’s often worth the effort. Particularly if you’re running a B2B company, case studies demonstrate the effort you go through to support your customers. They also act as proof of your success and set valuable expectations for customers. Here’s an example of a case study page by Fabrikbrands.com:

The Rating

If you’re just posting basic five-star ratings on your website or asking your customers to give you a number between one and ten for how positively they’d rate your service, then you can use a few handy automation tools to create one of these visuals. 

All you need to do is add a little basic CSS to your website or use a star rating widget that automatically calculates your average score based on all of the reviews that you collect from customers. 

Just make sure that your star ratings are positive not just on your website but on other review sites too. For instance, if you give yourself five stars by adjusting the CSS and then get three stars from Yell, customers will begin questioning your authenticity. 

Notably, while star ratings grab customer attention, they are a little basic if you’re trying to convert people and convince them to buy an expensive product. Most customers will often need more information than a basic star rating can provide. 

How to Display Reviews on Your Website

Now that you know what kind of reviews customers can leave about your product or brand, you can start exploring ways to display them on your website. 

You could decide to let your reviews show up on other third-party sites and leave it at that. For instance, if you’re a hotel manager, you may know that your customers are already leaving reviews on Booking.com and TripAdvisor. However, leaving your audience to seek your reviews out for themselves means that they spend less time where you want them – on your website. 

There’s also a risk that failing to add reviews to your site will make you look less credible. If you don’t own your rating or score, customers might wonder what you have to hide. 

Fortunately, we’ve got some great options to help you get started.

1. Create a Testimonials Page

The first and perhaps most accessible option for showcasing your reviews and testimonials is to design a page where your customers can easily find all the information they need about your brand. Having a dedicated testimonials page can be a great way to demonstrate transparency as a brand and show your customers that you’re not hiding anything. 

You could even add a form at the bottom of your testimonials page that allows other customers to leave their reviews and information. Just make sure that you have a CAPTCHA or another security measure in place to prevent people from spamming your site. 

It makes sense to showcase some of your most positive reviews at the top of your page, so your customers see those first. However, it could also be a good idea to showcase some negative reviews alongside them. That’s because customers generally expect to see at least some negativity associated with your brand. If all your reviews are positive, they might assume that you’re hiding something.

When displaying your negative reviews, make sure you also show that you’ve responded to them and are working hard to address any issues. You can even publish the “thank you” you get from an unhappy customer after rectifying the problem. 

2. Show Reviews in Your Website Header

The great thing about using reviews and testimonials on your website is that if you have a little coding knowledge and the correct information, you can display them wherever you choose. Most companies leave the reviews at the bottom of the website, but this could mean you’re missing out on an excellent opportunity to connect with your audience as soon as they visit you. 

Having a positive review highlighted at the top of your page could immediately boost your credibility and give your audience a reason to keep reading. Remember that a picture of the person sharing the review and their name can make them look a lot more credible when you’re trying to build trust. 

3. Add Some Reviews to Your About Us Page

It’s best not to hide your reviews somewhere your customers will have to search for them, but that doesn’t mean that you can’t scatter a few testimonials around other pages. A great way to give more credibility to your brand and your website is to create a sidebar on your “About Us” page or just showcase a handful of reviews underneath the description of your business. 

Suppose you don’t want to show customer testimonials on your About Us page. In that case, you could always show different kinds of reviews, like badges that show your certification with certain industry bodies or awards and recognition you’ve received.

Showing that you’re connected with major industry groups and that you’ve been recognized in your sector is a kind of review in itself. It indicates that other people have already assessed your business and see you in a positive light. 

Every review doesn’t necessarily have to come from your customers. Any business or person who can give more credibility to your business deserves some representation too!

4. Embed a Carousel on Your Site

As your business begins to grow, the number of regular reviews and testimonials you get from happy customers should start to skyrocket too. You might even get to a point where you’re not sure how to fit all the reviews you want to showcase onto the same page of your website. If you already have a dedicated “reviews” page where people can go to get more insights into your growing collection of social proof, try a carousel. 

Carousels are a great and dynamic way to showcase customer reviews while getting your audience more involved with your website. Give them a button they can click so that they can browse through a broader range of reviews after they’ve seen the ones that show up straight away on your carousel. It’s also worth including a link nearby the carousel widget that the user can click to visit your review page or your company’s page on a dedicated review website. 

If you want to go beyond putting carousels on your home page, remember that you can add them to your product pages and menus too. Online reviews impact around 67.7% of purchasing decisions, so it makes sense to put them somewhere your customers will see them when they’re figuring out whether or not they should hit the buy button. 

5. Add Reviews to Your Social Media Ads

Reviews can be an excellent way to add an extra spark to your advertisements elsewhere in the digital landscape. Telling your audience on Facebook that you have the best steaks in the country is great – but it’s not going to make a significant impact on most of them. That’s because every business claims to be the best. Most of your clients expect you to speak well of yourself. 

However, if you can combine an attractive image on social media with a quoted review from one of your happy customers, your ads will make more of an impact. You can include the quote from your customer in the text above your Facebook ad or create an image to display it instead.

Remember to add any hashtags and extra information that might make your ad more appealing and share it as often as you can with the right audience. Targeting your audience carefully towards people who are in the “consideration” stage of the buyer journey may help you to get more conversions. 

While customers usually scroll past dozens of social media ads every day, a genuine statement from a real person still shakes up the status quo and grabs attention. Include a button below the ad so your customer can learn more about the product the customer is talking about. 

6. Link to Reviews in Email Signatures

Finally, social media ads aren’t the only way to bring attention to your reviews outside of your website. If you want to get more external customers to go and check out your products or rediscover what your business is all about, you can add review links to your email signature too. These links can go directly to the case study or review pages on your website, reminding customers what it is that makes your service or product special. Alternatively, you can get dedicated signatures for your email that link to specific review sites too. 

Showing your clients how many ratings you have on Yelp or how many stars your products have earned with Google Reviews gives every message you send a lot more credibility. Most email marketing software solutions make it relatively easy to add information like this to the footer of your email.

Remember, your signature shouldn’t take up too much space in your email, so don’t add any specific reviews from customers. A star rating and a link back to a page where consumers can get more information will spruce up your content without weighing down your emails. 

Show Off Your Social Proof

Successfully collecting positive reviews that show your prospects how much customers love your company can be challenging enough. However, that’s just the first piece of the puzzle. Once you’ve got all those great reviews, you also need to show them off in the most effective way. From dedicated pages on your website to scrolling carousels and Facebook ads, there are a million ways to prove your credibility to your customers with testimonials.


Featured image via Pexels.

Source

The post How To Leverage Social Proof Successfully first appeared on Webdesigner Depot.


Source de l’article sur Webdesignerdepot

PageSpeed Insights is a free performance measurement tool provided by Google. It analyzes the contents of a web page for desktop and mobile devices. It provides a single number score (from 1 to 100) that summarizes several underlying metrics that measure performance. If you have not run PageSpeed Insights on your website, then you should stop and do it now. It’s an important indicator of how Google scores and ranks your site.

If your PageSpeed Insights score is below 80, don’t panic. You are not alone. Many websites are not optimized for performance. The good news is that you can take steps that should immediately improve your score.

You will notice that PageSpeed Insights highlights issues that cause slow page loading. However, you might need more guidance to resolve these issues. Below, we walk you through how to resolve four common issues related to images. We also show you how ImageEngine, an image CDN, can simplify, automate, and deliver the best image optimization solution possible.

Performance Drives Google SEO Rankings

Why does the PageSpeed Insights score and performance matter? Isn’t SEO ranking all about content relevance, backlinks, and domain authority? Yes, but now performance matters more than it did a year ago. Starting in 2021, Google added performance metrics to the factors that impact search engine rankings. In a market where websites are constantly jockeying to match their competition’s pages (for content relevance, keywords, and other SEO issues), performance is making a difference in keyword search engine rankings.

What Are Core Web Vitals Metrics?

PageSpeed Insights relies on a set of performance metrics called Core Web Vitals. These metrics are:

Largest Contentful Paint (LCP): Measures the render time (in seconds) of the largest image or text block visible within the viewport, relative to when the page first started loading. Typically, the largest image is the hero image at the top of pages.

First Input Delay (FID): Measures the time from when a user first interacts with a page (i.e. when they click a link, tap on a button, or use a custom JavaScript-powered control) to the time when the browser is actually able to begin processing event handlers in response to that interaction.

Cumulative Layout Shift (CLS): Measures the layout shift that occurs any time a visible element changes its position from one rendered frame to the next.

Images and JavaScript are the Main Culprits

PageSpeed Insights breaks down problems into categories based upon how they impact these Core Web Vitals metrics. The top two reasons why you might have a low score are driven by JavaScript and images.

JavaScript issues are usually related to code that either blocks or delays page loading. For example, lazy-loading images might involve JavaScript that blocks loading. As a rule of thumb, do not use a third-party JavaScript library to manage image loading. These libraries frequently break the browser’s built-in image loading features. Lazy-loading may make above-the-fold images load slower (longer LCP) because the browser starts the download later and because the browser first has to execute the JavaScript.

Another JavaScript issue involves code that is large or unnecessary for the page. In other words, code bloat. There are good resources for resolving these issues on the web. However, in this blog, we will focus on image problems.

Images are a major contributor to poor performance. The average website payload is 2MB in 2021, and 50% of that is images. Frequently, images are larger than they need to be and can be optimized for size with no impact on quality…if you do it right.

Four Image Issues Highlighted by PageSpeed Insights

Largest Contentful Paint is the primary metric impacted by images. PageSpeed Insights frequently recommends the following four pieces of advice:

  1. Serve images in next-gen formats.
  2. Efficiently encode images.
  3. Properly size images.
  4. Avoid enormous network payloads.

That advice seems straightforward. Google provides some great advice on how to deal with images in its dev community. It can be summarized in the following steps:

  • Select the appropriate file format.
  • Apply the appropriate image compression.
  • Apply the right display size.
  • Render the image.
  • Write responsive image code to select the right variant of the image.

We call Google’s process the “Build-Time Responsive Syntax” approach. If you have a relatively static website where you don’t generate new pages or switch out images frequently, then you can probably live with this approach. However, if you have a large and dynamic site with many images, then you will quickly feel the pain of this approach. Google itself stresses that developers should seek to automate this image process. Why? Because the process has some serious workflow drawbacks:

  • Adds storage requirements due to a large increase in image variants.
  • Increases code bloat and introduces more code complexity.
  • Requires developers’ time and effort to create variants and implement responsiveness.
  • Requires logic to account for different browser’s support for next-gen image formats.
  • Doesn’t adapt to different contexts. It relies on best-guess (breakpoints) of what device visits the web page.
  • Needs a separate CDN to further increase delivery speeds.
  • Requires ongoing maintenance to adapt to new devices, breakpoints, image formats, markets, and practices.

Key Steps to Achieving High-Performance Images

Instead of using the Build-Time Responsive Syntax approach, an automated image CDN solution can address all of the image issues raised by PageSpeed Insights. The key steps of an image CDN that you should look for are:

  1. Detect Mobile Devices: Detection of a website visitor’s device model and its technical capabilities. These include: OS version, browser version, screen pixel density, screen resolution width and height, support for next-gen image and video formats. This is where ImageEngine is unique in the market. ImageEngine uses true mobile device detection to further improve image optimization. It has a huge impact on the effectiveness of the image optimization process.
  2. Optimize Images: An image CDN will leverage the device’s parameters to automatically resize, compress and convert large original images into optimized images with next-generation file formats, like WebP and AVIF. Frequently, an image CDN like ImageEngine will reduce the image payload by up to 80%.
  3. Deliver by CDN: Image CDNs like ImageEngine have edge servers strategically positioned around the globe. By pushing optimized images closer to requesting customers and delivering them immediately from the cache, it often provides a 50% faster web page download time than traditional CDNs.

Easy Integration Process for Image CDN

After signing up for an ImageEngine account and free trial, you will receive a Delivery Address. After adjusting your <img /> elements to include the Delivery Address, ImageEngine will start to pull the original images from your website (no need to move or upload them), automatically optimize them, and deliver them.

You can automate the addition of the Delivery Address to the img src tag by using plug-ins for WordPress and Magento. Developers can also use ImageEngine’s React, Vue, or Angular JavaScript frameworks to simplify the process.

Additionally, there are many ways to simplify implementation via adjustments to templates for many CMS and eCommerce platforms.

Results: Improved Performance, Better SEO

Most ImageEngine users see a huge improvement in LCP metrics, and consequently, a big improvement in the overall PageSpeed Insights score. ImageEngine provides a free demo analysis of your images before and after image optimization. In many cases, developers see improvements of many seconds on their LCP and Speed Index.

In summary, performance drives higher search rankings, and better UX, and increases website conversions for eCommerce. The steps you take to improve your image performance will pay for themselves in more sales and conversions, streamlined workflow, and lower CDN delivery costs.

Source

The post 4 Steps to Improve PageSpeed Insights Score and SEO first appeared on Webdesigner Depot.


Source de l’article sur Webdesignerdepot

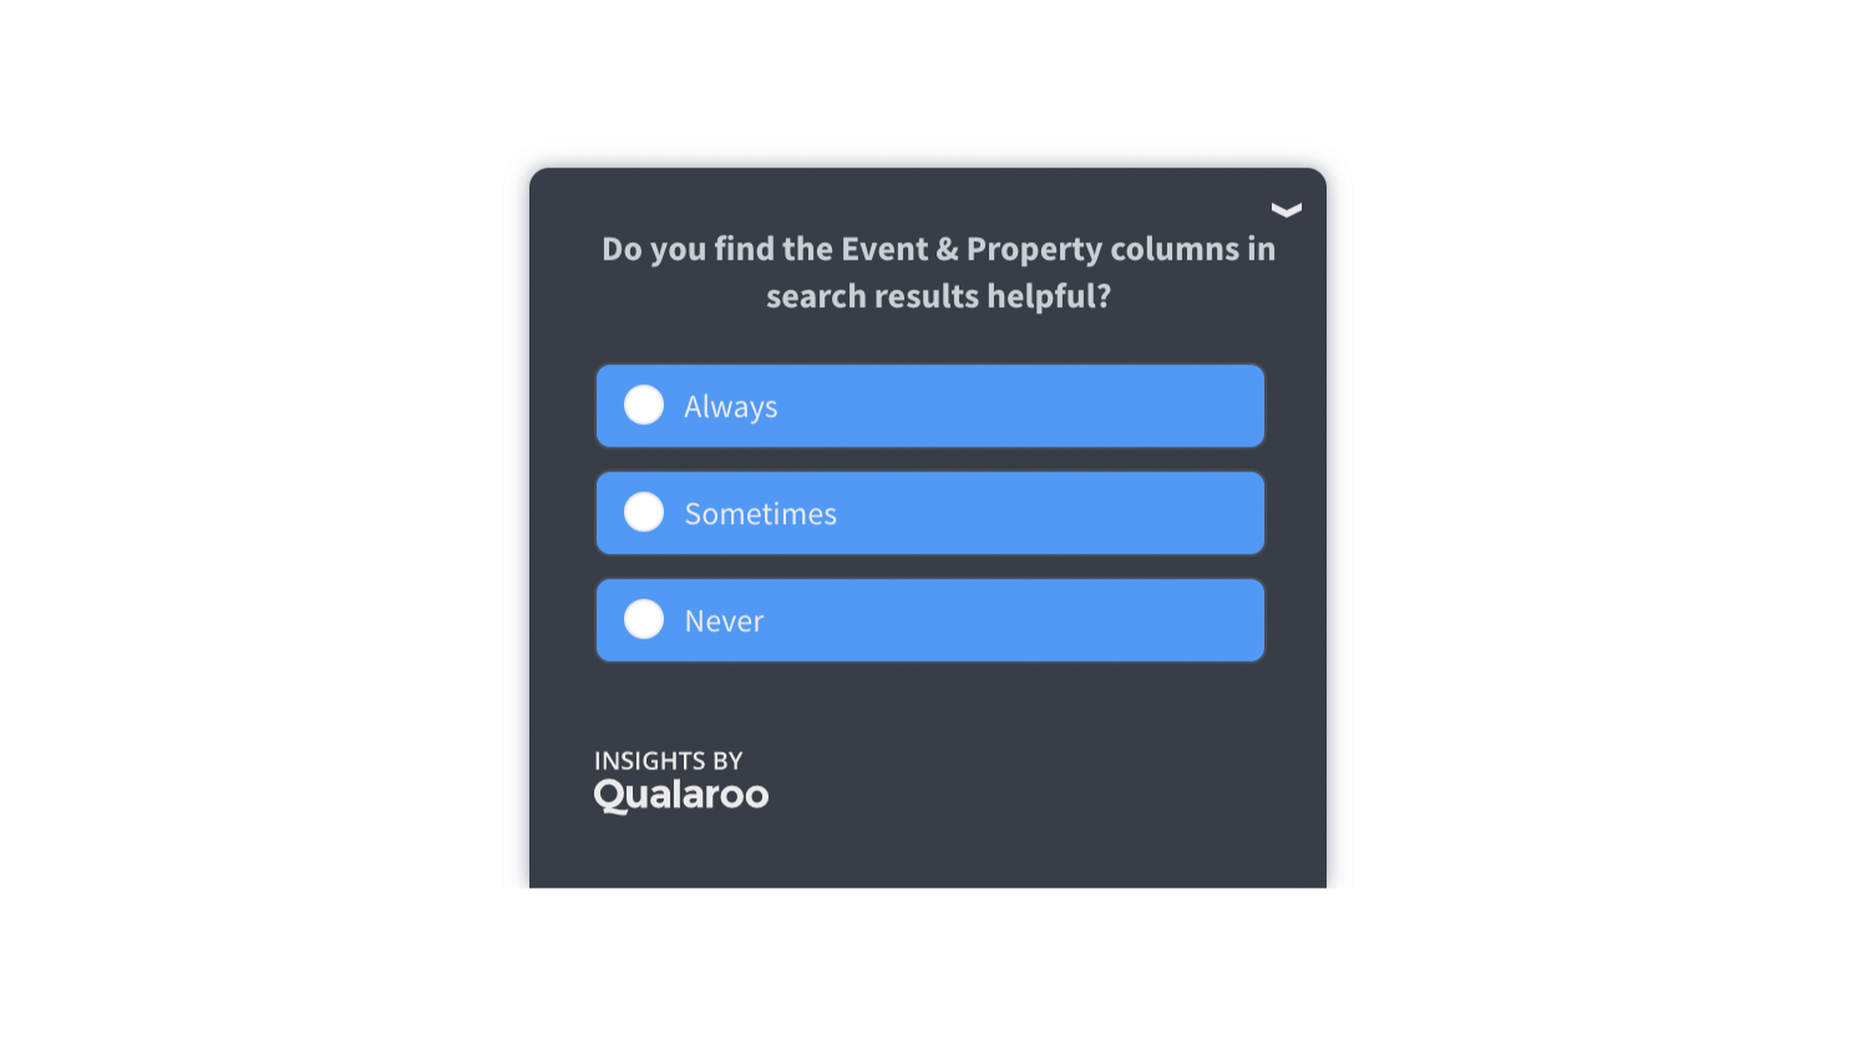
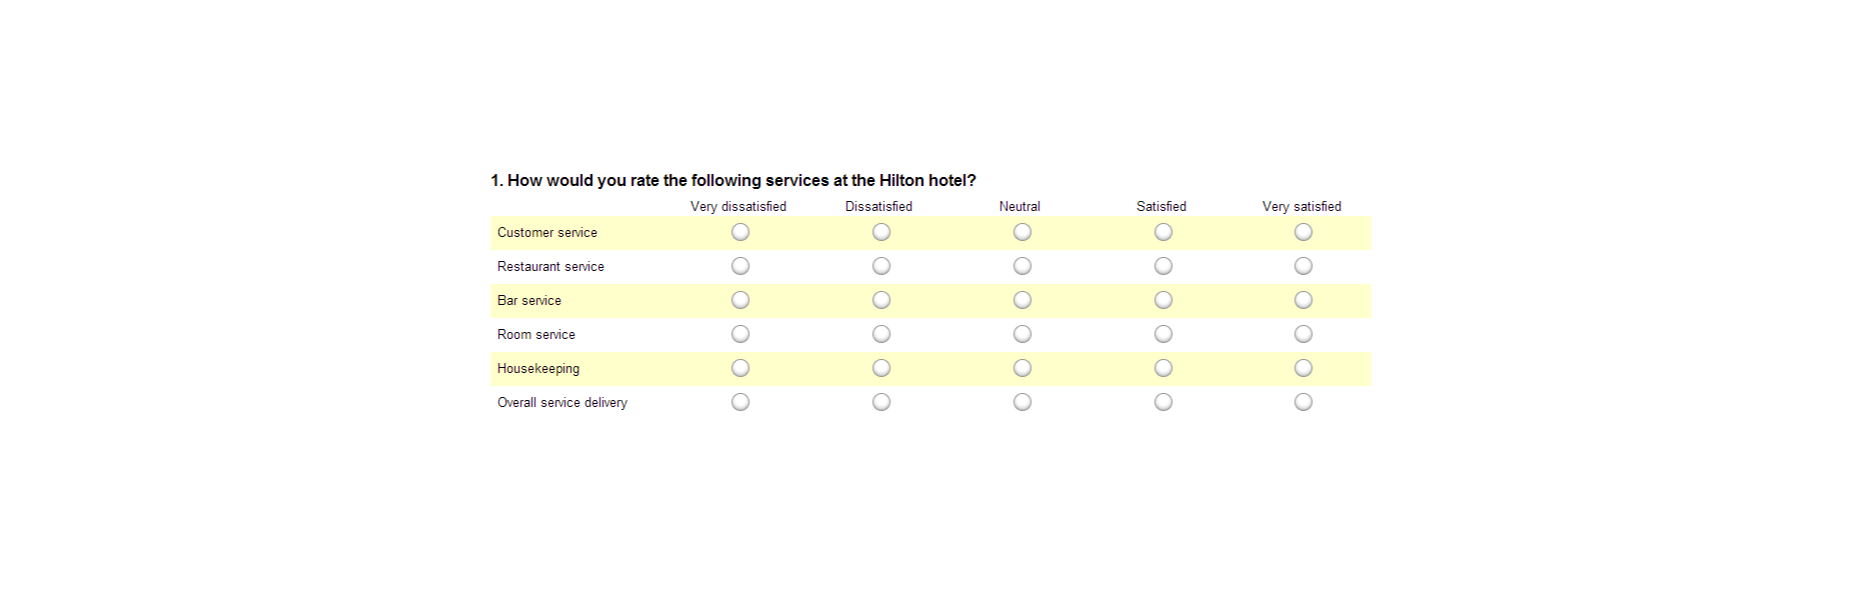
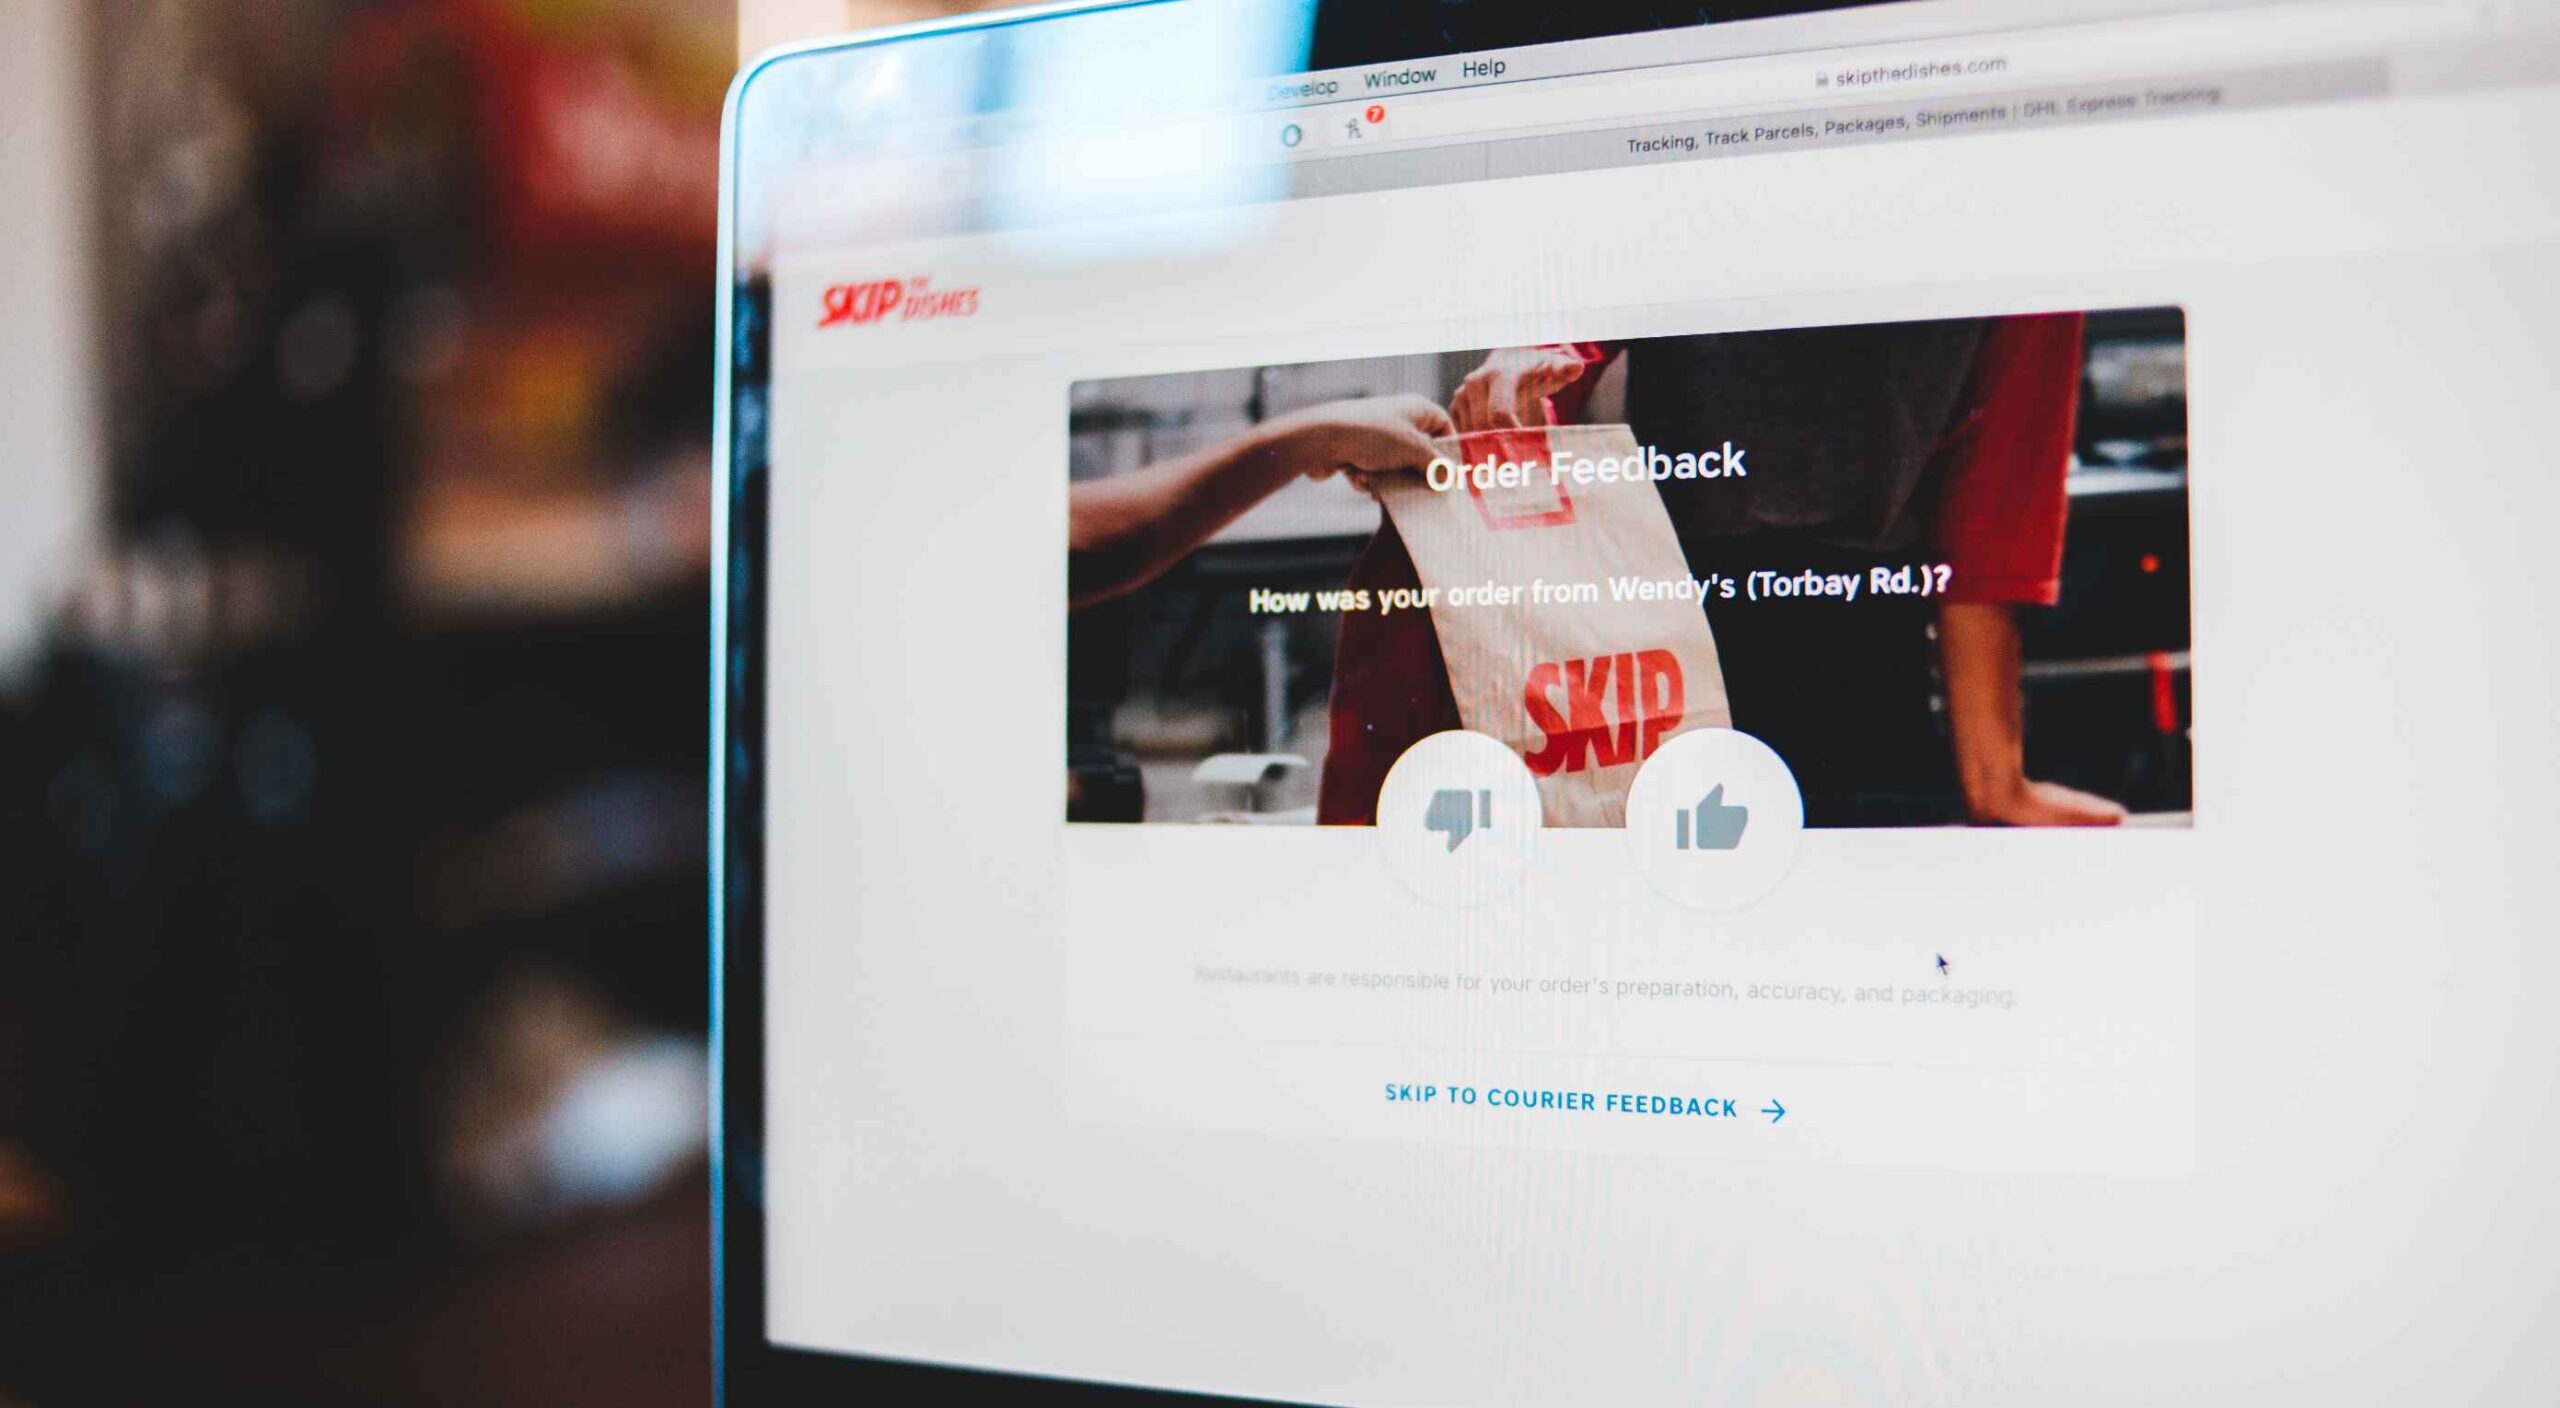
Feedback is one of the most valuable resources for any business. Informative messages from your customers can tell you a lot about your company. They’re a way to check that your service strategies are paying off and a chance to learn which parts of your product need an upgrade.

Reviews and testimonials can also help you better understand your audience and the kind of solutions they’re looking for with your brand. 

Solid feedback is also how you improve your chances of gaining more customers in the long term. Brands with superior customer service generate about 5.7 times more revenue than their competitors. 

Of course, before you can begin tackling challenges like pulling trends from feedback or using your reviews to upgrade your business, you have one essential task to consider: How are you going to collect the valuable information your customers have to share?

There are a lot of options to choose from. You can reach out to clients individually with email messages or set up a feedback form on your website. You could even consider working with a review site to give your audience more options. 

Today, we will look at the steps you can take to collect customer feedback the right way.

Unlocking the Benefits of Customer Feedback

Customer feedback is the information and input shared by your community. It provides a behind-the-scenes view of people’s interactions with your team and shows you where you need to focus on beginning driving new opportunities. 

Customer feedback becomes a guiding compass for your organization when used correctly. It shows you what you’re getting right and wrong from your customer’s perspective. Positive feedback can even become part of your marketing campaigns. User-generated content in the form of reviews and testimonials makes for excellent tools to encourage new people to purchase your products. 

Case studies and in-depth reviews from your clients can also help generate trust among potential customers, so you’re more likely to earn crucial sales. 

Only around 3% of customers say that they find marketers and salespeople “trustworthy.” This means that no matter how good your marketing messages might be, you’re only going to be able to accomplish so much with the claims you make about your brand. Ultimately, your clients will turn to other customers like them to determine who they should buy from.

On average, buyers read around seven reviews before they’ll even consider trusting a business. 

The good news is that around two-thirds of customers will share their personal information with a brand. Clients are happy to provide feedback in the right circumstances. It’s your job to ensure that the process is as easy as possible for your customers.

So, how do you get customer reviews?

1. Design an Effective Feedback Survey

The most obvious way to encourage feedback from your customers is to ask for it. Unfortunately, designing a good customer survey isn’t always as simple as it seems. 

On the one hand, you’re keen to gather as much information as possible from your customer, which could mean that you want to ask many questions. On the other hand, asking too many questions could easily scare your audience away. 

To improve your audience’s chances of actually sharing information, keep the feedback requests as simple as possible.

One or two questions at a time should be enough to give you some helpful information about customer preferences and expectations. When choosing what to include in your survey, remember:

  • Only ask essential questions: If the answer to a question isn’t going to help you achieve your goals, don’t ask it. You don’t need to know someone’s age if you want to know if they had a good experience with your service reps. Keep it relevant. 
  • Make the questions thoughtful: Yes or no questions are great for collecting quick information. However, if you want more valuable feedback, leave your queries open-ended, and give customers room to explain themselves. 
  • Use rating scales: If your customer doesn’t have time to respond to a question in your survey with a complete answer, a rating scale can give you some helpful insights with minimal effort from the client. 

Ensure none of the questions on your survey are leading or loaded. Customers don’t want to feel like you’re answering questions for them. It might also be worth showing your audience how much you value their data with a quick response. Hilton Hotels always responds to any adverse reactions to surveys within days of receiving the information. 

Customers can even see how their reviews contribute to the overall rating of the business. 

2. Master Your Emails and Customer Contact Forms

Email is one of the easiest and most effective ways to gather customer feedback. Because this is a standard support channel for most businesses, there are plenty of opportunities to generate feedback. 

The first step in using emails for feedback is to send a message thanking your customer for their recent interaction with you. If someone purchased a product from your company, immediately follow up to let them know you appreciate their custom. A couple of days after, when your customer has had a chance to use your product or service, that’s when you follow up with your feedback request. 

Ideally, your email request should be as short and straightforward as possible, with a clear call to action that tells your customer what to do next. This example from Papier keeps things as detailed as possible.

If you want to boost your chances of engagement, you can add elements to your email that might encourage a positive response, for instance:

  • Remind them of what they bought: Remind your customer of the item they purchased with a picture and a bit of information. Highlight the key features and benefits of that product, so they have some inspiration on what to write about in their review. 
  • Offer them a reward: If you want to boost your chances of your customers doing something for you, you need to offer something in return. This could be a discount on their next order, a chance of winning something, or even just free shipping on their next purchase. 
  • Personalize the message: Make your customer feel special by personalizing the message. Use their name and reference their previous interactions with your company. If they’ve been with your business for a while, mention that in the email.  

Remember, many of your customers are likely to check their emails on the go. That means that giving feedback should be as simple as possible, regardless of the tech your customer is using. For instance, in this Zomato example, users can choose to drop an email to the company or send feedback straight from the app. 

3. Create App Usability Tests

If you want some in-depth insights into your company, and your business processes, then a usability test could be the best way to generate valuable feedback. If you have your app, ask your customer to submit some information right there and then, after they’ve finished using the service. The great thing about this kind of input is it’s fresh.

Unlike other customer reviews that might come a day or two after your customer has used a product, usability tests allow you to get feedback at the moment. There’s a much better chance that you’re going to get some relevant and detailed responses here. 

For instance, in this Skype lab feedback request, customers can tick boxes for any video or audio issues they had and leave a starred review. 

If there’s extra information to share, the customer can tap on the comment box to elaborate. However, they don’t need to do this part unless they want to. 

With usability tests, it’s a good idea to focus on a few key things that you want to learn about. For instance, Skype’s example above demonstrates that the company wants to check at least five user experience issues for both video and audio. 

Giving your customers options that they can choose from reduces the amount of work they need to put into leaving a review. It also means that you can get actionable information on which parts of your app or site need the most improvement. 

You can get the same kind of instant feedback on your website, too, mainly if you’re using a live chat app for customer service. 

Live chat is quickly becoming an essential part of the customer experience environment because it’s fast, easy to use, and efficient. It’s also highly affordable for most companies, thanks to evolving technology. Set up your Live Chat app to immediately request a review from your customer when the interaction is over.

For instance, SiteGround asks customers to rate their service provider with a picture of the employee they spoke to. The image lets the customer see that they were talking to a real person, which improves the relationship with the company. The statement about feedback improving the customer service and support that SiteGround can offer shows the customer how valuable their reviews are. 

4. Conduct Customer Interviews

Conducting a customer interview is a lot like sending out a survey. The main difference is that you ask the client to engage in a much more in-depth conversation. Usually, these interviews will be the initial research required for a published case study on a B2B website. 

Reaching out to valuable and loyal customers can give you a fantastic source of in-depth information to learn from. You’ll need to make sure that you have a good relationship with the customer in question before you attempt this, however. Most one-time clients won’t want to get involved with a time-consuming interview. 

Look at your CRM technology and find out who your most impressive VIP customers are. Reach out to them with a request for feedback, and make sure you offer something in return. For instance, tell them that you’d like to interview for a case study that you can display on your website. If they’re happy for you to do this, you can reward them with a discount on their next purchase or some gifts. 

You could also follow up with a customer who recently contacted your team for an interview, like Ticket Arena does here. With this message, they promise the customer that their insights will make the customer experience better for future clients:

When requesting long-form qualitative feedback, remember to think through your questions carefully. In-depth stories from customers bring nuance and color to your quantitative data. They could even guide your business to making some crucial future decisions. 

When talking to your customers:

  • Start with an open-ended dialogue: Remember that open-ended questions are crucial to get as much detail as possible from your customers. These queries give your customers more flexibility to cover the details of their experiences.
  • Get more specific as you go: Start with simple questions, then build on them as your conversation evolves. Use the things you learn from your customers to dive into topics that are relevant to them. For instance, if a customer mentions your live chat app, go into a deeper discussion about the channels they prefer to use. 
  • Practice active listening: Make sure that you’re open and receptive to the information you’re given. Actively listen to customers, even if you’re not in the same room, by acknowledging what they say and providing valuable responses. 

5. Use Social Media

Sometimes, people are reluctant to give feedback for your business on your website because they’re not in the frame of mind. When customers come to your site, there’s a good chance they’re looking for information from you or want to check out a new product. 

They’re probably not in the right mood to start sharing their opinions. 

However, if you capture your customers on social media, there’s a good chance they’ll be feeling a lot more talkative. After all, social media platforms are where most customers discuss their issues with companies, talk about purchases with friends, and make their voices heard. 

Simply paying attention to when people talk about your company on social media can give you a lot of helpful feedback. Social listening tools allow you to collect post information every time someone mentions your business name or product. 

Alternatively, you can actively use the tools on social media to gather data from customers. For instance, Instagram has its own “poll” feature on Stories that allows companies to collect opinions. 

If you’re collecting feedback on social media, remember that you shouldn’t be asking any questions that are too complicated. Although people are more willing to share their opinions on social, they’re still looking for a relatively laid-back and casual experience.

Polls, where people can vote for their preferences with a single click, are more likely to garner engagement than a post asking people to tell you about the best purchasing experience they ever had with your brand. 

If you do want to encourage more in-depth feedback, the best option is to promise a reward in return for your follower’s effort. 

Make the experience fun by transforming it into a competition. 

For instance, ask your customers to share their favorite story involving your brand for a chance to win an impressive prize. You can ask each customer to tag their response with a branded hashtag so that relevant answers are easier to find. You could even add users to tag their friends in their posts too, to increase brand reach while you collect feedback:

With gifts and rewards to incentivize them, people will be much more likely to interact with your brand and put effort into the reviews they leave. You could even gather some user-generated content to put into your subsequent ad campaigns. 

6. Create a Dedicated Website Page

Finally, if you want to make it as simple as possible for people to leave feedback on your website and for you to collect all of that information into one space, then create a review page on your website. This can double up as social proof for people who need additional evidence to buy from your brand. 

A review page could be as simple as a page on your website listing the latest comments that your customers have left. You can include a form at the bottom of the page where people can add their thoughts. Just make sure that you carefully review these posts before they’re submitted to your website if you want to prevent spam from getting through. 

You could also create a case study or portfolio page that showcases the work you’ve done with other companies like Fabrik Brands does here:

At the bottom of each case study, give your customers a unique email address they can reach out to if they want to be featured as your following case study. Or include a contact form where people can get in touch to discuss their own experiences. 

Having a dedicated review, case study, or testimonial page on your website could be enough to inspire more feedback from your customers. It’s also a fantastic way to demonstrate how credible your company is to potential buyers. 

Still, Struggling? Take the Customer Out of the Equation

If, even with all the suggestions above, you still can’t seem to convince your audience to give you some decent feedback, then take them out of the equation. You can learn things about your audience without asking them for information. Google Analytics and other tools will give you valuable insights into which of your blog pages get the most engagement and how many people click on individual buttons throughout your site. 

These fundamental insights might not be as good as valuable, contextual feedback from your audience, but they’re an excellent way to start figuring out how to invest in your future growth. 

Remember, feedback of any kind – even if it’s just statistics and numbers – gives your business the ability to grow and make informed decisions.

Gather as much feedback as you can, and make sure you use it!


Featured image via Pexels.

Source

The post 6 Tips for Collecting Customer Feedback (The Right Way) first appeared on Webdesigner Depot.


Source de l’article sur Webdesignerdepot

La mise en oeuvre d’un nouveau système ERP offre une occasion majeure de transformer numériquement votre entreprise. Non seulement vous pouvez dépasser les fonctionnalités limitées ou la technologie obsolète de votre ancien système, mais vous pouvez également tirer parti des capacités du système ERP moderne pour vous aider à saisir de nouvelles opportunités commerciales.

Cependant, toutes les mises en place ne se déroulent pas sans heurts. Alors comment préparer votre entreprise à une mise en oeuvre réussie de l’ERP ? Comment éviter les coûts et les risques inutiles ? Ces meilleures pratiques de mise en œuvre d’un ERP peuvent vous aider à éviter les pièges les plus courants et à profiter plus rapidement des avantages de votre nouveau système ERP.

Par où commencer votre projet ERP ?

Lorsque les gens pensent à la mise en oeuvre d’un système, ils commencent souvent par envisager les fonctionnalités souhaitées. Mais les nouvelles fonctionnalités ou technologies ne sont pas le cœur du problème ; ce dont une entreprise a besoin pour se développer, ce sont des processus de gestion modernes. Ce n’est qu’avec des processus efficaces qui vous permettent d’être agile et réactif que vous pourrez stimuler votre compétitivité et mieux servir vos clients internationaux.

Souvent, les processus existants sont rigides et ne répondent pas aux besoins de l’entreprise. Même lorsque des processus éprouvés et rentables sont en place, ils doivent souvent être mis à jour pour répondre à l’évolution des besoins ou être enrichis de nouvelles fonctionnalités, comme l’accès mobile, les alertes et la veille économique. Il est donc important de toujours garder ces processus au cœur de votre plan de mise en œuvre.

Quel est le plus grand facteur de réussite ? Votre équipe de projet.

Toutes les études de cas sur la mise en oeuvre d’un ERP se rejoignent
: le facteur déterminant est l’équipe de mise en œuvre.

Un excellent logiciel n’est excellent que s’il est mis en œuvre par une équipe solide. Si les membres de l’équipe n’ont pas le temps, le soutien ou les compétences nécessaires pour effectuer le travail efficacement, ils ne réussiront pas – et le projet souffrira probablement de retards, de coûts supplémentaires et/ou d’un logiciel qui ne répond pas aux besoins de l’entreprise.

Les entreprises qui ont connu des revers ou des échecs en matière d’ERP ont souvent affecté des employés qui « avaient le temps » de travailler sur le projet. Mais pour réussir, vous devez recruter les personnes dont « vous ne pouvez pas vous passer ». Il s’agit des personnes bien occupées qui connaissent les processus opérationnels, travaillent bien avec les autres membres de l’organisation et ont le respect de la direction. Dédiez ces personnes au projet à plein temps (40 heures de disponibilité), ou autant d’heures que possible par semaine.

N’ajoutez à l’équipe de projet clé aucune personne qui ne peut pas consacrer au moins 25 % de son temps (minimum 10 heures) au projet chaque semaine. Les membres de l’équipe consacrant moins d’un quart de leur temps pourront rattraper les activités du projet mais n’y apporteront aucune valeur ajoutée.

Le soutien de la direction à votre équipe est essentiel. Dans toute mise en œuvre importante, des décisions doivent être prises concernant les priorités et les compromis en matière de ressources. Sans un soutien et un engagement fort, même les équipes qualifiées peuvent échouer.

La mise en oeuvre rapide d’un système ERP moderne est l’une des choses les plus importantes qu’une entreprise puisse réaliser. Cela vaut la peine d’y consacrer vos meilleurs éléments et de poser les bases du succès dès le départ.

Comment planifier la mise en œuvre de votre ERP

Planifiez la séquence de mise en place de façon réaliste. Tenez compte de la disponibilité de votre équipe de direction, des managers et des experts internes qui contribuent à l’effort.

Classez vos besoins par ordre de priorité afin de pouvoir vous concentrer sur les gains importants tout en constituant une base logicielle et technologique de base qui pourra évoluer en fonction des besoins de votre entreprise.

Votre plan détaillé et vos indicateurs clés de performance seront adaptés à vos besoins spécifiques. Toutefois, les activités clés suivantes sont des étapes communes à toutes les mises en place réussies :

Mise en oeuvre d'un ERP

1. Sélectionnez un partenaire intégrateur pour vous aider à la mise en œuvre

Votre équipe de projet n’est probablement pas très expérimentée dans la mise en œuvre d’un logiciel ERP ; elle aura besoin d’aide. Cherchez et sélectionnez un ou plusieurs consultants qualifiés pour la mise en oeuvre de l’ERP, ayant une connaissance approfondie et une expérience de l’application ERP que vous allez installer. Confirmez qu’ils comprennent comment la nouvelle solution logicielle soutient vos processus d’affaires actuels et à venir. Interrogez leurs références pour le vérifier.

Vos partenaires intégrateurs doivent disposer d’un personnel formé à votre secteur d’activité et disponible sur vos sites. Si vous avez des clients et des fournisseurs internationaux, vos partenaires doivent avoir les compétences nécessaires en matière de commerce international, de langues et de devises pour rationaliser votre mise en œuvre.

Enfin, examinez le logiciel de gestion de projet que l’entreprise utilise pour vous assurer qu’il est compatible avec votre système interne de planification, d’ordonnancement et de suivi.

2. Détaillez toutes les tâches du projet

Votre partenaire de mise en place vous aidera à dresser une liste détaillée de toutes les tâches à accomplir. Cette liste sera longue. La formation seule, par exemple, comprend de nombreuses tâches :

  • Formation de l’équipe de projet : Votre équipe doit se familiariser avec le logiciel afin de pouvoir décider comment adapter vos processus d’entreprise.
  • Formation de l’équipe informatique : L’équipe informatique doit être formée afin de comprendre comment installer et maintenir le système de manière optimale.
  • Formation des utilisateurs métiers : Toutes les personnes appelées à utiliser le logiciel doivent apprendre comment il fonctionne.
  • Formation continue : Les nouveaux utilisateurs auront besoin d’être formés au fur et à mesure qu’ils rejoignent votre entreprise, vous devrez donc mettre en place un plan à plus long terme.

La liste des tâches doit être divisée en phases. Il faut prévoir du temps pour le pilote en salle de conférence, la personnalisation de l’application, l’intégration à d’autres applications et sources de données, la mise en œuvre de l’infrastructure, le nettoyage des données, l’acceptation par les utilisateurs, etc.

3. Calculez les heures de travail

Estimez soigneusement le temps nécessaire à chacune des tâches. Pour ce faire, comprenez la tâche et le travail qu’elle implique, puis déterminez le nombre d’ « heures de travail » nécessaires. Il peut s’agir d’une fourchette d’heures, mais elle doit être précise. Additionnez les heures de travail pour chaque phase du projet et désignez la personne chargée de les réaliser.

C’est pourquoi il est important de faire appel à un partenaire intégrateur qui connaît bien la solution logicielle. Si vous effectuez cette étape correctement, vous serez en mesure de calculer avec précision votre calendrier, de déterminer si vous avez besoin d’aide en dehors de votre équipe actuelle et de limiter les dérapages.

4. Créez un calendrier réaliste

Maintenant que vous avez calculé les heures de travail disponibles et nécessaires, vous pouvez créer un calendrier réaliste. Dans de nombreux cas, le premier passage révèle un problème de capacité par rapport au calendrier de mise en œuvre qui avait été présenté à l’origine aux dirigeants.

Voici un exemple de calcul qui illustre les écarts potentiels :

  • Délai de mise en service prévu = 12 mois ou 1 an
  • Nombre total d’heures de travail disponibles sur une période de 12 mois = 540/semaine ou 28 080 heures/an
  • Nombre total d’heures de travail nécessaires à la mise en place = 42 000 heures au total
  • Heures requises divisées par les heures disponibles par an = 1,496 années

Le résultat ? La date de mise en service est manquée avant le début du projet. Voici quelques solutions possibles :

  • Réduire le scope – même si l’équipe a convenu que ces tâches sont essentielles.
  • Repousser la date à une date réaliste
  • Ajouter plus de ressources internes et externes (heures de travail disponibles)
  • Décomposer le projet en phases

C’est ici que l’équipe de direction devra prendre la décision. Ce n’est qu’un exemple des raisons pour lesquelles ils doivent être impliqués dans le processus de sélection et de mise en œuvre du logiciel.

5. Menez un projet pilote

Une fois le projet lancé et avant la mise en service, effectuez un test ou un pilote (dans une salle de conférence) avant le déploiement complet. Ce pilote interne vous permettra de vous assurer que vous avez mis en place les processus opérationnels appropriés pour les besoins actuels et futurs de l’entreprise. Lorsque vous concevez vos nouveaux processus, il est important de comprendre l’éventail des options disponibles dans votre système ERP – et de valider vos processus avec l’équipe de projet et les parties prenantes de la communauté des utilisateurs.

Au cours de cette phase de plusieurs semaines, votre partenaire de mise en place installera un logiciel pilote qui vous permettra de tester tous vos processus et de vous assurer qu’ils fonctionnent comme prévu, sans surprise. Souvent, vous pouvez appliquer les meilleures pratiques pour gagner du temps, en particulier si vous disposez des outils de configuration pour effectuer des ajustements rentables à mesure que vous affinez vos opérations.

6. Nettoyez vos données

Cela semble simple, mais le nettoyage des données est une activité chronophage. Il est préférable de commencer à évaluer l’exactitude de vos données dès que possible, car il faut beaucoup d’efforts pour réaliser cette étape correctement. Au cours du projet, des changements de processus métiers se produiront – soyez donc prêt pour des étapes supplémentaires de gestion des données pendant la mise en œuvre.

7. Tenez tout le monde informé

Chaque semaine, un membre du personnel doit contacter toutes les parties prenantes clés afin qu’elles soient informées des points positifs et moins positifs de l’avancement du projet de mise en œuvre. Le pire scénario est celui où les gens ne sont pas tenus au courant et sont pris par surprise.

La plupart des bons systèmes de gestion de projet comportent des représentations visuelles de l’avancement du projet.

Commencez par les processus les plus importants de votre entreprise

Toutes les entreprises n’ont pas les mêmes problèmes. Il est donc préférable de passer en revue vos processus opérationnels et de classer par ordre de priorité ceux qui doivent être abordés en premier. Voici une liste de domaines à haute valeur ajoutée à prendre en compte :  

  • La veille stratégique, y compris les alertes de gestion et les tableaux de bord : Votre équipe a besoin de mises à jour rapides sur les problèmes de l’entreprise, ainsi que de la possibilité d’approfondir facilement les détails pour résoudre rapidement les problèmes – au bureau, à la maison ou sur la route. Vous avez besoin d’une intelligence d’affaires intégrée et de données qui se trouvent dans une base de données unique.
  • Gestion de la relation client (CRM) : Aujourd’hui, les processus CRM touchent généralement toutes les parties d’une entreprise. Les ventes directes, les distributeurs, les showrooms, le commerce électronique, le service client et les commerciaux partagent tous des informations sur les clients avec la gestion des commandes, les opérations, les achats, l’ingénierie, les comptes clients et l’expédition.
  • Finance et comptabilité : Des transactions financières précises et en temps réel, des indicateurs clés de performance et des analyses sont essentiels à toute entreprise, et ils doivent couvrir tous les sites et départements. Outre la comptabilité, elles doivent être intégrées à l’évaluation des coûts, à la budgétisation, aux prévisions, aux projets, à la gestion des actifs, à la conformité et à la gestion de la trésorerie.
  • Gestion de la chaîne logistique (DSC) et fabrication : Les délais serrés, les faibles marges et les perturbations de la chaîne d’approvisionnement constituent un défi pour toutes les entreprises. Leur gestion nécessite un travail d’équipe – collaboration avec les fournisseurs, les transporteurs, les sociétés d’import/export, les banques et d’autres partenaires – souvent sur des appareils mobiles répartis sur plusieurs sites.
  • Ressources humaines (RH) : La gestion d’une main-d’œuvre diversifiée est plus difficile aujourd’hui que jamais, et votre équipe a besoin d’un accès immédiat et sécurisé aux informations sur les employés pour la paie, les avantages sociaux, la budgétisation, la programmation et les besoins de conformité. De plus, le recrutement, le développement et la fidélisation des employés constituent une part importante de l’évaluation des plans d’affaires actuels et proposés.
  • Langues, devises et sites multinationaux : À mesure que vous développez votre entreprise, en particulier si vous vous implantez dans de nouvelles régions ou de nouveaux pays, vous devez être en mesure d’ouvrir et de développer de nouvelles opérations de manière cohérente et rapide. Cela nécessite des capacités logicielles étendues et avancées, ainsi que des services cohérents de la part de votre fournisseur de logiciels sur chaque site.
  • La mobilité : La capacité d’accéder à l’information et de travailler à distance est désormais vitale – comme l’a démontré la pandémie de COVID-19. Les entreprises qui disposent des outils nécessaires pour s’adapter rapidement peuvent prendre l’avantage en période de perturbation.

Conseils pour atténuer les risques liés à la mise en œuvre d’un ERP

Tous les projets comportent un élément de risque. Vous trouverez ci-dessous cinq conseils précieux pour améliorer vos chances de mener à bien votre projet dans les délais et les budgets impartis.

  1. Choisissez des partenaires expérimentés en matière de logiciels, de processus opérationnels et de mise en oeuvre qui possèdent un savoir-faire sectoriel et local. Interrogez toujours des références dans des entreprises comme la vôtre.
  2. Ne poussez pas une technologie dépassée au-delà de ses limites. Éliminez les anciens systèmes autonomes dépassés et, dans la mesure du possible, consolidez vos données dans une base de données unique (version unique de la vérité) avec une veille économique intégrée pour des performances multinationales.
  3. Dans l’économie numérique, les entreprises doivent souvent intégrer des systèmes entre les unités commerciales ainsi qu’avec les clients et les fournisseurs. Confirmez que vous disposez de capacités d’intégration dans le cloud et d’une expertise en matière de réseaux de fournisseurs.
  4. Évitez les dérives du projet. Il est fréquent de découvrir des besoins et des opportunités au cours de la mise en œuvre d’un ERP. Il est donc important de gérer les ordres de modification pour éviter les retards et les dépassements de coûts.
  5. Confirmez que vous disposez d’une expertise cohérente sur tous vos sites. Vous avez besoin d’une formation, d’une mise en place et d’une assistance, souvent fournies par la direction locale, les distributeurs de logiciels, les sociétés de conseil et votre partenaire logiciel.

Conseils pour éviter les coûts supplémentaires liés à la mise en œuvre d’un ERP

L’investissement dans un nouveau système ERP comprend l’engagement en temps de votre entreprise, le conseil en processus métier et en mise en œuvre, les logiciels et les services cloud, ainsi que l’équipement en ordinateurs, tablettes et téléphones – il est donc important de contrôler le projet et les coûts.

Voici quelques points clés à suivre :

  • Restez concentré sur le coût total de possession (TCO). Gérez vos coûts totaux – et les avantages au fil du temps pour minimiser les dépenses et maximiser le rendement. N’oubliez pas que la mise en œuvre d’un système ERP aura un impact important sur votre entreprise.
  • Respectez l’orientation de l’entreprise et n’imposez pas de changements de processus inutiles. Dans de nombreux cas, les entreprises sont contraintes de modifier leur mode de fonctionnement pour s’adapter à leur logiciel, ce qui augmente les coûts de mise en œuvre et d’exploitation.
  • Concentrez-vous sur les processus de routine qui apportent une valeur significative à l’entreprise.  La gestion des commandes des clients, la mise à jour des prix, l’ajout de nouveaux produits et services, la modification des détails de fabrication et l’intégration des nouveaux employés sont des exemples de ces processus de routine.
  • Évitez les personnalisations et tirez parti d’une interface utilisateur configurable, des tableaux de bord, des alertes, des flux de travail, de la veille économique et des fonctionnalités mobiles. Grâce à ces fonctionnalités, vous pouvez rationaliser le travail de tous vos services ainsi que procéder à des ajustements rapides et rentables si nécessaire.
  • Les piratages de systèmes et les violations de données coûtent cher. Lorsque vous utilisez Internet, utilisez une solution ERP en nuage sécurisée si nécessaire – confirmez que vos fournisseurs de logiciels et de services prennent en charge une gamme d’options de déploiement de logiciels sécurisés.

Quand votre mise en oeuvre ERP sera-t-elle terminée ?

Une fois votre mise en oeuvre initiale terminée, vous aurez toujours besoin de la flexibilité nécessaire pour ajouter des fonctionnalités supplémentaires à votre entreprise. De nombreux changements peuvent être à l’origine de ces opportunités, comme de nouveaux sites, de nouvelles gammes de produits et de services, et des acquisitions.

La transformation numérique offre également des possibilités supplémentaires de faire équipe avec les clients et les fournisseurs pour redéfinir la manière dont les affaires sont menées dans votre secteur. Souvent, ces projets incluent de nouvelles technologies, comme l’apprentissage automatique et l’intelligence artificielle (IA), ainsi que l’intégration avec des équipements et des véhicules utilisant l’Internet des objets (IoT) pour améliorer la vitesse et l’efficacité.

Prêt à passer à l’étape suivante ?

Dans tout projet ERP, il y aura des problèmes inattendus – alors attendez-vous à en rencontrer dans le vôtre. Mais, en suivant les meilleures pratiques pour une mise en oeuvre réussie de l’ERP, vous pouvez les identifier et les traiter dès qu’ils se présentent afin de gérer efficacement vos risques et vos coûts.

Essayez une solution ERP moderne cloud

The post Meilleures pratiques de mise en œuvre d’un ERP pour réduire les risques et les coûts appeared first on SAP France News.

Source de l’article sur sap.com