Articles

This month’s collection of the best new fonts is headed in a lighter and quirkier direction than previous months. What’s more, font foundries seem to be getting more creative with their designs as many of these fonts come with alternative stylistic sets, giving you more control over the resulting typeface.

If you’re looking for some fun new fonts to spice up your web designs with, start here:

1. Beauty Rose

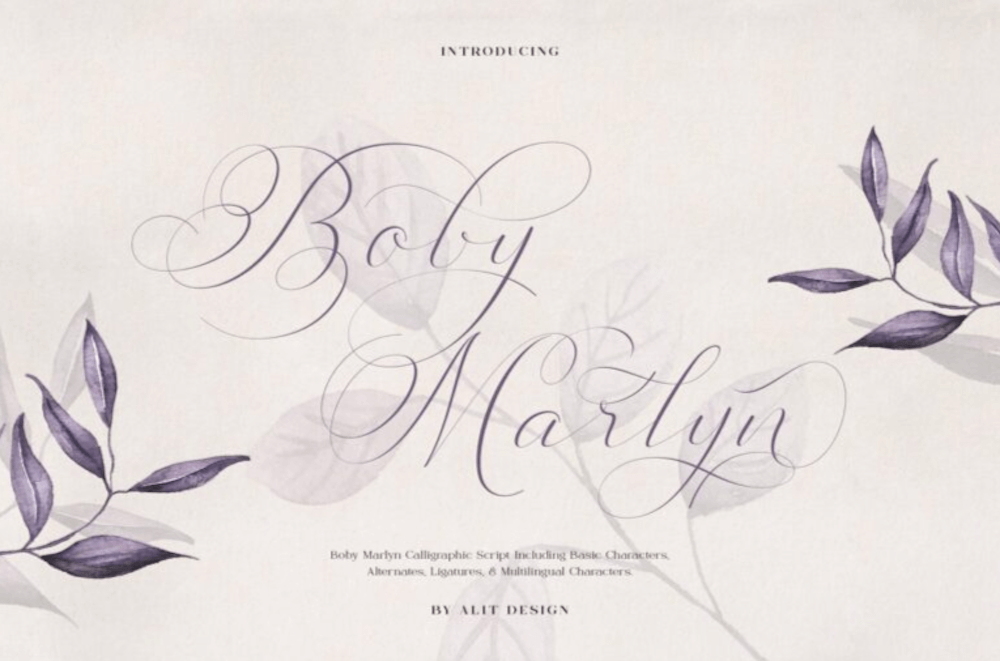
Beauty Rose is a whimsical script font that can add a touch of romance and warmth to header text and hero images. It would also look great when promoting holidays and events like Mother’s Day, Valentine’s Day, and weddings.

2. Black Sharp

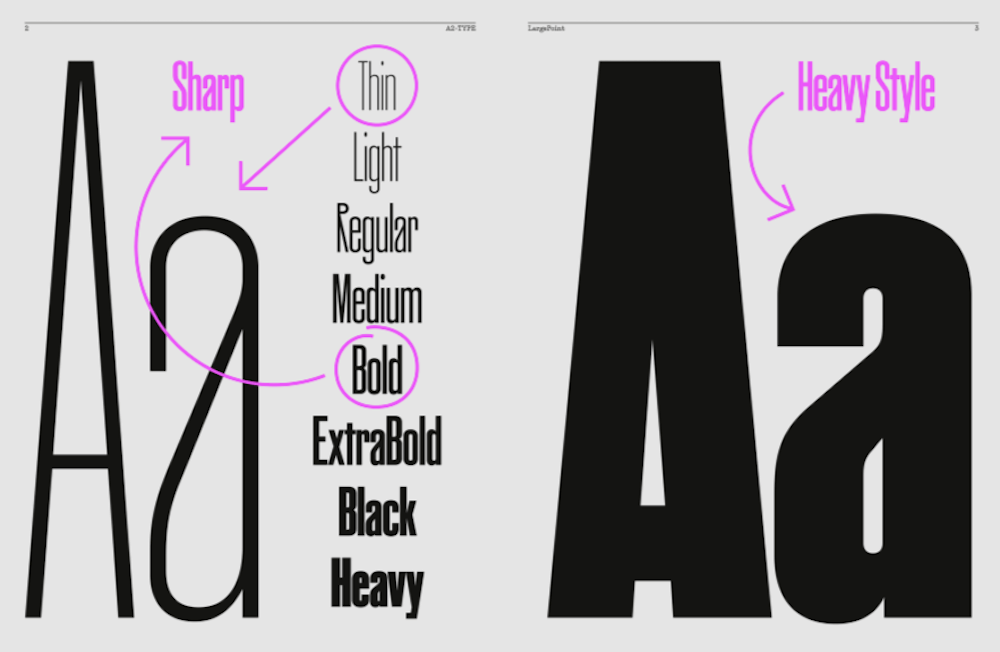
Black Sharp is a bold display font that works equally well for website logos as it does for physical products (e.g., signage, packaging, book covers, etc.). What’s especially neat about this font is how it transforms when you change its texture. It takes on a very different tone with a grainy look instead of a shiny one, for instance.

3. Goat & Qalvigo

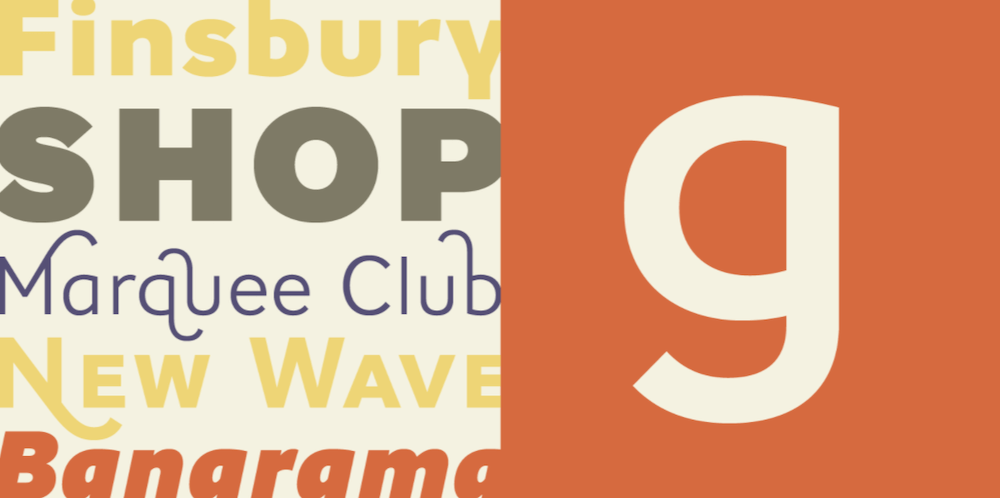
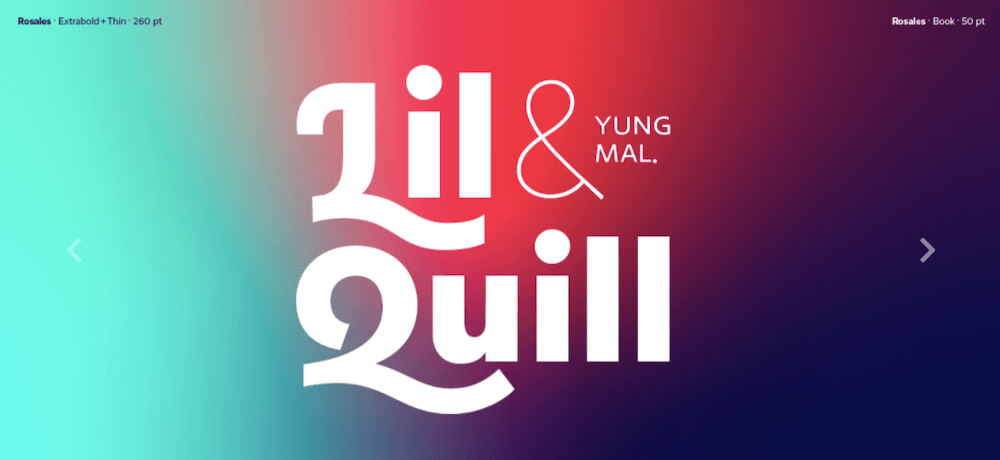
Goat & Qalvigo is a classic serif font with a modern twist. While many of the examples provided by the type designer show off the funky side of the font, thanks to the additional ligatures and alternative styles, you can always use the regular character sets. Either way, you’ll have a classy new font to use all over your website.

4. Happy Comic

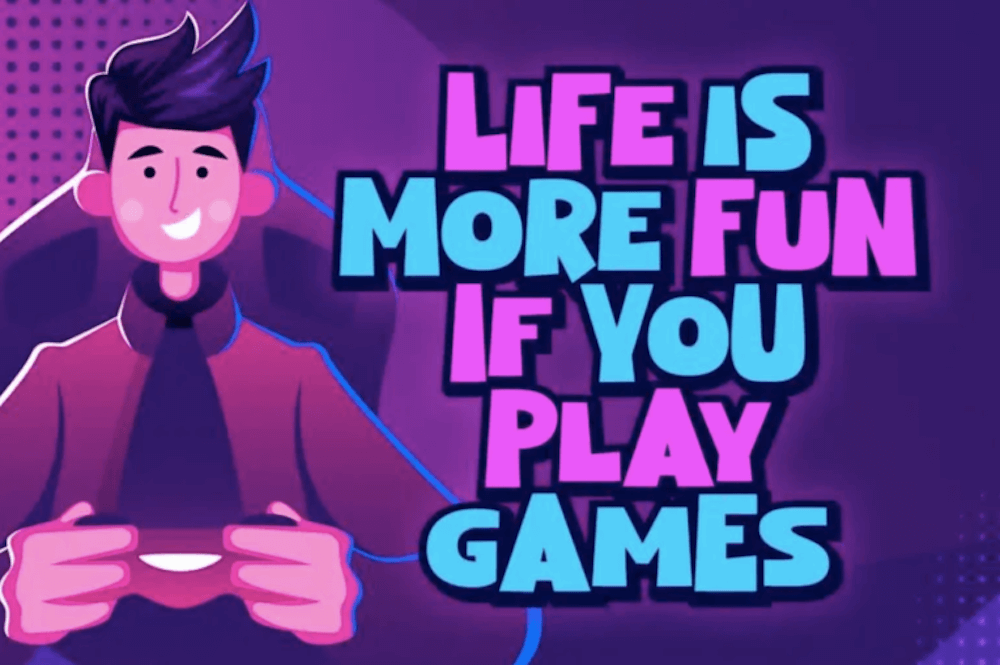
Happy Comic is a font filled with personality. Looking at it makes me think of a goofy cartoon character or maybe even an older Adam Sandler movie. This would be a good font for branding lighthearted and humorous brands or publications.

5. Helsa Display

Helsa Display is a slim and compact serif. While serifs usually work pretty well for paragraph text, this one belongs in headlines and sub-headlines because of how thin the characters are. It also has a bit of a dark side (see the examples at the link to see what I mean), so reserve this font for boundary-pushing brands and personalities.

6. Lab Antiqua Variable

Lab Antiqua is a font that took years to create. The most recent release for this font family is called Lab Antiqua Variable. Like other variable fonts, Lab Antiqua will effortlessly transition through a range of font sizes without losing the characteristics that make this serif font so unique.

7. Monomorium

Monomorium is a monospaced typeface with open apertures and a flowing style. In addition, this quirky font comes with additional ligatures, stylistic alternates, parentheses, and more, depending on how fun or buttoned-up you want it to look.

8. Neumond

Neumond is a serif font that pushes the boundaries of legibility. This font gives you the ability to equip the characters with razor-sharp lines, overlap the letters, and push them towards extreme angles. If you have a brand that’s challenging the norm, a font like this that does the same will go really well with it.

9. Pratico Slab UI

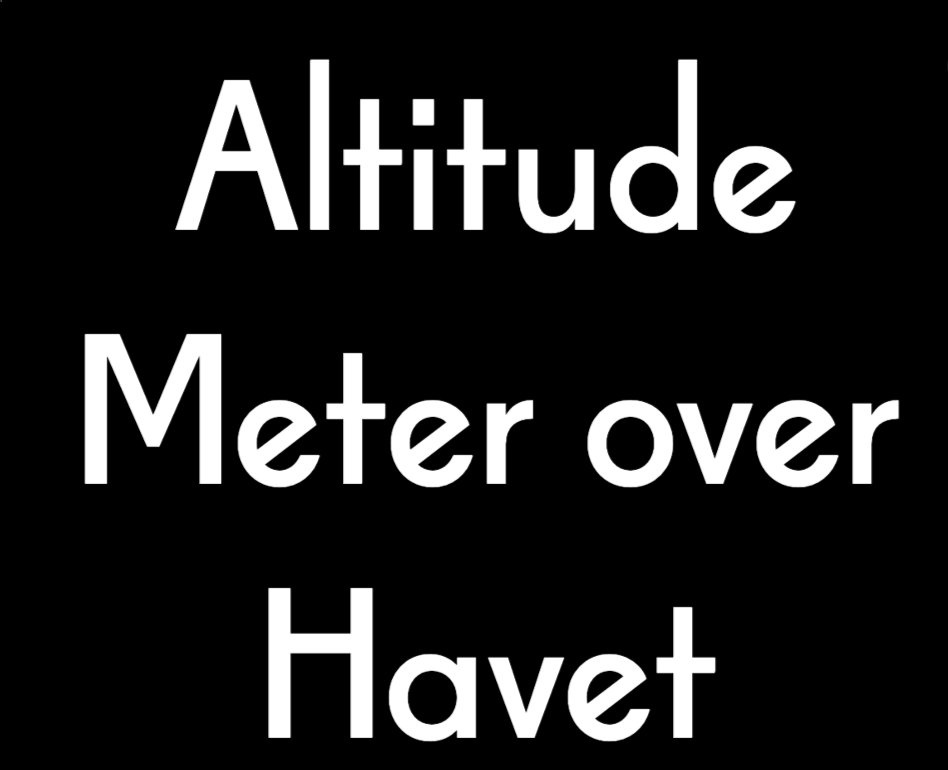
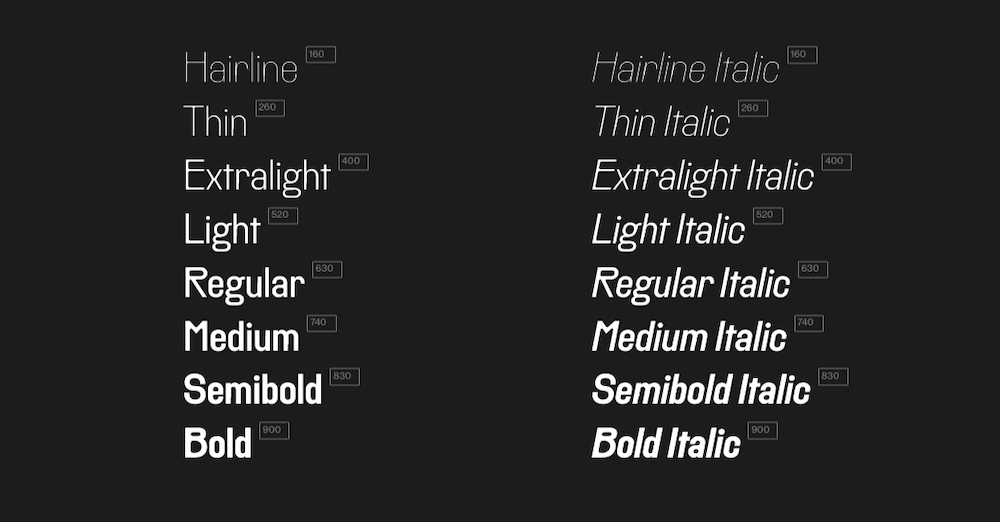
Pratico Slab UI is a slab serif font that would add strength and character to the text of a website. You can also experiment with the weight and size if you’re looking for a not-so-boring but highly legible header font.

10. PT Nature

PT Nature is an exciting collection of script fonts. While they all technically belong to the PT Nature family, each font is modeled after different people’s handwriting. So this font family could be really useful if you use a lot of script fonts in your work. Or if you want to make one site and brand look like it has multiple personalities.

11. Rosehot Typeface

Rosehot Typeface is a pretty font that straddles the line between serif and sans serif. With its elegant curves, unexpected twists, and additional angles, this font would beautifully elevate designs for high-end retailers, fashionistas, and others with luxury offerings or services.

12. Shorai Sans

Shorai Sans is a sans serif font inspired by both calligraphic brushstrokes as well as geometric outlines. You can use it to style Latin text as well as Japanese. The font’s creators suggest pairing it with Avenir Next for greater harmony in your designs.

13. Shoutyperson

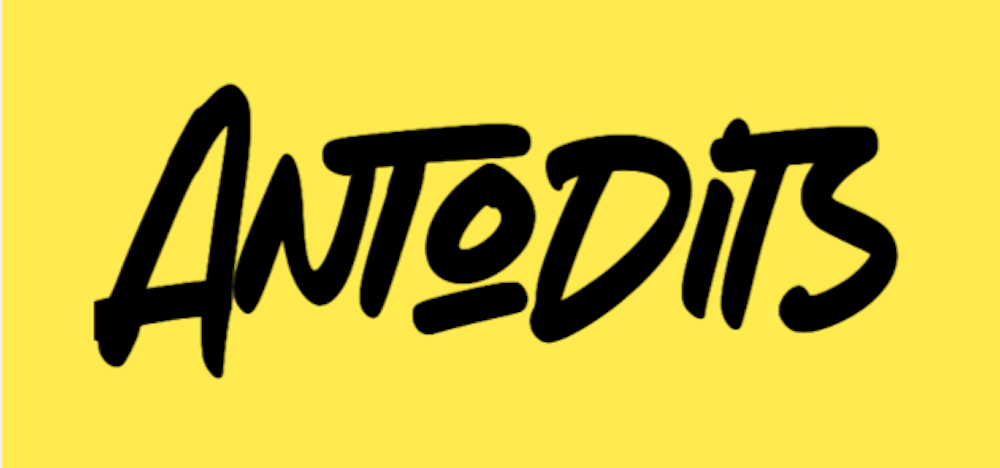
Shoutyperson is a bold all-caps font. Because of the grungy, stenciled style of the font, it’s not really applicable for many projects. That said, Shoutyperson would be an effective font choice for military, ammunition companies, or brands or personalities associated with a strict, regimented lifestyle (like personal trainers).

14. Simple Farmhouse

Simple Farmhouse is a basic handwriting font that’s highly legible. It resembles the style of writing you’d use to jot down notes on a whiteboard or in a notebook, so it would work well for brands that want to convey a casual and low-key vibe.

15. Sweet Pancakes

Sweet Pancakes is a fun font with full-bodied characters. Most of the examples provided frame the font against food, so this could be used on restaurant websites or food blogs. However, that’s not to say it couldn’t be used elsewhere. It’s a lighthearted and easy-to-read font, so it could just as well be used to style websites and branding for companies and personalities with a bubbly personality and/or positive mission.

Source

The post 15 Best New Fonts, April 2022 first appeared on Webdesigner Depot.

Source de l’article sur Webdesignerdepot

Whether you’re new to the job or are an experienced designer, the anxiety of a new project can sometimes – often unexpectedly – cause us to freeze in our tracks. This creative paralysis sees us staring at a blank page, unable to come up with ideas, and the knowledge that time is slowly ticking away.

We’ve all been there. So we thought it would be helpful to share our tips and tricks for overcoming the tyranny of the blank page and help you get back to doing great work.

The first thing to know is that you are not alone; blank page syndrome has a basis in science, with a clearly identifiable set of symptoms that consistently occur together. 

The first thing to know is that you are not alone; blank page syndrome has a basis in science

It starts when you become stressed. Stress causes your brain to produce hormones that slow down neural functions, which only serves to increase the feelings of inadequacy over a lack of creative spark – and fuel anxiety. Understandably, this causes a spiral as your mind seems to get emptier and the blank page more threatening.

But don’t fear! Because there are ways to move past blank page paralysis and get back to productivity. 

Just Relax

Once you’re in a negative spiral, it’s notoriously difficult to get out of. The best solution is to avoid the spiral entirely – by starting in the right frame of mind. This means setting up a calm work environment before you even sit down. 

Do your best to avoid major distractions – such as young children who need your attention or colleagues who like to play music that vexes your soul. We’re not saying that you need a sound-proofed home office – the kitchen table might be fine – but schedule your work time for when the kids are at school or with a minder, or work from home if the office is likely to be noisy. A pair of noise-canceling headphones can be handy, too.

Avoid Distractions

Seemingly small things can also get in the way of your work. Chat and email notifications are the digital equivalents of a person calling your name from across a room. Try to avoid or silence anything that stops you getting into the creative mindset, even if you just mute things for a few hours. It’ll help you mentally separate your creative workspace from everything else.

all of those notifications will still be there when you resurface

Ultimately, you need to create a mood that you subconsciously associate with being productive. But even when the space around you is perfect, it can still take a while to get into the zone. Brains don’t just flip into creativity at the flick of a switch, so be kind to yourself. And remember – all of those notifications will still be there when you resurface later in the day. 

Do a Warm-Up

Studies have shown that a blank page is particularly stressful because it makes the task in front of you feel bigger than it really is. Gazing at an empty page is like seeing the whole project stretching out before you. The stress comes from the feeling of having to fill the whole journey, all the way from A to Z.

So don’t start with A! Instead, begin with a warm-up. Just as dancers always start with a series of exercises to warm up their muscles, creative designers can benefit from something similar. You could start by talking things through with colleagues or sketch some ideas using pen and paper, before opening your design app. 

Alternatively, you could start by planning your content hierarchy. You don’t need all the final words – but it can be helpful to work out how many headings you’re going to have, where images will sit, and whether your copy will be in paragraphs or lists. 

By doing this, you’ll have elements to place and a rough idea of their relative importance. It’s easy to get overawed by the importance of actual content – so start by getting a grip on the type, density, and length of content. 

Take Inspiration

The world around us is filled with inspiration and according to an icon designer Yannick Lung:

It helps to observe things in the real world and play around with them.

It can also help to borrow an idea. Obviously, we never condone copying someone’s work, but using existing work as a reference or jumping-off-point can help. Think of it as putting your own twist on an existing idea.

“I sometimes find it useful to reverse engineer a good example of the sort of thing I’m trying to write (and this works for design too). I usually break down a successful example into its constituent parts and swap them out for things more relevant to the project at hand, then refine from there,” says Harvey, one of Sketch’s brand storytellers.

Let Templates Take the Strain

Instead of putting pressure on yourself to instantly start designing, begin by creating templates or wireframes. This isn’t an avoidance tactic. Spending time creating an outline template saves time in the long run – plus, doing practical work that doesn’t need lots of detail will act as a warm-up. It might even help you catch potential issues in your designs earlier. 

Be Collaborative and Welcome Early Feedback

In general, people don’t work well in isolation – so collaborating with colleagues is a great way to get design ideas flowing. At the start of a project, reach out to your colleagues to let them know what you’re going to be working on and set up a session to collaborate on ideas and ask for direct input.

Never wait until the end of a project to ask for feedback. Involving your colleagues in the process early helps counter blank page paralysis and involving stakeholders can help you manage expectations. Aim to get regular and consistent feedback rather than waiting for it – which could cause a delay in your project. 

And of course, you should always choose a design software that enables real-time collaboration so that everyone working on a project can avoid version conflicts.

Avoid Burnout

When work isn’t physical, it can be hard to judge how much it takes out of us

When work isn’t physical, it can be hard to judge how much it takes out of us. If you’re suffering from blank page paralysis, it’s probably a sign that you’re starting to get burnt out. Try setting an alarm on the other side of the room so you have to get up to turn it off regularly – or just scheduling some time into your day to take a break, stretch, or even take a walk. Stepping away from your screen is good for your brain and your body.

In the end, the most important thing to remember when it comes to blank page syndrome is that you have to be kind to yourself. Nobody can be productive 100% of the time – we’re only human, after all. What matters is that you do whatever you need to get your creativity flowing.


Featured image via Pexels.

Source

The post Overcoming Blank Page Paralysis first appeared on Webdesigner Depot.

Source de l’article sur Webdesignerdepot

This month all of our web design trends have a common theme – imagery. Whether it’s seasonal or just coincidence, there’s a shift in the styles and types of images on many designs right now. One thing that might push these design trends is a relaxation of COVID-spurred rules worldwide or even fatigue from the pandemic.

Here’s what’s trending in design this month.

1. Little Images Everywhere

The jury is still out on whether we love or hate this design trend – tiny images (and videos) everywhere.

The thing that’s nice is there is a lot to see and interact with. The thing that’s challenging is that these designs can feel a bit unbalanced and all over the place.

Most of these designs feature four or more images or videos at a time. That can be a lot for a user to digest when we are accustomed to having just one thing to look at in the hero area.

Those four or more images then include all of the other user interface elements that you would expect on the page – navigation, large headline, secondary text, scroll, or engagement interaction. It can be a lot to decipher.

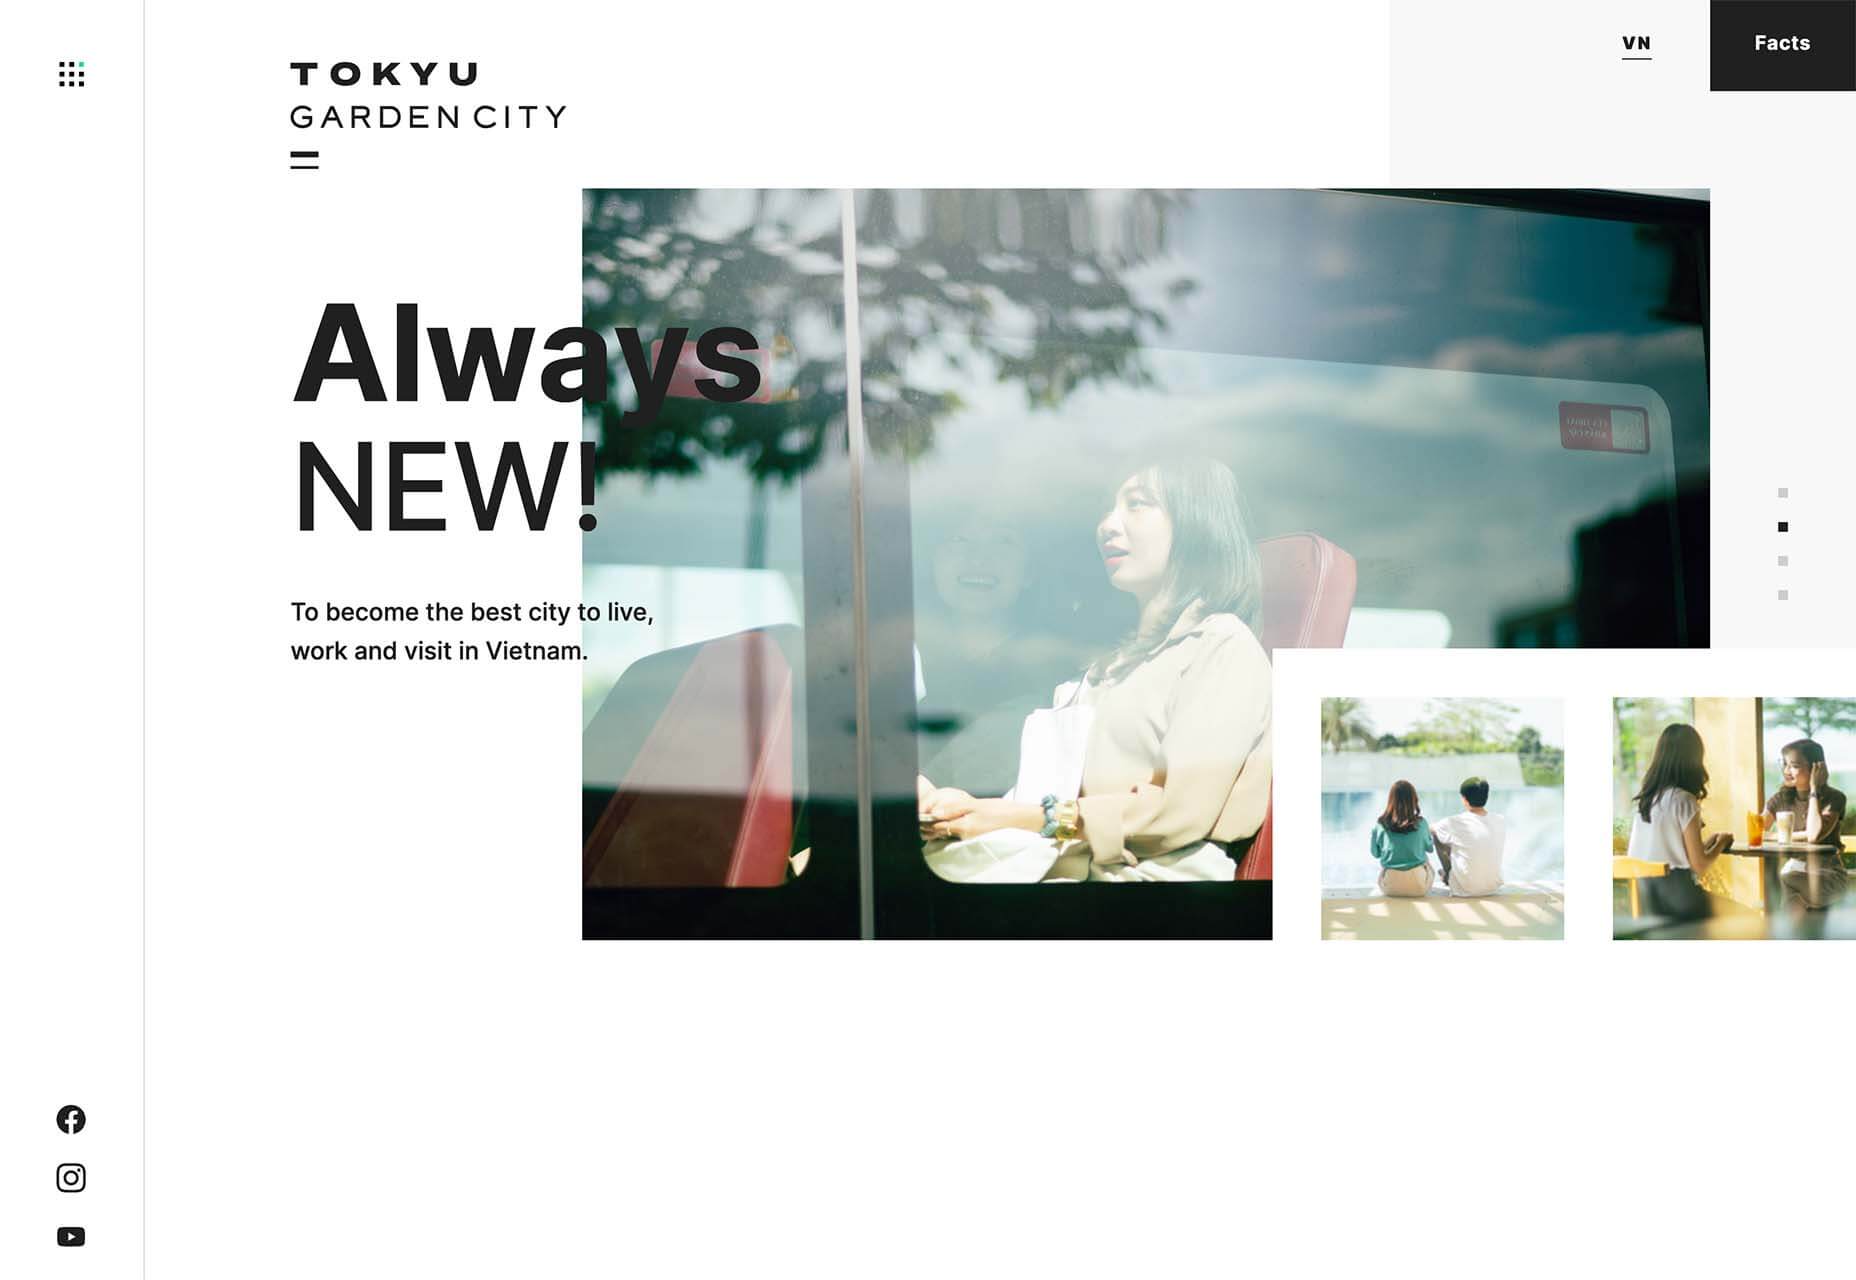
Tokyu Garden City does it with a mix of still and moving images with sliders and other animations. The images are always changing and moving, and there’s constantly something new to look at with movement at the top and bottom of the screen.

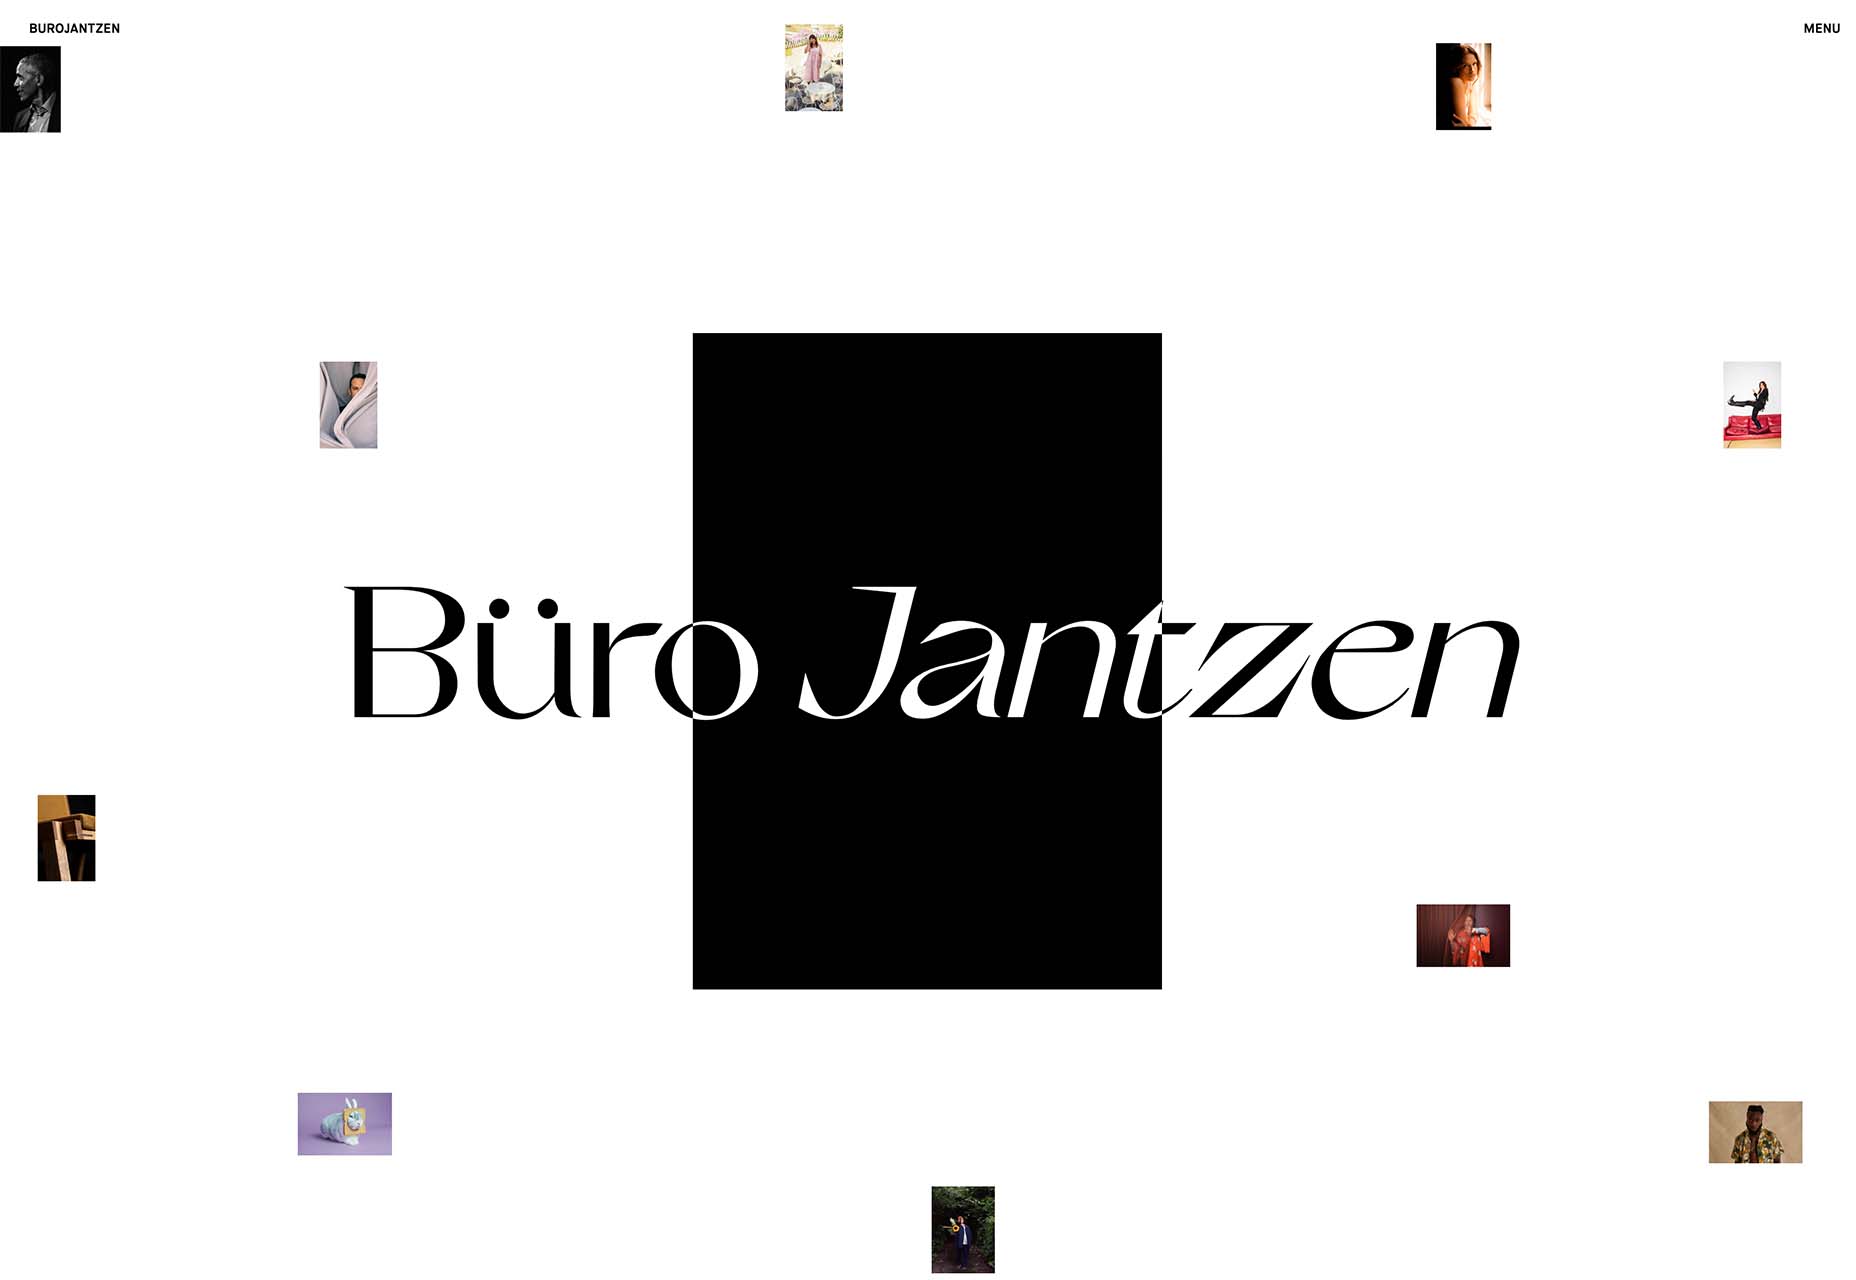
Buro Jantzen takes the tiny image idea to an extreme with ten images on the homepage. And every one is smaller than a postage stamp. There is a cool effect that happens with each image though. On hover, the small image pops into the large black box at a size where you can really see the photo.

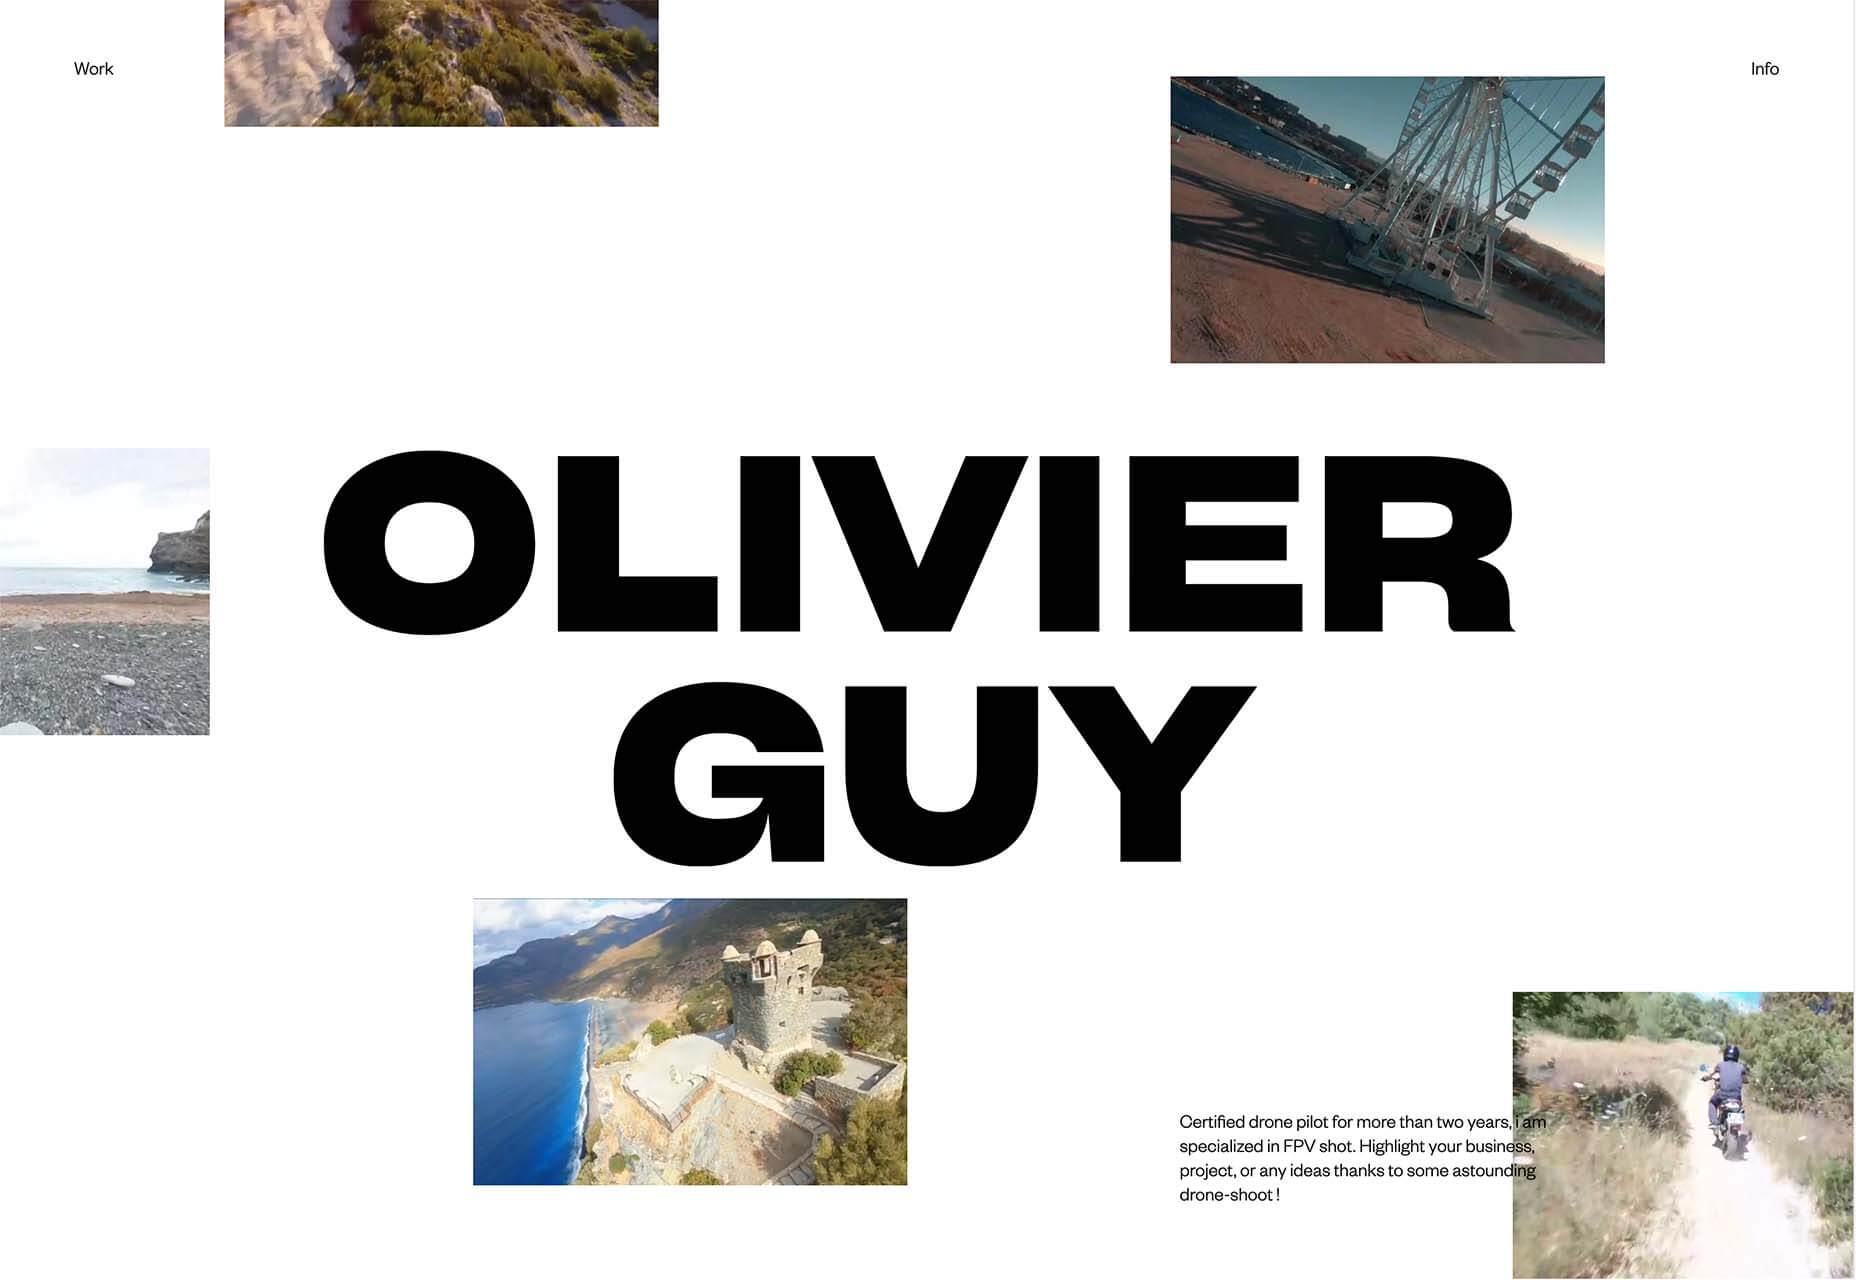
Oliver Guy uses a combination of video images on his website, which makes perfect sense for his industry of drone photography. There’s some interesting hover animation happening that allows you to see additional video clips without leaving the homepage. The contrast of small video on the white background makes this design easy to understand.


2. Big Detail Photography

Photographic details in all their glory. Images and elements that are so in your face that you can see every detail. That’s majorly trending in website design.

Big detail photography and videography is one of those image trends that can be so visually interesting that you can’t look away. It has other benefits, too, such as facilitating decision-making for e-commerce or helping someone better understand what an item is or the overall messaging.

Each of these examples shows something larger than life-size.

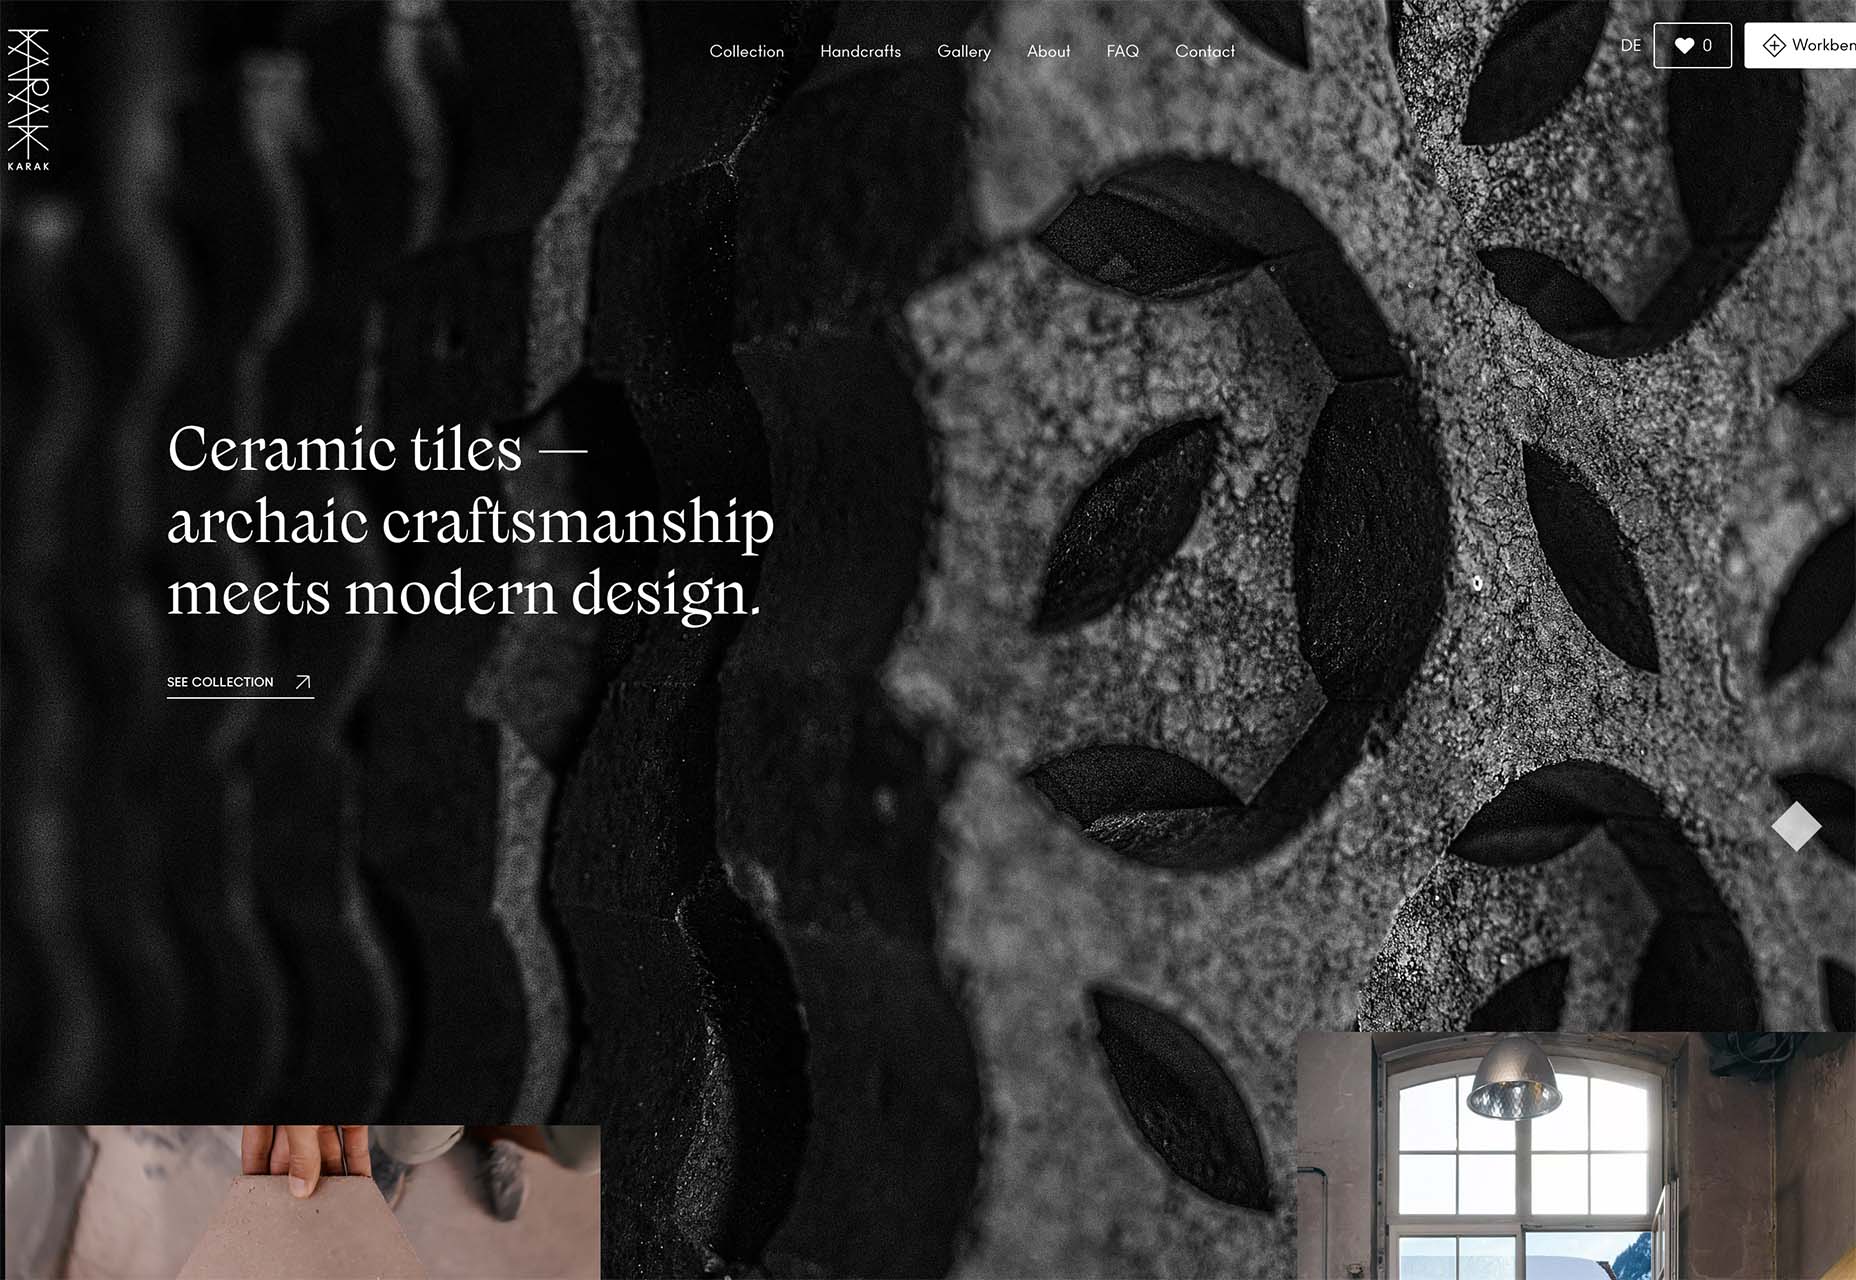
Karak creates ceramic tiles. The primary background image is so big and with such detail that it almost only serves as texture for the design. But it is paired with a smaller image and video that pull everything together for a complete understanding. The big detail image is beautiful and exciting and provides an extra layer of information.

Wuillemin Fleuristes features an off-balanced hero image with a large floral detail. What’s interesting about this design choice for a detail image is that it is the only image on the screen and partially obscured by a tinted box and text element. The overall design draws the eye but may leave the user wanting to see a little more of the image.

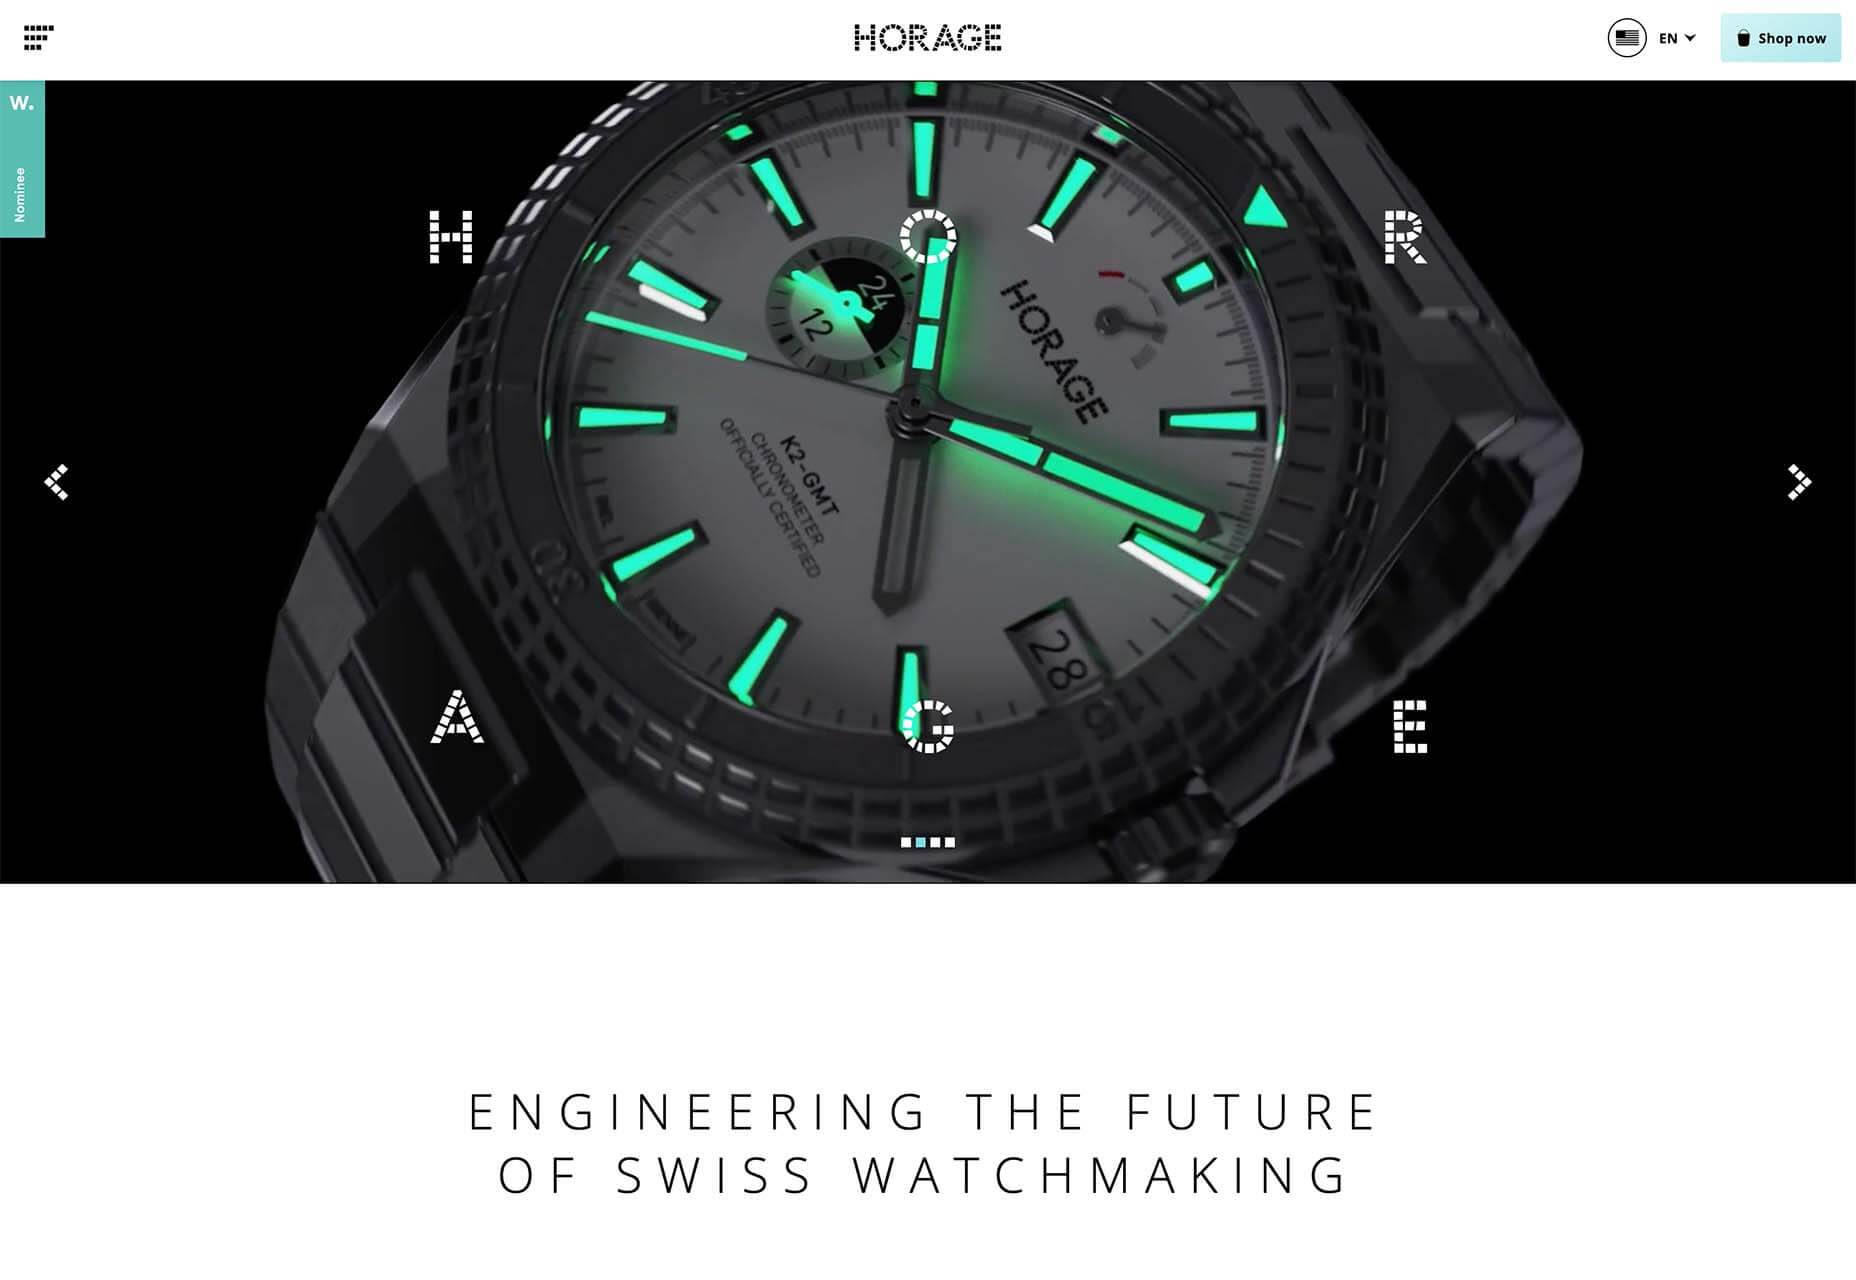
Horage pushes its watch in your face with motion in a video that zooms the product closer and closer into view. The combination of detailed video with very little text is a bold choice for e-commerce and might work because this item is still in the preorder phase. Detailed imaging is designed to help create a desire for the product.


3. Big Faces are Back

After two years of not having that many faces in design projects, designers are going big and bold and showing people again.

One of the reasons we haven’t seen as many faces in design projects is because there was concern over how to show people – masked or maskless, alone or in crowds – and it caused more concern than was worth just going another way.

But projects with big faces are back in a major way. And it’s refreshing to make virtual eye contact again.

There are plenty of ways to do it, as outlined in each of these examples.

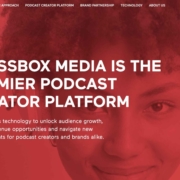
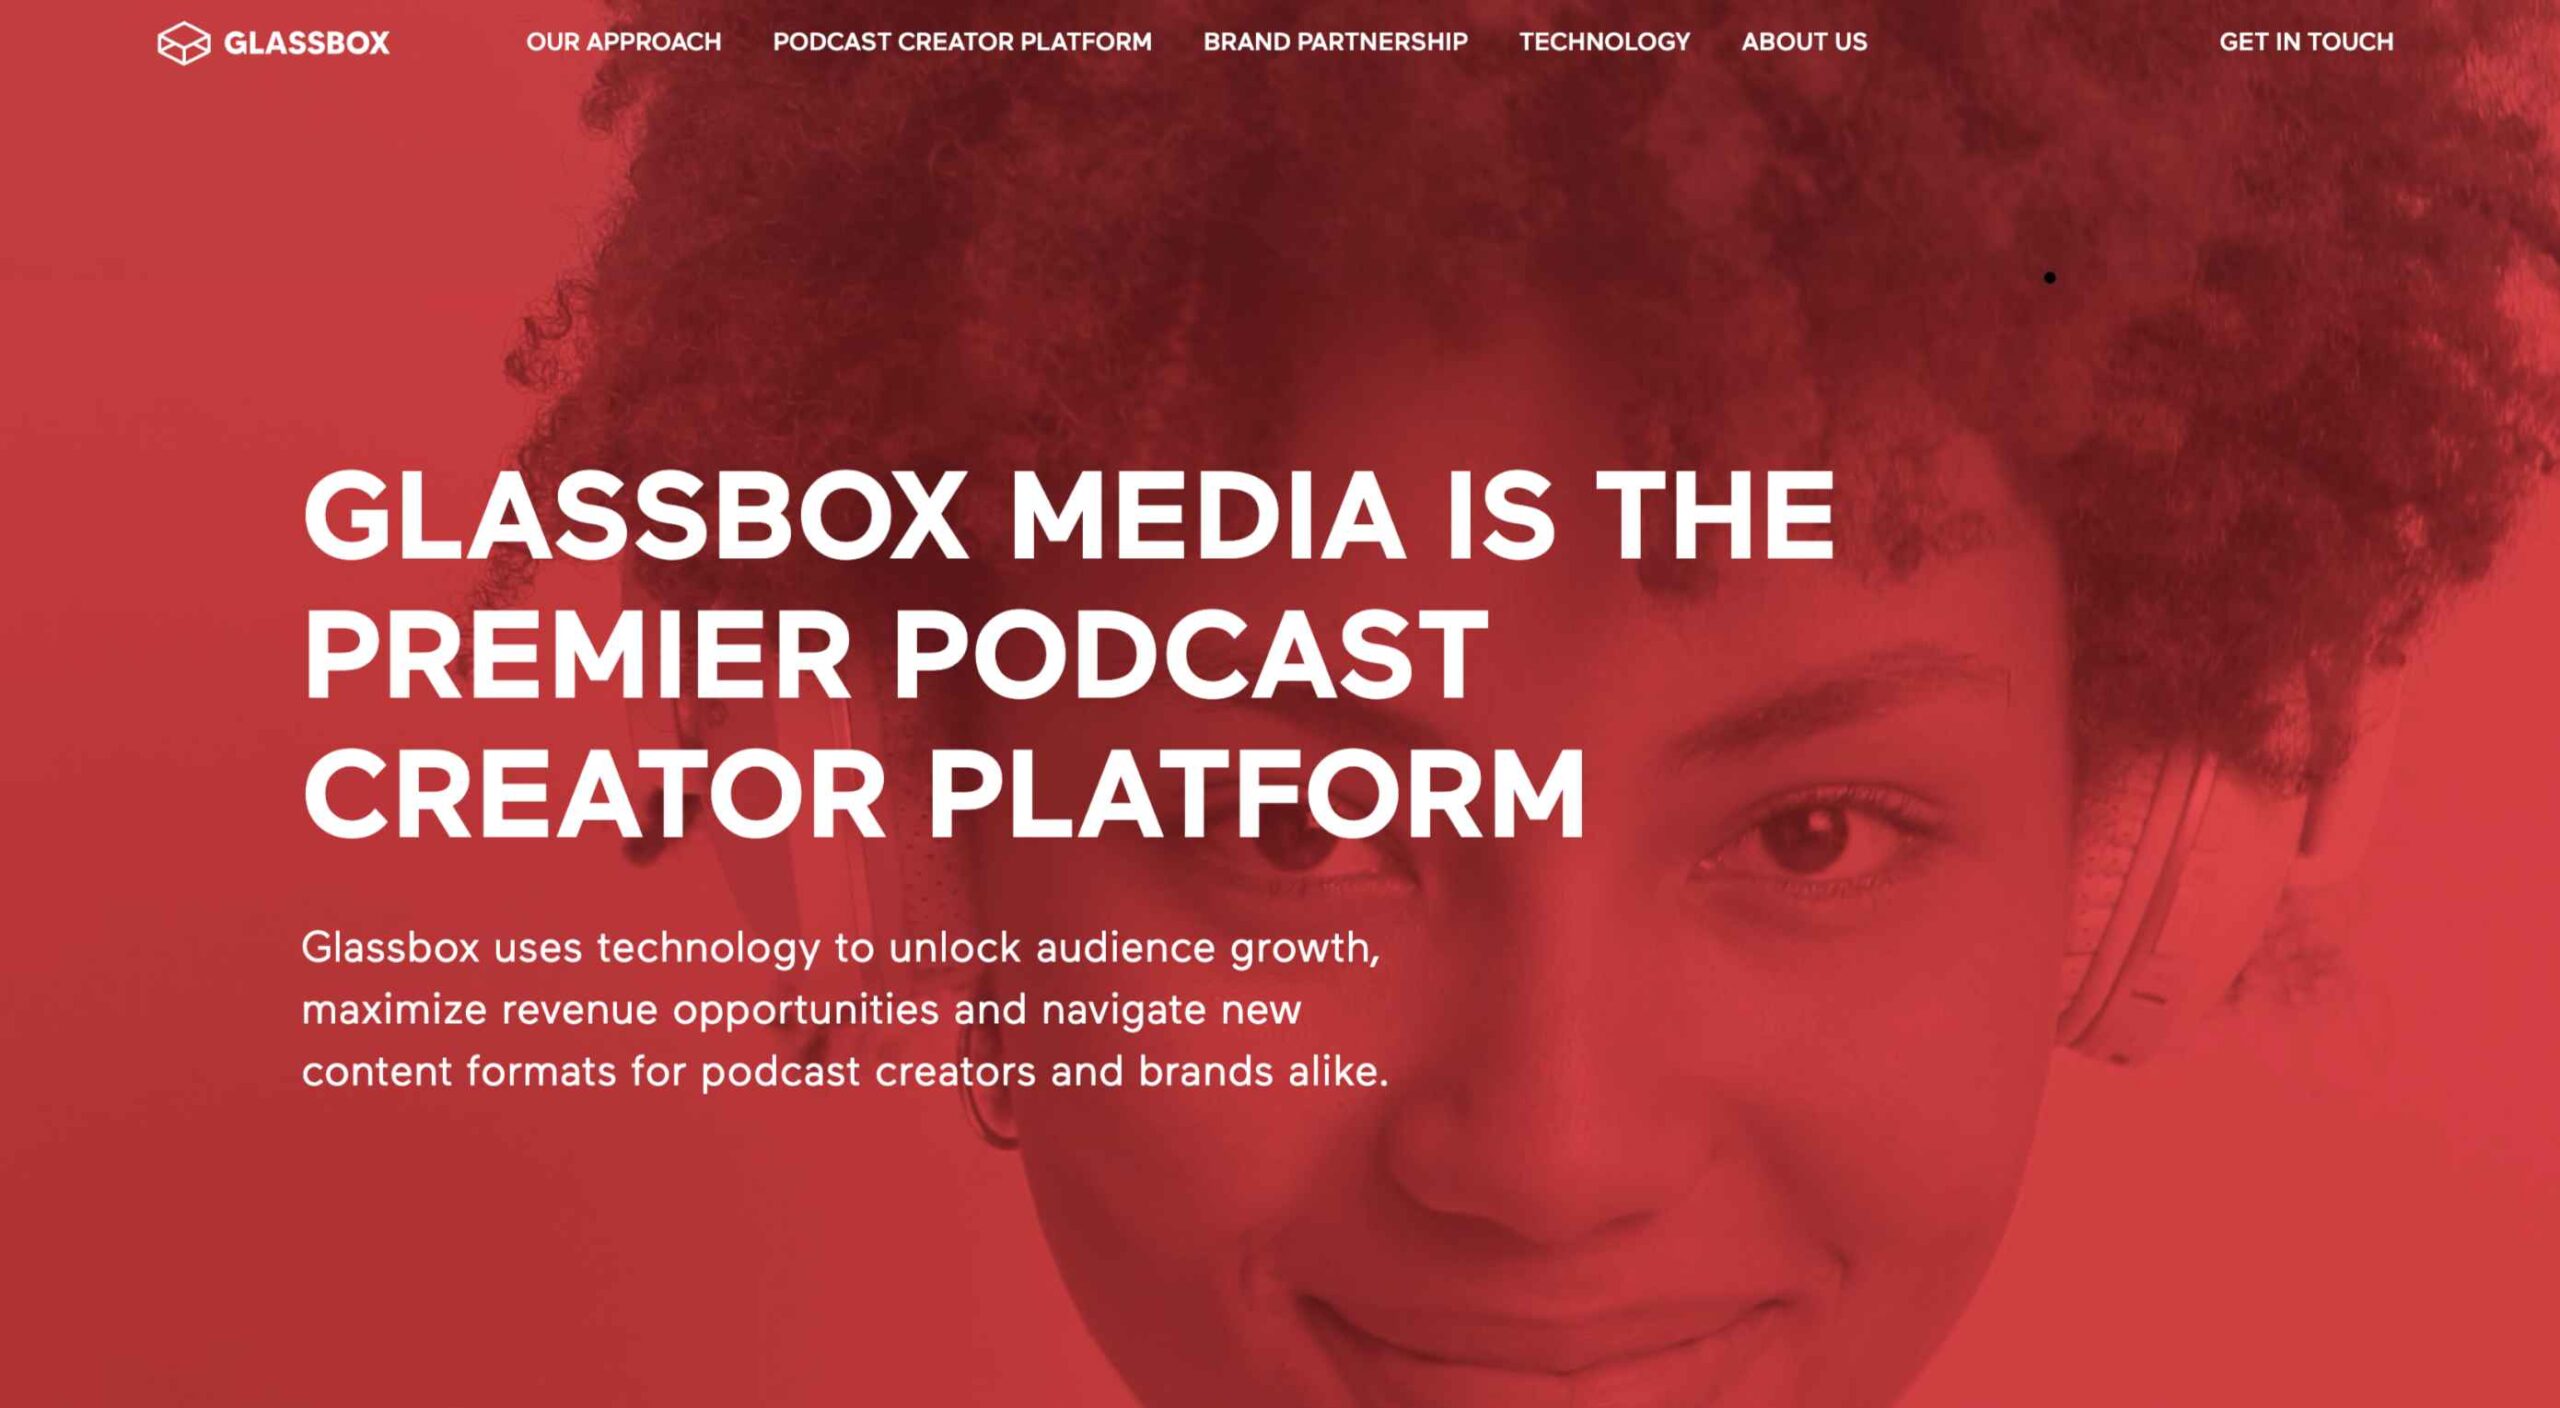
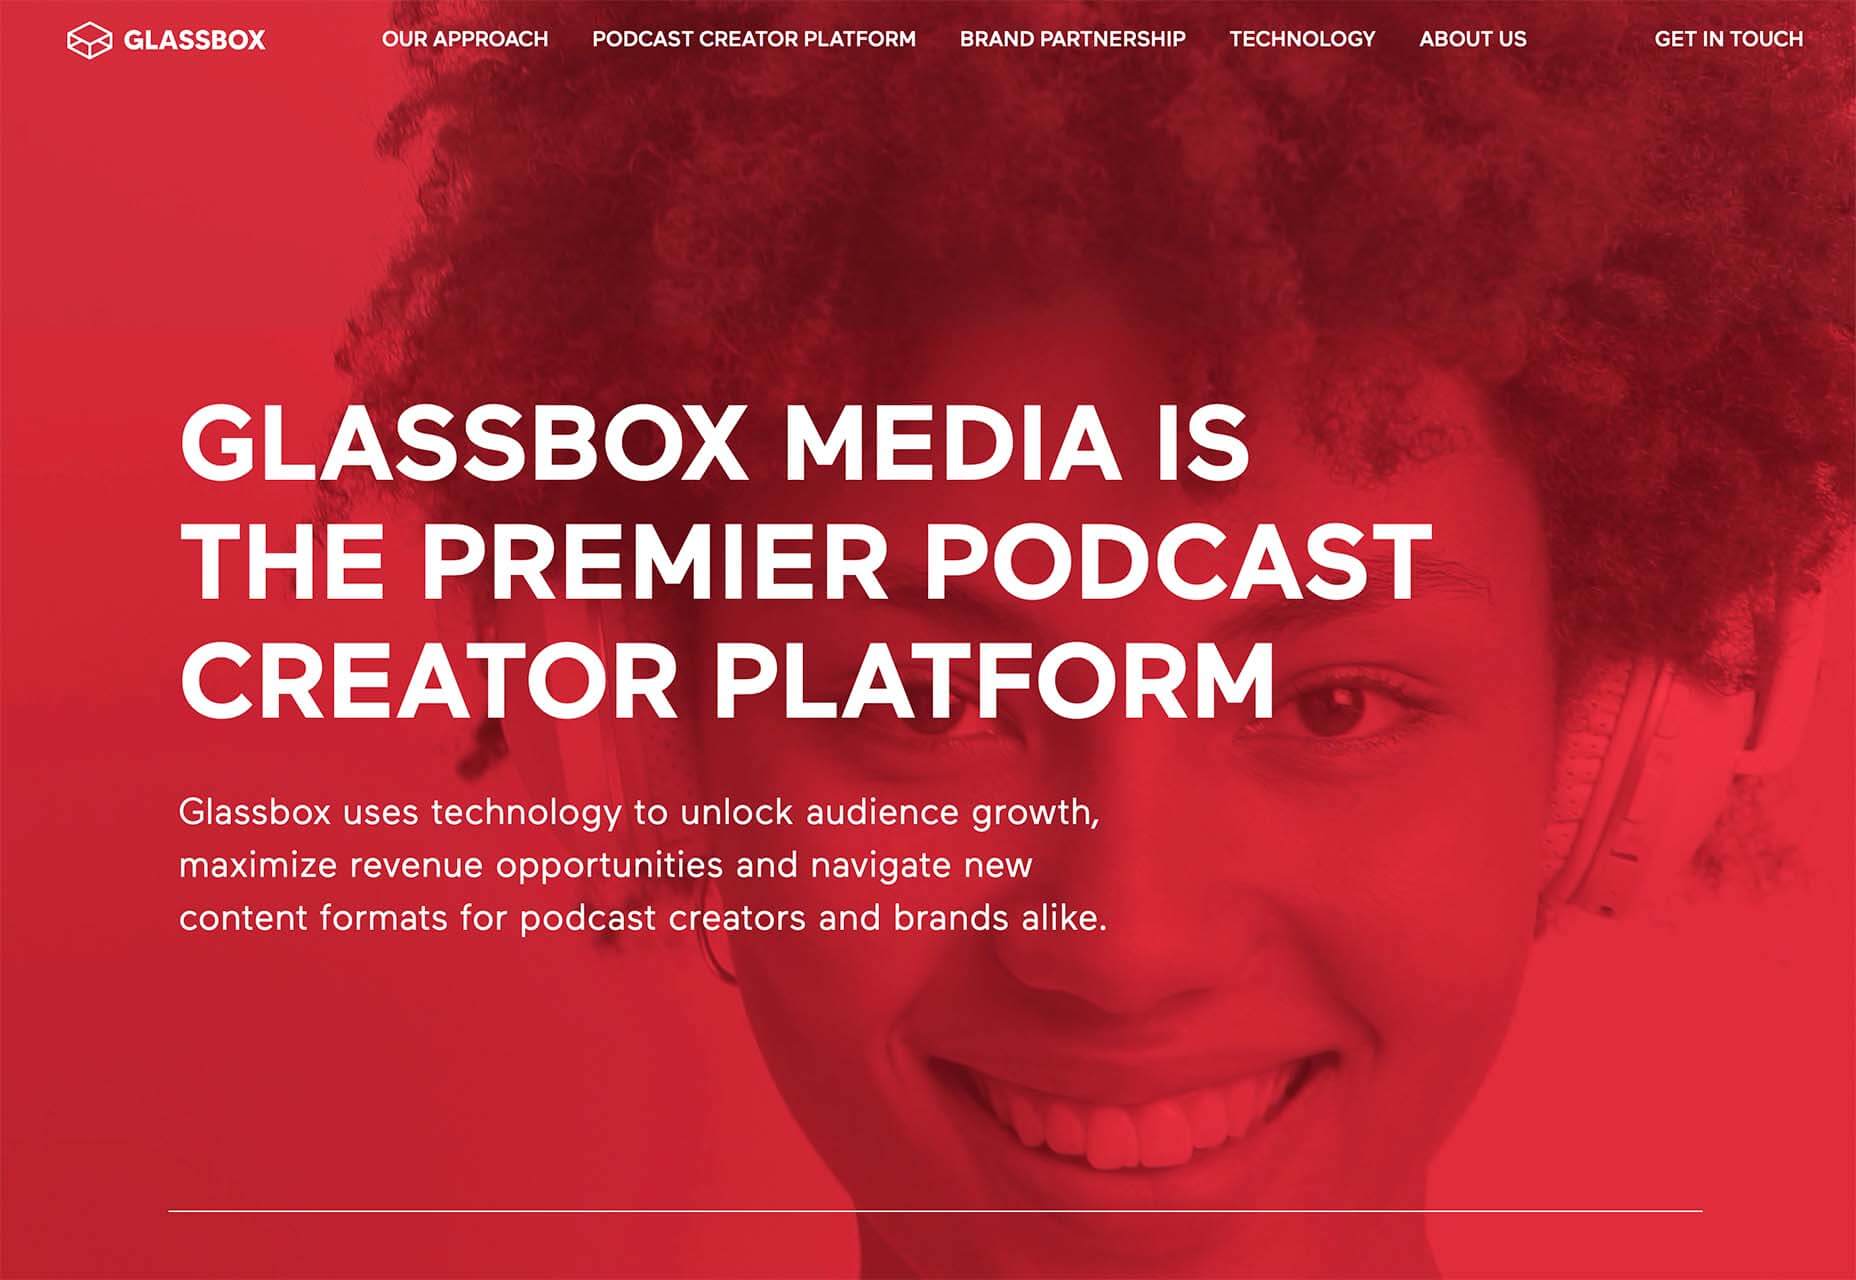
Glassbox Media uses a full-screen oversized video on the homepage. You can see the subject’s eyes and feel engaged with the person on the screen. She seems happy, and the size and scale of the face make you feel almost like you are in a room with her, ready to have a conversation.

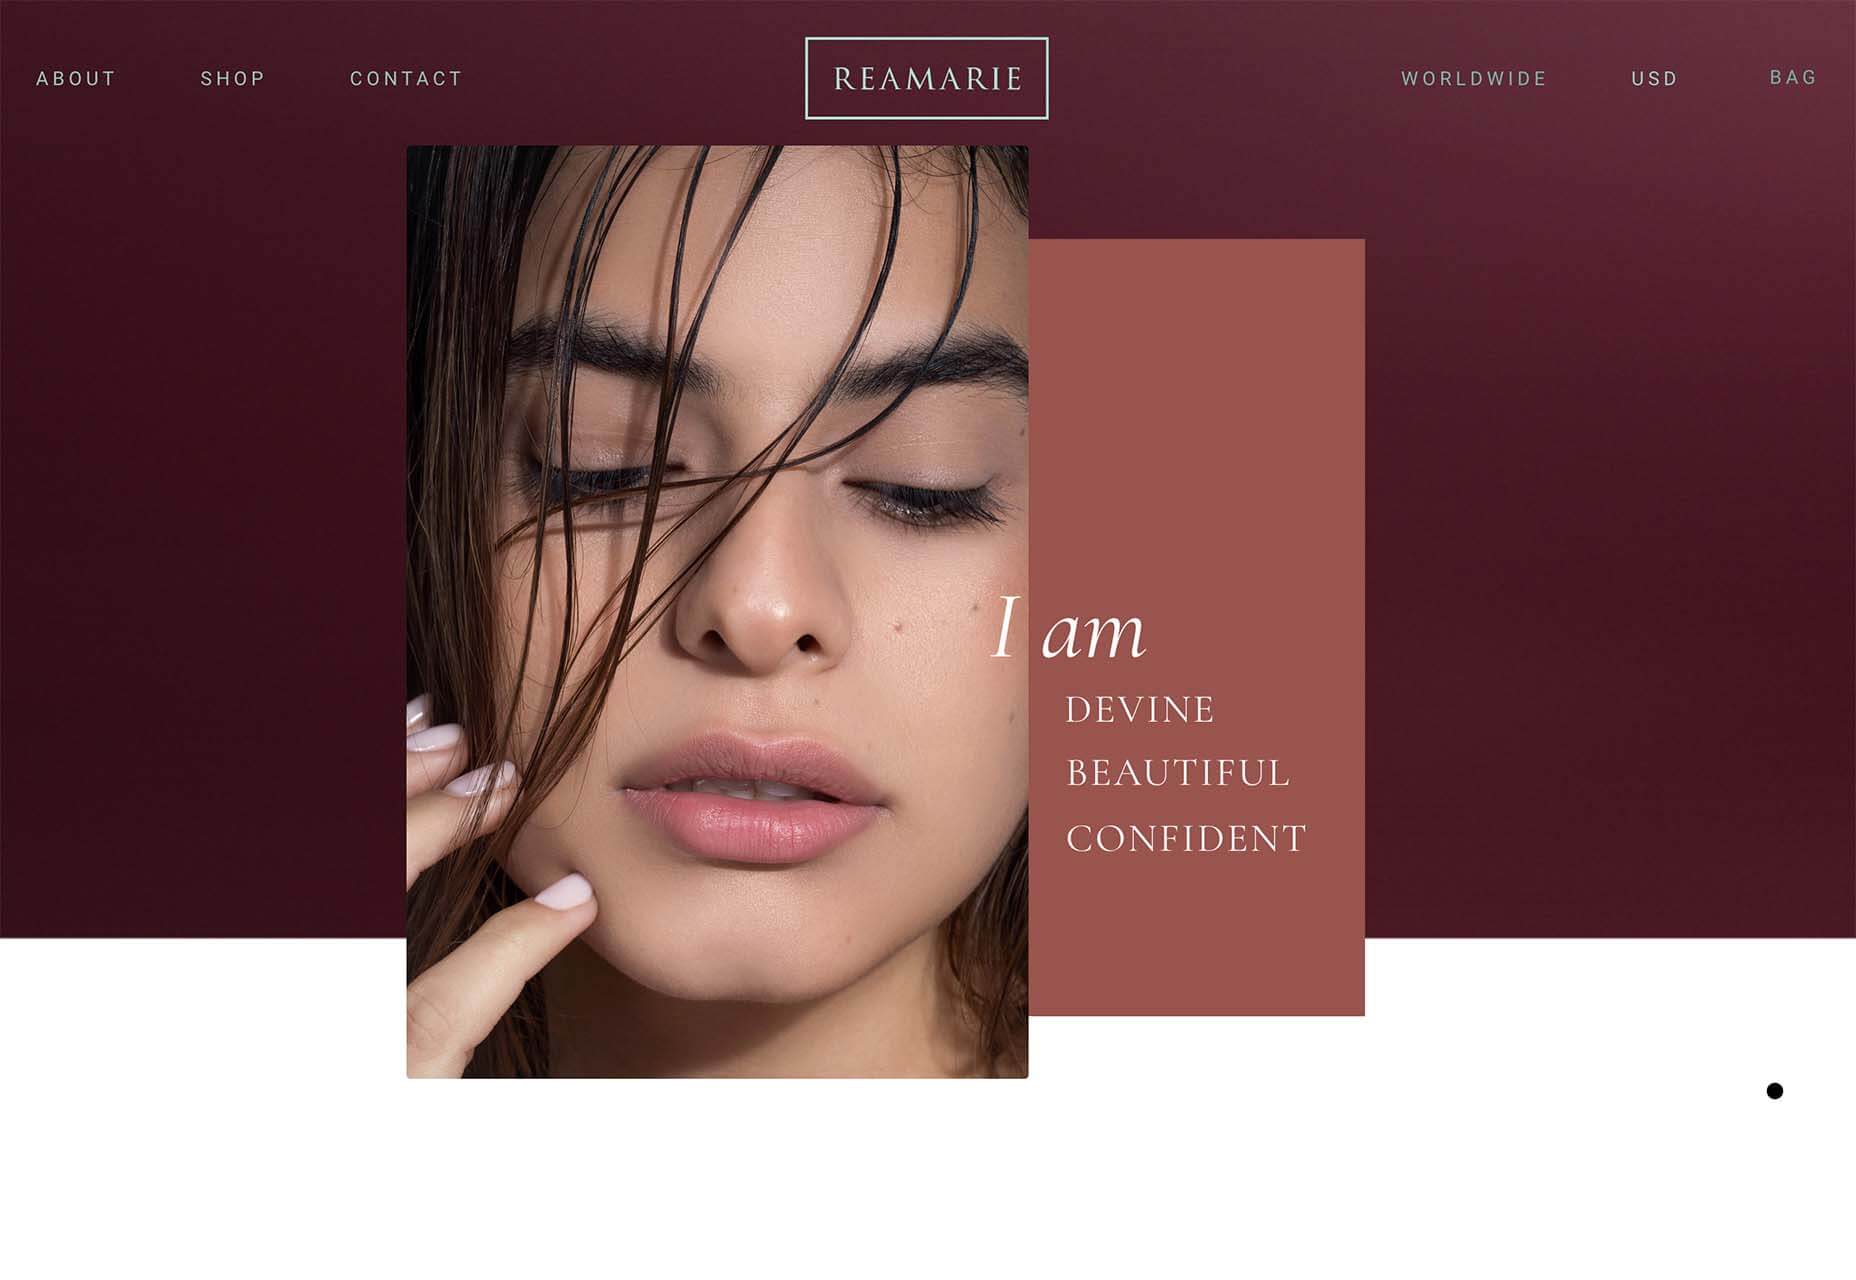
Reamarie uses smaller still images with tight crops to bring you into the faces on the screen. There are more, bigger faces throughout the scroll as well so that the user feels connected to the people and product. Even if an image isn’t super large, a tight crop can make it feel bigger and create the same level of engagement as something that has more size on the screen.

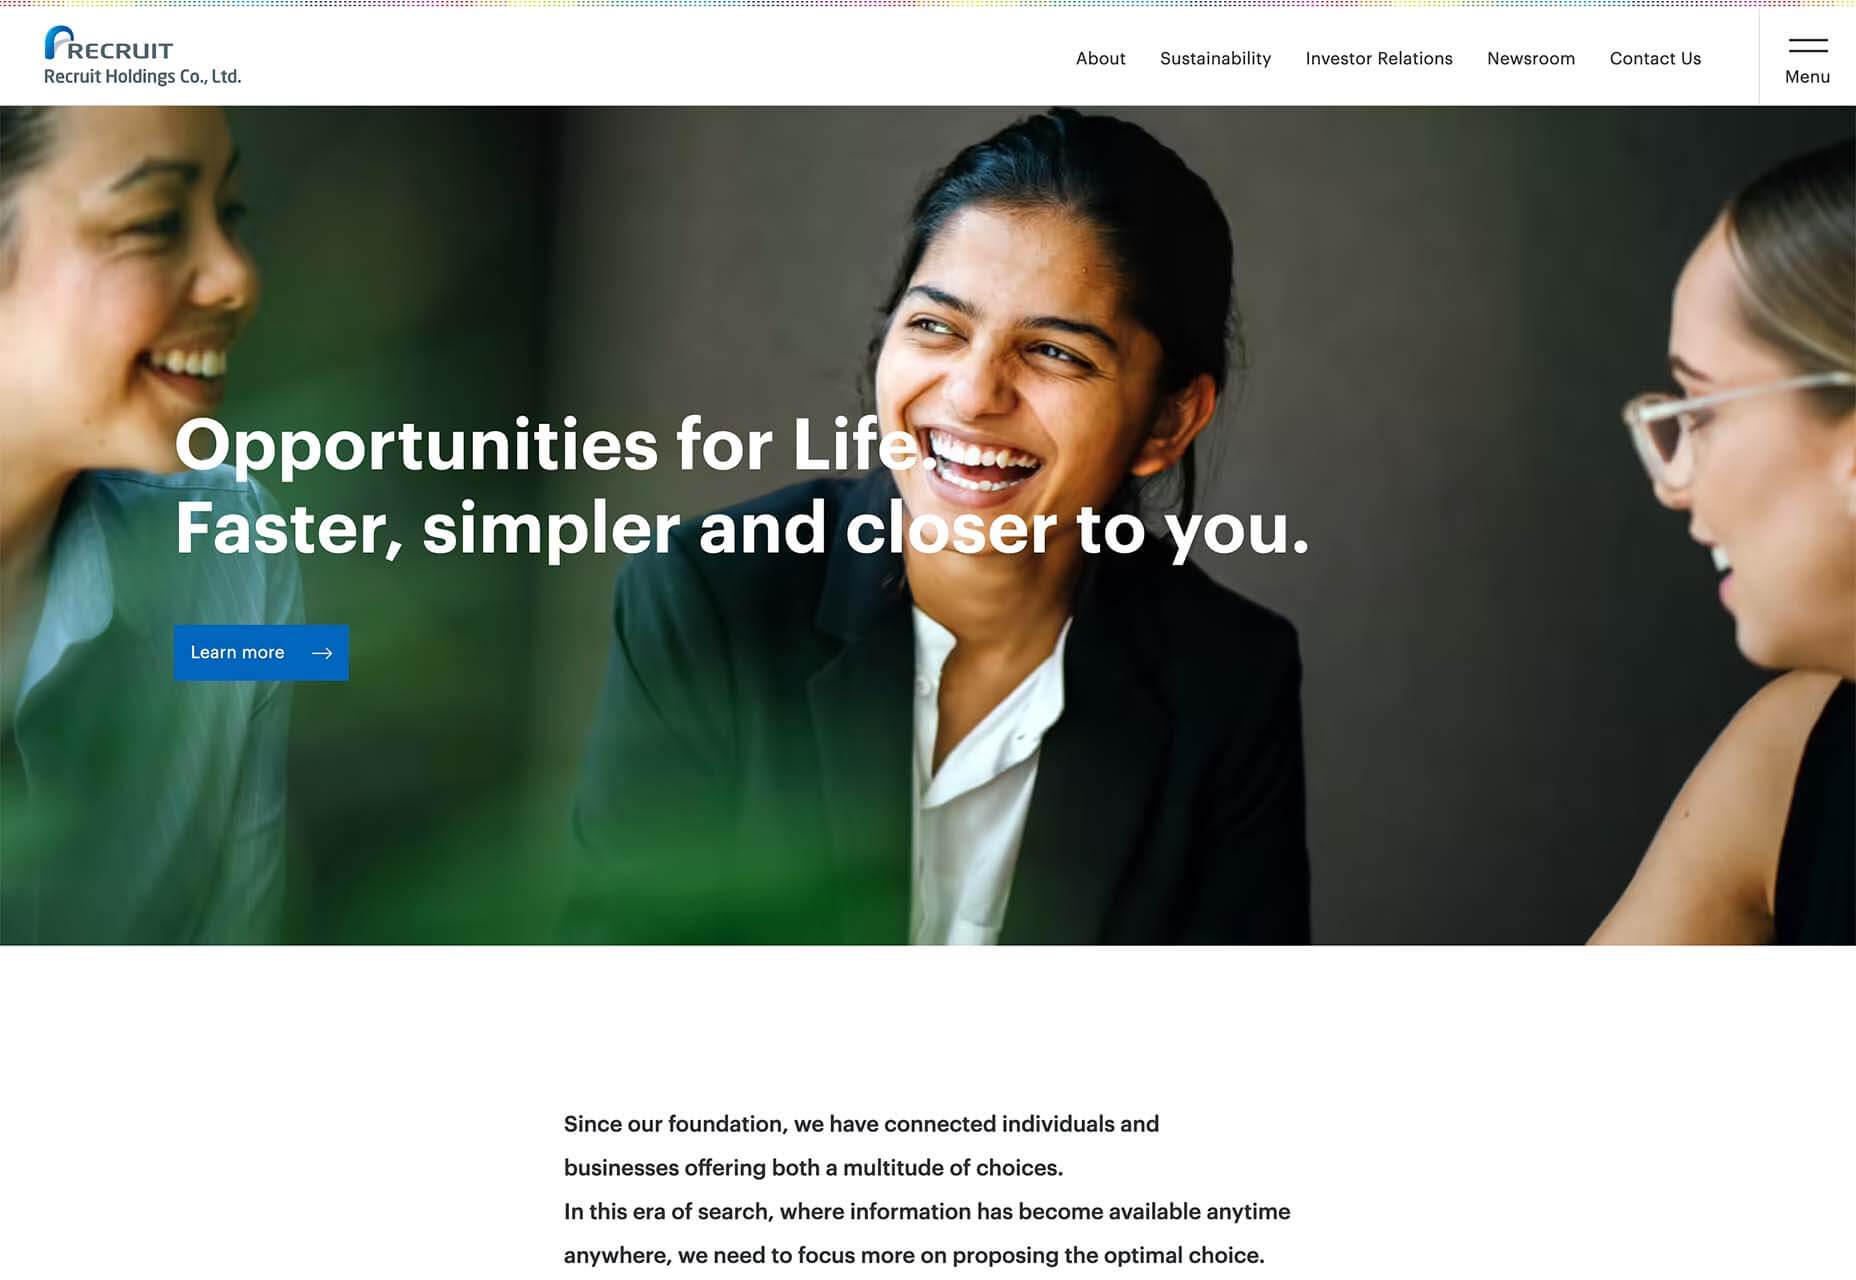
Recruit Holdings Co. uses a trio of people together, happy and smiling, to establish a connection with website visitors. The entire design features similar images throughout and makes you feel like you want to be a part of what they are offering. Note that the people are close together and without masks; that’s a culture shift we are starting to see in a lot of imagery.


Conclusion

Photography, videography, and image trends can be driving factors for website design projects. The types of images selected can set the tone for projects, relate to brand identity, and help engage users.

Source

The post 3 Essential Design Trends, March 2022 first appeared on Webdesigner Depot.

Source de l’article sur Webdesignerdepot

Yulia: Hi, guys! Thank you for agreeing to meet me today. Let’s start with a simple question. How would you describe Reface in a few words? 

Ivan: Everything started with a face-swap. We created state-of-the-art technology and made it possible to provide it to more than 180 million people. Reface is an app that allows users to swap faces in images, GIFs, and videos in seconds and with high accuracy. Moreover, in 2021 we developed more AI tools for personalized content, which allow us to animate faces, place faces on objects, and voice over them), empowering users to generate completely new and viral content. 

Source de l’article sur DZONE


The glass morphism effect is popping up all over the web at the minute. Although in the past it was generated mostly with images, we can now achieve the same result using CSS. The CSS glass morphism effect is pretty widely supported as well. Below, I’ve created a generator so you can make your own CSS glass morphism effects and add them to your applications and websites.

CSS Glass Morphism Generator

A little while ago I used the CSS glass morphism effect to create some apple UI elements. To show how this effect works a little better, I’ve created a CSS glass morphism generator below. You can change the options, and generate your own glass morphism along with code.

Source de l’article sur DZONE


WordPress is by far the world’s most popular CMS. Not only does it dominate the CMS market with a 64% market share, but it also powers 39.6% of all websites. It has taken the internet by storm by democratizing the web for all. Now, anyone can build, manage, and host a successful website without needing a college degree or coding expertise.

However, while WordPress is great at managing many technical aspects, it still can’t do everything for you. Built mostly on PHP, there are often concerns regarding how performant WordPress is. And, with performance impacting everything from bounce rates to SEO rankings to conversions, it’s something that should be on your radar too.

If you don’t know it yet, images are one of the main causes of slow-loading websites. In recent years, WordPress has stepped up its efforts to try and help users with image optimization out-of-the-box.

Still, as we’ll show, it’s not a total solution, and there is still plenty you can do to deliver better experiences on your WordPress website through image optimization.

What is WordPress Image Optimization? Why is it Important?

Simply put, image optimization is anything you do to make images load faster on your website pages. Almost all websites that use images can benefit from some form of image optimization, even those using WordPress.

Why?

Well, performance is a hugely significant factor when it comes to the competitiveness of your website today.

Google has also made performance an increasingly important factor when it comes to SEO rankings. In fact, performance is a direct ranking signal that carries significant weight.

Google’s Page Experience Update that went live in 2021 has been the biggest move in that direction yet. Soon, Google might even use visual indicators in SERP results to distinguish high-performing websites from the rest.

In Google’s own words, “These signals measure how users perceive the experience of interacting with a web page and contribute to our ongoing work to ensure people get the most helpful and enjoyable experiences from the web.”

So, Why Should We Target Images For Performance Optimization?

According to Google, images are the largest contributor to page weight. Google has also singled out image optimization specifically as the factor with the most untapped potential for performance optimization.

This problem isn’t going away soon. According to data by the HTTP Archive, there are roughly 967.5 KB bytes of image data on desktop web pages and 866.3 KB of image data on mobile pages. This is an increase of 16.1% and 38.8%, respectively, over the last five years.

Thanks to popular e-commerce tools like Woocommerce, it’s estimated that up to 28% of all online sales happen on WordPress websites.

And don’t forget, images are both a key part of conveying information to the user and integral to the design of your website. If they take significantly longer to load than your text, for example, it will negatively impact the user experience in a variety of ways.

In summary, optimized images help your WordPress website by:

  • Improving user satisfaction.
  • Improving various traffic metrics, like bounce rates, time-on-page, etc.
  • Boosting your SEO rankings.
  • Contributing to higher conversions (and sales).

How Does Image Optimization in WordPress Work?

WordPress is so popular because it’s a CMS (content management system) that allows anyone to build, design, and manage a website without any coding or advanced technical experience. Advanced features can be installed with just a few clicks, thanks to plugins, and you rarely have to touch the code behind your website unless you want to make some unique modifications.

In short, using a CMS like WordPress shields you from many of the day-to-day technicalities of running a website.

WordPress Image Optimization: What It Can Do

As we mentioned, one of the main reasons WordPress is so popular is because it takes care of many of the technical aspects of running a website. With that in mind, many think that WordPress should also automatically take care of image optimization without them having to get involved at all.

Unfortunately, that’s not really the case.

True, WordPress does offer some built-in image optimization. Whenever you upload an image to WordPress, it currently compresses the quality to about 82% of the original (since v4.5).

In v4.4, WordPress also introduced responsive image syntax using the srcset attribute. This creates four breakpoints for each image you upload according to the default WordPress image sizes:

  • 150px square for thumbnails
  • 300px width for medium images
  • 768px max-width for medium_large images
  • 1024px max-width for large images.

Here you can see an example of the actual responsive syntax code generated by WordPress:

<img loading="lazy" src="https://bleedingcosmos.com/wp-content/uploads/2021/12/33-1024x683.jpg" alt="" class="wp-image-9" width="610" height="406" srcset="https://bleedingcosmos.com/wp-content/uploads/2021/12/33-1024x683.jpg 1024w, https://bleedingcosmos.com/wp-content/uploads/2021/12/33-300x200.jpg 300w, https://bleedingcosmos.com/wp-content/uploads/2021/12/33-768x512.jpg 768w, https://bleedingcosmos.com/wp-content/uploads/2021/12/33-1536x1024.jpg 1536w" sizes="(max-width: 610px) 100vw, 610px">

Depending on the screen size of the device from which a user visits your webpage, WordPress will let the browser pick the most appropriately sized image. For example, the smallest version for mobile displays or the largest for 4K Retina screens, like those of a Mac.

While this may seem impressive, it’s only a fraction of what can be achieved using a proper image optimization solution, as we’ll show later.

Lastly, WordPress implemented HTML native default lazy loading for all images starting with version 5.5.

So, in short, WordPress offers the following image optimization capabilities baked-in:

  • Quality compression (limited)
  • Responsive syntax (up to 4 breakpoints)
  • Lazy loading

WordPress Image Optimization: What it Cannot Do

There are other issues many have with both the implementation of image compression and responsive syntax as it’s used by WordPress. This leads to some users even purposefully deactivating WordPress’ built-in image optimization so they can fully take control of it themselves.

Here are some of the reasons why:

  • WordPress uses a very basic form of quality compression. It does not use advanced technologies like AI and machine learning algorithms to compress images while maintaining maximum visual quality. It’s also lossy compression, so the quality is lost for good. You can clearly see the difference between an original HD image and the compressed version created by WordPress.
  • WordPress only compresses most images by up to 20%, while advanced image optimization tools can reduce all image sizes intelligently by up to 80%.
  • Responsive syntax can provide significant performance improvements over simply uploading a single HD image to be served on all devices and screens. However, it’s still only limited to a set number of breakpoints (typically 3 or 4). Since it’s not dynamic, a whole spectrum of possible image sizes is not created or used.
  • Responsive syntax code is not scalable and can quickly lead to code that’s bloated, messy, and hard to read.
  • WordPress doesn’t accelerate image delivery by automatically caching and serving them via a global CDN, although this can be done using other tools.

Another important optimization feature that WordPress does not have is auto-conversion to next-gen image file formats. Different image formats offer different performance benefits on different devices. Some formats also enable higher levels of compression while maintaining visual fidelity.

Next-gen formats like WebP, AVIF, and JPEG-2000 are considered to be the most optimal formats on compatible devices. For example, until recently, WebP would be the optimal choice on Chrome browsers, while JPEG-4000 would be optimal on Safari browsers.

However, WordPress will simply serve images in the same formats in which they were originally uploaded to all visitors.

How to Measure the Image Performance of a WordPress Website?

As the undisputed king of search engines, we’ll base most of our performance metrics on guidelines established by Google.

Along with its various performance updates, Google has released a number of guidelines for developers as well as the tools to test and improve their websites according to said guidelines.

Google introduced Core Web Vitals as the primary metrics for measuring a web page’s performance and its effect on the user experience. Thus, Core Web Vitals are referred to as “user-centric performance metrics.” They are an attempt to give developers a testable and quantifiable way to measure an elusive and abstract concept such as “user experience.”

Combined with a number of other factors, Core Web Vitals constitute a major part of the overall page experience signal:

You can find a complete introduction to Core Web Vitals here. However, they currently consist of three main metrics:

  • LCP (Largest Contentful Paint): The time it takes the largest above-the-fold element on your page to load. This is typically a full-sized image or hero section.
  • FID (First Input Delay): The delay from the moment a user first interacts with an element on the page until it becomes responsive.
  • CLS (Cumulative Layout Shift): The visual stability with which the elements on a page load.

Here is an illustration of how these metrics are scored:

While these are the three most important metrics to optimize, they are not the only ones. Google still measures other metrics like the FCP (First Contentful Paint), SI (Speed Index), as well as the TTFB (Time to First Byte), TBT (Total Blocking Time), and TTI (Time to Interactive).

A number of these metrics are directly affected by the images used on your web pages. For example, LCP, FCP, and SI are direct indicators of how fast the content of your web page loads and depends on the overall byte size of the page. However, it can also indirectly affect FID by keeping the main thread busy with rendering large amounts of image content or the perceived CLS by delaying the time it takes large images to load.

These metrics apply to all websites, whether they are custom-made or built using a CMS like WordPress.

When using tools like Lighthouse or PageSpeed Insights, you’ll also get scored based on other flags Google deems important. Some of them are specific to images, such as properly sizing images and serving images in next-gen formats.

If you only use built-in WordPress image optimization, you’ll get flagged for the following opportunities for improvement:

Some of the audits it will pass, however, are deferring offscreen images (lazy loading) and efficiently coding images (due to compression):

A Better Way to Optimize WordPress Images: ImageEngine

Billions of websites are all vying for prime real estate on Google SERPs, as well as the attention of an increasingly fussy internet-using public. Every inch matters when it comes to giving your website a competitive advantage.

So, how can you eliminate those remaining performance flags and deliver highly optimized images that will keep both your visitors and Google happy?

Sure, you could manually optimize images using software like PhotoShop or GIMP. However, that will take you hours for each new batch of images. Plus, you still won’t benefit from any automated adaptive optimization.

A more reasonable solution in today’s fast-paced climate is to use a tool developed specifically for maximum image optimization: an image CDN like ImageEngine.

ImageEngine is an automated, cloud-based image optimization service using device detection as well as intelligent image compression using the power of AI and machine learning. It can reduce image payloads by up to 80% while maintaining visual quality and accelerating delivery around the world thanks to its CDN with geographically dispersed PoPs.

Why is ImageEngine Image Optimization Better Than WordPress?

When making a head-to-head comparison, here are the reasons why ImageEngine can deliver better performance:

  • Device Detection: ImageEngine features built-in device detection. This means it picks up what device a visitor to your website is using and tailors its optimization strategy to what’s best for that specific device.
  • Client hints: By supporting client hints, ImageEngine has access to even more information regarding the device and browser to make better optimization decisions.
  • Next-gen formats: Based on optimal settings, ImageEngine automatically converts and serves images in next-gen formats like WebP, AVIF, JPEG2000, and MP4 (for GIFs).
  • Save data header: When a Chrome user has save-data mode enabled, ImageEngine will automatically compress images more aggressively to save on data transfer.
  • CDN with dedicated edge servers: ImageEngine will automatically cache and serve your optimized image assets using its global CDN. Each edge server has device awareness built-in to bring down latency and accelerate delivery. You can also choose to prioritize specific regions.

So, the key differentiator is that ImageEngine can tailor optimizing images for what’s optimal for each of your visitors. ImageEngine is particularly good at serving mobile visitors thanks to WURFL device detection, which can dynamically resize images according to most devices and screen sizes in use today. As of now, this is a completely unique capability that none of its competitors offer.

It allows for far better and more fine-tuned optimization than WordPress’ across-the-board approach to compression and responsive syntax.

If you want, you could turn off WordPress responsive syntax and compression, and you would still experience a performance increase using ImageEngine. However, ImageEngine also plays nice with responsive syntax, so it’s not completely necessary unless you want to serve the highest-fidelity/low-byte-size images possible.

How Does ImageEngine Work with WordPress?

The process ImageEngine uses to integrate with WordPress can be broken down into a few easy steps:

  • Sign up for an ImageEngine account: ImageEngine offers three pricing plans depending on the scale and features you need as well as a no-commitment 30-day free trial.
  • Specify your image origin: This tells ImageEngine where to find the original versions of your images. For a WordPress website, you can just use your domain, e.g., https://mywordpresswebsite.com. ImageEngine will then automatically pull the images you’ve uploaded to your WordPress website.

  • Copy the Delivery Address: After you create an account and specify your image origin, ImageEngine will provide you with a Delivery Address. A Delivery Address is your own unique address that will be used in your <img> tags to point back to the ImageEngine service. Delivery Addresses may be on a shared domain (imgeng.in) or customized using a domain that you own. A Delivery Address typically looks something like {random_string}.cdn.imgeng.in. If your images are uploaded to the default WordPress folder /wp-content/uploads/, you can access your optimized images from ImageEngine simply by changing your website domain. For example, by typing {imageengine_domain}.cdn.imgeng.in/wp-content/uploads/myimage.jpg into your browser, you’ll see the optimized version of that image. Just press the copy button next to the Delivery Address and use it in the next step configuring the plugin.

  • Install the ImageEngine Optimizer CDN plugin: The plugin is completely free and can be installed just like any other plugin from the WordPress repository.
  • Configure and enable ImageEngine Plugin in WordPress: Just go to the plugin under “ImageEngine” in the main navigation menu. Then, copy and paste in your ImageEngine “Delivery Address,” tick the “Enabled” checkbox, and click “Save Changes” to enable ImageEngine:

Now, all ImageEngine basically does is replace your WordPress website domain in image URLs with your new ImageEngine Delivery Address. This makes it a simple, lightweight, and non-interfering plugin that works great with most other plugins and themes. It also doesn’t add unnecessary complexity or weight to your WordPress website pages.

ImageEngine vs Built-in WordPress Image Optimization

So, now let’s get down to business by testing the performance improvement you can expect from using ImageEngine to optimize your image assets.

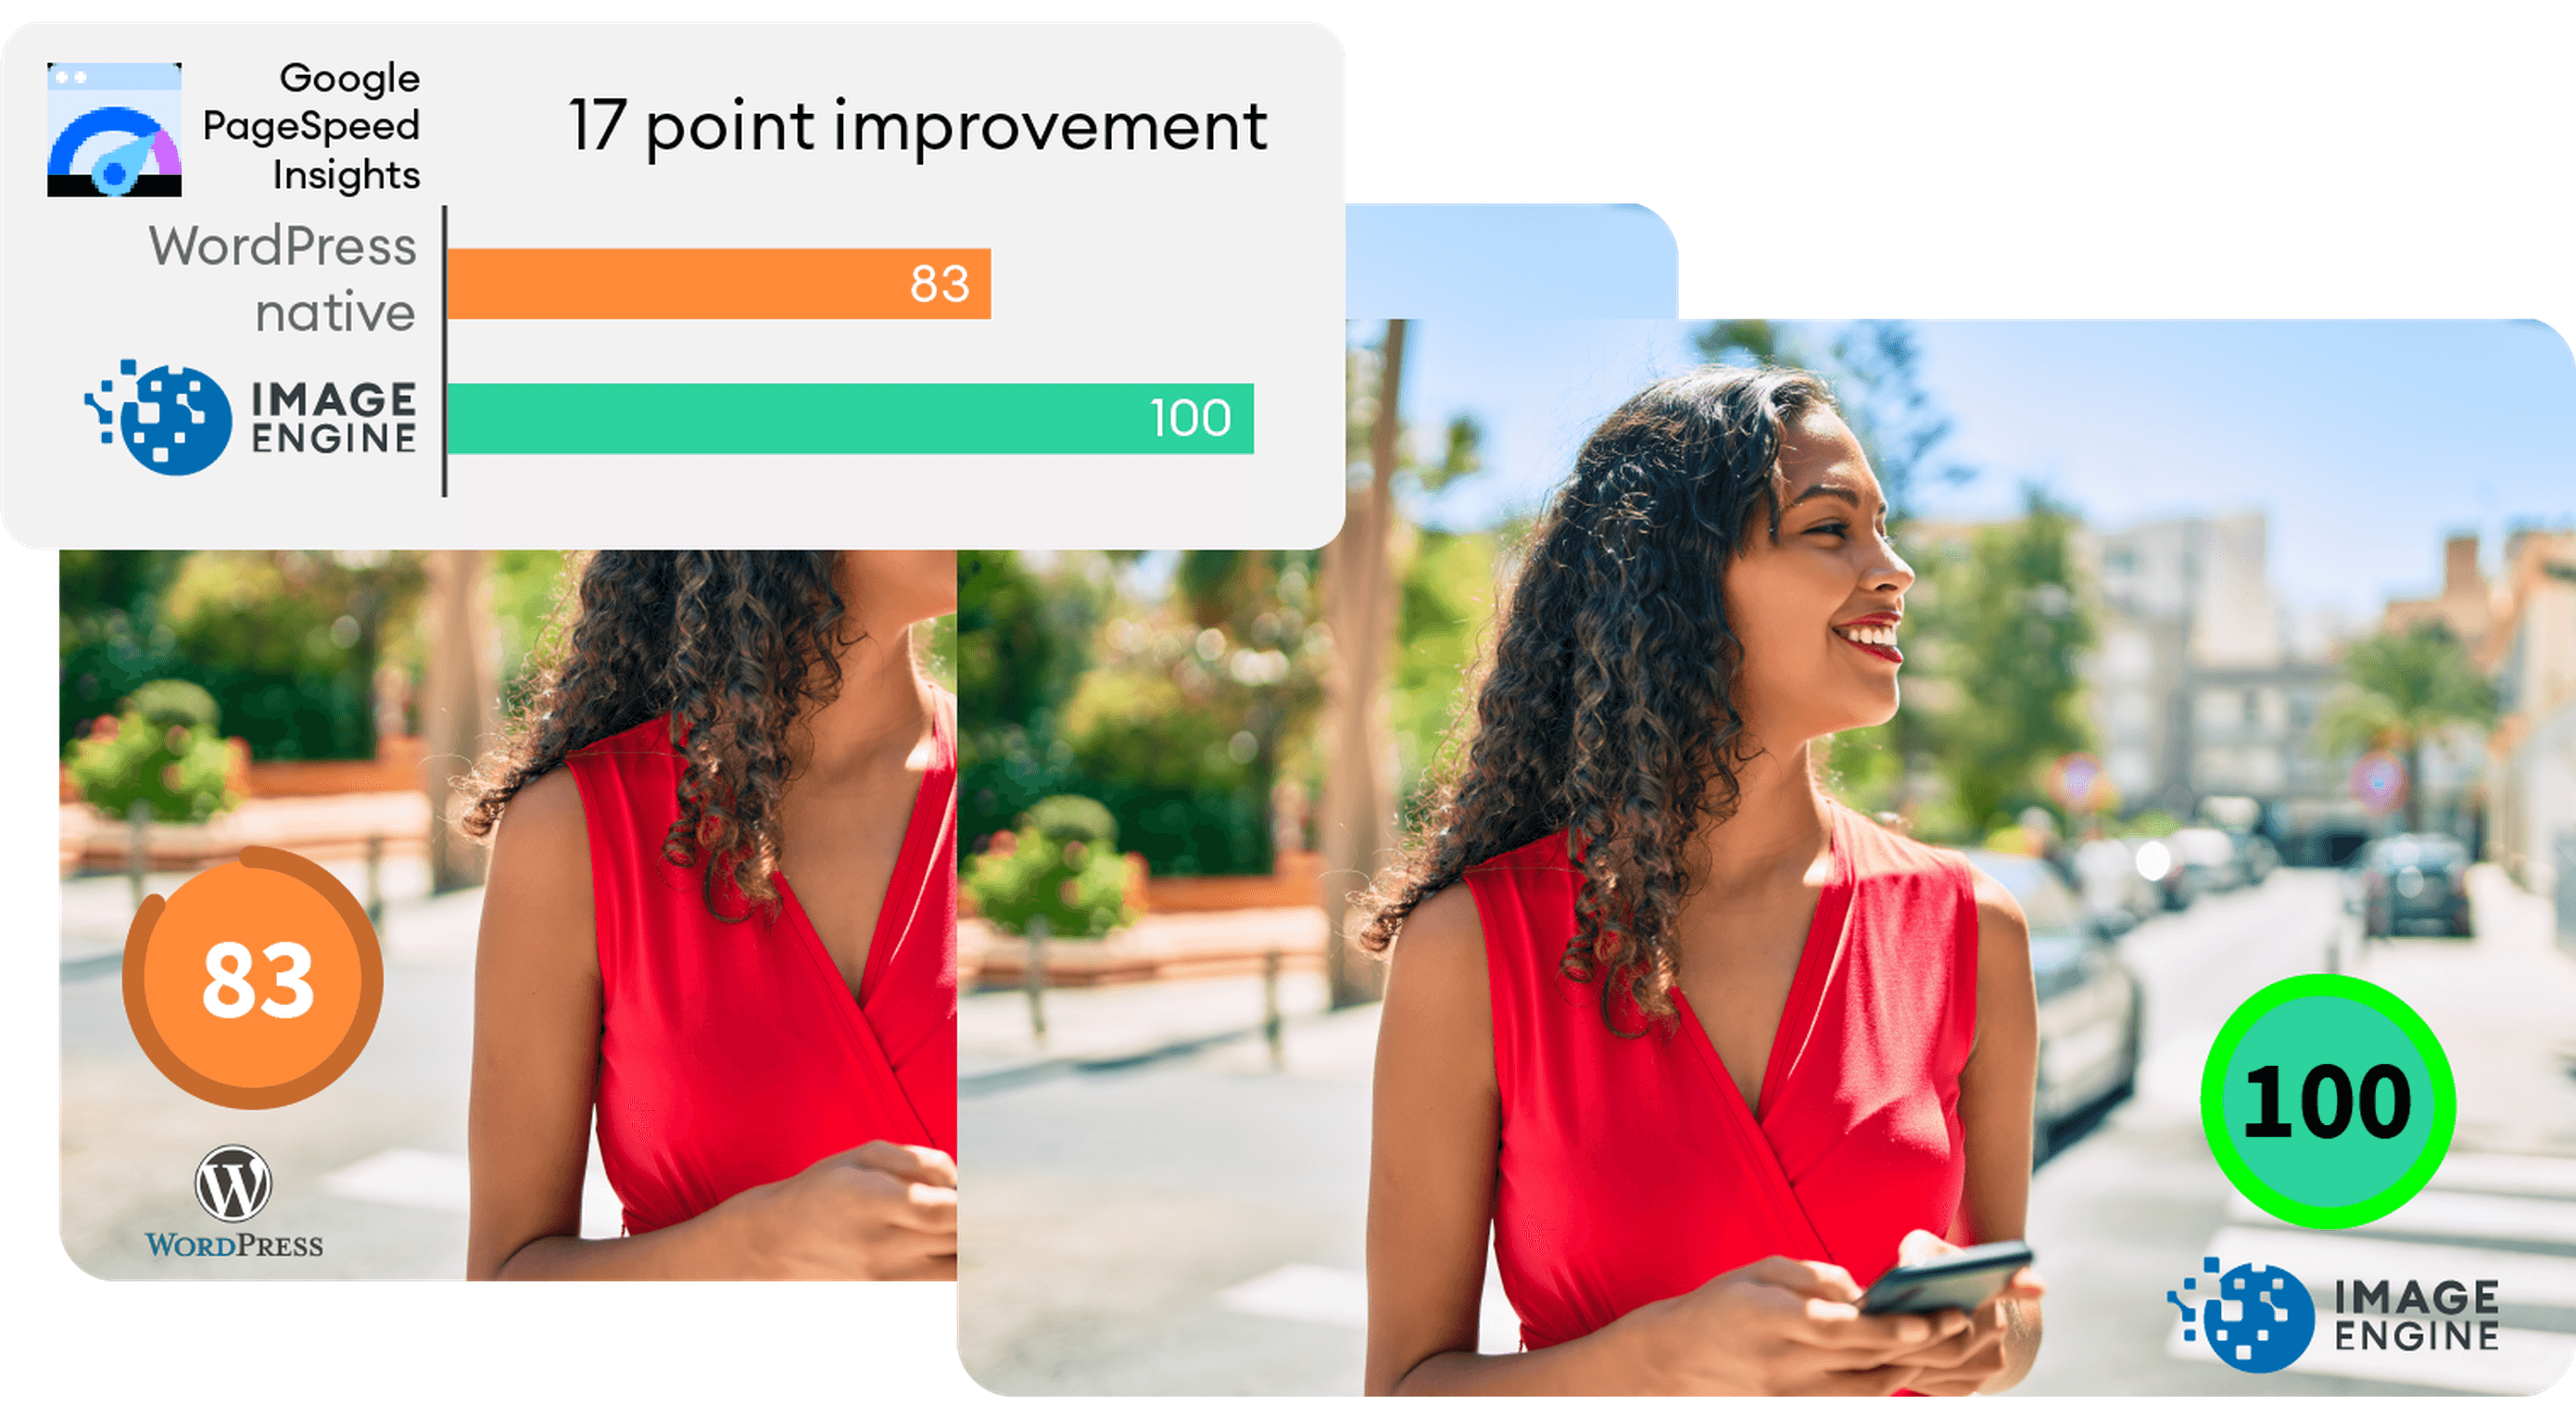
To do this test, we set up a basic WordPress page containing a number of high-quality images. I then used PageSpeed Insights and the Lighthouse Performance Calculator to get the performance scores before and after using ImageEngine.

Importantly, we conducted this test from a mobile-first perspective. Not only has mobile internet traffic surpassed desktop traffic globally, but Google themselves have committed to mobile-first indexing as a result.

Here is a PageSpeed score using the Lighthouse calculator for WordPress with no image optimization:

As we can see, both Core Web Vitals and other important metrics were flagged as “needs improvement.” Specifically, the LCP, FCP, and TBT. In this case, both the LCP and FCP were a high-res featured image at the top of the page.

If we go to the opportunities for improvement highlighted by PageSpeed, we see where the issues come from. We could still save as much as 4.2s of loading time by properly resizing images and a further 2.7s by serving them in next-gen formats:

So, now let’s see how much ImageEngine can improve on that.

The same test run on my WordPress website using ImageEngine got the following results:

As you can see, we now have a 100 PageSpeed score. I saved roughly 2.5s on the SI (~86%) as well as roughly 1.7s on the LCP (~60%). There was also a slight improvement in the FCP.

Not only will you enjoy a stronger page experience signal from Google, but this represents a tangible difference to visitors regarding the speed with which your website loads. That difference will lead to lower bounce rates, increased user satisfaction, and more conversions.

There was also a 53% overall reduction in the total image payload. This is impressive, considering that it’s on top of WordPress’ built-in compression and responsive syntax.

Conclusion

So, as someone with a WordPress website, what can you take away from this?

Well, first of all, WordPress does feature some basic image optimization. And while not perfect, it should help you offer reasonable levels of performance, even if you use a lot of image content.

However, the caveat is that WordPress applies aggressive, across-the-board compression, which will lead to a noticeable reduction in visual quality. If you use WordPress for any type of website where premium quality images are important, this is a concern — for example, as a photography portfolio, exhibition, or image marketplace like Shutterstock.

By using ImageEngine, you can reduce image payloads and accelerate delivery even further without compromising too harshly on visual quality. What’s more, ImageEngine’s adaptive image optimization technology will provide greater improvements to more of your visitors, regardless of what device(s) they use to browse the web.

Whether or not you still want to use WordPress’ built-in optimizations, ImageEngine will deliver significant improvements to your user experience, traffic metrics, and even conversions.

Plus, true to the spirit of WordPress, it’s extremely simple to set up without any advanced configuration. Just sign up for ImageEngine in 3 easy steps, install the plugin, integrate ImageEngine by copy/pasting your image domain, and you’re good to go.


[ This is a sponsored post on behalf of ImageEngine ]

Source

The post WordPress Website Analysis: Before & After ImageEngine first appeared on Webdesigner Depot.

Source de l’article sur Webdesignerdepot
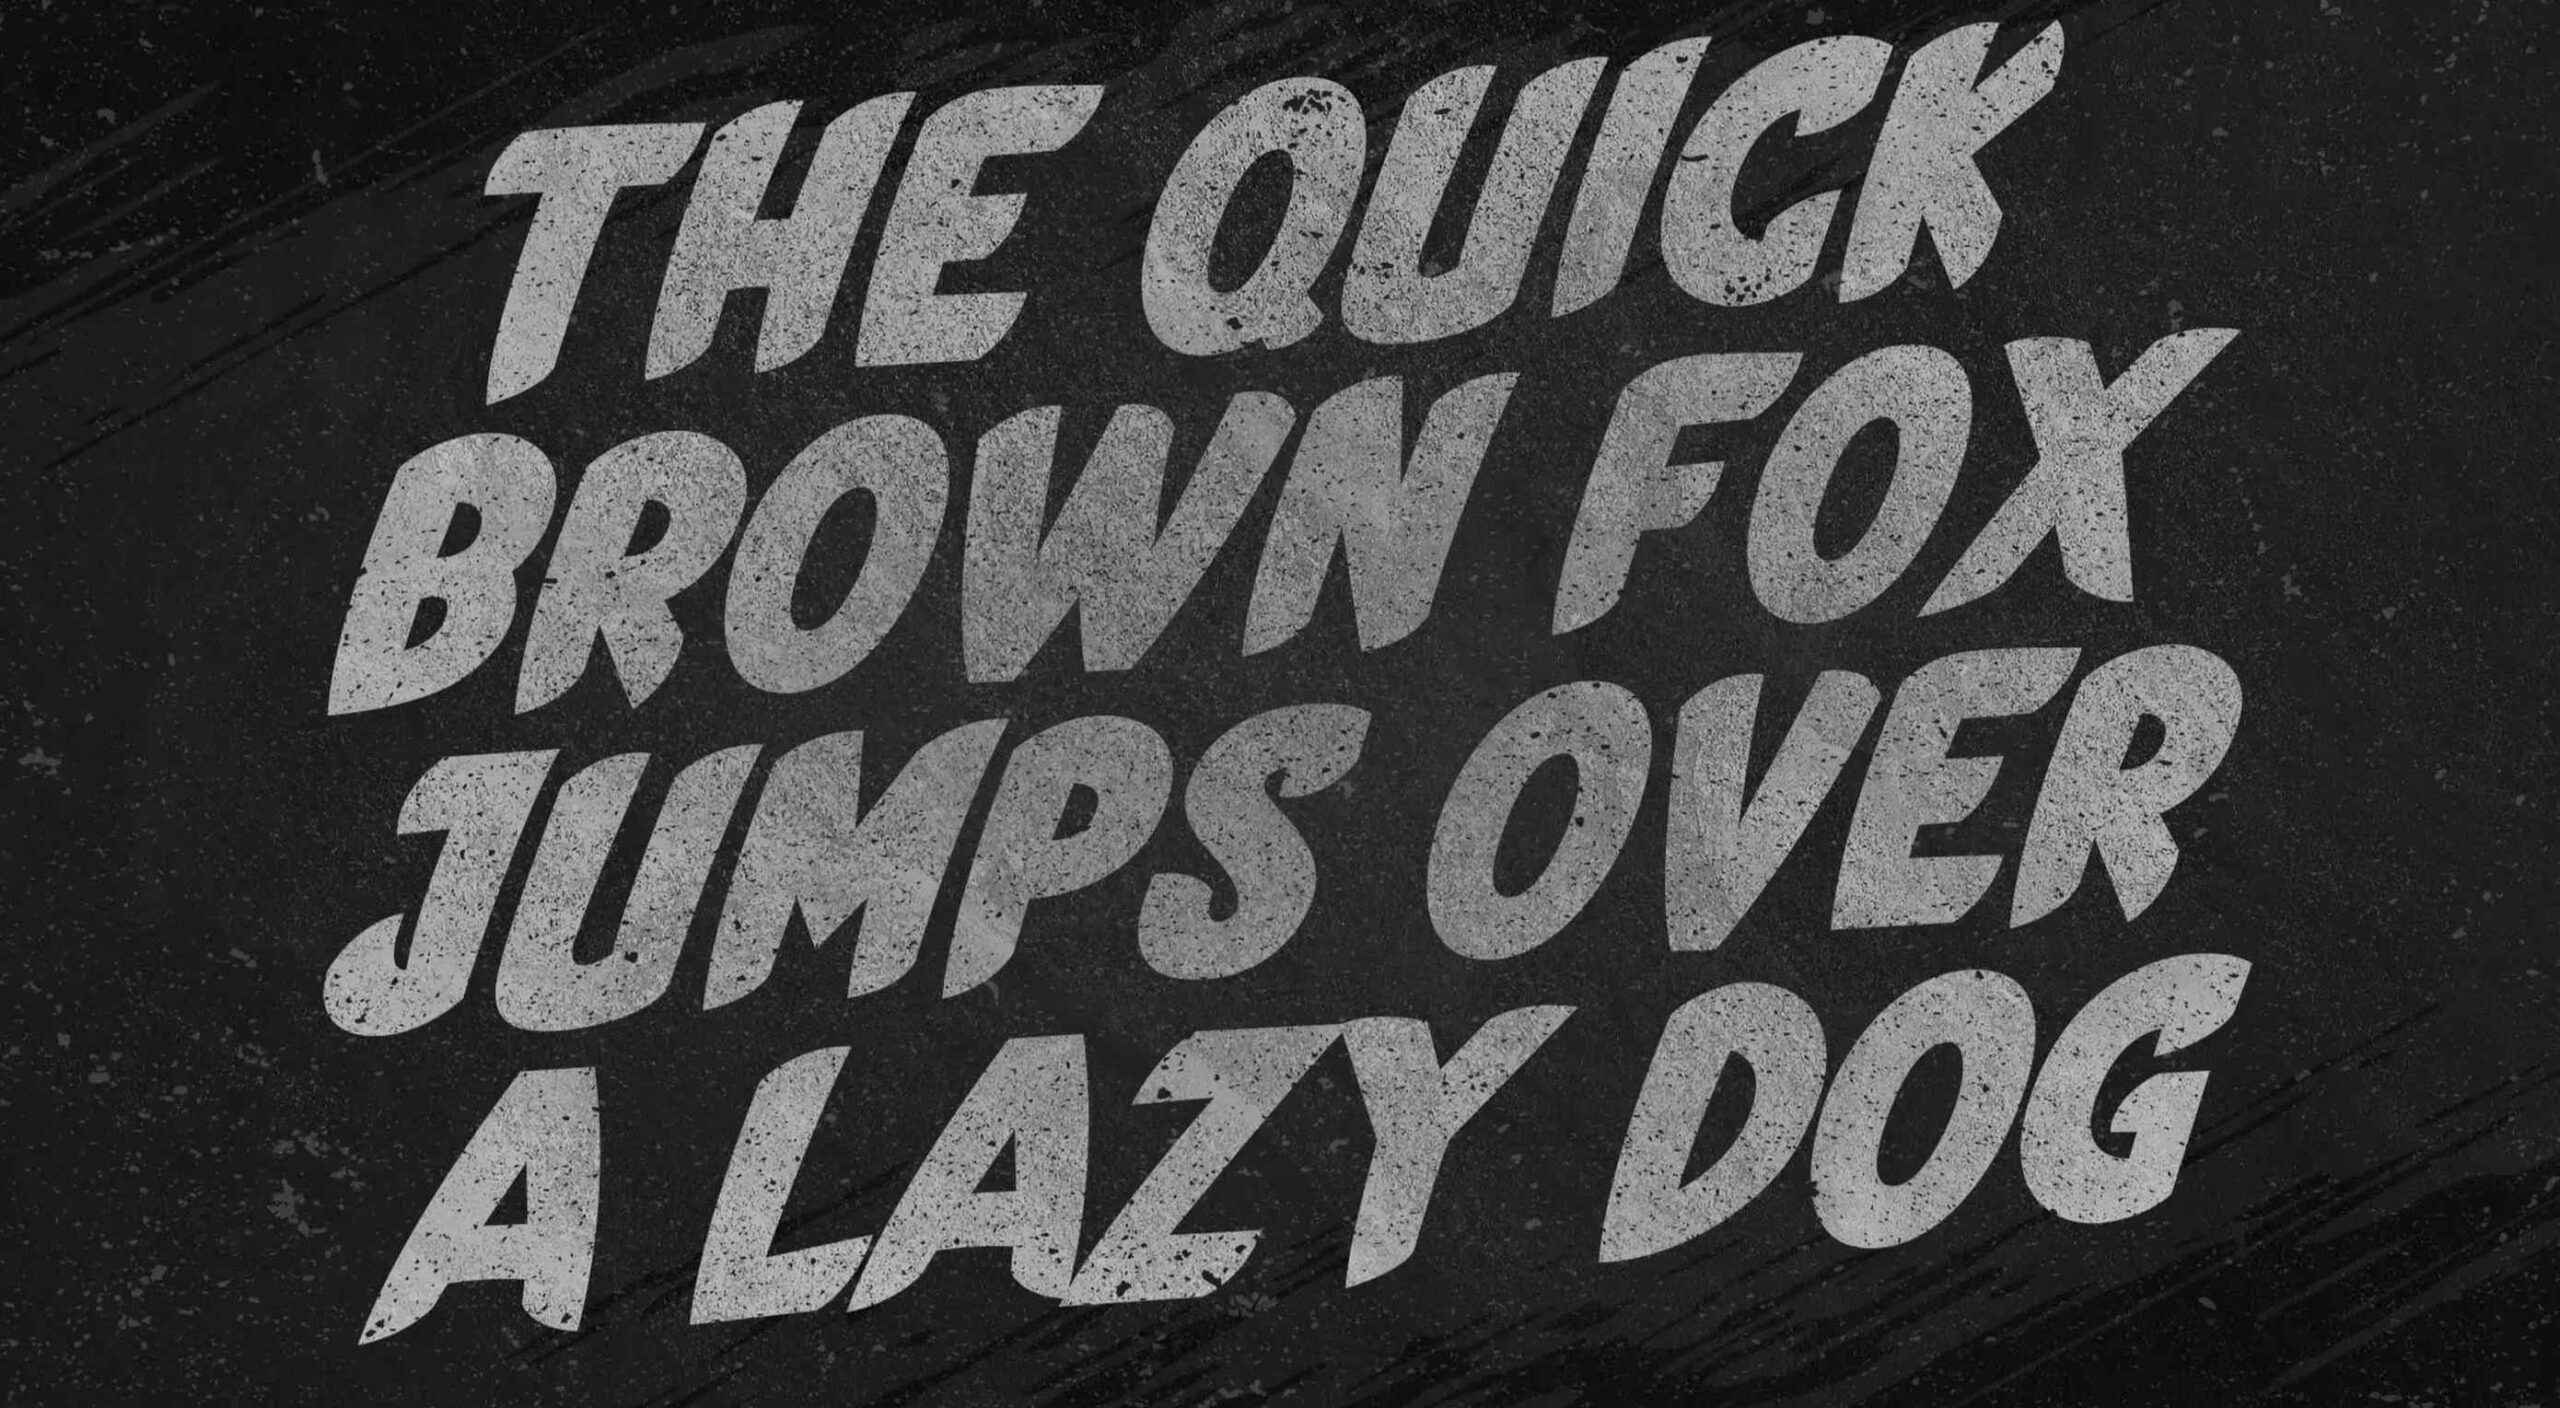
What stands out as an incredible web design project for you? Do you count your creation as a success if it’s modern, minimal, and accessible? Maybe you’re the kind of designer that’s constantly experimenting with the latest dynamic design tools or state-of-the-art technology. Perhaps your websites are vivid, animated, and brimming with unique components?
Sometimes, creating the ideal design means thinking carefully about what you want to accomplish for your client. The purpose of your web creation has a significant impact on the components that you need to consider. For instance, if you’re hoping for a highly emotive and human design, it may be worth combining some of your sleek lines and graphics with hand-drawn elements. 

The Value of Hand-Drawn Graphics in Web Design

Hand-drawn elements are just like the other components of web design; that way may use to express individuality in a cluttered digital environment. In a world where everyone focuses on futuristic and virtual creations, hand-drawn elements can pull attention back to the importance of humanity in your content. 

As web designers, we know that visual components often impact people more than text-based content. Illustrations are highly engaging functional elements that capture audience attention and convey relevant information. 

The main difference between hand-drawn elements and graphics built with vectors and other digital components is that one appears to be more influenced by the human hand than the other. Even if your illustrations are created on a screen, just like any other web design component, it pushes an audience to see something more straightforward, more natural, and authentic. 

For a brand trying to convey innocence and humanity in its personality, hand-drawn design can speak to the part of the human psyche that’s often unappreciated by web design. Perhaps more than any other visual, the content reminds your audience that there’s a human behind the web page

The Value of Hand-Drawn Features in Web Design

Any image can have a massive impact on the quality of your web design. Visuals deliver complex information in an easy-to-absorb format. In today’s world of fast-paced browsing, where distractions are everywhere, visuals are a method of capturing attention and delivering value fast. 

However, with hand-drawn elements, you go beyond the basic functionality of images to embrace the emotional side of the content. Benefits include:

  • A memorable experience: Web illustrations are becoming more popular among leading brands like Innocent Smoothies and Dropbox. However, the time that goes into these components means that they’re still scarce. If you want to stand out online, illustrations can help you do that. 
  • Brand personality: One of the most significant benefits of hand-drawn web design is showcasing your brand personality. The blocky lines of imperfect content that go into illustrated images highlight the human nature of your company. So many businesses are keen to look “perfect” today to make the human touch much more inviting. 
  • Differentiation: As mentioned above, hand illustrations are still rare in the digital design landscape. If you’re struggling to find a way to make your brand stand out, this could be it. Although there needs to be meaning behind your design, the result could be a more unique brand if you can convey that meaning properly. 

Tips for Using Hand Drawn Elements in Web Design 

Hand-drawn components, just like any other element of visual web design, demand careful strategy. You don’t want to overwhelm your websites with these sketches, or you could end up damaging the user experience in the process. 

As you work on your web designs, pulling hand-drawn elements into the mix, think about how you can use every illustration to accomplish a crucial goal. For instance:

Create Separation

Hand-drawn design components can mix and match with other visual elements on your website. They work perfectly alongside videos and photos and help to highlight critical points. 

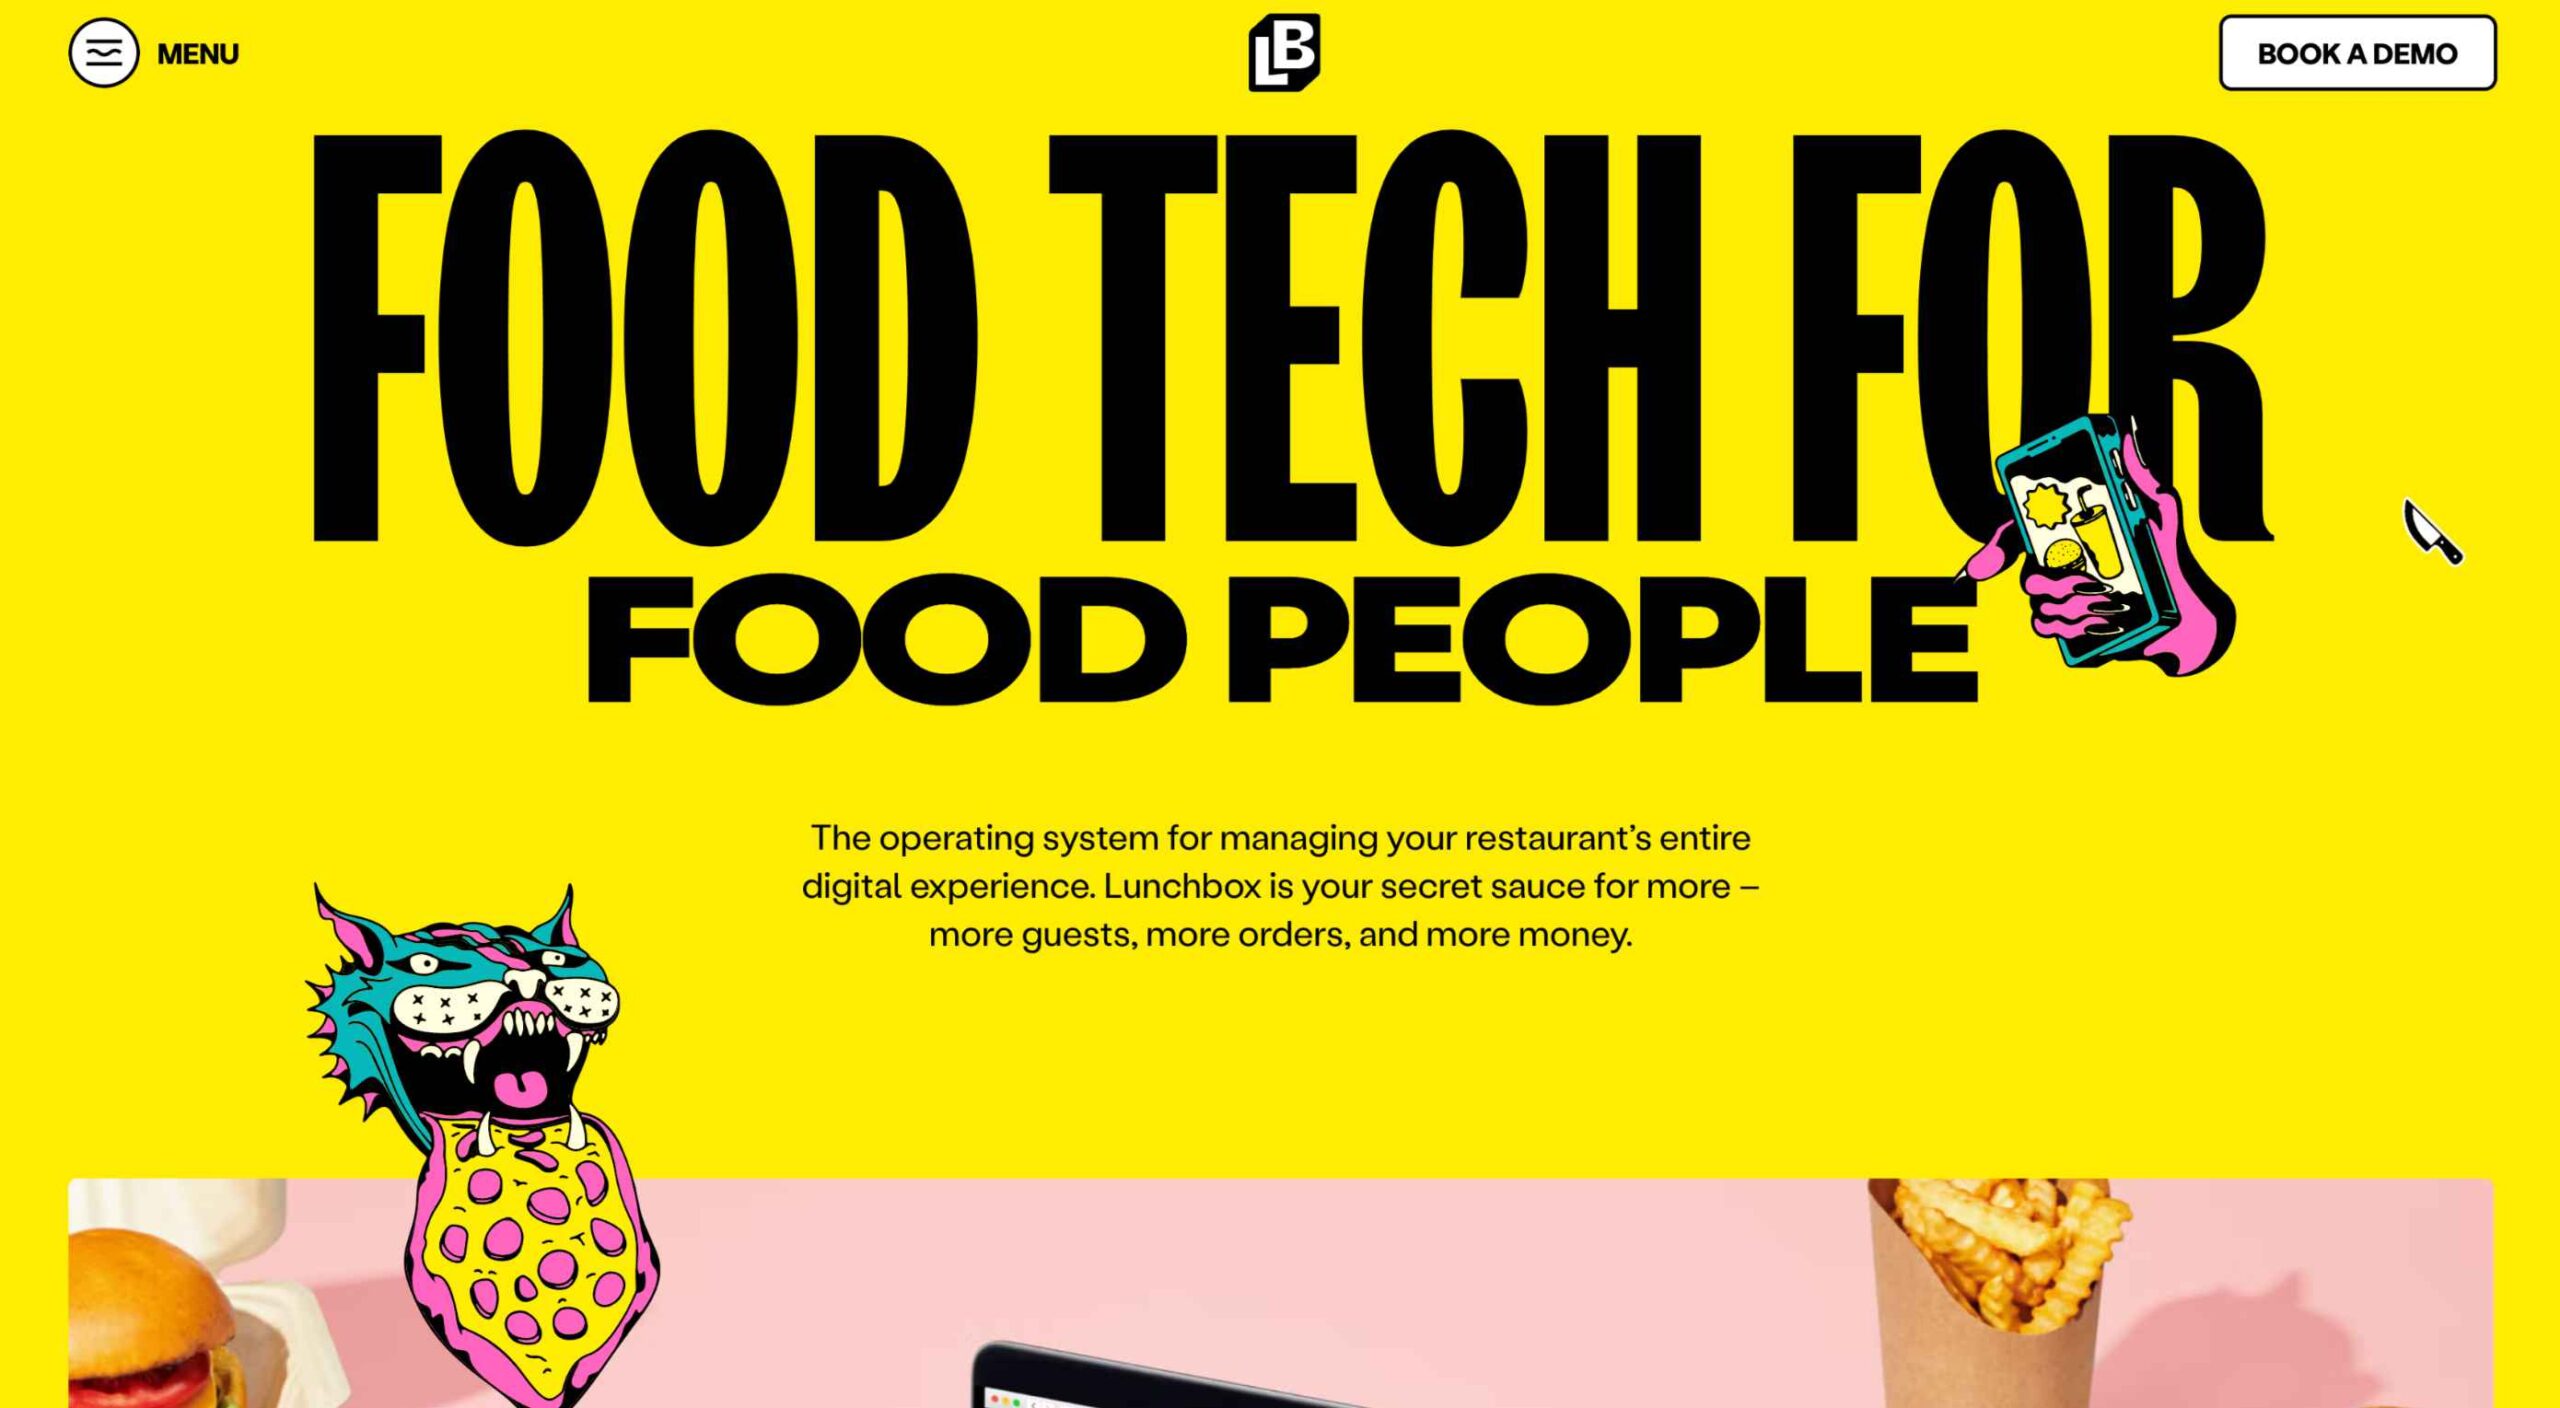
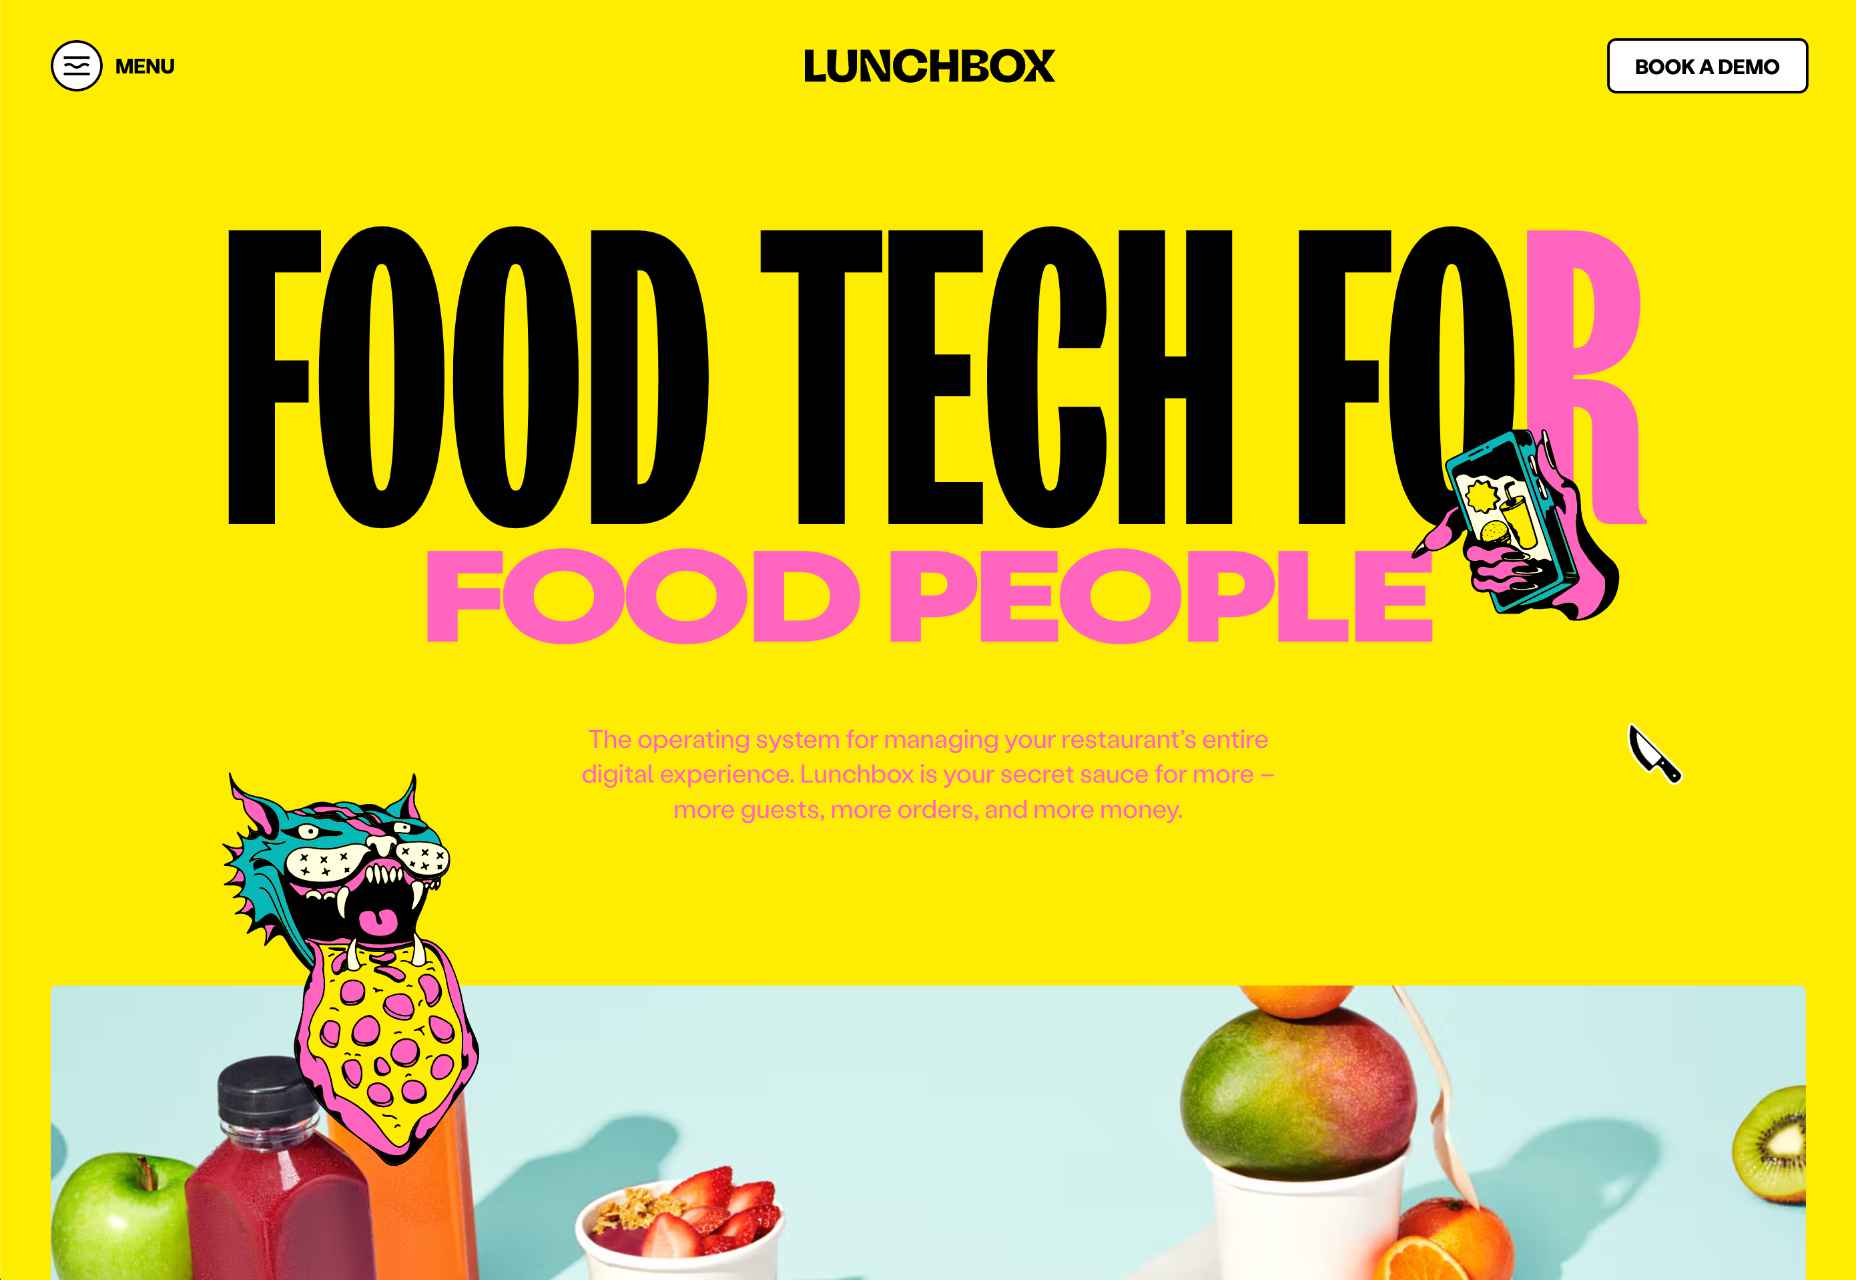
On the Lunchbox website, the company uses hand-drawn elements. This helps make the site stand out, and it provides additional context for customers scanning the website for crucial details.

Engage Your Audience

Sometimes, hand-drawn elements are all about connecting with end-users on a deeper, more emotional level. One of the best ways to do this is to make your hand-drawn elements fun and interactive pieces in the design landscape. 

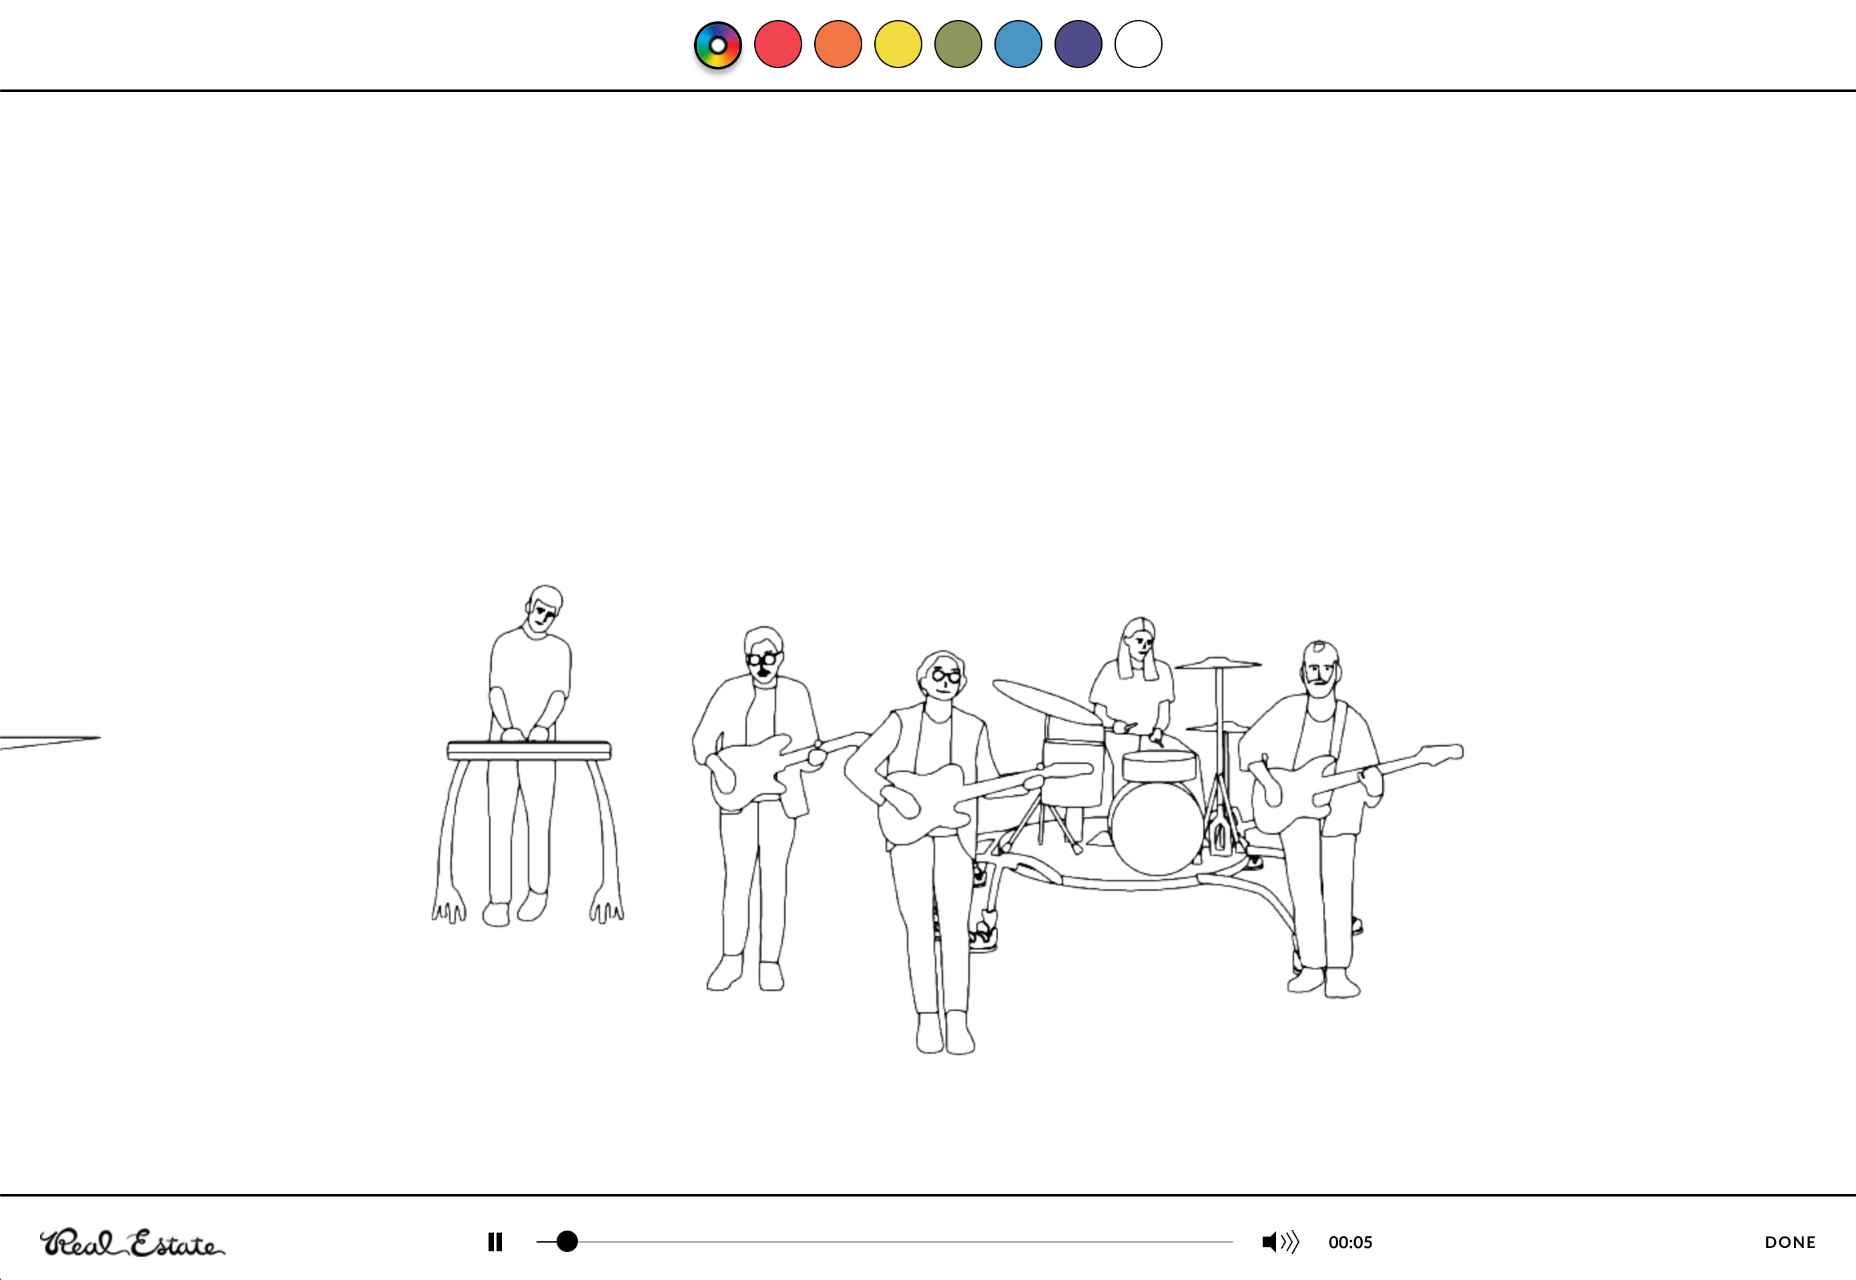
One excellent example of this is in the Stained Glass music video here. This interactive game combines an exciting web design trend with creative interactive components so that users can transform the web experience into something unique to them.

Highlight Headers with Typography

Sometimes, the best hand-drawn elements aren’t full illustrations or images. Hand-drawn or doodle-like typography can also give depth to a brand image and website design. 

Typography styles that mimic natural, genuine handwriting are excellent for capturing the audience’s attention. These captivating components remind the customer of the human being behind the brand while not detracting from the elegance of the website. 

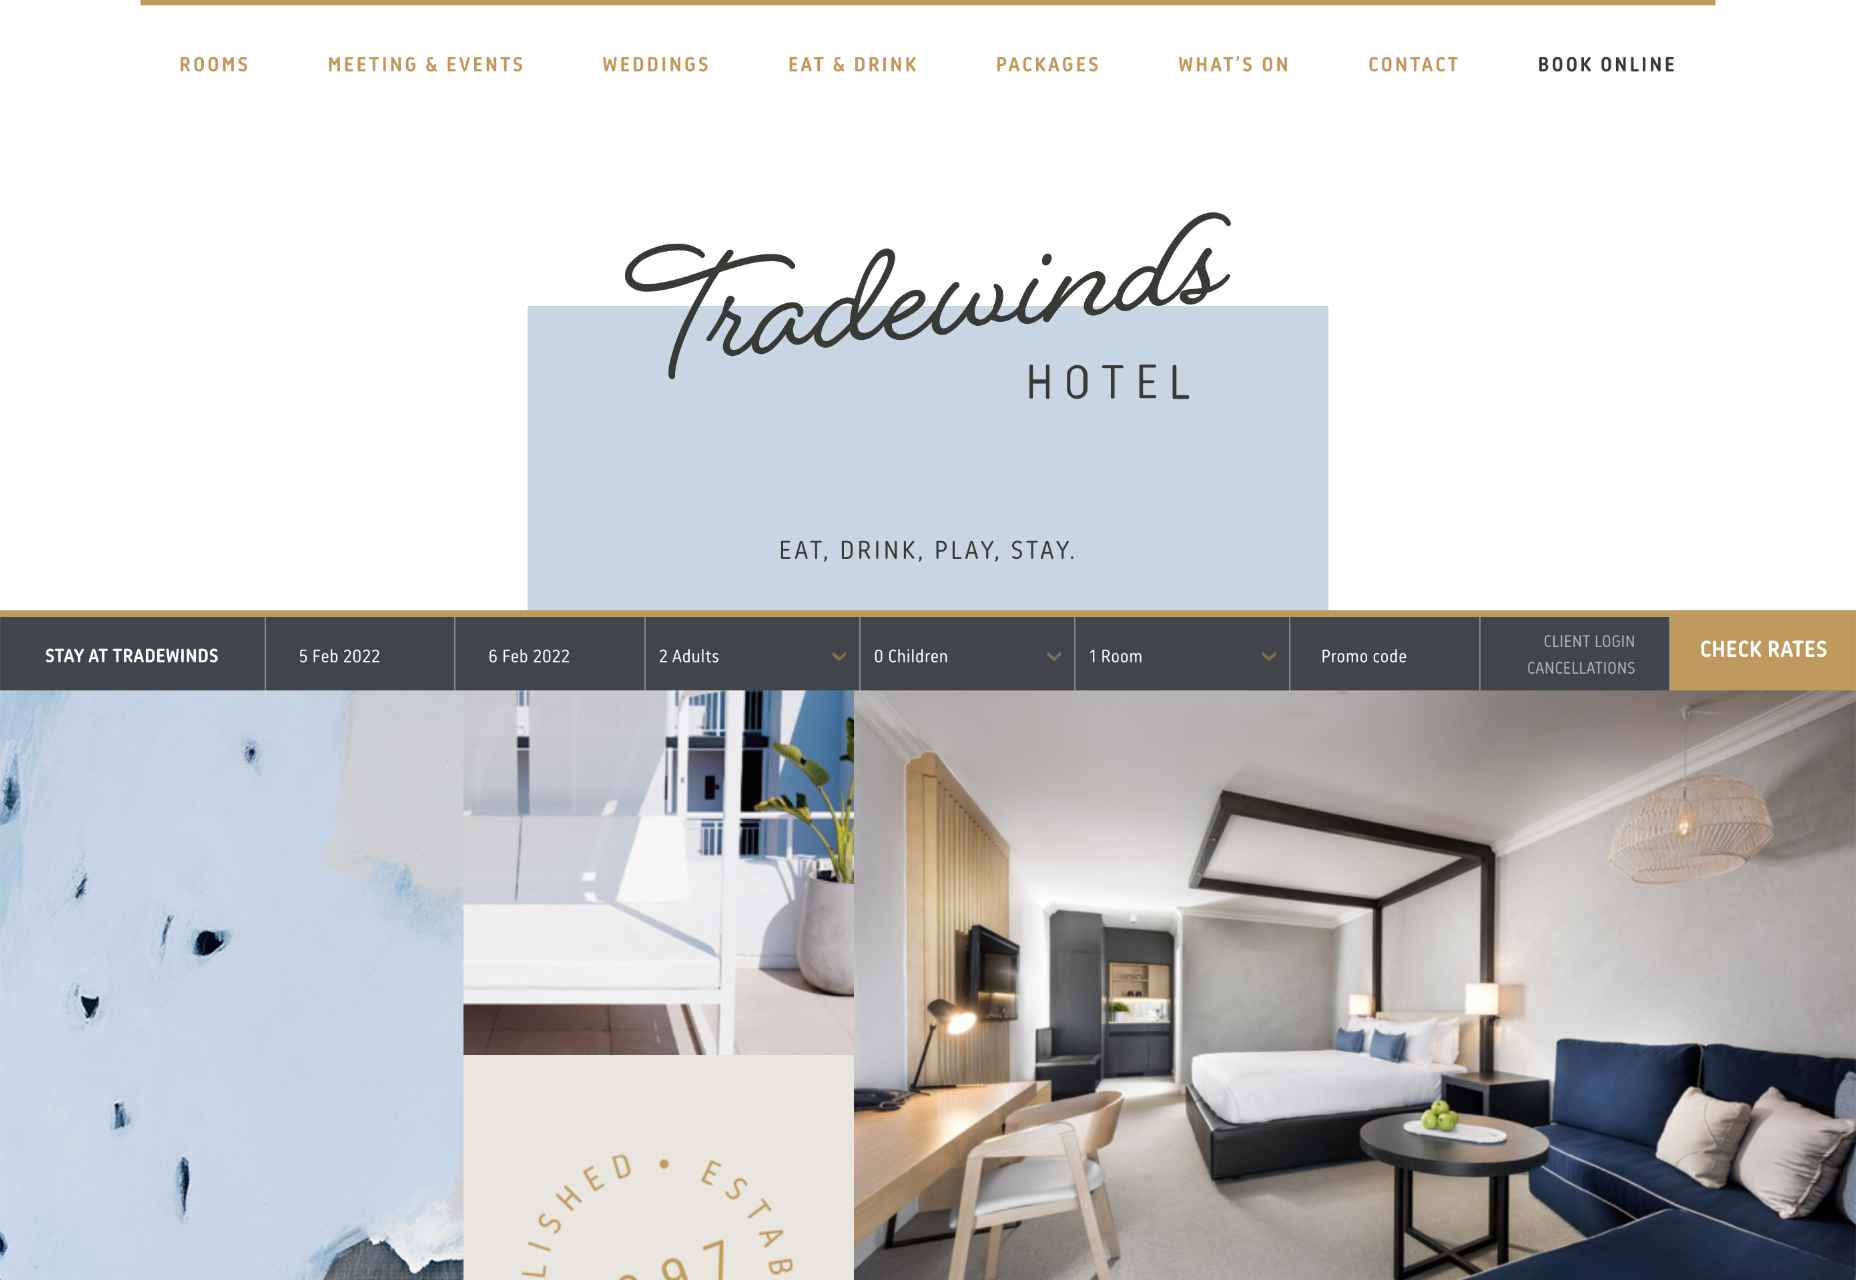
This example of hand-drawn typography from the Tradewinds hotel shows how designers can use script fonts to immediately capture customer attention. Notice that the font is still easy to read from a distance, so it’s not reducing clarity. 

Set the Mood

Depending on the company that you’re designing for, your website creation choices can have a massive impact on the emotional resonance that the brand has with its audience. Hand-drawn elements allow websites to often take on a more playful tone. They can give any project a touch of innocence and friendliness that’s hard to accomplish elsewhere. 

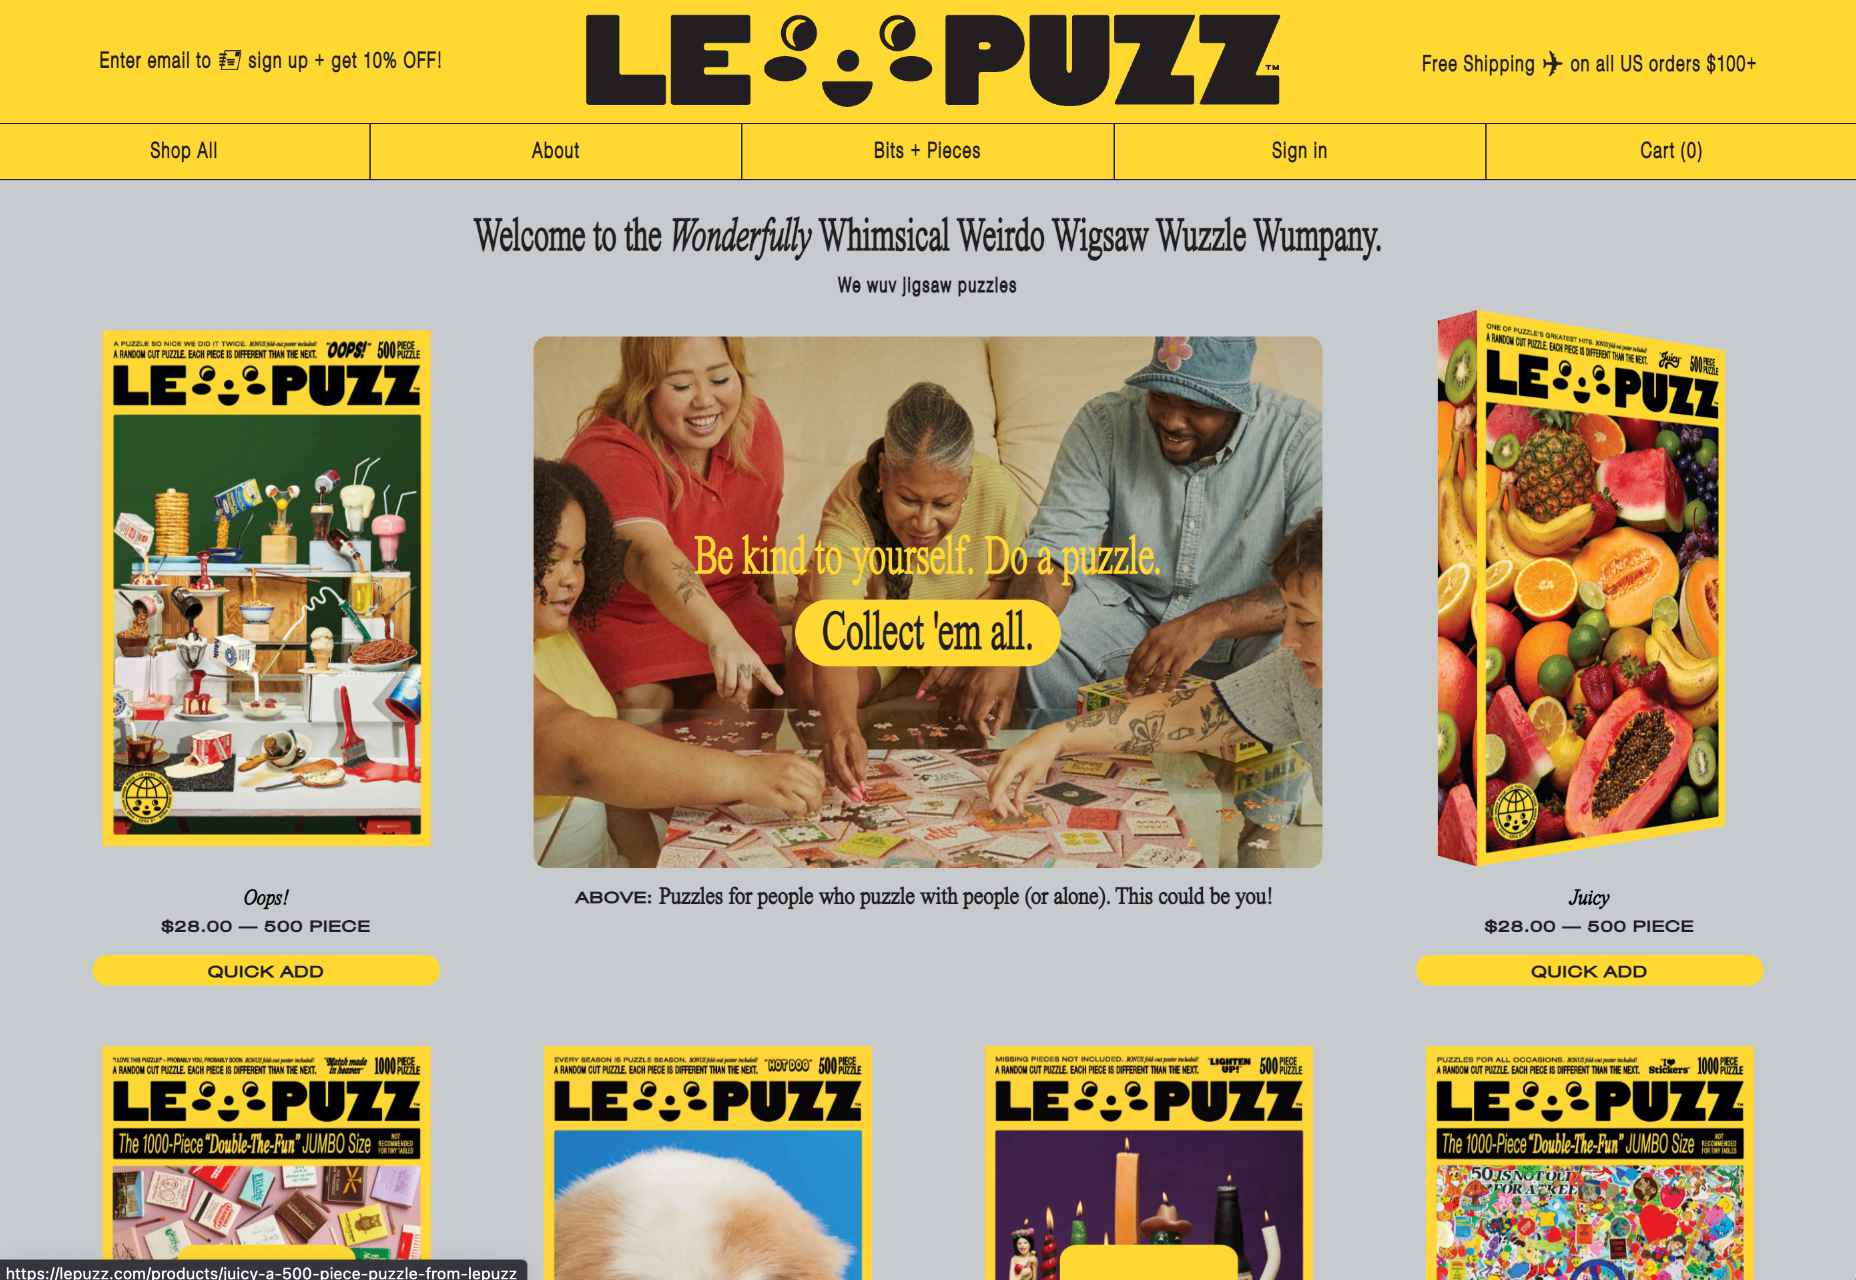
A child-like aesthetic with bright colors and bulky fonts combines with hand-drawn elements on the Le Puzz website. This is an excellent example of how web designers can use hand-drawn elements to convey a mood of creativity and fun.

Animated Elements

Finally, if you want to combine the unique nuances of hand-drawn design with the modern components of what’s possible in the digital world today, why not add some animation. Animated elements combined with illustrations can help to bring a website to life. 

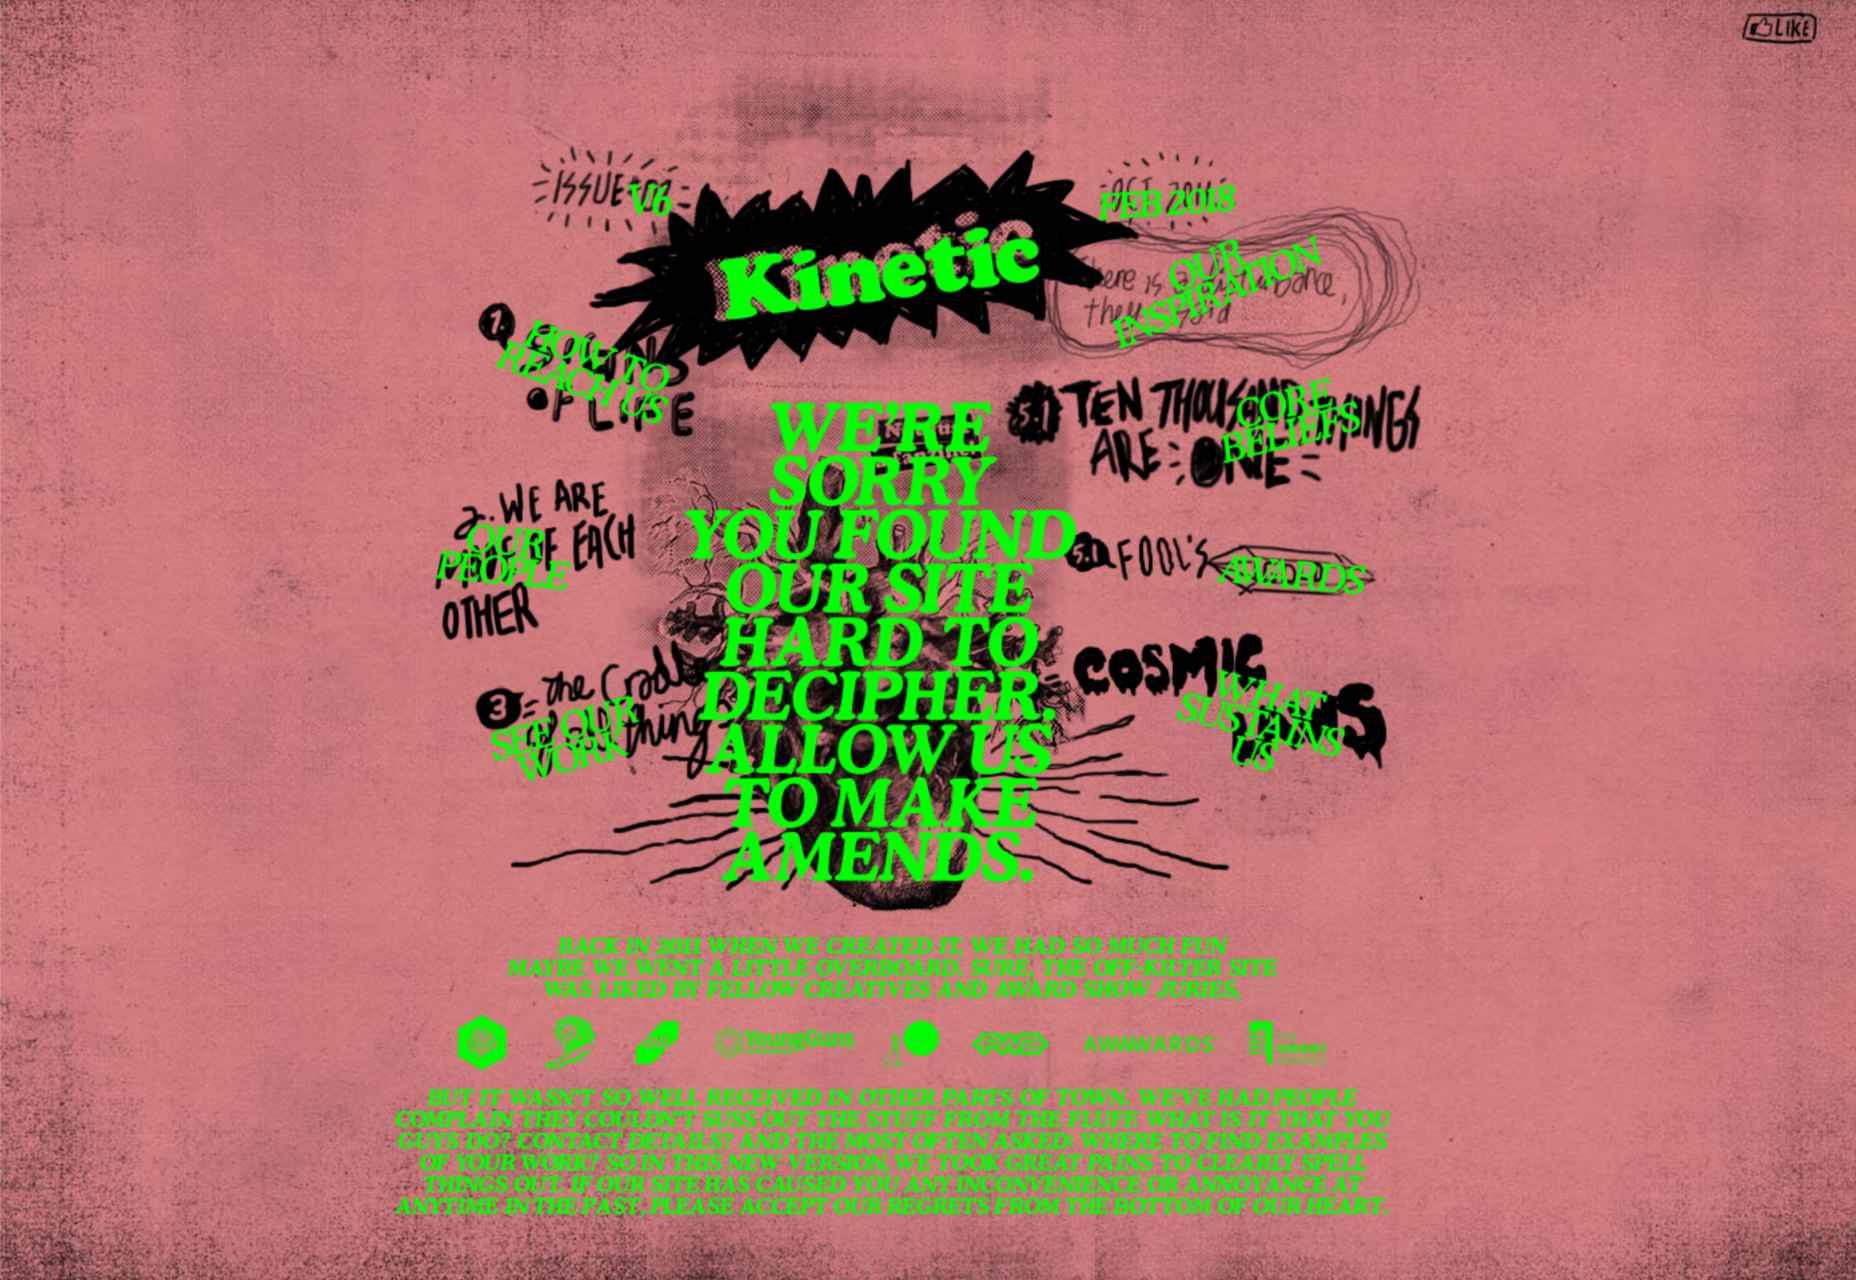
In the Kinetic.com website, the animated illustrated components help to highlight the punk-rock nature of the fanzine. It’s essential to ensure that you don’t go too over-the-top with your animations here. Remember that too many animations can quickly slow down a website and harm user-friendliness.

Finishing Thoughts on Hand-Drawn Elements

Hand-drawn elements have a lot to offer to the web-design world. 

Even if you’re not the best artist yourself, you can still simulate hand-drawn components in your web design by using the right tools and capabilities online. 

Although these features won’t fit well into every environment, they can be perfect for businesses that want to show their human side in today’s highly digitized world. Hand-drawn components, perhaps more than any other web design feature, showcase the innocence and creativity of the artists that often exist behind portfolio pages and startup brands. 

Could you experiment with hand-drawn design in your next project?

Source

The post How to Use Hand-Drawn Elements in Web Design first appeared on Webdesigner Depot.

Source de l’article sur Webdesignerdepot

User Experience (UX) design and User Interface (UI) design are two terms people sometimes mistakenly use interchangeably. While aspects of each are interconnected, there are distinct differences between UI/UX design.

According to Internet Live Stats, there are over 1.9 billion websites, but not all are active at the same time. No matter how you slice it, there’s a lot of competition to grab and keep user attention. Good UX is just part of the equation. For a genuinely stellar site, you must also offer an excellent interface.

Learning the ins and outs of good UI and UX requires a bit of knowledge of how the two differ and what works. Although they weave in and out of the same design, they are different.

What Is the Biggest Difference Between Good UX and UI?

UI is the functionality of the design and what users see. How do they interact with various elements? UX is more the way things come together — both visual and interactive features — to create a feel for the user. You can certainly see why people confuse the two as they both apply to interacting with a website or app.

Top design firms often have team members specializing in each discipline. However, UX designers are also aware of UI, and UI designers are also mindful of UX. How can you ensure you’re offering excellent UI/UX design while covering the full spectrum of requirements for each?

Ensuring Effective UX Design

Good UX design increases conversion rates by 400% or more. The site visitor walks away feeling understood and not frustrated. What are some of the most important aspects of good UX design?

1. Create a Good Structure

What is the hierarchy of your site? What is the first thing the user sees when they pull it up? How do they navigate from one page to the next? A well-designed website classifies different aspects of the page, and new content naturally falls into the appropriate category as it grows.

When creating a structure for your site, think about how it might expand in the next five years. You want the hierarchy to work from day one, but you also want to think through significant shifts in the content you might see down the road.

Even your navigational hierarchy should accommodate new areas easily. Plan for the unexpected, so you know how to work it into the overall design when you must.

2. Choose Beautiful Aesthetics

You have a few seconds to make an excellent impression on your site visitors. Take the time to make sure your design functions and is visually appealing. Your color palette should work, images should be crisp and relevant, and typography should be readable and engaging.

Step back from your computer and look at your design from a distance. Does anything stand out that isn’t pleasing to the eye? Get feedback from visitors about what they like and dislike. Since the focus is on user experience, your best source of constructive criticism is from your target audience. Listen to their concerns and ideas.

3. Communicate With Site Visitors

Most experts agree that users want an element of interactivity on sites and apps. People want to know you hear them and get a response. Some ideas include adding a live chat option to your site or engaging in SMS customer support.

Put yourself in their shoes. A customer may visit your site for the first time, having never heard of your brand. They have no reason to trust you or that you’ll follow through on your promises. Potential leads may have a few questions before parting with their hard-earned dollars.

Adding various ways to communicate shows them you’ll be there should they have a problem. It’s much easier to trust a company when you know you can phone, engage in live chat or shoot off an email and get an almost immediate response.

4. Add Clear Direction

Excellent UX is intuitive. You should add calls to action (CTAs) and images pointing the user where they should go next. You can use graphics of arrows, people looking or pointing toward the next step, words, or CTA buttons.

Get feedback on how clear the directions are and tweak them as needed. The user should never have to stop and ponder what to do next. Everything on the page should guide them toward the ultimate goal.

5. Break Down Complex Data

Every industry has complicated data that is difficult for non-experts to understand. Part of good UX is breaking down complex information and sharing it in a simplified way.

One example might be the registration process. Instead of just showing text, a good UX designer would number the steps. Visualizations help add to understanding.

Embracing Effective UI Design

User Interface impacts UX and involves how the design works. The UI designer thinks through visitor expectations and then creates an interface that isn’t frustrating. UI works within the framework of a website to develop functional features. User experience isn’t the complete focus of UI, but it does tie into the planning phases. What are some elements of good UI design?

1. Set Standards

For a design to have good UI, it must perform as expected. Have you ever clicked on a button, and nothing happened? Determine how you want things to work and the minimum acceptable standards for your site.

For example, what happens when someone clicks on a link or button? How does the user know their action created the expected result? Consistency is crucial to how a site performs.

2. Choose the Right Colors

While UX designers look at the emotional impact of various colors, UI designers look at whether the shades match branding and how well the different ones contrast for readability and usability. UI/UX design often bridges a single designer’s work, so the employee ensures everything works as intended, both emotionally and functionally.

You may work with another designer to make the site aesthetically pleasing while also tapping into the emotions driving users. For example, some people love blue, so a blue button can have positive results.

UX and UI designers utilize split testing to see which users respond best to. Then, make adjustments as indicated by how site visitors respond.

3. Focus on Cognitive Matters

According to the Interaction Design Foundation, people can only retain around five things in their short-term memory. Designers should work with recognition instead, as users tend to rely on cues to find what they need.

UI designers may develop an intuitive navigation system and then use the same cues on every page, such as placement, color, and language. Users can then recognize the system without having to memorize it.

4. Prevent Errors

Your job is to ensure errors are kept to a minimum when designing a website or app. One of the most significant parts of a designer’s job is testing and retesting.

Think about all the potential problems a user might run into, such as broken links, images not showing, or incomplete actions. How can you keep those problems from occurring in the first place?

Error prevention is particularly vital when designing software as a service (SaaS) or apps. Users grow frustrated quickly and will find another solution rather than troubleshooting an issue. You’re much better off avoiding the error in the first place.

How Do UX and UI Work Together?

You’ve likely already figured out how closely UX and UI entwine to create a usable experience. The UX designer pays attention to function and interactivity, and the UI designer thinks through how the interface looks.

UX pays attention to the flow of the website and where users start, go next and end up. On the other end, UI figures out how the elements look to the viewer and where everything is placed.

The UX team may decide to add an extra button to the page. The UI team must determine where to place it, if any sizing needs must occur, and how it impacts usability on desktop and mobile devices.

Although each has a different function, user experience and user interface must work together to create a usable site the target audience responds to. You can’t have excellent UX without excellent UI, and vice versa. The best designers consider both and implement them to their fullest potential.


Featured image via Pexels.

Source

The post What’s the Difference Between Good UI and Good UX? first appeared on Webdesigner Depot.

Source de l’article sur Webdesignerdepot